Your Monstera adansonii Care Guide: Everything I Wish I Knew Sooner
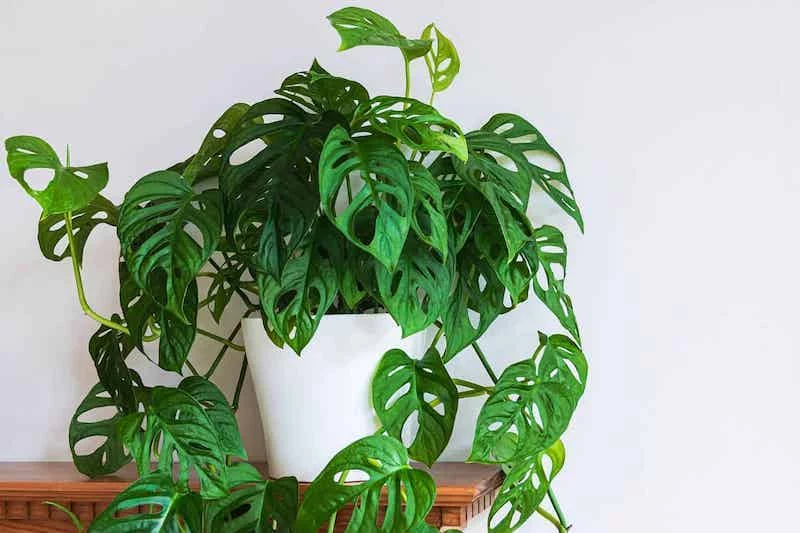
I’ve spent more years than I can count with my hands in the dirt, and I’ve seen a ton of plant fads come and go. But one plant that never seems to lose its charm is the gorgeous Monstera adansonii. You’ve probably heard it called the ‘Swiss Cheese Plant,’ just like its bigger, more famous cousin. But this one… this one’s different. It’s a delicate, vining character with those iconic, naturally formed holes (the pros call them fenestrations) that just grab your attention.
In this article
- Your First 48 Hours: A New Plant Welcome Plan
- Understanding Its Jungle Roots
- Creating the Perfect Environment at Home
- Soil and Water: The Foundation of Health
- Taking It to the Next Level: Feeding and Climbing
- Pruning and Propagation: More Plants for Free!
- Troubleshooting the Common Problems
- A Final, Important Warning: Keep Away From Pets
- Inspirational Gallery
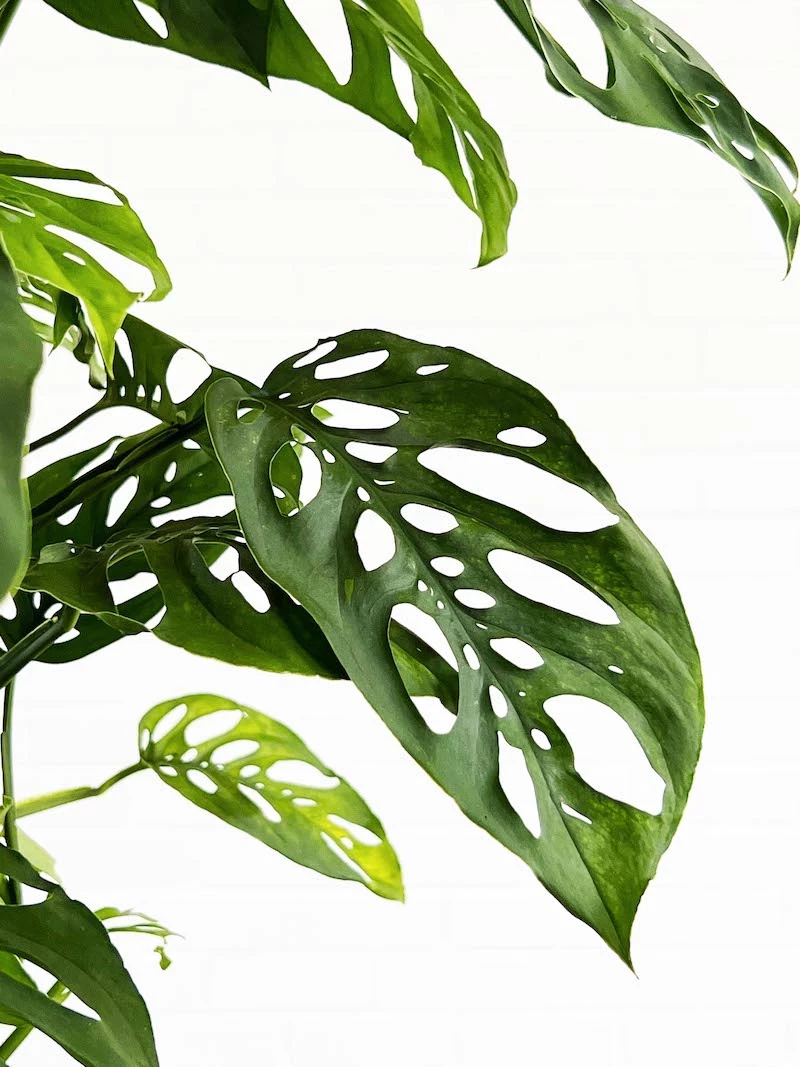
Honestly, the single most common question I get is about telling this plant apart from the almost mythical Monstera obliqua. And it’s a big deal, because a lot of sellers—sometimes by accident—get the labels wrong. A true obliqua is incredibly rare and can cost thousands of dollars. So that beautiful $20-$40 plant you found at the local nursery or big-box store? It’s a stunning adansonii. And you should be thrilled! The leaves have a sturdy, almost leathery feel, with holes covering maybe half the surface. An obliqua is basically more hole than leaf and feels like tissue paper. So let’s celebrate the amazing plant you actually have! This guide is packed with everything I’ve learned from growing thousands of these, helping you go from just keeping it alive to helping it truly thrive.
Your First 48 Hours: A New Plant Welcome Plan
Okay, you just brought your new green friend home. What now? The first couple of days are critical. Don’t just stick it on a shelf and hope for the best. Follow these steps.
First, quarantine it! Find a spot for it away from any other plants you own for a week or two. This is your chance to spot any sneaky pests like spider mites that might have hitched a ride from the store. After a day or two, give it a good, gentle inspection. Look under the leaves and near the stems.
Whatever you do, resist the urge to repot it immediately. The plant is already stressed from the move. The only exception is if it’s sitting in a dense, soaking-wet brick of soil, which can be a death sentence. Otherwise, let it acclimate. Check the soil with your finger; if it’s dry two inches down, give it a good drink. If not, let it be. Patience is key here.
Understanding Its Jungle Roots
To really get a plant, you have to think about where it came from. The Monstera adansonii is a tropical creature, native to the forests of Central and South America. It doesn’t grow out in the open; it lives in the jungle understory, a world of dappled, filtered light. Getting this one fact right is the foundation for everything else.
So, What’s With All the Holes?
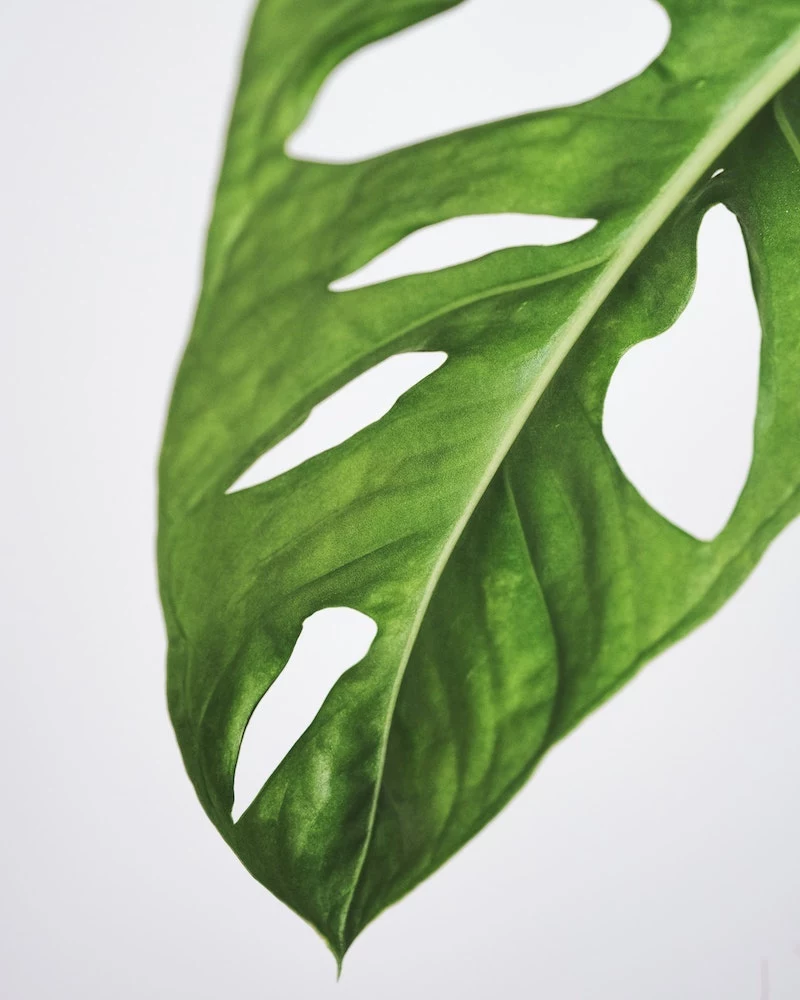
Those famous fenestrations aren’t just for looks; they’re a brilliant survival tactic. The main theory is that in a crowded jungle, having holes allows a leaf to get much bigger overall without completely blocking the sun from the leaves below it. This way, the whole plant can catch more of those precious sunbeams. It’s an incredibly efficient design! Others think the splits help big leaves handle strong winds without tearing or help channel rainwater down to the plant’s roots. When you see a new leaf unfurl with few or no holes, it’s often a sign your plant is craving more light.
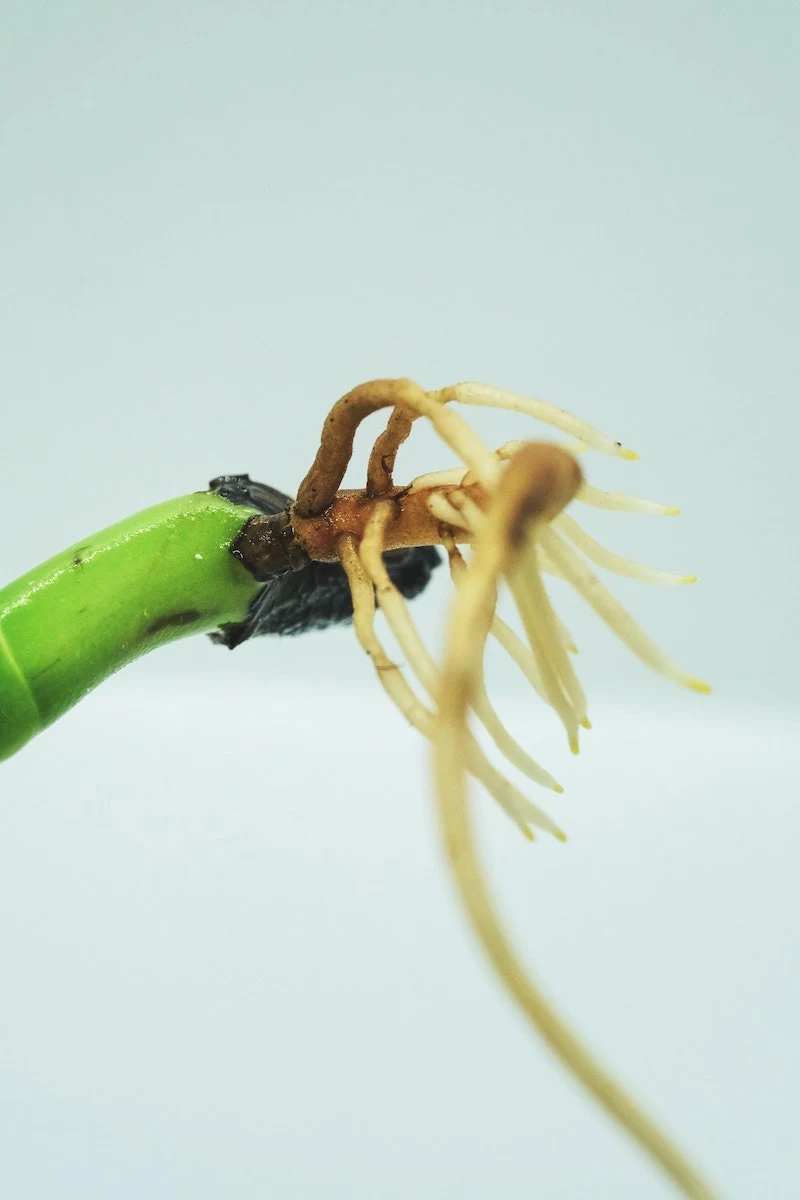
Don’t Ignore Those Wiry Roots
You’ll soon see brown, stringy roots popping out from the stem. These are aerial roots, and they’re a huge clue about what your plant wants to do: climb. In the wild, this plant latches onto tree trunks and climbs toward the canopy. These roots also pull moisture right out of the humid air. In your home, they are begging for a support structure. Giving it something to climb isn’t just for aesthetics; it’s the only way to encourage larger, more mature leaves. The small leaves on a young plant are just its baby form. For the big, impressive foliage, you have to give it a ladder to the sky.
Creating the Perfect Environment at Home
Your goal is to mimic that jungle understory. No, you don’t need a greenhouse, but you do have to get the light, humidity, and temperature right.
Light: Let’s Get Specific About ‘Bright, Indirect’
That phrase ‘bright, indirect light’ gets thrown around so much it starts to lose its meaning. Let’s make it practical. An ideal spot is a few feet away from an east-facing window that gets soft morning sun. A south or west-facing window can work, but you absolutely need a sheer curtain to diffuse the harsh afternoon light. Direct sun will scorch the leaves, leaving behind brown, crispy spots that will never heal. I learned that the hard way once and fried a whole tray of young plants in one afternoon. A costly lesson!
On the flip side, too little light is just as bad. In a dark corner, your plant will get ‘leggy’—the stems will get long and stretched out with sad, tiny leaves as it desperately reaches for a light source.
Humidity: This Is Not a Suggestion
These plants come from the jungle. They literally breathe humidity. Most homes, especially with the heat or AC running, sit around 30-40% humidity. Your adansonii wants 60% or more. If the air is too dry, the edges of the leaves will turn brown and crispy.
The easiest fix? Get a small humidifier. A decent one will only set you back about $25-$40 online and it’s a total game-changer for tropical plants. Grouping your plants together also helps create a little humid microclimate.
Quick tip: Don’t have a humidifier yet? No problem. Take your plant into the bathroom with you when you shower. It’s like a free spa day, and it absolutely loves the steam!

Temperature: Cozy and Consistent
Your Monstera adansonii is happy in the same temperatures you are, somewhere between 65°F and 85°F (that’s 18°C to 29°C). What it hates is sudden change. Keep it away from drafty doors, windows, and air conditioning vents. Those sudden blasts of hot or cold air are incredibly stressful and can cause leaves to yellow and drop for no apparent reason.
Soil and Water: The Foundation of Health
Get this part right, and you’re halfway to a happy plant. This is where most people trip up, but a little know-how makes all the difference.
The Perfect Soil: It’s All About Airflow
Regular bagged potting soil is way too dense. It holds on to water like a sponge and suffocates the roots, which leads straight to root rot—the number one killer of houseplants. You need a chunky, airy mix.
You can buy a pre-made ‘aroid mix’ online, or you can easily make your own. A DIY mix sounds intimidating, but it’s super simple. Head to a garden center or shop online for a few key ingredients. A small bag of orchid bark will run you about $8-$15. Perlite is a must for aeration, and a big bag is about $10. Then grab some coco coir for about the same price. Mix two parts orchid bark, two parts perlite, and one part coco coir. Some people even add a handful of horticultural charcoal to keep the soil ‘sweet.’ The goal is a mix that feels light and chunky, not dense and heavy.

Watering: Let the Plant Tell You When
Please, don’t water on a rigid schedule. The best way is to let the plant tell you when it’s thirsty. Stick your finger two inches into the soil. If it feels dry, it’s time to water. If you feel any moisture, wait a few more days and check again. As you get to know your plant, you can even learn to tell by the weight of the pot—a dry pot is much lighter.
When you do water, do it right. Take the plant to the sink and drench it until water flows freely out the bottom drainage holes. This flushes out any built-up mineral salts and makes sure the entire root ball gets hydrated. Then—and this is critical—let it drain completely. Never, ever let it sit in a saucer full of water. That’s an open invitation for root rot.
Taking It to the Next Level: Feeding and Climbing
Once your plant is settled, it’s time to encourage that lush, mature growth. This means two things: food and support.
Fertilizer: Easy Does It
These guys are not heavy feeders. You can do more harm than good by over-fertilizing. During the growing season (spring and summer), use a balanced liquid fertilizer. The key is to dilute it to quarter-strength. So, if the bottle says to use one teaspoon per gallon of water, you’ll only use a quarter of a teaspoon. It’s that simple. Feed it every other time you water. This gives it a gentle, steady stream of nutrients. Skip fertilizer entirely in the fall and winter when growth slows down.
The Magic of a Climbing Pole
As we talked about, this plant is a climber. Giving it a moss or coir pole is the single best thing you can do to get those big, beautiful leaves. I’ve seen it firsthand: a plant with leaves the size of my hand in a hanging basket will, after six months on a damp moss pole, start putting out leaves nearly twice that size with far more holes! It’s the #1 trick to getting that mature look.
Gently tie the main stem to the pole with some soft plant ties. The real pro move is to keep the pole itself damp by misting it every few days. This encourages the aerial roots to grow right into it, anchoring the plant and telling it, ‘This is home. It’s time to grow up.’
Pruning and Propagation: More Plants for Free!
Pruning keeps your plant looking full and tidy, and it gives you cuttings to make new plants. It’s one of the most rewarding parts of plant care.
How to Prune Without Fear
The best time to prune is in the spring. Grab a clean, sharp pair of scissors. To make your plant bushier, just trim back a few of the longest vines. Look for the little bump or knobby joint on the main vine where the leaf stem shoots off. That’s the node! It’s where all the magic happens. Make your cut about a quarter-inch past a node. Don’t be afraid; the plant is designed to put out new growth from there.
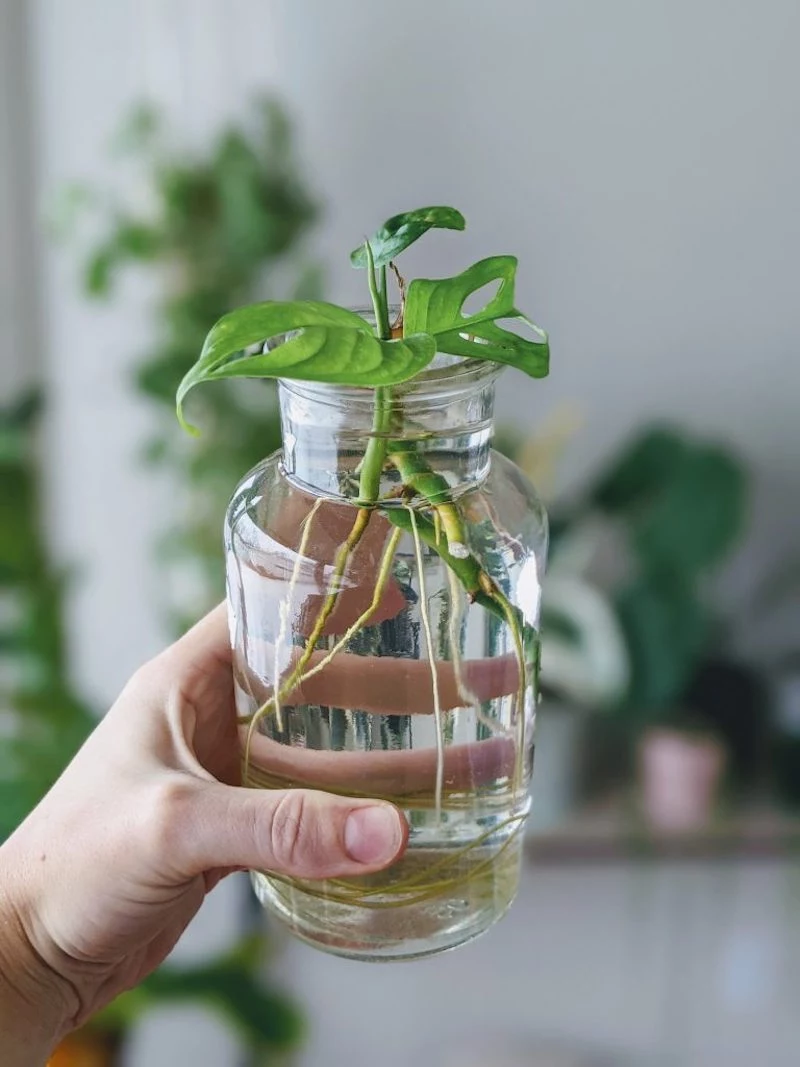
Making New Plants: It’s Easier Than You Think
This plant is incredibly easy to turn into more plants.
First, take a cutting from a healthy vine that has at least two leaves and two nodes. Snip the bottom leaf off to expose that node—this is where the new roots will sprout.
You have two great options. The water method is perfect for beginners. Just pop the cutting in a glass of water, making sure the node is submerged but the leaf isn’t. Change the water every few days. In a few weeks, you’ll see roots! Once they’re a couple of inches long, you can pot it up. My personal favorite is the moss method. Nestle the cutting’s node into a container of damp sphagnum moss and cover it to create a mini-greenhouse. The roots that form are often stronger and transition to soil more easily.
Troubleshooting the Common Problems
Even the best of us run into issues. Here’s a quick-glance guide to what your plant might be telling you.
- The Symptom: Yellowing leaves.
The Likely Cause: Nine times out of ten, this is overwatering. Your plant’s feet are too wet!
Your Fix: Check the soil. If it’s soggy, let it dry out completely. Ease up on the watering frequency. - The Symptom: Brown, crispy leaf edges.
The Likely Cause: The air is too dry. It’s a classic sign of low humidity.
Your Fix: Time for that humidifier or more frequent trips to your bathroom spa! - The Symptom: Long, sparse vines with tiny leaves.
The Likely Cause: It’s not getting enough light and is stretching to find some.
Your Fix: Move it to a brighter spot. You can also prune those leggy vines back to encourage bushier growth at the base. - The Symptom: Fine webbing or white, cottony fluff on the leaves.
The Likely Cause: Pests. You’ve got spider mites (webbing) or mealybugs (fluff).
Your Fix: Act fast! Isolate the plant. Wipe off what you can with a cotton swab dipped in rubbing alcohol. Then, spray the entire plant—tops and bottoms of leaves—with an insecticidal soap or neem oil solution. Repeat every 5-7 days for a few weeks to deal with their entire life cycle.
A Final, Important Warning: Keep Away From Pets
Okay, a super important heads-up. As a plant lover and pet owner, I can’t stress this enough: all parts of the Monstera adansonii are toxic to cats and dogs (and humans!) if they chew on them. The plant contains sharp little crystals that cause immediate, painful irritation and swelling in the mouth and throat. It’s rarely fatal, but it’s extremely unpleasant and might mean a trip to the vet. Be smart and place your plant on a high shelf or in a room where your furry friends or small kids can’t get to it.
Honestly, caring for an adansonii is so rewarding. By learning to read its signals and giving it what it needs, you can have a stunning piece of the jungle right in your own home. Every space is different, so watch your plant, adjust as you go, and enjoy the process. That’s the real secret to having a green thumb.

Inspirational Gallery
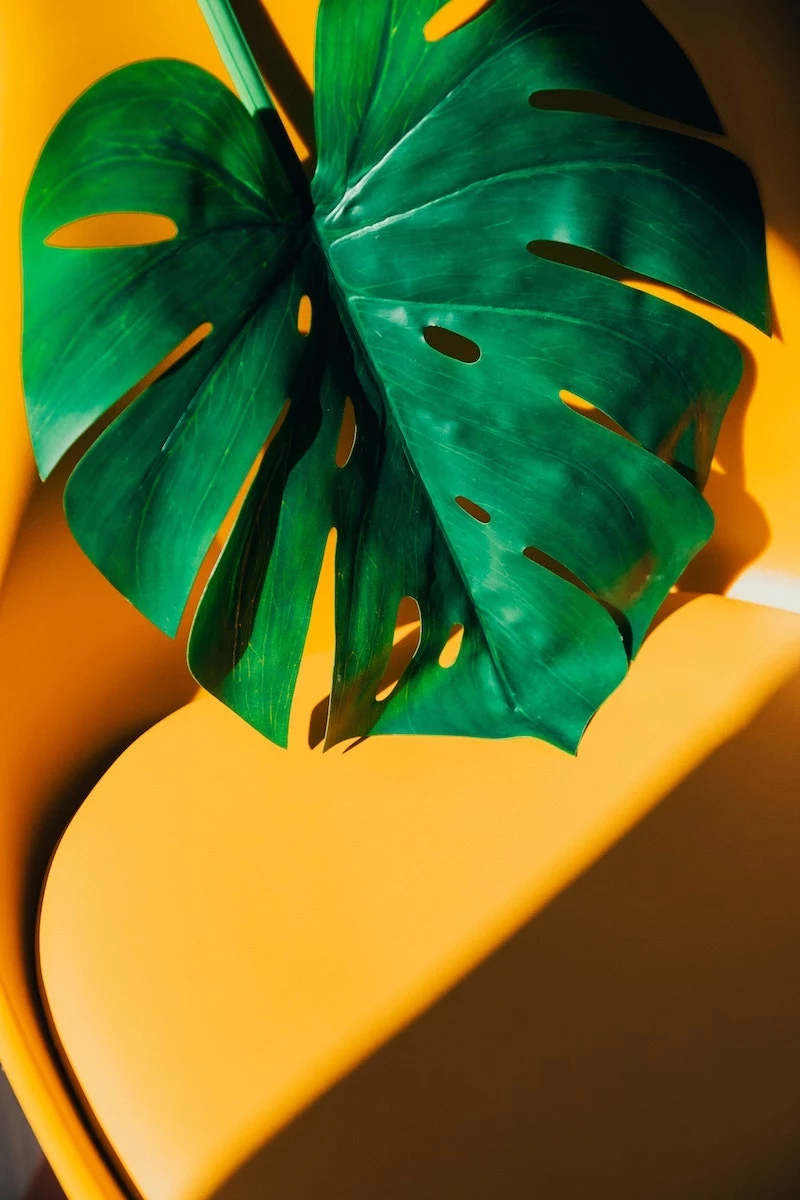
The holes, or fenestrations, in a Monstera adansonii leaf are a brilliant evolutionary trick. In the wild, they allow patches of sunlight to filter through the dense canopy to reach the plant’s lower leaves.
This means that as your plant matures and receives good light, its new leaves will likely develop more and larger holes. It’s the plant’s way of saying, ‘I’m thriving!’
Wondering why your adansonii’s leaves are turning yellow?
Don’t panic! It’s the plant’s primary way of communicating distress. The most common culprit is overwatering, which suffocates the roots. Check the soil: if it’s soggy, let it dry out completely. Yellowing can also signal a need for nutrients (if you haven’t fertilized in ages) or, less commonly, a pest issue. Start by adjusting your watering schedule—it solves the problem nine times out of ten.
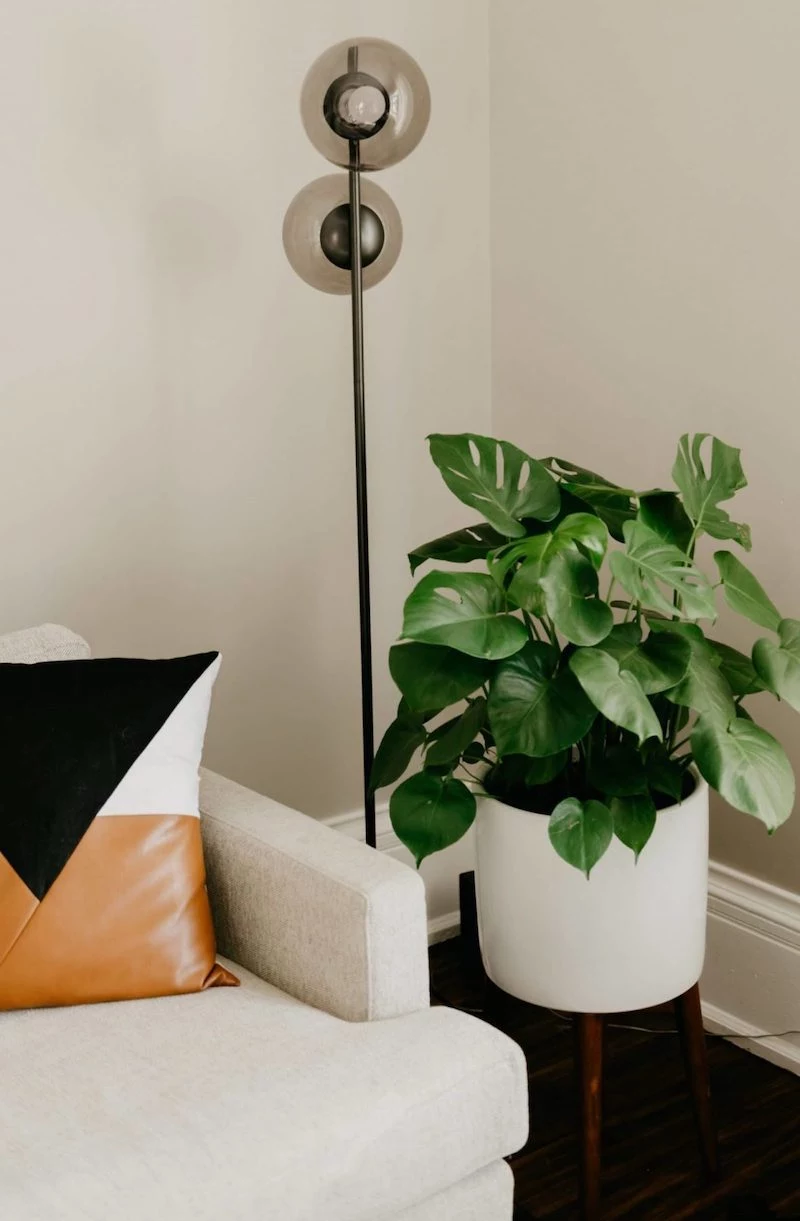
Climbing: Encourages the plant to produce larger, more fenestrated leaves, mimicking its natural growth up jungle trees. A coco coir or sphagnum moss pole is ideal, as the aerial roots will latch on for support and moisture.
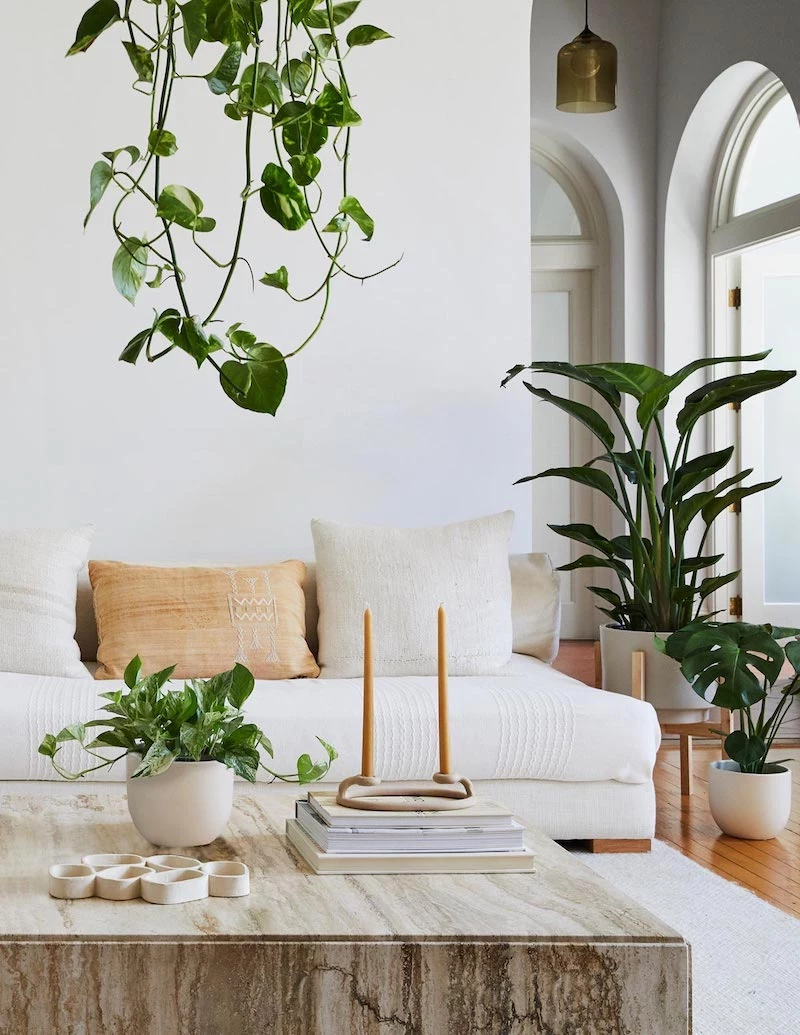
Hanging: Creates a beautiful cascading effect from a hanging basket or high shelf. The leaves will typically remain smaller and more delicate in this form. A perfect choice for a lush, trailing vibe in a smaller space.
Ultimately, the choice depends on the look you want to achieve. For impressive leaves, let it climb!
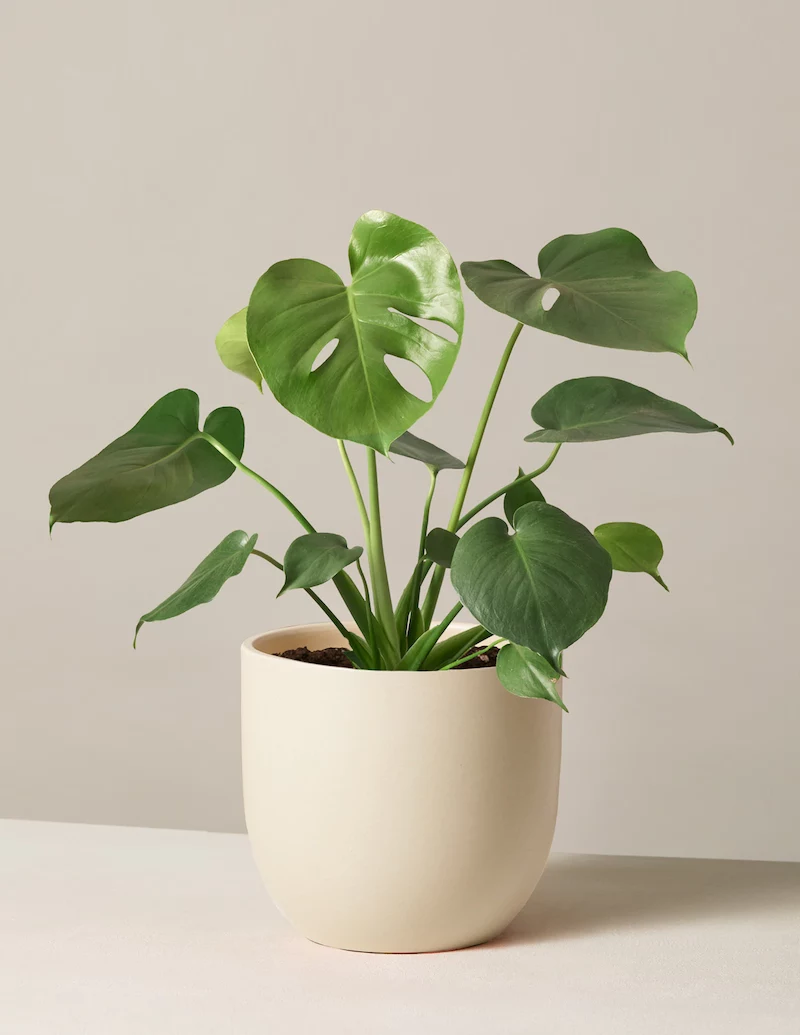
Give your adansonii the perfect foundation with a custom soil mix. Commercial potting soil is often too dense and retains too much water. A simple, airy blend does wonders:
- One part high-quality indoor potting mix (like FoxFarm Ocean Forest)
- One part orchid bark for chunky aeration
- One part perlite or pumice to ensure fast drainage
Mix it all together, and your Monstera’s roots will have the perfect balance of moisture, support, and oxygen they need to thrive.
- Prevents root rot by allowing excess water to escape.
- Flushes out mineral buildup from tap water and fertilizers.
- Allows oxygen to reach the root zone, which is critical for a healthy plant.
The one non-negotiable for your Monstera adansonii? A pot with drainage holes.
Let your adansonii tell a story in your space. Train its delicate vines to frame a doorway or climb up a bookshelf. For a subtle touch, guide the stems along a wall using small, clear adhesive hooks like those from Command. In a macrame hanger, it becomes a living sculpture, its perforated leaves creating dancing shadows in the afternoon light. This plant isn’t just decor; it’s a dynamic, green collaborator.
Keep it out of reach. Monstera adansonii contains calcium oxalate crystals, making it toxic to cats and dogs if ingested, which can cause oral irritation, drooling, and swelling.
Important note on feeding: This plant is a modest eater. During the spring and summer growing season, use a balanced liquid fertilizer, like Dyna-Gro Foliage-Pro 9-3-6, but dilute it to half the recommended strength. Feed it once every 3-4 weeks. Cut back entirely during the fall and winter when growth naturally slows.
Ready to make more plants for free? Propagating your adansonii is surprisingly simple.
- Find a healthy vine and locate a node – the small bump where a leaf meets the stem.
- Make a clean cut just below the node, ensuring your cutting has at least one leaf and one node.
- Place the cutting in a glass of water, making sure the node is submerged but the leaf is not.
- Put it in a spot with bright, indirect light and change the water weekly. In a few weeks, you’ll see new roots emerge!
If you see long, bare-looking roots dangling from the stems, don’t be alarmed! These are aerial roots. In nature, the plant uses them to cling to trees and absorb moisture from the humid air. You can gently guide them towards the soil or a moss pole, or simply let them hang for a wild, jungle-like aesthetic. Resist the urge to trim them off, as they are a part of the plant’s natural toolkit.


