Thinking About Brow Lamination? Here’s What a Pro *Really* Wants You to Know
I’ve been in the beauty world for over a decade, and let me tell you, I’ve seen brow trends that would make you laugh… and some that would make you cry. So when brow lamination started blowing up online, I was skeptical. The pictures looked almost too good. But I’m not one to knock something without understanding it, so I dove headfirst into training with some of the best in the business.
In this article
- So, How Does This Magic Actually Work?
- The Consultation: The Most Important 15 Minutes
- What to Expect During the Appointment (The Step-by-Step)
- Is Brow Lamination Right for You?
- Lamination vs. Microblading vs. Tint: What’s the Difference?
- The Big Question: What’s This Going to Cost Me?
- A Warning About At-Home Kits
- Aftercare: Protecting Your Investment (And Your Brows!)
- Help! What If…? (Quick Troubleshooting)
- Inspirational Gallery
And honestly? I was converted. When it’s done right, brow lamination is a game-changer.
It’s not about sticking hairs to your forehead with glue. It’s a clever chemical process that lets an artist totally reshape and redirect your brow hairs. We can fix unruly growth, fake fullness in sparse areas, and give you that polished, fluffy look that lasts for weeks. This is the real-deal guide I share with my own apprentices, filled with the honest advice I give every client who sits in my chair.
So, How Does This Magic Actually Work?
To really get it, you have to understand a little bit about your hair. Your eyebrow hairs are made of a protein called keratin, and the shape of that hair—whether it’s stubbornly straight or a little curly—is held in place by tiny chemical bonds. Think of them as the hair’s internal scaffolding.
Brow lamination is a two-step process to gently break down that scaffolding and then rebuild it in a whole new direction.
Step 1: The Softening Cream
First, we apply a lifting cream. The active ingredient is a type of alkaline solution that softens the hair and breaks those little protein bonds. This is the most crucial part of the whole service. I’m basically unlocking the hair’s natural shape, making it totally pliable. Timing here is EVERYTHING and it’s based completely on your hair type. Fine brows might only need 5-7 minutes, while really coarse, resistant hair could take up to 12. Leaving this on too long is how you get “fried,” frizzy brows—and it’s 100% avoidable with a trained pro who is paying attention.

Heads up: This cream can have a distinct chemical smell, a lot like a classic hair perm. It’s totally normal, but it’s good to know what to expect!
Step 2: The Setting Lotion
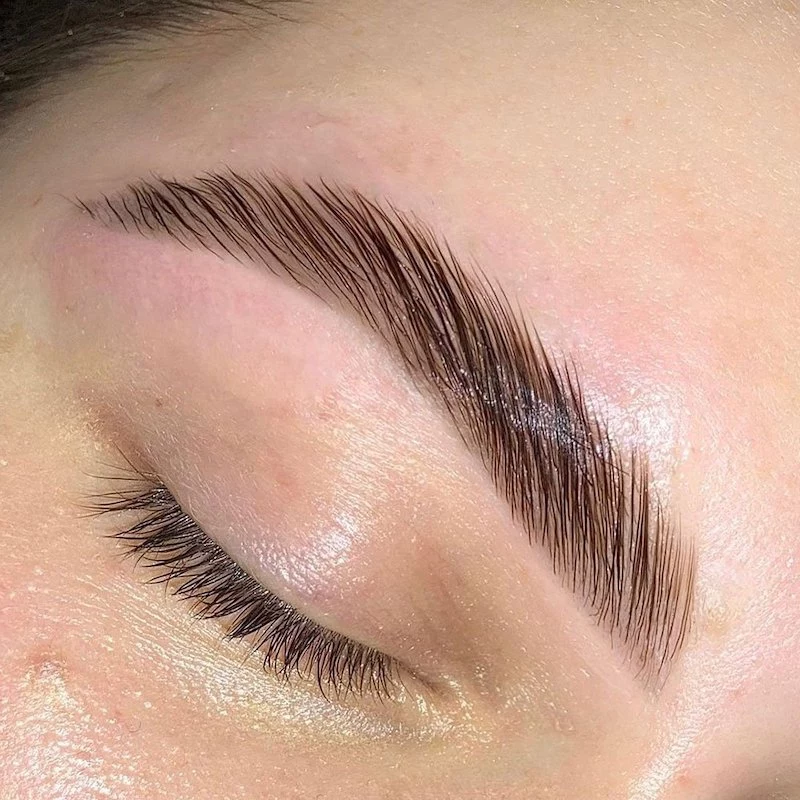
After the lifting cream is wiped away, we meticulously brush your brows into the perfect, lifted shape. Then, we apply a second solution, a neutralizing lotion. This one does the exact opposite of the first: it rebuilds those protein bonds, locking the hairs into their new, fabulous position. This is what makes the look last.
Once this step is done, your brow shape is set for the entire life of those hair cycles. A few millimeters in brushing technique is the difference between a soft, feathery look and something that looks way too severe. It’s a real art!
The Consultation: The Most Important 15 Minutes
Before any chemicals get near your face, a good esthetician will sit down with you for a real chat. If they try to rush this, consider it a red flag. We need to look at your hair texture, its growth pattern, and the condition of your skin. We can’t perform this service on irritated skin, period.

We’ll also talk about your goals. It’s my job to be honest. Lamination works with the hair you already have. It creates an illusion of density, but it doesn’t magically grow new hairs. For some people, a different service might be a better fit.
Oh yeah, and we have to go over the no-go list. We have to postpone if you are pregnant or breastfeeding, using strong retinoids like Tretinoin, have certain skin conditions, or recently had other facial treatments. Your health always comes first.
What to Expect During the Appointment (The Step-by-Step)
The whole thing usually takes about 45 to 60 minutes. It’s pretty relaxing, honestly.
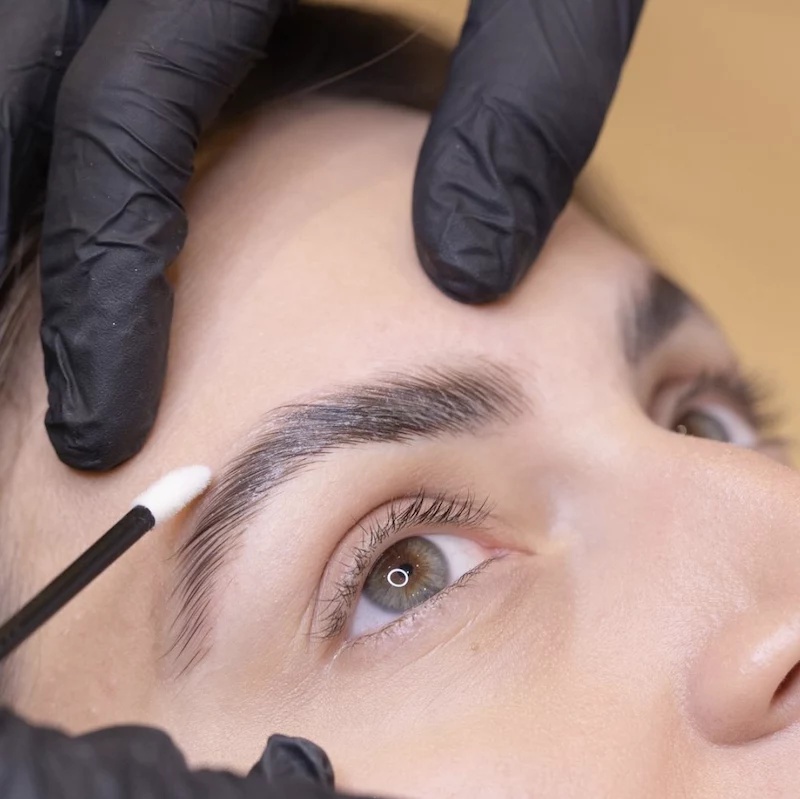
1. Clean & Prep: We start by deep-cleaning the brow area. Any oil or makeup will stop the solutions from working properly.
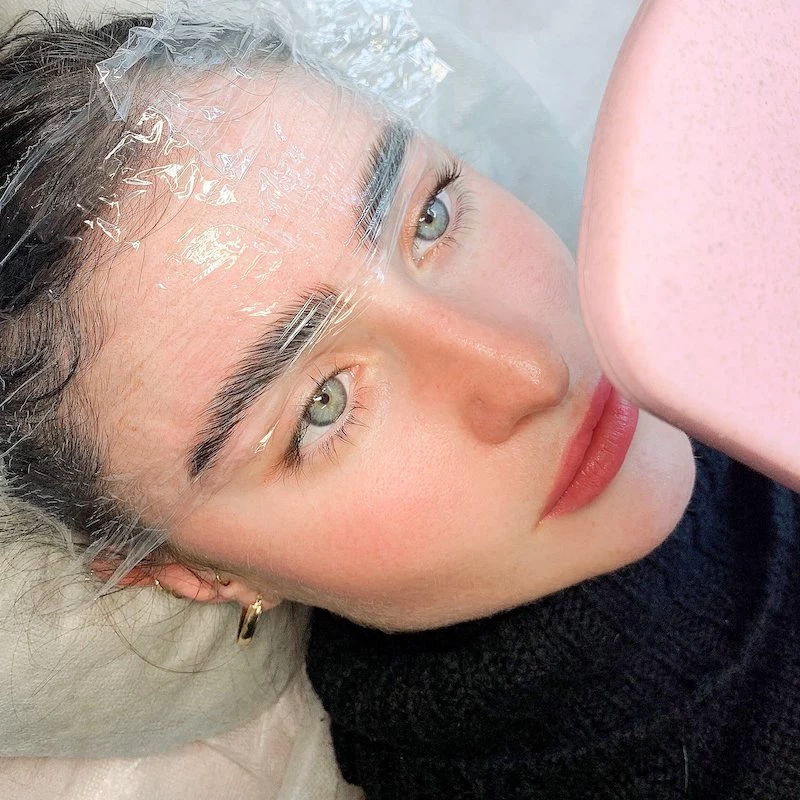
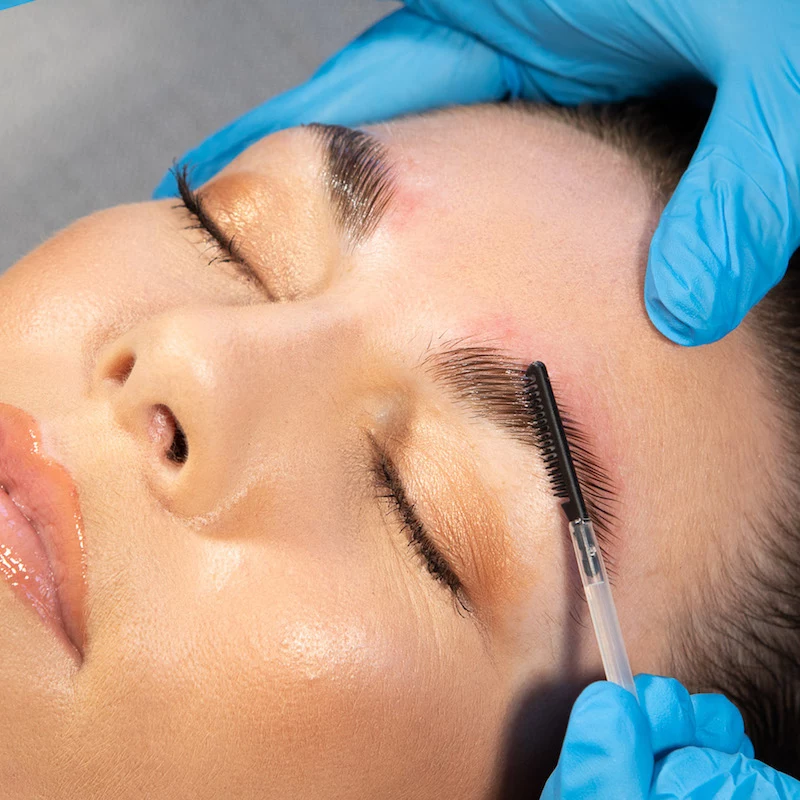
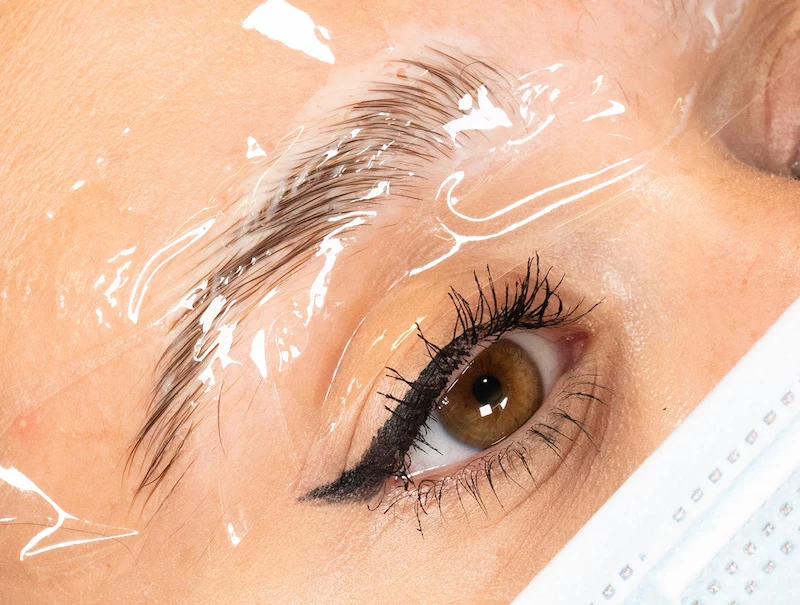
2. Lifting Cream: We carefully apply the first cream. Then we brush the hairs up and cover them with a small piece of plastic film to keep the solution working evenly. This is when the timer starts!
3. Shape & Set: Once the hair is ready, we remove the cream and get to work shaping. This is the fun part! Once every hair is perfectly placed, we apply the setting lotion to lock it all in. You might feel a slight tingle during this processing time, but it shouldn’t be uncomfortable.
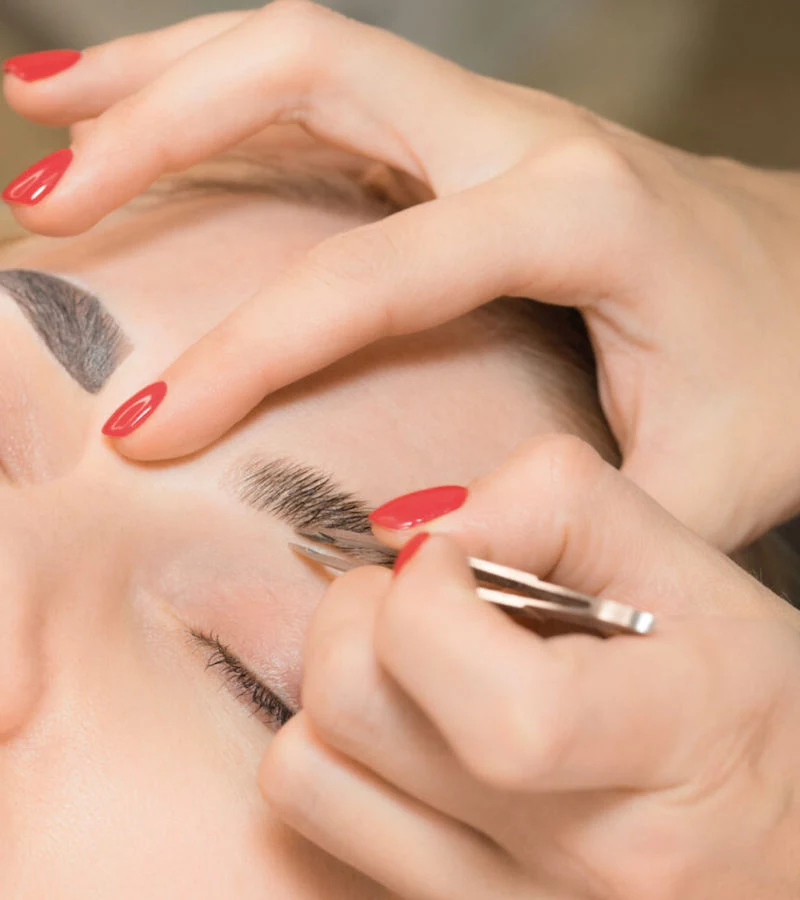
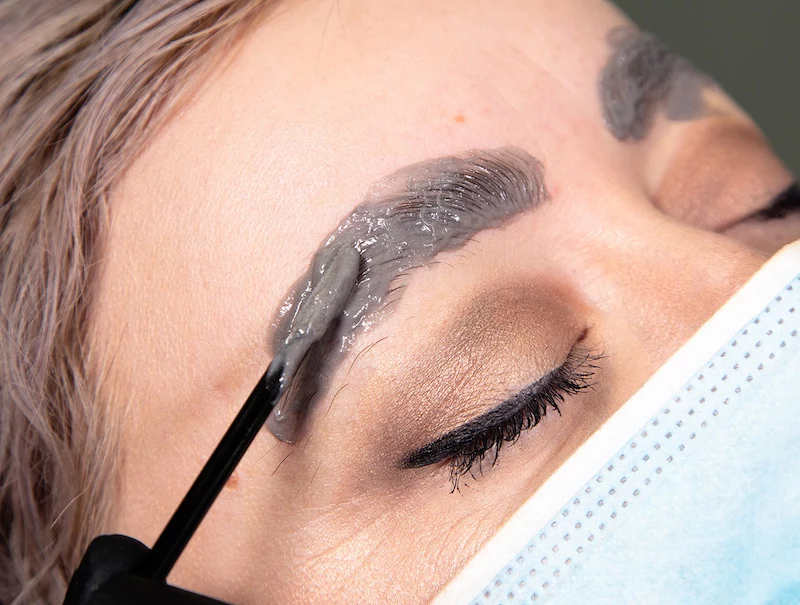
4. Tint & Tidy: After the lamination is done, I almost always recommend a brow tint. It adds back so much depth and makes the brows pop. A quick wax or tweeze to clean up stray hairs is the final touch. A quick tip: a good pro will always tint and wax after the chemical service, never before, as the skin is too sensitive.
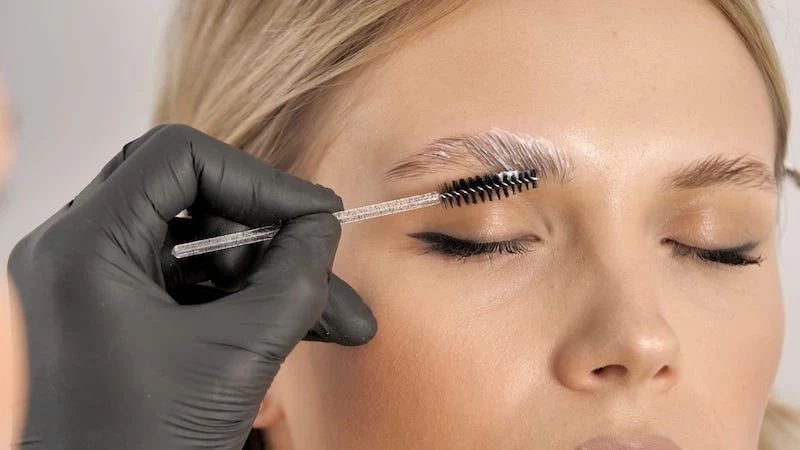
5. Nourish: The final, most important step is applying a deep conditioning oil or keratin treatment. This puts moisture back into the hair and keeps it healthy and shiny. I always send my clients home with a little sample to get them started.
Is Brow Lamination Right for You?
Lamination is amazing, but it’s not for everyone. Here’s the breakdown:
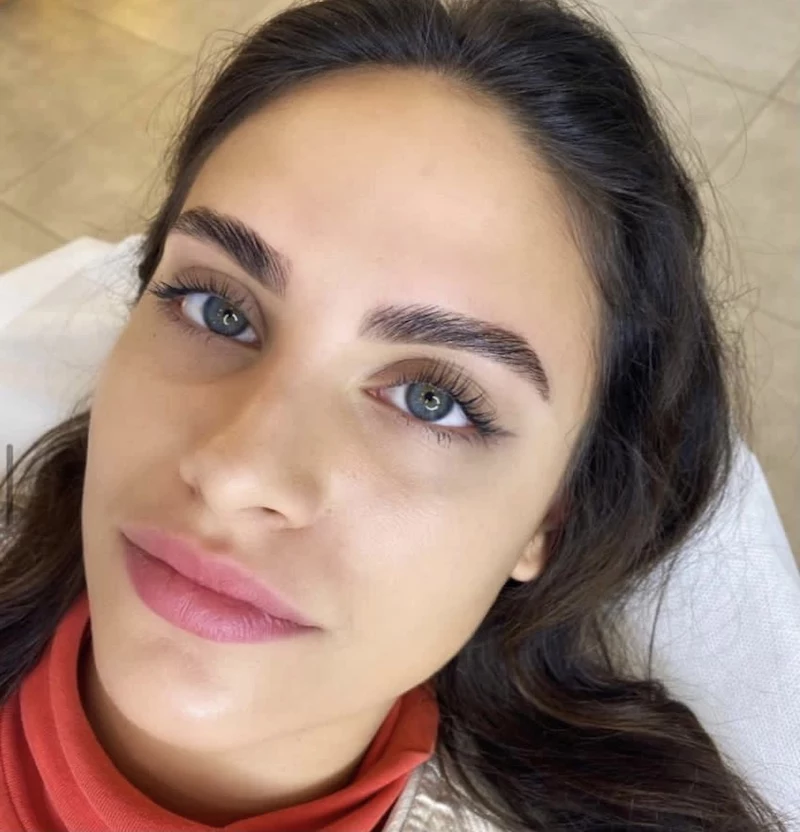
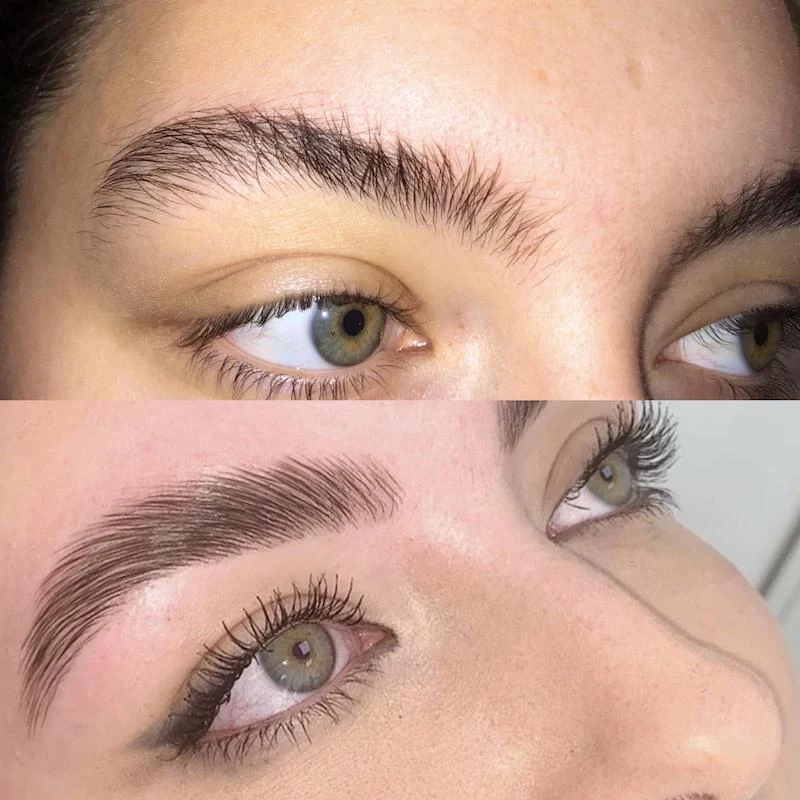
It’s a dream come true if you have: – Unruly brows or hairs that grow downwards. – Gaps or sparse areas you want to camouflage. – Decent brows already, but you want that perfectly groomed, symmetrical “soap brow” look. – Thinner or aging brows, as it makes the hair you have look fuller and more substantial.
Want to try a quick test? Go to a mirror right now. Take a clean spoolie (or even just your finger) and brush your brow hairs straight up. See how they instantly look fuller and cover more area? That’s the potential we’re unlocking!
You might want to think twice if you have: – Extremely sparse brows. If there isn’t much hair to work with, it can sometimes just look like a few hairs combed over a lot of skin. – Very coarse or wiry hair. It can still work, but the results might not last as long and require a very experienced technician. – Super sensitive skin. We always, always do a patch test first, but even then, chemicals are chemicals. – You want a zero-maintenance routine. It’s low-maintenance, not no-maintenance. You still have to brush them and apply oil daily.
Lamination vs. Microblading vs. Tint: What’s the Difference?
People get these confused all the time, so let’s clear it up. Think of it this way:
- Brow Lamination: This is a perm for your existing brow hairs. It redirects and sets them in a new shape. There are no needles and no pigment. It’s all about working with what you’ve got. It lasts about 6-8 weeks.
- Brow Tinting: This is like hair dye for your brows. It stains the brow hairs to make them look darker and more defined. It’s often done with lamination. On its own, a tint lasts about 3-4 weeks.
- Microblading: This is a semi-permanent tattoo. An artist uses a tiny blade to create hair-like strokes of pigment under your skin. This is for creating the appearance of hair where there is none. It’s more invasive, more expensive, and lasts one to three years.
To be frank, they solve different problems. Lamination styles your hair, microblading fakes the hair itself.

The Big Question: What’s This Going to Cost Me?
Let’s talk money. Prices vary a lot based on your location and the salon’s reputation, but you can generally expect a professional brow lamination service to cost anywhere from $75 to $150.
Most places offer a package deal that includes a brow tint, which is a fantastic add-on. If you get the tint separately, it’ll probably add another $20 to $30 to your bill. It’s not the cheapest service, but for a look that lasts 6-8 weeks, many people find it’s totally worth it.
A Warning About At-Home Kits
You’re going to see DIY lamination kits on Amazon for $30, and I know it’s tempting. Please, don’t do it. There’s a reason professionals need to be licensed and certified. We are trained to assess different hair types and adjust processing times to the minute. You can’t do that for yourself. The risk of over-processing your brows, causing dry, frizzy damage—or worse, getting harsh chemicals in your eyes—is incredibly high. It’s just not worth the risk to save a few bucks.
Aftercare: Protecting Your Investment (And Your Brows!)
What you do after you leave the salon is just as important as what we do during the service. The bonds in your hair are still settling, so you have to be gentle.
The Golden Rules for the First 24-48 Hours: – Keep them BONE DRY. No water, no steam from the shower, no saunas, no sweaty workouts. – Don’t touch or rub them. – No makeup or skincare products on the brow area. – Try to sleep on your back to avoid squishing them.
Long-Term Care is Simple: – Condition them daily! This is non-negotiable. Use a nourishing oil every single day to keep the hairs healthy and hydrated. A good aftercare oil will have things like castor oil, argan oil, or jojoba oil. You can find these at places like Sephora, Ulta, or even online. – Brush them into place every morning with a clean spoolie. After you wash your face, a quick brush-up is all it takes. – Go easy on exfoliants (like scrubs or acids) around the brows. – Schedule appointments 8 weeks apart, at minimum. This gives your brows time to go through their natural growth cycle and prevents damage.
Help! What If…? (Quick Troubleshooting)
It’s normal to have a few questions, especially if it’s your first time. Here are some common freak-outs:
“What if I accidentally get them wet?” Don’t panic. Gently blot them dry with a soft towel and use a spoolie to brush them back into place. A tiny splash isn’t a disaster, but a full-on drenching in the first 24 hours can affect how well the lamination sets.
“They look too intense! Do I have to wear them brushed straight up?” Absolutely not! The super-laminated, straight-up look is just one style. After the first 24 hours, you can brush them however you want. I love a softer style, brushing them up and slightly out towards the tail of the brow for a more natural, fluffy look.
“My brows look a little frizzy after a week. What did I do wrong?” This almost always comes down to one thing: dehydration. Are you using your nourishing oil every single day? Just like the hair on your head, chemically treated brows need conditioner to stay smooth and healthy. Start using oil religiously, and you should see a huge difference.

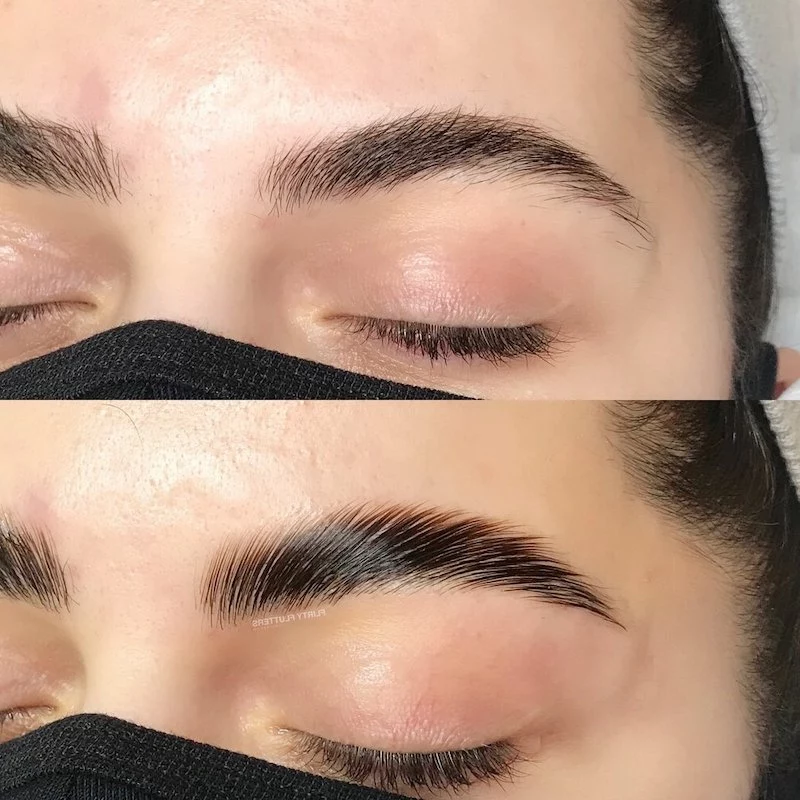
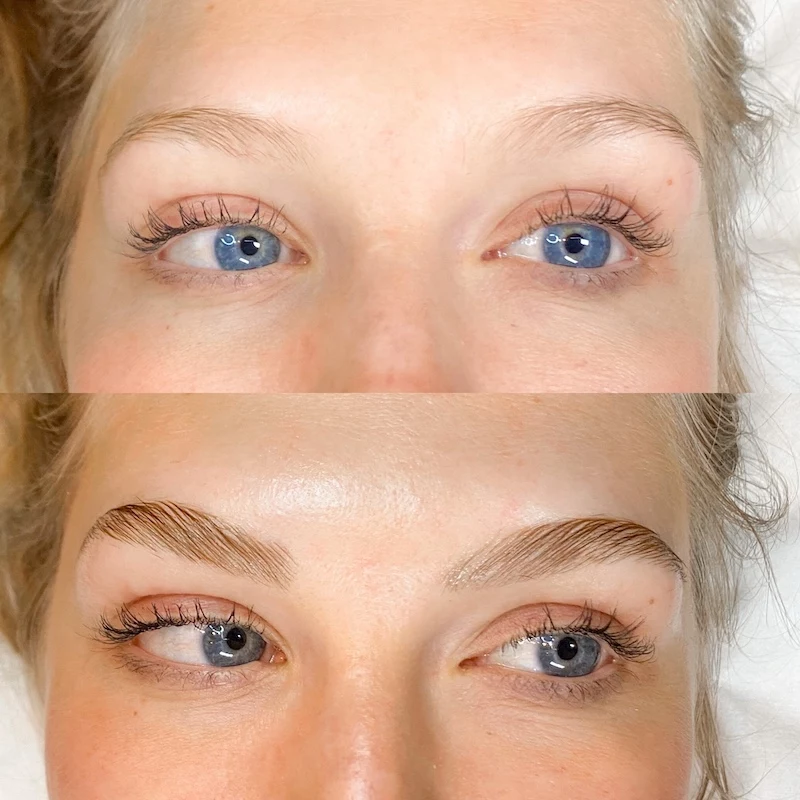
Inspirational Gallery
Brow Lamination: A chemical treatment that redirects your existing brow hairs to create a fuller, uniform shape. Results are temporary, lasting about 6-8 weeks, and work by altering the hair itself.
Microblading: A semi-permanent tattoo technique that creates fine, hair-like strokes on the skin to fill in sparse areas. It addresses the skin, not the hair, and lasts 1-3 years.
Essentially, lamination perfects the hairs you have, while microblading adds the hairs you don’t.
For the first 24 hours, your newly laminated brows are still ‘setting’ in their new, perfectly sculpted shape.
This isn’t just a suggestion; it’s science. The neutralizing lotion used in the final step works to reform the hair’s chemical bonds. This process needs a full day to cure without interference. Introducing water, steam, sweat, or makeup can disrupt these delicate, newly formed bonds, causing the hairs to relax and revert to their old shape before they’re properly locked in.
- Deeper, more uniform color.
- A bolder, more ‘3D’ appearance.
- Less need for daily brow makeup.
The secret? It’s the one-two punch of lamination paired with a tint. Ask your technician to add a custom-blended tint or a longer-lasting hybrid dye right after the lamination service. This combination is what creates the truly striking ‘before and after’ transformations, defining every single hair for maximum impact.
Can I still fill in my brows after lamination?
Absolutely! Lamination creates the ideal shape and texture, but you might still have natural gaps you want to perfect. The key is to wait 24 hours post-treatment. Then, opt for a micro-fine pencil or a powder to lightly sketch in sparse areas. Avoid heavy, waxy pencils, as they can weigh down the fluffy, lifted hairs and disrupt the sleek finish.

Don’t skip the aftercare oil: This is a non-negotiable step for long-term brow health. The chemical process, while safe, can be drying. To keep your brow hairs nourished, flexible, and glossy, brush a single drop of a nourishing oil through them each night. Castor oil is a classic, but lightweight squalane or argan oil works beautifully, as do dedicated products like the GrandeBROW serum.
Tempted by a DIY lamination kit? Professionals urge caution. The difference between perfectly sculpted brows and frizzy, damaged ones comes down to seconds. An experienced technician assesses your unique hair thickness and resistance to customize the processing time precisely. It’s this expert judgment—something a one-size-fits-all kit can’t provide—that ensures a safe and beautiful result.
To get the most from your appointment, a little prep goes a long way. Follow this checklist for ideal results:
- Arrive with a clean face, completely free of any brow makeup.
- Stop using retinoids, Accutane, or strong chemical exfoliants (like AHAs or BHAs) near the brow area for at least a week prior.
- Avoid tweezing, waxing, or threading for at least two weeks so your technician has as much natural hair as possible to work with.
Once your brows are laminated, a tiny bit of daily styling keeps them looking salon-fresh. Each morning, gently brush the hairs upward into place with a clean spoolie. To lock them in that perfect, fluffy position all day, use a clear setting product. A strong-hold gel like NYX’s The Brow Glue or a flexible wax like Anastasia Beverly Hills’ Brow Freeze will give you that iconic laminated look without any crunchiness.


