Thinking About a Tongue Piercing? A Piercer’s Honest Guide
So, you’re thinking about getting your tongue pierced. Awesome. I’ve been a professional body piercer for a long time, and I’ve done thousands of them. But here’s the thing about tongue piercings—they’re one of the most misunderstood mods out there. People see it as just a cool look, but for any piercer worth their salt, it’s a procedure that demands serious respect for anatomy.
In this article
- First, Let’s Talk Anatomy (The Important Part!)
- The Piercing Process: What to Expect in a Good Studio
- Tongue Piercing Placements: The Good, The Bad, and The Ugly
- The Healing Journey: Your First Few Weeks
- Jewelry Smarts: Material, Size, and Myths
- Your Top Questions Answered
- How to Find a Piercer You Can Trust
- Final Thoughts
- Galerie d’inspiration
Your tongue isn’t just a slab of muscle. It’s an incredibly complex machine you use constantly for talking, eating, and even breathing. My training wasn’t just about needles; it was about staring at anatomy charts until my eyes burned and mastering sterilization protocols. This is the stuff that prevents bad outcomes. So, this guide is basically the exact conversation you and I would have if you sat down in my studio chair. We’re going to get into the nitty-gritty of why placement matters, which piercings are a TERRIBLE idea, and what a healthy healing process actually looks like.
First, Let’s Talk Anatomy (The Important Part!)
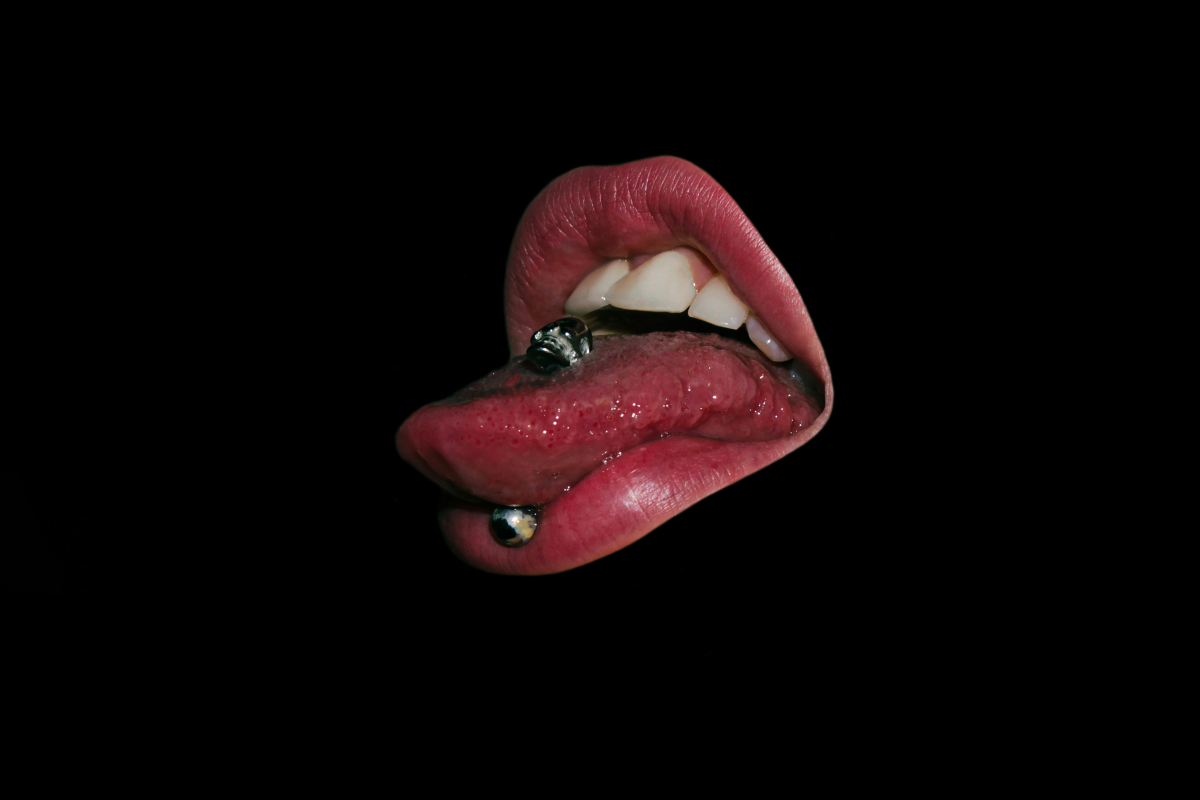
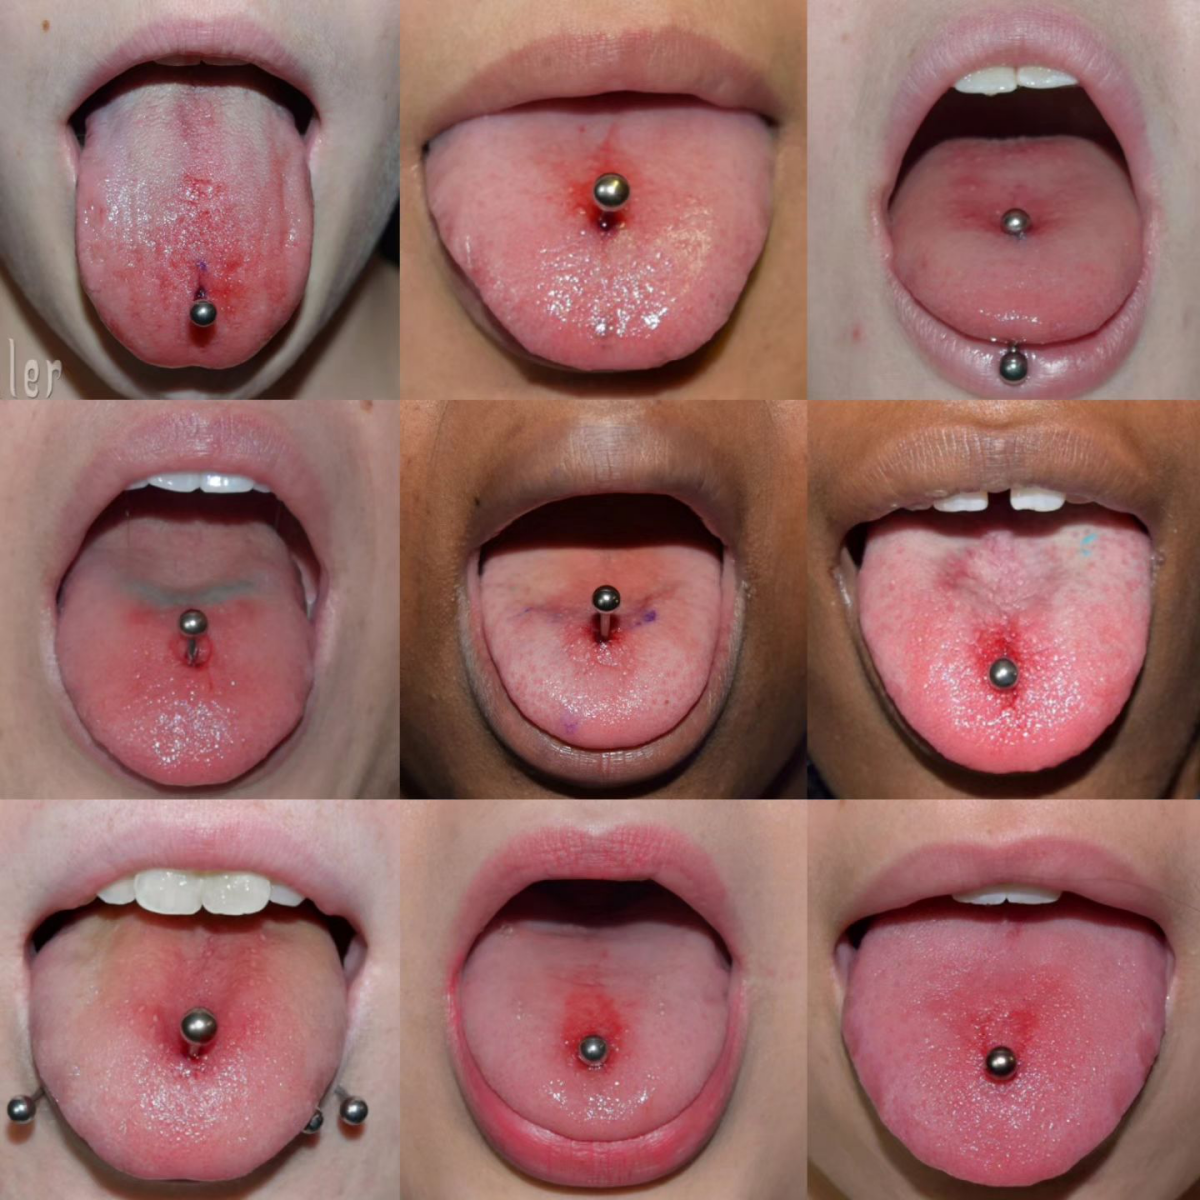
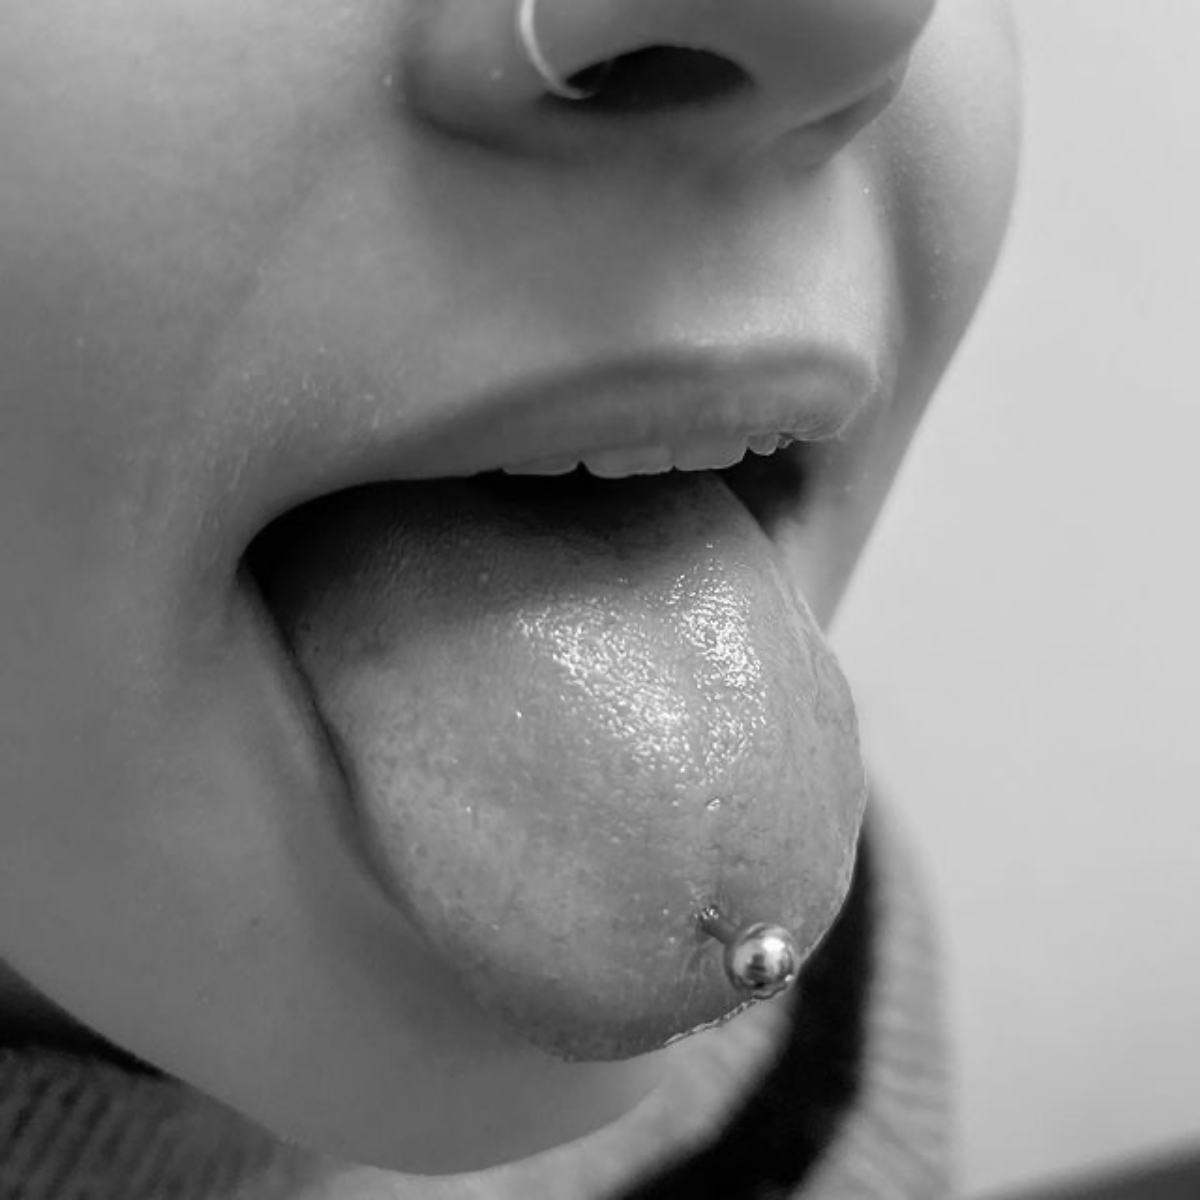
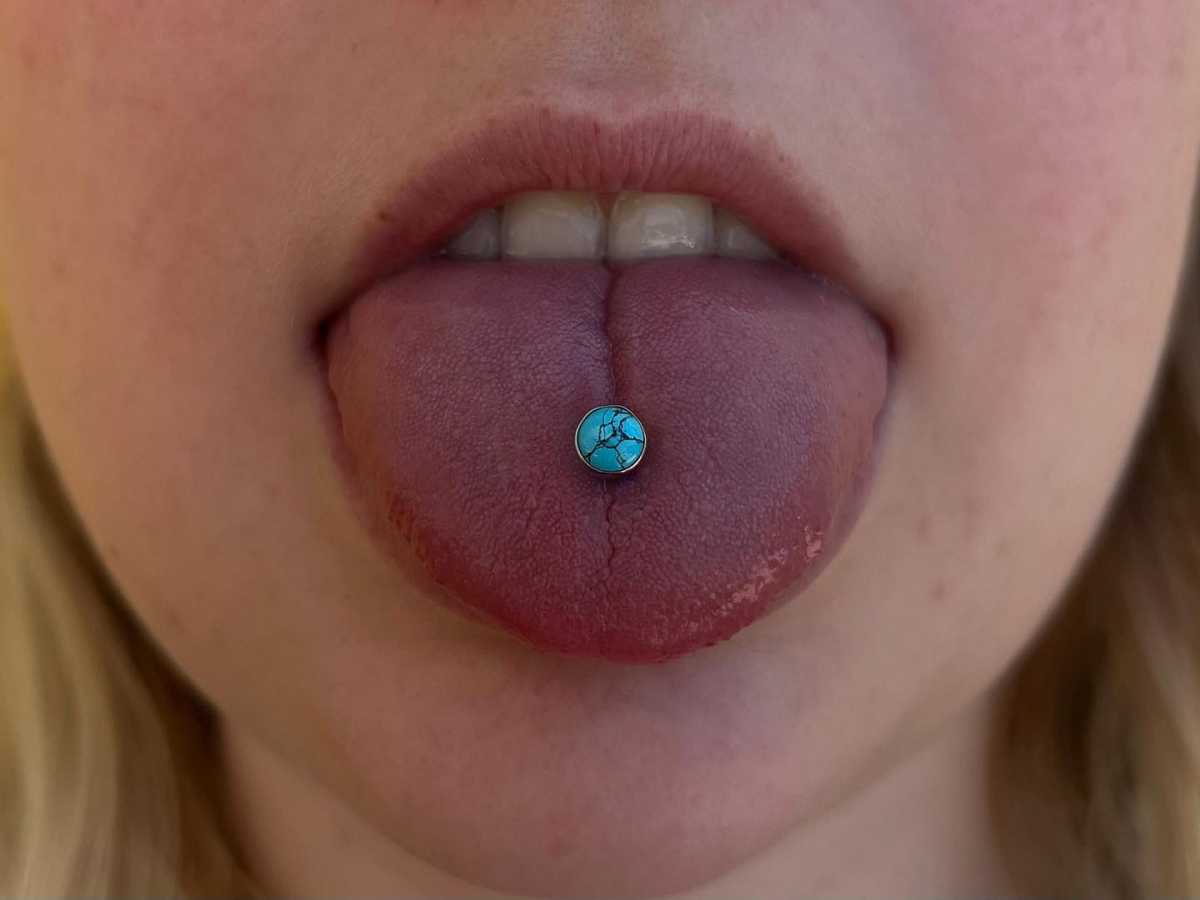
Before a needle even comes out, we have to understand the landscape. Your tongue is essentially two long muscles, left and right, fused down the middle. That faint groove you can see running down the center? That’s called the median sulcus. This little valley is the sweet spot because it has fewer major blood vessels and nerves, making it the safest zone for a traditional piercing.
A good piercer’s number one job is to avoid the big, important structures lurking under the surface. Here’s what we’re looking out for:
- The Big Blood Vessels: Deep inside your tongue, on either side of that center line, are your lingual arteries. Puncturing one of these is a legitimate medical emergency. This is exactly why off-center piercings (we’ll get to those later) are so incredibly risky.
- Nerves, Nerves, Nerves: Your tongue is packed with nerves that control movement and sensation (like taste!). Damaging one can lead to numbness, a lisp, or permanent changes to how you taste food. Again, careful central placement is your best defense.
- The Frenulum (Web): Go ahead, look in the mirror. Lift your tongue. See that thin web of tissue connecting your tongue to the floor of your mouth? That’s your lingual frenulum. It can sometimes be pierced, but only if it’s prominent and flexible enough. If it’s short or tight, it’s a no-go.
This isn’t just trivia; it’s the foundation of a safe piercing. When someone asks for a specific look they saw online, my first thought is always, “Is their anatomy right for this?” If the answer is no, I won’t do it. Your long-term health is way more important than a temporary aesthetic.
The Piercing Process: What to Expect in a Good Studio
A professional piercing should feel clinical and precise, never rushed. First, we talk. I’ll go over your health history, and then I’ll ask you to stick your tongue out so I can get a good look at your personal anatomy. I’m checking out that median sulcus, looking for big veins (a bright light helps me see them), and seeing how your tongue rests against your teeth.
Next comes the setup. Everything is sterile. I’ll be wearing gloves, and all my tools, especially the needle, are single-use and come from a sealed sterile package. The jewelry should be top-notch—implant-grade titanium (specifically ASTM F-136) is the gold standard. It’s what surgeons use, so it’s incredibly biocompatible. Heads up: if a studio uses mystery “surgical steel,” walk out. It’s often a low-quality alloy with nickel that can cause major issues.
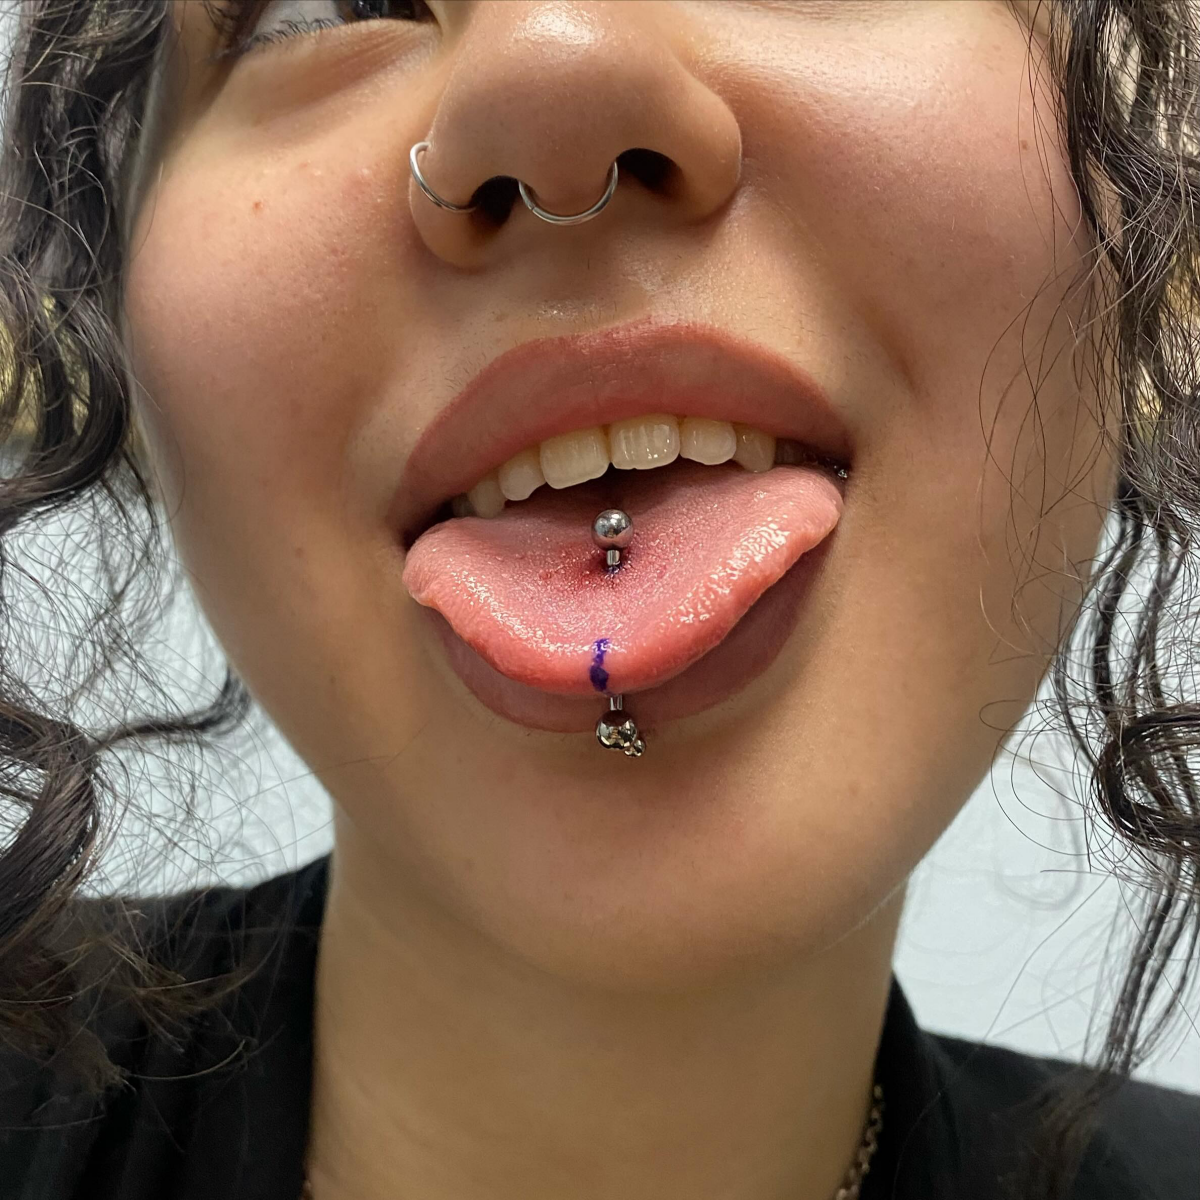
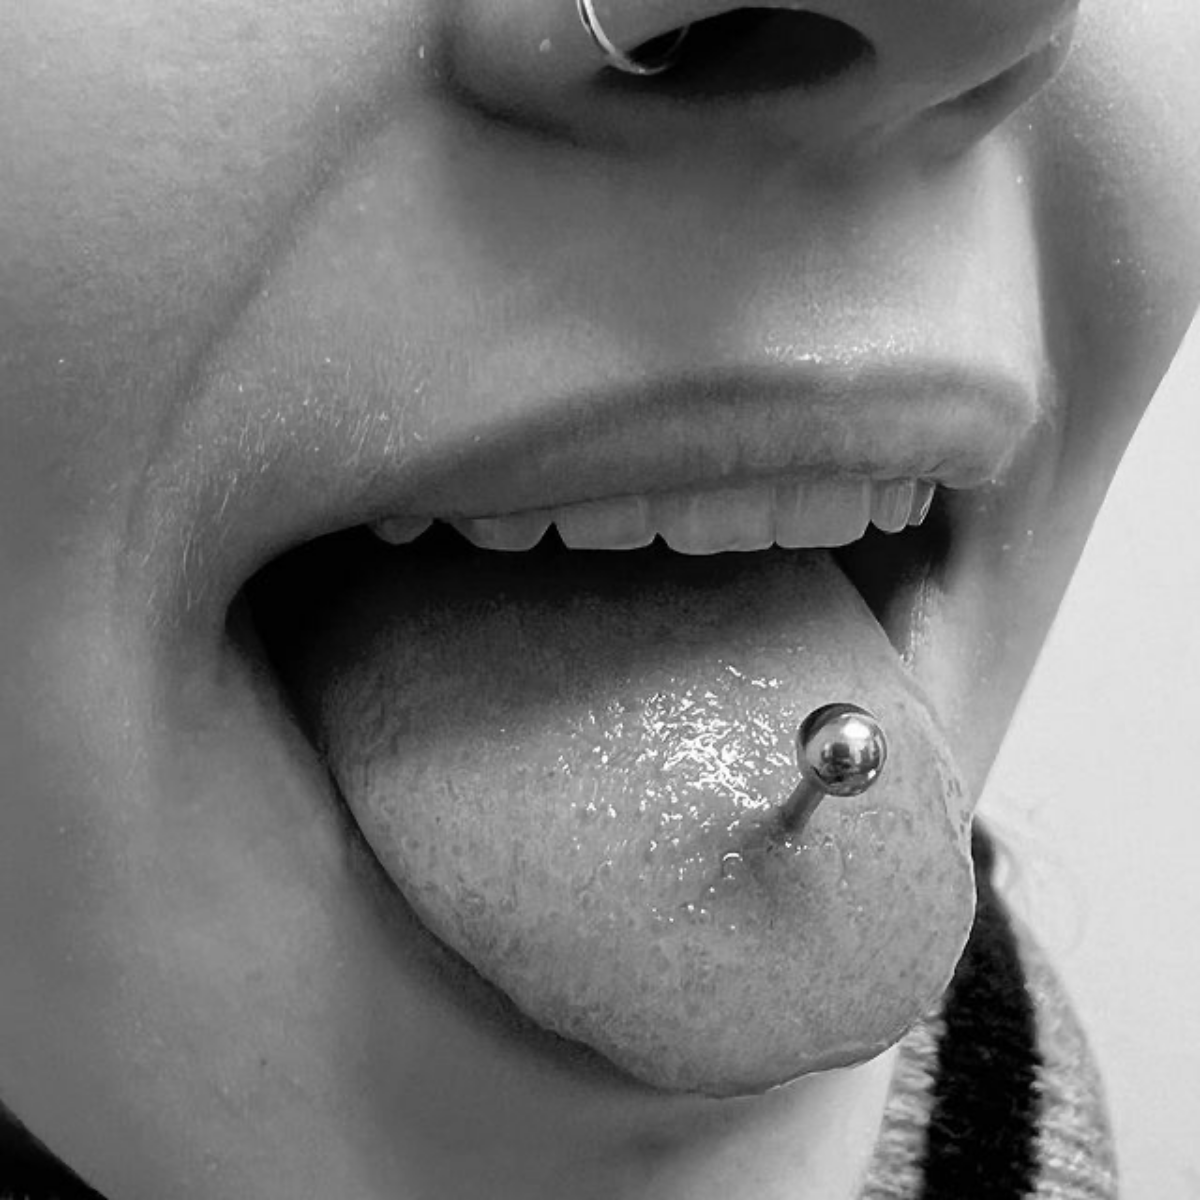
I’ll mark the spot with a sterile, single-use marker, and you’ll get to approve it in the mirror. The piercing itself is super fast. You’ll feel a quick, intense pressure, and then it’s over. I thread the jewelry right behind the needle for a smooth transfer, screw on the top ball, and you’re done. The initial barbell will be long, maybe around 7/8 of an inch (20-22mm), to make room for swelling. This is absolutely crucial.
Oh yeah, the cost: You should be prepared for the price to reflect the quality. In a reputable U.S. studio, expect to pay between $50 and $90 for the piercing fee itself. On top of that, the initial implant-grade titanium barbell will likely run you another $40 to $60. Don’t forget to budget for a shorter bar in a few weeks!
Tongue Piercing Placements: The Good, The Bad, and The Ugly
Not all piercings are created equal. Some are classic and safe, while others are a disaster waiting to happen. Here’s my professional take.
Recommended & Generally Safe
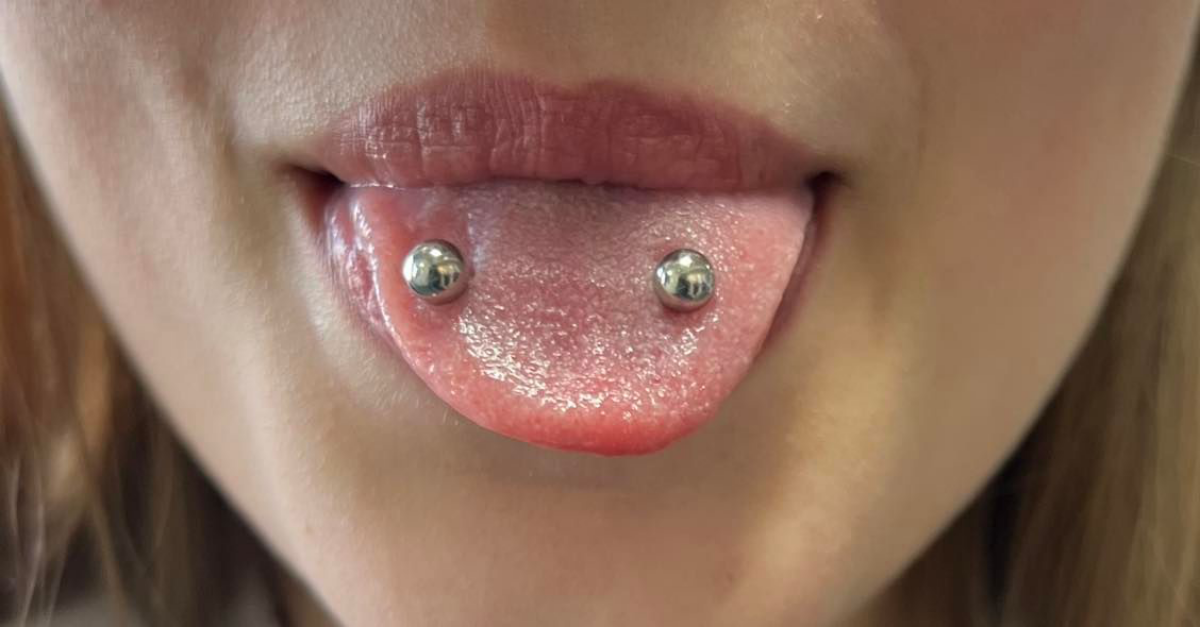
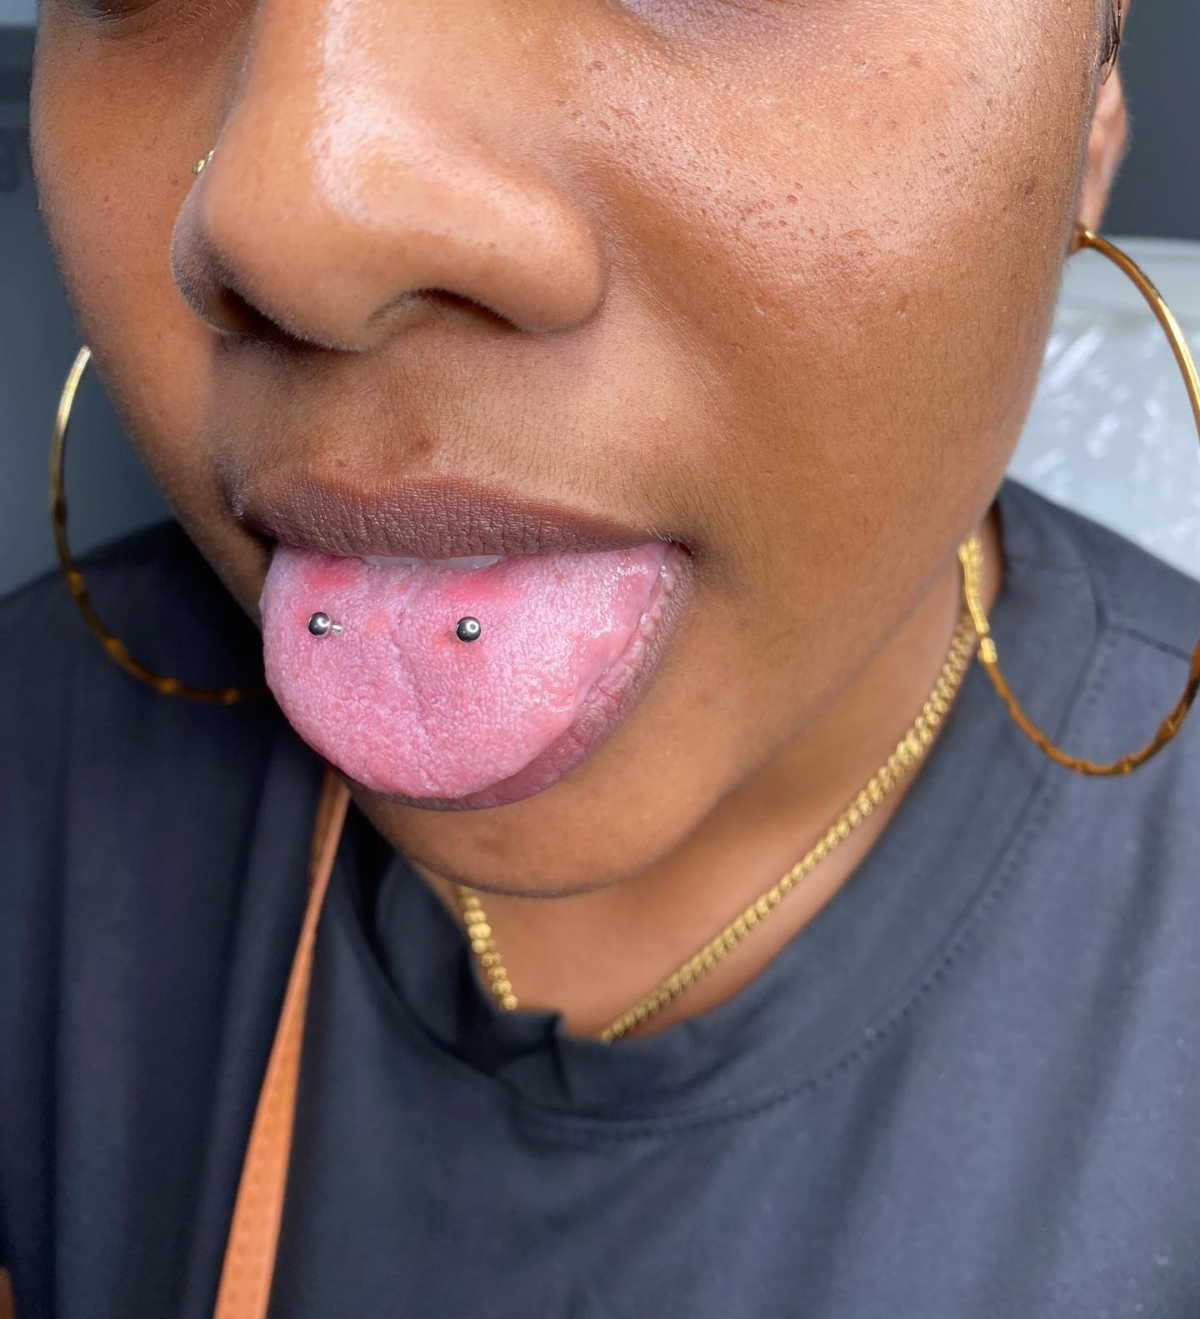
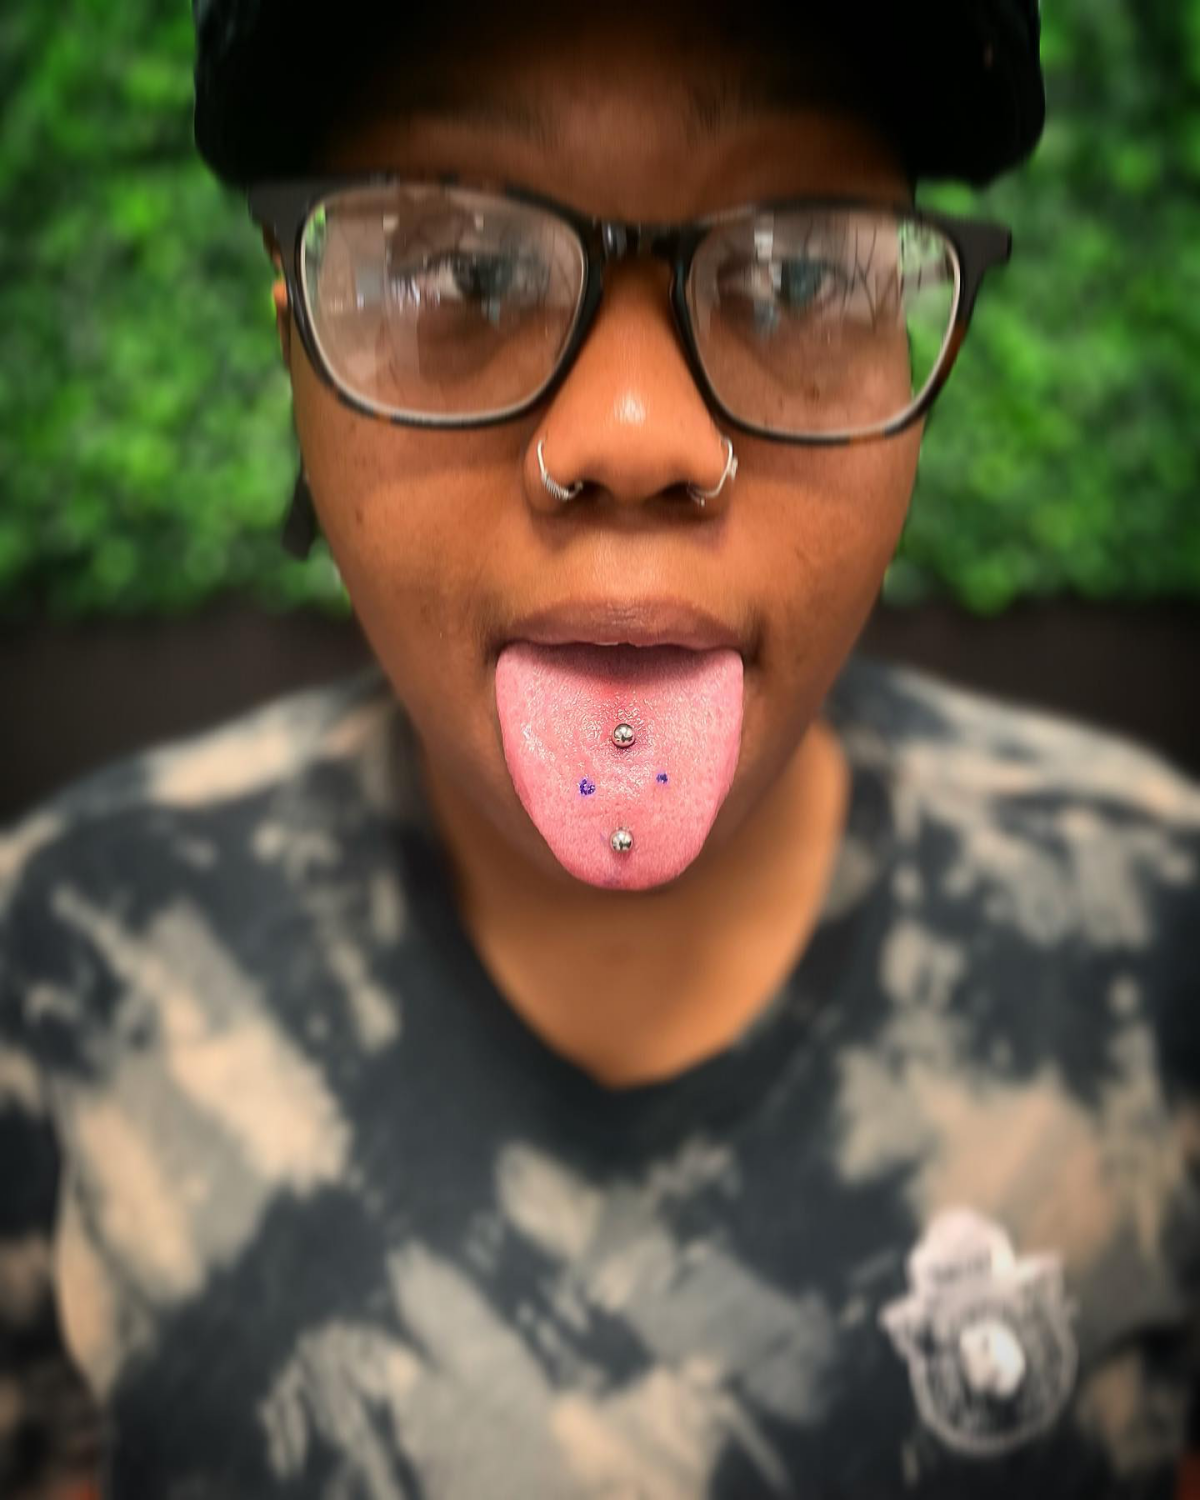
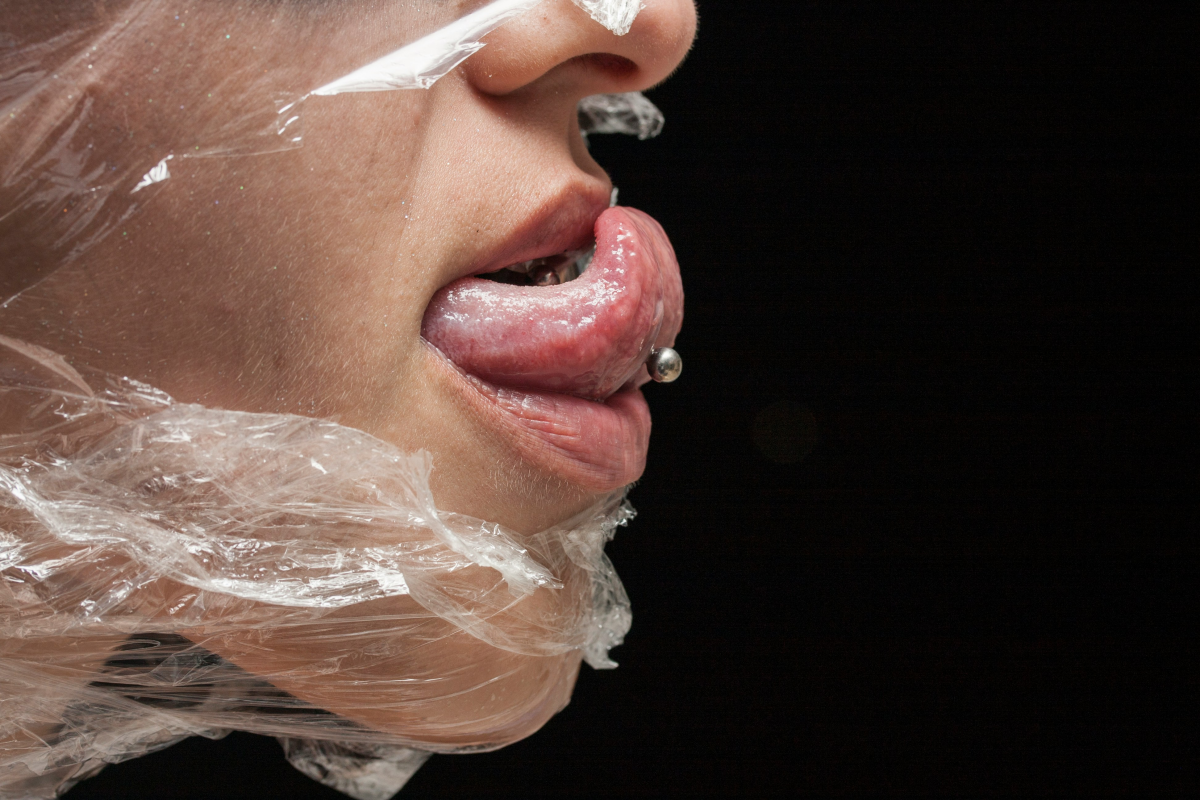
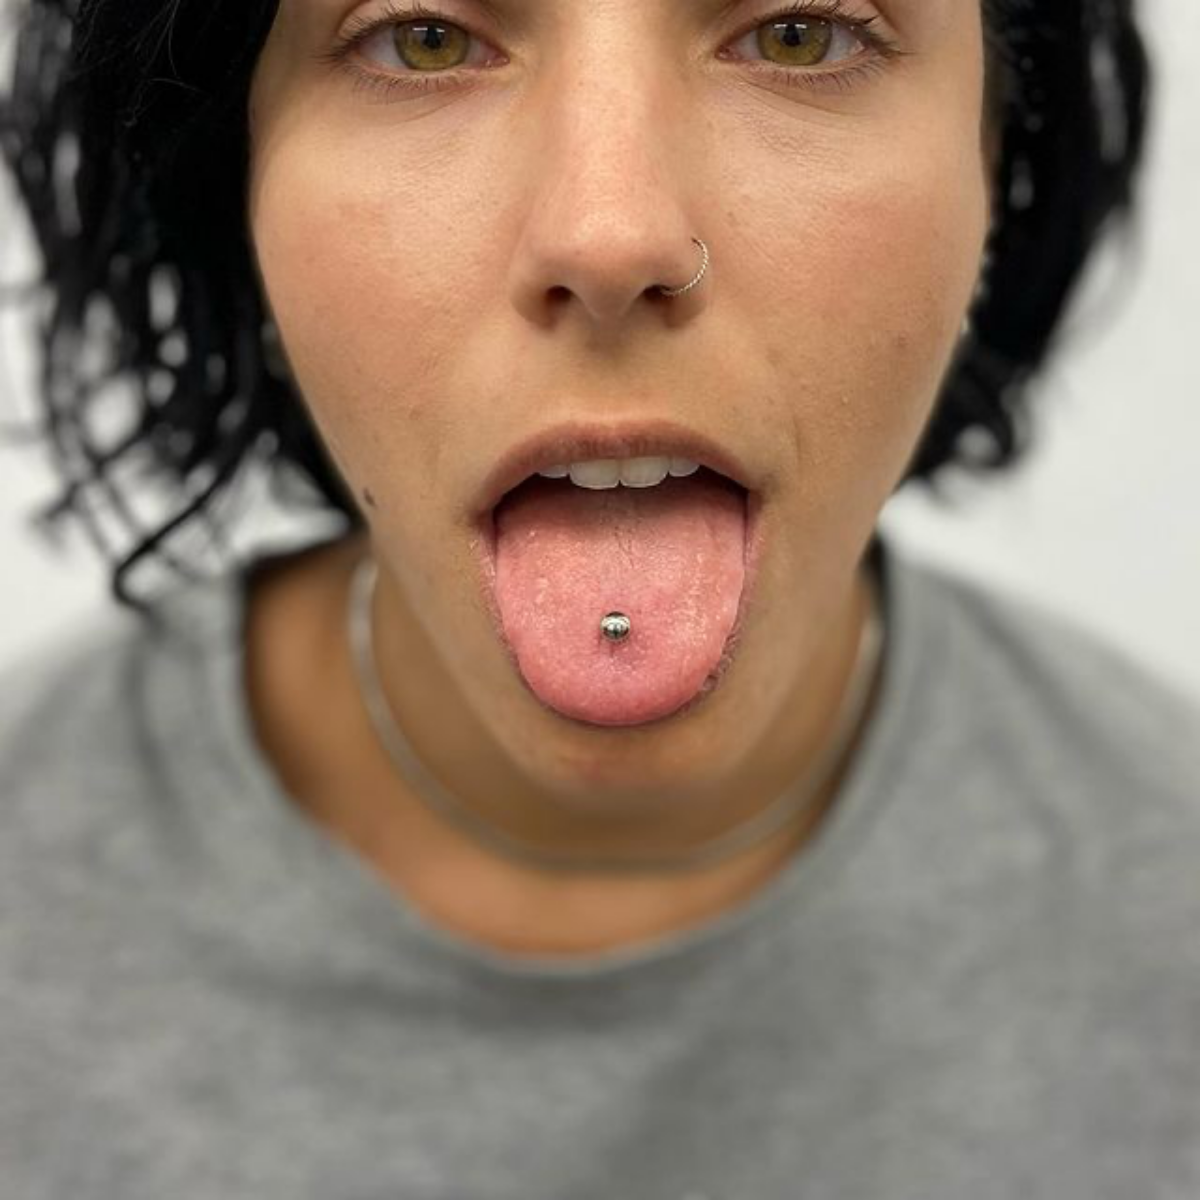
- Standard Midline Piercing: This is the classic, the one you probably picture. It’s a single, vertical piercing right through the center. It avoids all the major danger zones and, honestly, heals the best. Healing takes about 4 to 8 weeks, but downsizing the jewelry after 2 to 4 weeks is mandatory.
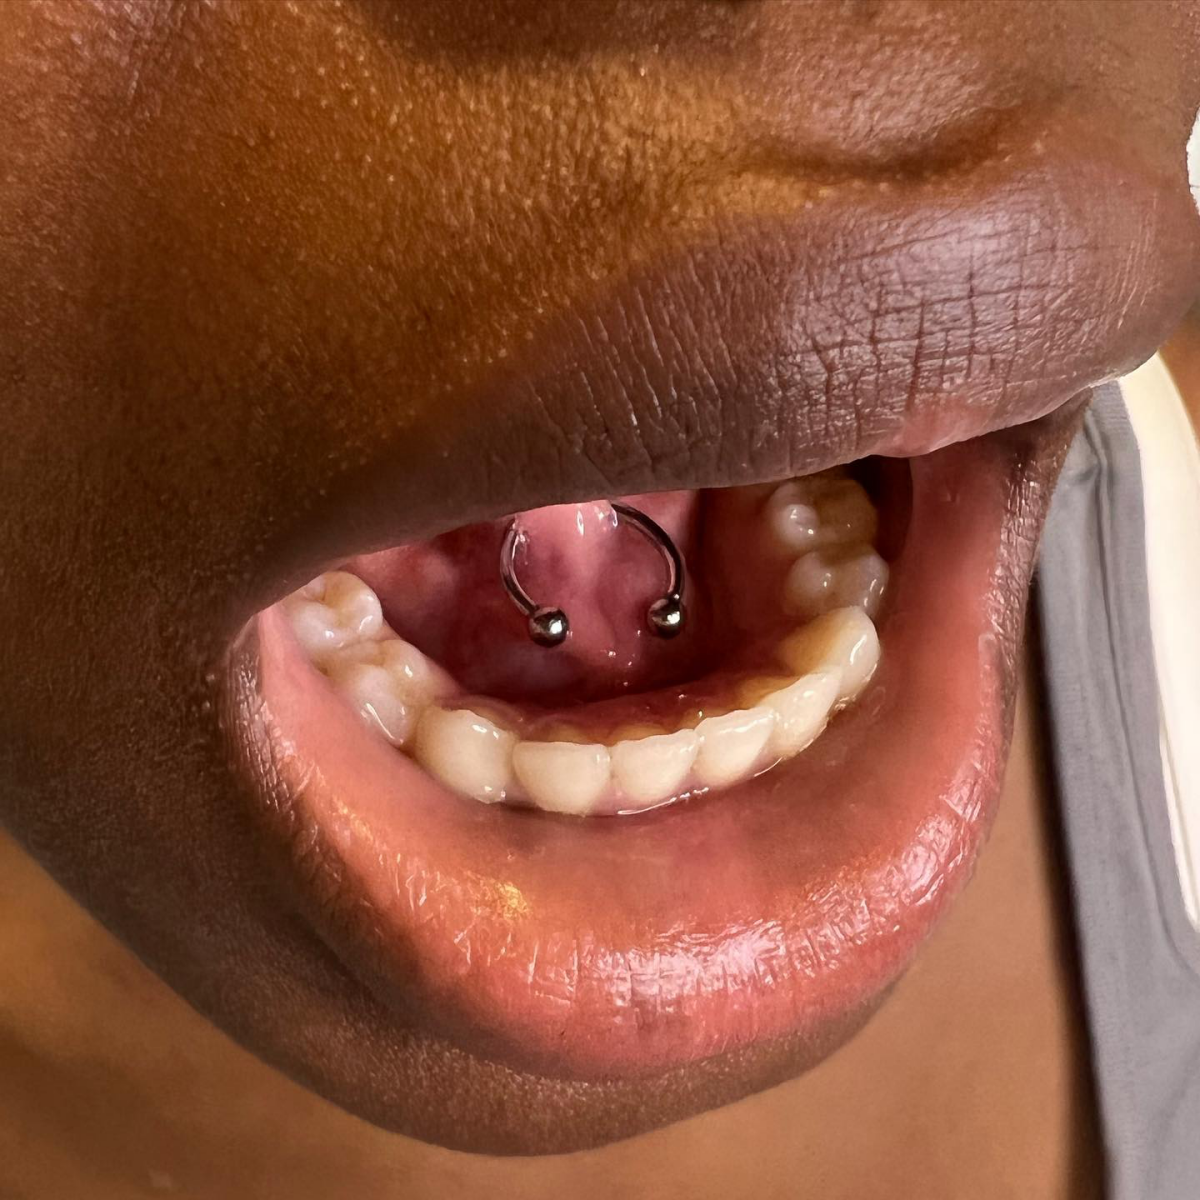
- Frenulum (Web) Piercing: This is the horizontal one through the web under your tongue. It’s super discreet. The main risk here is long-term gum recession or enamel damage on your lower teeth if it rubs. A piercer has to check your anatomy carefully for this one—I probably turn away about a third of the people who ask for it because their frenulum is too small.
High-Risk Piercings I Will NOT Do
I feel it’s my duty to warn you about these. Some piercers might do them, but the risks are just too high in my professional opinion.
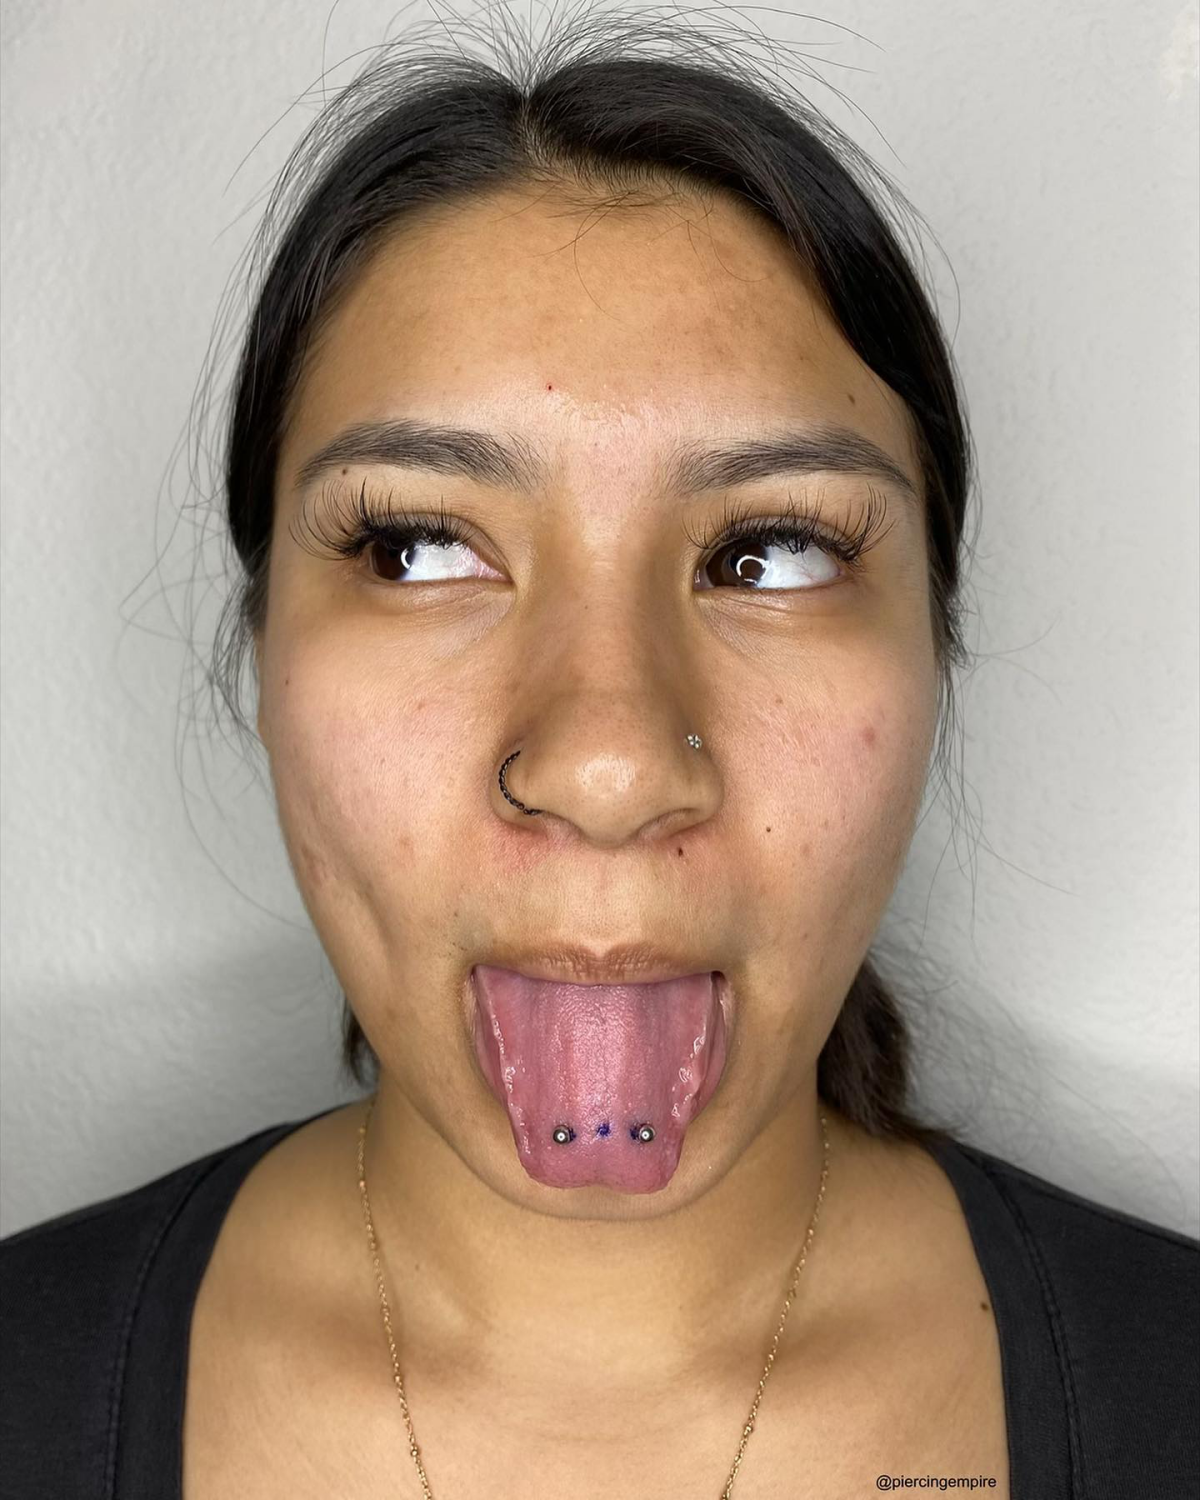
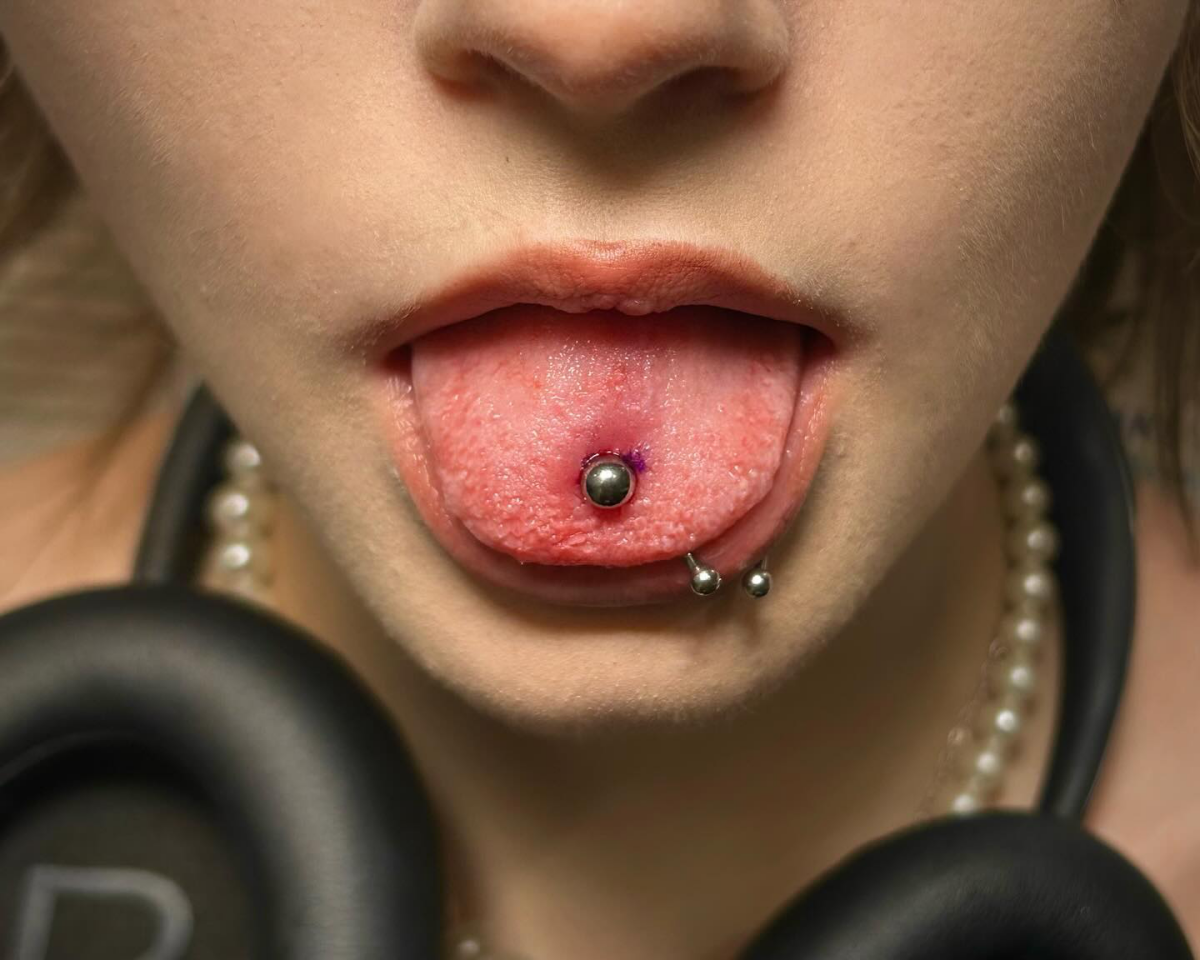
- “Snake Eyes” (Horizontal Tip Piercing): This is a horizontal bar through the very tip of your tongue. It’s one of the most dangerous oral mods. It pins the two muscles of your tongue together, which can mess with your speech. Worse, the balls sit right against your teeth, leading to chipped teeth and enamel erosion. It also rejects constantly, leaving a nasty scar.
- “Scoop” (Surface Piercing): This is a surface bar that sits horizontally across the top of the tongue without going all the way through. Your tongue is always moving, which is the worst environment for a surface piercing. They almost always reject, pushing their way out of your skin and leaving a huge scar.
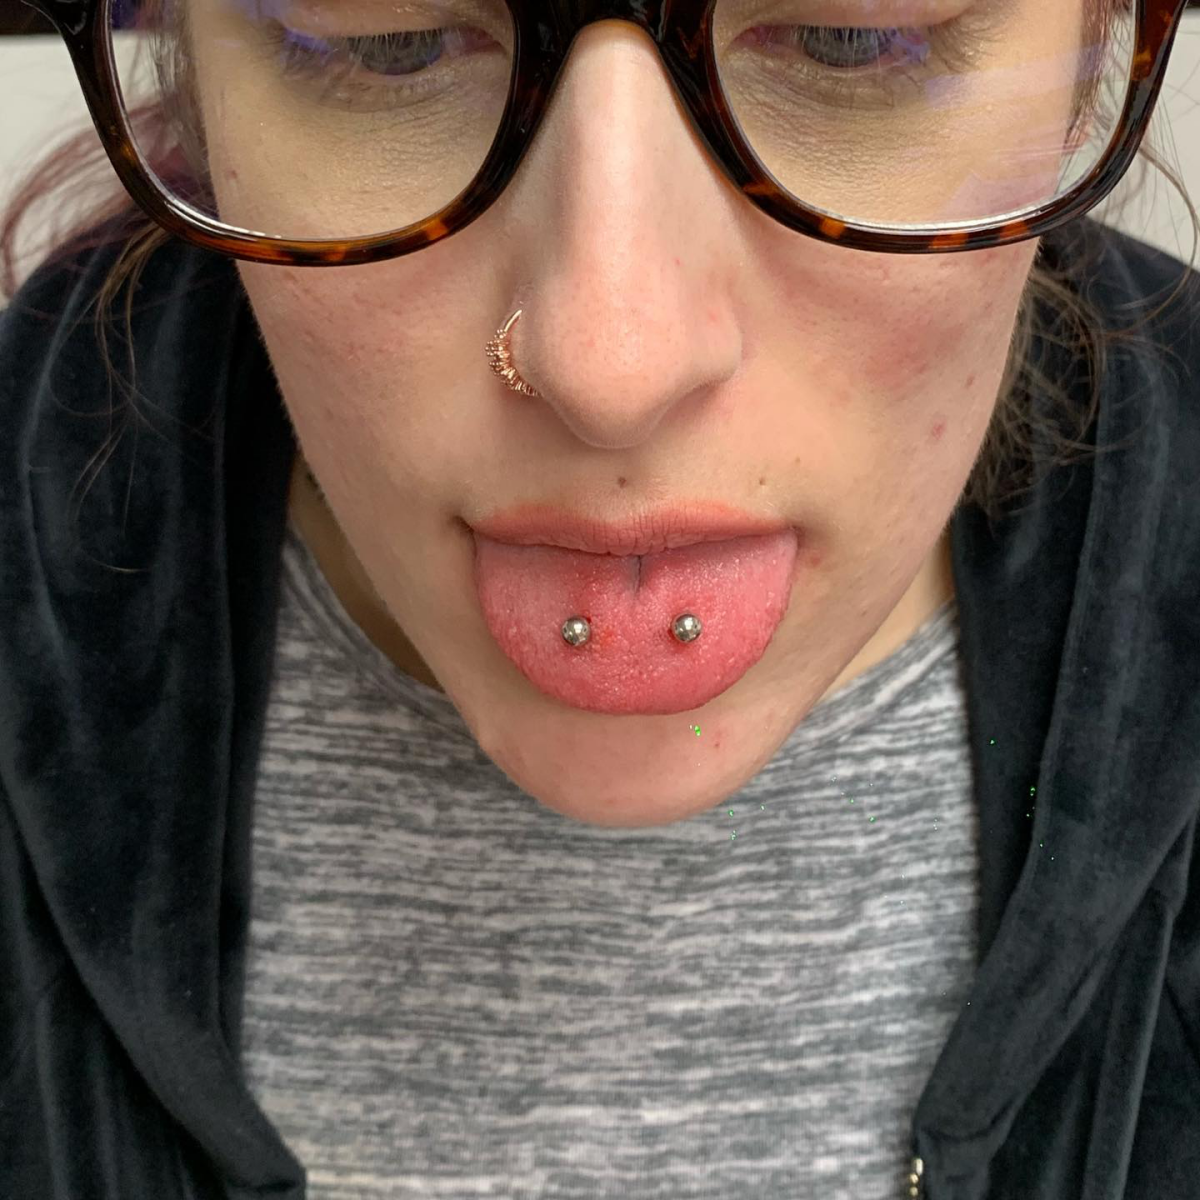
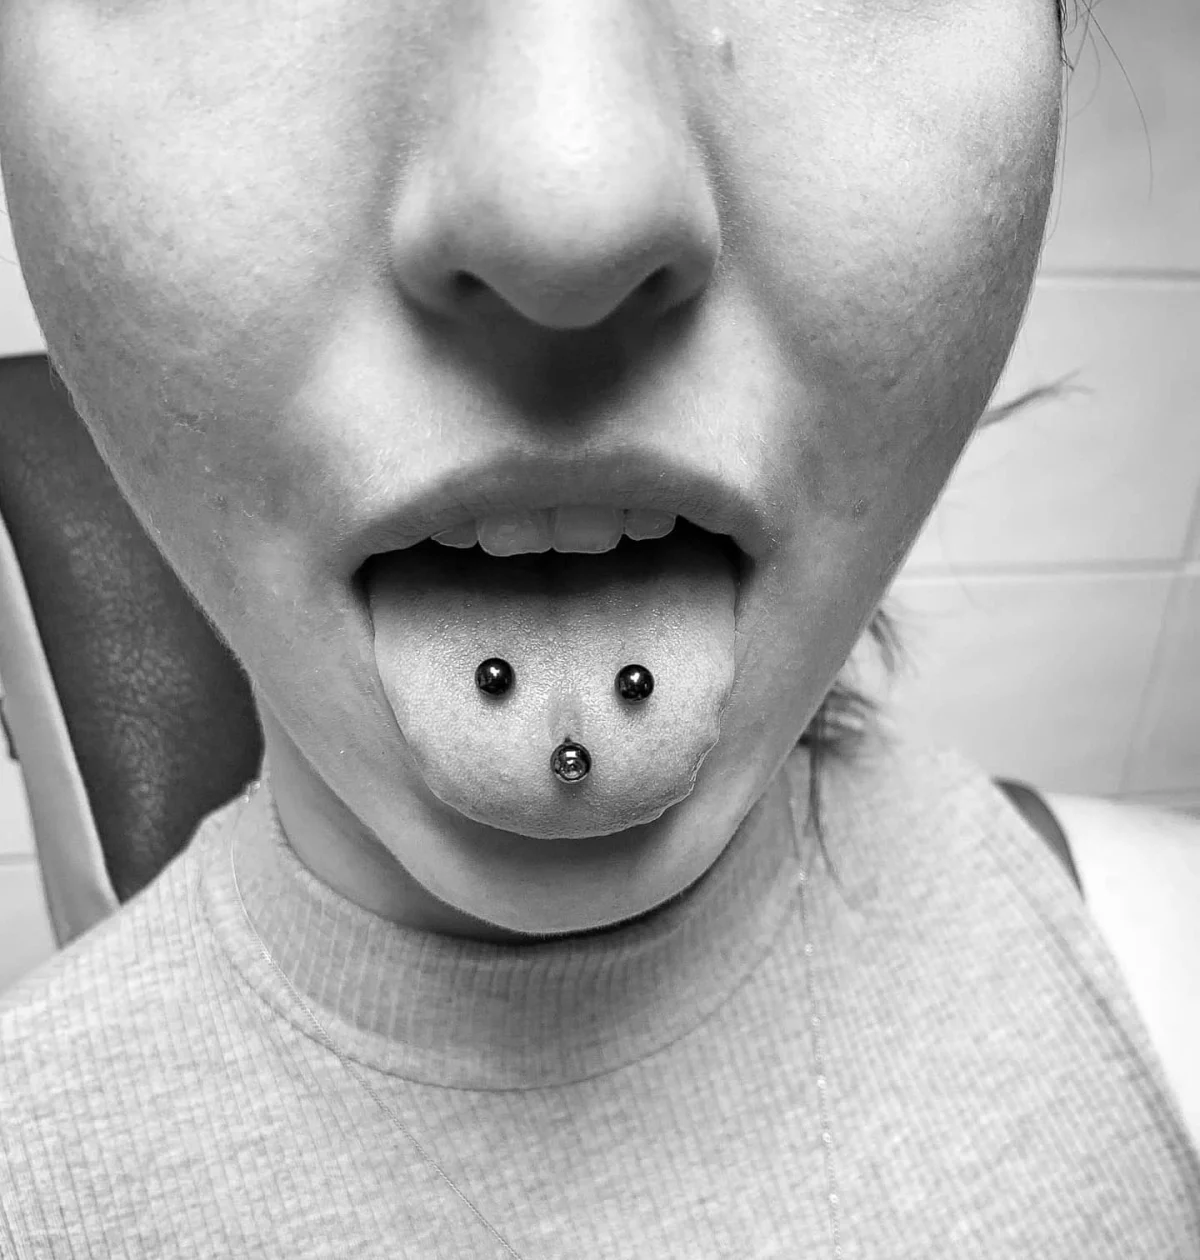
- “Venom Bites” (Paired Lateral Piercings): This is two piercings placed symmetrically on the sides of the tongue. Remember that anatomy lesson? This puts the piercings right in the neighborhood of your main arteries and nerve bundles. The risk of severe bleeding or permanent nerve damage is just not worth it.
The Healing Journey: Your First Few Weeks
Okay, you did it! Now what? Your job is to keep things clean and calm so your body can heal.
Week 1: The Swelling is Real
The first 3 to 5 days are the toughest. Your tongue will swell up, you’ll probably have a lisp, and eating will be weird. This is normal! To get through it, you’ll want a little survival kit.
Your First 5 Days Shopping List: – Ibuprofen (like Advil or Motrin) for the swelling – A gentle, alcohol-free mouthwash (Biotene is a great one) – Plenty of soft foods: smoothies, yogurt, soup, protein shakes, ice cream – Ice pops or just letting small ice chips melt in your mouth for relief – A quick tip: Brew some chamomile tea, pour it into an ice cube tray, and use those to soothe your tongue. It’s wonderfully calming.
For cleaning, you’ll want to rinse your mouth after you eat or drink anything that isn’t water. Use a pre-made sterile saline spray (NeilMed makes a great one you can find at most pharmacies) or make your own by dissolving 1/4 teaspoon of non-iodized sea salt into one cup (8 oz) of warm distilled or bottled water. Swish gently and spit. DO NOT use mouthwash with alcohol!
Weeks 2-4: Time to Downsize!
After a week or two, the swelling will dramatically decrease, and that long initial barbell will start to feel like a liability, clanking against your teeth. This is your cue for the MOST important step: downsizing. You have to go back to your piercer to get a shorter bar put in. Seriously, don’t skip this. A properly fitted bar protects your teeth and gums from damage and is way more comfortable. Skipping this is the #1 cause of dental issues from tongue piercings.
Jewelry Smarts: Material, Size, and Myths
The metal in your mouth matters. Cheap jewelry can cause irritation and infection.
- Good Stuff: Stick to implant-grade titanium (ASTM F-136), niobium, or solid 14k-18k gold from a reputable body jewelry company. Titanium is the best for initial piercings.
- The Plastic Myth: You’ll see acrylic or Bioplast jewelry online, often marketed as “safer for teeth.” Don’t buy it for a healing piercing. These materials are porous, meaning they have microscopic holes that can trap bacteria, making them a nightmare to keep clean. Stick with mirror-polished, implant-grade metals.
- Pro Tip for Teeth: Once your piercing is fully healed, you can minimize dental risks by switching the metal balls to smaller ones or, even better, to flat, M&M-style disc ends. They have a much lower profile and are less likely to cause damage.
Your Top Questions Answered
Will it hurt? Yes, but it’s over in a flash. Most people describe it as a very intense pinch for about two seconds. The swelling afterward is more uncomfortable than the piercing itself.
Will it ruin my teeth? It can if you’re not careful. The keys are downsizing your jewelry on time and not playing with it. Clicking the bar against your teeth is a surefire way to cause chips and wear.
Is this a normal healing thing or an infection? Great question. It’s easy to get worried, so let’s clear it up.
Normal healing looks like: Swelling (especially in the first week), some tenderness, and a thin, whitish or clear fluid discharge. That fluid is lymph, not pus, and it’s a sign your body is healing.
Signs of a possible infection are: Thick, yellow or green pus; a foul taste or smell coming from the piercing; red streaks spreading out from the hole; or you develop a fever. If you see these signs, DO NOT take the jewelry out. That can trap the infection inside. Call your piercer or see a doctor right away.
How to Find a Piercer You Can Trust
Okay, so how do you find someone who knows all this stuff? Look for a piercer who is proud to show off their work. Check their online portfolio—you want to see lots of pictures of clean, well-placed, and healed piercings. See if they talk about their jewelry quality, specifically mentioning implant-grade titanium. Their studio should be visibly clean and professional. A huge green flag is a piercer who is part of professional organizations dedicated to safety and continuing education—it shows they take their craft seriously.
Final Thoughts
A tongue piercing can be a fantastic, safe way to express yourself, but you have to treat it like the minor surgical procedure it is. It requires a knowledgeable piercer and a real commitment from you to take care of it properly. Your body is the one that has to live with this for years, so choose a piercer who respects that. Ask questions, demand quality, and be safe.
Galerie d’inspiration

More than 41% of individuals with a tongue piercing have experienced some form of tooth chipping or cracking, according to a study in The Journal of the American Dental Association.
This isn’t to scare you, but to empower you. The key to minimizing this risk is twofold: precise initial placement by a skilled piercer and, crucially, downsizing your barbell stem once the initial swelling subsides. An overly long bar is the primary culprit for dental damage.
Will I be able to talk normally after getting it pierced?
Expect a temporary lisp for a few days up to a week. The initial long barbell, designed to accommodate swelling, can feel clumsy in your mouth. Your tongue is learning to navigate around this new object. The lisp typically fades dramatically once you downsize to a shorter, properly fitted bar. Practice speaking slowly and clearly at home to speed up the adaptation process.

Implant-Grade Titanium (ASTM F-136): This is the gold standard for initial tongue jewelry. It’s nickel-free, highly biocompatible (meaning your body is less likely to react to it), and lightweight, which aids in a more comfortable healing process. Don’t settle for ‘surgical steel,’ which is a vague term and can contain nickel alloys that cause irritation.
- Reduced gum erosion over time.
- Less risk of chipping your teeth.
- A more comfortable, barely-there feeling.
The secret? Downsizing. Your initial piercing requires an extra-long barbell to allow for swelling. After 2-4 weeks, returning to your piercer to have a shorter, custom-fit post installed is not optional—it’s essential for long-term oral health and comfort.

Navigating meals for the first week can be tricky. Stick to soft, cool, and non-spicy foods that require minimal chewing. Think of it as a temporary ‘smoothie and soup’ diet.
- Yogurt and kefir
- Ice cream or sorbet (the cold helps with swelling)
- Smoothies (but don’t use a straw!)
- Mashed potatoes or puréed soups
- Oatmeal or soft-cooked grains
Once healed, your jewelry becomes a form of expression. High-quality body jewelry brands like Anatometal, Neometal, or BVLA (Body Vision Los Angeles) offer an incredible range of ends. You can opt for minimalist polished discs, vibrant synthetic opals, or genuine gemstones set in 14k or 18k gold. Anodized titanium also offers a rainbow of color options for the barbell itself, allowing for full customization.
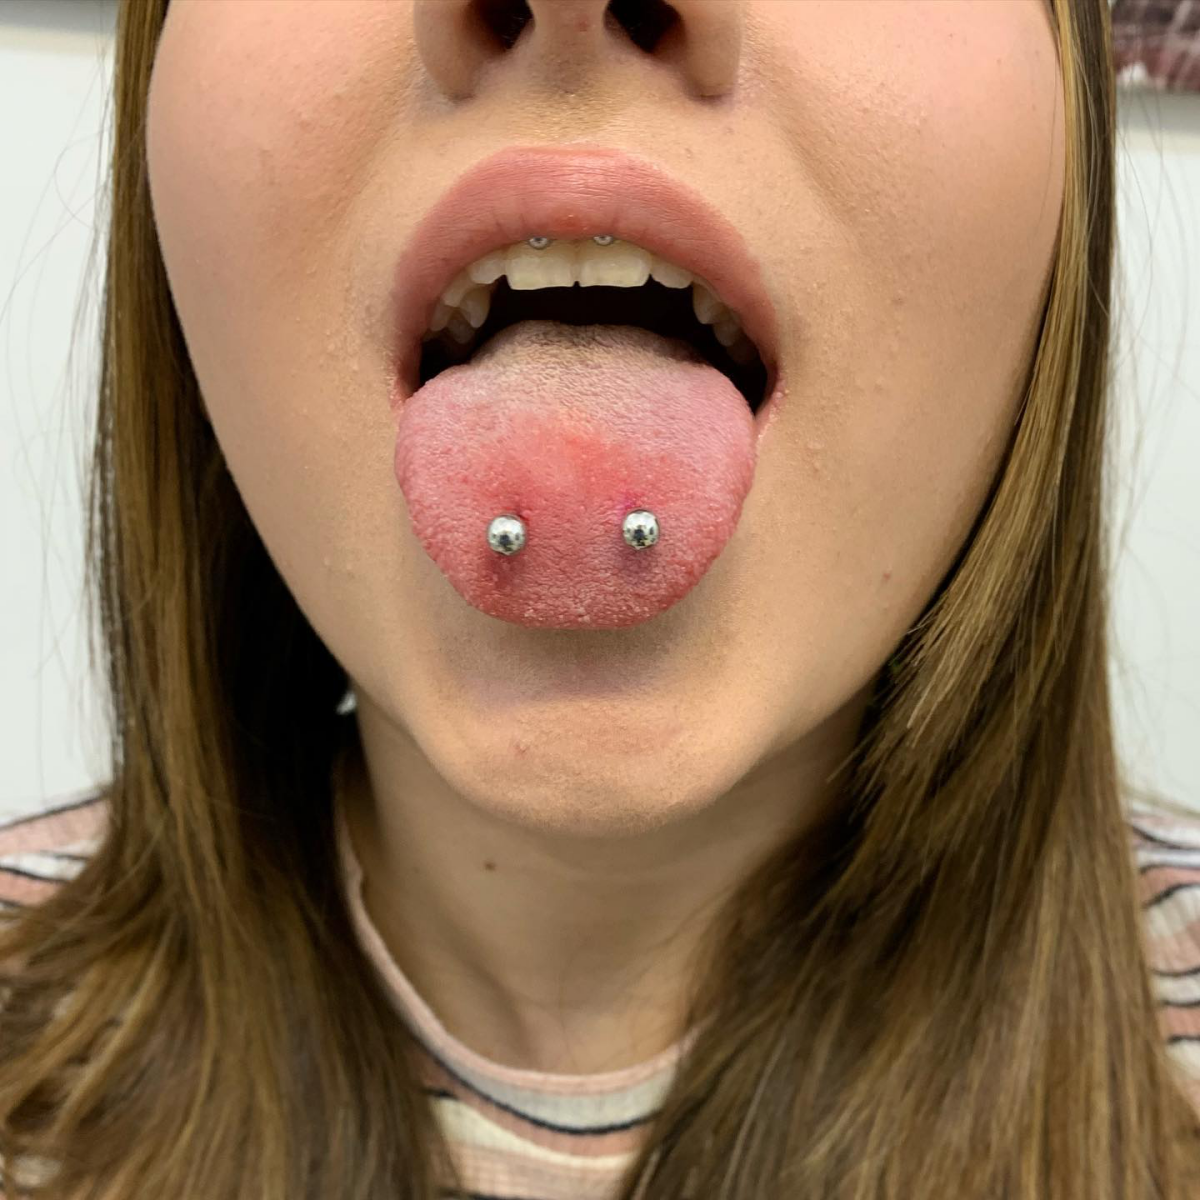
The ‘Venom Bite’ piercing, a pair of symmetrical piercings on either side of the tongue, bypasses the safe central zone and goes directly through the muscle masses, posing a significant risk of hitting major nerves or the lingual artery.
Plain Ball End: The classic, simple, and most common option. It’s smooth, less likely to get caught, and easy to clean.
M&M-style End: A flatter, disc-like top that sits more flush against the tongue. Many find this style more comfortable as it interferes less with the roof of the mouth.
For initial piercings, a simple ball is standard. Once healed, an M&M-style end from a brand like Industrial Strength can offer a lower profile.
A quality piercing isn’t cheap, and for good reason. The price, typically ranging from $50 to $100+, reflects more than just a needle and a piece of metal. You’re paying for the piercer’s extensive anatomical knowledge, single-use sterilized equipment, a certified autoclave for tool sterilization, and high-quality, body-safe initial jewelry. A ‘bargain’ piercing cuts corners on one of these critical safety elements.
Your new piercing’s worst enemies are bacteria and irritation. The biggest healing mistake is playing with the jewelry—rolling it against your teeth or clicking it. This not only invites bacteria but can cause significant dental and gum damage. Also, avoid harsh, alcohol-based mouthwashes like Listerine; they’re too aggressive for a healing wound. Stick to a sterile saline solution or a dedicated non-alcoholic piercing aftercare rinse.
- Rinsing your mouth with sterile saline solution (or non-iodized sea salt mixed in distilled water) for 30-60 seconds after every meal and before bed.
- Gently brushing your teeth, tongue (avoiding the piercing site), and the jewelry balls themselves to prevent plaque buildup.
- Avoiding smoking, vaping, and alcohol during the initial 2-4 week healing period as they can increase swelling and delay healing.
While a modern fashion statement, intentional tongue perforation has ancient roots. Aztec and Mayan priests would perform ritual tongue piercing to draw blood as an offering to the gods, believing it opened a channel for communication with the divine. It was a symbol of sacrifice and spiritual devotion.
The question on everyone’s mind: what about kissing? After the full healing period is complete (usually 4-6 weeks), kissing is perfectly fine. Initially, the sensation will be new for both you and your partner. The key is communication and gentleness. A well-placed piercing with properly sized jewelry shouldn’t be uncomfortable or get in the way once you’re used to it.


