Forget ‘Face Yoga’—Here’s How Pros *Actually* Tone Facial Muscles
For years, my hands have learned the landscape of thousands of faces in the treatment room. I’ve seen exactly how stress loves to settle in the jaw, how focus furrows the brow, and how genuine joy lifts the cheeks right up.
In this article
It used to be that clients would come in asking for a miracle cream to lift and firm everything. And I’d have to explain that while creams are fantastic for the skin’s surface, the real support structure is underneath. Your face has over 40 muscles holding everything up and creating your expressions. Working with them is a game-changer.
Now, this isn’t about making weird, contorted faces to erase wrinkles. Honestly, that can backfire. Think of it less like a frantic gym workout and more like targeted physical therapy for your face. It’s a mindful practice to boost circulation, release chronic tension, and gently condition that muscular foundation. This guide is all about the safe, effective way to do it, based on what I know works.
So, How Does This Even Work? The Logic Behind It
Before you even touch your face, it helps to know what’s going on under the skin. Unlike the muscles in your arm that connect bone to bone, a lot of your facial muscles connect directly to your skin. That’s why you can make a thousand different expressions.
This direct connection is both a gift and a curse. When those muscles lose their natural resting tone, the skin attached to them can look a bit slack. On the flip side, when you overuse them—like clenching your jaw all day—you can etch in expression lines. So, our goal is to find a happy medium: strengthening the supportive muscles while relaxing the tense, overworked ones. It’s all about creating a better balance.
When you work these muscles correctly, a few key things happen:
- You get a circulation boost. Contracting and relaxing a muscle is like a tiny pump. It pushes out old fluid and pulls in fresh, oxygen-rich blood. This feeds your skin cells and is why clients often leave a facial massage with a healthier, more vibrant skin tone. It happens almost instantly.
- Muscles get a bit fuller. Just like with any other muscle, consistent work can add a tiny bit of volume—a concept known as hypertrophy. Some studies have shown that a consistent program can lead to fuller-looking cheeks. That slight plumpness from underneath can help soften hollows and supports the skin beautifully.
- Tension just melts away. We hold SO much tension in our faces, especially in the jaw and forehead. Specific movements can help release that chronic tightness. I once had a client who was a terrible teeth-grinder, and after a few weeks of focusing on a jaw-release exercise, she told me her morning headaches were practically gone. It really works.
Your Facial Toning Starter Kit
Before you get started, let’s talk setup. Rushing this part is a rookie mistake that can lead to irritation or breakouts. Here’s what you actually need—and it’s simpler and cheaper than you think.
1. A Clean Slate: This is non-negotiable. Always start with freshly washed hands and a clean face. Use a gentle cleanser that doesn’t strip your skin, and pat everything dry.
2. Something for ‘Slip’: Never, ever do these exercises on dry skin. You’ll pull and drag, which is the exact opposite of what we want. You need a facial oil or a thick serum to let your fingers glide smoothly. My top pick is a facial oil.
- A Quick Note for Oily Skin: I know the word “oil” can be scary if you’re acne-prone! But the right oil can actually help balance your skin. The trick is to use a “non-comedogenic” one, meaning it won’t clog your pores. Jojoba oil is the absolute hero here because its structure is incredibly similar to your skin’s own sebum. It tricks your skin into thinking it’s produced enough oil, which can actually make you less greasy over time.
- Where to Buy & How Much: You don’t need a fancy $100 oil. A high-quality, pure jojoba, rosehip, or squalane oil is perfect. Brands like The Ordinary or NOW Solutions offer fantastic options for around $10 to $20 a bottle, which will last you for months. You can find them online or at most health food stores. Just use 4-6 drops, warmed between your palms.
The Foundational Moves: Your Zone-by-Zone Guide
Alright, let’s get to it. Here are five core exercises I teach everyone. Do them in this order for a balanced session, and really try to focus on isolating the muscle you’re working without squinting or tensing up elsewhere.
1. The Forehead Smoother
This is all about relaxing those horizontal forehead lines and making you more aware of when you’re tensing up. We use your fingers as resistance to strengthen the muscle without actually creasing the skin.
Place the fingertips of both hands flat in the center of your forehead. Press in gently but firmly—this is your anchor. Now, try to raise your eyebrows like you’re surprised. Your fingers should stop the skin from wrinkling, forcing the muscle to work against them. Hold that contraction for a count of five, then relax completely. Do this 10 times.
Quick Win: Feeling stressed at your desk? You can do this one without any oil. Just press your fingers to your forehead and try to lift against them for 30 seconds. It’s a fantastic way to release that ‘computer-face’ tension in the middle of the day.
2. The Eye Opener
This one targets the circular muscle around your eye. A weak muscle here can contribute to droopy eyelids, while an overactive one creates crow’s feet. We’re aiming for strong and supportive.
Make a soft ‘V’ shape around each eye with your index fingers under your brows and your thumbs on your upper cheekbones. Apply gentle pressure to anchor the skin. Now, squint hard like you’re looking into the sun, feeling the muscle contract against your fingers. Your fingers should prevent the skin from crinkling. Hold the squint for five seconds, then relax. Repeat 10 times.
Heads up! The skin here is super delicate. Be very gentle. If you have any eye conditions, it’s always best to check with your doctor first.
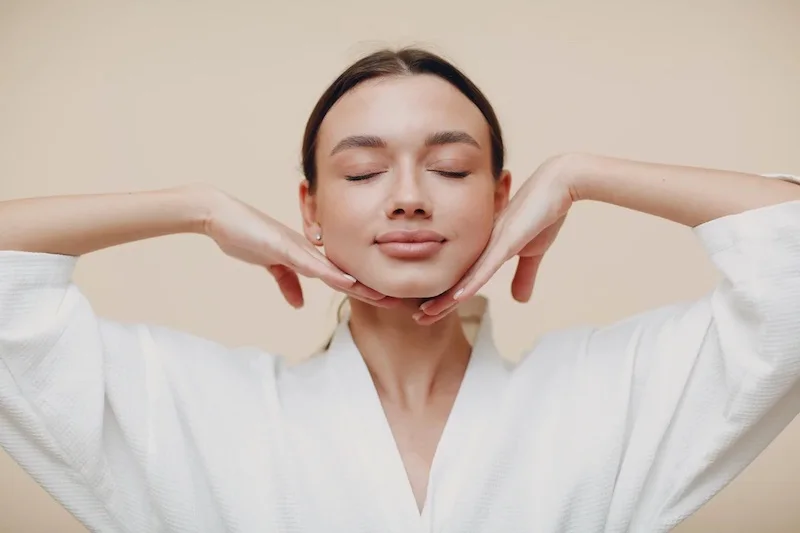
3. The Cheek Lifter
These are your smiling muscles! Toning them helps create a fuller, lifted look in the middle of your face and can soften the lines that run from your nose to the corners of your mouth.
Open your mouth and form a long, exaggerated ‘O’ shape, feeling a stretch in your cheeks. Keeping that ‘O’ shape, try to smile using only the corners of your mouth, lifting the cheek muscles up toward your eyes. You should feel a really strong pull in your upper cheeks. Hold that lift for a count of five, relax the smile (but keep the ‘O’!), and repeat the lift 10 times.
A common mistake here is pursing your lips. Try to keep your upper lip pressed gently against your teeth to really isolate those cheek muscles. It feels weird at first, but that’s the key!
4. The Jawline Definer
This is a favorite for releasing jaw tension and toning the sheet-like muscle that runs down your neck, which helps keep the jawline looking sharp.
Sit up straight and tilt your head back slightly, looking toward the ceiling without straining. Press your tongue firmly against the roof of your mouth. Now, while keeping your tongue pressed up, hum. The vibration and muscle engagement are super effective. You’ll feel a strong contraction under your chin. Keeping your tongue pressed, slowly lower your chin to your chest to feel a stretch. Hold for a breath, relax, and repeat 5 times.

Safety first: If you have TMJ or any jaw pain, please don’t do this one. Talk to a physical therapist who can give you safer release techniques.
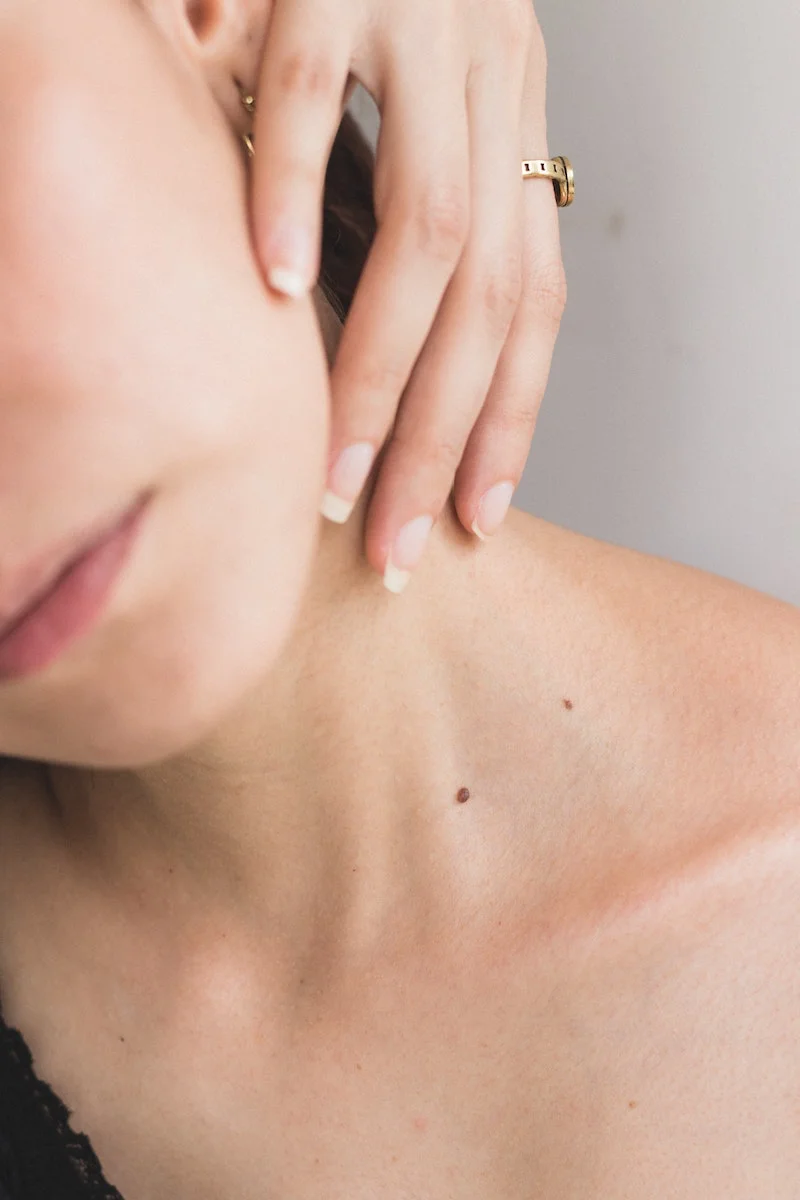
5. The Neck Firmer
Poor posture can literally pull your facial tissues down. This move, which uses a pro technique called PNF, helps release tension and strengthen the major neck muscles for better support.
Sit up straight and gently tilt your head to the right, bringing your ear toward your shoulder. Place your right hand on the left side of your head—don’t pull, just let its weight add a little something to the stretch. Now, gently press your head into your hand as if trying to return to center, but let your hand provide enough resistance so your head doesn’t move. Hold this gentle push for five seconds. Then relax the push and let your hand deepen the stretch for another 10 seconds. Slowly come back to center and repeat on the other side.
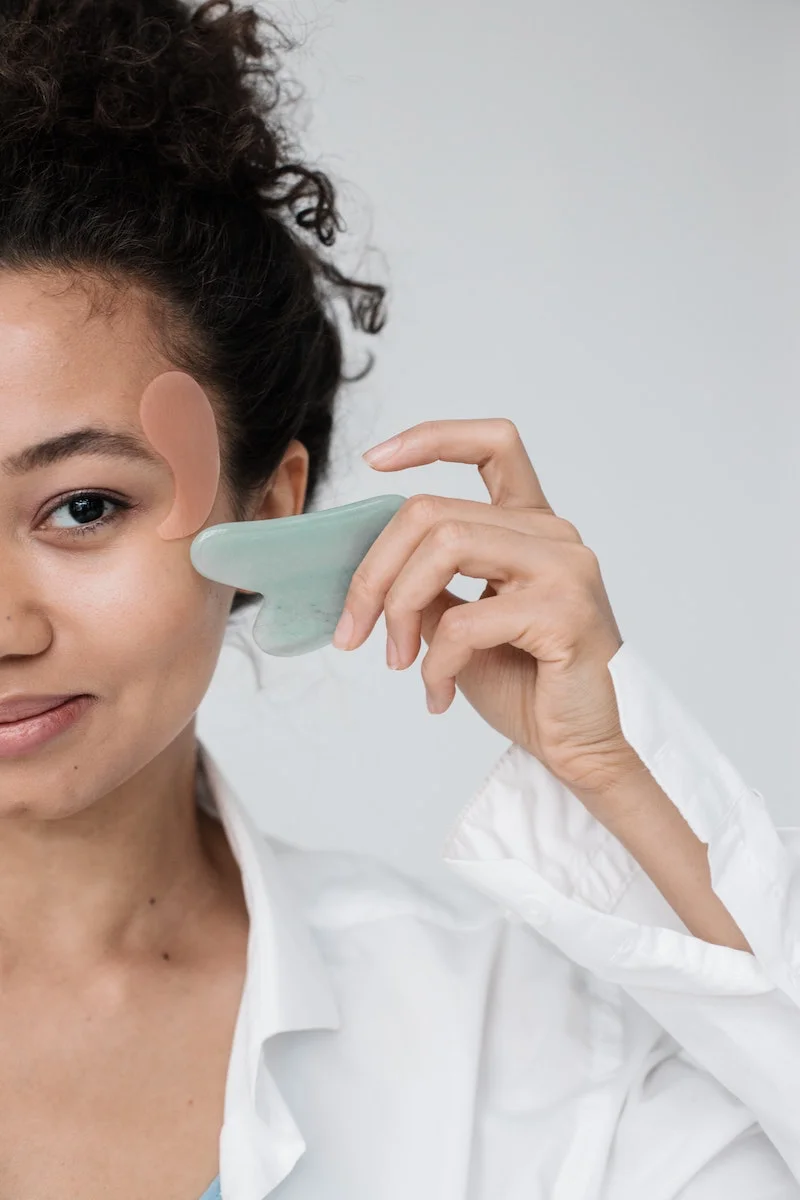
What About Tools Like Gua Sha and Rollers?
This is a great question, and there’s a lot of confusion out there. It’s best to think of them as having different jobs.
Think of it like this: the facial exercises you just learned are your strength training. They are designed to actively engage and tone the muscles through resistance. This is how you build that supportive foundation.
A Gua Sha tool, on the other hand, is for massage and releasing tension in the fascia—the connective tissue wrapped around your muscles. Using it with light, sweeping motions is incredible for lymphatic drainage (goodbye, puffiness!) and easing tightness. It complements the exercises but doesn’t replace them. If you buy one, get a non-porous tool like bian stone, jade, or stainless steel (around $15-$30) to keep things hygienic.
And the facial roller? That’s mainly for cooling and calming the skin. It feels amazing, especially if you pop it in the fridge, and it’s great for reducing surface-level puffiness and helping serums absorb. It’s the gentle cool-down of your facial workout.

Putting It All Together: Your 10-Minute Routine
Consistency is everything. You’ll get much better results from 10-15 minutes, 3-4 times a week, than from one long session every two weeks. As for when to do it, nighttime is perfect. You can incorporate it into your skincare routine, and the oil has all night to sink in and work its magic.
Here’s a simple routine to get you started:
- Prep: Wash face and hands, apply 4-6 drops of facial oil.
- Forehead Smoother: 10 reps
- Eye Opener: 10 reps
- Cheek Lifter: 10 reps
- Jawline Definer: 5 reps
- Neck Firmer: 1 rep per side (hold the contract/relax)
- Finish: Gently massage any remaining oil into your face, neck, and chest.
Be patient! You’ll likely feel a difference in tension and muscle awareness in a couple of weeks, but visible changes can take 8 to 12 weeks of consistent practice. Taking a quick selfie in the same neutral light before you start and a month later is the best way to see your progress.
Safety First: The Honest Disclaimers
My first rule is always “do no harm.” So let’s be crystal clear about the risks.
Yes, you can absolutely cause wrinkles if you do these exercises incorrectly by repeatedly creasing your skin. That’s why anchoring with your fingers and isolating the muscle are so important. If you see the skin crinkling, stop and reset your form.
Also, there are times you should just skip it. Don’t do these exercises if you have active or cystic acne, a rosacea flare-up, any skin infection, or a sunburn.
And a big one: if you’ve had recent injectables like Botox or fillers, you MUST wait. The standard advice is 4-6 weeks, but always get clearance from your doctor or injector. The reason is that massaging the area too soon can cause the product to migrate to unintended muscles, which could lead to a droopy eyelid or an uneven smile. It’s not worth the risk.

Finally, let’s be realistic. This practice is for maintenance and subtle improvement. It can’t change your bone structure, eliminate deep-set wrinkles, or replace the volume lost from aging. But as a way to actively participate in the health of your face? It’s one of the best things you can do. It’s a skill that, once you learn it, is yours for life.
Inspirational Gallery with Photos
Gua Sha: A flat, carved stone (often jade or rose quartz) designed to be scraped across the skin. It excels at releasing deep muscle tension, sculpting facial contours, and promoting lymphatic drainage.
Face Roller: Primarily used for a quick, cooling de-puffing massage and enhancing product absorption. It’s less about deep muscle work and more about a soothing surface treatment.
For deep sculpting, choose Gua Sha. For a quick, calming refresh, a roller is your best friend.
The lymphatic system has no central pump; it relies on muscle movement, breathing, and manual manipulation to circulate fluid and remove cellular waste. This is why intentional facial massage is so effective for reducing morning puffiness.
Choosing the right oil is essential for providing slip and preventing friction. Not all oils are created equal for the face.
- For acne-prone skin: Jojoba or Grapeseed oil. Both are non-comedogenic and lightweight.
- For dry or mature skin: Rosehip Seed oil. It’s packed with vitamins and fatty acids for extra nourishment.
- For sensitive skin: Squalane oil. It’s extremely gentle, non-irritating, and mimics the skin’s natural moisture.
Can I still practice facial massage if I have botox or fillers?
Yes, but with caution. It’s critical to wait at least two to four weeks after injections to allow them to settle completely. For botox, avoid directly massaging the treated muscles, as this could cause the neurotoxin to migrate. For fillers, deep, sculpting pressure over the injected material is a firm no, as it can displace the product. Gentle, sweeping motions around the area are generally safe. Always get the green light from your injector first.
- A brighter, more awake appearance around the eyes.
- Noticeable relief from tension headaches.
- A subtle, natural lift in the arch of the eyebrows.
The secret? A daily 60-second massage of the corrugator and temporalis muscles. Use your fingertips to apply small, circular motions to your temples, then use gentle upward strokes between and along your brows to release the muscles responsible for frowning.
Studies suggest that up to 31% of adults experience bruxism (teeth grinding or clenching), much of it happening subconsciously during periods of stress or sleep.
This chronic tension in the masseter muscles of the jaw doesn’t just cause pain; it can contribute to a squarer-looking jawline. Targeted massage, using your knuckles to knead the muscle in a circular motion, can provide immediate relief and help soften that tension over time.
Don’t forget the neck! The platysma is a broad sheet of muscle that runs from your collarbone up the front of your neck to your jaw. Tension here can pull down on the lower face. When performing your facial massage, always include gentle, upward strokes along the neck, from the clavicle to the jawline, to help keep this foundational area relaxed and toned.
The next wave of facial toning goes beyond manual tools. Devices like the NuFACE Trinity or the ZIIP Halo use gentle microcurrents—tiny electrical impulses that mimic the body’s natural current—to stimulate and energize the facial muscles directly. Think of it as a targeted workout for your face, helping to tone, lift, and contour the muscles from within for a visibly firmer result.
The art of facial massage has deep, elegant roots. Look to the Japanese Kobido tradition, a sophisticated facial massage once reserved for empresses and samurai. It’s not just a massage but a true ritual, involving a complex choreography of over 48 techniques—from fast, percussive taps to slow, deliberate kneading—designed to stimulate facial nerves, balance qi, and create a natural, vibrant lift without a single product.
What’s the difference between a morning and evening facial massage?
Think of it as setting your intention for the skin. In the morning, the focus is on waking up the face and reducing puffiness. Use lighter, faster, upward strokes and tools like a chilled jade roller to stimulate circulation. In the evening, the goal is to release the day’s tension. Opt for slower, deeper movements, perhaps with a Gua Sha tool, focusing on the jaw, brow, and temples to encourage relaxation and repair.


