Thinking About a Medusa Piercing? A Pro’s No-BS Guide
Alright, let’s talk about one of the most elegant and, honestly, most demanding piercings out there: the philtrum. You probably know it by its more popular name, the “Medusa.” In the professional world, though, we call it a philtrum piercing because that’s exactly what it is—a piercing placed right in the philtrum, that little vertical groove between your nose and your upper lip.
In this article
- More Than Just Skin: Why Your Anatomy Matters
- Let’s Talk Money: Budgeting for Your Philtrum Piercing
- The Piercing Process: What to Expect in the Chair
- Healing 101: The First Week Survival Guide
- Your Daily Cleaning Routine
- The Downsize: The Step You CANNOT Skip
- Let’s Talk Jewelry
- Troubleshooting & Long-Term Care
- Galerie d’inspiration
I’ve been in this business a long time, and I can tell you that few placements require this much precision. When it’s done right, it can create a stunning sense of balance on the face. But when it’s done wrong? It can cause real, lasting problems. My goal here isn’t to scare you off. It’s to have the frank conversation you should be having with your piercer before you ever sit in their chair. We’re going to cover everything, from why your unique anatomy is key to the nitty-gritty of aftercare that will save your smile.
More Than Just Skin: Why Your Anatomy Matters
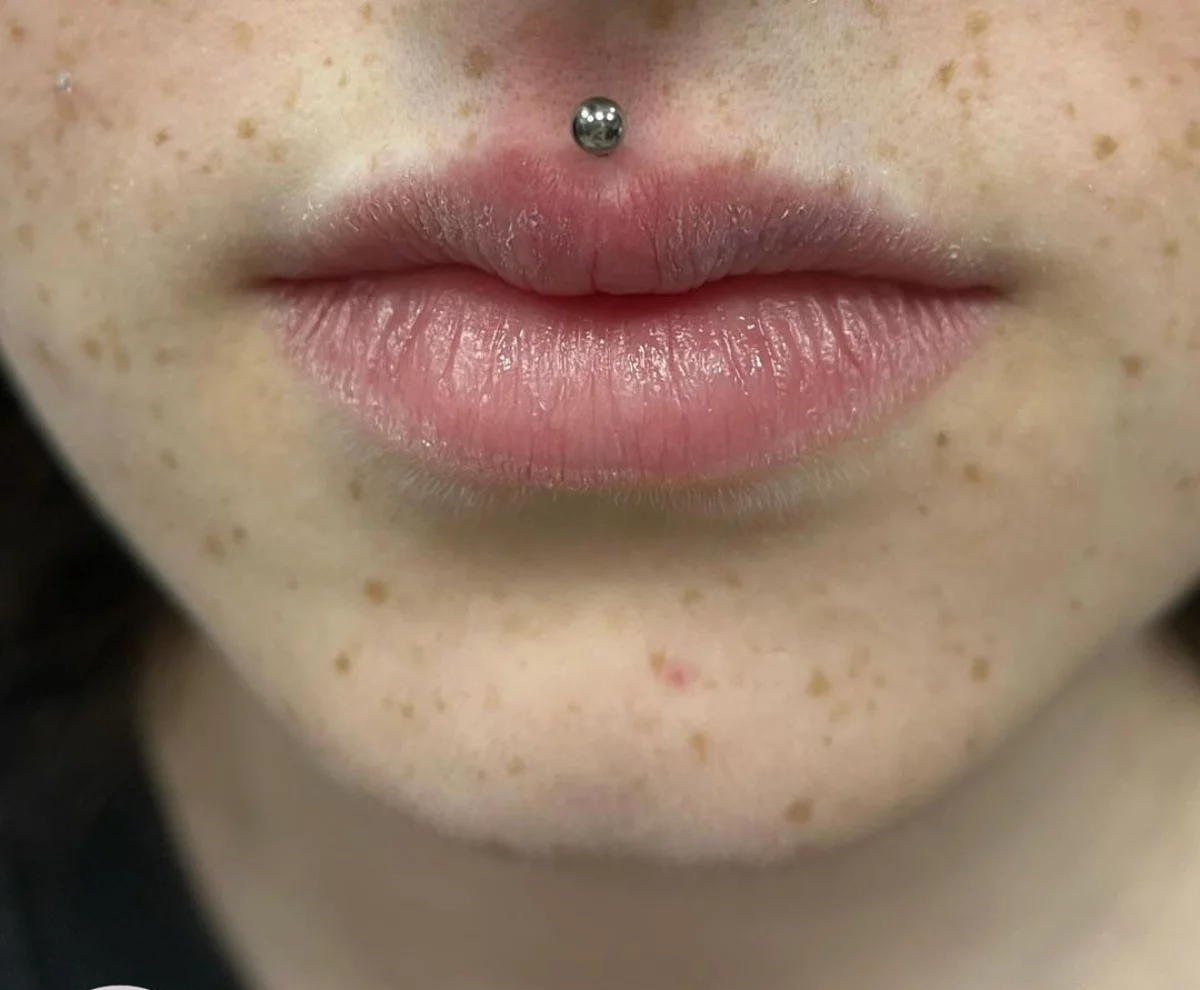
Before we even think about a needle, we have to look at the location. Your philtrum isn’t just a flat piece of skin; it’s a dynamic, complex area. Underneath is the orbicularis oris muscle, the same muscle that lets you smile, talk, and kiss. Every time you move your mouth, that piercing moves, so placement has to be perfect to minimize irritation.
The area is also packed with blood vessels and nerves, including the superior labial artery, which is a major blood supplier to your upper lip. This is why it can be a bit more sensitive than other spots. A professional piercer is trained to feel and look for the safest path for the needle, avoiding those major structures. And let’s be crystal clear: this is a job for a sterile, single-use needle ONLY. A piercing gun should never, ever come near your face, especially not here. The blunt force trauma is a recipe for disaster.
Heads up: everyone’s face is different. Some people have a deep, defined philtrum and a sharp Cupid’s bow, while others are a bit flatter. A great piercer will analyze all this to find your personal “sweet spot”—the one that looks centered when your face is relaxed and when you’re smiling. They’ll also check inside your mouth. Got braces? It’s usually possible, but the piercer needs to assess the clearance. A low-hanging frenulum (the little web connecting your lip and gum) might also make this piercing a bad idea. A pro will be honest and might suggest something else if the risks are too high.
Let’s Talk Money: Budgeting for Your Philtrum Piercing
Okay, let’s get into the question everyone wants to ask: how much is this going to cost? It’s not a one-and-done price, so it’s good to be prepared. Think of it in three parts:
1. The Piercing Fee: This is for the piercer’s time, expertise, and sterile setup. Expect this to run anywhere from $40 to $80 in a reputable studio. 2. The Initial Jewelry: You’ll buy your initial jewelry at the studio. For a high-quality, implant-grade titanium labret stud, you’re looking at $30 to $60+, depending on the decorative top you choose. 3. The Downsize Post: This is a mandatory follow-up step. You’ll need to buy a shorter post once the swelling goes down. Budget another $15 to $25 for this little piece of metal. It’s not optional, it’s essential!
So, all in, you should plan on spending somewhere between $85 and $165+ for a properly done philtrum piercing. If you find a place offering it for $30 total, you should be asking some serious questions about their jewelry quality and safety standards.
The Piercing Process: What to Expect in the Chair
A safe piercing is a careful, deliberate process. First thing’s first: you need to find a piercer you trust. Don’t just walk into the closest shop. Look up portfolios online. Do their philtrum piercings look clean, straight, and well-placed? A great starting point is to search for the “Association of Professional Piercers member locator” online to find a vetted professional near you.
Oh yeah, and here are some major red flags. If you see any of these, walk out:
- The studio is visibly dirty.
- The piercer isn’t wearing gloves or is touching other things after putting them on.
- They try to sell you externally threaded jewelry (more on that later).
- They pull out a piercing gun. Run!
Once you’ve found your pro, here’s how it should go:

- Marking: This is the most critical step. After cleaning the area, your piercer will use a skin-safe marker to place a dot. They’ll have you smile, talk, and relax your face to see how it moves. This is YOUR face, so don’t be shy. If the mark looks off to you, say something! A good piercer wants you to be happy.
- The Piercing & The Pain Question: Once you approve the mark, you’ll lie back. The piercer will ask you to take a deep breath in and exhale slowly as they pass the needle through in one smooth motion. So, does it hurt? Honestly, most people rate it a 4-6 out of 10. It’s a sharp, intense pinch that’s over in a second. It’s definitely more ouch than an earlobe, but it’s usually quicker and less achy than a cartilage piercing.
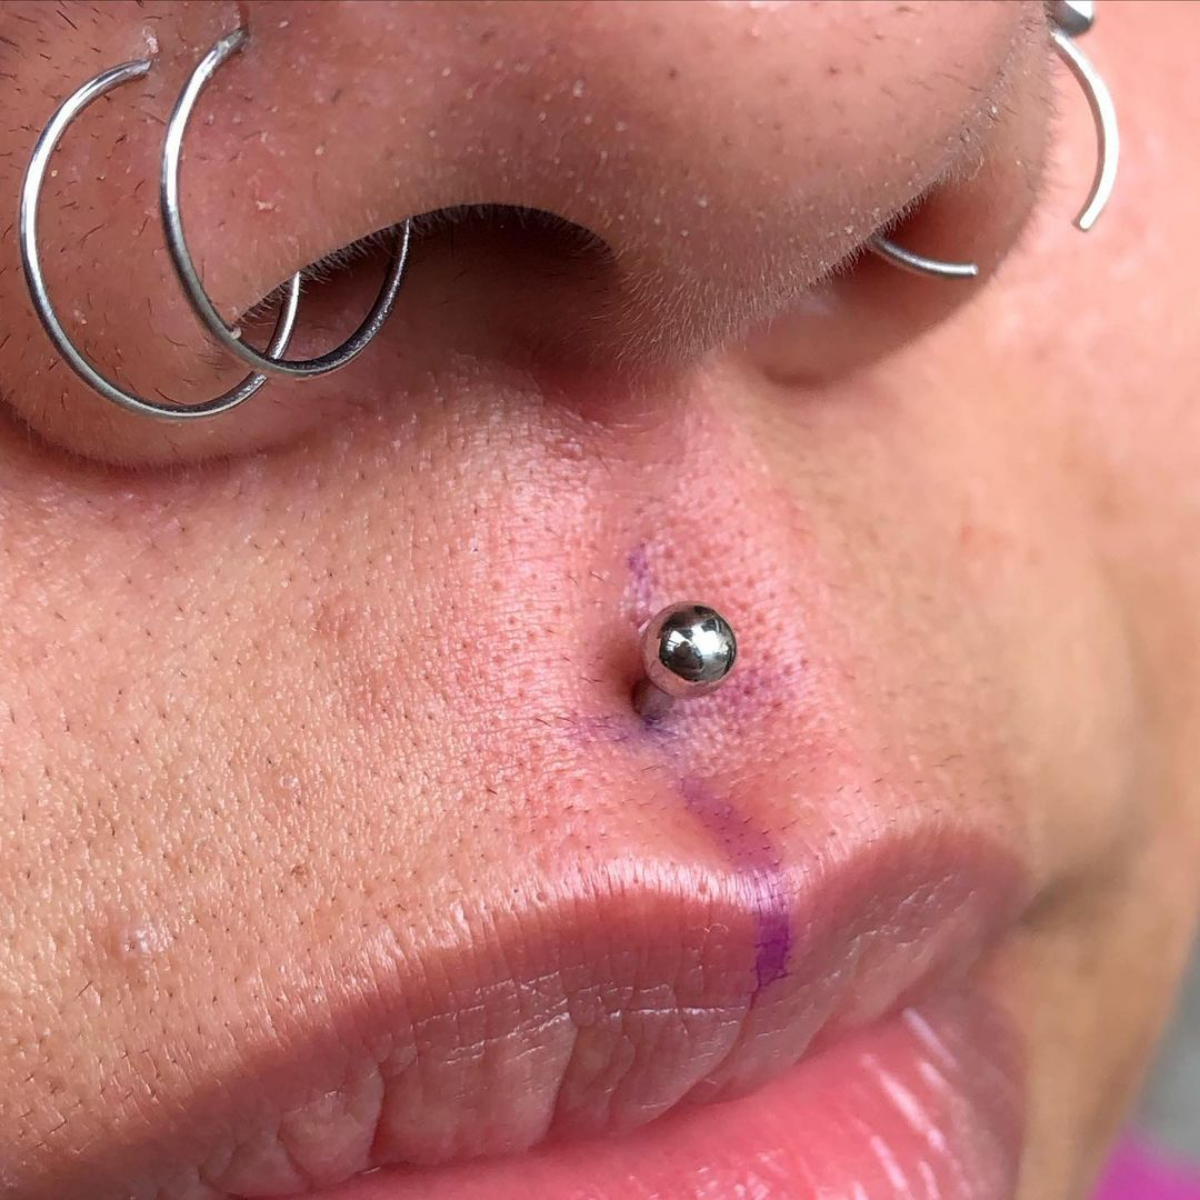
- Jewelry Insertion:* Right after the needle, they’ll insert your initial jewelry—a flat-back labret stud. The post will look comically long, but that’s on purpose! It’s there to accommodate swelling, which will definitely happen.
Healing 101: The First Week Survival Guide
The first 3 to 5 days are the most intense. Your upper lip will swell up, possibly quite a bit. You might have a temporary lisp. This is all normal. To get through it, you need a plan.
Your Pre-Piercing Shopping List: Before you even go to your appointment, swing by a pharmacy and grab these items. Trust me, you’ll thank me later. – A can of sterile saline wound wash (NeilMed is a popular brand, just make sure it’s 0.9% sodium chloride with no other additives). – A pack of non-woven sterile gauze pads (not cotton balls, which leave fibers behind). – Ibuprofen (if it’s safe for you to take). – Your favorite flavor of ice cream or sorbet!
For that first week, stick to soft, cool foods. Think of it as an excuse to eat like a kid again. Your approved food list includes things like smoothies (no citrus or pineapple!), yogurt, pudding, ice cream, mashed potatoes, and lukewarm soups. What you need to avoid are foods that are hot, spicy, acidic, or crunchy. That means no chips, no crusty bread, no spicy curry, and no oranges for a little while.
Your Daily Cleaning Routine
Keep it simple. Over-cleaning will just cause more irritation. – Outside: Twice a day, spray the sterile saline solution directly on the piercing. Let it soak for a minute to loosen any “crusties,” then gently pat it dry with a fresh piece of gauze or a paper towel. – Inside: Rinse your mouth for 30 seconds with an alcohol-free mouthwash or a simple sea salt solution after every meal. It’s also a great idea to just swish with plain water after having any drink that isn’t water.
The Downsize: The Step You CANNOT Skip
I can’t stress this enough. After 2 to 4 weeks, the major swelling will be gone, and that long initial bar will be a nuisance. You MUST go back to your piercer to have it swapped for a shorter one. This is called downsizing.
Why is it so critical? I once had a client who waited six months to downsize. When she finally came in, we could literally see a groove worn into her gum line from where the back of the stud had been rubbing. We managed to save the piercing, but that gum damage is permanent. Don’t be that person. The long bar will snag, move around, and wreck your teeth and gums. Downsizing isn’t a suggestion; it’s a requirement for the health of your mouth.

Let’s Talk Jewelry
The quality of your jewelry is just as important as the piercing itself. For a new piercing, you should only be wearing metals that are certified for implant in the human body.
Your best bet is Implant-Grade Titanium (ASTM F-136). It’s completely nickel-free, lightweight, and your body is extremely unlikely to have a reaction to it. It can also be anodized to look like different colors without any cheap plating. For healed piercings, 14k or 18k solid gold (nickel-free, of course) is a gorgeous option. Just make sure it’s solid, not plated, as plating can flake off and cause major issues.
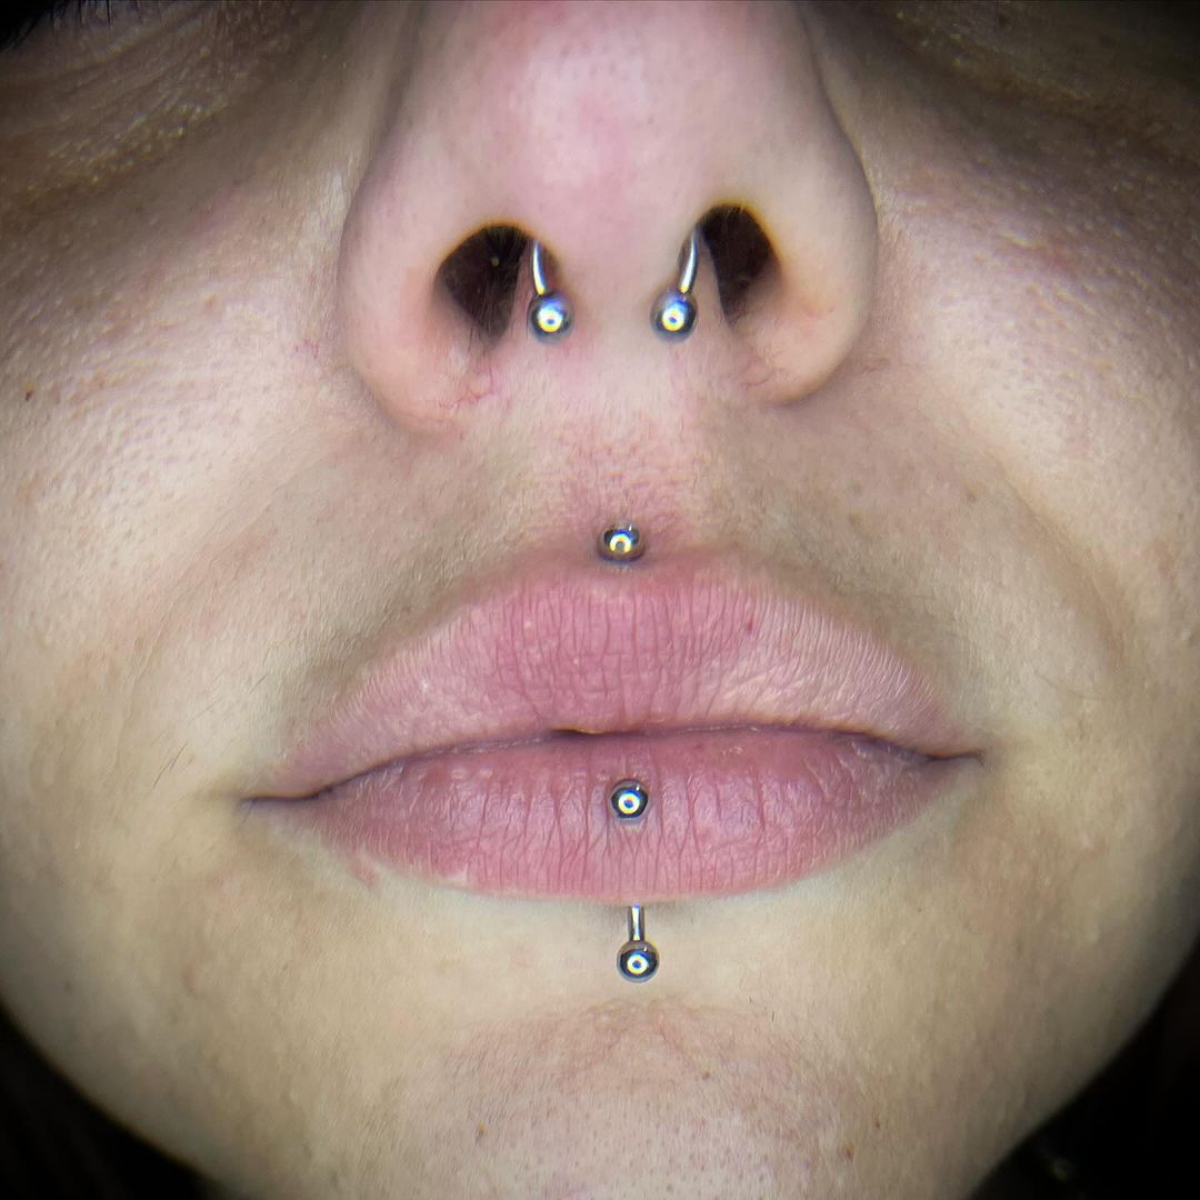
As for the style, you want a flat-back labret stud. The best ones are either threadless (press-fit), where a pin on the decorative end is held in the post by tension, or internally threaded, where the screw is on the end piece and goes into the post. Both are great because no rough threads are ever pulled through your skin. If a piercer tries to sell you externally threaded jewelry, where the screw threads are on the bar itself, it’s a sign of a low-quality shop.

Troubleshooting & Long-Term Care
Sometimes, even with perfect care, things can get weird. During healing, the back disc might settle into the soft tissue of your lip. This is called “nesting” and it’s okay. But if the skin starts to grow over* the disc, that’s “embedding,” and it means your post is too short. See your piercer immediately for a longer one.
And the dreaded irritation bump? It’s usually not an infection, but your body’s way of yelling that something is bothering it—maybe you snagged it, used harsh chemicals, or have the wrong size jewelry. The fix is to figure out the cause and remove it. Go back to basics with saline soaks and leave it alone.
Finally, the most serious consideration is your long-term dental health. Even with a perfectly downsized stud, there will be contact. To minimize risks, always wear a properly fitted labret with a small, low-profile disc on the back. And be sure to see your dentist regularly—let them know about your piercing so they can keep an eye on your gums and teeth.
A philtrum piercing is a beautiful commitment, but it’s a commitment nonetheless. Choose your piercer wisely, be patient with the healing, and you’ll have a striking piercing you can enjoy safely for years to come.
Galerie d’inspiration

Implant-Grade Titanium (ASTM F-136): The professional’s choice for initial piercings. It’s nickel-free, lightweight, and won’t cause allergic reactions, which is critical for a smooth healing process. Plus, it can be anodized to create a rainbow of colors.
14k-18k Solid Gold: A stunning option for when your piercing is fully healed. Stick to solid gold (not plated) from reputable brands like BVLA or Maria Tash to ensure it’s body-safe and won’t tarnish or flake off in your body.
For healing, titanium is the undisputed champion; for long-term luxury, solid gold is the goal.
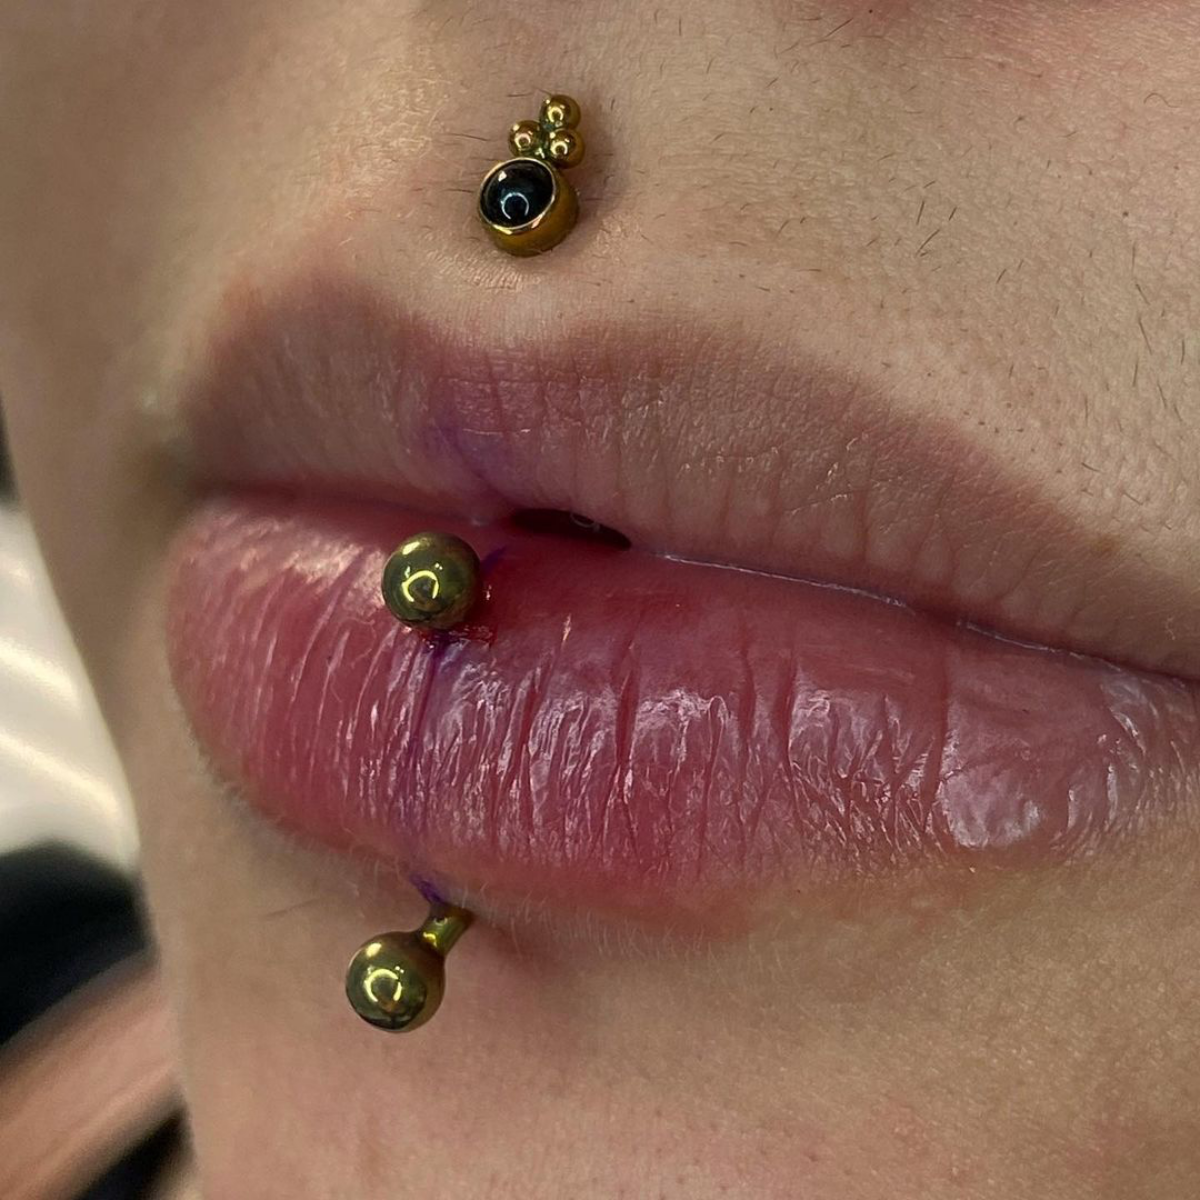
Is it normal for the flat disc on the back to sink into my lip?
Yes, to a degree. This is called “nesting,” and it’s your body’s way of protecting your teeth and gums by creating a small pocket for the jewelry to sit in. However, if the tissue begins to grow over the disc or it becomes painful, that’s “embedding.” It means your bar is too short, and you need to see your piercer immediately for a longer one to prevent serious complications.

Did you know? The orbicularis oris, the muscle your Medusa pierces, is the same complex muscle that allows you to pucker your lips for a kiss.
This is why initial swelling can feel so pronounced and why downsizing your jewelry after the swelling subsides is crucial. A bar that’s too long can get caught or shift, irritating this active muscle. A piercer will typically use a longer bar to accommodate swelling, then swap it for a snugger fit 2-4 weeks later.
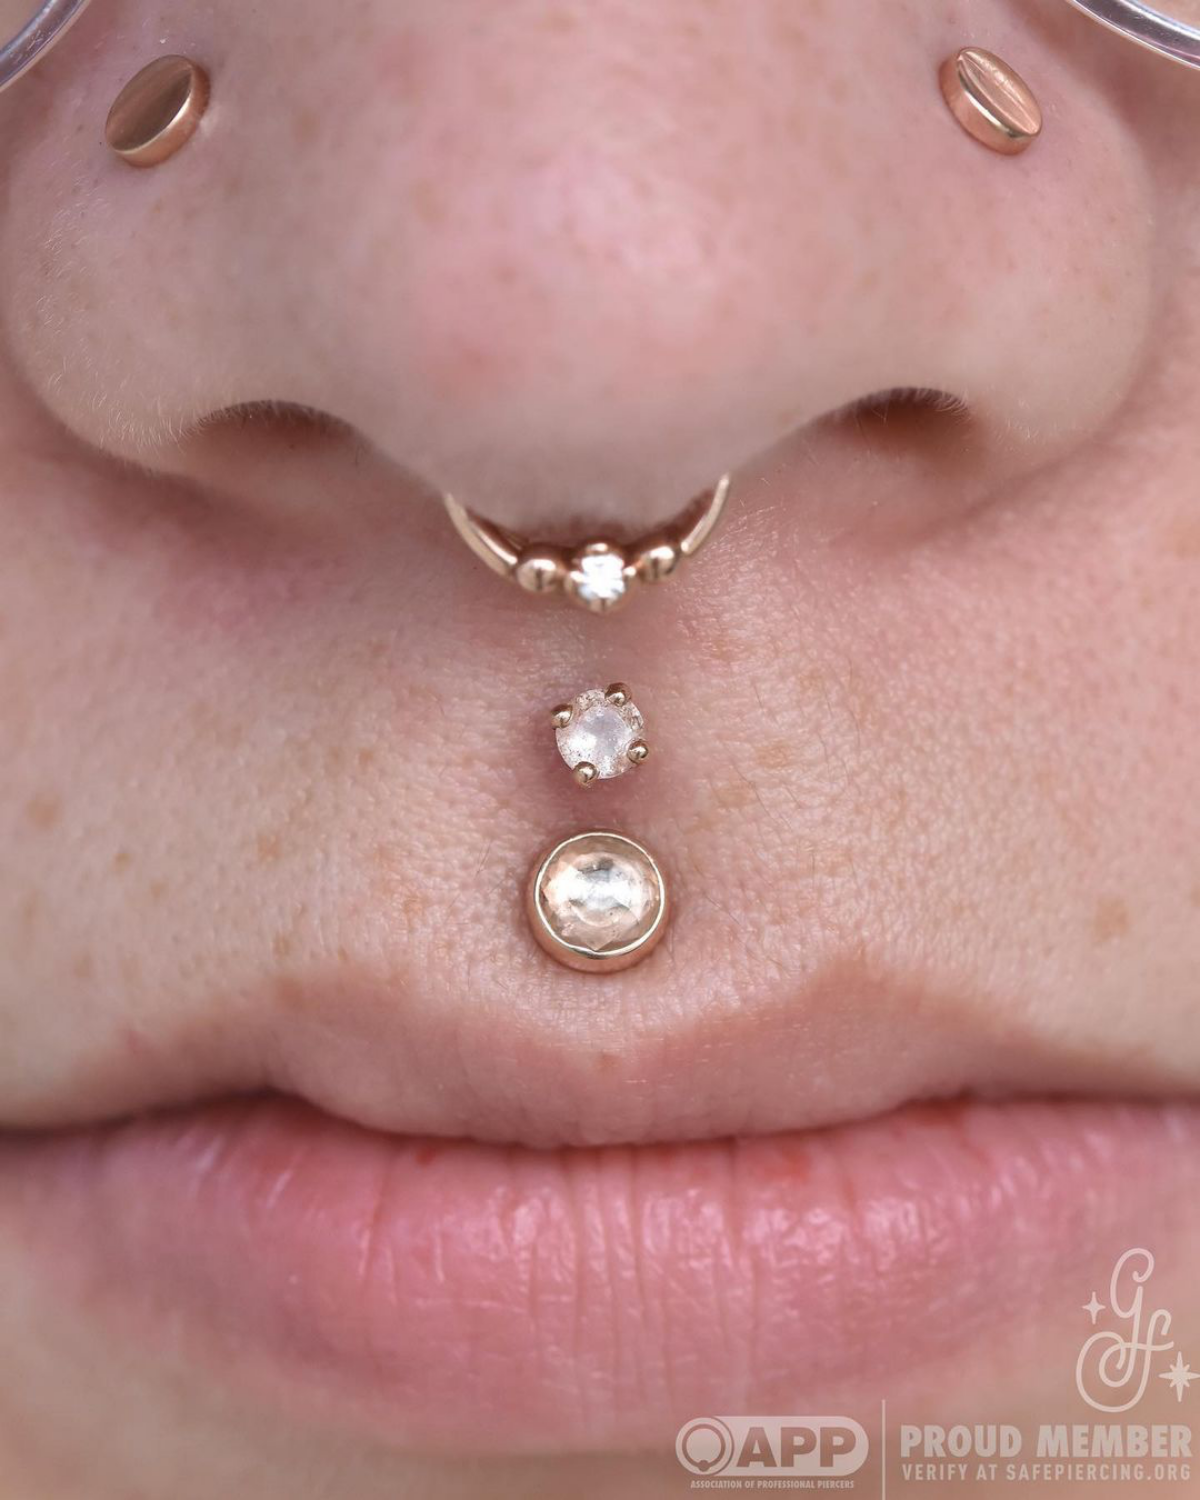
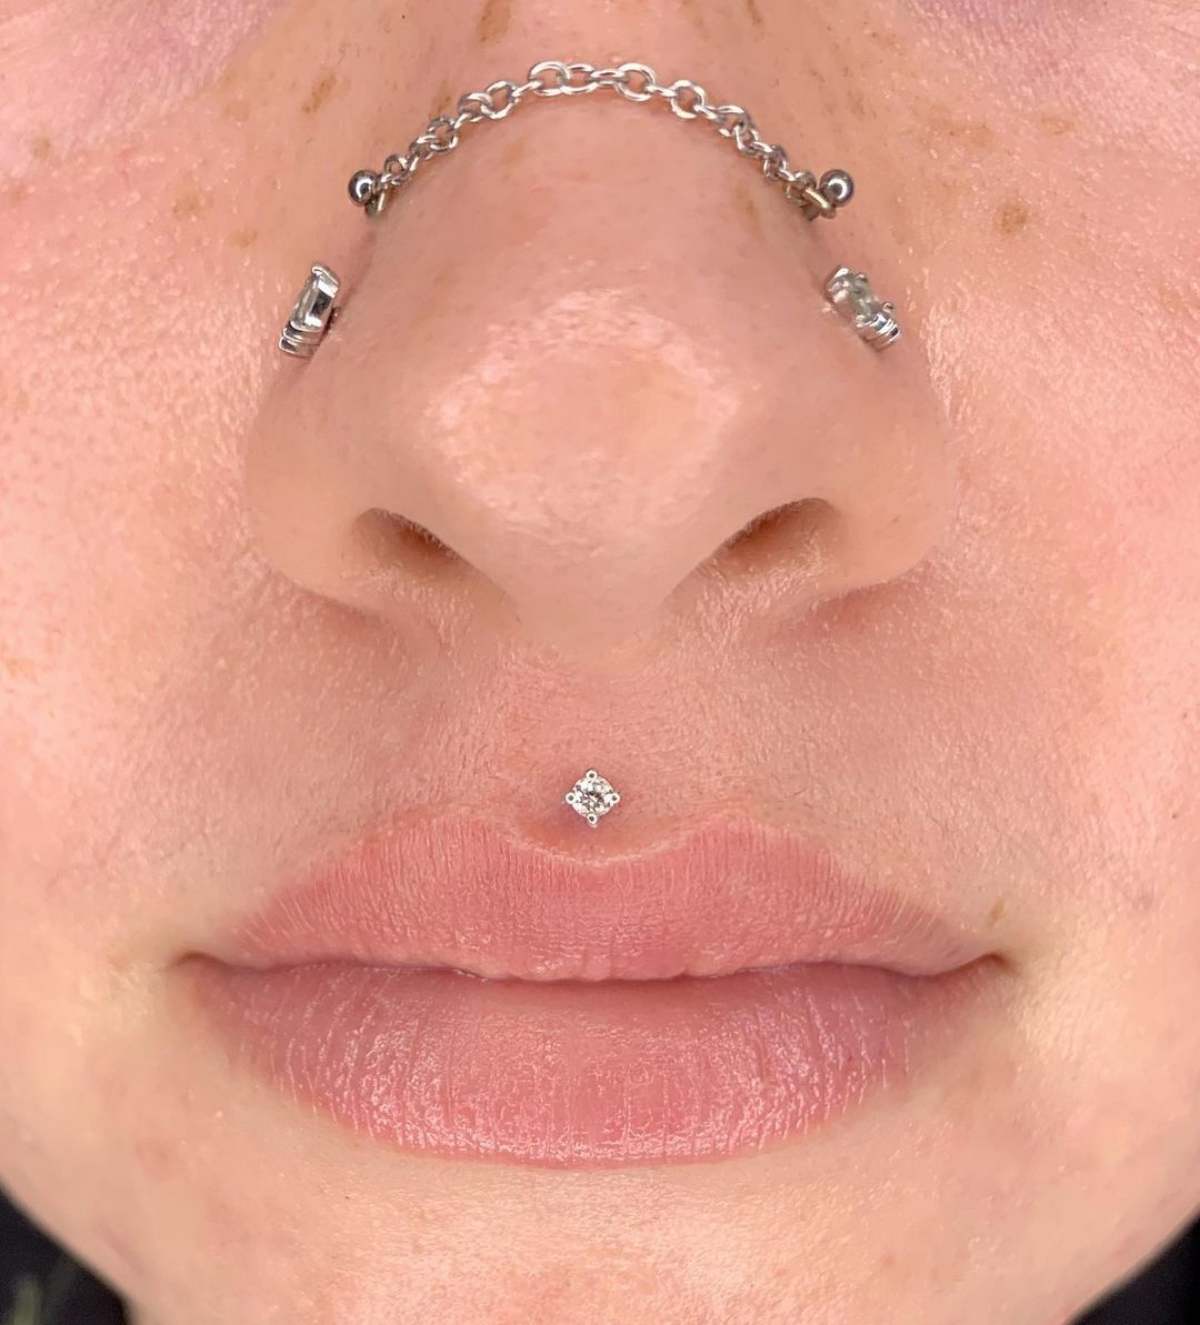
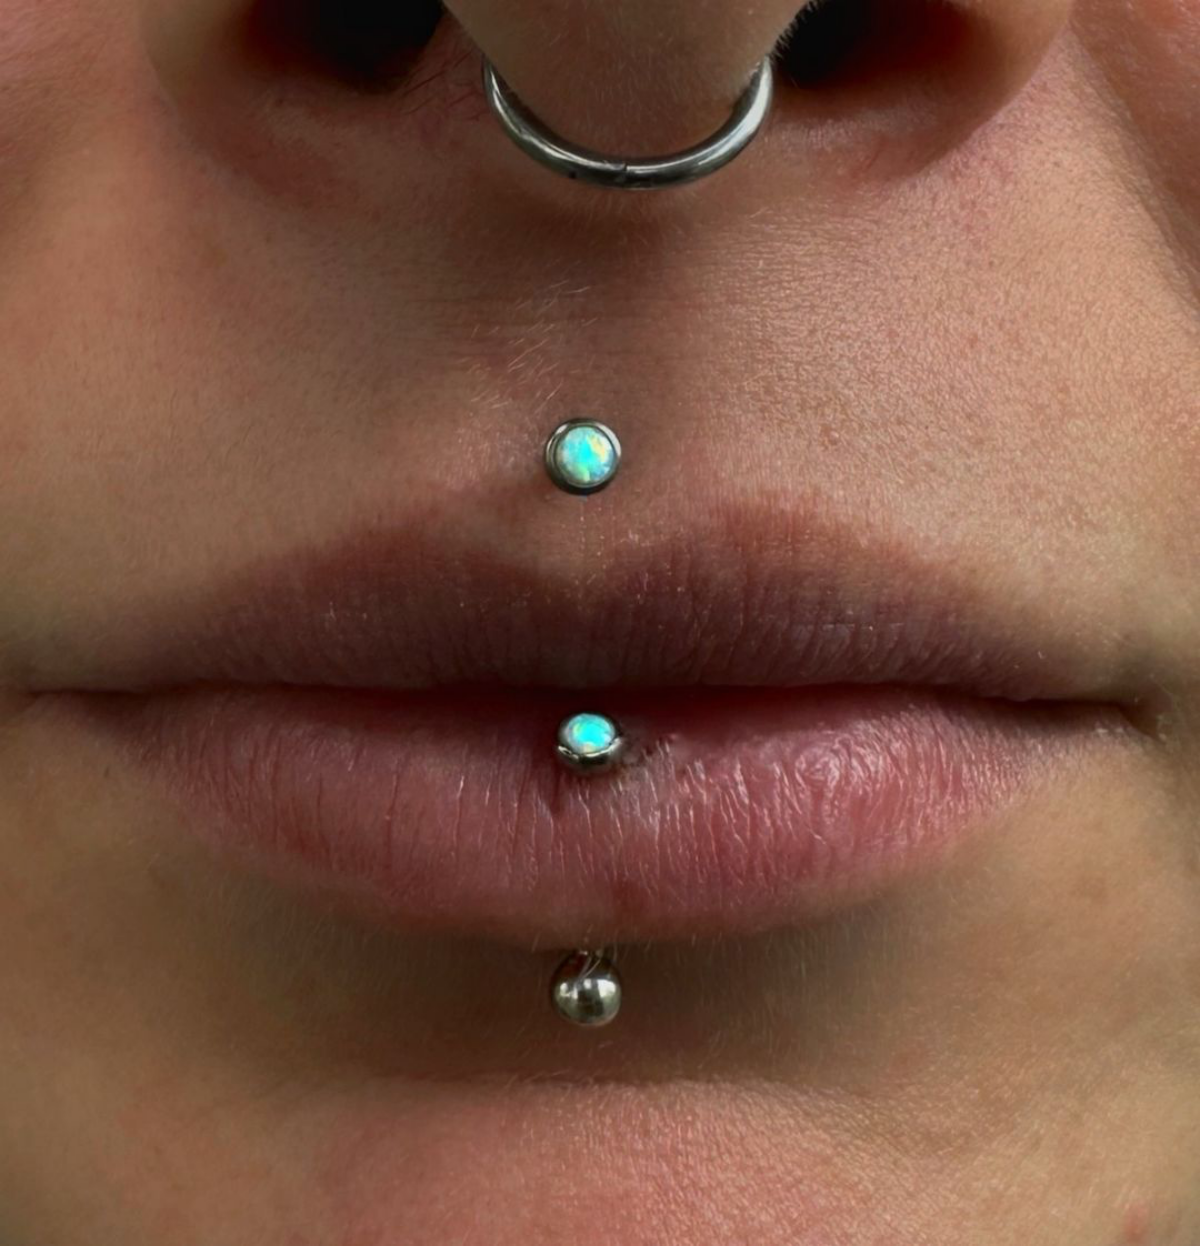
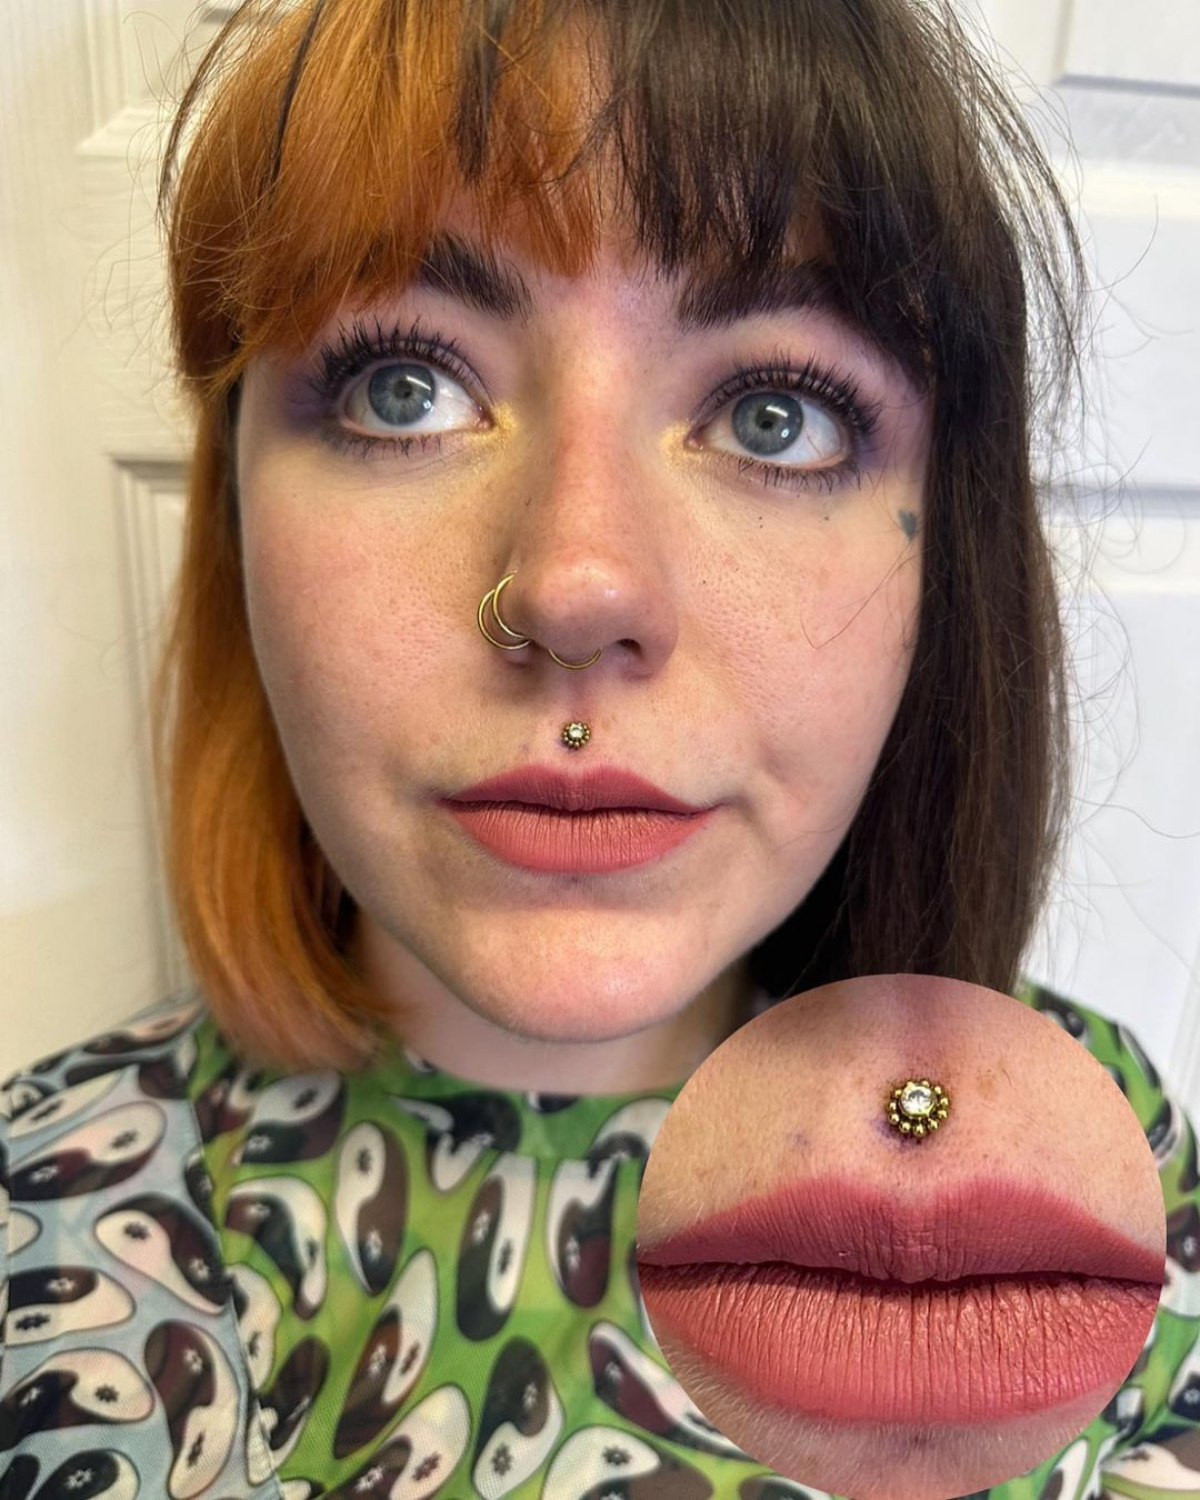
Once healed, the fun begins. Your Medusa is a focal point, so the jewelry end you choose defines its character. Consider these vibes:
- Subtle Sparkle: A tiny, 1.5mm or 2mm bezel-set gem from a brand like Neometal offers a delicate glint.
- Opulent & Bold: An intricate gold cluster or fan from Anatometal or BVLA creates a truly high-end, statement look.
- Minimalist Chic: A simple, high-polish disc or ball in titanium or gold provides a clean, classic aesthetic that never goes out of style.

A crucial note on placement: A properly centered Medusa should align not just with your nose and chin, but specifically with your Cupid’s bow. A great piercer will mark the spot and have you smile, talk, and relax your face to see how the placement looks with different expressions. If it looks off-center when you smile, it wasn’t placed correctly for your unique facial movements.
- Lessens the risk of gum erosion.
- Protects your tooth enamel from chipping.
- Feels more comfortable day-to-day.
The secret? Your jewelry backing. A flat-back labret stud is the only appropriate style for a philtrum piercing. Hoops or curved barbells will cause excessive movement, leading to oral damage and irritation. Insist on a high-quality, internally threaded or threadless labret from the start.


