The Real Deal on Bone Broth: A Pro’s Guide to Making It Right
In my line of work, you learn one truth fast: Nothing goes to waste. The parts of an animal most people tend to overlook—the bones, the joints, all that connective tissue—are actually where the real gold is hidden. For ages, smart cooks in kitchens everywhere knew this. They understood that a long, patient simmer could turn these humble bits into a liquid powerhouse of flavor and nourishment. It’s the secret soul of a good kitchen, the foundation for amazing soups, sauces, and gravies.
In this article
- First Things First: Are We Making Stock or Broth?
- Why ‘Low and Slow’ is the Golden Rule
- Getting the Right Bones: A Butcher’s-Eye View
- The Pro’s Method: A Step-by-Step Guide
- Help! Why Didn’t My Broth Gel?
- Modern Kitchen Shortcuts (Yes, You Can!)
- A Simple First-Timer’s Chicken Broth
- A Realistic Look at the Benefits
- Inspirational Gallery
These days, everyone calls it “bone broth,” but honestly, this isn’t some new fad. It’s just us remembering how things have always been done. And doing it right is a craft. It’s way more than just tossing bones in a pot of water; it’s about knowing how to pull out all that incredible collagen, minerals, and deep flavor. I’m going to walk you through exactly how it’s done, from picking the right stuff at the butcher counter to that final, beautiful, jiggly result.
First Things First: Are We Making Stock or Broth?
Alright, let’s clear something up. In a professional kitchen, words mean specific things, and people often use ‘stock’ and ‘broth’ like they’re the same. They’re not, really.
Traditionally, a broth is made by simmering meat, maybe with a few bones thrown in, for a fairly short time. Think about the liquid you get after you poach a whole chicken. It’s delicious and light, but it doesn’t have that rich, mouth-coating body.
A stock, on the other hand, is all about the bones. The whole point is a long, slow cook designed to break down all the connective tissue and pull out the collagen. When you cool a proper stock, it will set up into a firm gel. That jiggle is the sign of success!
So, what people are calling ‘bone broth’ today is basically a really, really well-made stock. It’s simmered for a long time—anywhere from 8 to over 24 hours—to get every last bit of goodness. For our purposes, we’re making this rich, gelatinous liquid, and you can call it either stock or bone broth. The goal is the same.
Why ‘Low and Slow’ is the Golden Rule
Making incredible bone broth isn’t magic; it’s just a bit of kitchen science. Once you get the ‘why’ behind the method, your results will get better every single time. The main prize we’re hunting for is collagen. This stuff is packed into skin, tendons, ligaments, and bones. When you gently heat it in water for a long time, that collagen slowly breaks down and turns into gelatin. That’s what gives your broth that prized silky texture and body.
A hard, rolling boil is your number one enemy. Seriously. It messes things up in two ways. First, it violently churns the liquid, breaking down fats and other gunk into tiny particles that get suspended in the broth, making it cloudy and greasy. Second, that aggressive heat can actually destroy the delicate gelatin you’ve worked so hard to create. You want a gentle, lazy simmer—what the pros call a ‘smile.’ Just a few bubbles breaking the surface every few seconds. It’s hot enough to do the job but gentle enough to keep things clear and perfect.
By the way, we always start with cold water. Why? Because bringing it to temperature slowly allows the impurities to clump together and float to the top, where you can easily skim them off. Starting with hot water can cook that gunk right into your broth from the get-go, making it cloudy.
And for that deep, roasted flavor? That comes from the Maillard reaction. It’s that beautiful browning that happens when you roast the bones first. This is a non-negotiable step for beef or lamb broth. It’s the difference between a thin, one-note liquid and a rich, complex, deeply satisfying broth.
Getting the Right Bones: A Butcher’s-Eye View
The quality of your broth starts and ends with the quality of your bones. This is where building a relationship with a local butcher can pay off, but you can also find what you need in most well-stocked grocery stores.
You’ll get the best results by using a mix of different types of bones:
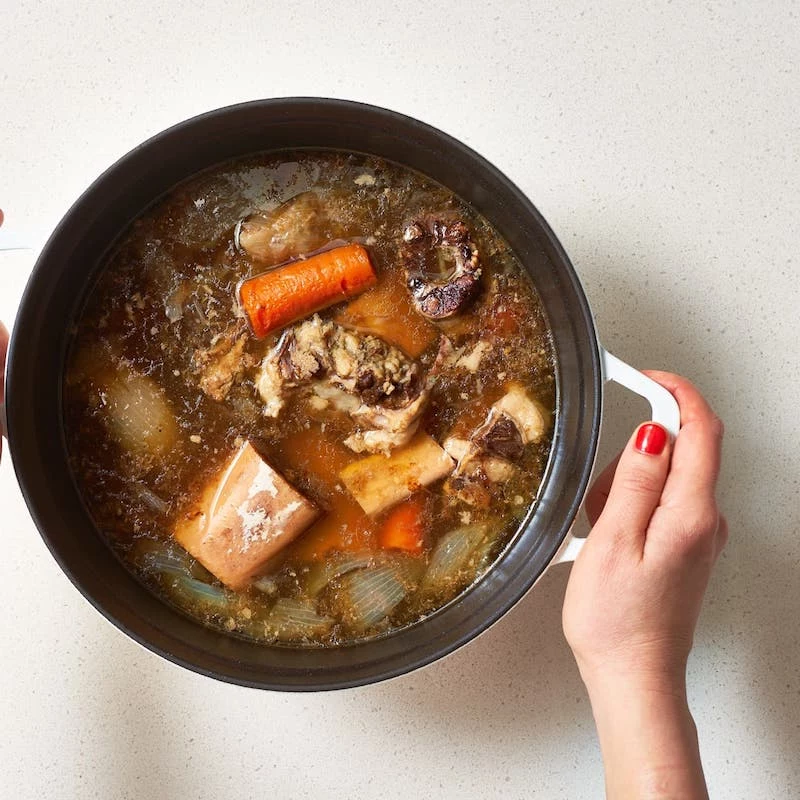
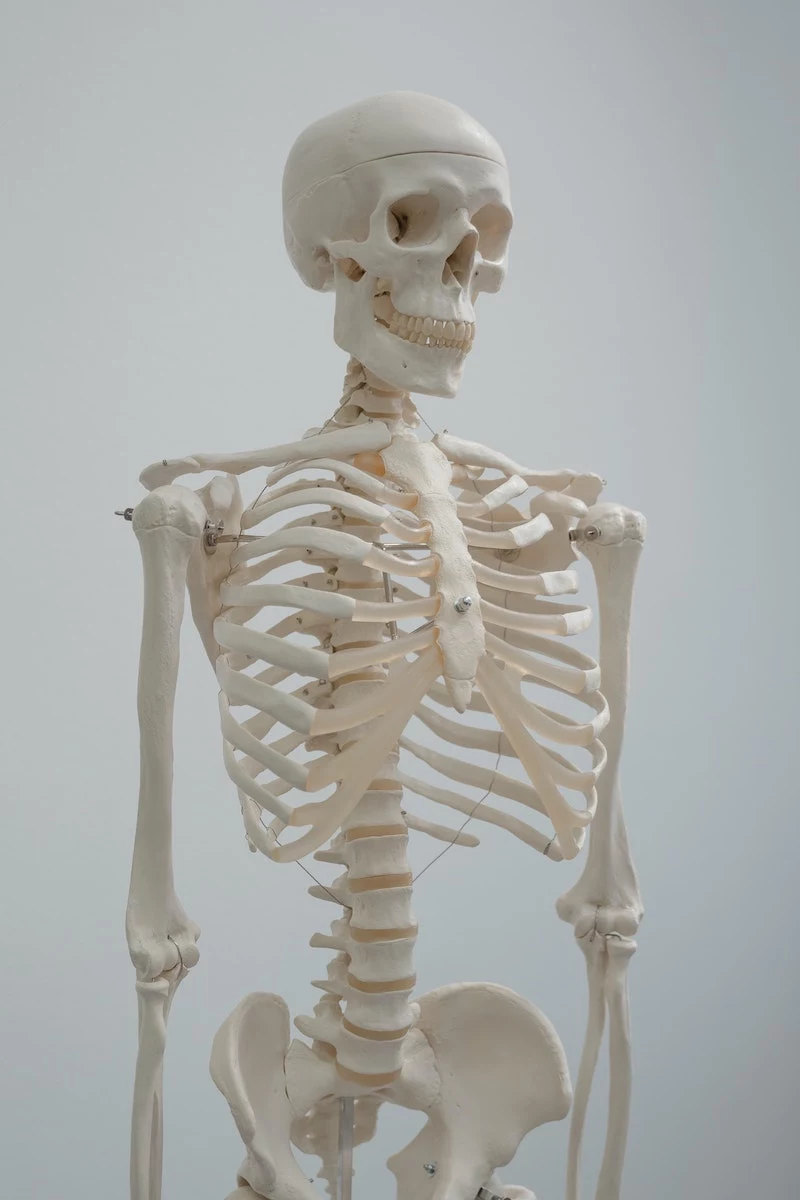
- Joint Bones (Knuckles, Feet): These are your gelatin powerhouses. They are loaded with cartilage and connective tissue. If you want a broth that sets up like Jell-O, you absolutely need these. Think beef knuckles, pig’s feet, and especially chicken feet. They are pure gold.
- Marrow Bones (Femur, Shank): These are the long, tubular bones filled with rich, fatty marrow. Marrow adds a deep, savory flavor and healthy fats to the mix. They also have some collagen.
- Meaty Bones (Neck, Ribs, Oxtail): These bring the flavor. The meat attached contributes a ton to the final taste. Oxtail is fantastic because it has a great mix of meat, fat, and cartilage.
Heads up on cost: Don’t be shy about asking for ‘soup bones’ or ‘scrap bones.’ They’re often cheaper and are exactly what you need. Expect to pay anywhere from $2 to $5 per pound for quality beef bones at a butcher shop. Sometimes you can find them for even less in the freezer section of a good grocery store.
Which Animal is Best?
For Beef Broth: You’ll get a deep, robust broth that’s perfect for hearty soups and rich sauces. Use a mix of marrow, knuckle, and neck bones for the best balance. Beef bones are dense and need the longest cook time, often 24 hours or even more.
For Chicken Broth: This creates a lighter, super versatile broth. It’s perfect for sipping on its own or as a base for classic chicken soup. The best chicken broth comes from using the carcass of a roasted chicken plus extra feet and wings for a gelatin boost. The simmer time is shorter, usually around 6 to 12 hours.
For Pork Broth: This can be wonderfully rich and a little sweet. It’s the foundation for many incredible Asian soups, like the famous tonkotsu ramen broth. Pig’s feet are amazing for gelatin, and pork neck bones add incredible flavor.
For Fish Stock: This is a quick one, known as a fumet. It’s delicate and should only be simmered for 30 to 60 minutes, tops. Any longer and it can turn bitter. It’s critical to use bones from non-oily, white-fleshed fish like halibut, cod, or sole. Ask your fishmonger for ‘lean fish frames.’ Oily fish like salmon will make for a strong, unpleasant stock.
The Pro’s Method: A Step-by-Step Guide
This is the tried-and-true method. It takes time, but the process itself is simple. Patience is your most important ingredient. This recipe is for a big batch of beef broth, but the principles are the same for any animal.
Good to know: This recipe makes a LOT of broth, roughly 6 to 8 quarts. It’s perfect for freezing and using for months!
What You’ll Need:
- A big, heavy-bottomed stockpot (at least 16 quarts, but any large pot will do)
- Roasting pans or baking sheets
- A fine-mesh strainer
- A ladle or skimmer
- Optional but helpful: Cheesecloth for extra-clear broth
The Ingredients:
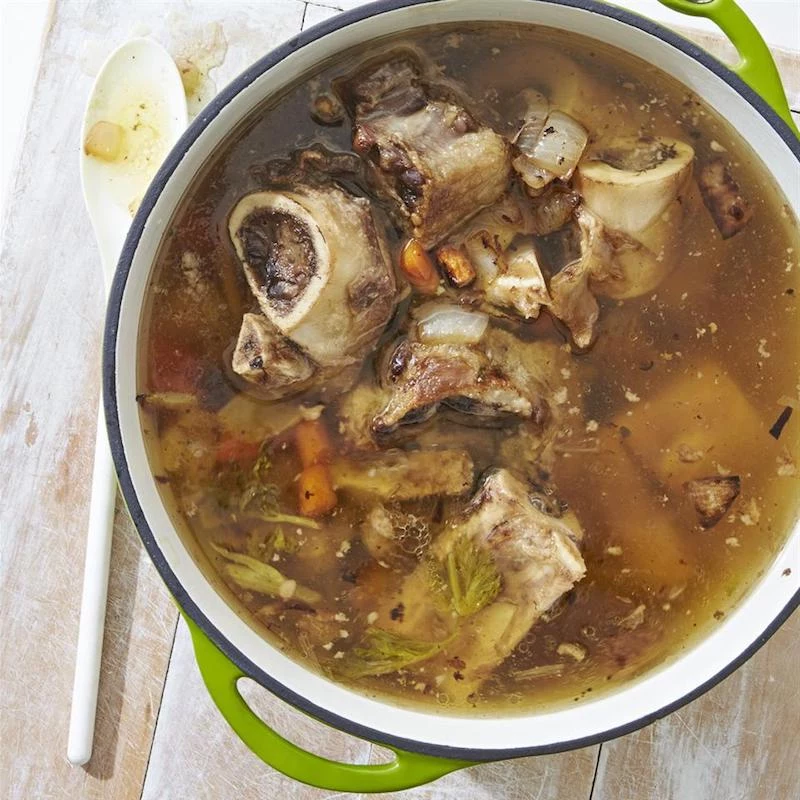
- 8-10 lbs of mixed beef bones (a mix of knuckles, marrow, and neck is ideal)
- 2-3 large onions, skin on, just cut in quarters
- 4-5 large carrots, washed and broken into large chunks
- 1 whole head of celery, including the leafy parts, roughly chopped
- 1 head of garlic, sliced in half crosswise
- About 1/4 cup of apple cider vinegar (this helps pull minerals from the bones)
- A few bay leaves and a tablespoon of whole peppercorns
- Cold water

Step 1: Blanch Your Bones (Optional, but a Pro Move)
Put the bones in your stockpot and cover them with cold water. Crank the heat to high and bring it to a boil. Let it roll for about 15-20 minutes. You’ll see a thick layer of grey foam and scum rise up. These are impurities you don’t want. Carefully dump everything into a clean sink and give the bones a good rinse with cool water. Wash out your pot, too. This step is key to a crystal-clear, clean-tasting broth.
Step 2: Roast Everything for Flavor
Get your oven preheating to 425°F. Spread the clean bones on your roasting pans in a single layer. Don’t crowd them. Roast for 30 minutes. Then, add your chopped onions, carrots, and celery to the pans. Give everything a good toss and roast for another 30 minutes. You’re looking for a deep, golden-brown color on everything. The kitchen should smell amazing.

Step 3: The Long, Slow Simmer
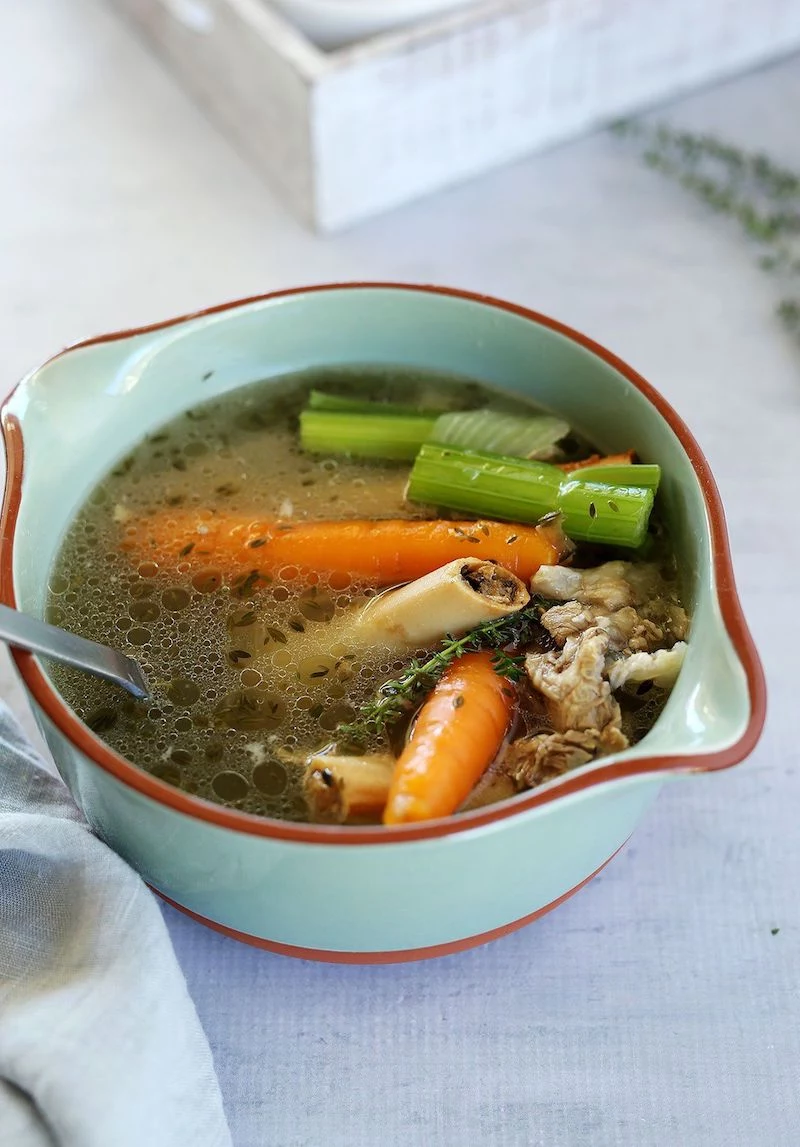
Move the roasted bones and veggies into your clean stockpot. See all those browned bits stuck to the roasting pan? That’s pure flavor. Pour a cup of water onto the hot pan and use a spoon or spatula to scrape it all up. Pour every last drop of that liquid into your stockpot. Cover the bones with cold water by at least 2-3 inches. Add your vinegar, bay leaves, and peppercorns. Now, slowly bring the pot to a simmer. The moment you see those first lazy bubbles, turn the heat down to low. You want the surface to barely tremble.
For the first hour or two, you’ll need to play lifeguard. Skim off any foam or gunk that rises to the top. A clean start means a clean finish. Now… you wait. For beef, let it go for at least 12 hours, but 24 is even better. For chicken, 6-8 hours will do it. Check it periodically and add more water if needed to keep the bones submerged. I never add salt at this stage. It’s best to salt the final dish you’re making, since the broth will concentrate.
Step 4: Strain and Cool (Safely!)
After its long nap, turn off the heat. Carefully pull out the big bones and veggies. They should be soft and practically falling apart. Set a fine-mesh strainer over another large, clean pot or a few heatproof containers. For stunningly clear broth, line the strainer with a couple of layers of damp cheesecloth. Ladle the hot broth through it. Don’t push on the solids in the strainer; that can make your broth cloudy.
This next part is a critical safety step. You have to cool this large volume of liquid down fast. A giant hot pot is a breeding ground for bacteria. The fastest way is an ice bath. Fill your sink with ice and water, then place the pot of strained broth right in it. Stir the broth every few minutes to help it cool down quickly. Never, ever put a huge, steaming pot of broth straight into your fridge. It’s a food safety nightmare and will warm up everything else in there.
Step 5: Defat and Store
Once the broth is fully chilled in the fridge, a solid cap of fat will form on top. For beef, this is tallow; for chicken, it’s schmaltz. This fat cap actually seals and preserves the broth underneath. When you’re ready to use it, just lift the cap off with a spoon. And DON’T throw that fat away! It’s incredible for roasting potatoes or sautéing vegetables.
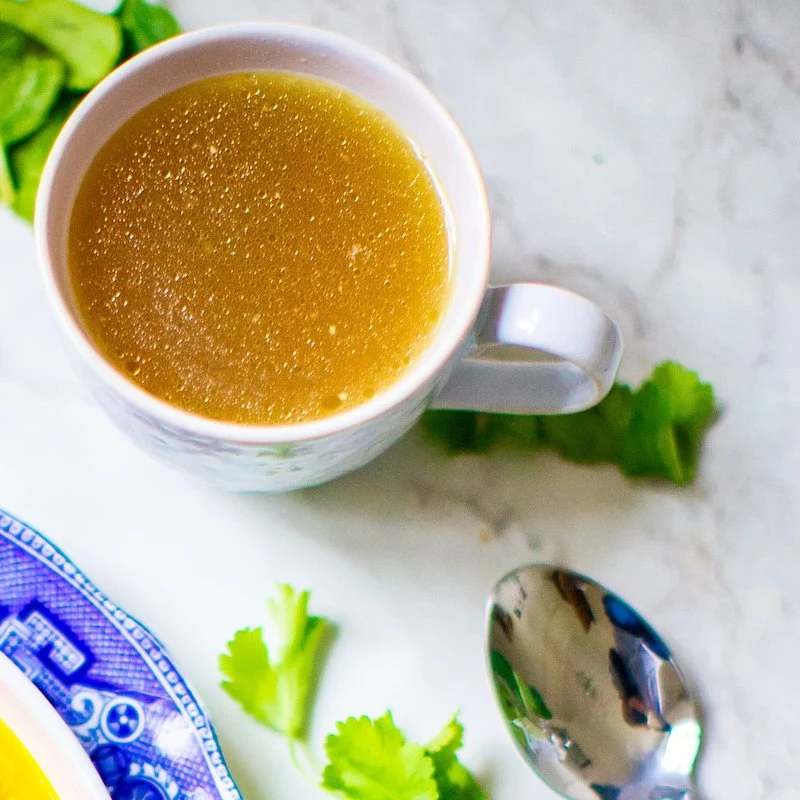
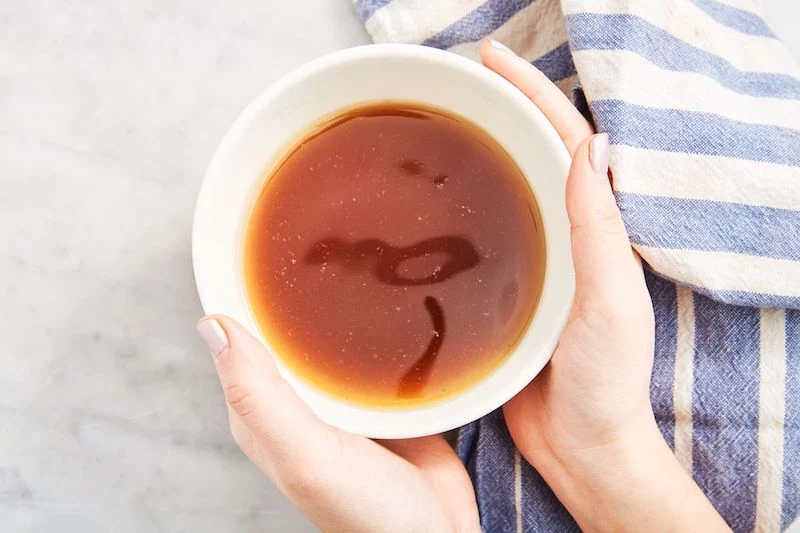
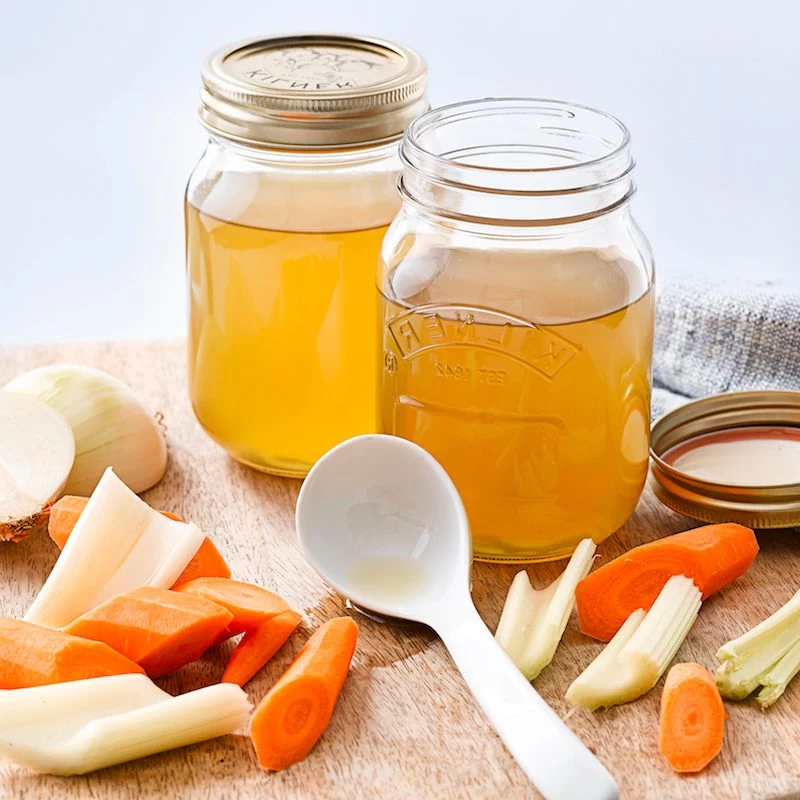
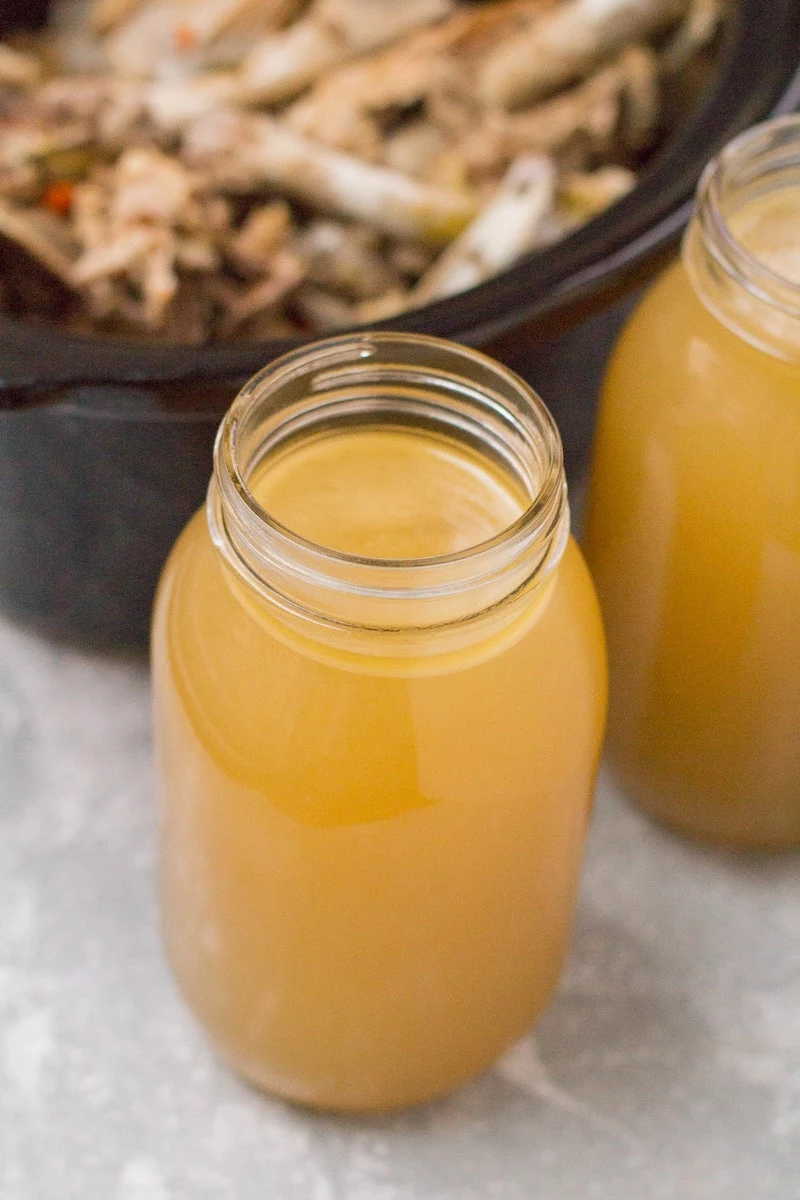
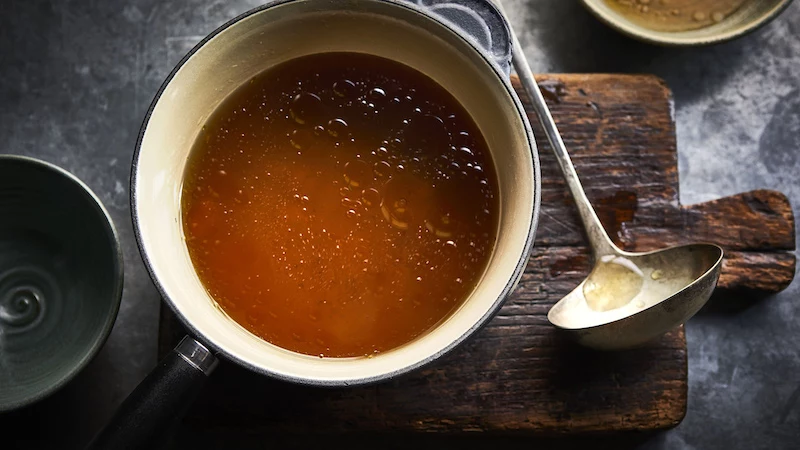
Underneath that fat, you should find your prize: a firm, wobbly, amber-colored jelly. That’s your perfect bone broth. It will keep in the fridge for up to a week or in the freezer for at least 6 months. My advice? Freeze it in different sizes. Ice cube trays are perfect for small portions to boost a pan sauce, and quart-sized containers are great for a big pot of soup.
Help! Why Didn’t My Broth Gel?
This is the number one question I get. It’s so disappointing when you wait 24 hours and don’t get that signature jiggle. Don’t worry, it happens. Here are the most common reasons:
- The Wrong Bone Ratio: You probably didn’t use enough of those collagen-rich joint bones like knuckles and feet. A broth made only from marrow bones, for example, will be flavorful but won’t have enough gelatin to set.
- Too Much Water: If your bone-to-water ratio is off, you can dilute the gelatin so much that it can’t gel. A good rule of thumb is to cover the bones with water by just 2-3 inches.
- Not Enough Time: Especially with beef bones, you might have just pulled it off the stove too soon. Collagen takes a long time to break down.
But here’s the good news: your broth is NOT a failure! It is still a delicious and nutritious liquid. It’s packed with flavor and minerals. You can absolutely still use it for soups, stews, and cooking grains. Just aim for more feet and knuckles next time!
Modern Kitchen Shortcuts (Yes, You Can!)
Not everyone has 24 hours to watch a pot on the stove. Luckily, modern gadgets make this whole process way easier.
For the Slow Cooker: This is the ultimate ‘set it and forget it’ method. Follow all the steps for blanching and roasting, then put everything into your slow cooker. Cover with water, set it to low, and let it go for 24 to 48 hours. It’s a fantastic, low-effort way to get a great result.
For the Instant Pot (Pressure Cooker): This is the fast track. The high pressure is incredibly effective at extracting collagen. After roasting your bones, pack them into the pressure cooker, add veggies and water (don’t fill past the max line!), and cook on high pressure for about 2-4 hours. It’s a game-changer for getting quality broth on a Tuesday night.
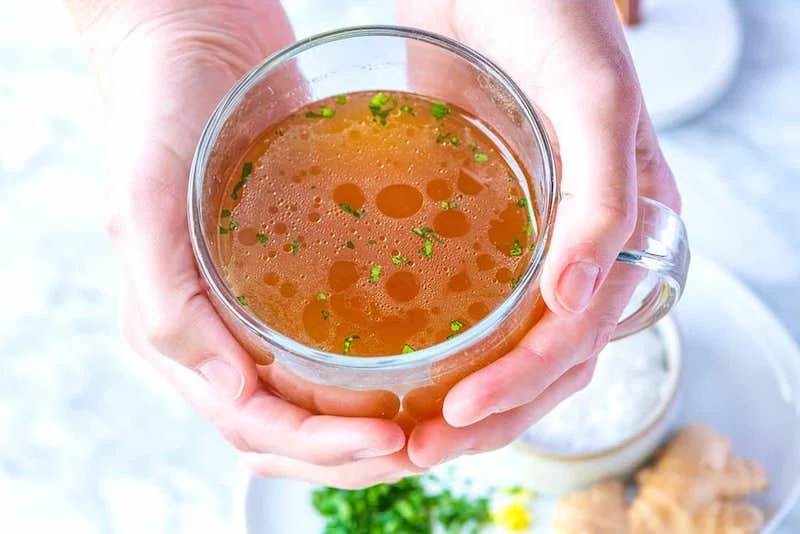
A Simple First-Timer’s Chicken Broth
Feeling intimidated by the big batch? Try this easy starter recipe. It’s a great way to get a feel for the process.
Just take the carcass from a roasted chicken (bones, skin, everything!) and put it in a small stockpot or your slow cooker. Add a pound of chicken wings or, even better, chicken feet (you can find these at most Asian markets or a good butcher for a couple of bucks). Toss in a rough-chopped onion, carrot, and celery stalk. Cover with cold water, add a splash of vinegar, and simmer gently for 6-8 hours (or 12-24 on low in the slow cooker). Strain and cool. It’s that simple!
A Realistic Look at the Benefits
People talk a lot about bone broth as a cure-all. From my perspective, it’s a deeply nutritious food, but let’s be realistic. The gelatin gives your body the raw materials—amino acids like glycine and proline—that it uses to repair its own connective tissues, like skin, joints, and the gut lining. It doesn’t magically go straight to your knees, but it provides support for your body’s own repair crew. It’s a fantastic part of a balanced diet.
A little caution is wise, though. The long cooking time can create higher levels of natural histamines and glutamates. If you’re sensitive to MSG or have a histamine intolerance, you might get headaches or feel a bit off. My advice? If you’re new to it, start with a small cup. See how you feel. Don’t go chugging a quart on your first day. As for heavy metals, this is rarely an issue with bones from healthy, well-raised animals. Another great reason to know where your food comes from.
Ultimately, making bone broth is a fundamental kitchen skill. It connects you to a long tradition of being resourceful and creating incredible flavor from scratch. The first time you pull a pot from the fridge and see that perfect, beautiful gel, you’ll get it. You’ll understand the craft, and you’ll have a freezer full of liquid gold to prove it.
Inspirational Gallery
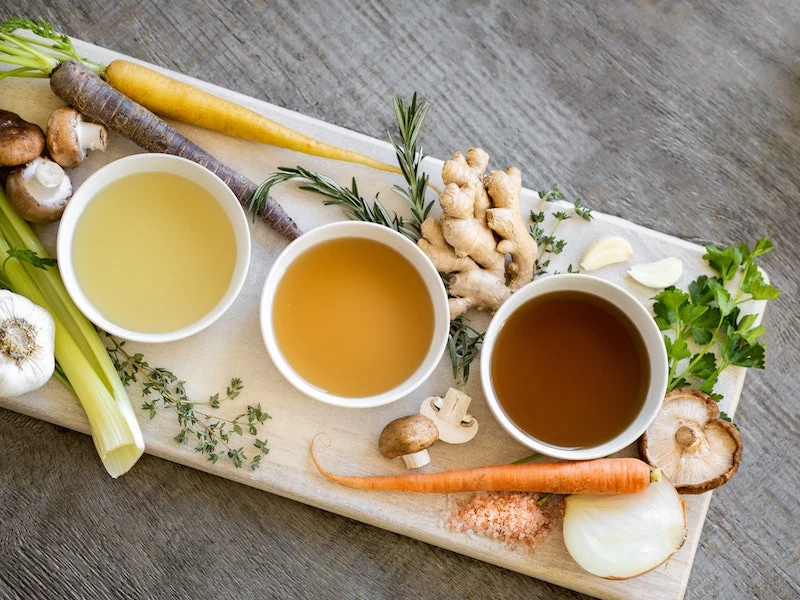
The Roasting Question: For a pale, delicate broth (perfect for chicken soup), use raw bones. For a deep, dark, and intensely savory broth with a rich, roasted flavor, spread your bones and a few coarsely chopped carrots and onions on a baking sheet and roast at 400°F (200°C) until well-browned before adding them to the pot. This step creates the Maillard reaction, the secret to profound flavor.
Nearly one-third of the protein in our bodies is collagen, which gives structure to our skin, bones, and connective tissues. Simmering bones for extended periods helps to break down this collagen into gelatin, making it easily absorbable.
Don’t let your hard work go to waste! For long-term storage, freezing is your best friend. Here’s how the pros do it:
- For easy portions: Pour cooled broth into large silicone ice cube trays, like those from Souper Cubes. Once frozen, pop the blocks out and store them in a freezer bag.
- For bulk storage: Use wide-mouth glass mason jars, but be sure to leave at least an inch of headspace at the top to allow for expansion and prevent the glass from cracking.
When should I add the vegetables?
A common mistake is to add vegetables like carrots, celery, and onions at the very beginning of a 24-hour simmer. This can lead to a bitter, overly vegetal taste. For a balanced flavor, add your aromatics and herbs during the final 2-3 hours of cooking. This is just enough time to extract their sweet, earthy notes without overwhelming the rich, meaty flavor of the broth itself.
The pot you choose can change the process entirely. A heavy-bottomed stockpot, like a classic Le Creuset or Staub, offers excellent heat distribution for stovetop simmering. An electric pressure cooker, such as an Instant Pot, can drastically cut down the time, extracting collagen in just a few hours. A slow cooker offers a ‘set it and forget it’ convenience, perfect for a low-and-slow simmer without occupying a burner.
- A richer, more gelatinous final product.
- A higher yield of minerals like calcium and magnesium.
The secret? A splash of acid. Add about two tablespoons of raw apple cider vinegar (like Bragg’s) to your pot with the bones and cold water. Let it sit for 30-60 minutes before turning on the heat. The acidity helps begin the process of breaking down the connective tissues, coaxing more goodness out of the bones.
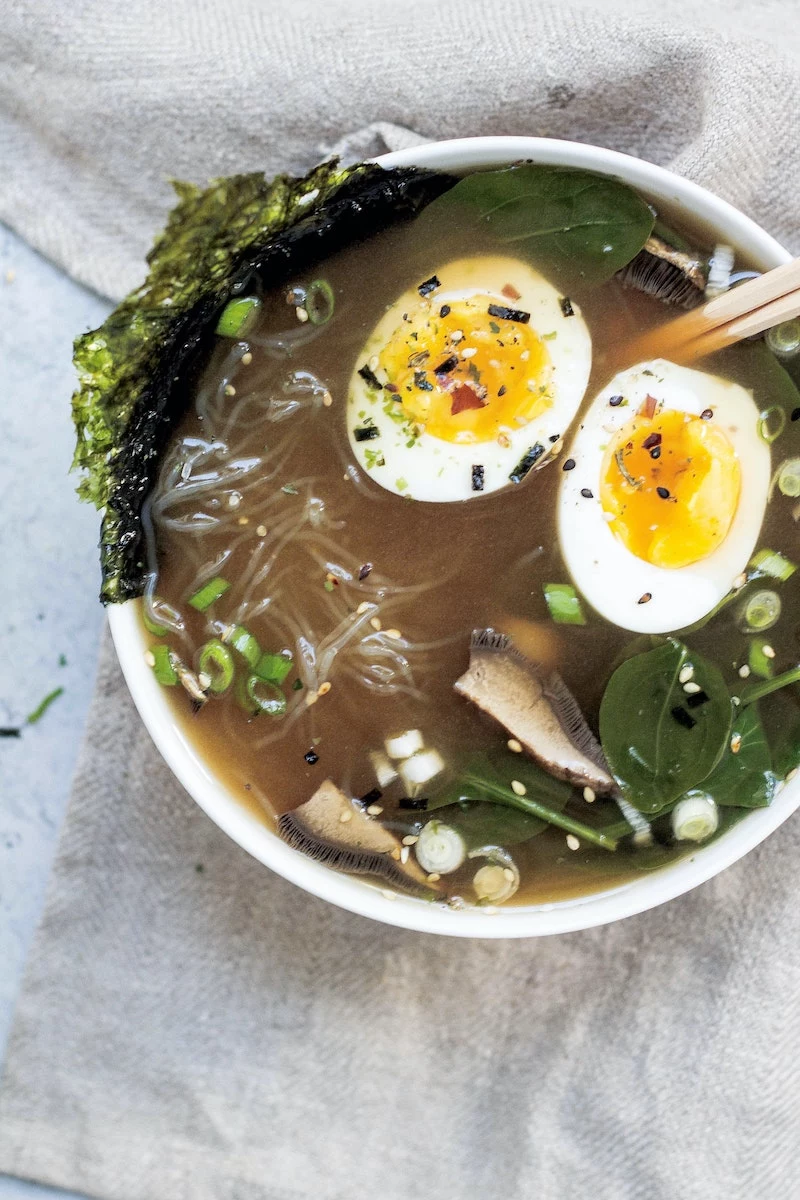
Once you’ve mastered the basic technique, let the world be your inspiration. Think of the creamy, emulsified pork-bone Tonkotsu broth from a Japanese ramen shop, or the fragrant, star-anise-and-cinnamon-spiced broth that forms the soul of Vietnamese Pho. These traditions show that bone broth is a global canvas for flavor.
Pro Tip on Skimming: Don’t obsess over skimming every bit of ‘scum’ that rises to the surface. This initial foam is mostly denatured proteins. While skimming some off in the first hour can lead to a clearer final product, leaving some behind is perfectly fine and won’t harm the flavor. The real enemy is a rolling boil, which will make your broth cloudy regardless of skimming.


