Your Guide to Gorgeous Valentine’s Nails (The Pro Secrets)
I’ve been working with clients’ hands for a long, long time. And one thing never changes: the February rush. As soon as the new year settles in, the requests for Valentine’s nails start rolling. People come in with pictures of pink hearts and red glitter, but my job is to see past the photo and get to the feeling they’re after. Is it fun and playful? Deep and romantic? Or maybe a little bold and edgy? The real magic isn’t just in the design, but in the professional execution that makes it last while keeping the natural nail healthy.
In this article
It’s the first thing I teach new technicians. A stunning manicure is built on a rock-solid foundation of perfect prep and knowing your products inside and out. A sloppy prep job means even the most beautiful art will lift and chip in days. Worse, using products incorrectly can lead to nasty skin sensitivities. This guide is all about doing things the right way, using the same techniques the pros use for everything from delicate art to that incredible liquid-metal chrome.
It All Starts with Flawless Prep
Before even a drop of color touches that nail, the canvas has to be perfect. This is, without a doubt, the most critical step, and it’s where most at-home manicures go wrong. Professionals spend a good chunk of time on prep because it’s the only way to guarantee the manicure will last for weeks without damage.
First up, the cuticle area. We’re focused on removing the thin layer of dead tissue that’s actually on the nail plate. Heads up! We never, ever cut the live skin at the base of the nail, which many people mistakenly call the cuticle. Cutting that can open you up to infection, and trust me, I’ve seen some painful, swollen fingers from aggressive cutting done elsewhere. It’s a serious safety issue.
A pro will use a cuticle remover with a gentle chemical exfoliant. This stuff softens the dead tissue so it can be removed safely. After letting it sit for 30 to 60 seconds, we use a sanitized metal pusher to gently glide that tissue off the nail plate. The pressure should be super light. Any stubborn bits get carefully nipped away with sterile nippers.

Next, we shape. For natural nails, a 180 or 240-grit file is the way to go; anything rougher can cause splitting. And here’s a pro tip: always file in one direction. Sawing back and forth creates micro-fractures at the tip. I can always tell when a client has been sawing at their nails because the tips look frayed under my lamp, almost like split ends on hair. After shaping, we lightly buff the nail plate with a fine-grit buffer to remove shine and create a better surface for the gel to grip. It’s a very light touch—you are not trying to thin the nail!
The final prep step is a thorough cleanse. A lint-free wipe soaked in 99% isopropyl alcohol removes all dust and oils. Oil is the number one enemy of a long-lasting manicure. Honestly, for a proper prep, you should plan for a solid 20-30 minutes. Rushing this is a recipe for disaster.
The Science Behind the Shine (And Why It Matters)
Understanding your materials is what separates the hobbyists from the experts. Gel polish doesn’t “dry” like old-school lacquer; it cures through a chemical reaction called polymerization. The polish has ingredients that, when hit with the right UV or LED light, link up and harden into a durable solid.
This brings us to the biggest question DIYers have: “Is my cheap lamp from Amazon okay to use with my expensive gel polish?” Maybe, but you have to check the specs. Your gel polish bottle should tell you what kind of light it needs, usually a specific wavelength like 365nm or 405nm. Check your lamp’s technical details to see if it matches. If it doesn’t, you’re running a huge risk of under-curing the gel.
And under-cured gel is no joke. It can leave uncured chemicals on your nail and skin, which can lead to a nasty contact allergy over time. It can start with itching and redness and turn into painful blistering. It’s why pros stick to a single, complete system—the lamp is designed to work perfectly with the polish. It’s the industry standard for safety and performance.
Pro Techniques for Those Valentine’s Designs
Okay, with our perfect base ready, it’s time for the fun part. Here are some of the most-requested looks for this time of year and how we actually make them happen.
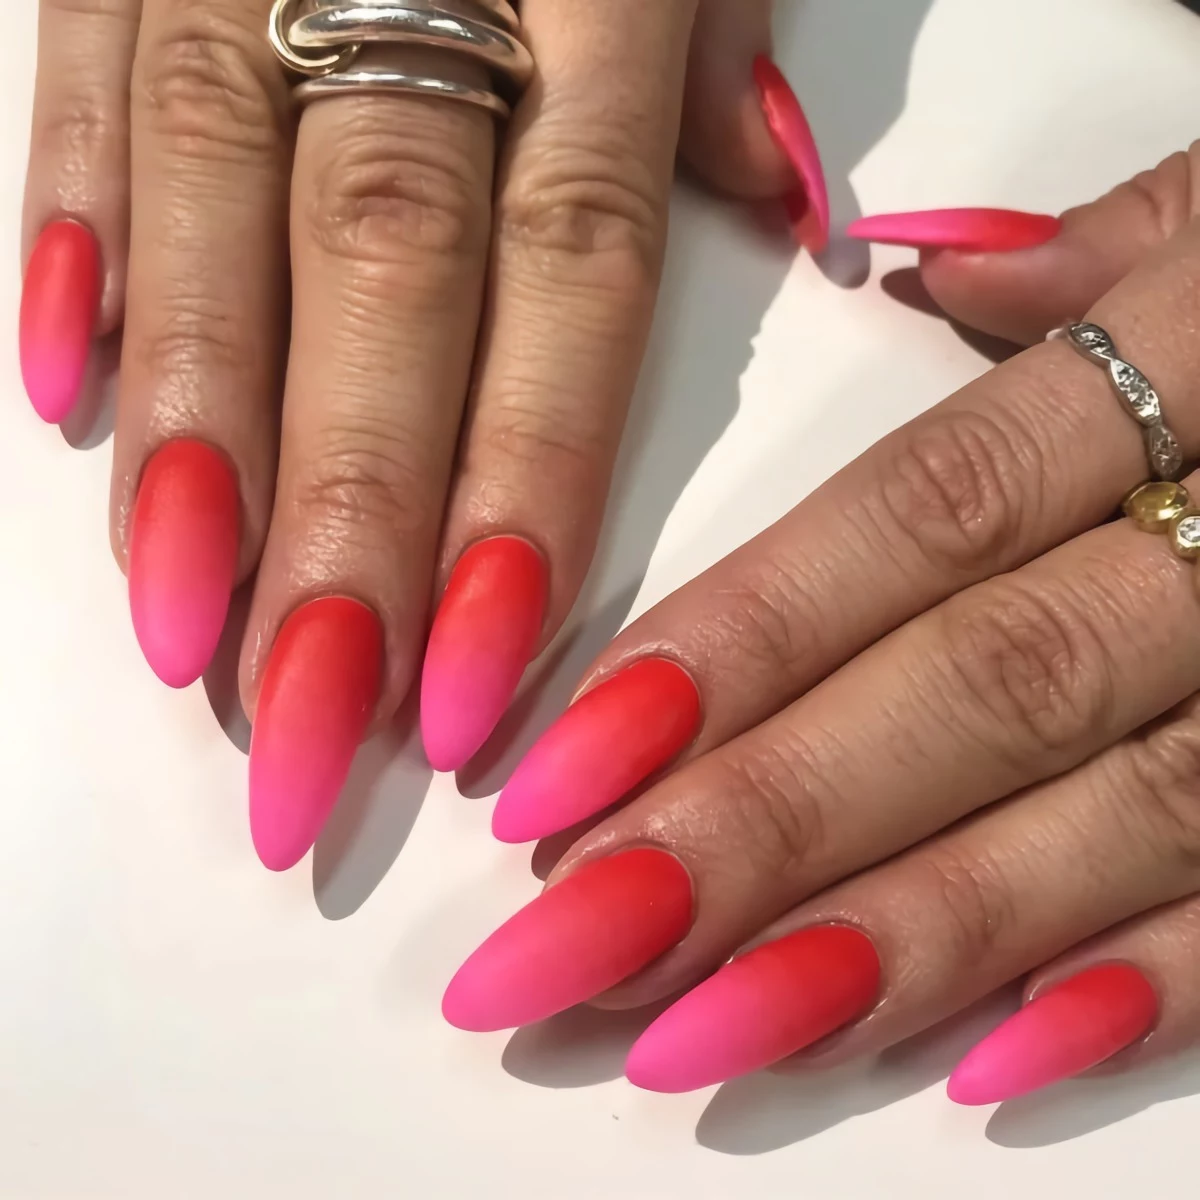
Technique 1: The Dreamy Aura Effect
Aura nails have that soft, blended circle of color that looks like it’s glowing from the center. There are a few ways to get this look.
So, which method is for you? Well, an airbrush gives you that absolutely flawless, ethereal blend, but it’s a pro tool with a pro price tag. The sponge method is super budget-friendly and creates a cool, slightly textured gradient. But for the best balance of ease and elegance at home, my money is on blooming gel. It gives you that soft, feathered effect without needing any fancy equipment.
Blooming gel is a special clear gel that makes any uncured color on top of it spread out or “bloom.” You apply a thin layer of it over your cured base color (but don’t cure the blooming gel itself!). Then, you place a dot of your aura color in the center and just watch. It will gently spread into a soft circle. When it looks right, you cure it immediately to lock it in place. A common mistake is applying the blooming gel too thickly, which makes the color spread too fast and lose its shape. A good bottle of blooming gel will run you about $12-$18 from a pro nail supply store, and it’s so much fun to play with.
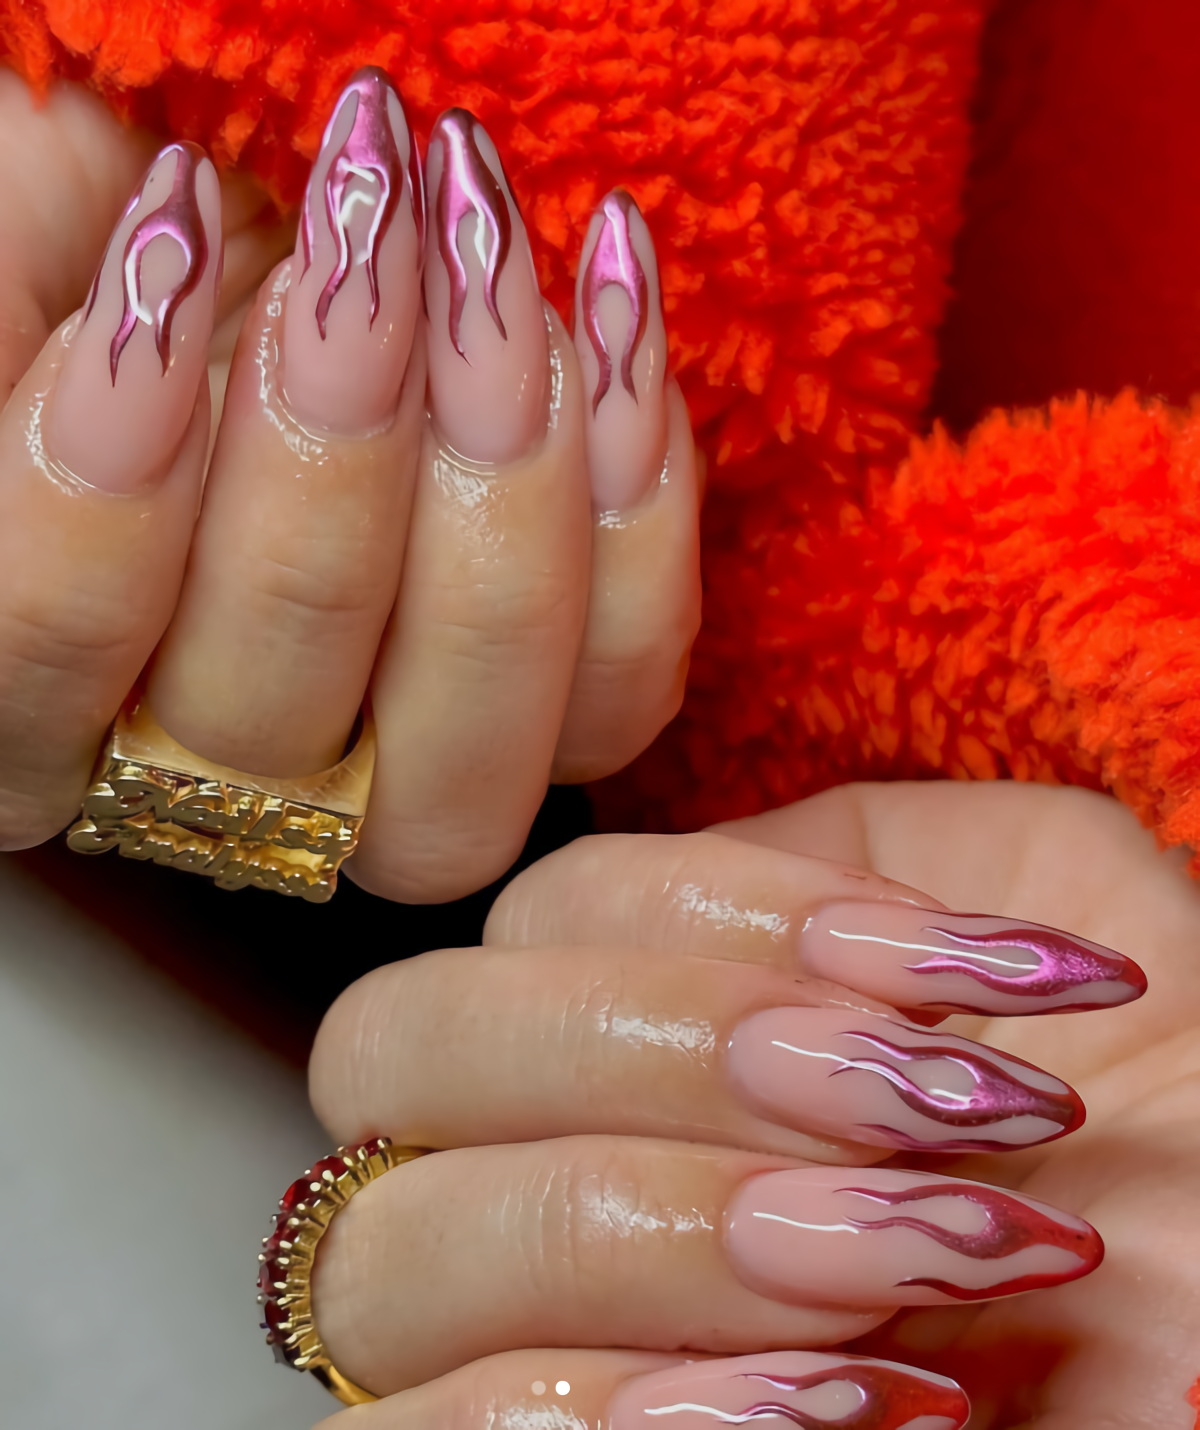
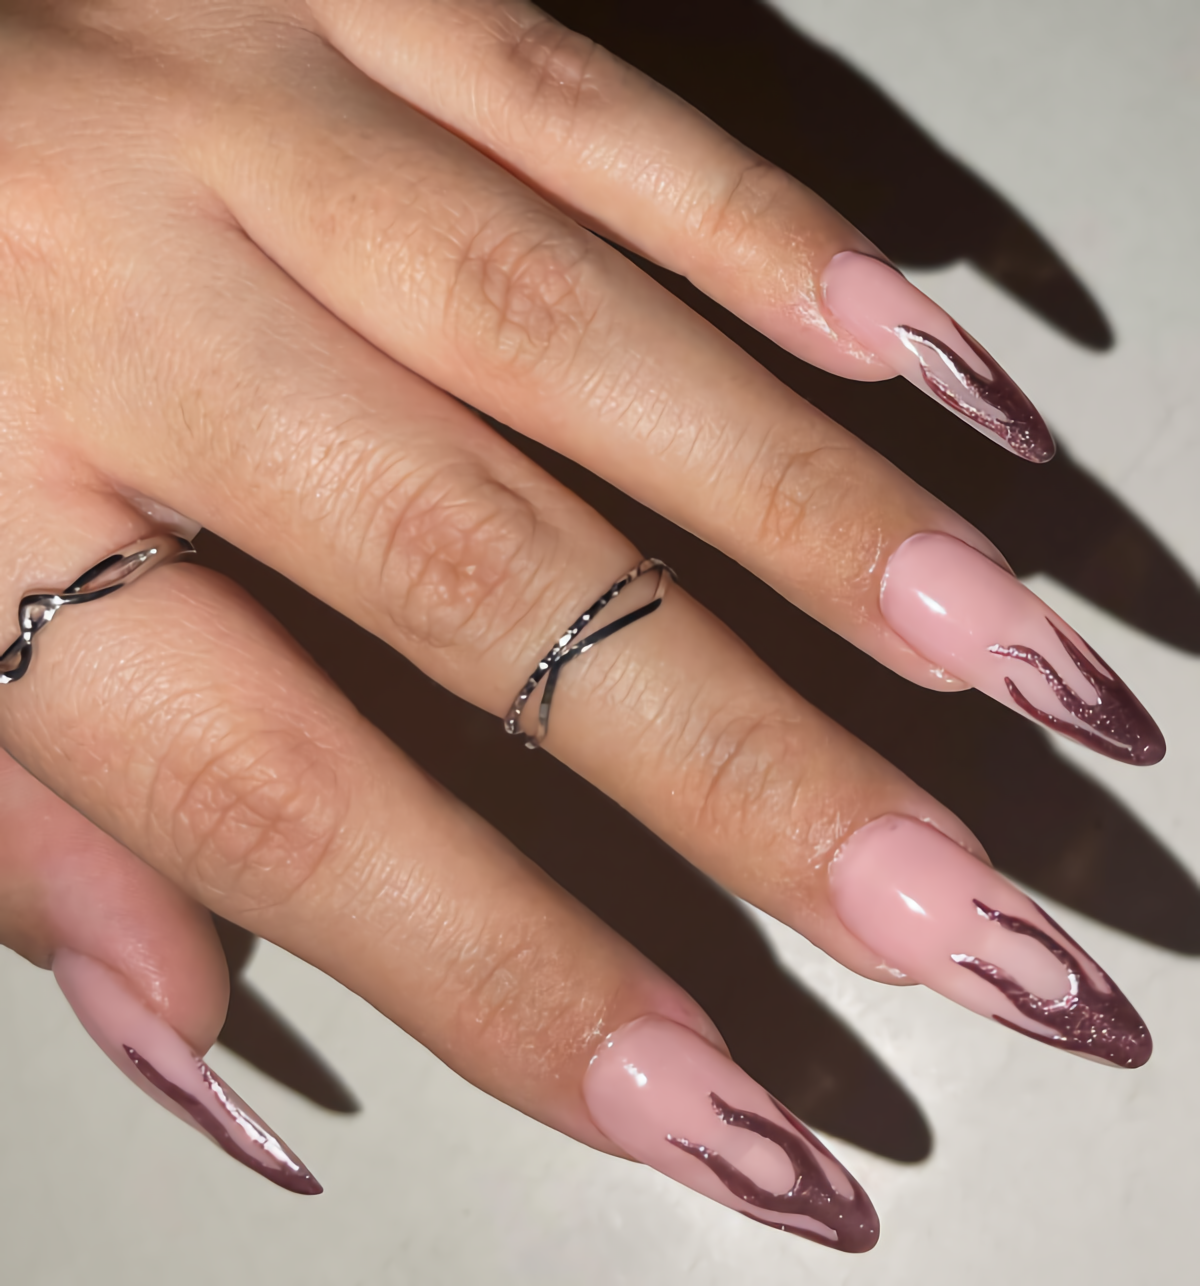
Technique 2: That Liquid Metal Chrome Finish
True, mirror-like chrome is an effect you just can’t get from a regular polish. It’s an ultra-fine powder that you burnish onto a specific surface: a no-wipe gel top coat.
Here’s a trade secret: after you apply the no-wipe top coat, don’t always cure it for the full 60 seconds. We often cure it for just 30 seconds. A slightly under-cured, warm surface grabs the powder perfectly, allowing it to melt into that seamless mirror finish. If you cure it for the full time, the surface gets too slick, and the powder won’t stick properly—it’ll just look like loose, messy glitter. Every brand is a bit different, so it’s smart to test on a swatch stick first.
Using a little silicone tool or an eyeshadow applicator, you rub a tiny amount of powder onto the nail. You’ll feel it transform from dusty to a smooth, reflective sheet. After dusting off any excess, you have to seal it. First, cap the free edge with a bit of base coat and cure, then apply your top coat over the whole nail. This is key for preventing chipping. By the way, be picky about your powders. Expect to pay between $8 and $20 for a small pot of cosmetic-grade chrome. The cheap craft stuff isn’t milled as finely and won’t give you the same effect.
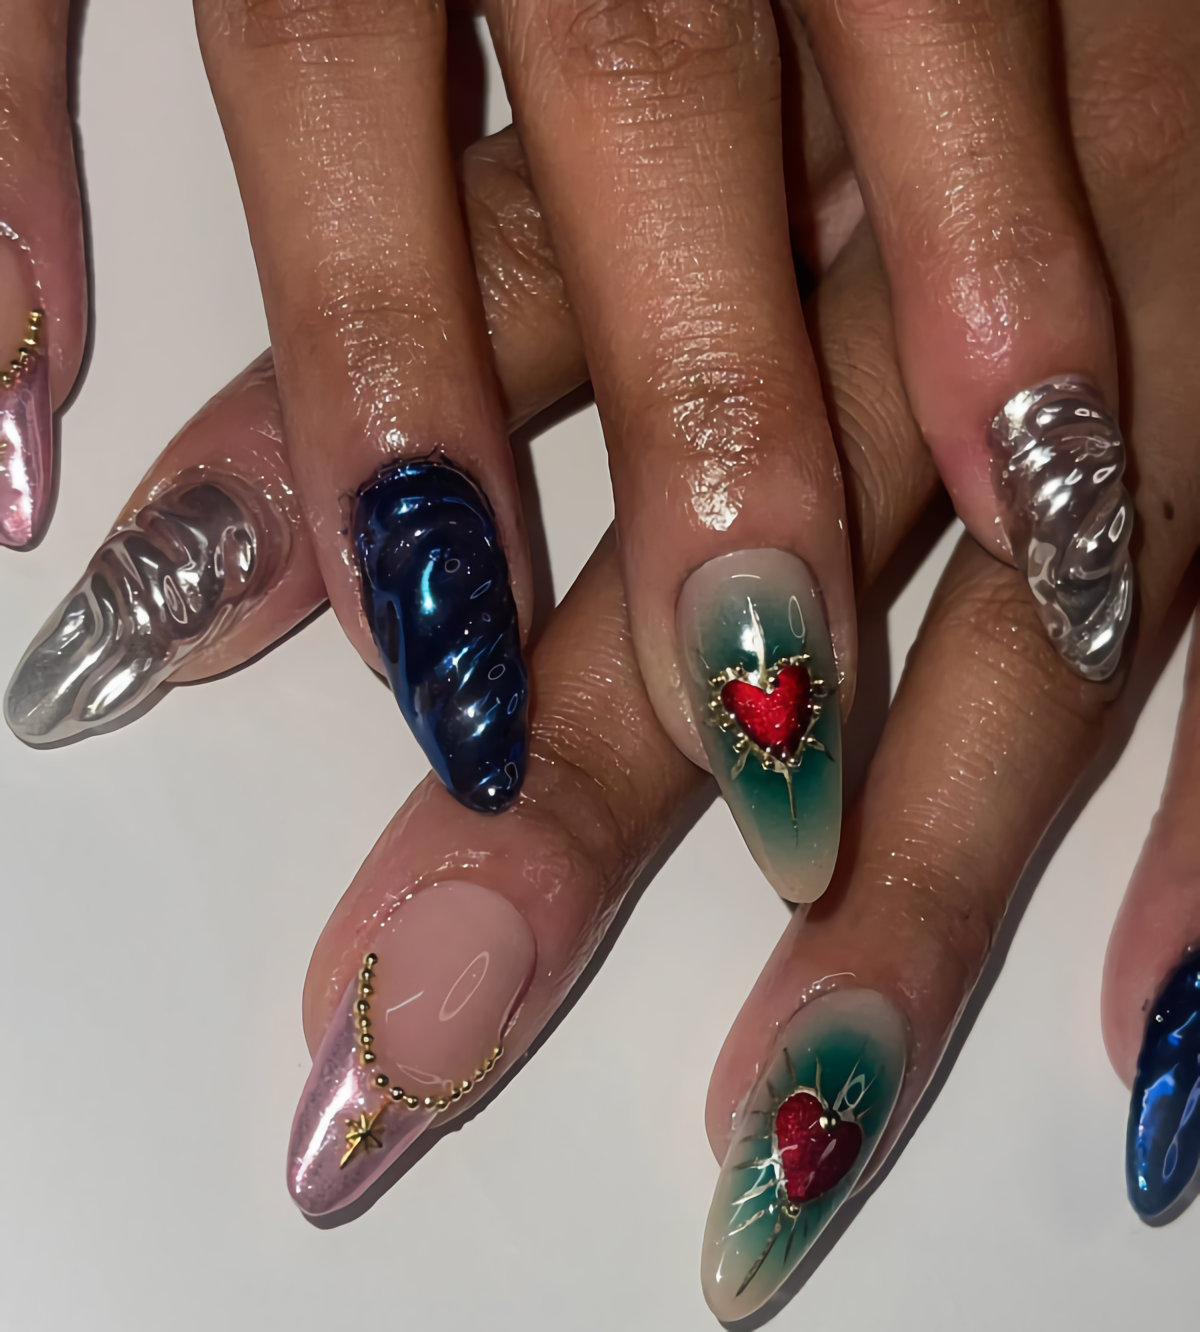
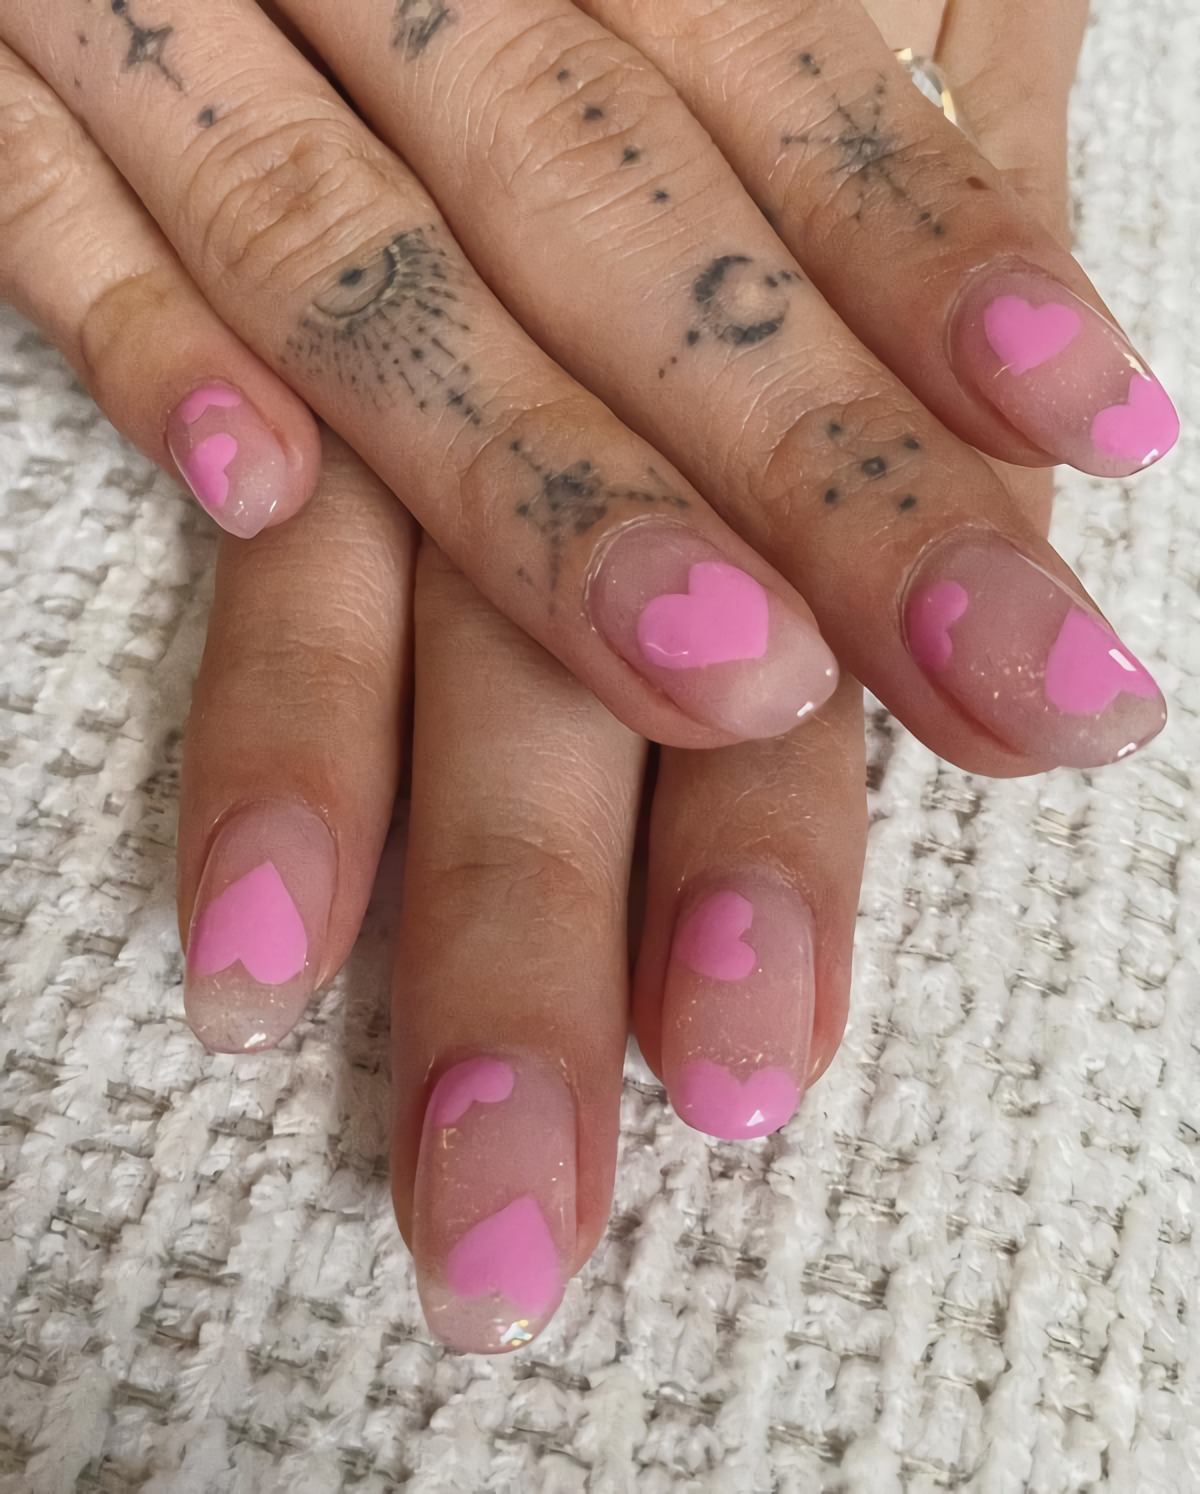
Technique 3: Perfectly Tiny Heart Art
Drawing a tiny, symmetrical heart is a test of a steady hand. The most reliable way is what we call the “Two-Dot Method.” Using a small dotting tool, place two identical dots of polish right next to each other. Then, with a super fine liner brush (we’re talking bristles that are only a few millimeters long), gently pull the polish from the bottom of each dot down to a single point. Voila, a perfect heart.
Here’s a little challenge for you: Try it right now! Grab a piece of paper and a pen. Just practice making two dots and dragging them down. It’s all about building that muscle memory before you even touch a bottle of polish.
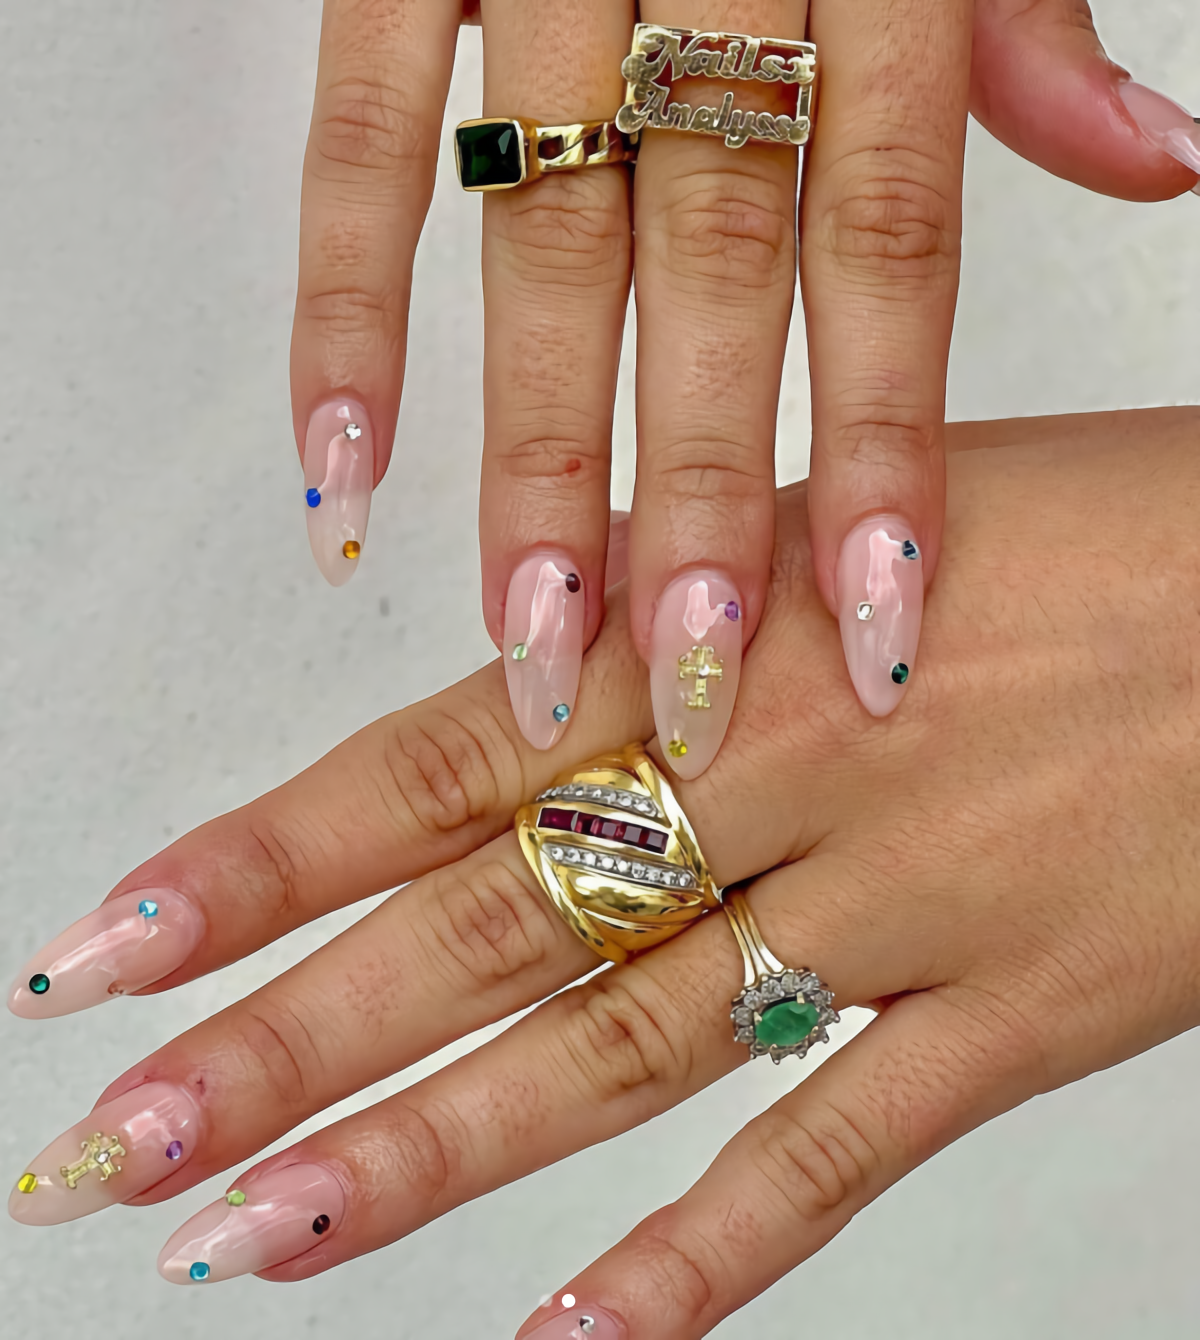
Technique 4: Making Gems & Charms Actually Last
Nothing is worse than a rhinestone falling off into your food. For a gel manicure, we embed stones in a thick gel to make sure they stay put for weeks. Search online for a “Rhinestone Glue Gel” or “Gem Gel.” A good one will cost about $10-$20 and is a total game-changer.
We place a small bead of the thick gel on the nail, set the stone into it, and cure. The final, crucial step is sealing it. Using a liner brush, we trace around the base of the stone with a top coat to seal all the edges. A word of advice: never paint top coat over a quality crystal! It completely dulls the facets and makes it look like a cheap piece of plastic. This method secures the stone without sacrificing any of its beautiful sparkle.
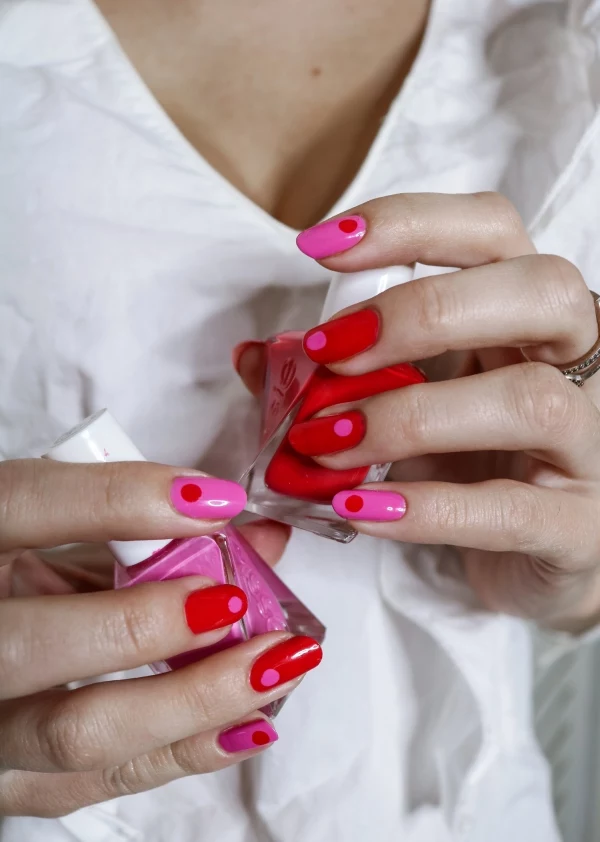
Putting It All Together: The Art of the Mix
Some of the most stunning manicures combine several different finishes and techniques. For a Valentine’s theme, you could do a “skittles” look where each nail is different but cohesive:
- Thumb and Ring Finger: A soft pink base with a red aura effect.
- Index Finger: A bold, solid red creme.
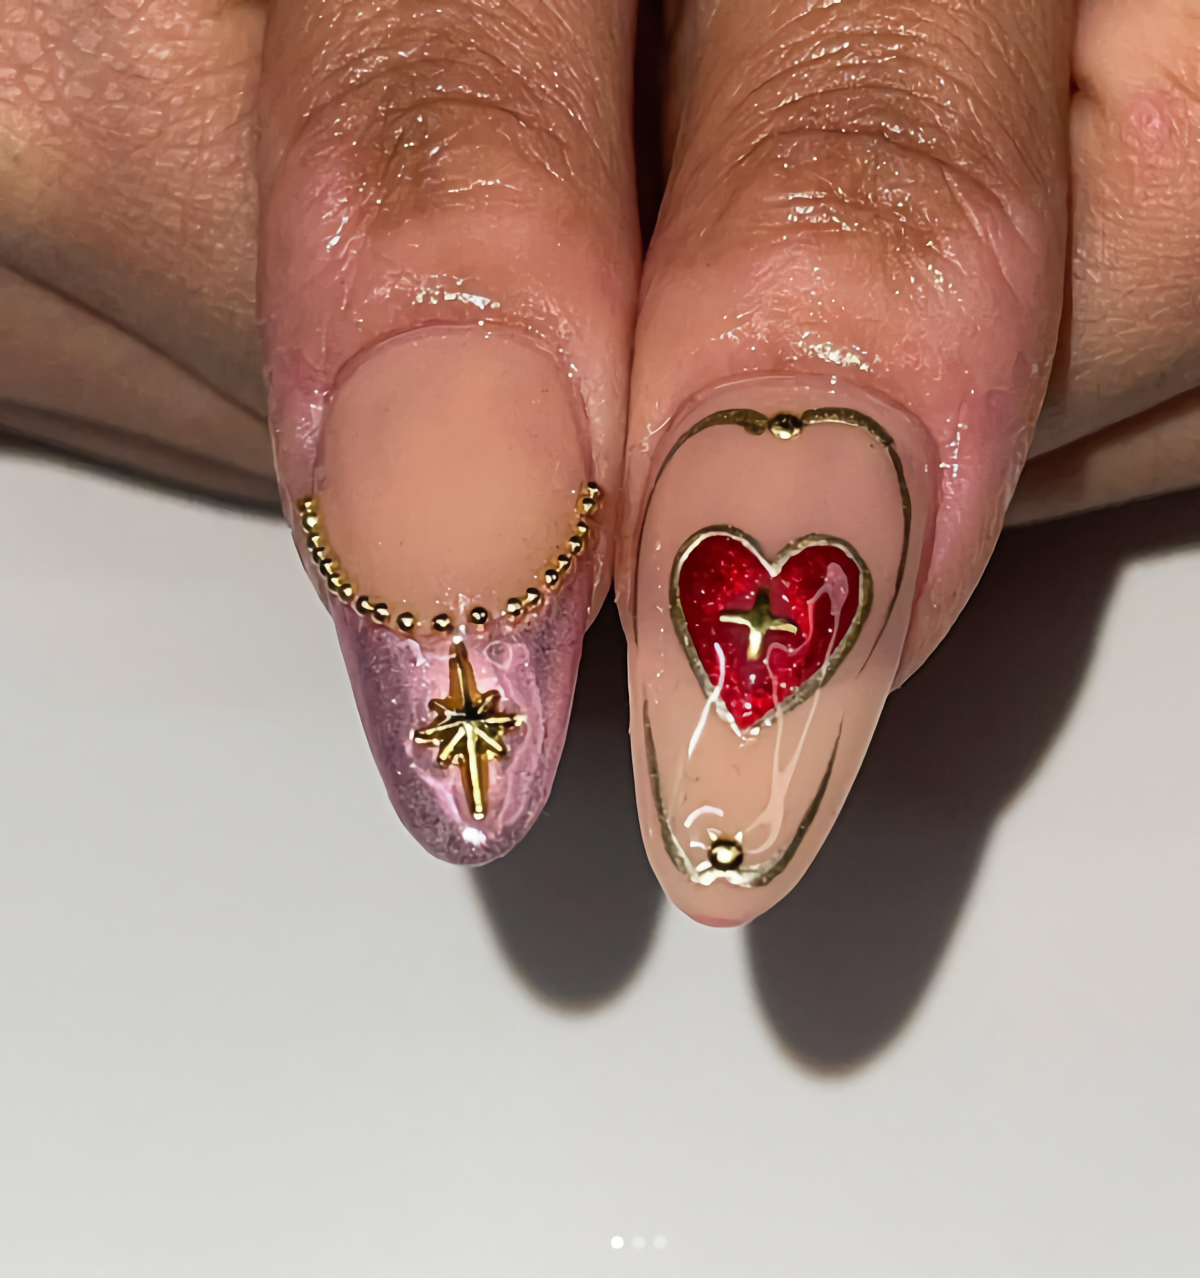
- Middle Finger: A nude base with a matte top coat, featuring a single tiny, shiny red heart near the cuticle. The contrast between matte and shiny is so sophisticated.
- Pinky Finger: A full-coverage, dazzling pink chrome.
This kind of set is a real showcase of skill and a great way to express your personal style.
Final Words on Safety and Aftercare
A beautiful manicure should never, ever come at the cost of your health. If you’re going to a salon, make sure they use properly sterilized metal tools—meaning they come from a sealed pouch that was processed in a medical-grade autoclave. Files and buffers should be brand new for every client.
And your job starts when you leave the chair! Use cuticle oil every single day. I can’t say this enough. It keeps your nails and the surrounding skin hydrated and flexible, which helps prevent lifting and breakage. And please, treat your nails like jewels, not tools. Don’t use them to open soda cans or scrape off labels. Whether you’re a DIYer or a salon regular, remember that patience and precision are your best friends. A healthy nail is the foundation for everything else, so start there, and the beautiful art will follow.
Inspiration:
Want that perfect, mirror-like chrome finish for an edgier Valentine’s look?
The secret is a specific layering technique. Pros start with a cured gel color (black creates the most intense effect). Then, they apply and cure a ‘no-wipe’ gel top coat—this is the non-negotiable step, as chrome powder won’t adhere properly to a standard tacky layer. A tiny amount of cosmetic-grade chrome powder is then firmly burnished onto the nail with a silicone tool or a small sponge applicator until it reflects like liquid metal. After dusting away any excess, a final layer of top coat seals the deal for a durable, futuristic shine.


