Thinking About Botox or Fillers? An Insider’s Guide to Doing It Right
I’ve been in the world of cosmetic medicine for a long time—long enough to see fads explode and then fizzle out. But one thing has always stayed the same: that deep-down desire we all have to just feel good in our own skin. Honestly, my job isn’t about creating a whole new person. It’s about using my medical background and a bit of an artistic eye to bring back some confidence and just enhance what’s already there.
In this article
Over the years, I’ve held the hands of some very nervous first-timers and popped the bubbly to celebrate amazing results with my regulars. But I’ve also had to manage complications and learn the kinds of hard lessons you only get from being in the trenches. It’s so much more than just sticking needles in faces.
We are medical professionals first and foremost. This entire practice is built on a solid foundation of facial anatomy, how drugs work in the body, and the science of skin. We’re trained to assess, plan, and perform treatments safely. And you know what else we’re trained to do? Say no. A truly good provider will be honest with you when a treatment isn’t the right fit, or if your goals might be a little unrealistic. So, I want to pull back the curtain and give you the real inside scoop on these common procedures, so you can make choices that are informed, safe, and right for you.

First Things First: The Consultation Is Everything
Before any needles, lasers, or peels get anywhere near your face, we need to talk. A lot. A thorough consultation is, without a doubt, the most important part of this whole journey. If a clinic tries to rush you through this part? That’s a massive red flag. Seriously, just walk away.
For any new patient, I block out at least 45 minutes for our first chat. We don’t just talk about your wrinkles; we talk about your life and your health.
This is your chance to interview your potential provider, too. Don’t be shy! Here are the questions you absolutely should be asking:
- “Can you walk me through your process for a new client?” They should mention a deep dive into your medical history. I need to know about any allergies, health conditions (like autoimmune disorders), and every single medication you take. Something as common as a blood thinner can ramp up your risk of bruising. Honesty here is non-negotiable for your safety.
- “What do you think is realistically achievable for me?” This opens the door to talk about your goals and, just as importantly, your fears. Bringing in photos can be a good starting point, but it’s my job to manage expectations. I might have to explain that the person in the photo has a different bone structure that filler simply can’t mimic. The goal is always the best version of you.
- “What are the biggest risks of this procedure, and how are you prepared to handle them?” For fillers, a great follow-up is, “Do you have hyaluronidase in the office right now?” (That’s the emergency dissolving agent). If they hesitate on either of these, it’s a no-go.
- “Can I see some before-and-after photos of your actual clients?” Look for results that look natural and refreshed, not ‘done’.
During this time, I’ll be doing a full facial analysis, asking you to smile, frown, and raise your brows. This shows me your unique muscle movements. I’m also looking at your skin quality, where you’ve lost volume, and your facial symmetry. This is where I might notice that the lines on your forehead are actually from your eyelids feeling a bit heavy. If we just treat the forehead, it could make that heaviness worse. We have to treat the cause, not just the symptom.

Based on all this, I’ll suggest a plan. And it might be phased! Sometimes, we start with improving skin quality with microneedling before we even think about filler. I’ll lay out all the risks, benefits, realistic downtime, and, of course, the costs. There should be zero pressure to decide right then and there. This is a medical procedure, and the consultation is our number one safety check.
Starting with the Canvas: Peels and Microneedling
You can’t build a beautiful house on a shaky foundation, right? The same goes for your face. Healthy, glowing skin is the ultimate base for everything else. That’s why I often start clients with treatments that work on the canvas itself. Two of my favorites are chemical peels and microneedling.
Chemical Peels: A Fresh Start for Your Skin
The words “chemical peel” can sound a little scary, I get it. But it’s a very controlled process where a specific acid solution is applied to the skin to encourage old, dead cells to shed. This controlled ‘injury’ kicks your body’s healing response into high gear, telling it to produce more collagen and generate fresh, new skin. The result? Smoother texture, more even skin tone, and a serious glow.

Not all peels are created equal. We choose the right acid for your skin and goals. For surface-level stuff like dullness or fine lines, we might use a lighter glycolic or lactic acid peel. For someone struggling with acne and clogged pores, an oil-soluble salicylic acid peel is a lifesaver because it gets deep into the pores. For more significant concerns like deeper lines or acne scars, a stronger TCA peel might be the answer, but it comes with more downtime.
Good to know: A light, ‘lunchtime’ peel might cost you between $150 and $300. Deeper peels can be more. Since you’ll likely need a series for the best results, ask about package pricing! Buying a series of 3 or 4 can often save you 15-20%. As for pain, it’s more of a tingly, spicy sensation than outright pain—maybe a 3/10 on the pain scale.
What to expect right after: You’ll likely be a bit red and feel tight, like you have a mild sunburn. Over the next 3-7 days, you’ll experience some flaking. The golden rule? Do NOT pick at it! Let your skin shed on its own.

Microneedling: Building Better Skin from the Inside Out
If a peel works from the top down, microneedling works from the bottom up. We use a device with super-fine, sterile needles to create thousands of tiny, controlled micro-injuries in the skin. Your body senses these little channels and launches a powerful healing cascade, stimulating new collagen and elastin—the proteins that make skin firm and bouncy.
This isn’t an overnight miracle. The real magic happens over the next 4 to 6 weeks as that new collagen network gets built. We can even supercharge the treatment by applying Platelet-Rich Plasma (PRP), derived from your own blood, during the procedure to boost the healing process.
Heads up! Please, please, please avoid at-home ‘derma rollers’. I’ve seen the damage they can do. The needles are often poor quality and tear the skin rather than making a clean puncture. Plus, they’re almost impossible to sterilize at home, which is a huge infection risk. This is a procedure that should only be done by a trained pro.
The practical stuff: A microneedling session typically runs from $300 to $700, depending on your location and if you add PRP. Pain-wise, we use a strong topical numbing cream, so most people find it very tolerable, maybe a 2-4/10. Afterward, you’ll look and feel like you have a moderate sunburn for about 24-48 hours. And just like with peels, clinics almost always offer package deals.
Tackling Expression Lines: Neurotoxins
Every time you squint, frown, or show surprise, your facial muscles contract, creasing the skin above them. Over the years, those creases can decide to stick around for good. Neurotoxins (you’ve probably heard of the most famous brand, Botox) are a type of medicine that temporarily tells those specific muscles to relax. They don’t erase deep-set lines completely, but they soften them dramatically and prevent them from getting worse.
The science is pretty cool: the product blocks the nerve signal from reaching the muscle. The nerve is still talking, but the muscle isn’t listening. It just chills out. The effect is very localized and wears off naturally in about 3 to 4 months.

This is where art truly meets science. A few millimeters can be the difference between a gorgeous brow lift and a droopy eyelid. That’s why you’re paying for the injector’s expertise, not just the product.
So, how much does it cost? This is the number one question! Pricing is usually “per unit,” and a unit can cost anywhere from $12 to $20. Treating the ’11s’ between your brows, for example, typically takes around 20 units, so you can expect to pay in the ballpark of $240 to $400 for that area. The forehead might take 10-20 units, and crow’s feet another 12-24 units (total for both sides).
And does it hurt? Honestly, not much. The needles are teeny-tiny. It feels like a quick, tiny pinch. Maybe a 2/10 on the pain scale. The whole thing is over in minutes.
Immediate Do’s and Don’ts: For the first 4 hours, DO stay upright (no naps!) and DON’T rub the treated areas. For the rest of the day, DON’T do a sweaty workout, go in a sauna, or get a facial. You want the product to stay exactly where it was placed.
Bringing Back Volume: Dermal Fillers
As time goes on, our faces naturally lose volume. The fat pads in our cheeks shrink and slide down, and we even lose a bit of bone. This is what causes hollows under the eyes, flattened cheeks, and those deeper folds around the mouth. Dermal fillers, which are usually a gel made of hyaluronic acid (HA), are used to restore that lost volume, smooth lines, and contour the face.
I approach filler with a ‘structural support’ mindset. Instead of just chasing one line, I look at the whole picture. For instance, if you’re bothered by your smile lines, the real culprit is often volume loss in your cheeks. By adding a bit of firm filler to the cheekbone, I can lift the whole mid-face, which softens the smile line in a much more natural-looking way.
The investment: Filler is priced “per syringe,” and the cost can range pretty widely, from about $700 to over $1,200 depending on the type of filler and the clinic. Restoring volume in the cheeks might take one syringe. A plan for full-face balancing could involve 3-4 syringes over several appointments. As for pain, we use numbing cream and many fillers have lidocaine mixed right in, so it’s more of a weird pressure sensation than sharp pain.
A common rookie mistake: Getting lip filler a week before a wedding or a big event! Oh, please don’t do this. You have to plan for swelling and potential bruising to fully resolve, which can take a good 2 to 4 weeks. Give yourself that buffer time!
The Most Important Safety Talk: We need to talk about vascular occlusion. It’s rare, but it’s the most serious risk with fillers. It happens if filler accidentally gets into a blood vessel, blocking blood flow. The signs are immediate and distinct: sudden pain and a pale, blotchy area of skin. This is a true medical emergency. That’s why every injector MUST have an enzyme called hyaluronidase in their office at all times. It’s an emergency drug that dissolves HA filler instantly. I check my emergency kit every single day. This is why you go to a medical professional—we’re trained to recognize this and fix it immediately.
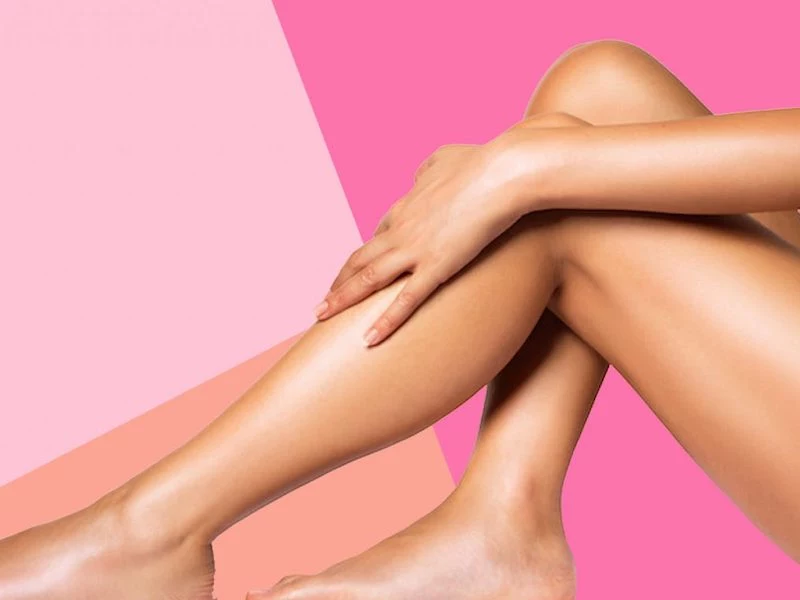
For the Body: Laser Hair Removal
Laser hair removal is a fantastic long-term solution for unwanted hair, but the science is more complex than most people think. The laser emits a beam of light that gets absorbed by the pigment (melanin) in the hair follicle. That light turns into heat, which damages the follicle so it can’t grow new hair. Because it targets pigment, it works best on dark hair against lighter skin and isn’t effective on white, grey, or very light blonde hair.
Hair grows in cycles, and the laser only works on hair in its active growth phase. That’s why you need a series of treatments—usually 6 to 8 sessions, spaced 4 to 6 weeks apart—to catch all the hairs as they cycle through.
Safety is all about the right tool for the job. For lighter skin tones, certain lasers are very effective. But using those same lasers on darker skin is dangerous and can cause burns or pigmentation. For my clients with darker skin, I exclusively use a different type of laser (like an Nd:YAG) with a longer wavelength that bypasses the pigment in the skin and safely targets the follicle. A pre-treatment test patch is non-negotiable to ensure the settings are safe.
The Cost: This varies wildly by area. A small area like the upper lip might be $75-$150 per session, while a large area like the full legs could be $400-$600+. Again, always look for package deals to save money.
Choosing Your Partner in This Journey
Look, these treatments can be an amazing tool for self-care. But they are medical procedures with real risks. The single most important decision you’ll make is choosing your provider. Look for a licensed medical professional with specialized training in aesthetics—think a Registered Nurse, Nurse Practitioner, or Doctor. Ask to see their work. Ask them the tough questions we talked about. And trust your gut.
A great provider is a partner. We listen, we educate, and we will always, always put your health and safety above making a sale. My goal is for you to walk out of my clinic feeling like the best, most refreshed version of yourself. The investment isn’t just in a syringe of product; it’s in the expertise, artistry, and care of the person holding it. And that’s a responsibility I take to heart every single day.


