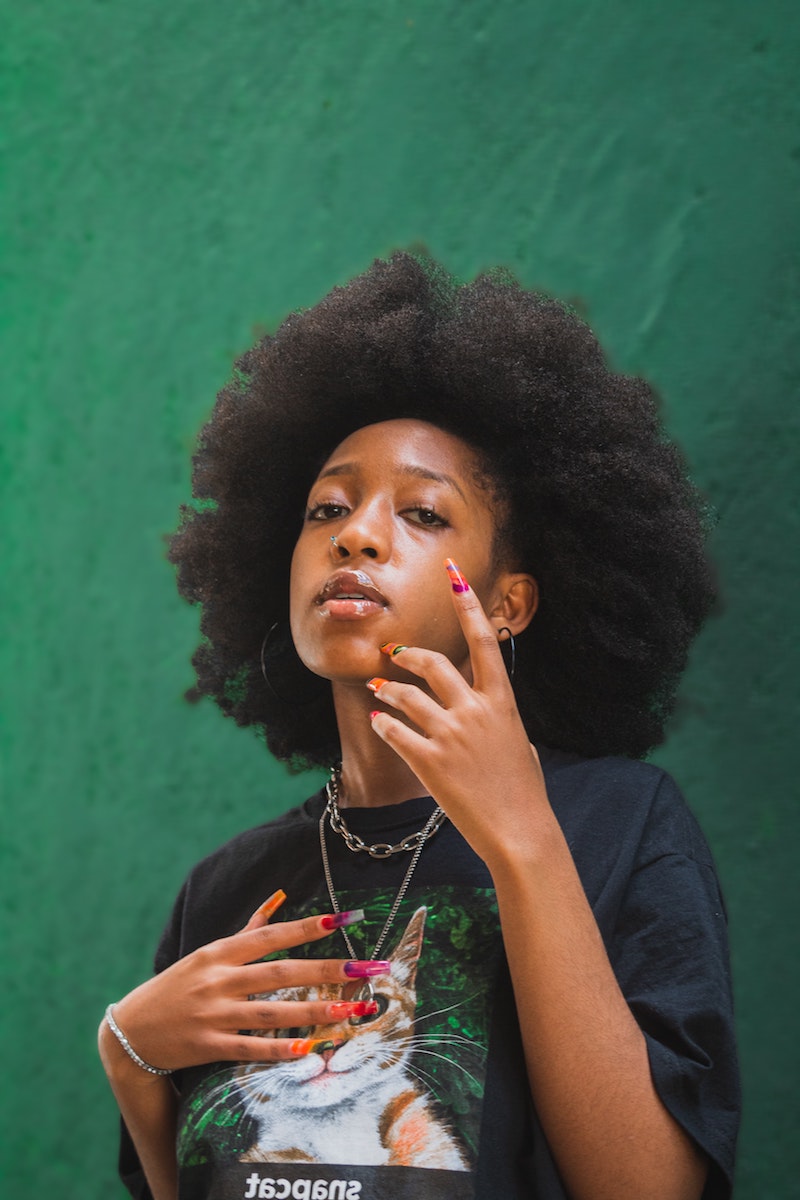
Your Guide to Gorgeous Spring Nails That Actually Last
You can always feel it in the salon when spring hits. After months of deep reds and moody blues, everyone suddenly gets the itch for something fresh and hopeful. It’s like a collective exhale. Clients start chatting about gardens, upcoming weddings, and vacation plans. But this shift is about more than just switching up colors; it’s about getting hands ready for a season where they’ll be way more visible and active.
In this article
For a nail tech, this means our focus has to be on more than just pretty designs. We need to create durable, healthy nails that can handle all that gardening, swimming, and fun in the sun. It’s a philosophy I learned early on: the art is the last 10%, but the first 90% is all about structure and preparation. That single idea has been the foundation of my entire career.
So, let’s pull back the curtain. This guide is all about the professional methods that make spring nail art look incredible, last for weeks, and most importantly, protect the health of your natural nails. We’re going way beyond the fleeting trends.
First Things First: Healthy Nails are Non-Negotiable
Before we even dream of pastels or floral art, we have to talk about the canvas—the natural nail and the skin around it. Spring and summer activities mean more moisture and stress on your hands, and a healthy foundation is the only thing standing between you and a world of chips, breaks, and lifting.
Why Healthy Nails Matter
Your nail is made up of tightly packed layers of keratin. When water gets in, these layers can swell and separate, which leads to that annoying peeling. The sun can also make them extra dry and brittle. This is why professional prep work is so meticulous.
Our goal is two-fold: gently remove any non-living tissue from the nail plate and make sure the surrounding skin is hydrated. Good to know: that little ridge of skin at the base of your nail is the eponychium—it’s living tissue and should never be cut! The cuticle, on the other hand, is the paper-thin layer of dead skin that sticks to your nail. THAT’s what we can safely remove. Getting it off creates a clean surface for gel to stick to, which is the secret to preventing lift.
I’ve seen some horror stories from improper prep. A new client once came to me with red, angry skin and deep gouges in her nails. Her last tech had used a super aggressive sanding band to “clean” her cuticles, damaging the nail matrix where new nail cells grow. It took six months of gentle care, protective builder gel, and a strict cuticle oil routine to fix the damage. This stuff isn’t just for looks; it’s about safety.
Pro Prep Techniques That Make a Difference
In the salon, we use a combination of an e-file with very specific bits and high-quality nippers. This is a skill that takes hundreds of hours to get right.
1. Soften Up (The Right Way): We skip the water soaks because they saturate the nail and can mess with gel adhesion. Instead, we use a pro-grade cuticle softener that gently breaks down the dead tissue without over-hydrating the nail itself.
2. E-File Work: Using an e-file on a low speed (think 5,000-7,000 RPM), we use a fine-grit diamond flame bit to carefully lift the cuticle. The key is to use zero pressure and let the bit do the work. You should never feel any heat or vibration. A quick tip for anyone learning: look for bits with a red or yellow ring. That colored band usually means it’s a fine or extra-fine grit. Avoid the green or black ones for natural nail prep—they’re far too coarse.
3. Nipping with a Purpose: We only nip what is clearly lifted, dead skin. This is for true hangnails or that flaky bit of cuticle, not the living eponychium. Over-nipping is a huge cause of irritation.
4. The Final Cleanse: After shaping, we scrub the nail plate with 99% isopropyl alcohol. Why 99%? It dehydrates the very top layer of the nail more effectively and evaporates lightning-fast without leaving residue. The higher water content in standard 70% alcohol can actually interfere with a perfect gel bond.
Oh yeah, and cuticle oil is NOT optional. I tell every single client to use it twice a day. It keeps your skin flexible (bye, hangnails!) and even penetrates the enhancement to keep your natural nail from getting brittle underneath. A good quality oil with jojoba as a main ingredient is your best bet—its molecules are small enough to actually get the job done. You can find a great one for about $10-$20, and it’ll last you ages.
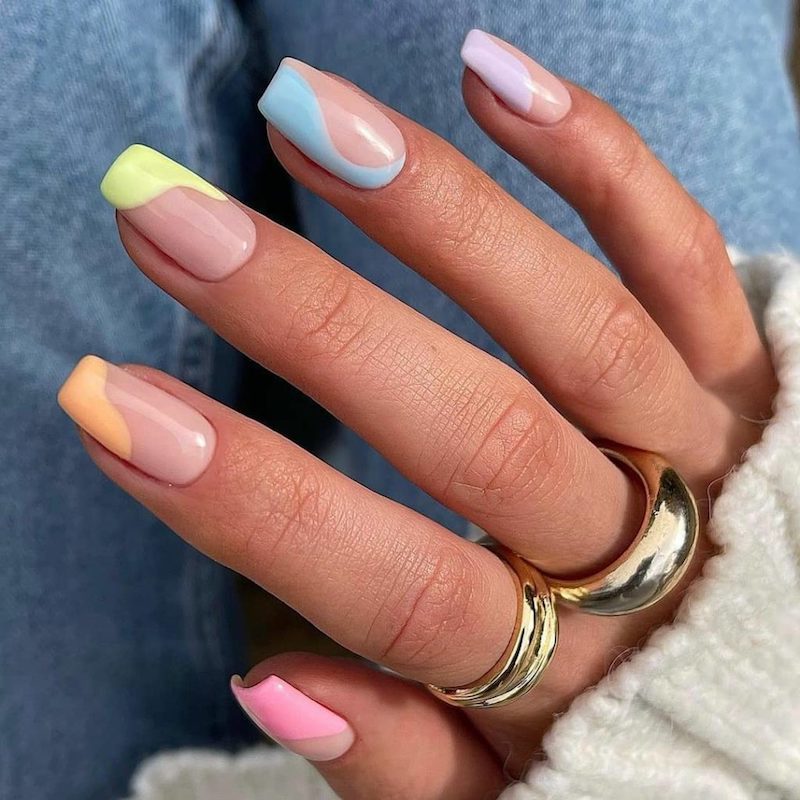
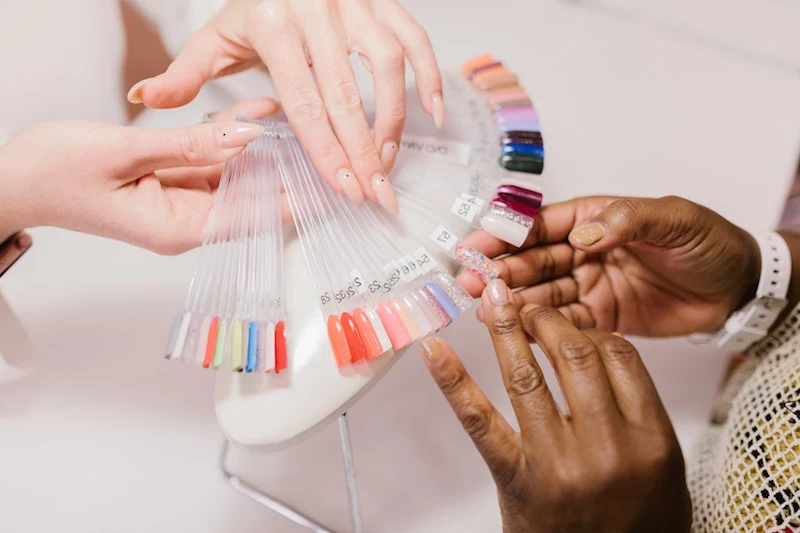
Tackling Tricky Spring Colors
Let’s be honest, those beautiful pastel polishes can be a nightmare to apply. They have a reputation for being streaky, and there’s a bit of science behind why.
The Pastel Pigment Problem
Pastels are packed with titanium dioxide—it’s the white pigment that gives them that soft, opaque look. But it’s heavy, and it loves to settle at the bottom of the bottle. If it’s not mixed properly, you get streaks. Neons have their own issues; their fluorescent pigments can be sheer and cure poorly if the coat is too thick.

Here’s how we get that flawless finish:
- Mix, Don’t Shake: I roll the bottle firmly between my palms for a good minute. Shaking creates tiny air bubbles that can cause pits in your final coat.
- Use a Smart Base: For really sheer pastels or neons, we often apply a single, thin coat of an opaque white or a soft nude first. It creates a perfect canvas, meaning you need fewer coats of the tricky color. Less bulk is always better.
- Float, Don’t Press: The trick is to float the color onto the nail. I get a decent bead of polish on the brush and guide it down with almost no pressure. If you press down, the bristles dig in and drag the pigment, causing streaks. Let it sit for a few seconds to self-level before curing.
- Flash Curing is Your Friend: For a finicky color, I’ll have the client pop their finger in the lamp for a quick 10-second “flash cure” right after I apply the polish. This sets it just enough to prevent shrinking or pooling. Once all five fingers are done, we do the full 60-second cure. Heads up! Under-curing is a primary cause of gel allergies, so never, ever skimp on the full cure time.

Modern Takes on Timeless Spring Designs
French manicures and florals are spring staples. But the way we do them has gotten a serious upgrade. Here’s how we get those crisp, clean looks that everyone wants.
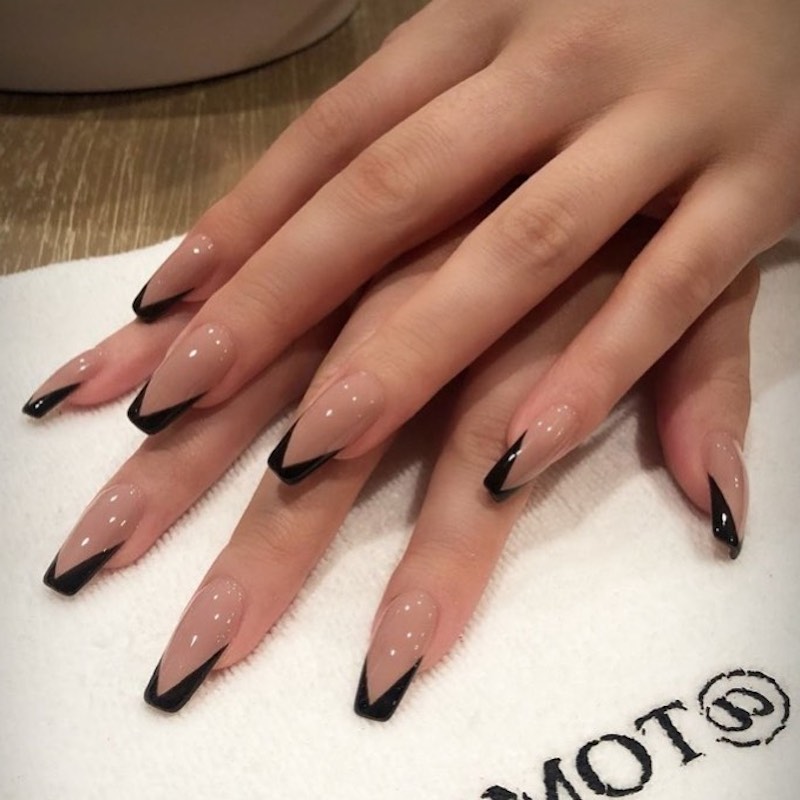
The Perfect French Tip (The Easy Way)
A deep, sharp smile line is a true sign of skill. And while I can still paint them by hand with a liner brush, we have much faster tools for a perfect classic French.
What You’ll Need:
- Your nude base color (cured)
- Your chosen color for the tip
- A silicone nail stamper (these are cheap, maybe $5-$10 online or at a beauty supply store)
My go-to method these days is the stamper trick. After the nude base is cured, I’ll paint a little bit of the tip color onto the squishy silicone stamper. Then, I gently press the edge of the nail into the stamper at a 45-degree angle until I get the smile line as deep as I want it. Pull straight back, and you have a perfect curve. A quick swipe with a cleanup brush dipped in alcohol gets rid of any smudges on the skin, and it’s ready to cure. A colorful French tip usually adds about $10-$15 to the service price.

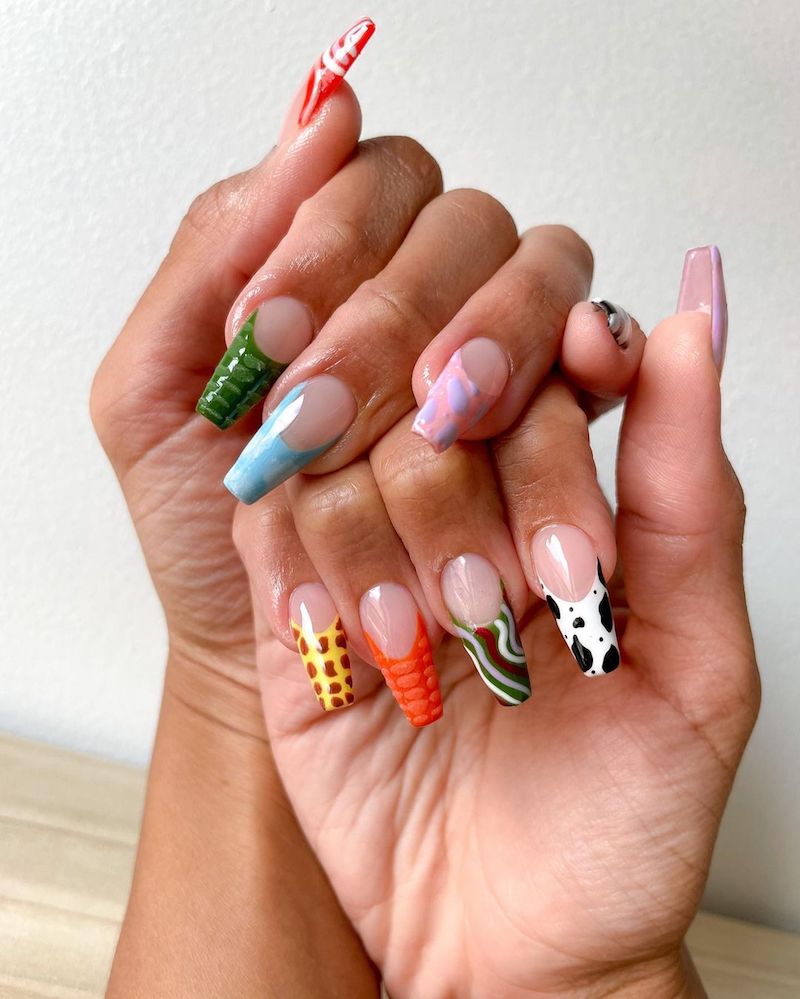
Hand-Painted Florals for Every Skill Level
Floral art can go from a 5-second daisy to a 15-minute masterpiece. The key is using the right product. We ditch regular gel polish for intricate art and grab highly pigmented art gels from pro brands like Kokoist or The Gel Bottle. Their thicker consistency means they stay exactly where you put them.
For a Simple Daisy (Time: ~1 min/nail, Price: +$3-5/nail):
- Tools: A dotting tool.
- How-To: Place a yellow dot for the center. Then, using a bigger dotting tool, place five white dots around it. Before you cure, take the small end of the tool and gently drag each white dot inward to create a petal shape. Cure, top coat, and you’re done!
For an Advanced Rose (Time: ~15 min/nail, Price: +$15+/nail):
- Tools: A fine liner brush and a small flat brush for blending.
- How-To: This is all about layering. I start by painting a dark pink “C” shape for the rose’s center and cure it. Then, I add larger, curved petals around it with a medium pink, leaving space between them, and cure again. Finally, I add highlights with a light pink or white. Curing between each layer is what creates that beautiful depth. Because of the time and skill involved, this kind of art is priced at a higher tier, and it’s important to be upfront about that.
Advanced Pro-Level Techniques
For those who love longer nails or more complex patterns, we have to think like engineers. It’s all about structure and mastering your materials.
The Tortoiseshell Manicure
Everyone loves a good tortoiseshell, but it’s so easy to get wrong. The secret to making it look deep and realistic instead of like a muddy mess? Layering.
1. Start with one coat of a sheer amber or honey-colored gel. Cure it. 2. Using a dark brown or black gel, add some random, irregular splotches. Don’t cover more than a third of the nail. Before curing, use a clean brush to gently tap and blur the edges. Cure. 3. Here’s the magic step: apply another full coat of the sheer amber gel over everything. This is what creates that gorgeous depth. Cure. 4. Add a few more dark splotches, placing them in different spots. Blur the edges again. Cure. 5. Finish with a glossy top coat to make it all pop.
A common mistake I see is the ‘muddy tortie.’ From my experience, this almost always happens because people skip that second sheer amber coat. That’s the step that pushes the first layer of splotches back, creating a 3D effect. Without it, everything just sits on one level and looks flat.
Safety First: When to DIY and When to See a Pro
My number one job is to keep my clients safe. The boom in at-home gel kits has, unfortunately, led to a huge increase in preventable issues like gel allergies (contact dermatitis).
The allergy risk is very real. Gel polish contains acrylates, which can cause a reaction after repeated contact with uncured gel on the skin. This is why pros are so obsessed with keeping your cuticles clean. If we get a drop of gel on the skin, we wipe it off before it goes in the lamp. I once had to turn away a young woman who had developed a severe allergy from doing her own gels; her fingers were covered in blisters. It’s almost always preventable with clean, careful technique.
And here’s a major red flag to watch for in any salon: if your tech pulls a used, dusty-looking file out of a drawer, you should leave. Seriously. Non-metal tools like files and buffers must be brand new for every single client, period. Metal tools, like nippers and e-file bits, should be sterilized in a medical-grade autoclave between clients.
While a simple manicure with regular polish at home is totally fine, you should always leave these services to a licensed professional:
- Acrylic or hard gel extensions
- Structured gel manicures (builder gel)
- Any e-file work on the natural nail
The cost of a professional service isn’t just for the pretty colors. It’s for the expertise that keeps your nails healthy and safe for years to come.

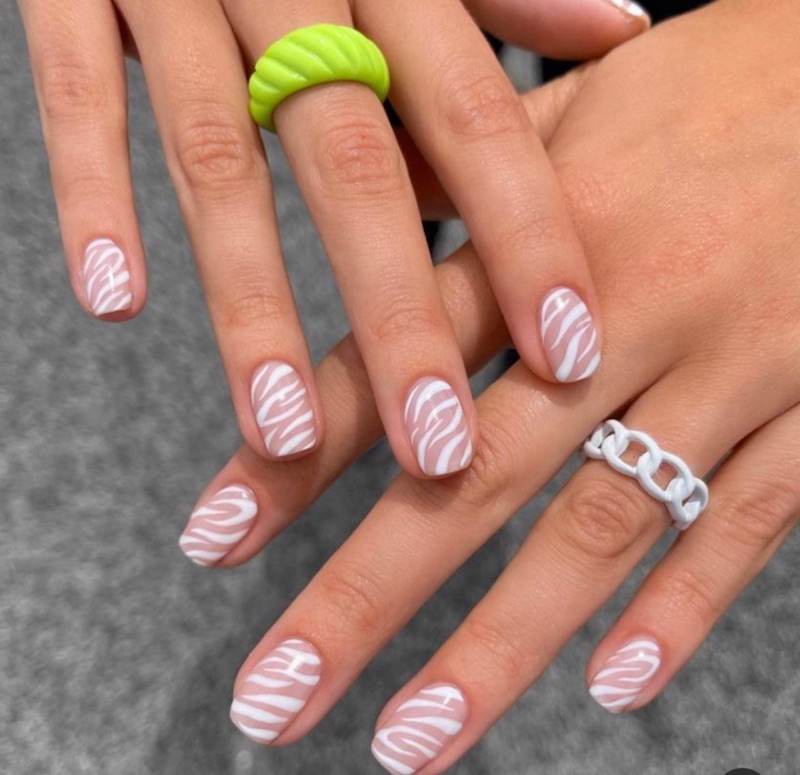
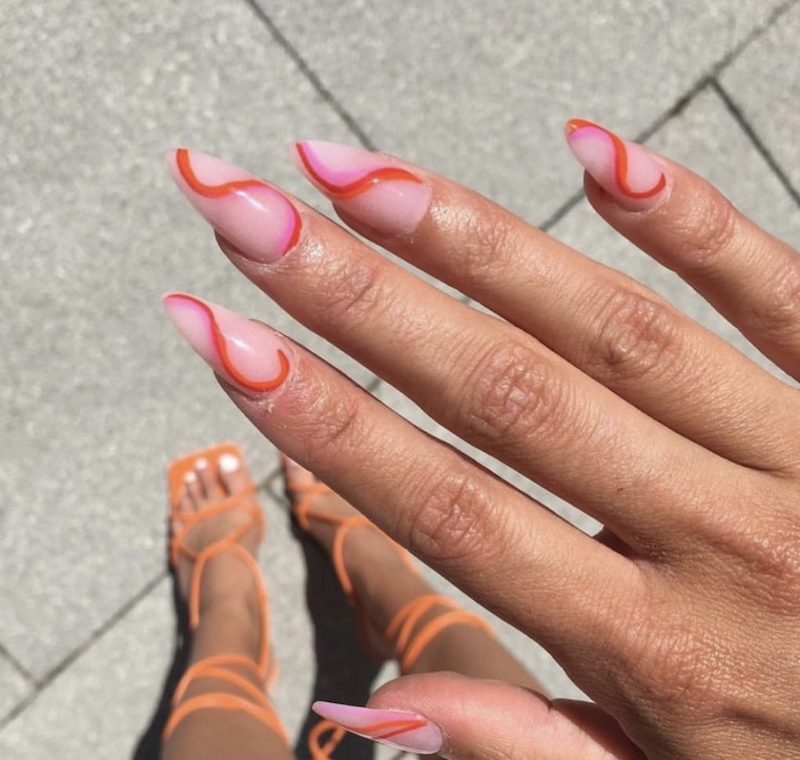
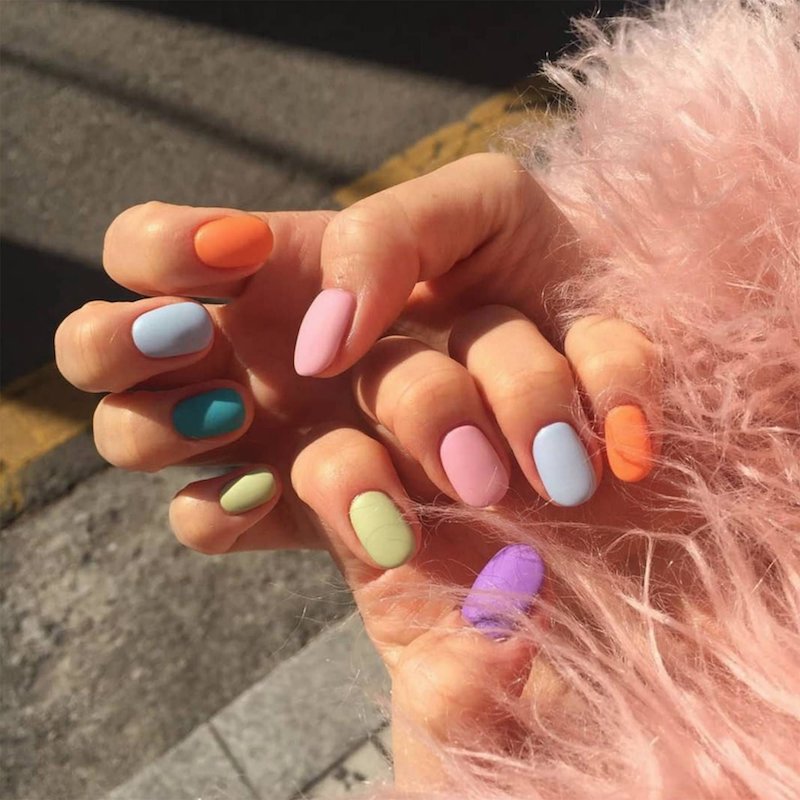
Inspirational Gallery


Nearly 70% of a manicure’s longevity is determined by the preparation of the nail plate and the application of the base coat.
This statistic from industry studies highlights why professionals are so meticulous before color is even opened. It’s not just about cleaning; it’s about creating the perfect adhesive surface. A quality bonder or pH-balancing dehydrator, like Young Nails’ Protein Bond, creates a ‘double-sided tape’ effect for your polish, drastically reducing the chance of lifting or chipping as you enjoy the active spring season.

Ever notice your favorite pastel shade looking a little… different after a week? The secret weapon you’re missing is a UV-protective top coat.
- It shields light colors like baby pinks, lavenders, and mints from yellowing due to sun exposure.
- It prevents the glitter in specialty polishes from losing its prismatic sparkle.
- It keeps whites brilliantly crisp, essential for modern French manicures or floral details.
The key is a non-yellowing formula, a staple in professional gel systems but also available in traditional polishes like Zoya’s Armor Top Coat.
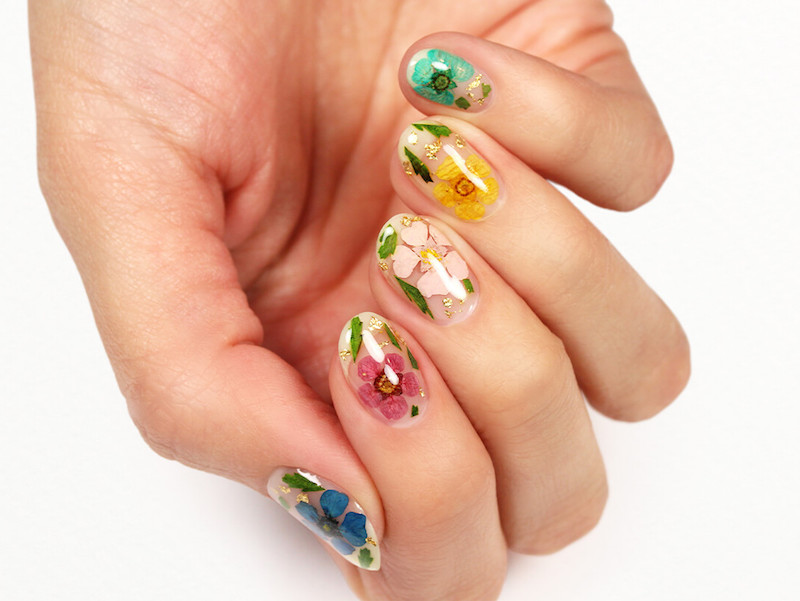
The problem: You love the look of delicate floral nail art, but your hands are always busy with gardening or spring cleaning.
The solution: Ask your technician for encapsulated designs. This technique involves painting the art directly onto a cured layer of builder gel (like The GelBottle Inc’s BIAB) and then sealing it under another clear layer before the top coat. The art is literally ‘inside’ the nail structure, making it impervious to scratches and wear. Your tiny daisies will look freshly painted for weeks.

The ‘Blush Nail’ trend is spring’s answer to quiet luxury. It mimics a natural, healthy flush, concentrating a sheer, rosy pink in the center of the nail and diffusing it outwards. The effect is subtle, sophisticated, and incredibly flattering. To get the look, apply a neutral base and then use a small makeup sponge to lightly dab a translucent pink, like OPI’s ‘Rosy Future’, onto the nail’s center before adding a top coat.
Can I get that chrome ‘glazed donut’ effect at home without gel?
Yes, you absolutely can! The trick is to use a specialized water-based top coat. After your color is almost dry (but still slightly tacky), apply a thin layer of a product like Maniology’s Smudge-Free Top Coat. Let it dry completely. Then, use a small eyeshadow applicator to gently rub a pearlescent chrome powder onto the nail. Finish with your regular, durable top coat to seal in the shine.

- Adds strength to prevent spring-activity-related breaks.
- Smooths over ridges for a flawless canvas.
- Offers a flexible yet durable finish.
The secret is swapping your regular polish for a high-performance long-wear system. Systems like CND Vinylux or OPI Infinite Shine use a specific base coat, color, and top coat that work together, curing to a harder finish with exposure to natural light—no UV lamp required.
Don’t shake, roll.
It’s a simple mantra from nail professionals. Vigorously shaking a bottle of polish introduces air bubbles, which can cause a bumpy application and lead to premature chipping. Instead, gently roll the bottle between your palms. This warms the formula slightly and mixes the pigments perfectly without creating those pesky bubbles.

Builder Gel: A thick, viscous gel applied with a brush, creating a strong, durable apex that protects the natural nail. Ideal for adding length or reinforcing weak nails before applying spring colors.
Rubber Base: A more flexible, soak-off gel base coat with a rubber-like texture. It’s perfect for adding strength and durability to a natural nail manicure without the rigidity or thickness of builder gel. It bends with the nail, preventing cracks.
For most people simply wanting a chip-proof spring manicure on their natural nails, a rubber base is the perfect modern solution.
To keep your cuticles hydrated and your manicure flexible (which helps prevent chipping!), a daily dose of cuticle oil is non-negotiable. Look for products rich in jojoba oil, as its molecular structure is small enough to penetrate the nail plate.
- Pro Tip: Apply CND SolarOil not just to the cuticle area but also underneath the free edge of your nail at night.
- Budget-Friendly: A simple bottle of pure jojoba oil from a health food store works wonders.