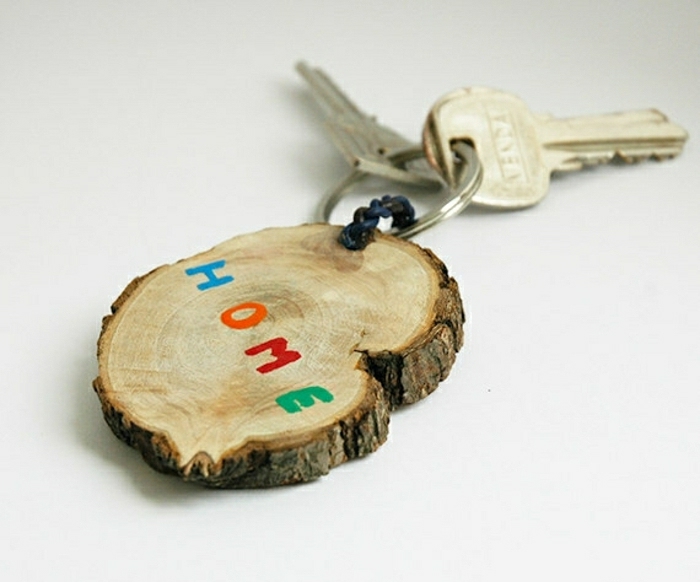
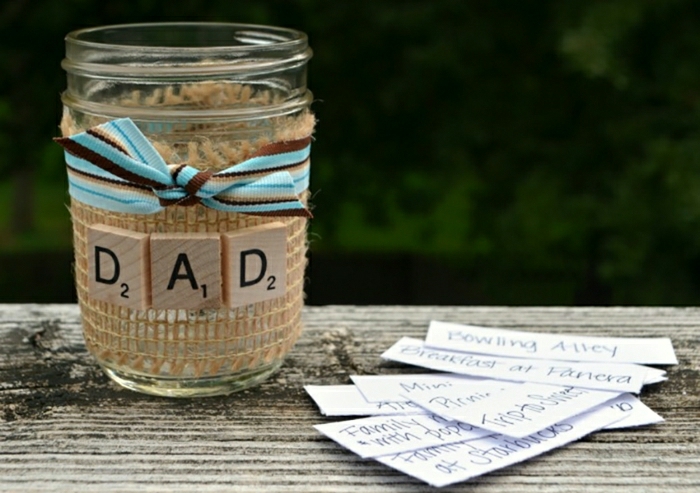
Handmade Gifts That Don’t End Up in a Drawer
I’ve spent years working with my hands—shaping wood, stitching leather, you name it. And I can tell you, the most rewarding things I’ve ever made weren’t the biggest or the fanciest. They were the gifts I made for people I care about. A store-bought gift is easy, sure. But something you make yourself? That carries a piece of your time, your focus, and your story.
In this article
When a special occasion like Father’s Day rolls around, it’s easy to get stuck in a rut and buy another gadget that’ll collect dust. I want to offer a different path. This isn’t about those flimsy kid’s crafts that fall apart. This is about using real, quality materials and solid techniques to create something with purpose. Something that can be used and appreciated for years.
Before we dive in, let’s talk about time and money, because that’s what everyone’s really thinking, right? If you’re short on time, you can knock out the Stamped Leather Keychain or the Custom Shaving Oil in under an hour for around $20-30 in initial supplies. If you’ve got an afternoon and a budget of about $40-60, the Leather Cable Organizer or the Geometric Wood Coasters are fantastic projects that teach core skills. The Hollow Book Safe is more about patience than money, but it’s a classic for a reason. Let’s build something cool.
Getting Started with Leatherwork
Leather can seem intimidating, but honestly, the basics are surprisingly easy to pick up. It’s a fantastic material—durable, flexible, and it just looks better with age. We’ll start with two super useful projects: a slick cable organizer and a classic stamped keychain. These will teach you the fundamentals of cutting, setting hardware, and finishing.
A Quick Word on Choosing Leather
You’ll see a bunch of terms out there, so let’s clear things up. “Faux leather” is just plastic. It’s cheap, which is fine for a test run, but it will eventually crack and peel. It just doesn’t have the soul of the real thing.
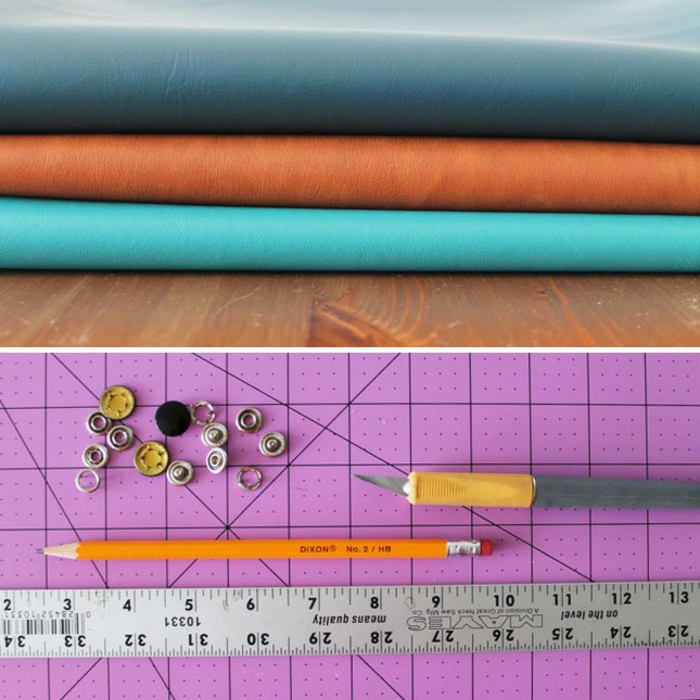
For these projects, what you want is vegetable-tanned leather, often called “veg-tan.” This type is treated with natural stuff like tree bark, which makes it firm and perfect for stamping. The best part? You don’t need to buy a giant, expensive hide. Check out online shops like Etsy or Tandy Leather. You can often find a bag of “veg-tan scraps” for $15-$25, which gives you more than enough material for several small projects. For the cable organizer, look for a thinner 2-3 ounce (0.8-1.2 mm) leather. For the keychain, a beefier 5-6 ounce (2.0-2.4 mm) piece is perfect because it takes a deep, satisfying stamp.
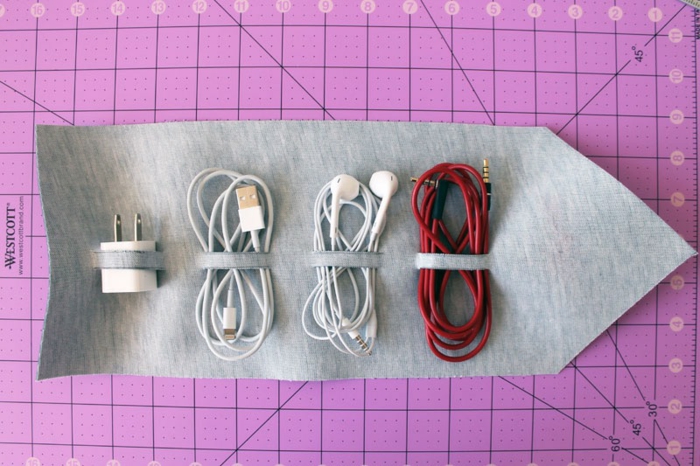
Project 1: The Leather Cable Organizer
This simple leather roll is a lifesaver for anyone tired of digging through a tangled mess of charging cables and headphones. This is a great beginner project that looks incredibly professional when you’re done.
Estimated Time: 2-3 hours
Estimated Cost: About $40-50 for a starter kit of tools you’ll use again and again. The leather for the project itself is only about $10.
Your Shopping List:
- A piece of 2-3 oz leather, roughly 12×6 inches
- A metal ruler (the kind with a cork back is great because it doesn’t slip)
- A rotary cutter or a very sharp utility knife (seriously, new blade!)
- A self-healing cutting mat
- A Line 24 snap setting kit (usually comes with the setter, anvil, and a few snaps for about $12 on Amazon or at a craft store)
- A poly or rawhide mallet (don’t use a metal hammer; it’ll wreck your tools)
- A pencil or scratch awl for marking
- Pro-Touch (Optional but Recommended): Gum tragacanth and a wood slicker for finishing the edges. This little combo costs about $15 and makes a world of difference.

Step 1: Cutting the Leather
Accuracy is key here. A crooked cut screams “I made this in my basement.” Lay your leather on the cutting mat. A rotary cutter is your best friend—it rolls right through for a clean edge. If you’re using a utility knife, a fresh blade is non-negotiable. A dull blade is how you get ugly, jagged cuts (and how you slip and cut yourself). Press your ruler down hard and make one smooth, confident pass. No sawing!
Step 2: Cutting the Cable Slots
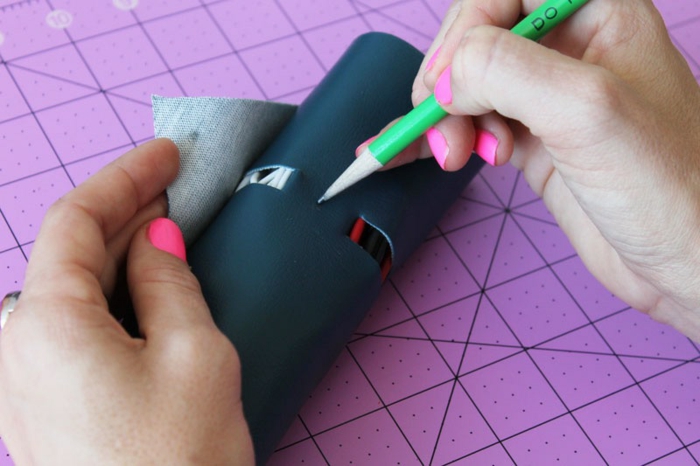
Lay your most-used cables on the leather to figure out the spacing. A good rule of thumb is to leave about 1.5 inches between them. Mark where you want your 1-inch long slots. Back on the mat, use your ruler and knife to press the tip through and make a clean, precise cut for each slot.
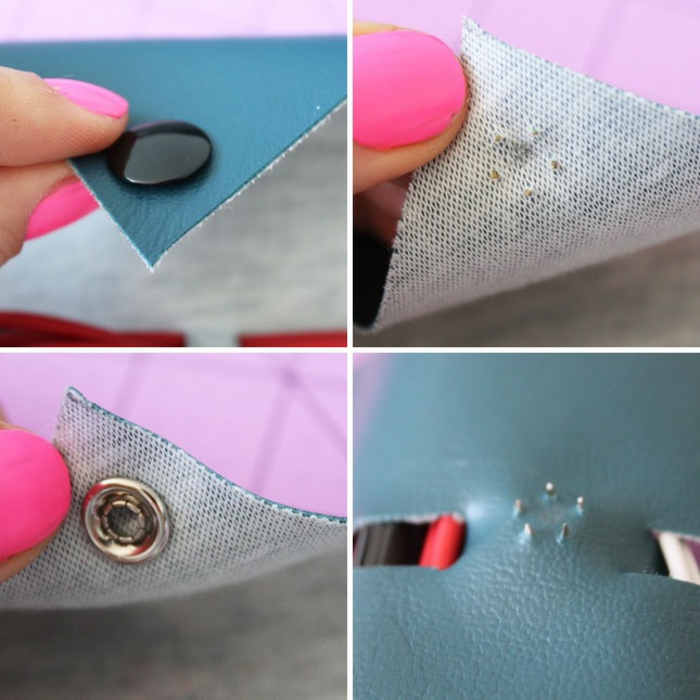
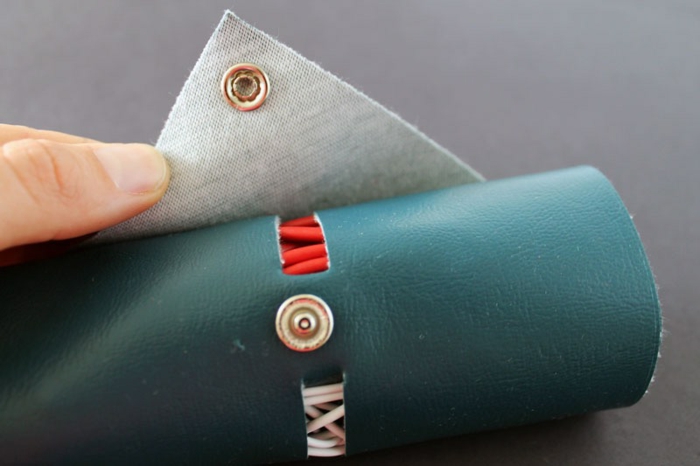
Step 3: Setting the Snap
A snap has four parts. Your kit will have a little diagram, but it’s basically a male and female side. Roll up your organizer with the cables inside to see where the flap should land. Mark that spot. Use the hole punch from your kit and give it a good whack with your mallet.
To set the snap, follow the kit’s instructions. You’ll place the cap and socket on the main body and the stud and post on the flap. The key is to give the setter tool a couple of firm, solid strikes. You want to hear a definitive “thwack.” Don’t go crazy and smash it, or you’ll crush the snap. My first time, I put one on backward and had to pry it off, which left a nasty scar on the leather. So, quick tip: lay all four pieces out and double-check the orientation before you make any holes.
Step 4: The Pro-Level Edge Finish
This step is technically optional, but it’s what separates nice from wow. An unfinished, fuzzy edge looks amateur. A burnished edge looks like you bought it at a high-end boutique. Just dampen the edge of the leather slightly, rub on a little gum tragacanth, and then rub it vigorously with the wood slicker. The friction and heat create a smooth, dark, glossy edge. It takes five minutes and elevates the entire piece.
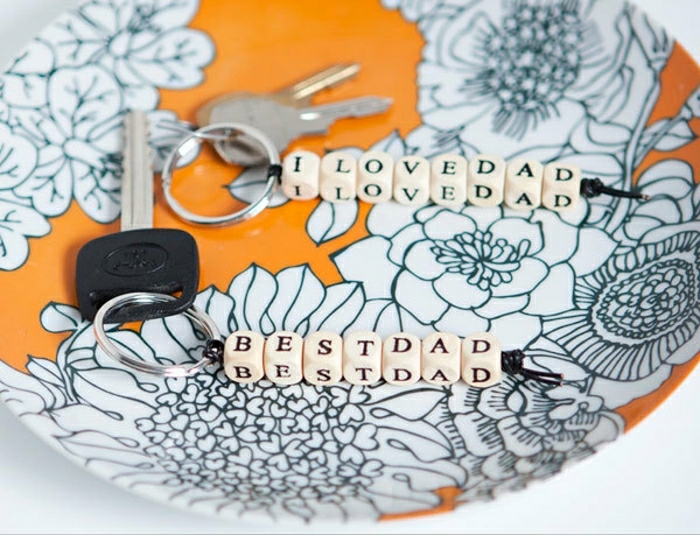
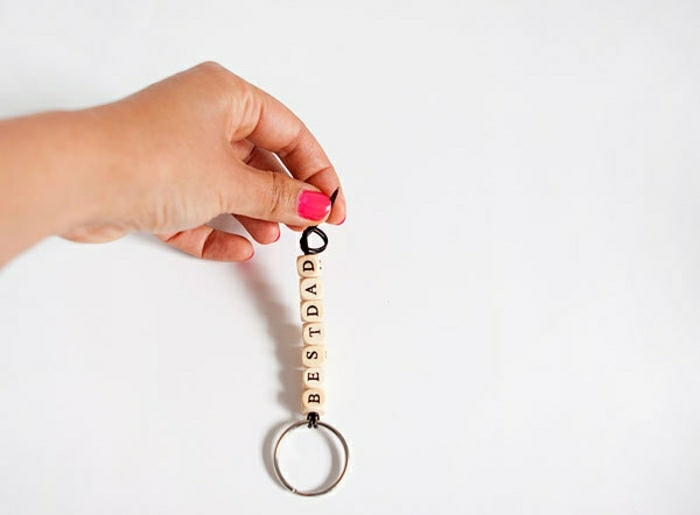
Project 2: The Stamped Leather Keychain
Okay, short on time or cash? This is your project. You can make a beautiful, personalized keychain in under an hour, and once you have the basic tools, each one costs just a couple of dollars in materials.
Estimated Time: Under 1 hour
Estimated Cost: About $25-30 for a letter stamp set and a surface. The leather and hardware are less than $5.
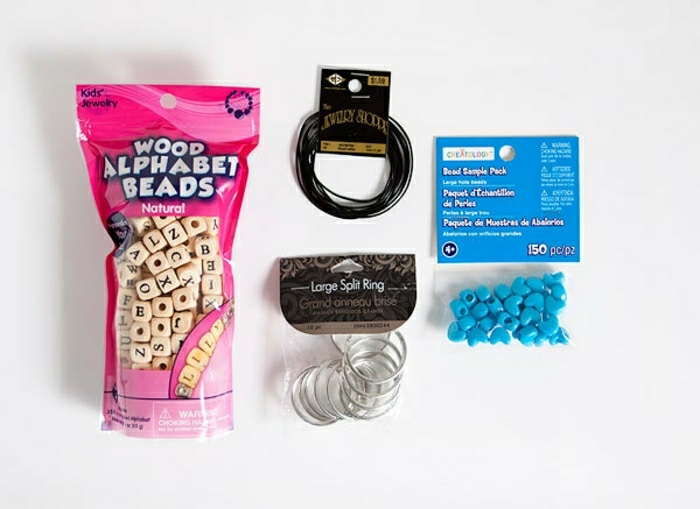
Your Shopping List:
- A piece of 5-6 oz veg-tan leather
- Leather stamping tools (a basic alphabet set is about $15 online)
- A solid, heavy surface for stamping
- A poly or rawhide mallet
- Sponge and a little bowl of water
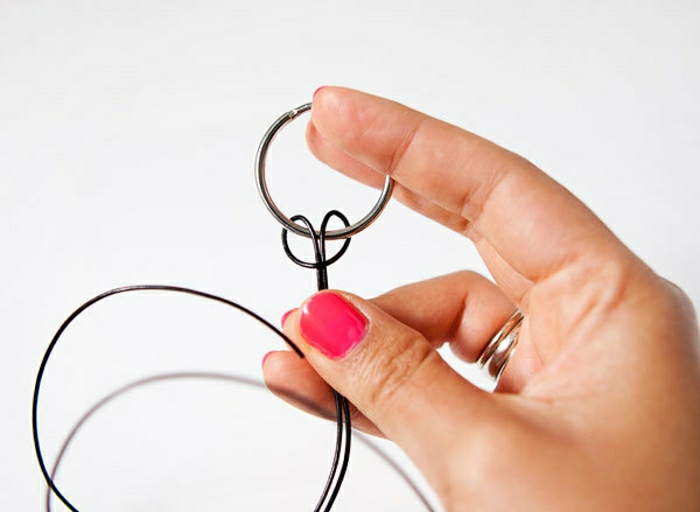
- Keyring hardware
- A leather hole punch
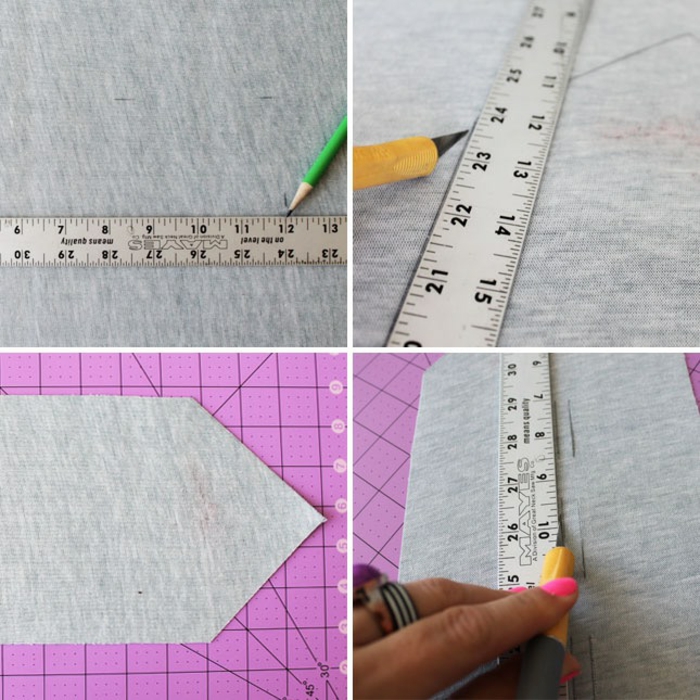
Step 1: Prep the Leather for Stamping
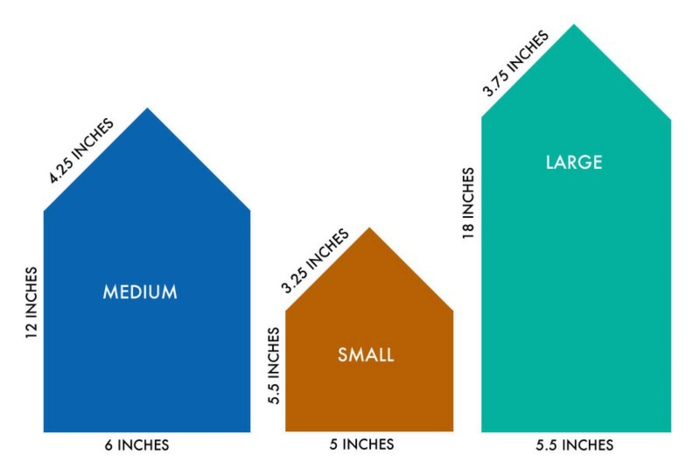
Cut your leather into a classic tag shape. Now, to get a good impression, you need to “case” the leather. This just means getting the moisture right. The easiest way is to quickly run the leather piece under the faucet and then let it sit. You’ll see the dark, wet color start to return to its original lighter shade. When the surface looks almost dry but it’s still cool to the touch, that’s the sweet spot. Too wet, and the stamp will look blurry; too dry, and it will be too faint.

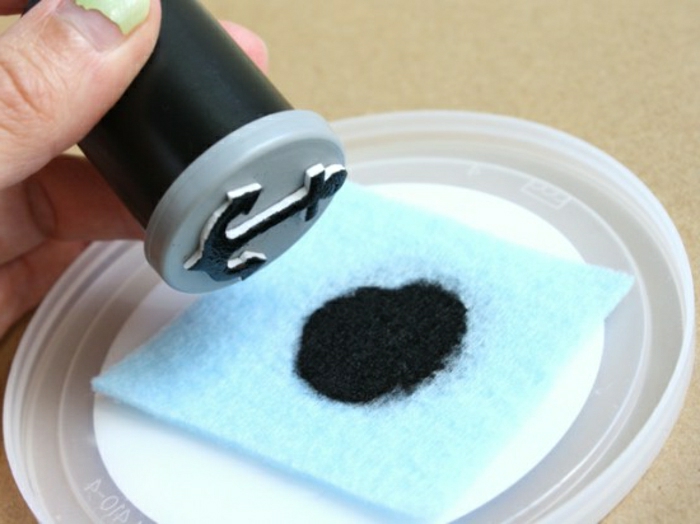
Step 2: Stamping the Design
Here’s a crucial tip: you can’t stamp on your kitchen table. You need a solid, non-bouncing surface. The pros use a granite slab, but honestly, a small steel bench block you can get on Amazon for about $15 is perfect for this. It provides the solid rebound you need for a crisp image.
Hold your letter stamp perfectly straight and give it one single, confident strike with the mallet. Don’t be timid! I once taught someone who was so gentle with the mallet his stamps were barely visible. It’s better to hit a little too hard on a practice scrap and learn to back off. Multiple light taps will just create a blurry, “ghosted” image. One good whack. That’s the secret.
Step 3: Finishing Up
Punch a hole for the keyring hardware and let the leather dry completely. You can leave it natural or apply a leather dye. If you dye it, you have to seal it. A simple beeswax-based leather conditioner works great. Rub a little in with a soft cloth to protect it and give it a nice sheen. Attach the keyring, and you’re done. A rugged, personal gift that will last forever.
Working with Wood and Finishes
You don’t need a huge workshop to make cool things out of wood. The secret to small, high-quality projects is all in the prep work and, most importantly, the finish.
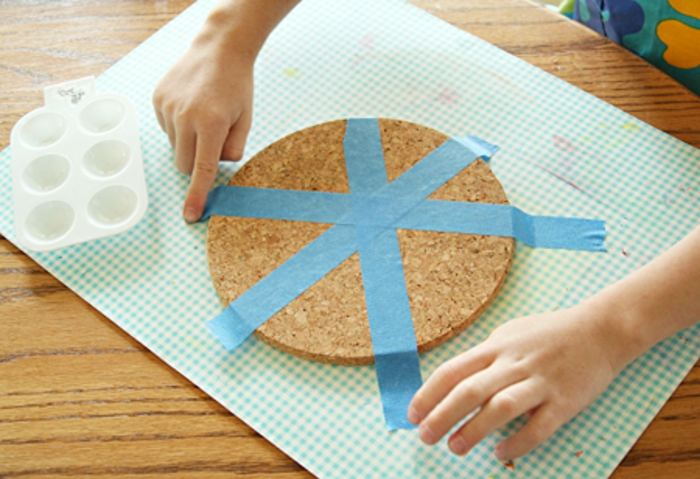
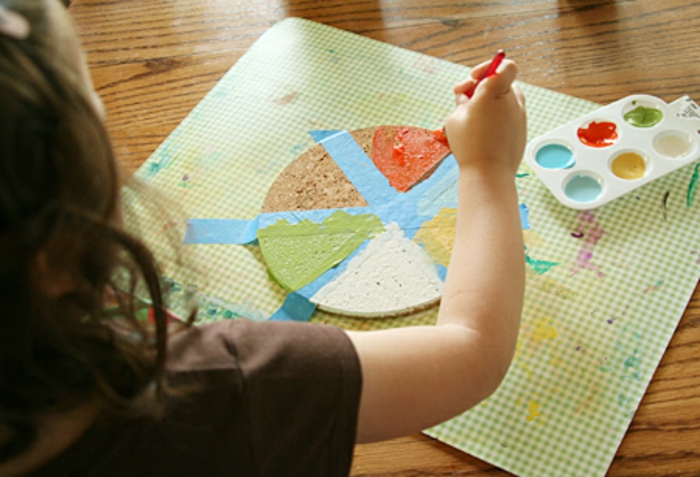
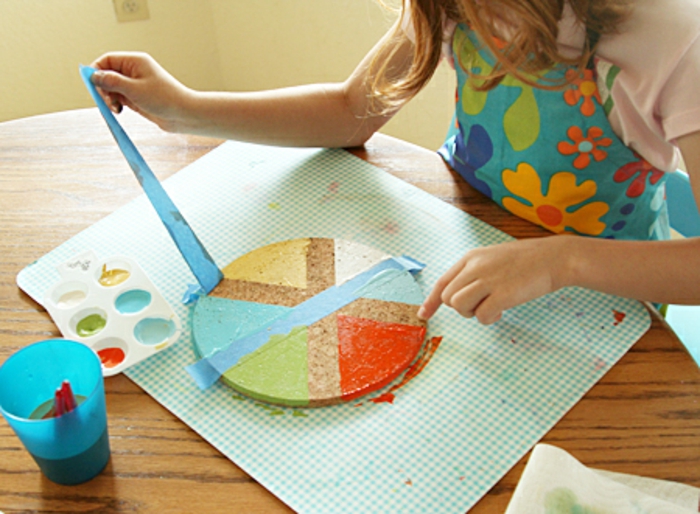
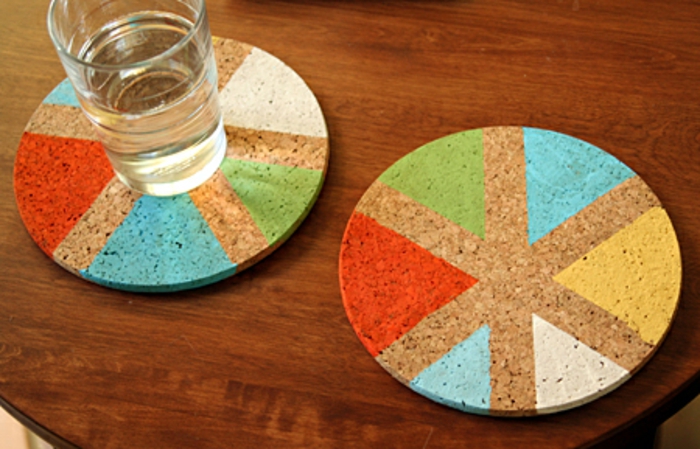
Project 3: Geometric Painted Wood Coasters
Forget those flimsy cork things. We’re making a set of solid wood coasters that feel substantial in your hand. The design is simple, but a professional finish makes them stand out.
Estimated Time: 3-4 hours (mostly drying time)
Estimated Cost: Under $20 for all materials.
Your Shopping List:
- Four 4×4 inch wood squares, about 1/4 inch thick (poplar or birch from Home Depot or a craft store is perfect)
- Sandpaper (120-grit and 220-grit)
- High-quality painter’s tape (spend the extra $3 on FrogTape or Scotch Blue, it’s worth it)
- Acrylic craft paint and small brushes
- A food-safe, water-resistant finish like a wipe-on “Salad Bowl Finish” or Shellac in a can.
Step 1: Sanding is Not Optional
Seriously. Never skip sanding. Start with 120-grit paper, always moving with the grain of the wood. Wipe the dust off, then go over everything again with 220-grit. It should feel silky smooth. This prep work is what makes everything else look good.
Step 2: Getting Those Crisp Paint Lines
Use your high-quality painter’s tape to create a cool geometric pattern. Here’s the trick: after you’ve laid down the tape, run your fingernail firmly along the edge you’re going to paint against. This seals the edge and is the single best way to stop paint from bleeding underneath. Apply two thin coats of paint—it’s always better than one thick, goopy one. Let it dry, then peel the tape off slowly at a 45-degree angle for a perfect line.
Step 3: The All-Important Finish
An unsealed coaster is a useless coaster. One sweaty glass will ruin it. You need a finish that’s both water-resistant and food-safe. A wipe-on “Salad Bowl Finish” is fantastic and easy to use. Just wipe on a thin coat with a clean rag, let it dry for a few hours, lightly sand with super-fine sandpaper (320-grit or higher), and apply another coat. Three thin coats will give you excellent protection. Oh, and if you live somewhere humid, give everything extra time to dry. Rushing it will leave you with a sticky, tacky finish that never fully cures.
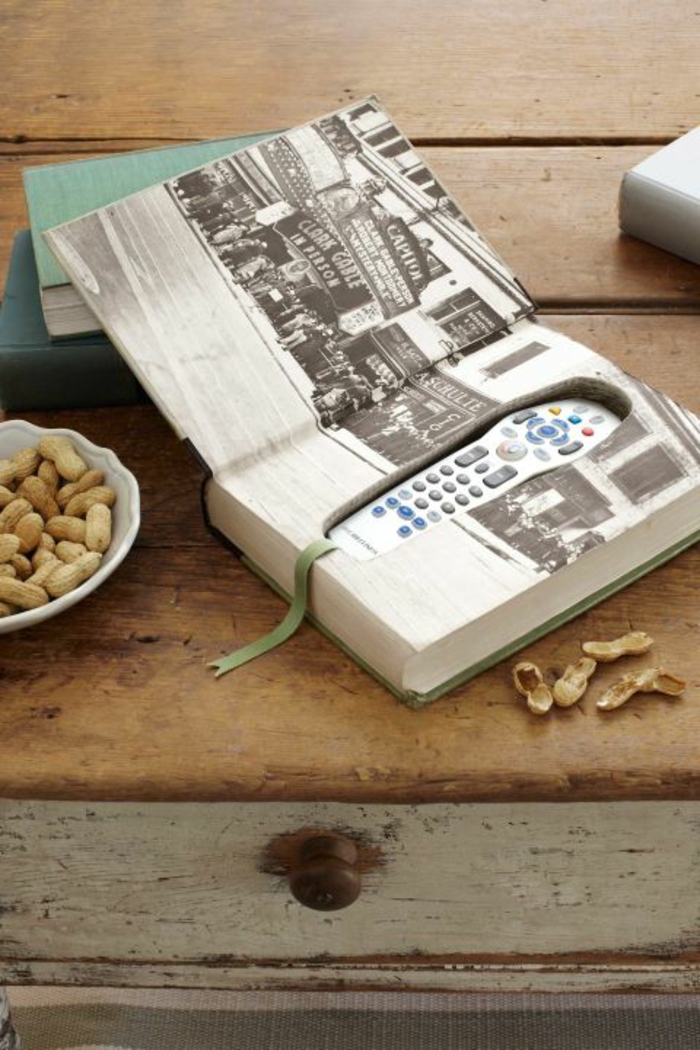
Project 4: The Hollow Book Safe
This is a classic for a reason. It’s clever, handsome, and surprisingly fun to make. The keys here are patience and safety.
Estimated Time: 4-5 hours (it’s tedious but worth it)
Estimated Cost: The price of a thrift store book and some glue.
Your Shopping List:
- A big, cool-looking hardcover book from a thrift store
- Standard white PVA glue or wood glue
- A small brush
- An extremely sharp utility knife or X-Acto knife with extra blades
- A metal ruler
- Clamps and two pieces of scrap wood
- Optional: A small piece of felt and spray adhesive
Step 1: Prep the Book
Leave the first few pages and the front/back covers loose. We need to glue the rest of the pages together into a solid block. Brush a moderate coat of glue along the three outer edges of the page block, then close the book. Wrap it in wax paper to protect the covers. Now, for pressure. Clamps are best, but if you don’t have them, no worries. Just wrap the book tightly in plastic wrap and then stack the heaviest books you own on top. Let it dry for a full 24 hours.
Step 2: The Cutting Process (Heads Up!)
Okay, safety talk. This is where you need to focus. The number one mistake is trying to cut through too many pages at once. The blade gets stuck, you push harder, it slips, and you get a nasty cut. Always use a fresh blade and always cut away from your body.
The solution is slow but safe: outline the cavity you want to cut, then use your ruler and knife to cut and peel out just 5-10 pages at a time. Yes, it’s tedious. Cut, peel, repeat. But this is the right way to do it for clean lines and zero injuries.
Step 3: Finish the Inside
The cut edges will be a bit rough. You can paint a thin layer of glue on the inside walls to seal and strengthen them. For a truly top-tier finish, line the cavity with felt. Use a spray adhesive on the back of the felt pieces and carefully press them into place. It looks fantastic and protects whatever’s stored inside.
Personalizing High-Quality Objects
Sometimes the best gift starts with a great object that you customize. This is less about building from scratch and more about adding a permanent, thoughtful touch.
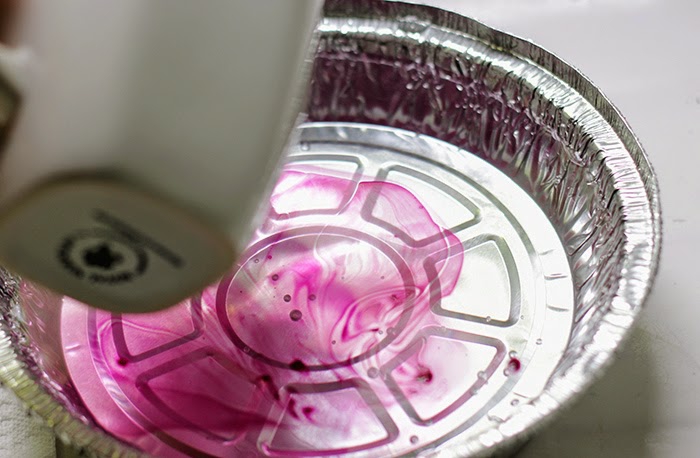
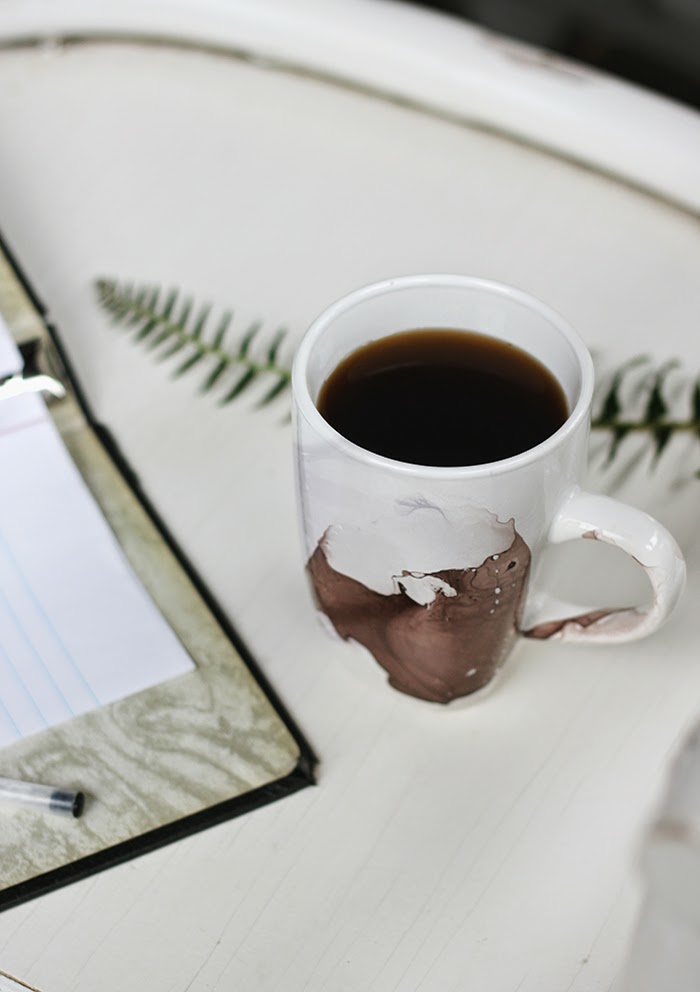
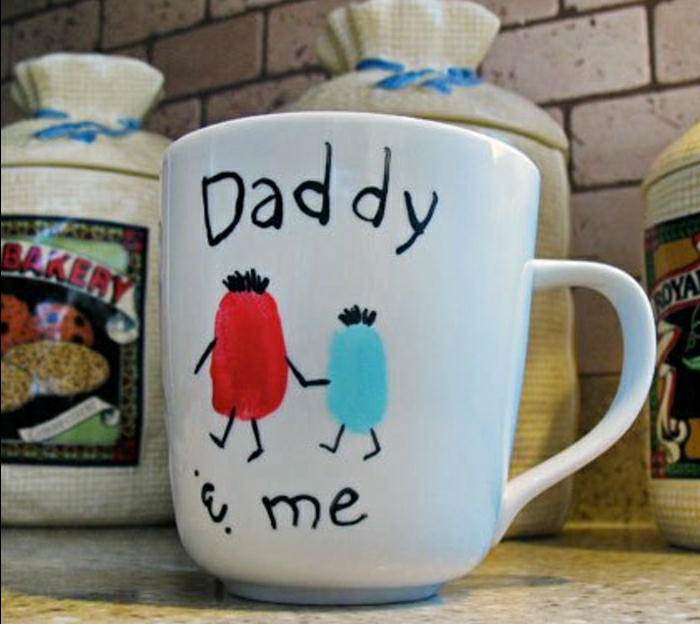
Project 5: The Permanent-Ink Mug
I have to be direct here: all those online hacks using nail polish or regular Sharpies are terrible ideas. They are not food-safe, not heat-safe, and will come off in the dishwasher. It’s a useless gift. Let’s do it the right way.
Your Shopping List:
- A plain, light-colored ceramic mug
- Oil-based ceramic paint pens (this is the crucial part)
- Rubbing alcohol
Step 1: Use the Right Tool for the Job
You cannot use regular markers. They will wash right off. You MUST use pens specifically labeled as “oil-based paint markers” or “ceramic paint pens.” The Pebeo Porcelaine 150 line is fantastic and widely available at craft stores like Michael’s or online for about $5 a pen. Always read the packaging to make sure it’s non-toxic after curing.
Step 2: Prep and Draw
Wash and dry the mug, then wipe the area you’re decorating with rubbing alcohol to remove any oils. Let it dry. Now, draw your design! If you mess up, a little more rubbing alcohol will usually wipe it away if you’re quick. Let the finished design air-dry for several hours as directed on the pen.
Step 3: Cure It for Keeps
This is the magic step that makes the design permanent. Place the finished mug in a COLD oven. Do not preheat it, or the sudden temperature shock could crack it. Turn the oven to the temperature on the pen’s instructions (usually 300-350°F), and once it’s up to temp, let it bake for about 30-40 minutes. Turn the oven off and let the mug cool down completely inside. Now it’s permanent and dishwasher-safe.
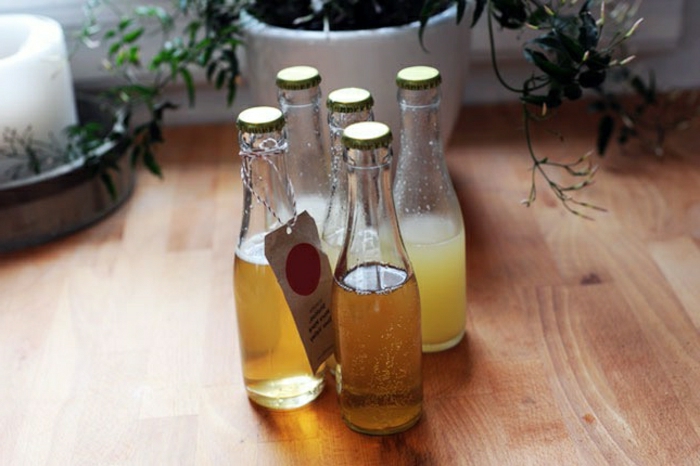
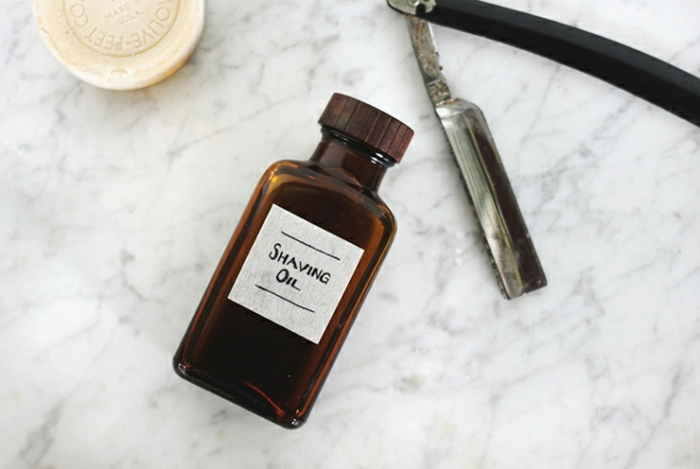
Project 6: Blending a Custom Shaving Oil
Here’s another super-fast, super-classy gift. Commercial shaving products are often full of weird chemicals. A handmade oil is luxurious, practical, and takes about ten minutes to make.
Estimated Time: 10 minutes
Estimated Cost: An initial investment of $25-30 for the oils, but that’s enough to make many bottles, bringing the per-gift cost way down.
The Lowdown on Oils
A good shaving oil has two parts. The carrier oil is the base; it provides lubrication and moisture. Jojoba oil is amazing because it’s very similar to our skin’s natural oils, and sweet almond oil is rich in vitamins. The essential oils provide scent and benefits, but they’re super concentrated and need to be diluted.
Good to know: Don’t just buy the cheapest essential oils you find at a big-box store. They’re often synthetic or heavily diluted. For pure, affordable oils, I always recommend trusted brands like Plant Therapy or NOW Foods, which you can find online or in health food stores.
A Great Recipe:
- 1/2 ounce (15 ml) Jojoba oil
- 1/2 ounce (15 ml) Sweet almond oil
- 3 drops Sandalwood essential oil (soothing)
- 2 drops Cedarwood essential oil (antiseptic)
- A 1-ounce dark glass bottle with a dropper (dark glass protects the oils from sunlight)
Just use a small funnel to pour the carrier oils into the bottle, add the drops of essential oil, cap it, and shake gently. That’s it! Make sure to label it. And a quick safety note: always do a little patch test on the inner arm and wait 24 hours to make sure there’s no irritation before using it on the face.
A Final Thought
Making something by hand takes more effort than clicking a button online, there’s no doubt. But what you get in return is more than just an object. It’s a connection. It’s proof that you spent time thinking about someone. Whether you’re working with leather, wood, or something else, I hope you take these techniques and make something you’re truly proud to give.
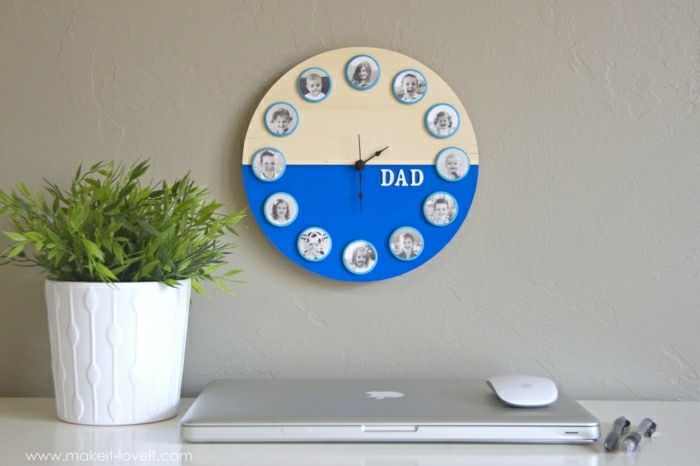
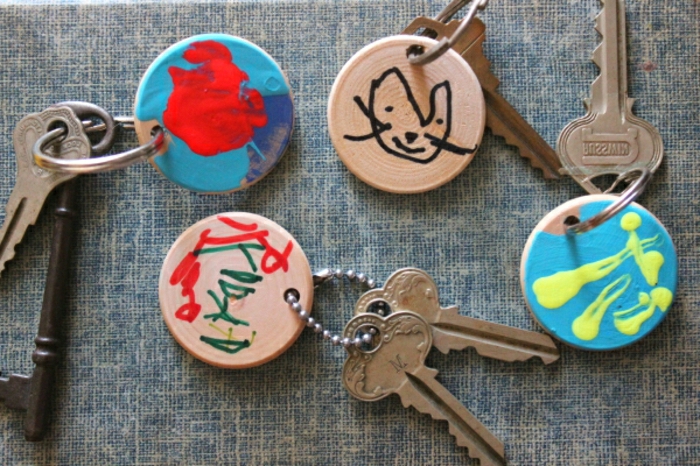
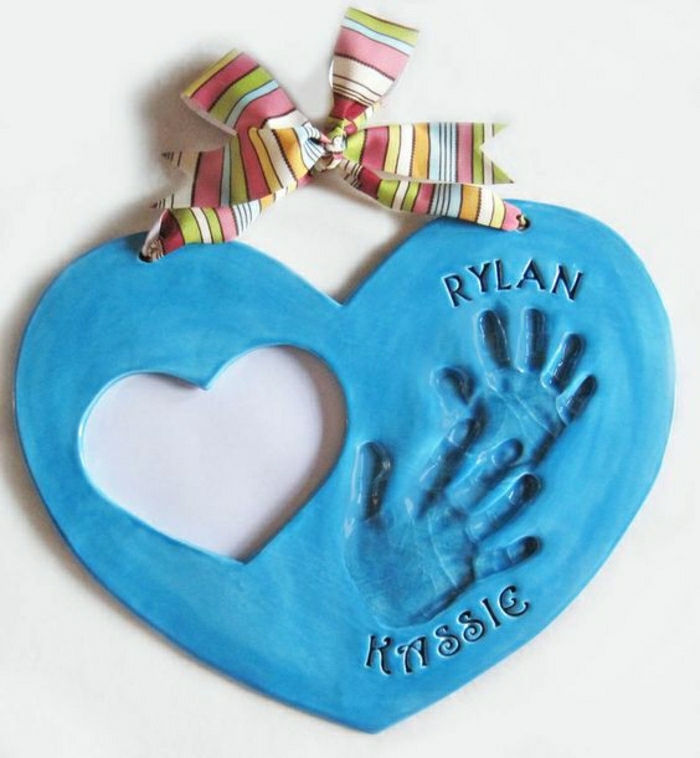
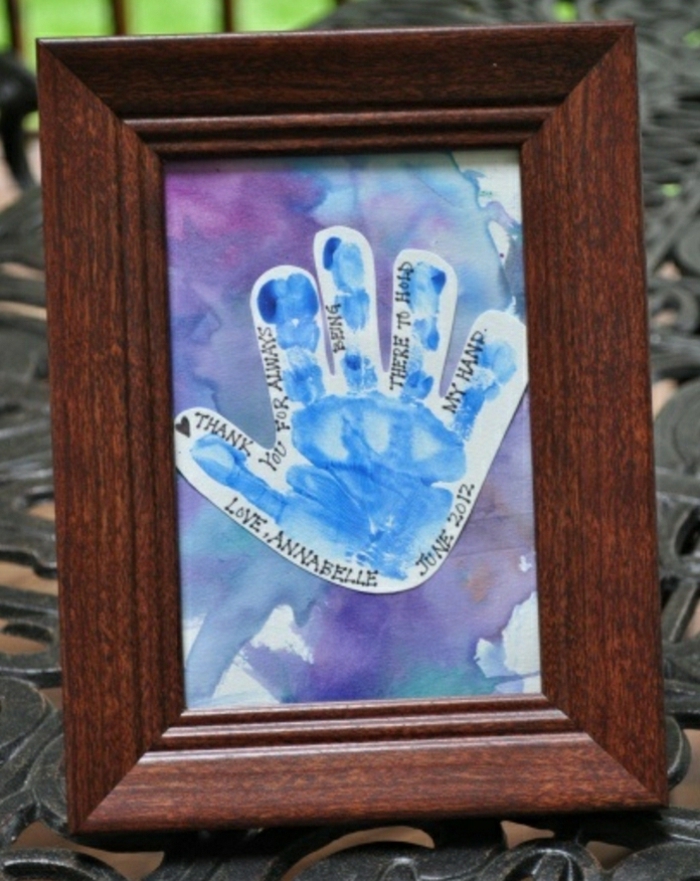
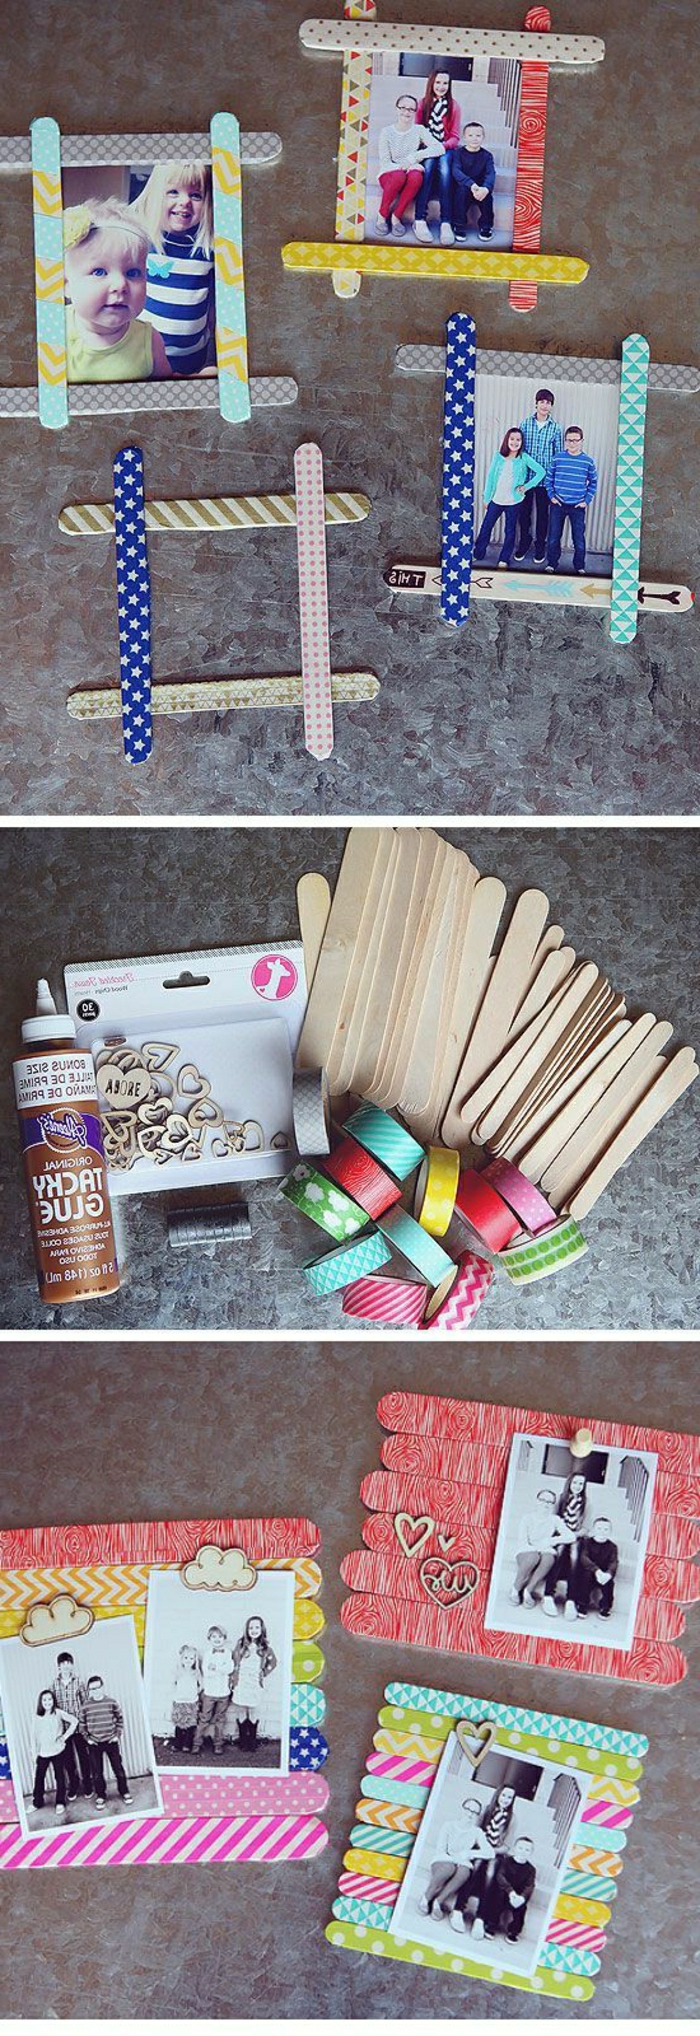
Inspiration Gallery
The one tool worth the investment: A high-quality craft knife. Forget the flimsy ones. A solid handle and razor-sharp, replaceable blades (like those from X-Acto or Olfa) are the difference between a ragged, frustrating cut and a clean, professional line. It’s your most-used tool for both leather and wood projects.
- A professional, sealed edge that won’t fray.
- A smooth, dark, glassy finish.
- A sign of true craftsmanship.
The secret? Burnishing. After beveling the leather edge, dampen it slightly and rub it vigorously with a wood slicker or even a piece of canvas. For a top-tier result, use a product like Tokonole or Gum Tragacanth before rubbing.
How do I make my leather stamping look straight and intentional?
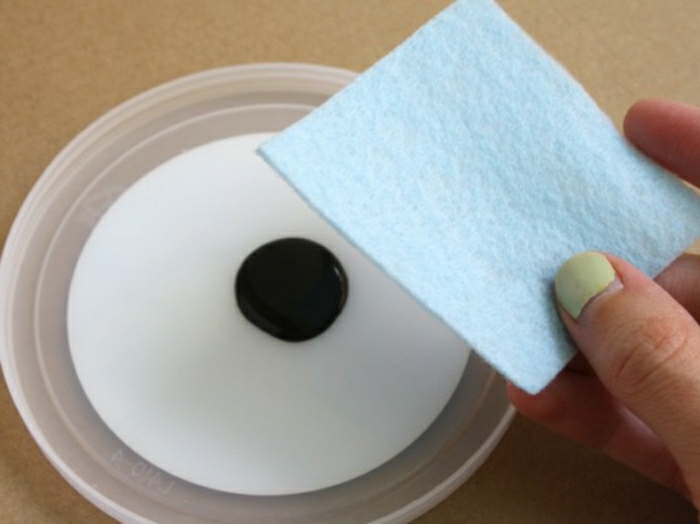
First, lightly dampen the leather surface with a sponge—this helps the leather take a clearer impression. Don’t soak it. Then, use a clear quilting ruler or a metal straight edge as a guide. Rest the bottom of your stamps against the ruler’s edge as you strike. And always, always do a few test hits on a scrap piece to gauge your mallet strength.

The value of a gift lies in the giver’s intention, not its price tag. The time and thought invested in a handmade object carry an emotional weight that mass-produced items can rarely match.
This is the core of why these projects resonate so deeply. When you give something you’ve made, you’re not just giving a leather keychain; you’re giving an hour of your focus, a bit of your skill, and a tangible piece of your affection.

Personalize beyond the initials. Consider stamping a significant date, the geographic coordinates of a meaningful place, or a short inside joke. For the Geometric Wood Coasters, you could burn a small, hidden symbol on the underside. It turns a handsome gift into a personal story.
Don’t overlook the presentation. The way you wrap a handmade gift is the final step in the crafting process.
- Wrap the gift in simple brown kraft paper.
- Tie it with a length of leather cord or natural twine.
- Include a small offcut of the material you used (wood or leather) as a gift tag, stamped or written on.
A common mistake: Rushing the finish. Whether it’s oil on a shaving blend, dye on leather, or glue on wood, curing time is not a suggestion. Patience is the final, invisible ingredient. Let dyes dry completely before conditioning, and let glue cure for the full time recommended by the manufacturer (like Titebond’s 24-hour suggestion) for maximum strength.
For the Wood Coasters – Sealer A: Shellac. It’s a natural, food-safe finish that gives a warm, amber glow. It dries fast but is less resistant to water and alcohol.
Sealer B: Polyurethane. A synthetic varnish that provides excellent protection against moisture and scratches, available in various sheens. It’s more durable for heavy use. For coasters, a wipe-on poly is an easy-to-apply choice.
According to a study published in the Journal of Marketing, recipients perceive handmade gifts as more thoughtful and loving, leading to a stronger emotional connection with the giver.
For the custom shaving oil, the base oil matters. Jojoba oil is fantastic because its structure is very similar to the skin’s natural sebum, making it absorb quickly without a greasy feel. Sweet almond oil is another great, affordable option, rich in Vitamin E. A few drops of sandalwood or cedarwood essential oil will add a classic, masculine scent.

Expand your leather-dyeing game. While a simple oil finish on veg-tan leather is beautiful, a dedicated dye can create a stunning effect. Fiebing’s Pro Dye is an industry standard, offering deep, uniform color. Apply it with a wool dauber in smooth, circular motions. Remember, you can always go darker, but you can’t go lighter, so start with a single coat.
- Get a deep, rich color that highlights the wood grain.
- Avoid a blotchy, uneven appearance.
- Ensure the final topcoat looks smooth and professional.
The trick? Before applying your stain, wipe the wood with a pre-stain wood conditioner. This simple step partially seals the wood, especially porous ones like pine, allowing the stain to absorb evenly.
Quick Project Idea: The Minimalist Wood Phone Stand. All you need is a small block of attractive wood (walnut or oak looks great), about 4x3x1 inches. Cut a groove at a 15-degree angle about a third of the way into the block, wide enough to hold a phone. Sand everything smooth, starting with 120-grit and finishing with 220-grit paper. Finish with a coat of tung oil or beeswax for a silky, natural feel.

My wood project isn’t perfectly flat. What’s the fix?
This is a common issue, especially with coasters. The solution is simple but requires patience. Tape a sheet of 100-grit sandpaper to a perfectly flat surface (a piece of glass, a countertop, or a cast iron tool table). Then, slide your wood piece back and forth over the sandpaper in a figure-eight pattern. This will evenly sand the high spots down until it sits perfectly flat.

The smell of freshly cut pine or the rich scent of oiled leather aren’t just workshop byproducts; they are powerful sensory triggers. Neuroscientists have shown that olfaction, our sense of smell, has the most direct link to the parts of the brain that process memory and emotion.
The experience of making the gift—the smells, the textures—becomes part of its story and value.
For the leather projects, the article mentions veg-tan scraps. This is key for budget crafting. Websites like Etsy or specialized suppliers like Tandy Leather or Weaver Leather Supply often sell ‘scrap bags’ by the pound. These contain varied offcuts from larger projects, perfect for keychains, cable organizers, and other small goods, giving you a wide range of thicknesses and colors to experiment with.

Think about including a small, handwritten care card with your gift. It’s a thoughtful touch that helps the recipient enjoy it for years to come.
- For Leather:


Important point: The ‘temper’ of the leather matters. For the stamped keychain, a firm temper is ideal so it holds its shape and takes a crisp impression. For the cable organizer that needs to wrap and flex, a medium or soft temper leather is more suitable. When buying scraps, you’ll often get a mix, so feel the pieces and match them to your project’s needs.


Titebond II Wood Glue: It’s water-resistant and offers a strong bond. Perfect for indoor projects like the coasters, as it can handle condensation from a cold drink.
Titebond III Ultimate Wood Glue: It’s fully waterproof, making it ideal for anything that might get seriously wet, like a handmade shower caddy or outdoor planter box. For most gifts, Titebond II is all you need.


Go beyond the projects listed with an incredibly simple, no-sew leather tray. Take a 6×6 inch square of medium-firm leather. Pinch each corner together and use a leather punch to make a hole through both layers. Secure each corner with a simple Chicago screw or a brass rivet. In less than 15 minutes, you have a handsome valet tray for keys and coins.


Can I get by without a full set of leather stamps?
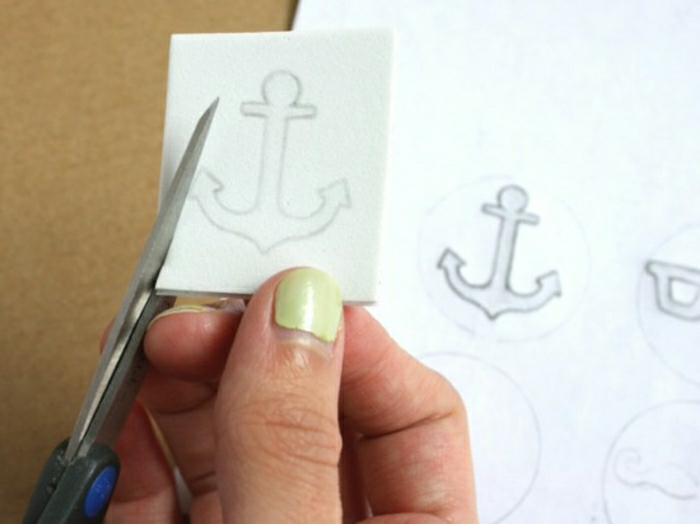
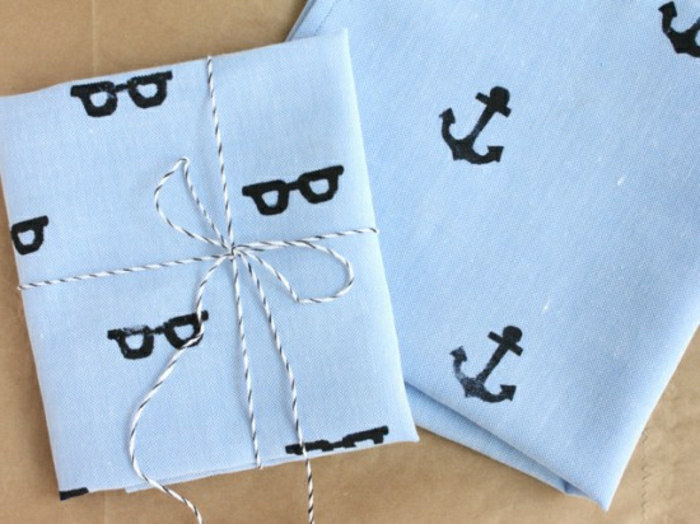
Absolutely. If you don’t want to invest in a full alphabet, get creative. Use a single decorative stamp, like a geometric or symbol design, to create a repeating pattern. You can also use the edge of a flathead screwdriver or the threaded part of a bolt to create unique textures and lines on the leather. The goal is to make it your own.


That satisfying ‘thwack’ of a mallet on a stamp, the scent of wood dust, the smooth feel of a perfectly burnished edge—these are the hidden rewards of making. The process itself is a gift to you, a moment of focused calm in a busy world. Embrace the experience, not just the outcome.
- Durable and incredibly strong.
- A rugged, nautical, or outdoorsy aesthetic.
- Extremely affordable and comes in hundreds of colors.
The material? Paracord. Weave a classic ‘cobra stitch’ bracelet or keychain fob. All you need is paracord, a buckle, a measuring tape, and scissors. It’s a perfect 30-minute project with a high-impact result.

Don’t throw away your wood dust! Mix fine sawdust from your final sanding (220-grit or higher) with a little bit of wood glue to create a custom, color-matched wood filler. It’s perfect for filling any small gaps or cracks in your project before the final staining and sealing, making the repair virtually invisible.