From Blank Notebook to Your Brain’s Best Friend: A Real-World Guide to Bullet Journaling
For years, my workshop has been a hub of what I like to call organized chaos. Juggling client projects, teaching apprentices, and managing supplies meant my brain was constantly overflowing with deadlines, measurements, and stray ideas. I tried it all—digital apps, fancy pre-printed planners—but nothing ever clicked. The apps felt weirdly disconnected from the hands-on work I do, and the planners were just too rigid. They couldn’t adapt when a project timeline suddenly changed or when a great idea struck me at an inconvenient time.
In this article
- Why Pen and Paper Still Wins
- Your Starter Kit: A Simple and Effective Shopping List
- Your First 10 Pages: A No-Fear Setup Guide
- The Real Magic: Migration and Threading
- What Happens When You Run Out of Pages?
- Making It Your Own: Collections for Everything
- A Quick Word of Warning on Trackers
- Troubleshooting the Common Sticking Points
- Final Thoughts: It’s a Tool, Not a Test
- Inspirational Gallery
I eventually stumbled upon a simple, flexible method of journaling that changed everything. The core idea was to create a system to “track the past, order the present, and design the future.” That really resonated with me. It sounded less like a boring to-do list and more like a blueprint for building a life with intention. So I grabbed a basic notebook and a pen, and that simple act genuinely transformed how I manage my work, my thoughts, and my time.
This guide is the result of years of using this system, tweaking it through trial and error, and sharing the core ideas with others. And let’s be clear: this isn’t about creating a Pinterest-perfect work of art. It’s about crafting a functional, reliable partner for your brain. It’s a system you build yourself, for yourself. And like any good project, it starts with the right tools and a solid plan.
Why Pen and Paper Still Wins
Okay, I get it. In a world full of screens, choosing a paper notebook can feel a little old-fashioned. But trust me, it’s not a step backward. There’s a powerful connection between your hand, your eye, and your brain that digital tools just can’t replicate. Understanding why this works will help you stick with it when the next shiny new productivity app tries to lure you away.
When you physically write something down, you’re essentially telling your brain, “Hey, pay attention to this!” It’s a cognitive process that actively encodes information. You’re not just passively tapping keys; you’re forming letters and words, which makes the information stick. That’s why you can often remember something you jotted down, even if you never look at the note again.
Another powerful feature? Imperfection. A digital list can be endlessly deleted and edited into a perfect, flawless document. A written page, on the other hand, is an honest record. A mistake has to be crossed out. This isn’t a bug; it’s a feature! Seeing your crossed-out tasks and changed plans creates a real-world log of your journey, not just a polished highlight reel. It builds a kind of self-awareness that’s hard to get when you can just delete a task without a trace.
Your Starter Kit: A Simple and Effective Shopping List
Let’s be real, you can start this with any pen and any notebook you have lying around. That’s the honest truth. But, like with any craft, using quality tools can make the process more enjoyable and the results more durable. You don’t need to spend a fortune, but a small investment can make a big difference.
Here’s a breakdown of what you might want to grab, with options for any budget. You can find most of this stuff at big box stores, local art supply shops, or online at places like Amazon or JetPens.
The Budget Start (~$15)
If you just want to dip your toes in without much commitment, this is all you need. Grab a generic dot-grid notebook from Amazon or a craft store—you can find decent ones for about $8-$10. Pair it with a reliable pen like the Pilot G2. They write smoothly and are available everywhere. The only heads-up is that the gel ink can sometimes smudge, so give it a second to dry.
The Pro-Level Kit (~$30-$40)
Ready to build a journal that will last? Look for a notebook with thicker paper, at least 100 gsm but ideally 120 gsm. This prevents ink from bleeding through the page (a frustrating issue known as ‘ghosting’). A lay-flat binding is also a must-have; you don’t want to be fighting to hold your notebook open. High-quality brands often include pre-numbered pages and a blank index, which is a huge time-saver. As for a pen, consider a fine-liner like the Sakura Pigma Micron (the 03 or 05 size is a great starting point). The ink is archival quality (so it won’t fade) and waterproof, which is a lifesaver if you’re prone to coffee spills. They’re a bit pricier, but one will last you a long time.
Oh yeah, one more thing: a small, 6-inch metal ruler is your best friend for drawing straight, clean lines. It’s way better than plastic.
Your First 10 Pages: A No-Fear Setup Guide
That feeling of staring at a pristine, empty notebook can be paralyzing. The fear of “messing it up” is real! So we’re going to get over that hump right now by setting up the foundation. Forget about making it pretty; just focus on getting these core sections down.
Quick Win: Before you even write on the first page, grab a scrap piece of paper and do a “Brain Dump.” For 10 minutes, just write down every single thing on your mind—tasks, worries, ideas, appointments. Don’t organize it, just get it out. This single act is the very essence of the whole system: getting things out of your head and onto paper so you can deal with them.
Ready? Let’s set up your journal.
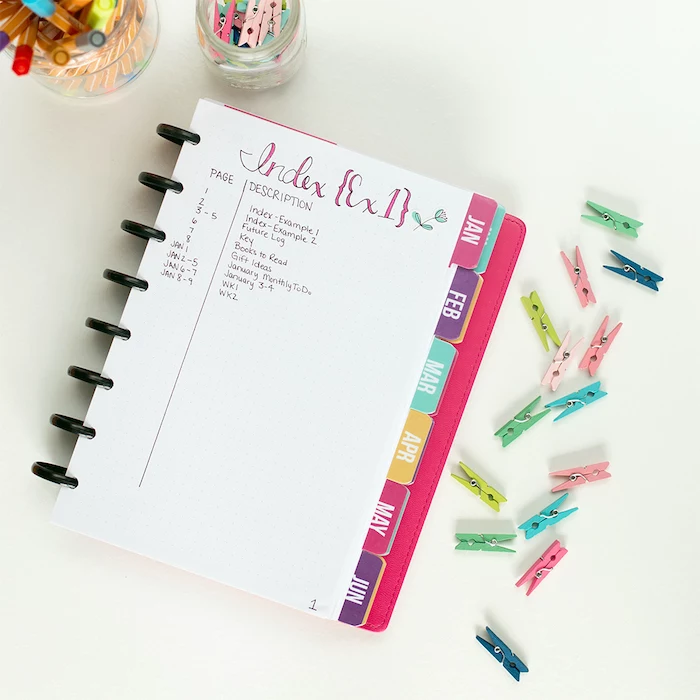
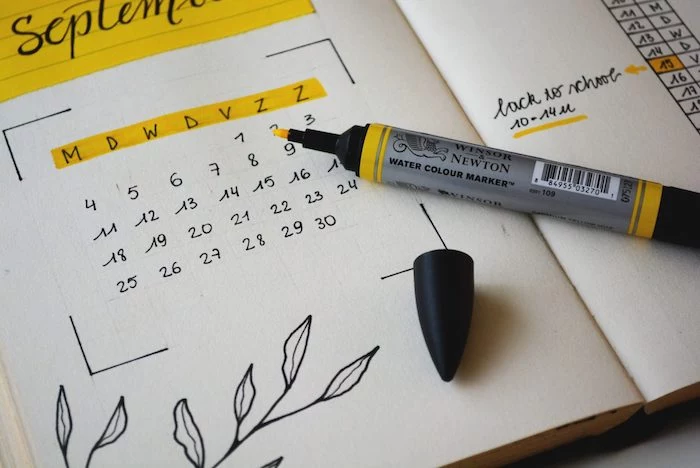
- The Index (Pages 1-4): Open your notebook to the very first page. Write “Index” at the top. This is your table of contents. Do the same for pages 2, 3, and 4. For now, just leave these pages blank.
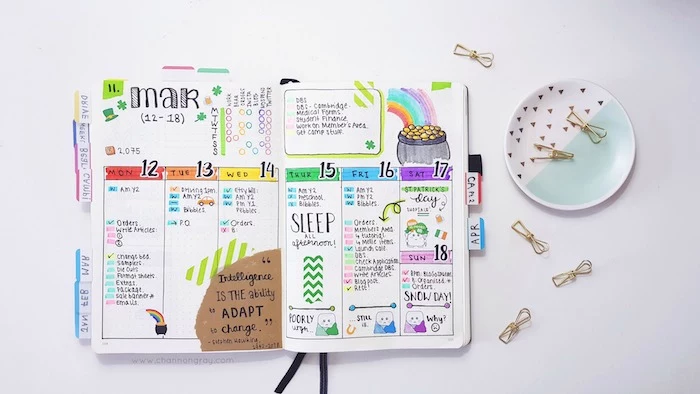
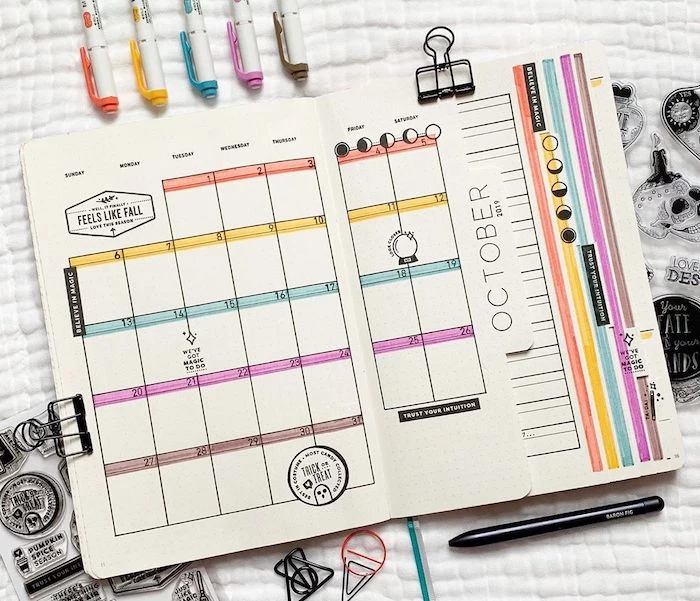
- The Future Log (Pages 5-6): Turn to the next two-page spread. We’re going to create a simple overview for the next six months. Use your ruler to divide each page into three horizontal sections. You’ll have six boxes in total. Label each box with a month (e.g., January, February, March…). This is where you’ll jot down future events, like birthdays or appointments, that fall outside the current month.
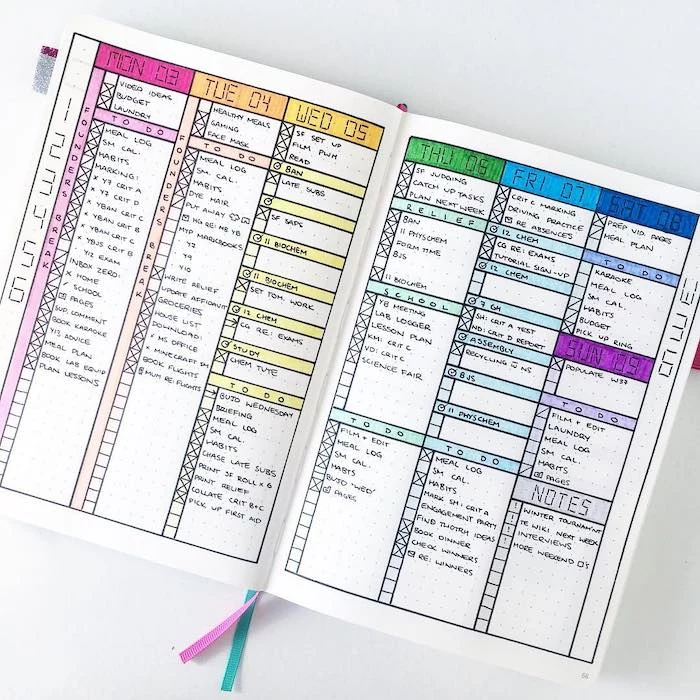
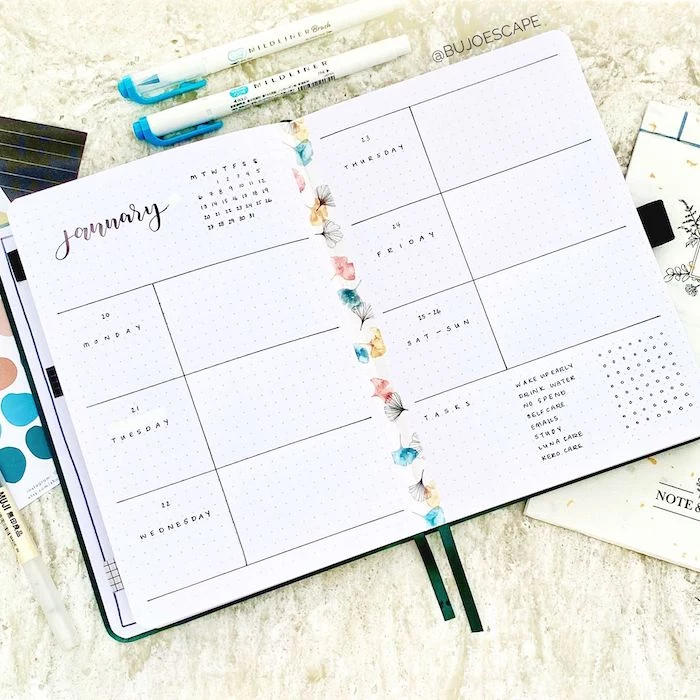
- Your First Monthly Log (Page 7): Turn to the next blank page. This is your command center for the current month. On the left side of the page, write the title of the month. Below it, make a list of all the dates of the month, followed by the first letter of the day (e.g., 1 M, 2 T, 3 W). This is for date-specific things. On the right side of the page, create a simple task list for things you want to accomplish this month that don’t have a hard deadline.
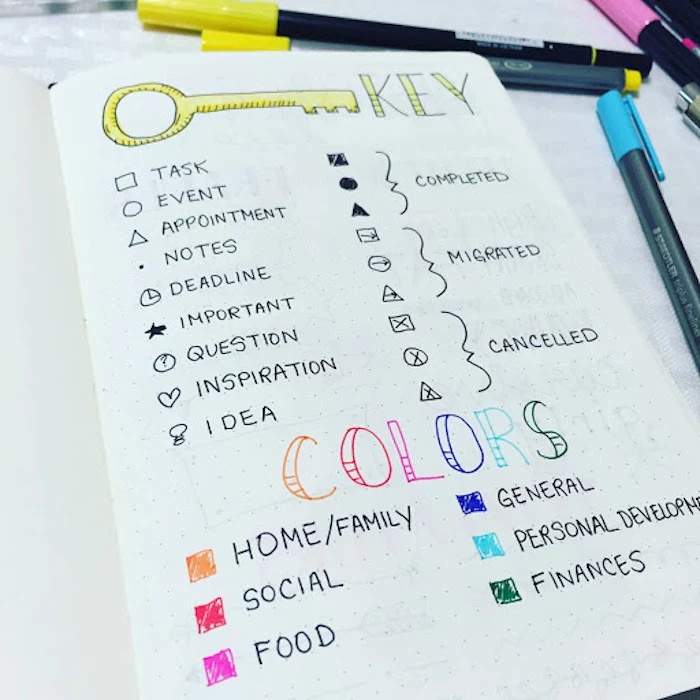
- Your First Daily Log (Page 8): On the next fresh page, write today’s date. This is it! This is where you’ll live day-to-day. You’ll use a simple system called ‘Rapid Logging’ to capture thoughts as they come. The classic symbols are:
- • (a dot) for a task you need to do.
- X (an ‘x’ over the dot) when the task is done.
- > (a right arrow over the dot) when a task is moved to another day.
- O (a circle) for an event or appointment.
- – (a dash) for a simple note, idea, or observation.
And that’s it! You’ve officially started. Your journal is no longer perfect, it’s functional. Which is so much better.
The Real Magic: Migration and Threading
Once you’re comfortable with the basics, a couple of simple techniques will turn your notebook from a simple diary into a dynamic, connected system.
The Fine Art of Migration
At the end of each month, you’ll perform a review. Look back at all your open tasks (the ones with a simple dot •). For each one, ask yourself: “Is this still important?”
If it is, you “migrate” it. You draw a little arrow over the dot (> and add the task to your new monthly task list. If it’s not worth doing anymore, be ruthless and just strike it out completely. This is so liberating! It’s a built-in process that forces you to be intentional about where you spend your energy.
Connecting the Dots with Threading
Often, notes on a single project will be scattered across several pages. Threading is a simple way to link them. For example, if you have project notes on page 20 and then more on page 35, you just write “cont. on pg 35” next to the entry on page 20. Then on page 35, you’d write “from pg 20.” It creates a breadcrumb trail you can follow without constantly flipping back to your Index.
What Happens When You Run Out of Pages?
This is a question everyone has eventually. Finishing a notebook feels great, but what do you do next? It’s simple: you archive the old one and start a new one. I call them “volumes.”
First, take your finished journal and label its spine. Something simple like “Vol. 1: Jan – Aug” works perfectly. Store it on a bookshelf. Then, in your new notebook, take a few minutes to migrate any truly essential, ongoing collections. For instance, you might re-copy a list of client contacts or a long-term project plan into the first few pages of your new volume before you set up your new Future Log. This way, your critical info is always in your current book, while the old one becomes a searchable archive.
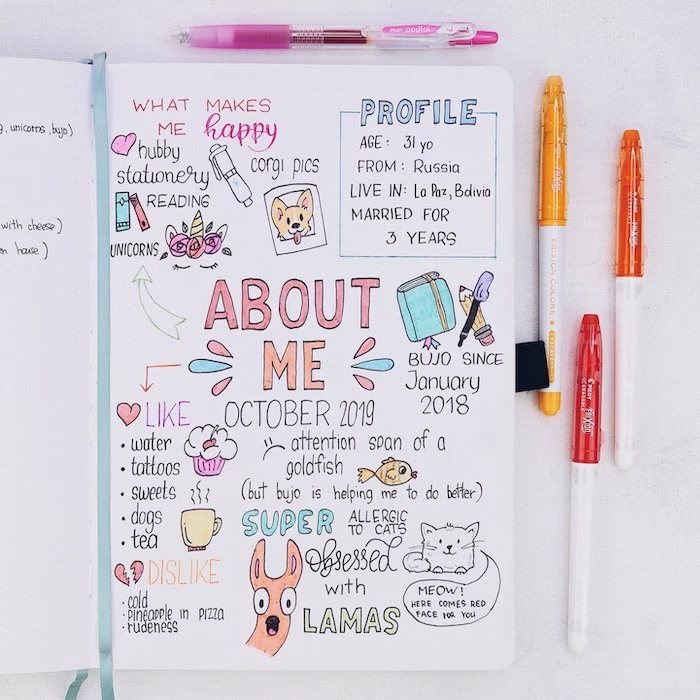
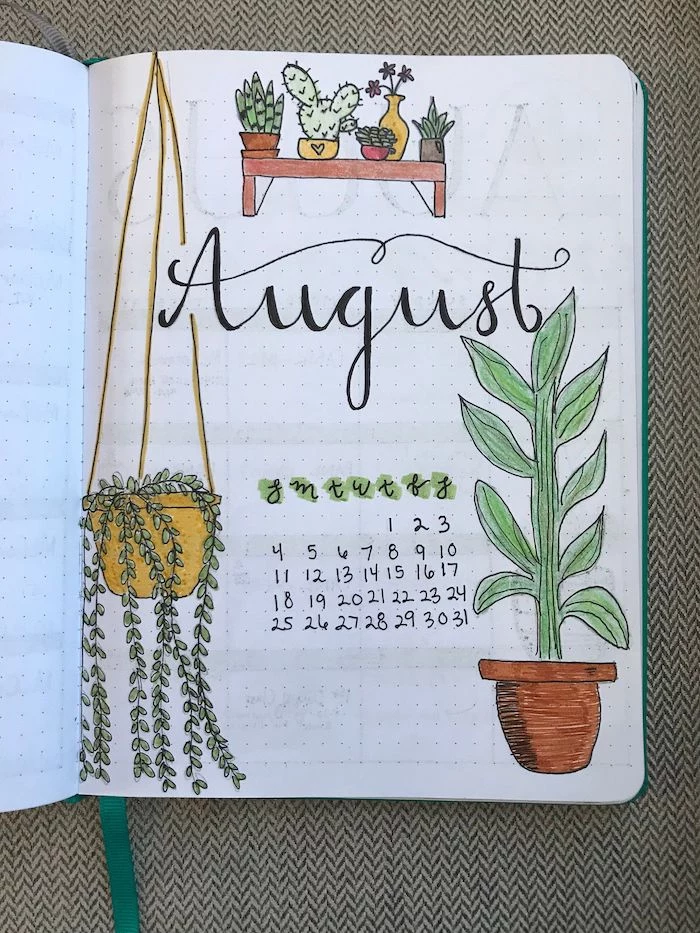
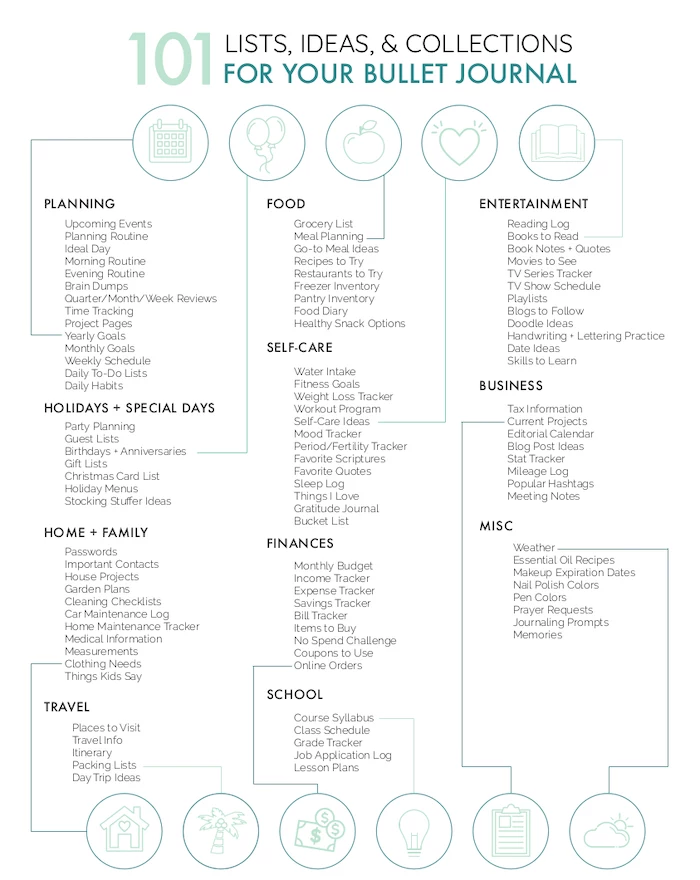
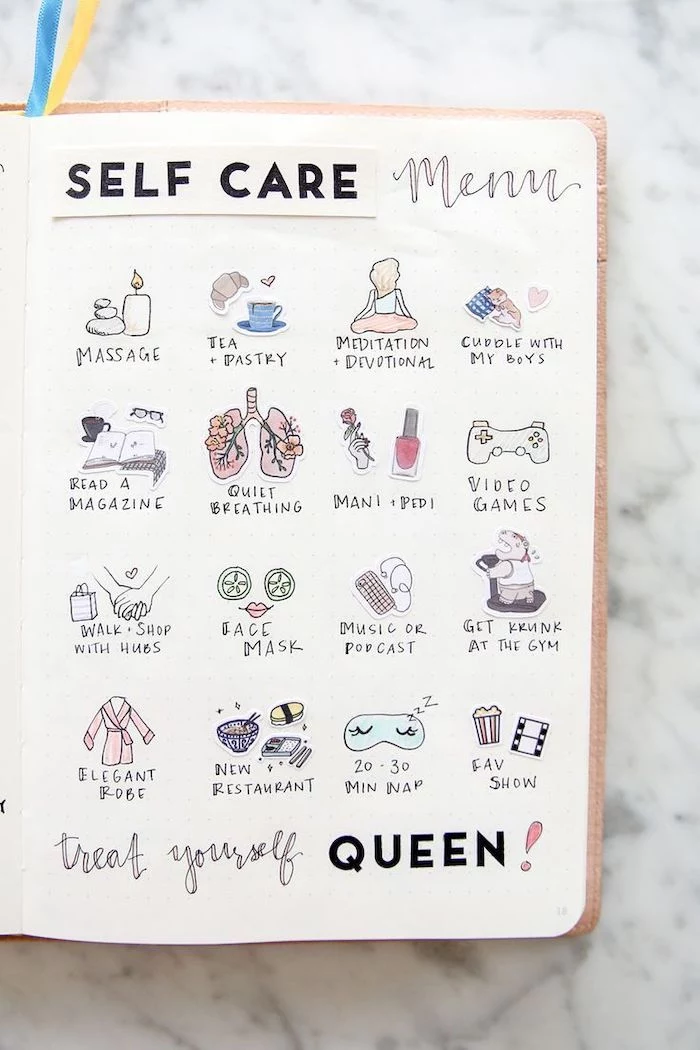
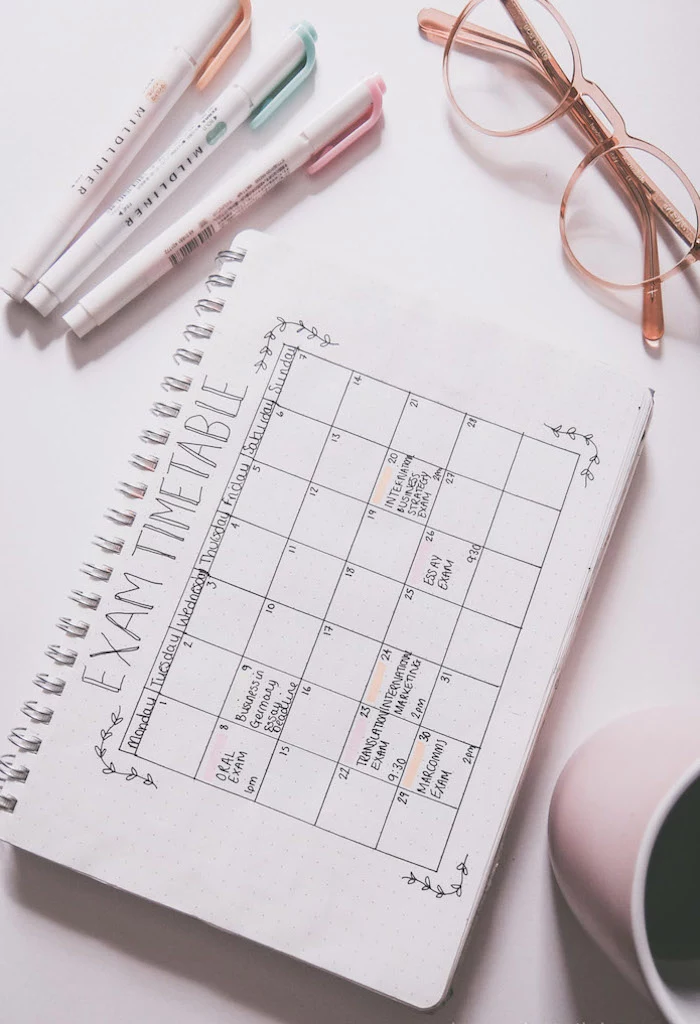
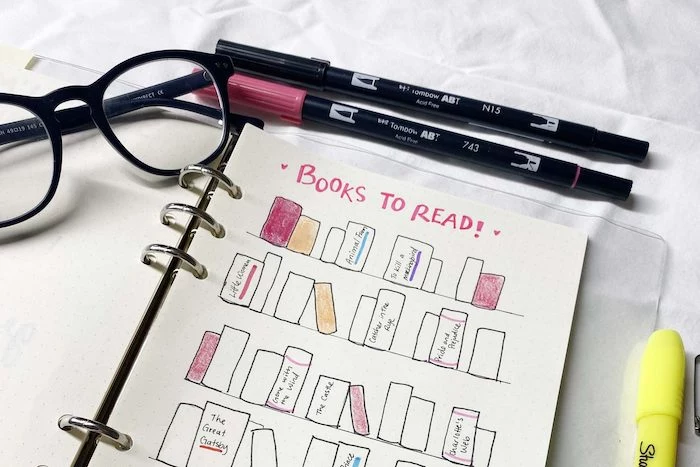
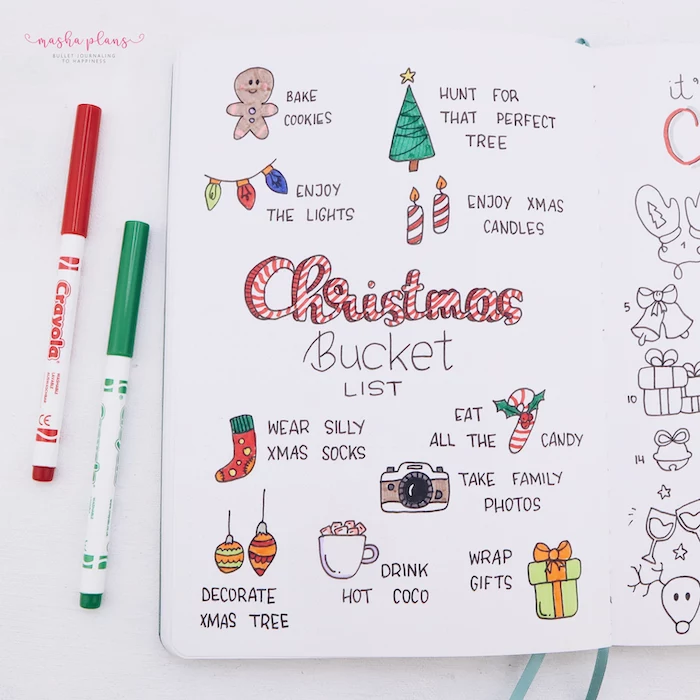
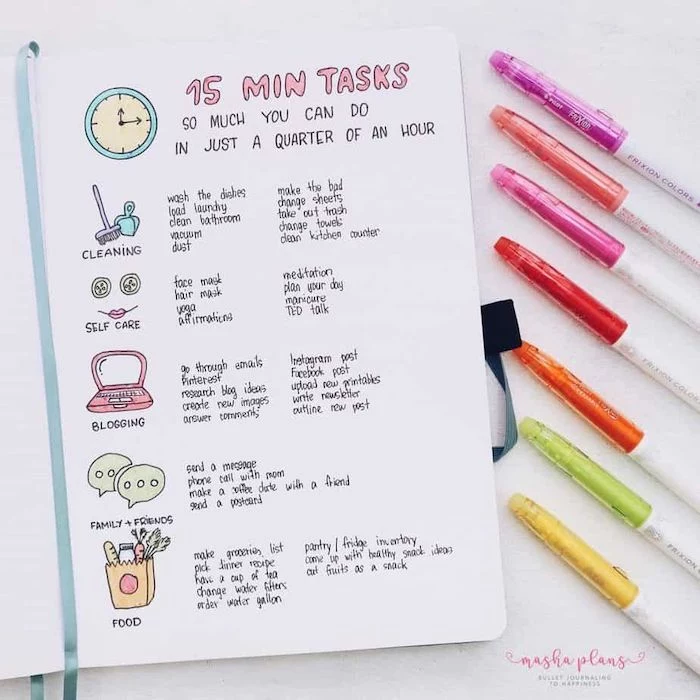
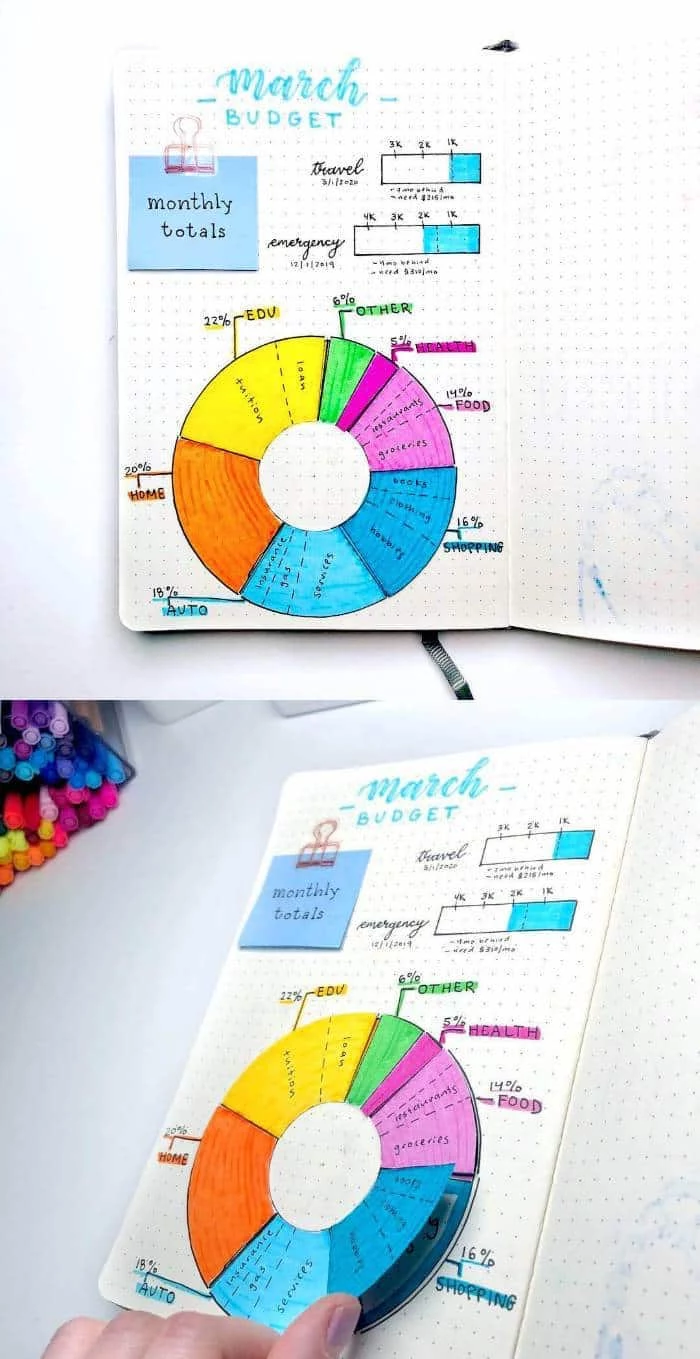
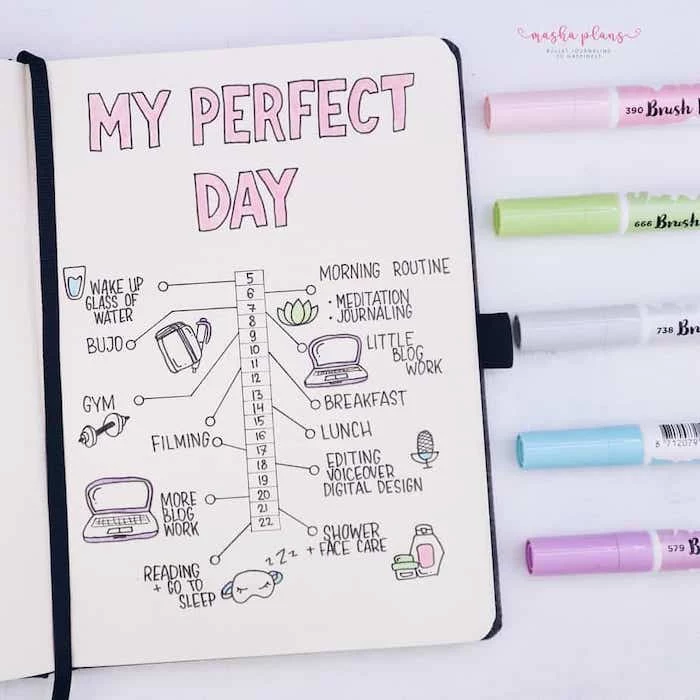
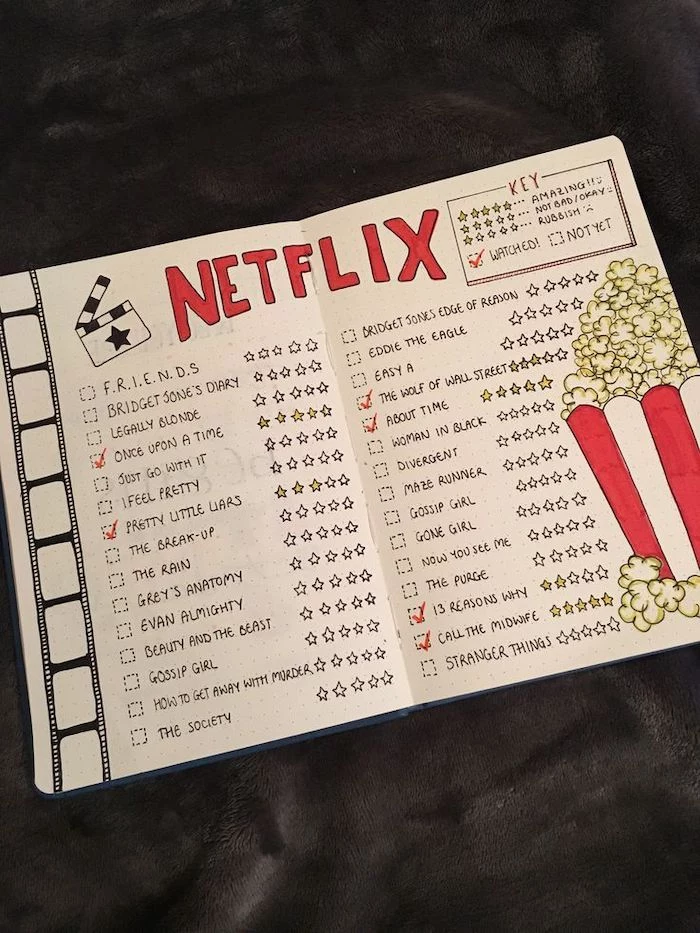
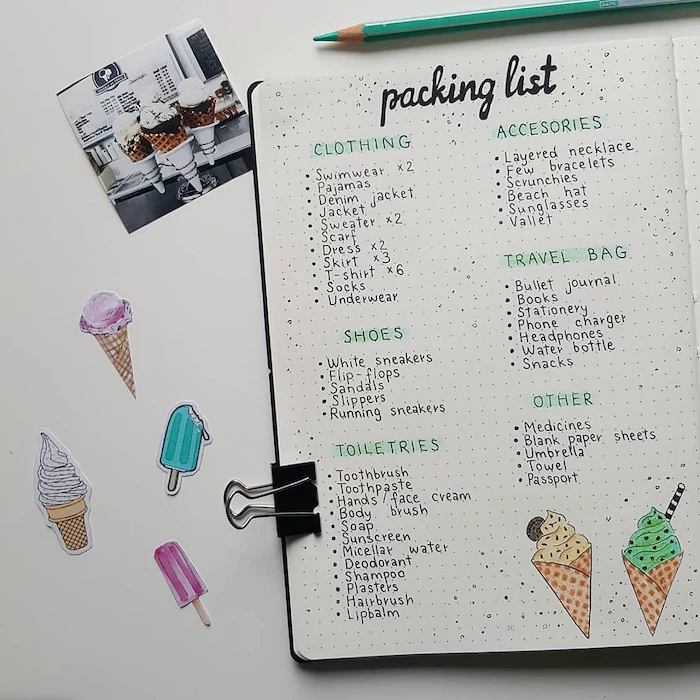
Making It Your Own: Collections for Everything
Beyond the core pages, you can create custom sections, or “Collections,” for literally anything. Just turn to a new page, give it a title, and add it to your Index.
Don’t go crazy at first, but here are some ideas to show how flexible this can be:
- For a Student: Class schedules, assignment trackers, reading lists for each course.
- For a Parent: Weekly meal plans, kids’ sports schedules, a log of funny things they say.
- For an Office Worker: Meeting notes by project, trackers for professional goals, a list of contacts.
- For a Creative: A place to sketch ideas, a list of books to read or movies to watch, project inspiration.
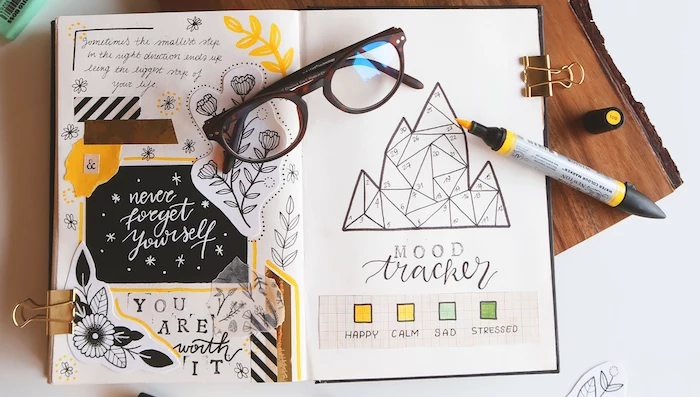
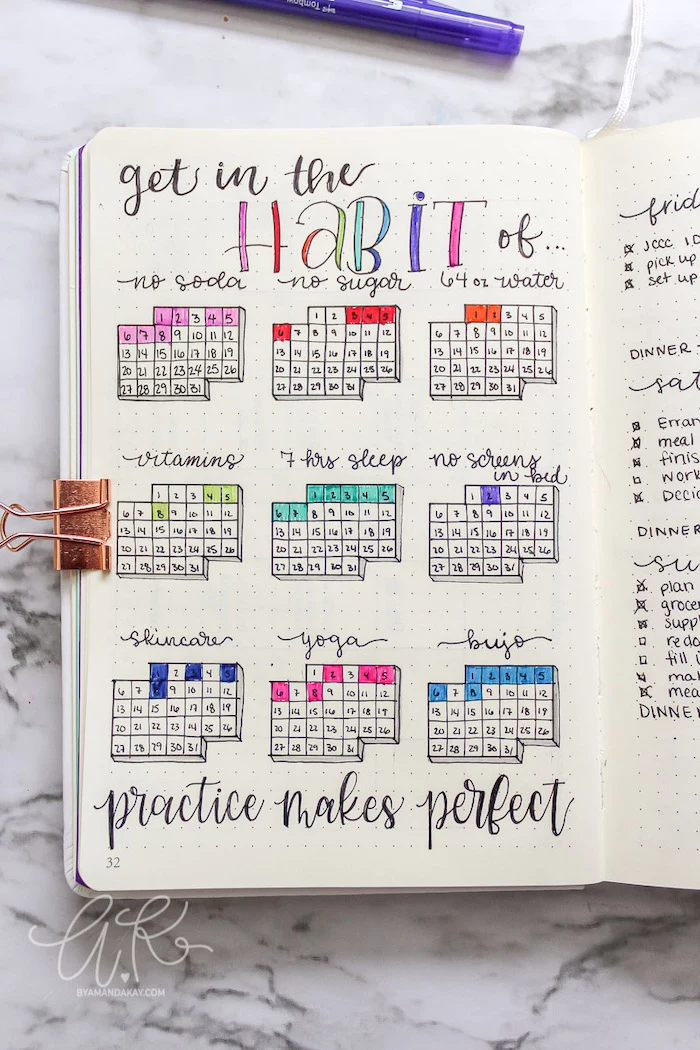
A Quick Word of Warning on Trackers
You’ll see a lot of fancy habit trackers online—grids where you color in a box every day. Honestly, be careful with these. They can be great, but they can also become a source of guilt. I once tried tracking ten different daily habits and it was exhausting. I felt like a failure every time I missed a box. I learned my lesson: only track what you are actively, seriously trying to improve. Start with just one or two things.
Troubleshooting the Common Sticking Points
You’re going to hit a bump in the road. Everyone does. Here’s how to get past the most common ones.
- Problem: “I missed a few days… or weeks. I’ve ruined it.”
Solution: No, you haven’t! This is the #1 hurdle. The fix is simple: turn to the next blank page, write today’s date, and just start again. Don’t try to go back and fill in the past. The journal serves you, not the other way around. - Problem: “I’m scared to mess up my beautiful new notebook.”
Solution: I love this trick. Flip to the very last page of the notebook and designate it as your “Pen Test” or “Scribble Page.” Make some marks, test your pens, just get some ink on it. It breaks the seal and reminds you that this is a tool to be used, not a perfect object to be preserved. - Problem: “This is taking way too much time!”
Solution: If it feels like a chore, you’re overcomplicating it. Strip it back to the absolute basics: a simple daily log with rapid logging. It should take five minutes in the morning to set up your day and five minutes at night to review. If you’re spending more than that, you’re probably getting lost in decoration.
Final Thoughts: It’s a Tool, Not a Test
Your bullet journal will grow and change with you. The one I use today looks nothing like the one I started with all those years ago. It’s adapted to my life, and that’s its real power. It’s not a rigid product; it’s a practice.
So start simple. Be consistent. Forgive yourself when you fall off the wagon. Focus on how it helps you think and organize, not on how pretty the pages are. The most valuable journal is the one that’s a little worn, a little messy, and full of the honest marks of a life being lived.
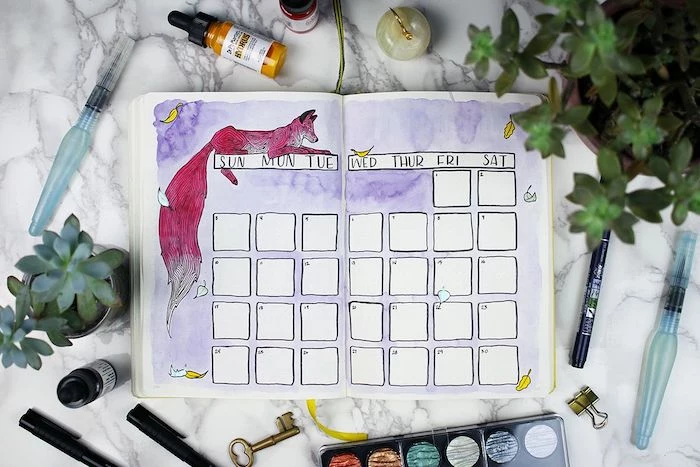
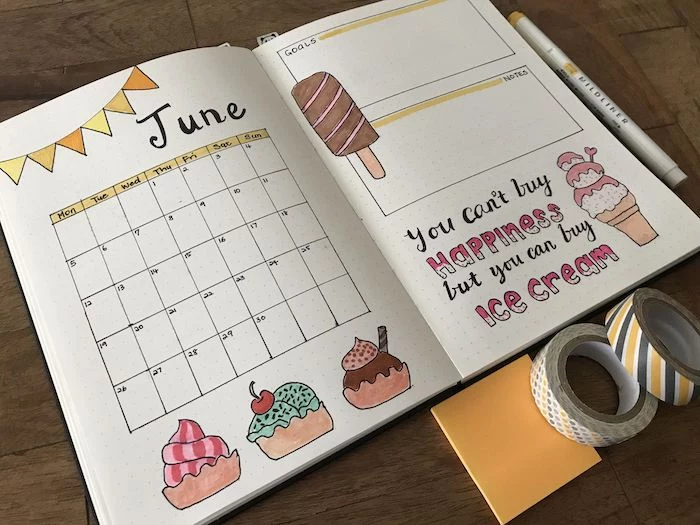
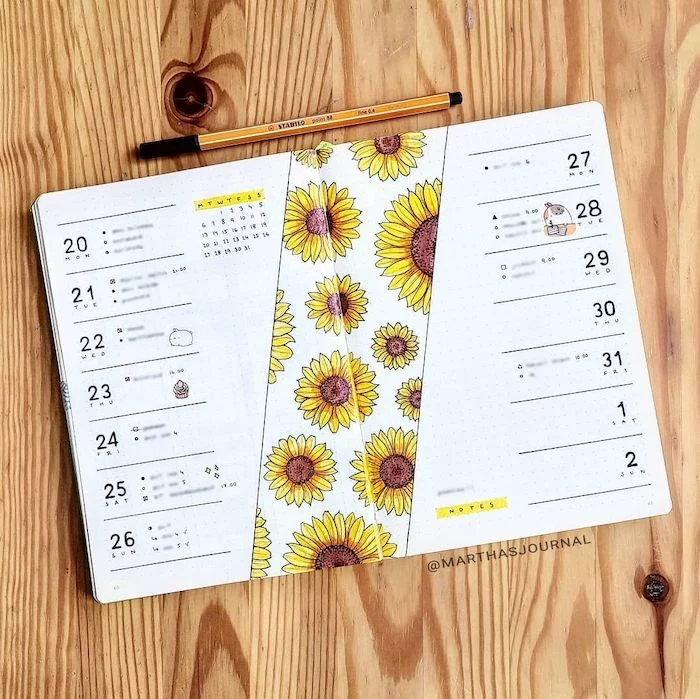
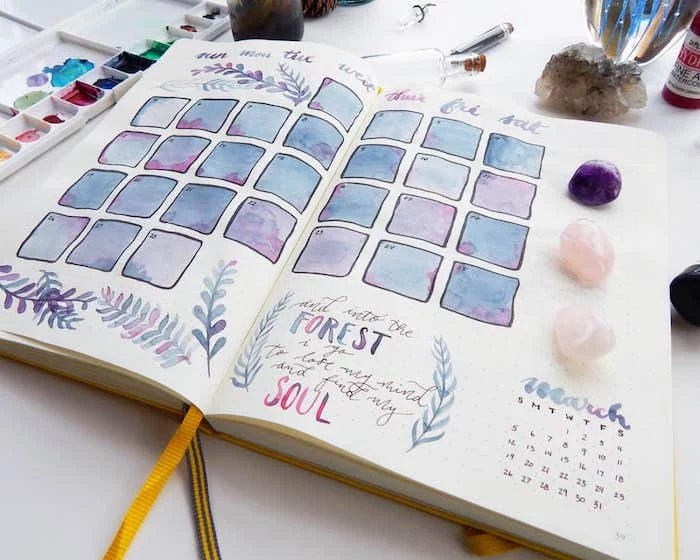
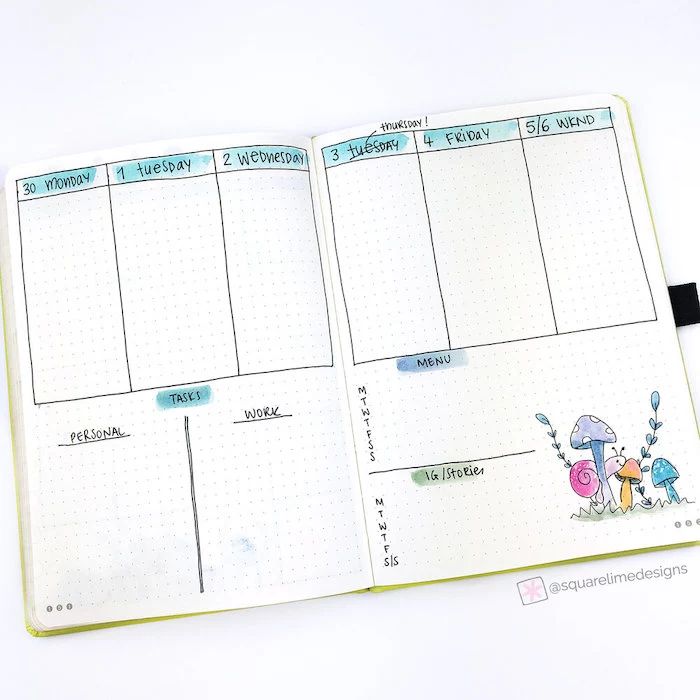
Inspirational Gallery
Notebook A: Leuchtturm1917. Often considered the gold standard for bullet journaling, it comes with pre-numbered pages and a blank index, saving you setup time. The paper is 80gsm, good for most pens.
Notebook B: Rhodia Webnotebook. Praised for its exceptionally smooth, 90gsm Clairefontaine paper, which is a dream for fountain pen users as it resists bleeding and feathering. The pages are not numbered, so it requires a bit more initial setup.
Your choice depends on your favorite pen and how much prep you want to do.
Finding the right pen is a journey in itself. Here are the top contenders:
- Fineliners: For crisp, consistent lines. The Sakura Pigma Micron is a classic for its archival, waterproof ink.
- Gel Pens: For smooth, vibrant color. The Pilot G2 is a reliable workhorse, while the Muji Gel Ink Ballpoint is a minimalist favorite.
- Brush Pens: For decorative headers and calligraphy. Tombow Fudenosuke pens have a firm-yet-flexible tip perfect for beginners.
What if I make a mistake or my handwriting is messy?
Embrace imperfection! This is a core tenet of functional bullet journaling. A crossed-out word is a sign of a tool being used, not a flawed masterpiece. For bigger errors, a bit of washi tape or a fun sticker can cover it up. Remember, this notebook is for your eyes only; clarity for you is all that matters.
The Index is your brain’s search engine: Don’t skip it! Every time you start a new ‘Collection’—like ‘Books to Read’ on page 28, or ‘Project Titan Notes’ on pages 45-50—add it to your Index at the front. This is what transforms a sequential notebook into a powerful, cross-referenced database of your life.
Don’t underestimate the power of washi tape. Beyond simple decoration, this low-tack paper tape is a versatile tool. Use it to tab important pages for quick access, create clean borders for your spreads, or even to neatly paste in receipts, photos, or tickets without messy glue.
According to a study published in Psychological Science, students who took notes by hand performed better on conceptual questions than students who typed them.
This scientific finding is at the heart of why Bullet Journaling works. The physical act of writing engages your brain on a deeper level, forcing you to process and summarize information. That’s why you’re more likely to remember—and act on—a task you’ve written down.
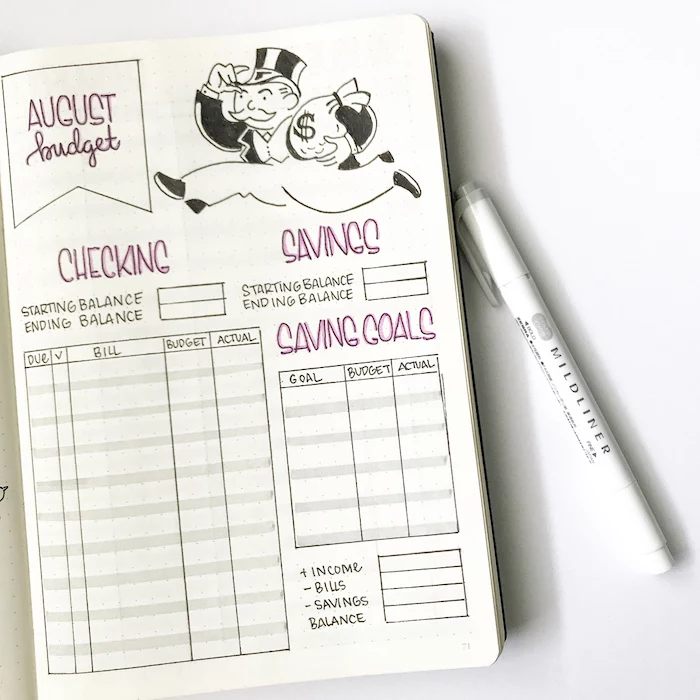
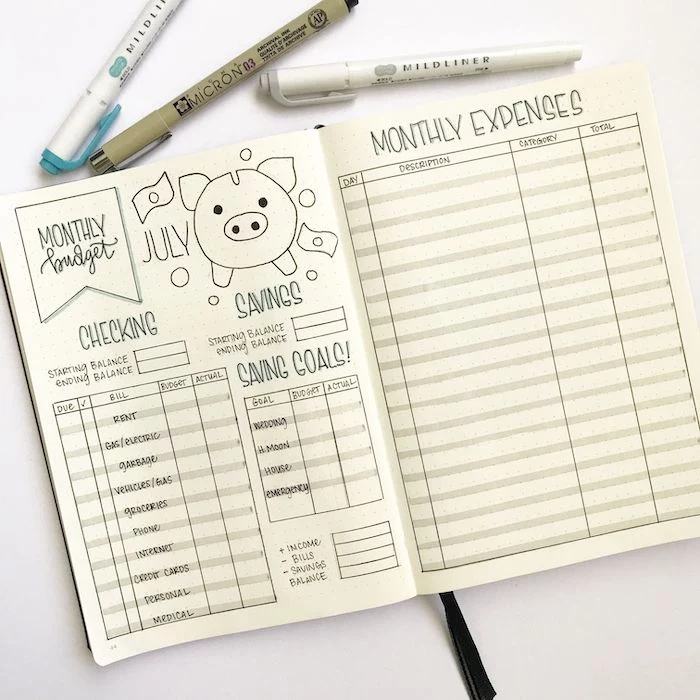
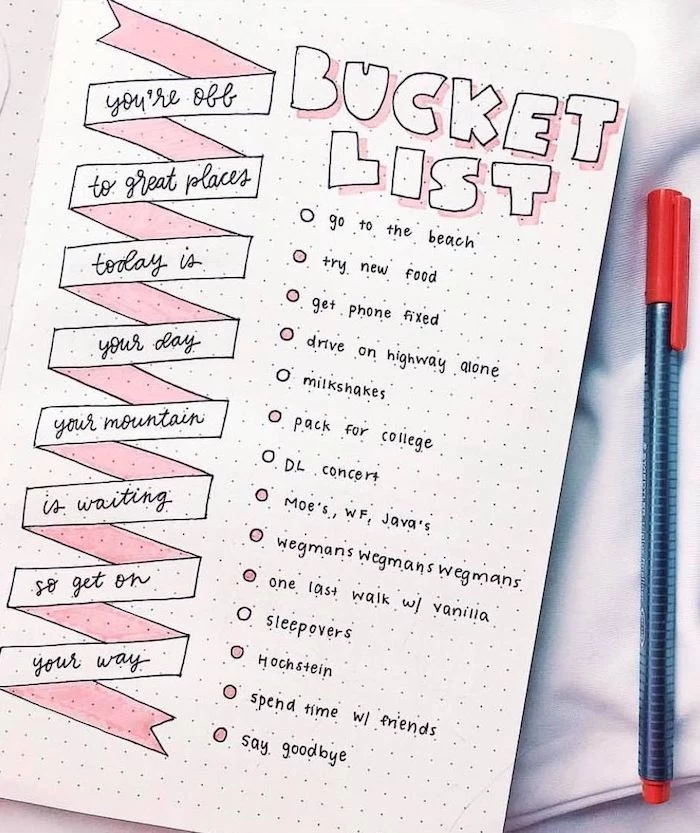
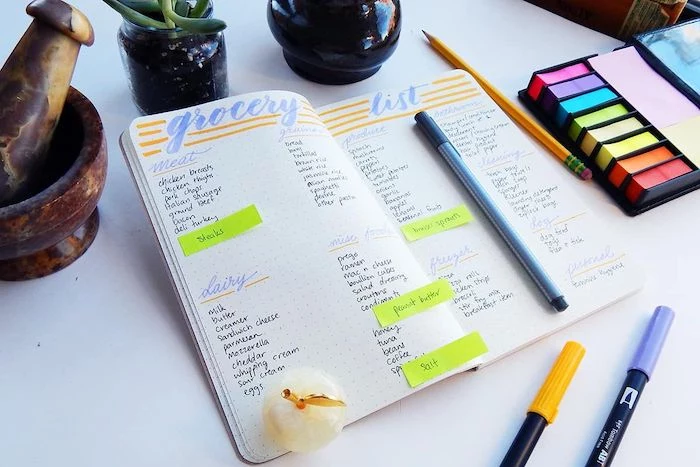
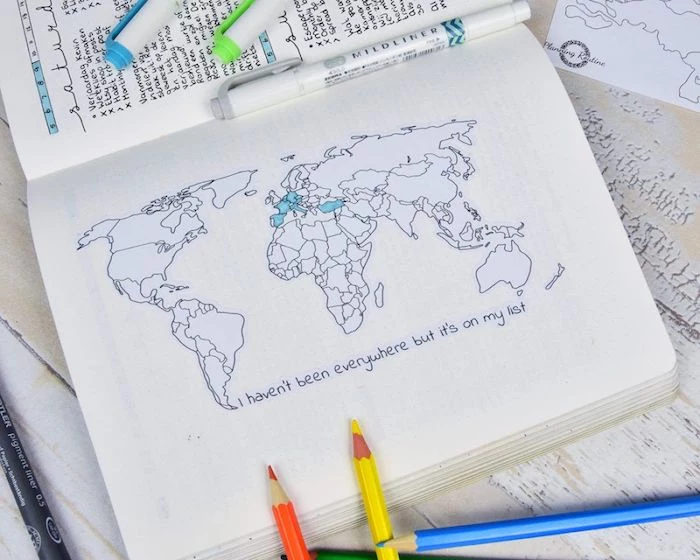
Your journal can hold more than just tasks. Use dedicated pages for ‘Collections’, which are lists of related information you want to track. Think beyond the obvious:
- Ideas for weekend trips
- Favorite quotes or poems
- A log of wines you’ve tried and liked
- Home maintenance tasks by season
- Plan your vacation six months from now.
- Remember a friend’s birthday next quarter.
- Note down professional goals for the year ahead.
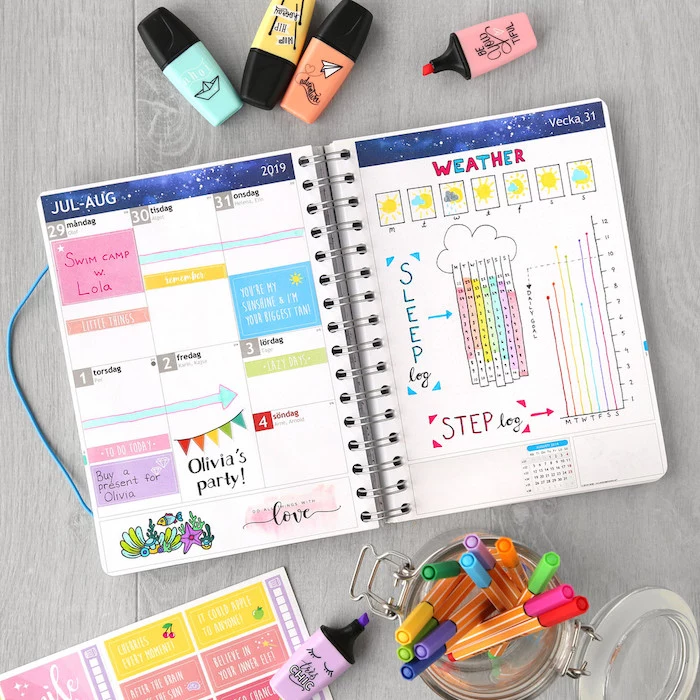
The secret is the Future Log. This is one of the first spreads you’ll create, usually a simple multi-month overview. It’s your dedicated space for events and tasks that fall outside the current month, ensuring nothing gets lost in the long term.
You don’t need to spend a fortune to start. The elegance of the Bullet Journal system is that it’s method-driven, not material-driven. A simple composition notebook from a brand like Mìquelrius and a reliable ballpoint pen, such as a Uni-ball Jetstream, are more than enough to build a powerful productivity tool.
What are ‘ghosting’ and ‘bleeding’ and how do I avoid them?
Ghosting is when you can see the shadow of the ink from the other side of the page. Bleeding is when the ink actually seeps through the paper. To avoid this, dedicate the last page of your notebook as a ‘pen test’ page. Scribble with each of your pens to see how they behave on the paper before you commit to using them in your spreads.

Minimalist Style: Characterized by a black pen (like a Muji 0.38mm), clean lines, and a singular focus on function. It’s incredibly fast to set up and maintain.
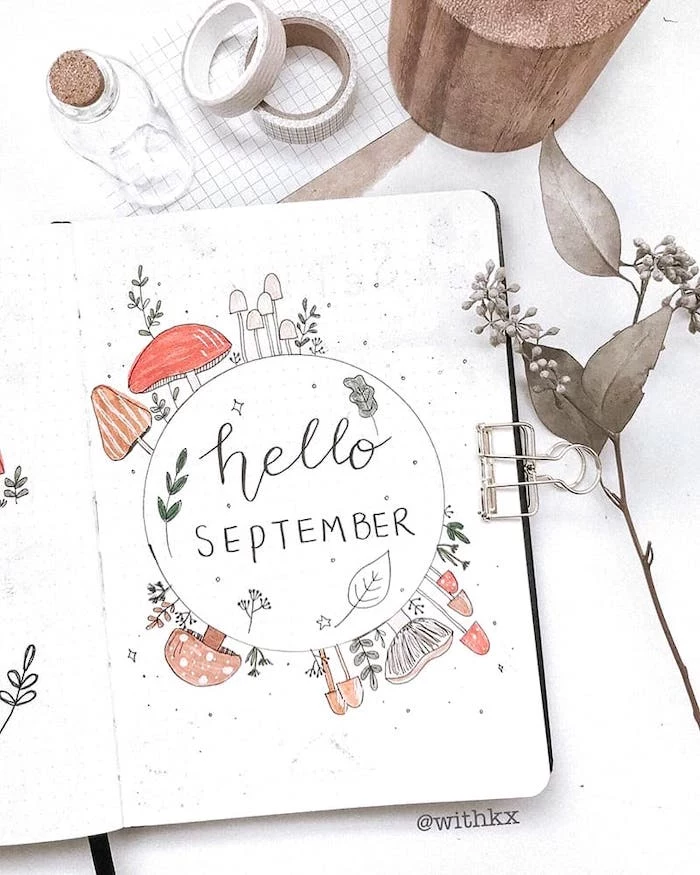
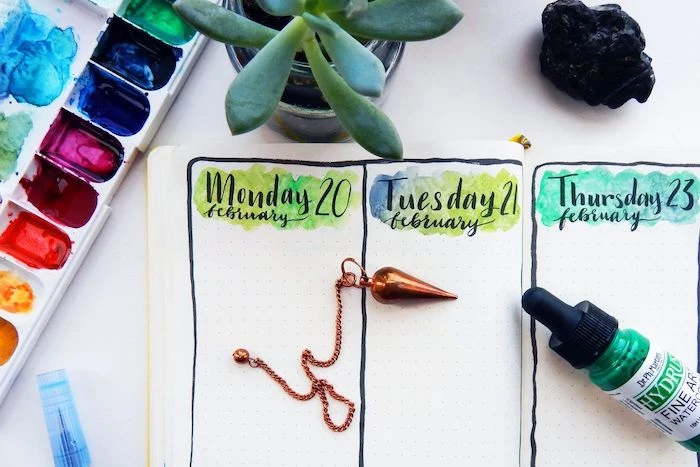
Maximalist Style: Involves watercolors, stickers, stencils, and elaborate drawings. It serves as both a planner and a creative outlet.
Neither is superior. The best system is the one you’ll actually use, so find the aesthetic balance that motivates you.
Don’t let perfection become the enemy of good: It’s completely normal to miss a day, a week, or even a month. The beauty of the Bullet Journal is its flexibility. Don’t feel pressured to go back and fill in the blank pages. Simply turn to a fresh page, write today’s date, and start again. No guilt required.
A single roll of washi tape can be used for up to 100 different applications in a standard A5 notebook.
The Sunday evening weekly review is a game-changer for staying organized. Spend 15 minutes reviewing the past week’s entries. Cross off completed tasks, and use the migration symbol (>) to move any unfinished tasks to the new week’s spread. This ritual provides closure and sets clear intentions for the days ahead.

Want to draw perfect icons and banners without being an artist? Stencils are your secret weapon. Brands like Jayden’s Apple and MoxieDori create durable, reusable stencils specifically designed for A5 journals, with everything from checkboxes and weather icons to habit trackers and monthly calendars.
Introduce a simple color code to add a layer of clarity at a glance. You don’t need dozens of pens; three or four are plenty. For example:
- Blue: Work-related tasks and appointments.
- Green: Personal errands and family events.
- Pink: Health and wellness (workouts, appointments).
- Orange: Important deadlines.
- Gain clarity on your priorities.
- Reduce the mental load of remembering everything.
- Feel a sense of accomplishment.
The key is Migration. This is the process of reviewing and moving open tasks forward. It forces you to consciously re-evaluate if a task is still important. If you find yourself migrating the same task several times, it might be a sign it wasn’t worth doing in the first place.
What do I do when my journal is full?
Celebrate! Finishing a journal is a milestone. The next step is archiving. Clearly label the spine with the date range (e.g.,
Consider a hybrid approach. Your analog Bullet Journal is perfect for daily tasks, brainstorming, and reflective journaling. Pair it with a digital tool like Google Calendar or Todoist for collaborative projects, recurring reminders, and sharing appointments with family. They complement each other’s strengths beautifully.
The Key is… well, the Key! Dedicate one of your first pages to your ‘Key’—a legend of the symbols you use. Keep it simple for efficiency.
- • = A new task
- X = Task completed
- > = Task migrated to another day/collection
- – = A note or observation
- O = An event
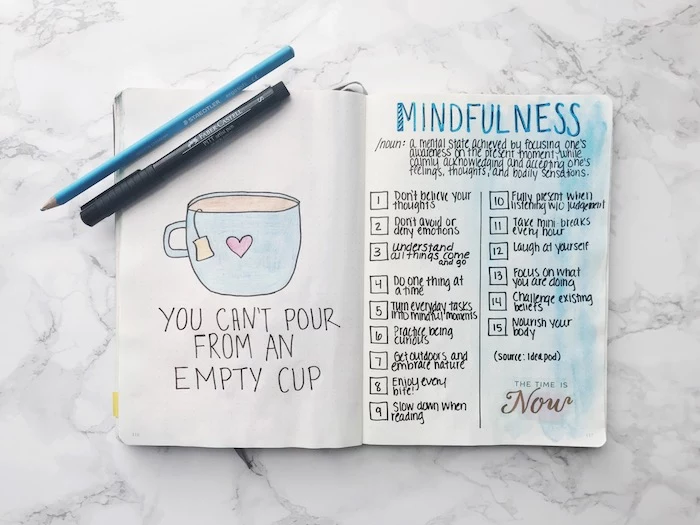
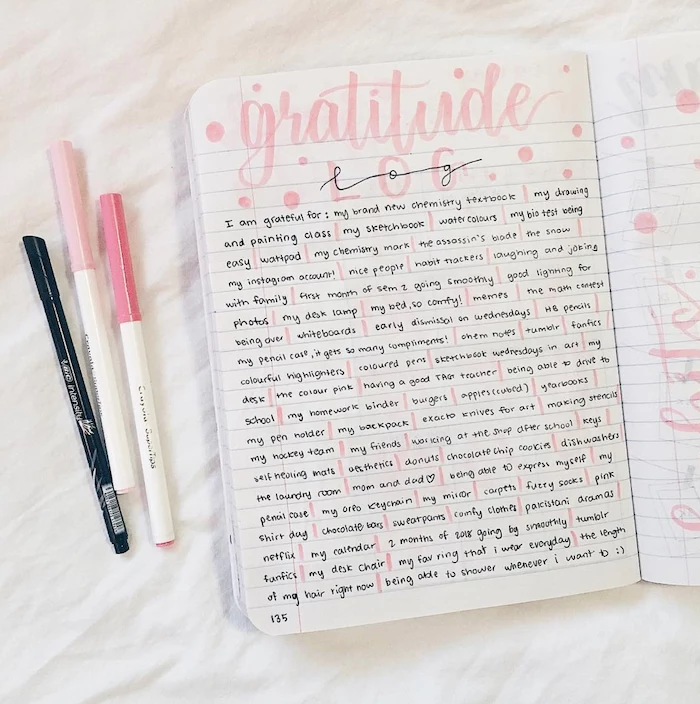
Create a dedicated ‘Mindfulness Log’ to connect with the present moment. It can be simpler than a full diary. Each evening, jot down one observation from your day, one thing you’re grateful for, and one feeling you want to acknowledge. It’s a two-minute practice with a huge impact on self-awareness.
Want to try fountain pens without breaking the bank?
The Pilot Metropolitan and Lamy Safari are two of the most recommended beginner fountain pens. They are durable, reliable, and offer a superior writing experience that can make your daily journaling feel like a luxurious ritual. Be sure your notebook’s paper (ideally 90gsm or more) can handle the ink.
A ‘Doodle-a-Day’ challenge is a fun way to build a creative habit without pressure. The goal isn’t to create a masterpiece, but simply to fill a small square with a drawing based on a prompt (e.g., ‘fruit’, ‘leaf’, ‘cup’). It’s a low-stakes way to overcome the fear of a blank page and add personality to your journal.


