Your Ultimate Guide to At-Home Facial Cupping (Without the Bruises)
I’ve been working with skin for what feels like a lifetime, both my own and my clients’. And in my studio, people are always asking about the latest tools they see popping up on social media. Facial cupping is one that comes up constantly. While it has roots in very old traditional medicine, it’s now super accessible for us to use at home.
In this article
A lot of people are curious but, honestly, a little nervous. They want to know if it actually does anything and, more importantly, if it’s safe. The answer to both is a big YES… but only if you know what you’re doing. This isn’t some magic wand. Think of it more like a specialized massage for your face that uses a bit of suction to get things moving. So, let’s walk through how it works, how to do it right, and how to sidestep the common mistakes I see all the time.
So, How Does Suction Actually Help Your Skin?
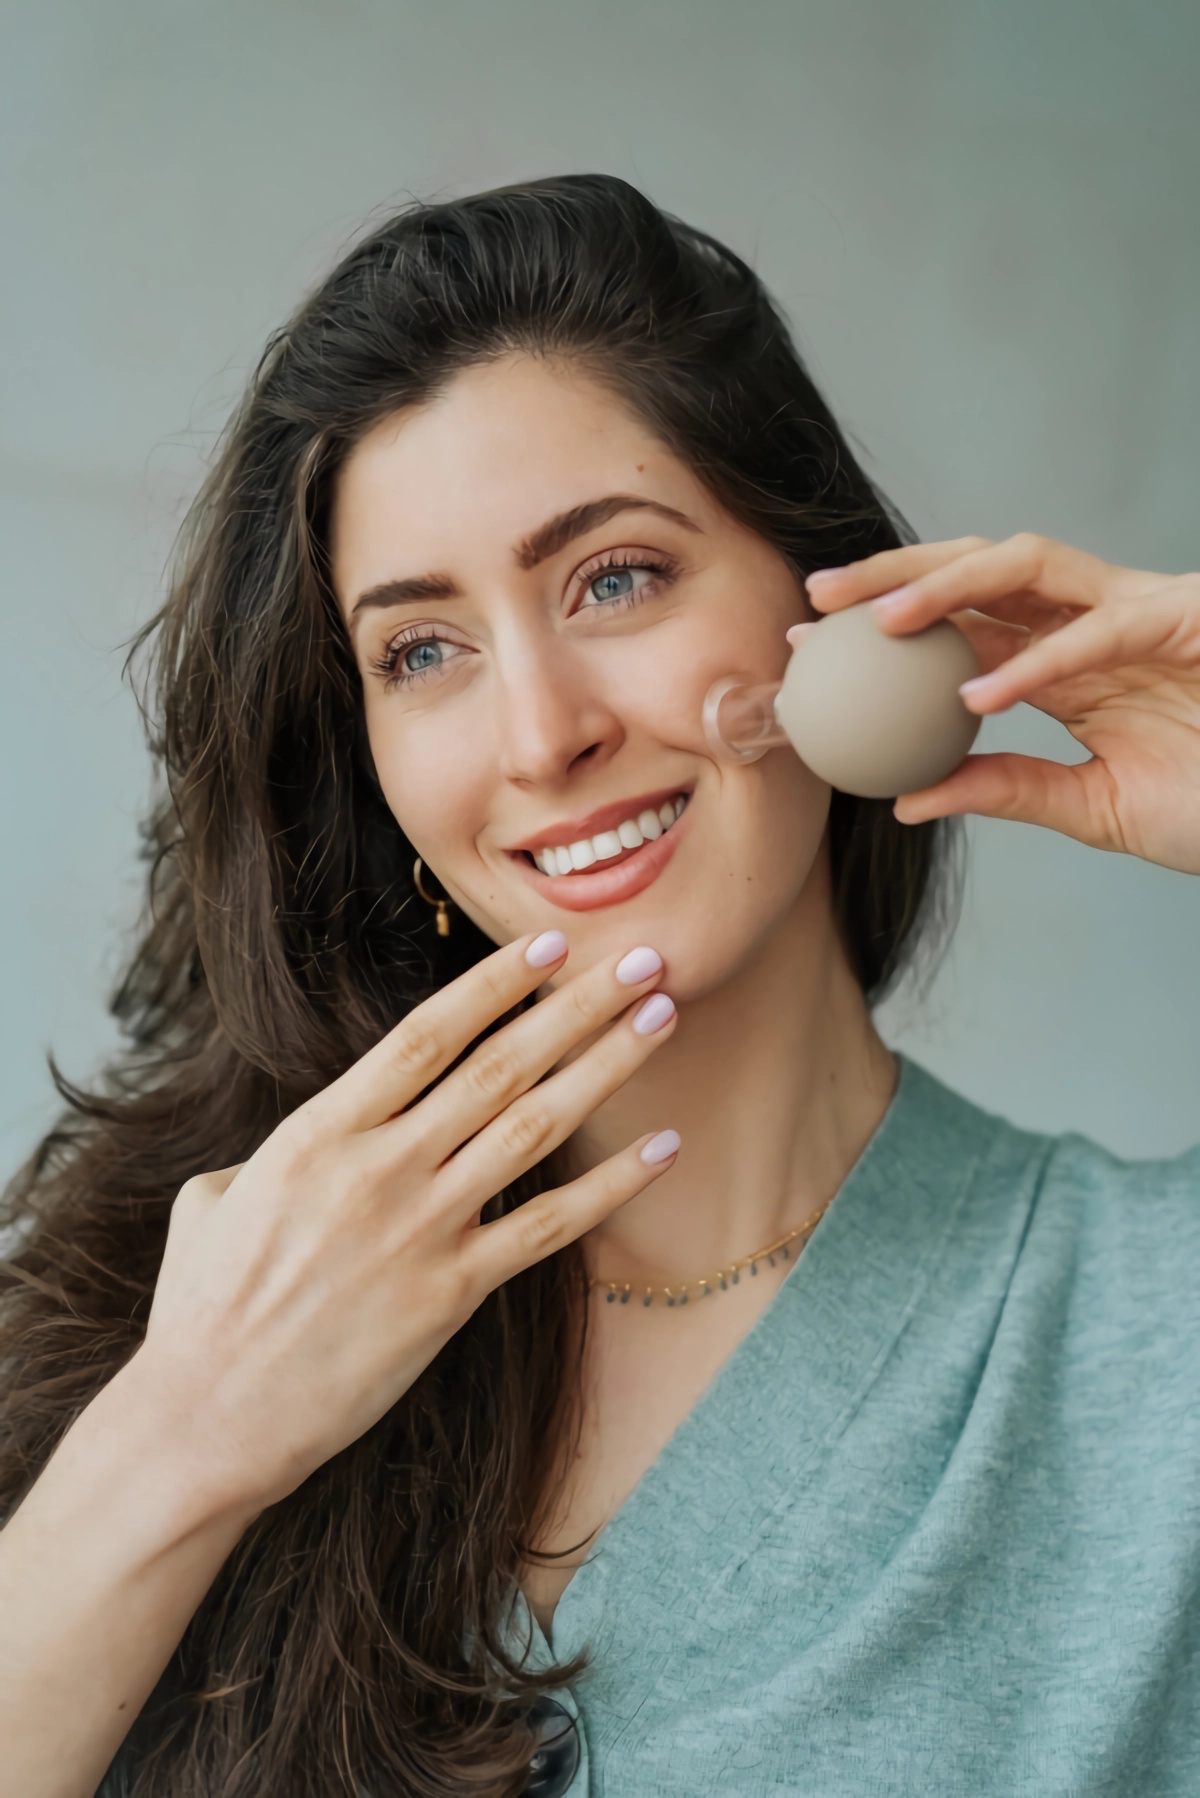
Before you put anything on your face, it’s smart to know what’s happening under the surface. Facial cupping is all about negative pressure. When you squeeze a little silicone cup and place it on your oiled-up skin, it creates a gentle vacuum as it tries to expand back to its normal shape. This lifts the skin and the tissue just beneath it.
This simple action does a few key things:
First, it gets your blood moving. The suction gently pulls fresh, oxygen-rich blood to the surface. This is what gives you that immediate, healthy-looking glow right after a session. It’s a beautiful, natural response from your body.
Second, it helps with fascia. What’s fascia? It’s basically a thin web of connective tissue that wraps around all of your muscles. When the fascia on your face gets tight and stuck, it can make expression lines look deeper and give your face a tense, drawn appearance. The lifting from the cup gently stretches and releases these layers, which can feel amazing, especially in your jaw and forehead.
Finally, it gives your lymphatic system a little nudge. Fun fact: Unlike your circulatory system which has the heart as a powerful pump, your lymphatic system has no pump of its own! It relies on things like muscle movement to clear out waste and excess fluid. The gliding motion of cupping helps move along stagnant fluid, which is why it can be fantastic for reducing morning puffiness.
Getting Your Gear: Cups and Oils
Your results and, more importantly, your safety really come down to the tools you use. The market is flooded with options, but you want to focus on quality and function.
For at-home use, you should ONLY be using silicone cups. The glass ones you might see in pictures of traditional treatments often use a flame to create suction and are absolutely for trained professionals only. Not safe for your bathroom counter!
The Practitioner’s Shopping List
So, what should you actually buy? Let’s break it down. For a decent set of medical-grade silicone cups, you should expect to pay between $15 and $40. You might see a few popular brands online, but the brand name matters less than the quality. The silicone should feel soft and pliable, but not flimsy, and the edges should be perfectly smooth. Cheap, stiff cups are a nightmare to control.

You’ll usually get a set with two to four different-sized cups. This isn’t just for looks:
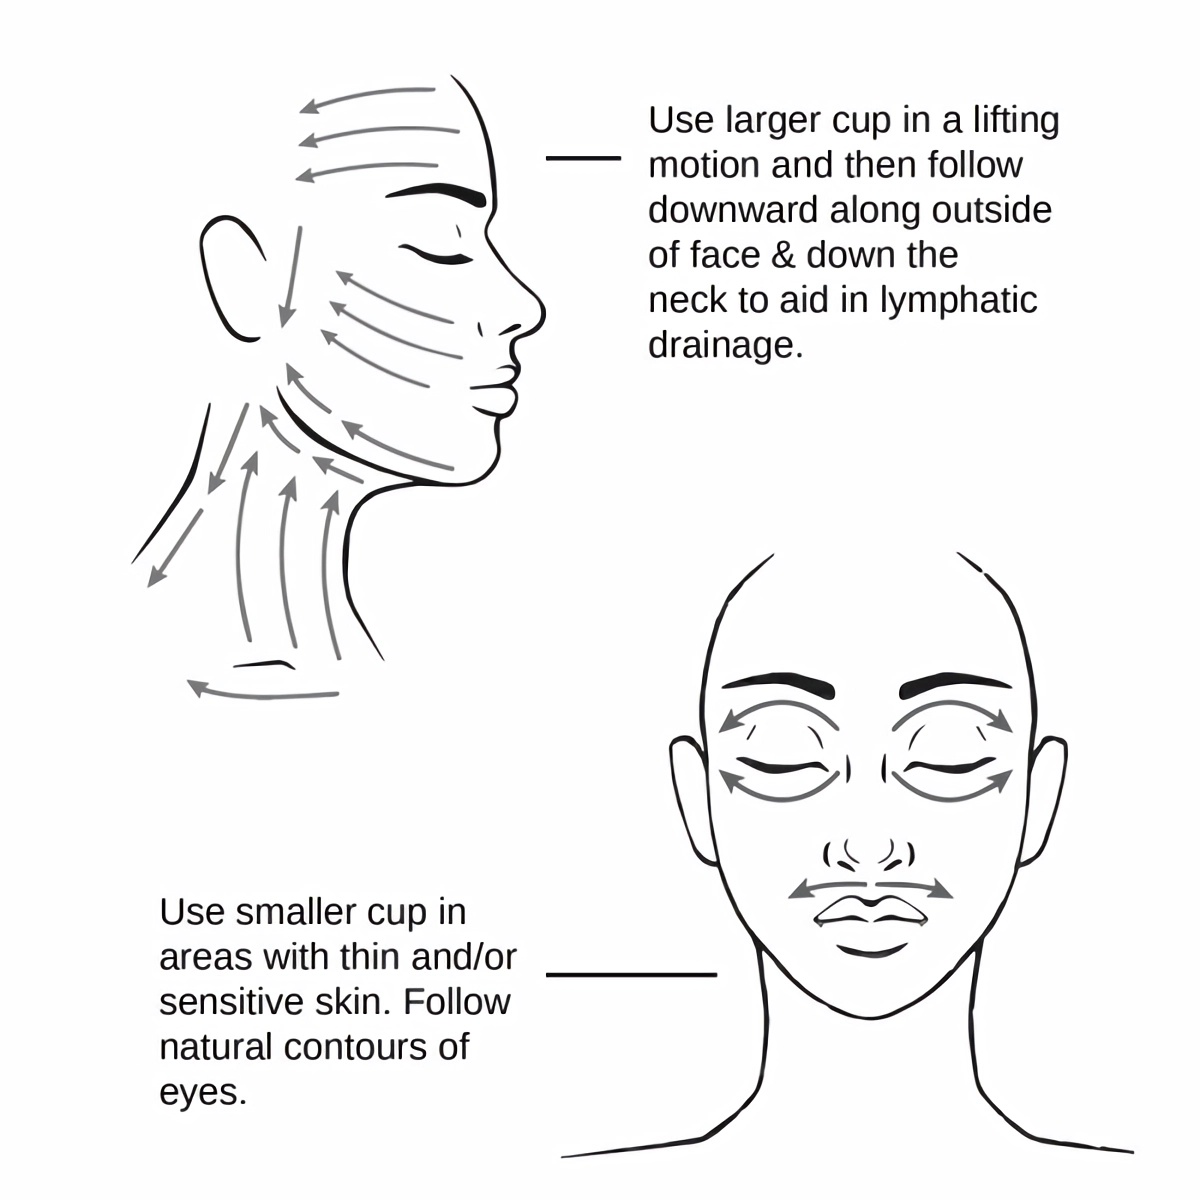
- The Big Cups: These are your workhorses for the broad areas of your face—forehead, cheeks, and jawline.
- The Tiny Cups: These are for the delicate, hard-to-reach spots. Think around the nose, above the lip, and very, very carefully around the eye area. Quick tip: NEVER use a cup on your eyelid or the soft tissue right under your eye. Stick to the bone.
Don’t Forget the Facial Oil!
You cannot, and I mean CANNOT, do this on dry skin. It’s non-negotiable. You need a good facial oil to provide “slip,” so the cup can glide without tugging. For the oil, a 2oz bottle will run you about $10 to $30 and will last you a long time. My favorites are:
- Jojoba Oil: This is a top pick in my practice. It’s incredibly similar to our skin’s own natural oils, so it rarely causes irritation. It feels silky and works for almost all skin types.
- Squalane Oil: Derived from olives or sugarcane, this one is super lightweight and won’t clog pores, making it perfect if you’re prone to breakouts.
- Rosehip Seed Oil: A bit richer, this oil is amazing for dry or mature skin and is packed with skin-loving nutrients.
A quick word of caution: I usually advise people to steer clear of coconut oil for this. For many, it can be a one-way ticket to clogged pores. Before you start, always do a little patch test with your oil on your inner arm to make sure you don’t have a reaction.
The Step-by-Step Guide to a Perfect Glide
Think of this as a slow, mindful dance with your skin. Rushing is a recipe for bruising. I suggest starting with just one 5 to 10-minute session a week. Once your skin is used to it, you can bump that up to two or three times a week. Always, always listen to your skin.
Step 1: Prep Your Face & Space
First, wash your face with a gentle cleanser and pat it dry. Then, apply a generous layer of your chosen facial oil. You want your face and neck to be slick, not just a little damp.
Step 2: Get the Feel
Take one of the larger cups and practice on your forearm first. Squeeze it gently, place it on your skin, and release. You should feel a light pull—never painful. The amount you squeeze the cup directly controls the suction. For your face, you want it to feel like a soft, gentle pinch.
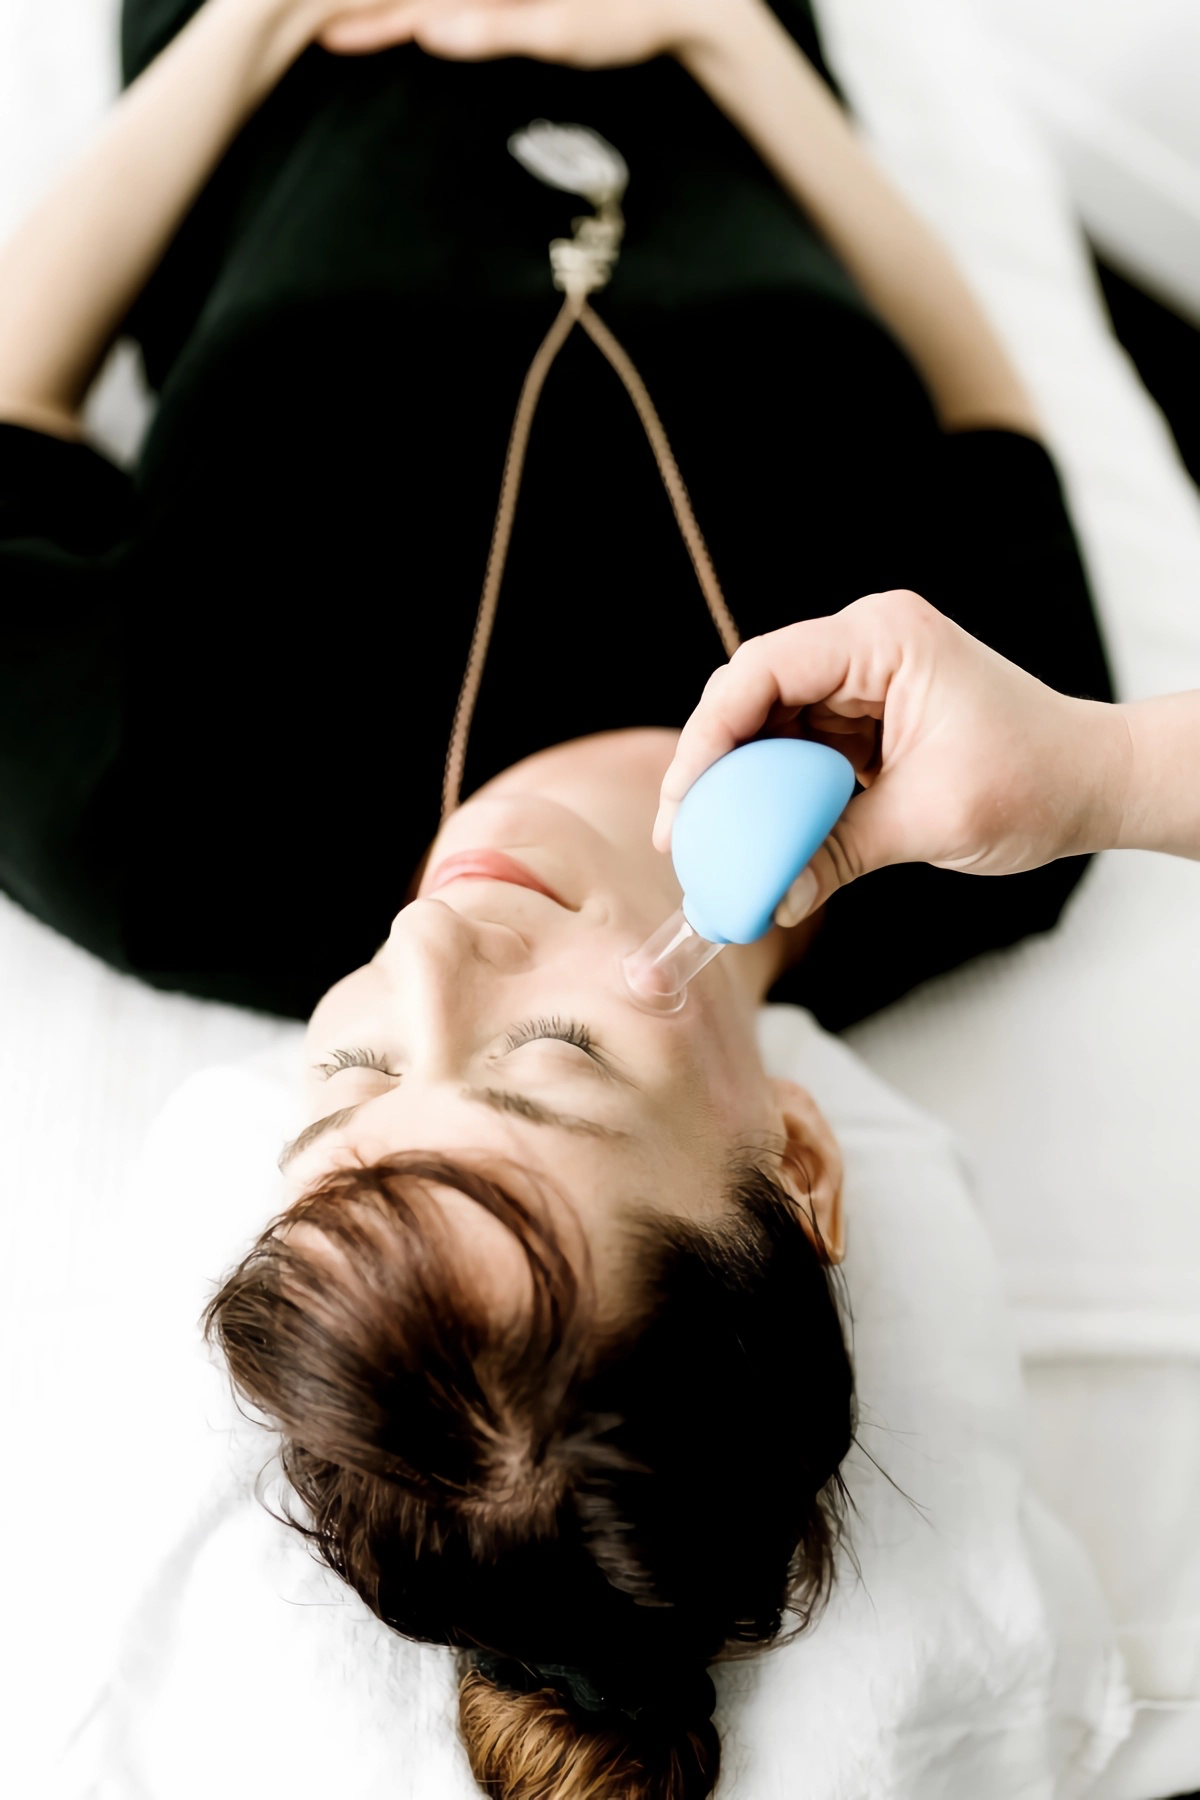
Step 3: Anchor and Glide (The Most Important Part!)
This is the secret sauce. Always use your free hand to anchor the skin. If you’re working on your cheek, place your other hand near your nose to hold the skin taut. From my experience, the best way to think about it is to imagine your skin is a fine silk sheet. You can’t just drag something across it; you have to hold one side firmly to get a smooth glide. Your anchor hand is just as important as your cupping hand!
Once the cup is suctioned, start gliding immediately. Never let the cup sit still.
The Movement Map
The golden rule is to always move from the center of your face outwards and generally in an upward motion. This helps direct fluid towards the lymph nodes near your ears and collarbones. And if you’re a visual learner, it’s a great idea to search online for a video of facial cupping drainage patterns. Seeing it in motion can really make it click.
- Neck: Start at your collarbone and glide up toward your jaw. Avoid the very center of your throat.
- Jawline: Anchor your chin and glide the cup along your jawbone up toward your earlobe. This feels heavenly for jaw tension. Do this 3-5 times on each side.
- Cheeks: Start next to your nose and glide outwards across your cheek toward your ear.
- Forehead: Start in the center and glide upwards to your hairline. Then, work from the middle out towards your temples.
- Mouth Area: Use a tiny cup for small, quick glides from the corners of your mouth outwards.
- Eye Area (EXTREME CAUTION): Use the smallest cup with the lightest suction possible. Anchor at your temple and glide very gently from the inner corner, staying on the orbital bone, and out towards your temple. One or two passes are plenty.
After each glide, just gently peel the cup off to break the seal. A bit of pinkness and warmth is totally normal—it means you’ve boosted circulation!

Safety First: The Non-Negotiable Rules
The first rule of any skin treatment is “do no harm.” Trust me, I’ve seen what happens with improper technique. So please, treat this section like gospel.
Heads Up: DO NOT Use Cups If You Have…
- Active acne breakouts, open sores, or cuts.
- Sunburned or otherwise inflamed skin.
- Conditions like rosacea or eczema in a flare-up.
- Lots of raised moles or skin tags in the area.
- Had recent injections like Botox or fillers. The standard advice is to wait at least four weeks, but check with your injector.
- Blood clotting issues or if you’re on blood thinners. You will bruise very easily.
The Cardinal Sin of Facial Cupping
I have to say this again because it’s that important: never let the cup rest in one place on your face. Not even for a second. I’ll be honest, when I was first learning years ago, I got distracted and left a cup on my own cheek for maybe three seconds. I had a faint circular mark for two days! It was the best lesson I ever learned: always, always keep the cup moving. Those dark circles you see from body cupping are broken capillaries—that’s damage you don’t want on your delicate facial skin.
After your session, rinse with cool water, apply a gentle hydrating serum, and wash your cups with warm, soapy water. Let them air dry and store them somewhere clean.
Troubleshooting & A Few Pro Moves
Once you’re comfortable, you can play around a bit. For example, a technique called “flash cupping” (squeeze, place for a second, release, lift, repeat quickly) is great for temporarily plumping lips before a night out.
Common Problems & Quick Fixes
- Problem: The cup keeps losing suction.
Solution: You probably need more oil. Another culprit can be fine hair along the hairline or jaw. A little pro trick: apply a bit of extra oil or even a water-based gel right on that area to get a better seal. - Problem: My skin feels like it’s being dragged down.
Solution: You forgot to anchor! Get that free hand in place to hold the skin taut. It makes all the difference. - Problem: My skin is super red and irritated.
Solution: You’re using way too much suction or going too slow. Lighten up your squeeze! The goal is a healthy pink flush, not an angry red reaction.
Let’s Be Real About Results
Okay, let’s have an honest chat. Facial cupping is a fantastic tool, but it’s not a facelift in a box. The benefits are real: you’ll see an immediate glow, reduced puffiness, and released muscle tension.
With consistent use, your skin can look brighter and feel a bit firmer, and it can soften fine lines caused by tension or dehydration. But it won’t erase deep wrinkles or fix significant sagging. Think of it as exercise for your face—a vital part of a healthy skin lifestyle that you maintain with regular practice.
Ultimately, facial cupping is a way to have a conversation with your body. It’s a chance to get hands-on with your own skin, and when done with a bit of knowledge and a gentle touch, it can be an incredibly rewarding ritual.
Inspirational Gallery with Photos
The right glide: The secret to a successful, bruise-free cupping session isn’t the cup—it’s the oil. You need a facial oil that provides enough slip without being absorbed too quickly.
Jojoba Oil: Its structure is incredibly similar to our skin’s natural sebum, making it a non-comedogenic choice for most skin types. It provides a lasting glide perfect for a full-face routine.
Squalane Oil: A lighter, fast-absorbing option. Best for a quick session or for oilier skin types. Brands like The Ordinary or Biossance offer excellent pure squalane options.
For beginners, Jojoba is often the safer bet to ensure continuous movement.
A 2017 study in the Journal of Bodywork and Movement Therapies found that facial massage techniques significantly improved skin blood flow and the appearance of facial sagging.
While facial cupping is a unique method, it works on this same core principle: boosting circulation. That immediate post-cupping flush isn’t just a temporary effect; it’s a visible sign of nutrient-rich blood nourishing your skin cells from within, promoting long-term skin health and resilience.
To get that sculpted, lifted look without irritation, remember what not to do:
- Never leave a cup stationary on your face for more than a second or two. It’s all about constant, gentle motion.
- Don’t perform cupping on dry or insufficiently oiled skin. This is the number one cause of pulling and potential bruising.
- Avoid cupping over active acne, rosacea flare-ups, or any broken skin. Let your skin heal first.
- Don’t apply strong suction. A gentle pinch of the cup is all you need to create the perfect vacuum.
Wondering how to pair cupping with your other favorite facial tools?
Think of facial cupping as the ‘de-puff and release’ step in your routine. It works beautifully after cleansing and applying oil. Use your cups first to promote lymphatic drainage and release fascial tension. Then, follow up with a cool Gua Sha stone or an ice roller to soothe the skin, enhance the sculpting effect, and help close up pores. The cup does the deep work; the stone provides the finishing touch.
- A brighter, more even skin tone.
- Reduced morning puffiness, especially around the eyes and jaw.
- A feeling of openness and release in tense areas like the forehead and jaw.
The secret? Consistency. Aim for a 5-minute cupping massage 2-3 times a week. Like any form of exercise, regular practice is what trains the facial muscles and lymphatic pathways to function optimally, transforming a temporary glow into a lasting radiance.
The different cup sizes in your kit aren’t just for show—they’re for precision. The smaller, more delicate cups are designed for the sensitive area around the eyes and lips where the skin is thinner. Use them to gently soften crow’s feet or ‘smoker’s lines.’ The larger cups, like those in sets from brands like WTHN, are your workhorses for the cheeks, jawline, and forehead, where you can cover more ground to effectively drain fluid and release tension.
Don’t skip the cleanup: Your silicone cups are magnets for oil, dead skin cells, and bacteria. To keep them hygienic and effective, wash them immediately after every use with warm water and a gentle antibacterial soap. Let them air dry completely on a clean towel before storing them. This simple step prevents breakouts and ensures your tools are ready and safe for your next self-care session.
Transform your cupping session into a true sensory ritual. Before you begin, take three deep, calming breaths. As you glide the cup across your skin, focus on the sensation of release in your facial muscles. Pay attention to the tight spots in your jaw or between your brows letting go. This isn’t just a skincare step; it’s a moment to reconnect with your body and melt away the day’s stress.
Is at-home cupping worth it compared to a professional treatment?
A single professional lymphatic drainage facial can cost anywhere from $100 to $250. An at-home facial cupping set, like those from Grace & Stella or other popular brands, typically costs between $20 and $40 and can be used hundreds of times. While a professional treatment offers expert hands and a spa-like experience, incorporating at-home cupping provides consistent, budget-friendly maintenance that delivers remarkable cumulative results.


