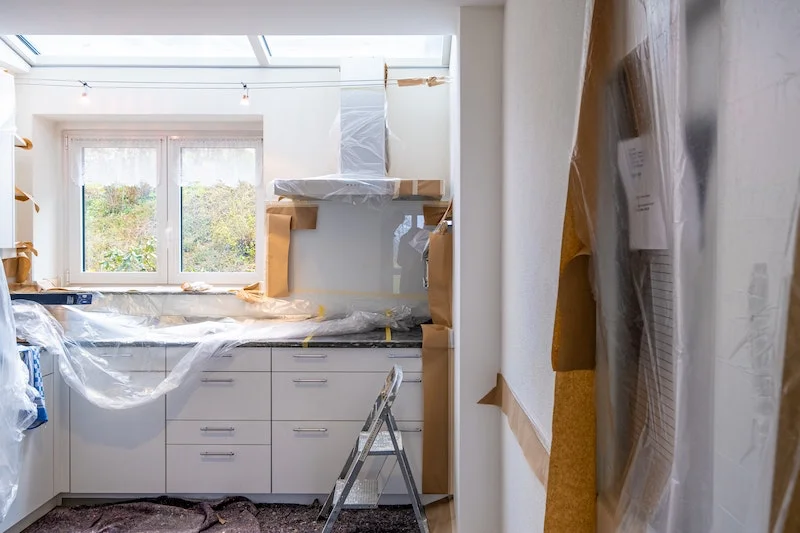
Your Reno’s Done, But The Dust Isn’t: A Pro’s Guide to Post-Construction Cleanup
So, the last contractor just walked out the door. Your new kitchen is gleaming, the bathroom tiles are perfect, and everything looks… almost perfect. Except for that fine, gritty layer of white dust that seems to be on EVERYTHING. If you’re staring at the mess and have no clue where to begin, you’re not alone. I’ve seen that look of despair on countless homeowners’ faces.
In this article
Most people think a quick sweep and a pass with the mop will handle it. But honestly, that’s one of the worst things you can do. You could end up scratching your brand-new floors or just kicking the most harmful dust right back into the air you’re about to breathe.
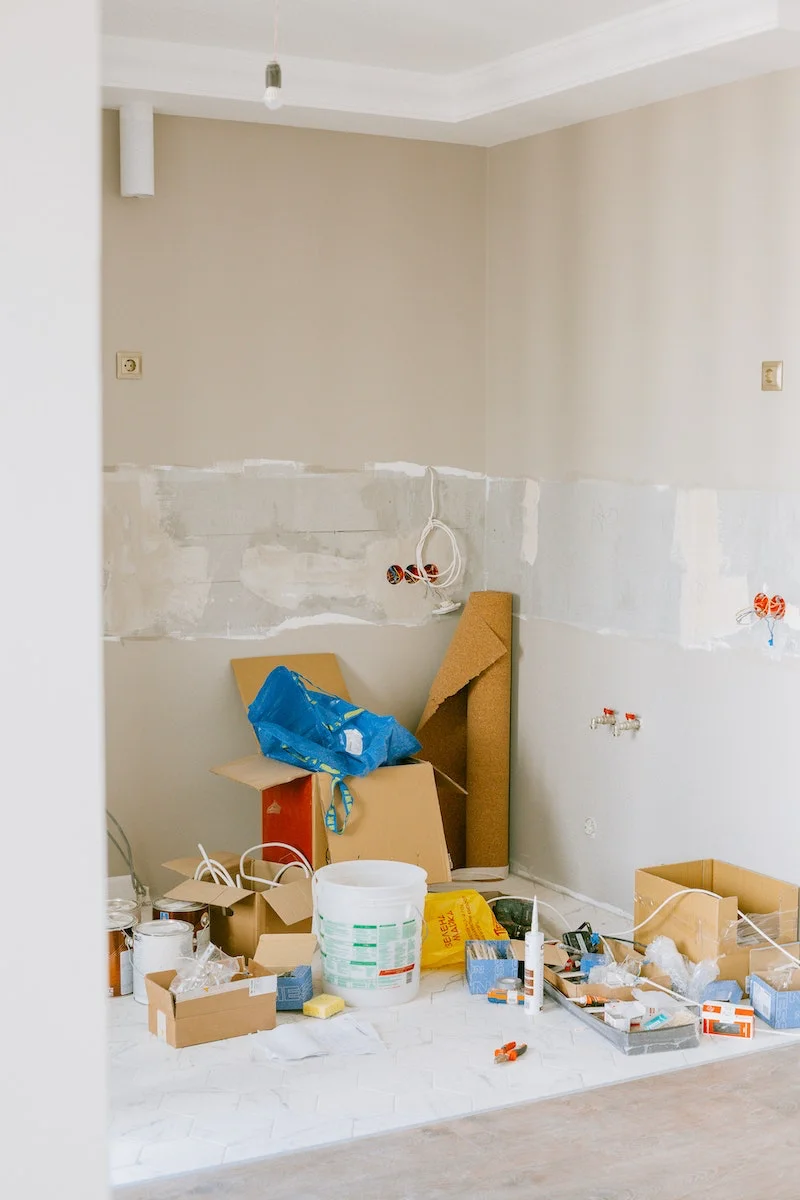
Post-construction cleaning is a totally different beast. That dust isn’t your average household fluff—it’s an abrasive, sneaky contaminant. We’re going to walk through the methodical process the pros use to get a space truly, safely clean. This isn’t about a quick wipe-down; it’s about systematically making your new space ready for real life.
First, Know Your Enemy: This Isn’t Your Average Dust Bunny
Before you even think about cleaning, you need to understand what you’re up against. That fine powder is a nasty cocktail of drywall dust (gypsum), sawdust, and potentially something more serious: crystalline silica from concrete, brick, or stone work.
The real issue is the particle size. This stuff is microscopic. It floats in the air for hours (sometimes days!) and, thanks to static electricity, it loves to cling to vertical surfaces like your walls and cabinet faces. This is why a feather duster or a dry cotton rag is a terrible idea. They just launch the dust back into the air to settle somewhere else.
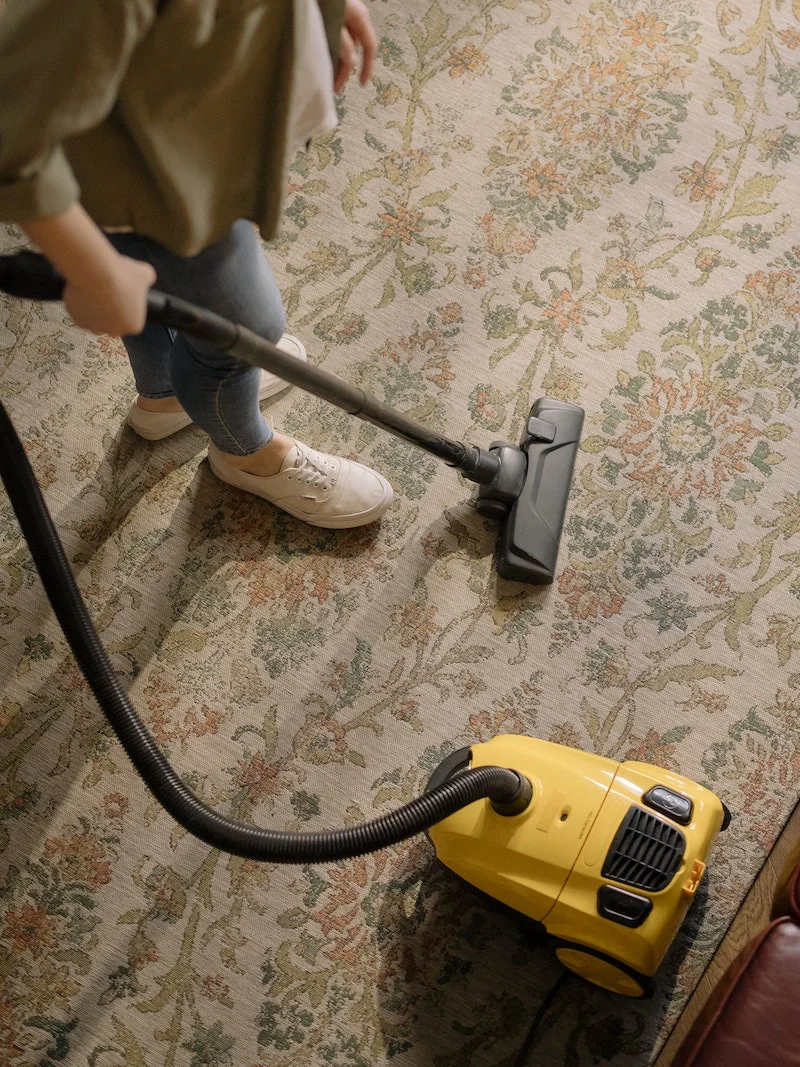
And your household vacuum? Forget about it. I’ll never forget a homeowner who tried to use their expensive household vac after a remodel. The ultra-fine drywall dust went straight through the filter and blew out the exhaust, coating their entire house in a thin white film. They had to pay us to re-clean everything. Standard vacuums just can’t trap these tiny particles.
Heads up: The health risks are no joke. Government safety agencies have strict rules about silica dust because breathing it in is seriously bad for your lungs. While a one-time cleanup isn’t the same as working on a site every day, you still need to protect yourself.
Your Game Plan: Assess the Situation First
Never, ever start cleaning blind. A quick walkthrough is the most important first step.
First, if you can, do a final walkthrough with your contractor. This isn’t about dust yet. It’s about making sure everything works. Flip all the switches, open the windows, run the faucets. Look for dings, scratches, or paint splatters that the crew should fix. It’s way easier to get this handled before you’ve officially signed off on the job.
Next, ask what’s still “curing.” Fresh paint, grout, and caulk can be easily damaged. Paint, for example, can take weeks to fully harden. Cleaning it too soon with the wrong stuff can ruin the finish. Make a mental note of these delicate areas and plan to clean them last, and very gently.
Finally, map out your cleaning route. The golden rule is always top to bottom, back to front. You’ll start in the room furthest from your home’s main entrance and work your way out. Within each room, you start high (light fixtures, tops of cabinets) and work your way down to the floor. This ensures you’re pushing dust down and out, not dragging it over already-clean areas.
Your Post-Construction Cleaning Toolkit
Having the right tools isn’t a luxury here; it’s essential for getting the job done right and keeping yourself safe. This is one area where spending a little extra to buy or rent gear is worth every penny.
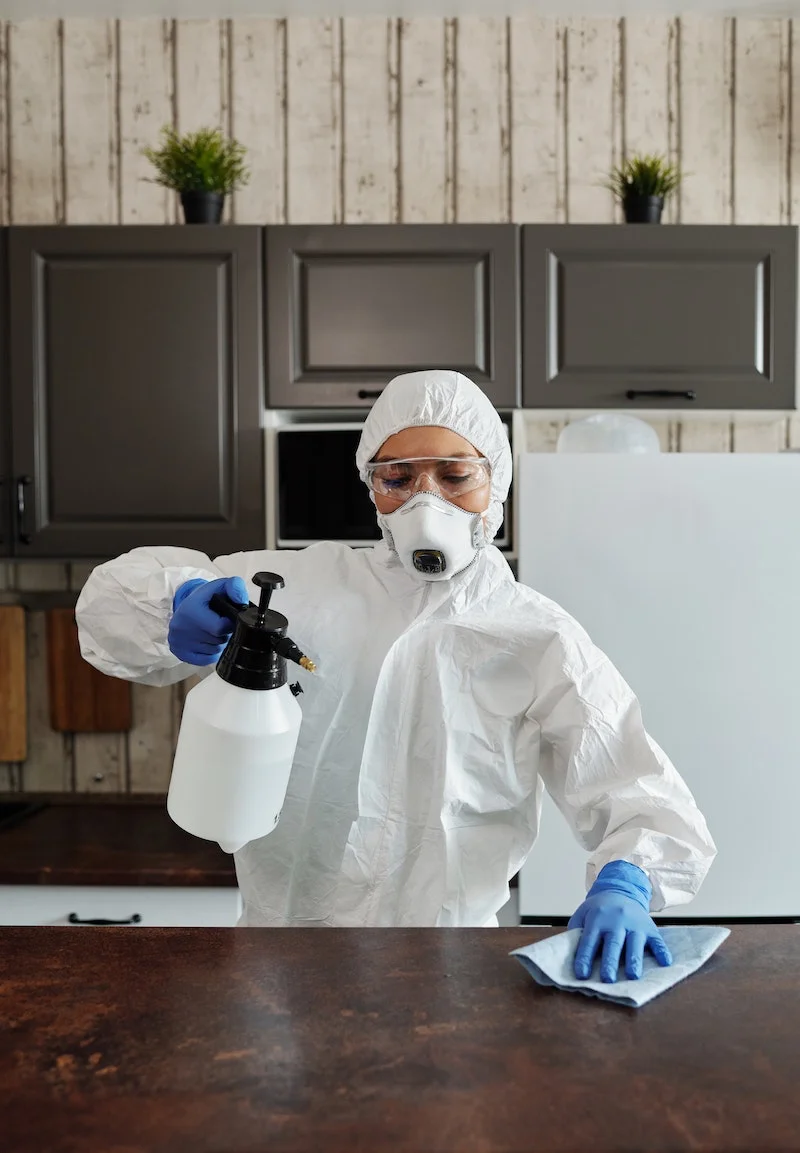
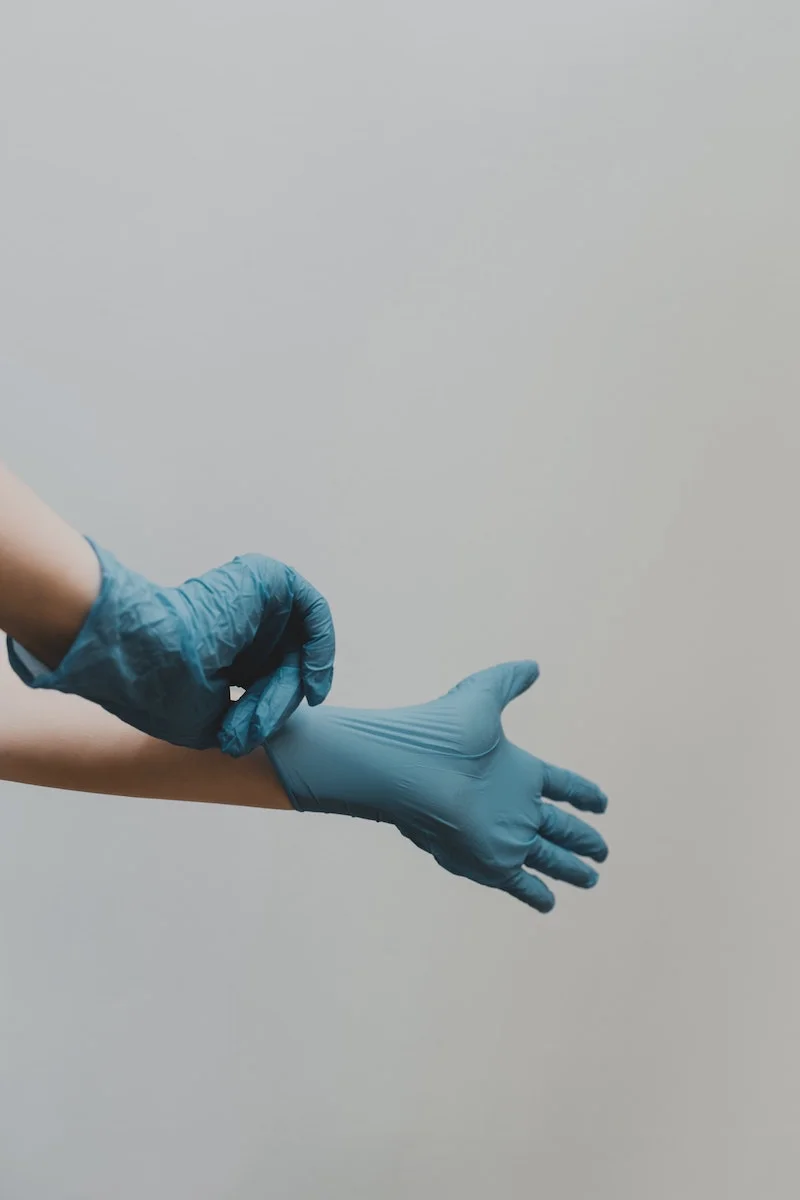
Personal Protective Equipment (PPE) – Don’t Skip This!
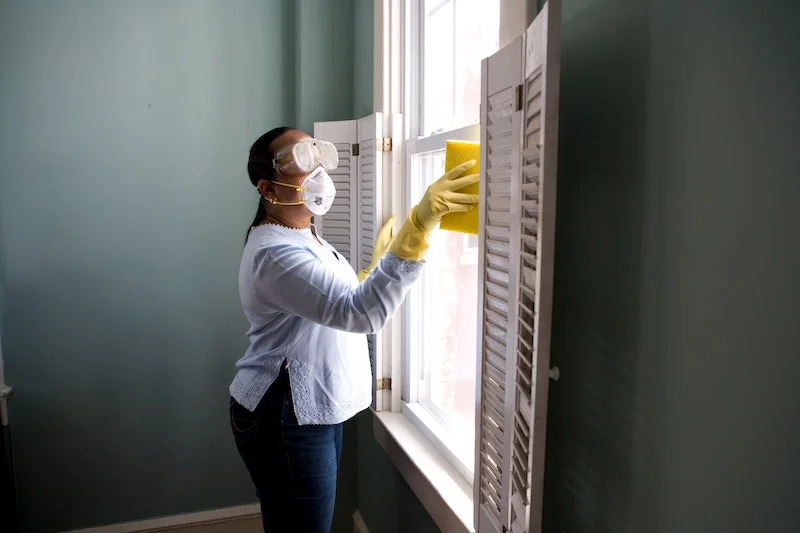
- Respirator: A simple paper mask won’t cut it. You need a NIOSH-approved N95 respirator, which you can get in a 10-pack for about $20 at any hardware store. It needs to fit snugly over your nose and mouth.
- Eye Protection: Dust in the eye is irritating and can scratch your cornea. Vented goggles are better than safety glasses because they seal around your eyes.
- Gloves: A good pair of heavy-duty rubber or nitrile gloves will protect your hands from cleaning solutions and any stray nails or staples left behind.
- Shoes: Always wear sturdy, closed-toe shoes. You never know what sharp debris is hiding on the floor.
Cleaning Gear and Supplies
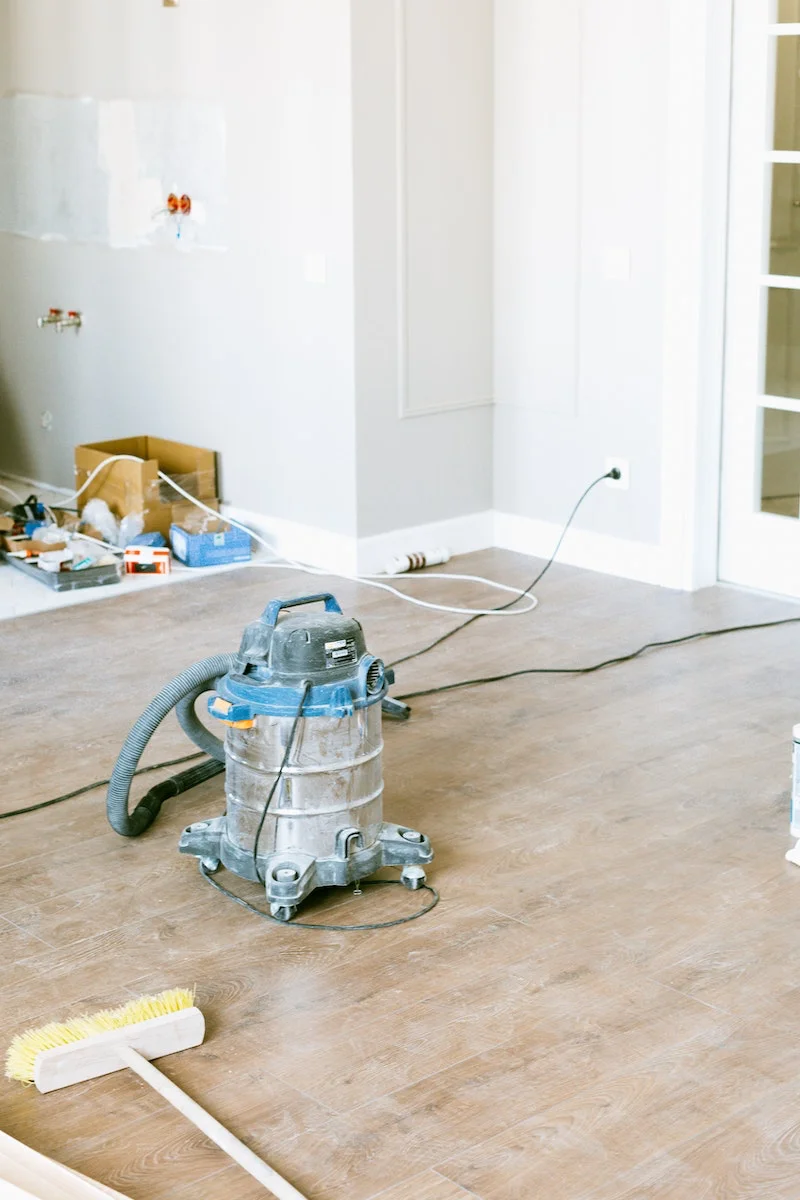
- A True HEPA Vacuum: This is your most important weapon. You’re looking for a commercial-grade vacuum with a sealed HEPA filter system. Good to know: You can rent one from places like Home Depot for around $50-$80 a day. If you plan on more renovations, buying a quality one like a Shop-Vac or a dedicated dust extractor starts around $400 and is a great investment. A wet/dry vac is also a huge help for bigger debris.
- Microfiber Cloths: Stock up. You’ll need way more than you think—at least 5-10 per room. Microfiber is designed to trap dust, not just push it around.
- Buckets: Grab two. One for your clean, soapy water and a second one just for wringing out the dirty cloth or mop. This prevents you from just spreading dirty water everywhere.
- Cleaning Solutions: You don’t need a whole arsenal. A bottle of a neutral pH cleaner (Dr. Bronner’s Sal Suds is a great, concentrated option), a good degreaser (honestly, a little Dawn Powerwash works wonders on sticky stuff), and some white vinegar for hard water spots will do. For stubborn sticker residue, a citrus-based remover like Goo Gone is a lifesaver. Always test new cleaners on a hidden spot first!
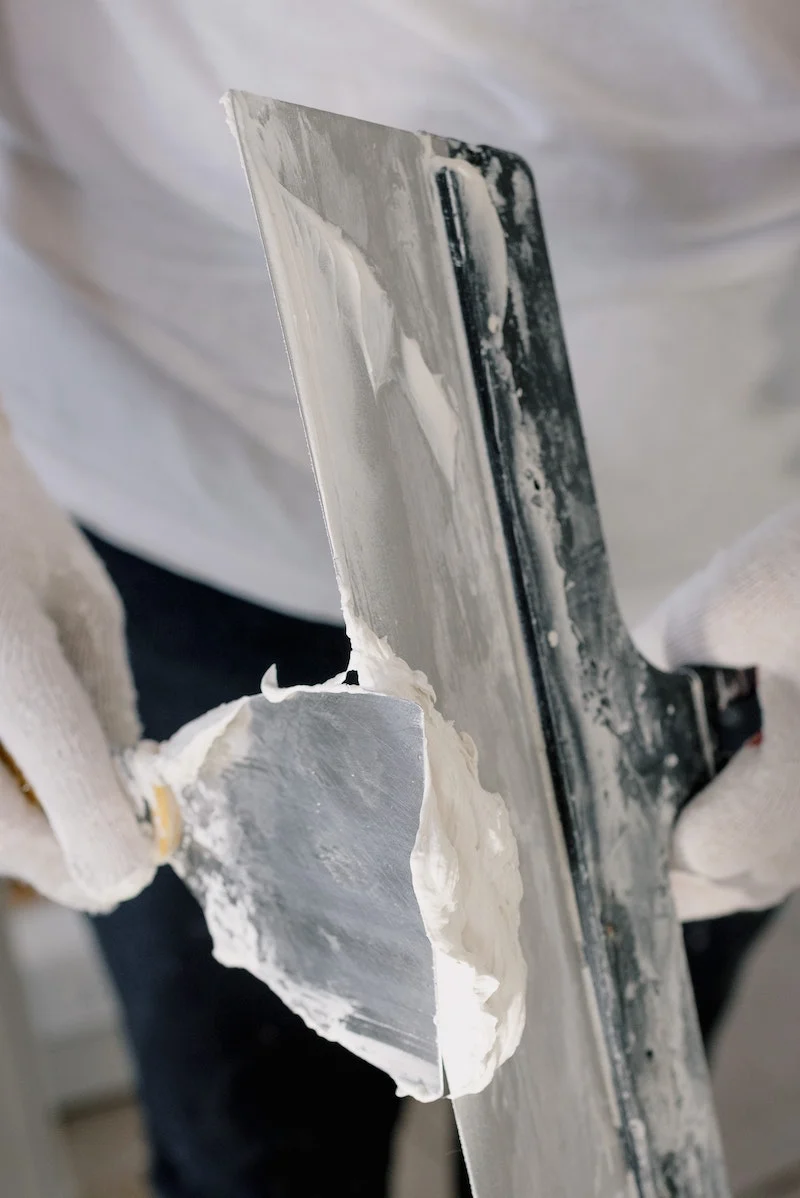
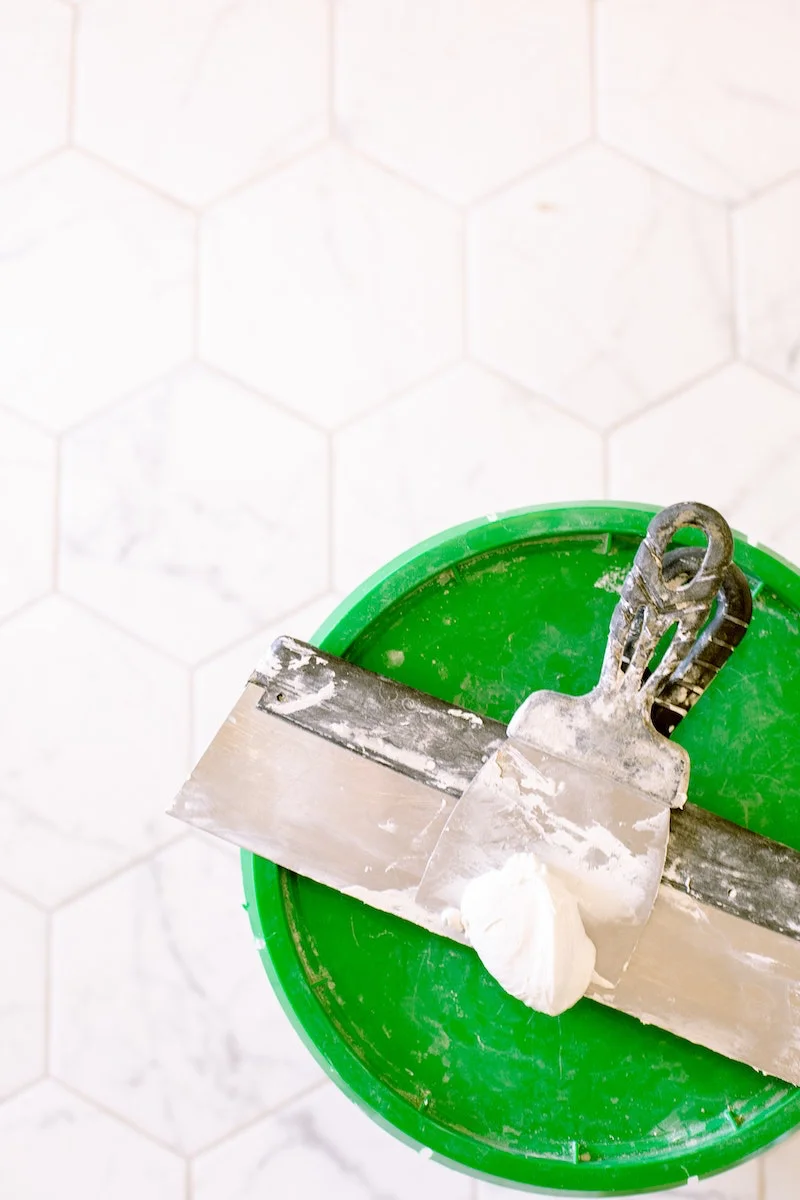
- Plastic Putty Knife: A flexible plastic one is perfect for gently scraping off dried paint drips or caulk without scratching new surfaces. Never use metal.
The Three-Phase Attack for a Truly Clean Space
We break every job into three phases. If you do them out of order, I guarantee you’ll be finding dust for weeks.
Phase 1: The Bulk Debris Removal
The goal here is just to get rid of all the big stuff and the top layer of loose dust. This isn’t the detail clean. For a typical kitchen renovation, plan for this phase to take you a solid 2-3 hours.
Start by collecting all the obvious trash—scraps of wood, plastic sheeting, tape, etc. Then, do your first big vacuum pass on the floors to get the majority of the visible grit. After that, take a dry microfiber cloth and start dusting from the highest point in the room (light fixtures, tops of cabinets) and work your way down the walls with long, top-to-bottom strokes. You’ll be amazed at what comes off. Fold your cloth into eighths and switch to a clean side as soon as one gets dirty.
Phase 2: The Deep, Detailed Clean
Now that the loose dust is gone, it’s time for the meticulous wet-wiping. This is the most time-consuming part.
You’ll clean every single surface, starting from the top and working down. For walls and trim, use a barely damp microfiber cloth. Here’s what “barely damp” really means: wring the cloth out until it’s almost dry to the touch, so you can’t squeeze a single drop out of it. Too much water will leave streaks on fresh paint.
Empty all cabinets and drawers, vacuum them out with a crevice tool, and then wipe them down—inside and out. Don’t forget the undersides! For windows, vacuum the tracks first, as they are magnets for debris. Then, clean the glass with one cloth and polish it dry with a second, clean microfiber cloth to prevent streaks.
This is also when you’ll tackle specific residues. Dried caulk or spackle can often be softened with a damp cloth for a few minutes before you gently scrape with your plastic putty knife. For stubborn construction adhesive, that citrus degreaser will be your best friend. After everything else is done, vacuum the floors one more time and then mop using your two-bucket system.
Phase 3: The Final Touch-Up
Wait. Seriously. Wait at least 24 hours after your deep clean. Why? Because any dust still floating in the air needs time to settle. It’s frustrating to see a new fine layer of dust appear, but it’s totally normal.
This last step is quick. Just a final, light wipe-down of all the flat surfaces with a clean, dry microfiber duster. The most important part of this phase, though, is your HVAC system. Turn the system off, remove and throw away the old furnace filter, and vacuum all the vent covers throughout the house. Then, put in a brand-new, high-quality filter. One last, careful vacuum of the floors, and you’re done.
Feeling Overwhelmed? A Quick Win.
If the sheer scale of the job is paralyzing you, just pick one small task. Decide you’re only going to tackle the windows today. Vacuum the tracks, clean the glass, and polish the frames in one room. Making one small area look perfect can give you the motivation you need to keep going.
DIY or Hire a Pro? An Honest Look
So, should you tackle this yourself or call in a professional cleaning crew? It really comes down to a few factors.
Cost: Hiring a professional post-construction crew can run anywhere from $500 to over $1,000, depending on the size of your home and the scope of the renovation. It sounds steep, but weigh that against the cost of your own supplies (easily $100+), renting a proper vacuum ($50-$80/day), and, most importantly, the value of your own time.
Time & Effort: The pros can often clean an entire 1,500 sq. ft. space in a single 8-hour day. For one person doing it alone, that same job could easily take up an entire weekend of hard, physical labor. It’s exhausting work.
Health & Safety: This is the big one. If your reno involved a lot of concrete, stone, or tile cutting, you have a high concentration of silica dust. A professional crew has the right commercial-grade equipment, like air scrubbers, and the training to handle it safely. And if your home is older, there’s a risk of lead paint or asbestos. If that’s the case, do not touch it yourself—that’s a job for certified abatement specialists, period.
Cleaning up after a renovation is a marathon, not a sprint. But by using the right gear and a methodical plan, you can finally get rid of that stubborn dust and start enjoying the beautiful new space you’ve worked so hard for.
Inspiration:
Don’t forget the interiors! Construction dust is insidious and settles inside every new cabinet and drawer. Before you even think about putting away your dishes or clothes, vacuum each interior space with a brush attachment, then wipe thoroughly with a damp microfiber cloth. For kitchen cabinets, a simple solution of water with a drop of dish soap helps grab any greasy residue left from installation.
- Eliminates lingering paint and sawdust odors.
- Neutralizes smells instead of just masking them.
- Leaves a fresh, almost imperceptible scent of home.
The secret? Activated charcoal. Forget scented candles or sprays. Place a few bags of activated charcoal (found in pet or home stores) around the renovated area. They are incredibly porous and will absorb airborne odors and pollutants over a few days, truly clearing the air.
The EPA reports that indoor air pollutant levels can be 2 to 5 times higher than outdoor levels, especially after renovation activities.
This is why the
Standard Shop Vac: It’s powerful, but often its filter isn’t fine enough. It can capture larger debris but may exhaust the finest, most harmful dust back into your air.
HEPA-Rated Shop Vac: This is the pro’s choice. Models from brands like Festool or Nilfisk use High-Efficiency Particulate Air (HEPA) filters that trap 99.97% of particles down to 0.3 microns. It’s an investment, but it’s the only way to truly remove drywall and silica dust from your environment.
For a one-time job, renting a HEPA vacuum is a smart compromise.
A human hair is about 70 microns wide. The most dangerous silica dust particles are less than 10 microns—completely invisible to the naked eye.
Your new surfaces need a gentle touch. Aggressive cleaning can cause permanent damage before you’ve even had a chance to enjoy them.
- Matte & Flat Paints: Avoid abrasive sponges. Use only soft, damp microfiber cloths and blot, don’t scrub. For smudges, a magic eraser (like Mr. Clean Magic Eraser) used very gently can work wonders.
- Unsealed Stone or Wood: Never use acidic cleaners like vinegar. Stick to a pH-neutral cleaner specifically designed for the material, and always use a damp (not wet) cloth to prevent water damage.
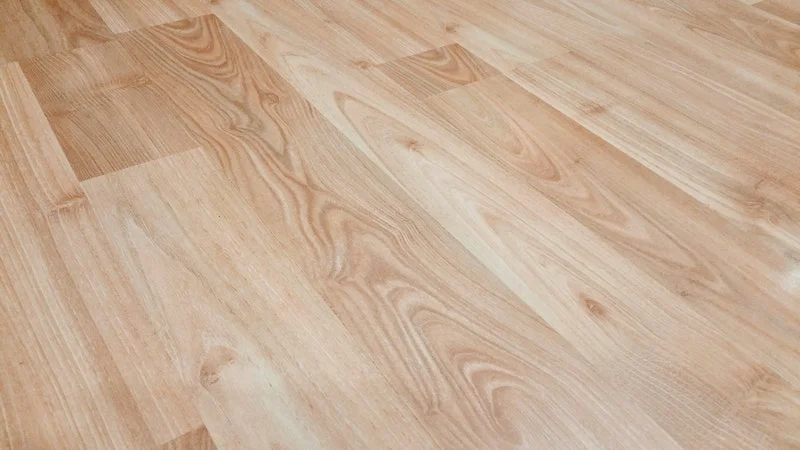
- Luxury Vinyl Tile (LVT): While durable, avoid wax-based cleaners that can build up a dull film. A simple solution of water and a few drops of apple cider vinegar is often recommended by manufacturers like Coretec.

What about those big machines the pros use? Are they worth it?
You’re likely thinking of an air scrubber. This machine is essentially a portable air filtration system with a powerful fan and a series of filters, including a HEPA filter. While you clean, it constantly pulls air from the room, traps the airborne dust you kick up, and exhausts clean air. Renting one for 24-48 hours from a tool rental shop can dramatically reduce the amount of dust that resettles after you’ve finished wiping everything down. It’s the final step to ensuring your air is truly clean.
Protect yourself properly: We can’t stress this enough. A simple cloth mask is not sufficient for construction dust. For your post-reno clean, you need, at a minimum, an N95-rated respirator mask to filter out fine particulates. Also, wear safety glasses to prevent dust from irritating your eyes and gloves to protect your hands from drying out.
Beyond the big vacuum, these small items make a huge difference in your final clean:
- A tack cloth: Available at hardware stores, this slightly sticky cloth is perfect for a final wipe-down on wood trim or shelves to pick up the very last specks of dust without leaving residue.
- A high-duster with an extendable pole: To reach ceiling corners, light fixtures, and the tops of cabinets where dust loves to settle.
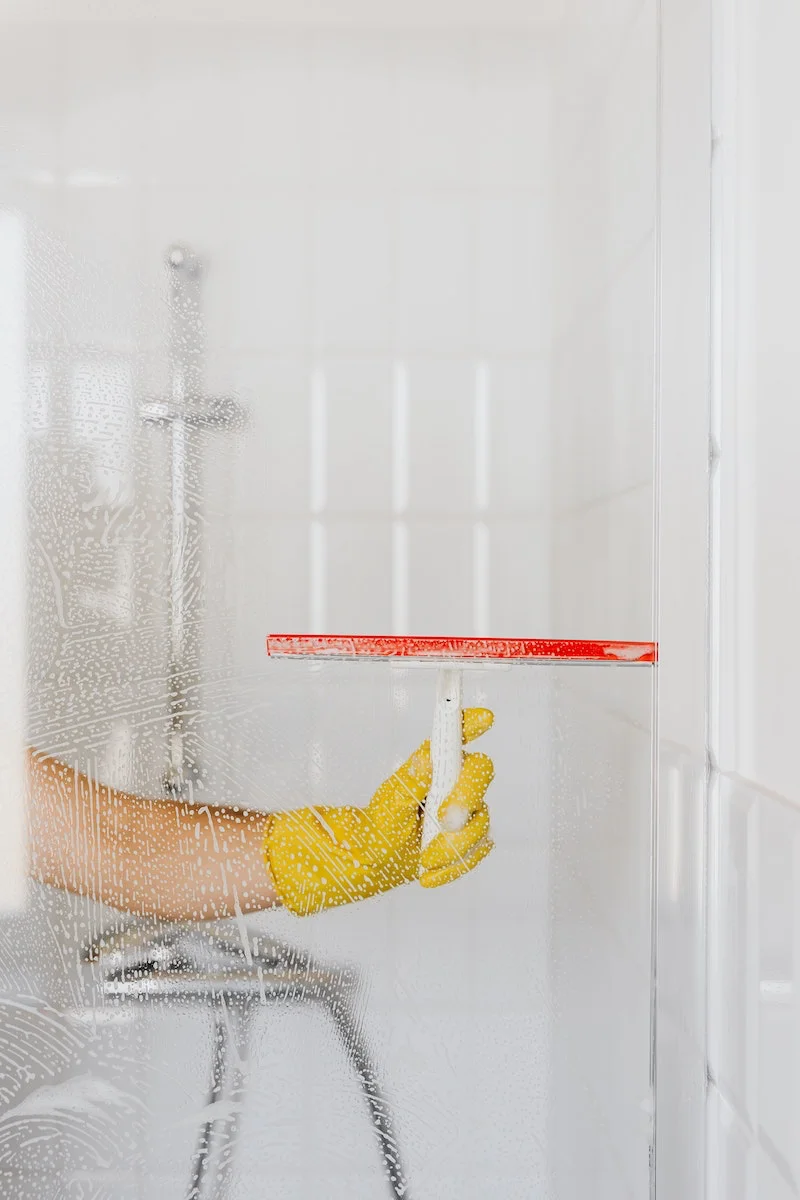
- A squeegee: Not just for windows! A good quality squeegee is the fastest way to clean new shower glass or large mirrors without streaks.


