The Snack Avalanche is Real: Here’s How to Finally Organize Your Pantry
I’ve walked into more pantries than I can count, from sparkling new builds to the beautiful, lived-in chaos of busy family homes. And you know what the number one problem is every single time? Snacks. It’s always the snacks.
In this article
- Hold Up! Don’t Buy a Single Bin Yet.
- A Few Common Mistakes I See All the Time
- The Pro Secret: First-In, First-Out (FIFO)
- To Decant or Not to Decant? That is the Question.
- What Your Bins Are Made Of Actually Matters
- The Step-by-Step Game Plan
- Quick Win: The “Eat Me First” Bin
- Keeping It All Together: The 15-Minute Weekly Reset
- Let’s Talk Money: A Starter Kit on a Budget
- Inspirational Gallery
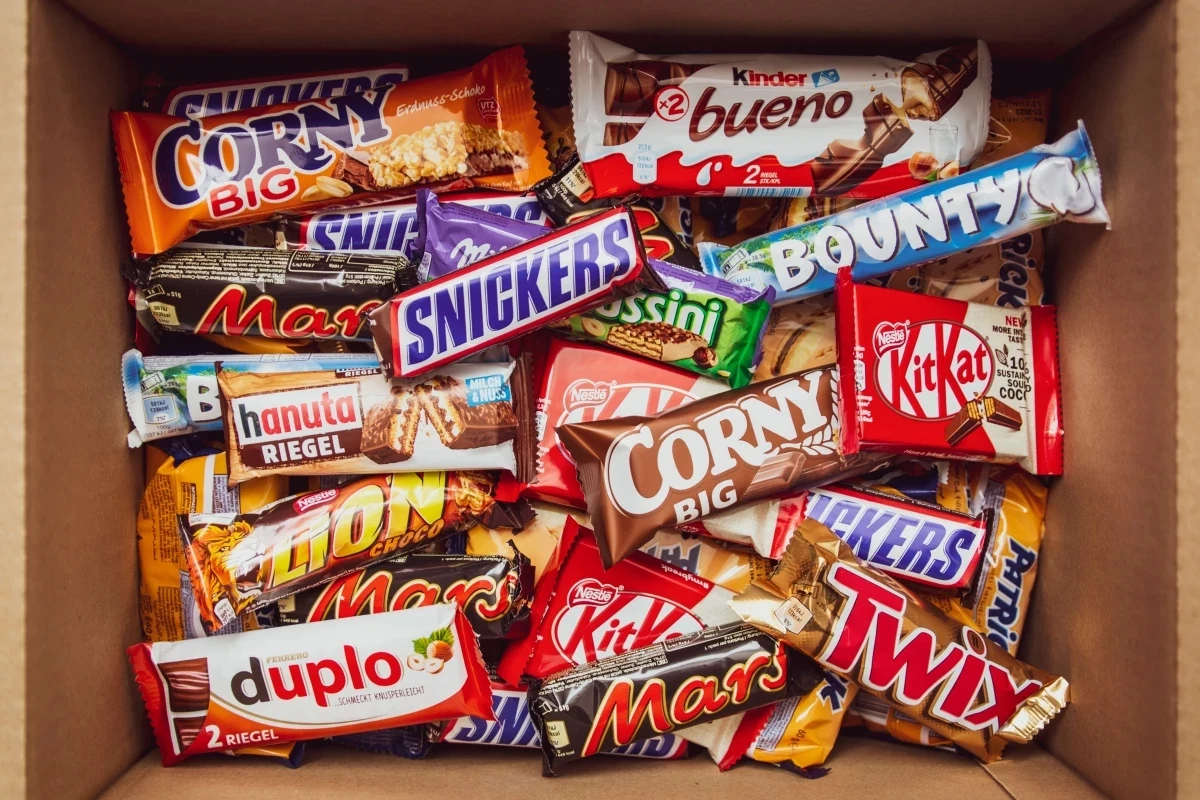
It starts innocently enough with a box of crackers. Then come the chips. Before you know it, you’re dealing with a jumble of half-empty bags, rogue granola bars, and a daily avalanche every time you open the door. It’s messy, it’s wasteful, and let’s be honest, it’s costing you money in forgotten food.
A well-organized pantry isn’t about being picture-perfect. It’s about creating a functional system that saves you time, cuts down on food waste, and brings a little calm to your daily routine. It’s about finding the pretzels when you want them, without having to go on an archaeological dig. This is the exact method I use, and it’s built to last, not just look good for a day.
Hold Up! Don’t Buy a Single Bin Yet.
This is the biggest mistake I see people make. They get a burst of inspiration, rush to Target or The Container Store, and come home with a trunk full of beautiful bins that don’t actually fit their space or their stuff. The real work, the part that actually matters, happens before you spend a dime.
First, get out a tape measure and get real with your space. Measure the depth, width, and height of your shelves. Write it down! A quick tip from my experience: Don’t forget to measure the usable depth. I once had a client whose shelves were 12 inches deep, but there was a half-inch lip on the front. Those 12-inch bins she’d already bought? Total waste. We had to return them all. That little lip meant she could only use bins that were 11.5 inches deep. Details like that save you a return trip.
Also, take a look at what your shelves are made of. Are they solid wood, or are they the standard particleboard that comes in most homes? Heads up! That particleboard can start to bow under more than 40-50 pounds of weight, so you probably don’t want to load it up with heavy glass jars of nuts and seeds.
Next, get honest about your family’s habits. Do you buy in bulk at Costco? Do you have toddlers who need to grab their own snacks? Is a severe food allergy a concern? The system for a single person is totally different than for a family of five. Safety first, always.
A Few Common Mistakes I See All the Time
- Buying Pretty Bins Before Measuring: We just covered this, but it’s so important it’s worth saying again. Your containers must fit your space.
- Creating Too Many Categories: You do not need separate bins for “chewy granola bars” and “crunchy granola bars.” Keep it simple! Broad categories like “Bars,” “Salty Snacks,” and “Sweet Treats” are much easier to maintain.
- Forgetting About Backstock: If you buy two giant boxes of Goldfish, one should be open and accessible. The other (the backstock) should be stored up high or in the back until you need it. Don’t let it clog up your prime real estate.
The Pro Secret: First-In, First-Out (FIFO)
In the food industry, there’s a golden rule called FIFO. It stands for “First-In, First-Out,” and it’s the single best way to stop finding expired food in the back of your pantry. It’s simple: when you get home with new groceries, the new stuff goes to the back. The older stuff gets scooted to the front. It’s a tiny habit that makes a massive impact on your food budget.
To Decant or Not to Decant? That is the Question.
Okay, now we can talk about containers. Their job is to create boundaries and make your life easier. The big debate is whether to take food out of its packaging (decant) or work with the original boxes.
Pouring crackers, chips, and cereal into matching clear containers looks amazing, no doubt. The main reasons to do it are for airtight storage, which is a lifesaver for keeping things from going stale, especially in humid climates. It also saves space compared to bulky boxes. The downside? It’s an investment. Good containers aren’t cheap. For top-tier airtight containers, a lot of pros love the OXO Pop line, but you can get a very similar look and function for less with the Better Homes & Gardens line at Walmart. Don’t sleep on Target’s Brightroom collection for fantastic bins, either. Another thing to consider is that you lose the expiration date. A quick pro tip: Use a fine-tip paint pen or a piece of masking tape to write the expiration date on the bottom of the container.
Honestly, you don’t need to decant to be organized. For most busy families, it’s more practical to work with the original packaging. Just group similar items in open-top bins—one for chips, one for bars, etc. For things like fruit snack pouches or granola bars, just tear the top off the main box to create an easy-grab dispenser. Easy.
What Your Bins Are Made Of Actually Matters
If you do buy containers, the material makes a difference:
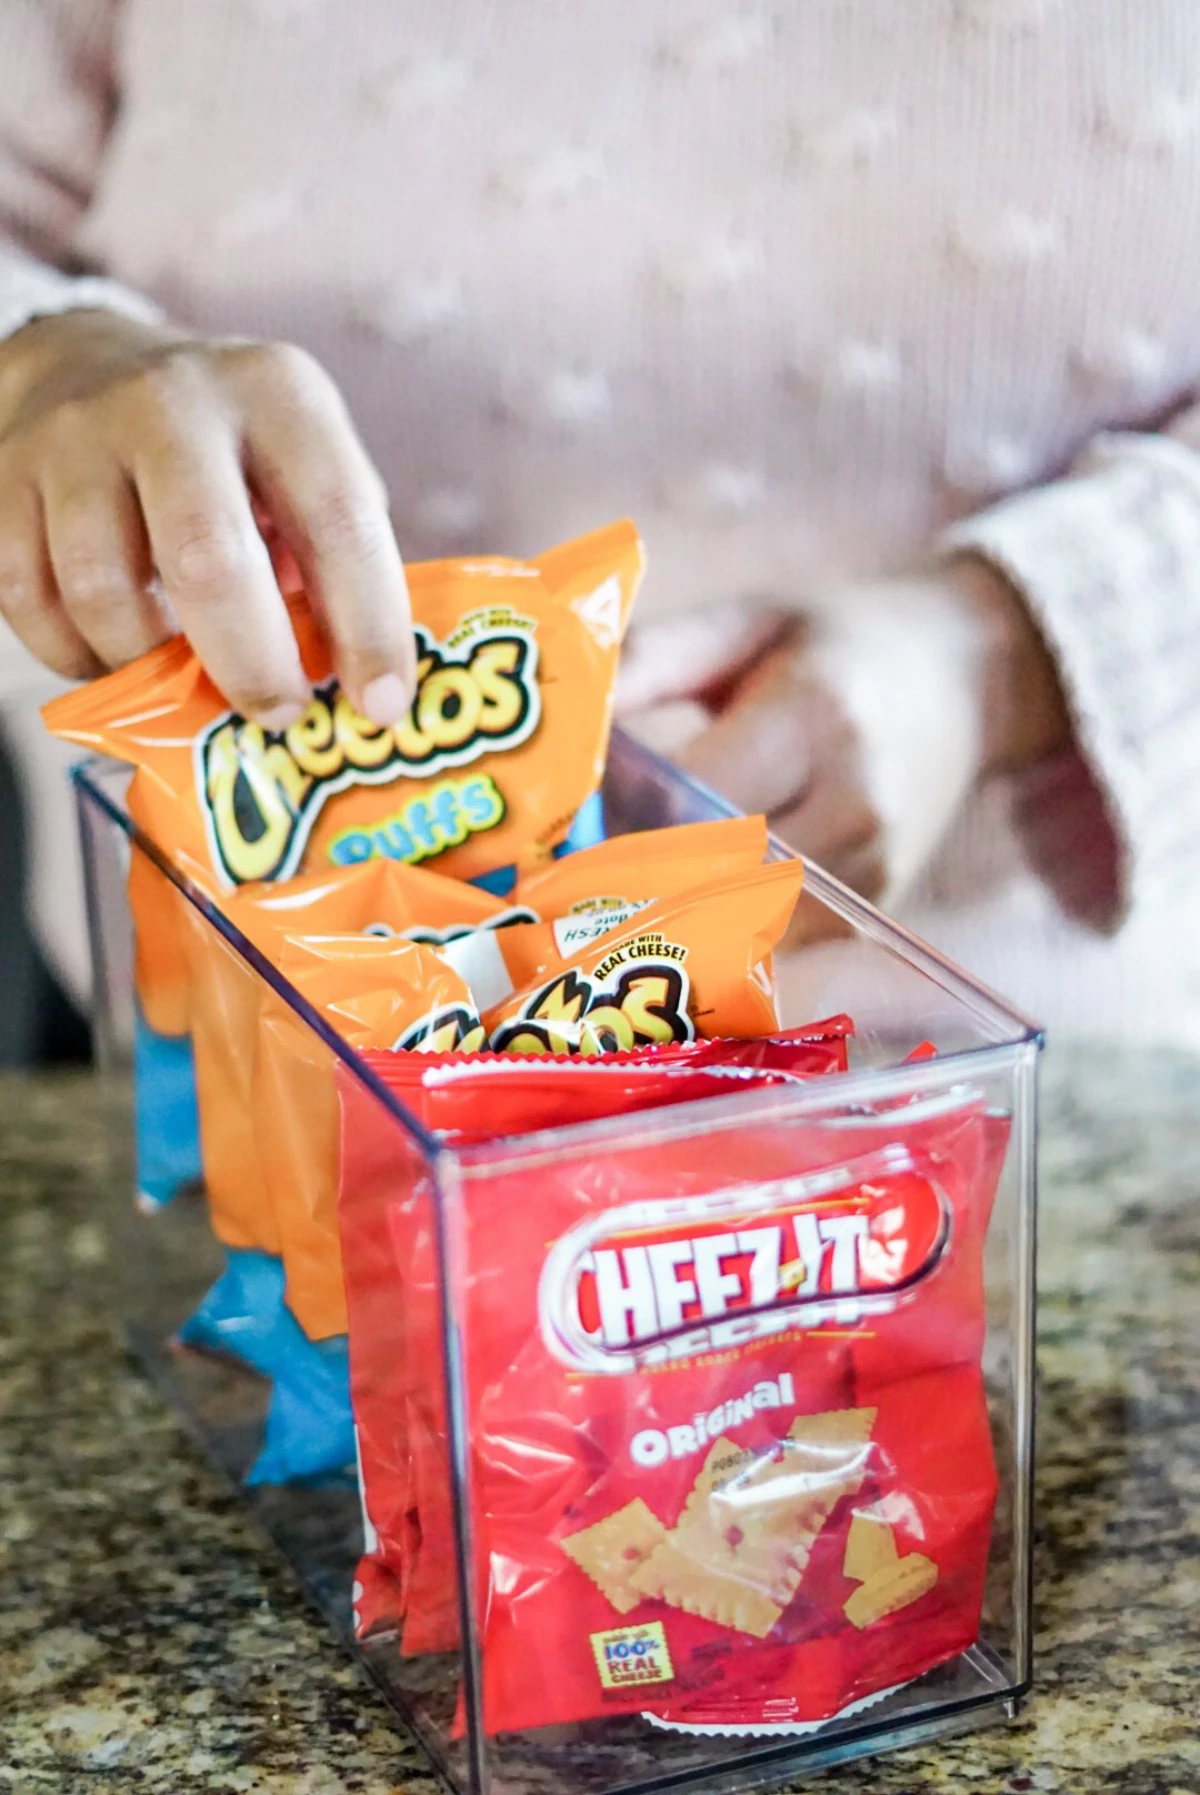
- Clear Plastic (Acrylic or PET): This is the workhorse of the organizing world. It’s lightweight, durable, and you can see everything. It’s perfect for most snacks, especially grab-and-go items for the kids since it won’t shatter.
- Glass: I love glass for things that need to stay super fresh, like nuts and coffee. It’s non-porous and won’t stain or hold odors. But, it’s heavy and breakable, so it’s best for shelves that are out of reach of little hands.
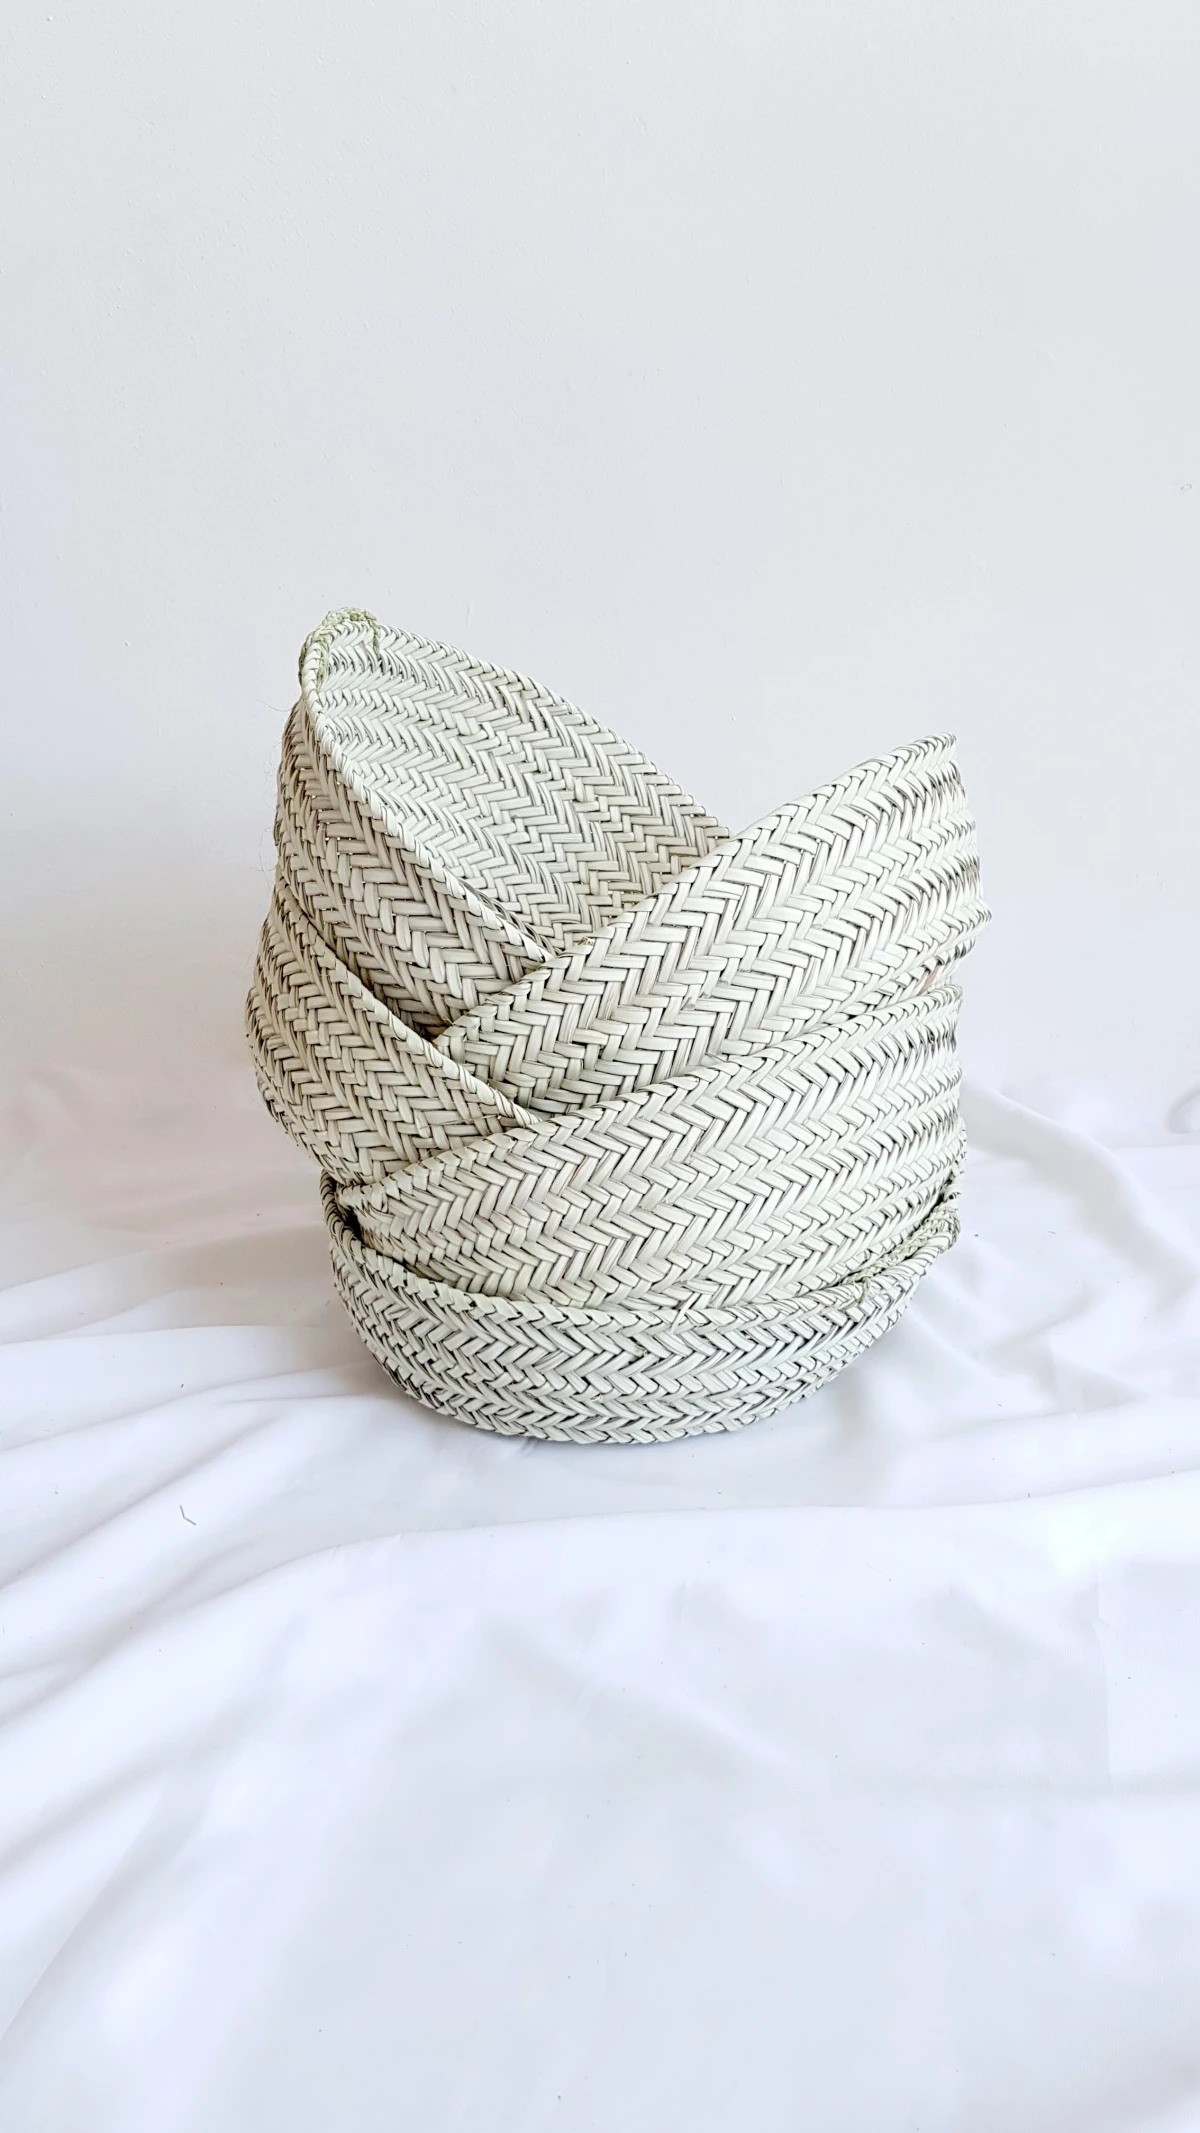
- Woven Baskets (Wicker, Seagrass): These give a great, warm look and are perfect for corralling packaged goods like bags of chips or boxes of crackers. Their only real flaw is they’re a pain to clean, so never put loose food directly inside them.
- Wire Baskets: These are great for allowing airflow, so I often use them for things like potatoes and onions. For snacks, they’re less ideal because small wrappers and crumbs can fall right through the gaps.
The Step-by-Step Game Plan
Ready to do this? Okay, let’s be real. For a standard pantry, this is probably a 2-4 hour project. Put on a good podcast, grab a coffee, and settle in. You only have to do this deep dive once, and it’s so worth it.
- The Great Empty-Out: Take. Everything. Out. Don’t try to shuffle things around. You need a completely blank slate to see what you’re working with.
- Clean & Inspect: Wipe down every single shelf. A little warm water with a splash of vinegar works wonders. Let it dry completely.
- Sort, Group & Purge: On your counter or floor, group items into broad categories (Salty, Sweet, Bars, Crackers, etc.). Check every single expiration date. Be ruthless. If it’s expired, toss it. If it’s unexpired but you know you’ll never eat it, start a donation box.
- Create Your Zones: Now, assign a permanent home for each category in your empty pantry. The stuff you grab daily goes at eye level—that’s your prime real estate. Backstock and less-used items go on the top shelf. Heavy things go on the bottom shelf. The bottom can also be a perfect spot for a designated “Kids’ Zone.” By the way, if you don’t have a big pantry and are just working with a cupboard, the same rules apply! Your ‘top shelf’ might be the one you need a step-stool for. Just adapt the zones to your space.
- Contain & Label: Put your sorted items into their bins. And then, you MUST label them. A system without labels is just a temporary cleanup that will fall apart in a week. A simple label maker is great, but honestly, a roll of masking tape and a Sharpie works just as well.
Quick Win: The “Eat Me First” Bin
This is my favorite trick, and you can do it in five minutes, even if you don’t have time for the whole project. Get one medium-sized bin and label it “Eat Me First.” Place it right at eye level. This is where you put the half-eaten bag of chips, the three remaining crackers, or anything nearing its expiration date. It’s a visual cue for the whole family to finish what’s already open before starting something new. It’s a game-changer for reducing waste.
Keeping It All Together: The 15-Minute Weekly Reset
An organized pantry won’t stay that way by itself. The secret is a tiny bit of maintenance. Once a week, maybe before you write your grocery list, spend 15 minutes on a reset. Put stray items back, pull older food to the front (FIFO!), wipe up any crumbs, and see what you’re running low on. This tiny habit prevents the chaos from ever coming back.
Let’s Talk Money: A Starter Kit on a Budget
You don’t need to spend a fortune. You can start with shoeboxes as free dividers! But if you want to get a dedicated system going, here’s a great way to start for under $50:
- Two large, open plastic bins for corralling chip bags and other bulky items. (You can find these at Walmart or Target for about $10-$15).
- A multi-pack of 4-6 smaller, clear bins for containing bars, pouches, and packets. (Usually around $20-$25 for a set).
- A good set of bag clips. Don’t underestimate these! (Around $5).
You can build your system over time. Start with your biggest pain point—is it the chip bags? Just buy the two big bins this week. See how it feels. The goal isn’t a magazine cover; it’s a living system that brings a little bit of satisfying order to your busy life. You’ll be shocked at how much smoother your days feel.
Inspirational Gallery
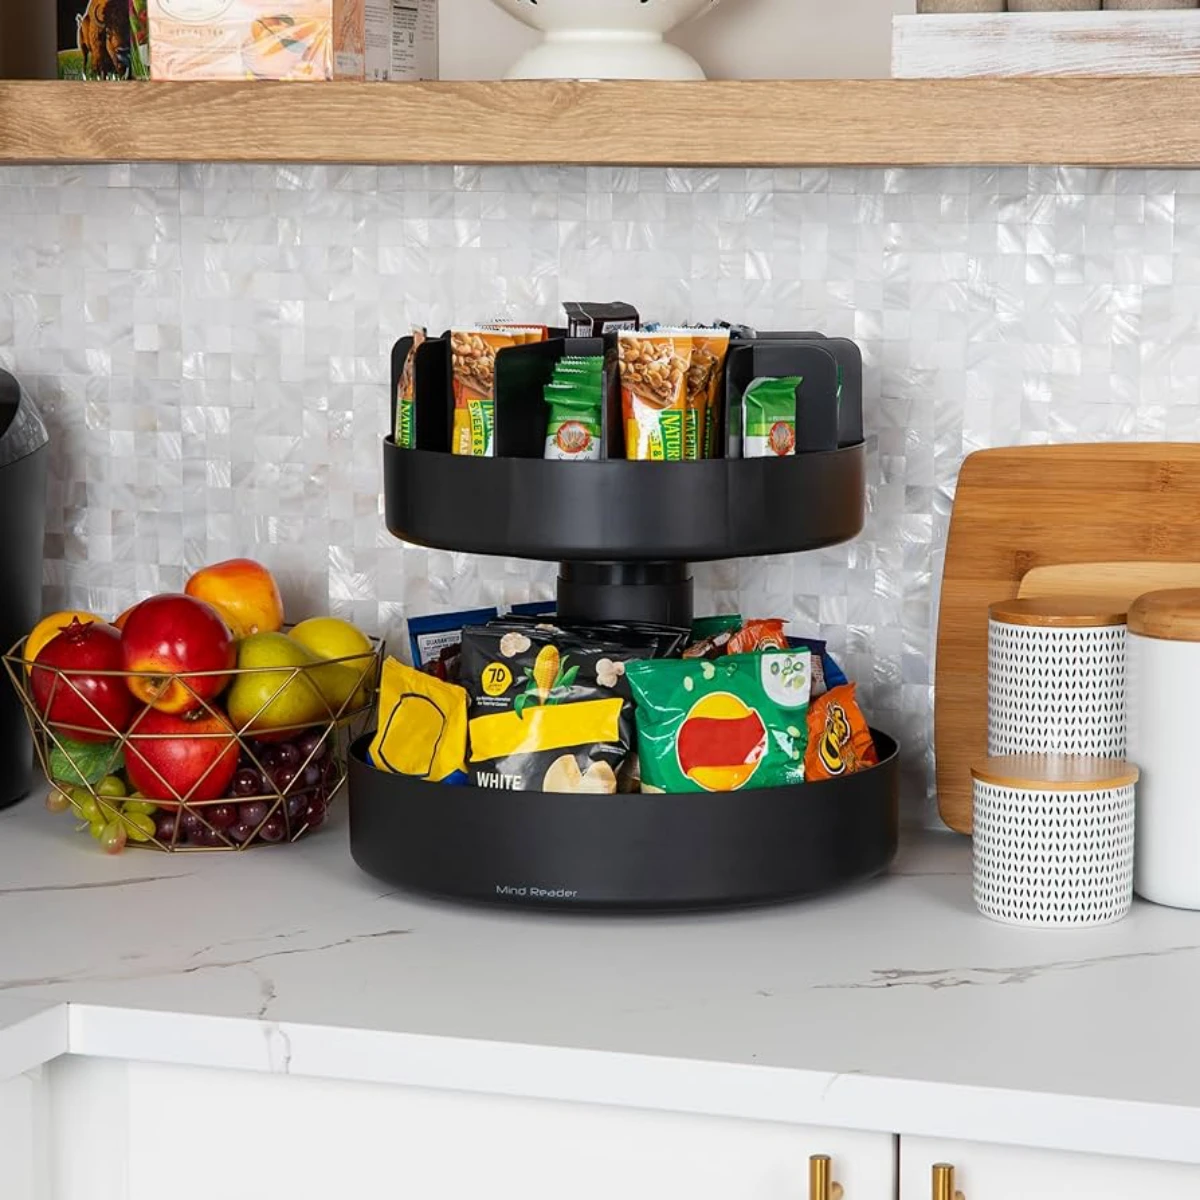
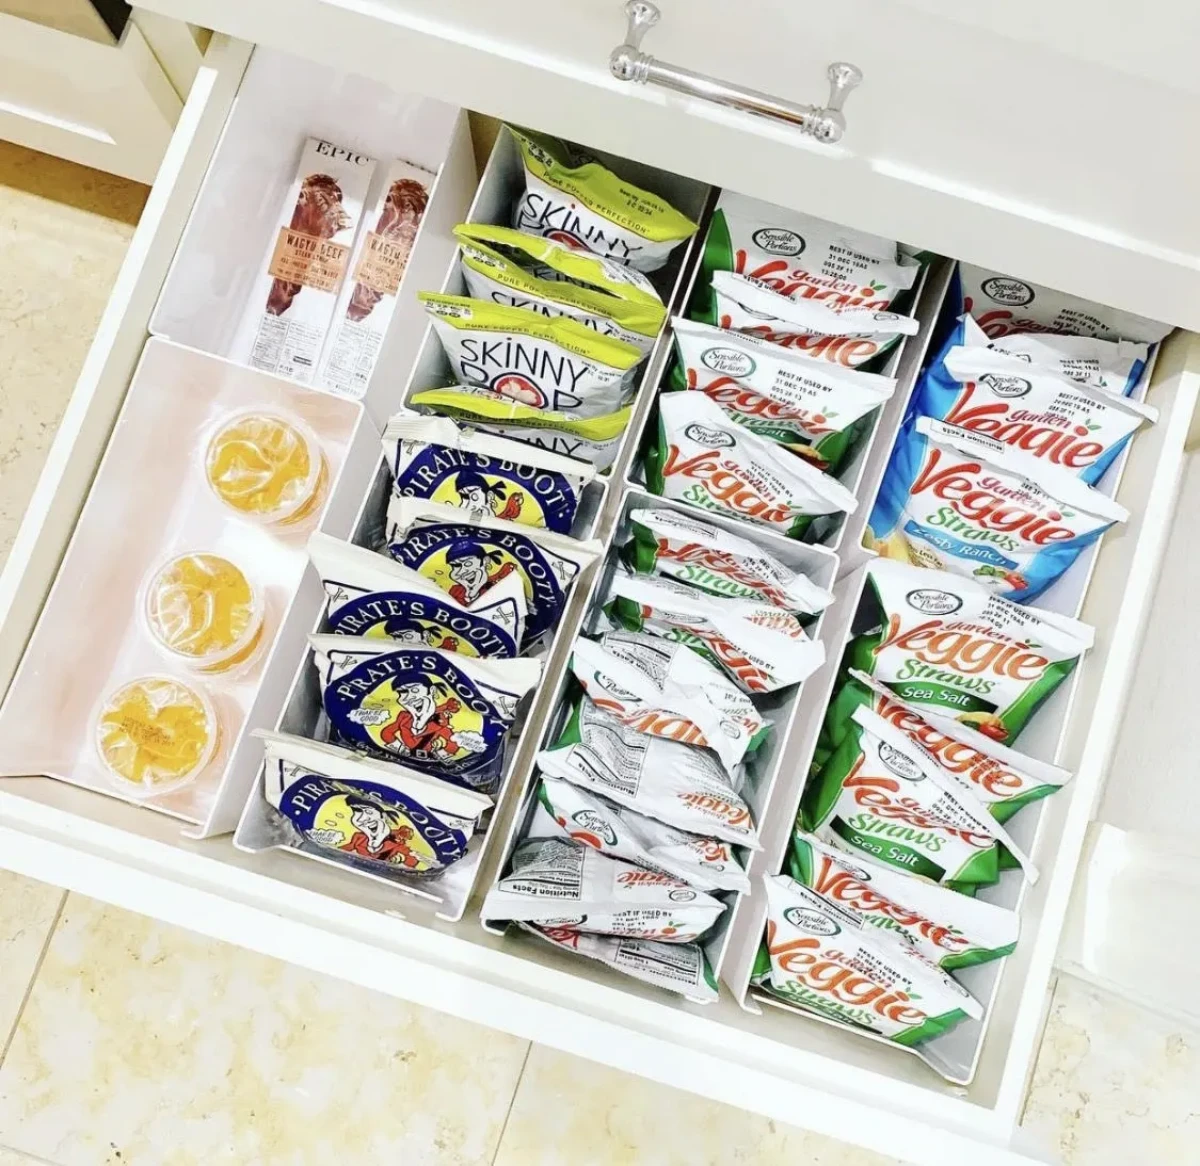
Clear Acrylic Bins: Perfect for instant visibility. You can see exactly how many bags of popcorn or fruit snacks are left at a glance. Brands like iDesign and The Home Edit at The Container Store offer stackable options that maximize vertical space.
Woven Baskets: Ideal for concealing visual clutter. Use them for multi-colored bags of chips or items that don’t stand neatly. They add a warm, natural texture. Look for sturdy water hyacinth or rattan baskets from places like IKEA (the BRANÄS series) or West Elm.
For a balanced look, use both: clear bins for categorized items and a woven basket for grab-and-go bulk snacks.
The average American family throws out about $1,500 in food each year, often because items are forgotten at the back of a cluttered pantry.
An organized snack system isn’t just about aesthetics; it’s a powerful tool against food waste. When you can see what you have, you’re far more likely to use it before it expires. Those clear bins for crackers and nuts suddenly become a money-saving strategy.
Are you creating a ‘Kids’ Zone’? Make it functional for them, not just for you. Place a bin of approved, easy-to-open snacks on a low shelf they can safely reach. This fosters independence and stops the constant
What about those half-empty, floppy bags of chips and pretzels?
This is where ‘decanting’ becomes your best friend. Instead of fighting with a mess of clips and rolled-up bags, transfer snacks into airtight containers. For chips, crackers, and pretzels, OXO Good Grips POP Containers are a classic choice for a reason—they seal with a satisfying click and keep things fresh. For smaller items like nuts or dried fruit, simple glass jars with sealed lids work wonders and look beautiful.
- Makes navigating deep corners effortless.
- Brings hidden items to the front with a simple spin.
- Perfect for oils, vinegars, jars of salsa, and peanut butter.
The secret? A well-placed turntable, or ‘Lazy Susan’. Don’t relegate them to the dining table. A 9- or 11-inch Copco or madesmart turntable can revolutionize a deep pantry shelf, ensuring no jar gets lost in the back again.
One common mistake is decanting absolutely everything. It looks great on Instagram, but it’s not always practical. Items like individual granola bars, fruit snack pouches, or protein bars are often best kept in their original box. Simply tear off the top flap of the box and place the entire thing inside a larger bin labeled ‘Bars’ or ‘Grab-and-Go’. You get the organization without the time-consuming and unnecessary extra step.
A study from Cornell University’s Food and Brand Lab found that we are three times more likely to eat the first food we see than the fifth one.
Use this to your advantage. Arrange your pantry with intention. Place healthy, go-to snacks like nuts, rice cakes, and dried fruit at eye level in clear, appealing containers. Relegate the candy and less-healthy treats to opaque bins on a higher shelf. It’s a simple psychological trick that nudges your family towards better choices without a single word.
Don’t underestimate the power of labels: Even with clear bins, labeling is the critical final step that makes a system last. It stops other family members from guessing where things go, preventing a slow descent back into chaos. You don’t need a fancy machine—simple white bin clips from madesmart with a chalk marker work great. For a more polished look, a Brother P-touch label maker creates durable, easy-to-read labels that withstand wear and tear.
- A roll of painter’s tape and a Sharpie to quickly note expiration dates on the bottom of decanted containers.
- A small, foldable step stool to make accessing the top shelf safe and easy.
- Museum Gel or QuakeHold! Putty to secure bins on wire shelving so they don’t shift.
- A good pair of sturdy bag clips (like the colorful ones from OXO) for the few items you don’t decant.
Think vertically! Many pantries have tall shelves with wasted air space above items. Reclaim it with stackable bins or, for a budget-friendly option, add freestanding shelf risers. You can find simple, sturdy metal ones from brands like Yamazaki or affordable versions at Target’s Brightroom line. They instantly double your storage for short items like canned goods or small boxes of crackers.


