Your Kitchen Isn’t Cluttered, It’s Just Misunderstood: A Pro’s Guide to Taming Your Appliances
I’ve spent a lot of my life designing and building kitchens, and if there’s one truth I’ve learned, it’s this: The size of your kitchen doesn’t matter nearly as much as how you use the space. I’ve seen massive kitchens that feel totally cramped and galley kitchens that are a dream to work in. The secret is almost always how you handle appliance storage.
In this article
Think about it. A kitchen is basically a workshop, and your appliances are the tools. If you can’t get to your tools easily, the whole process becomes a frustrating chore.
I remember this one client, a wonderful lady who was passionate about baking. Her countertops were a sea of machines—a stand mixer, food processor, blender, you name it. The only clear spot she had to work was a tiny space the size of a cutting board. Her cabinets were a nightmare of tangled cords and appliances stacked like a wobbly Jenga tower. She told me she loved how her kitchen looked, but was starting to despise actually using it. That’s a story I’ve heard more times than I can count. Our job wasn’t just about aesthetics; it was about giving her back the joy of her craft.
This isn’t a guide full of trendy organizing bins. This is about the real, structural methods the pros use to build storage that works, lasts, and makes your kitchen a better place to be. We’ll get into the ‘why’ behind the layout, the specific hardware I actually trust, and the common mistakes that just waste space and money.
First Things First: Understanding Workflow and Your Body
Before you even think about building a shelf, you have to understand how a kitchen flows. Most people have heard of the “kitchen work triangle”—the path between the sink, fridge, and stove. It’s a decent starting point, but we pros think in “work zones.” These are specific areas for specific tasks: a prep zone, a cooking zone, a baking zone, and a cleanup zone.
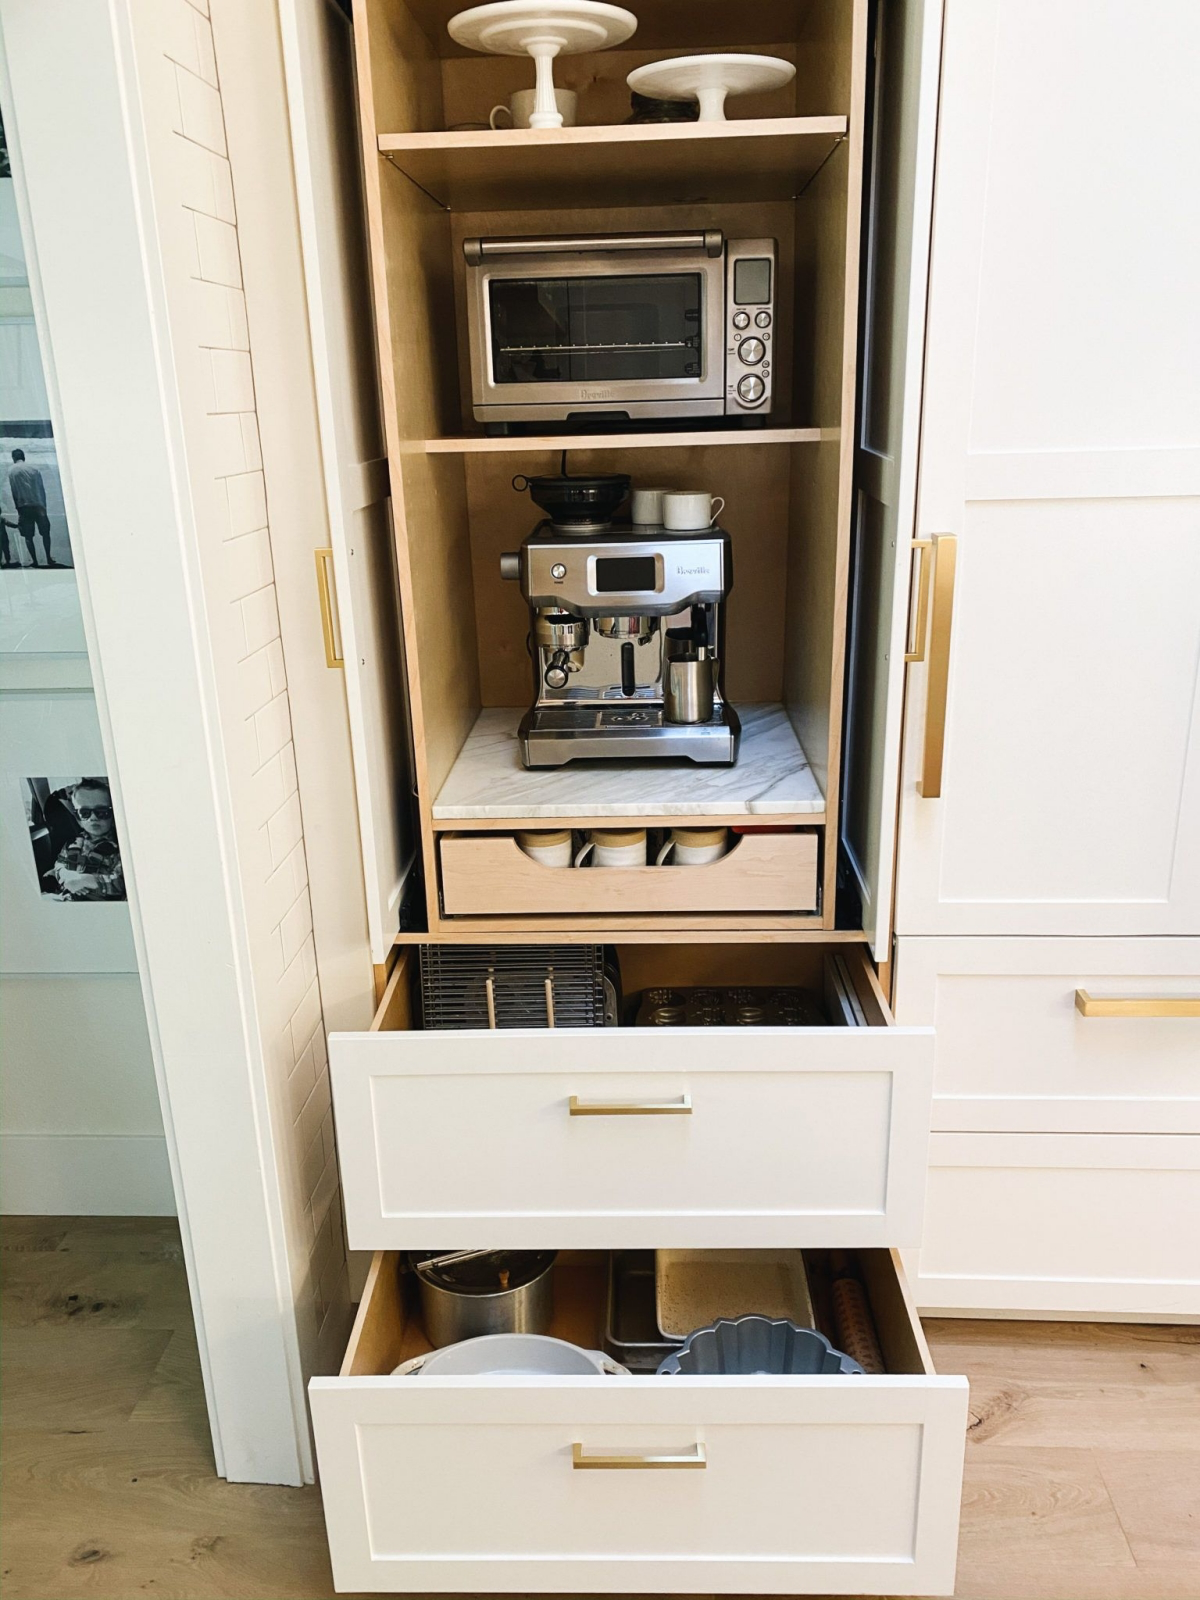
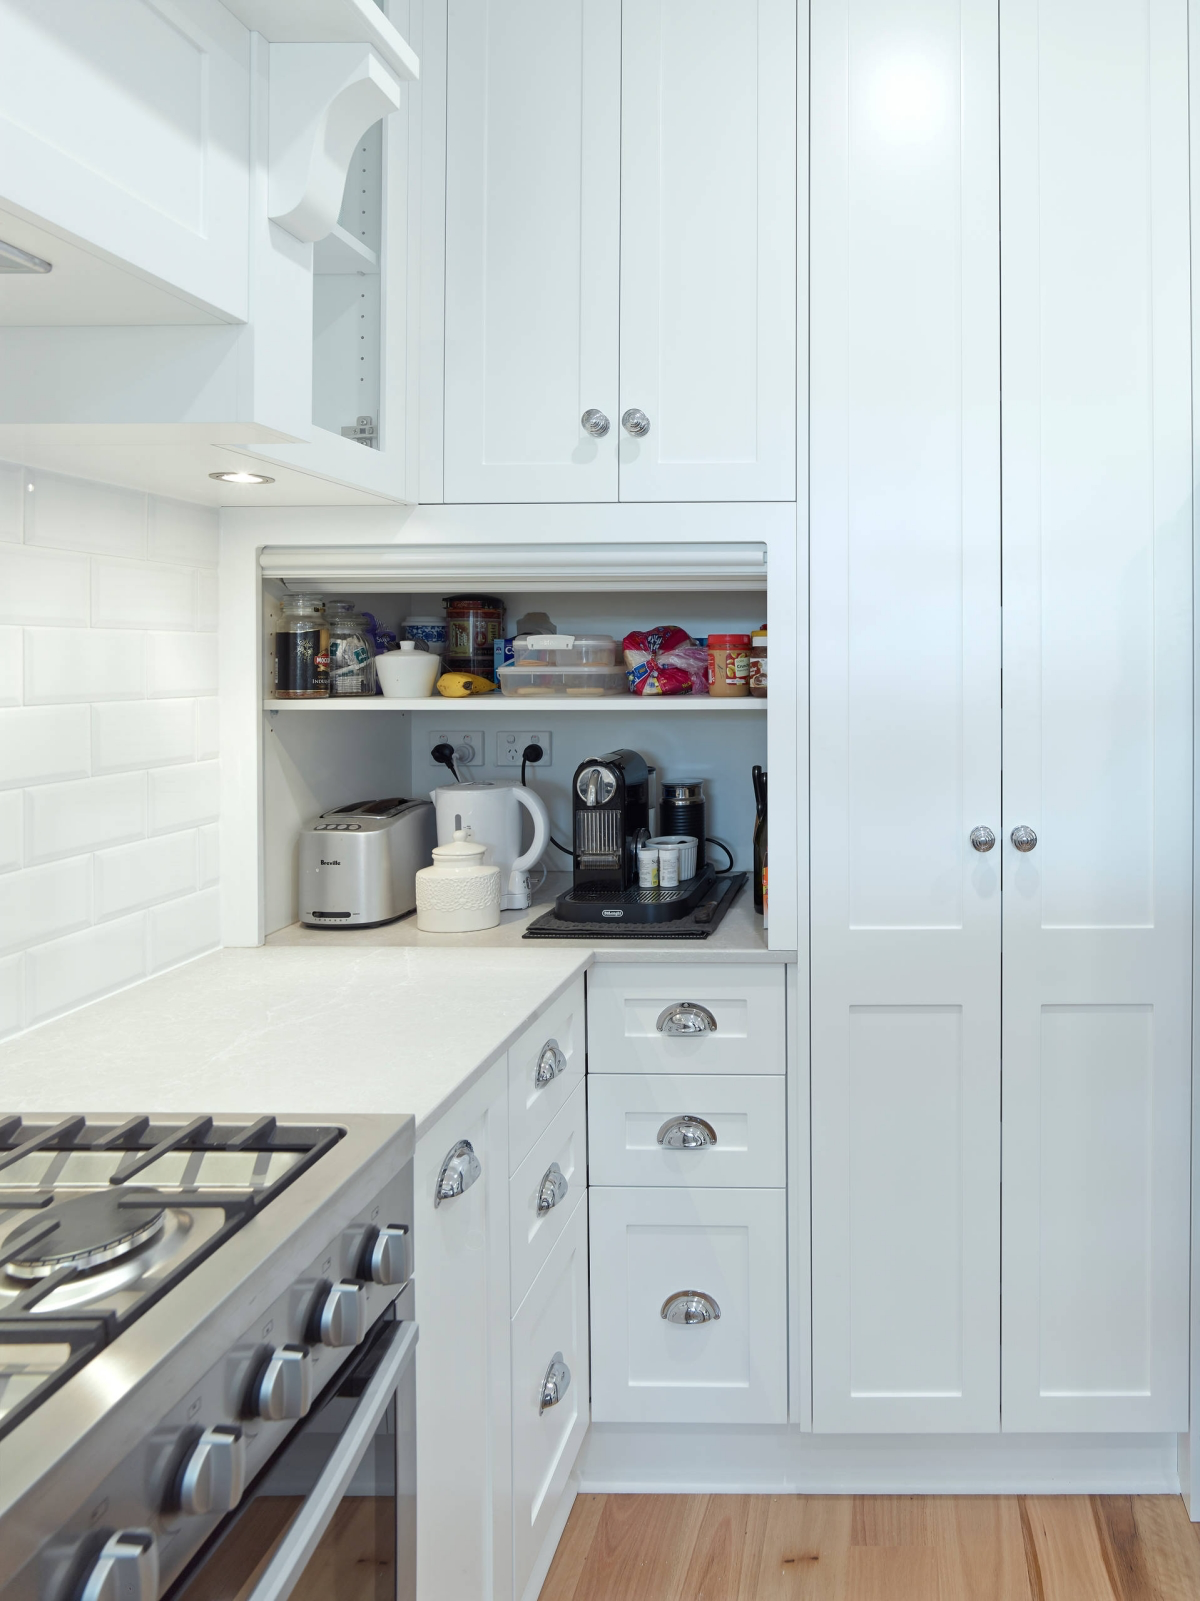
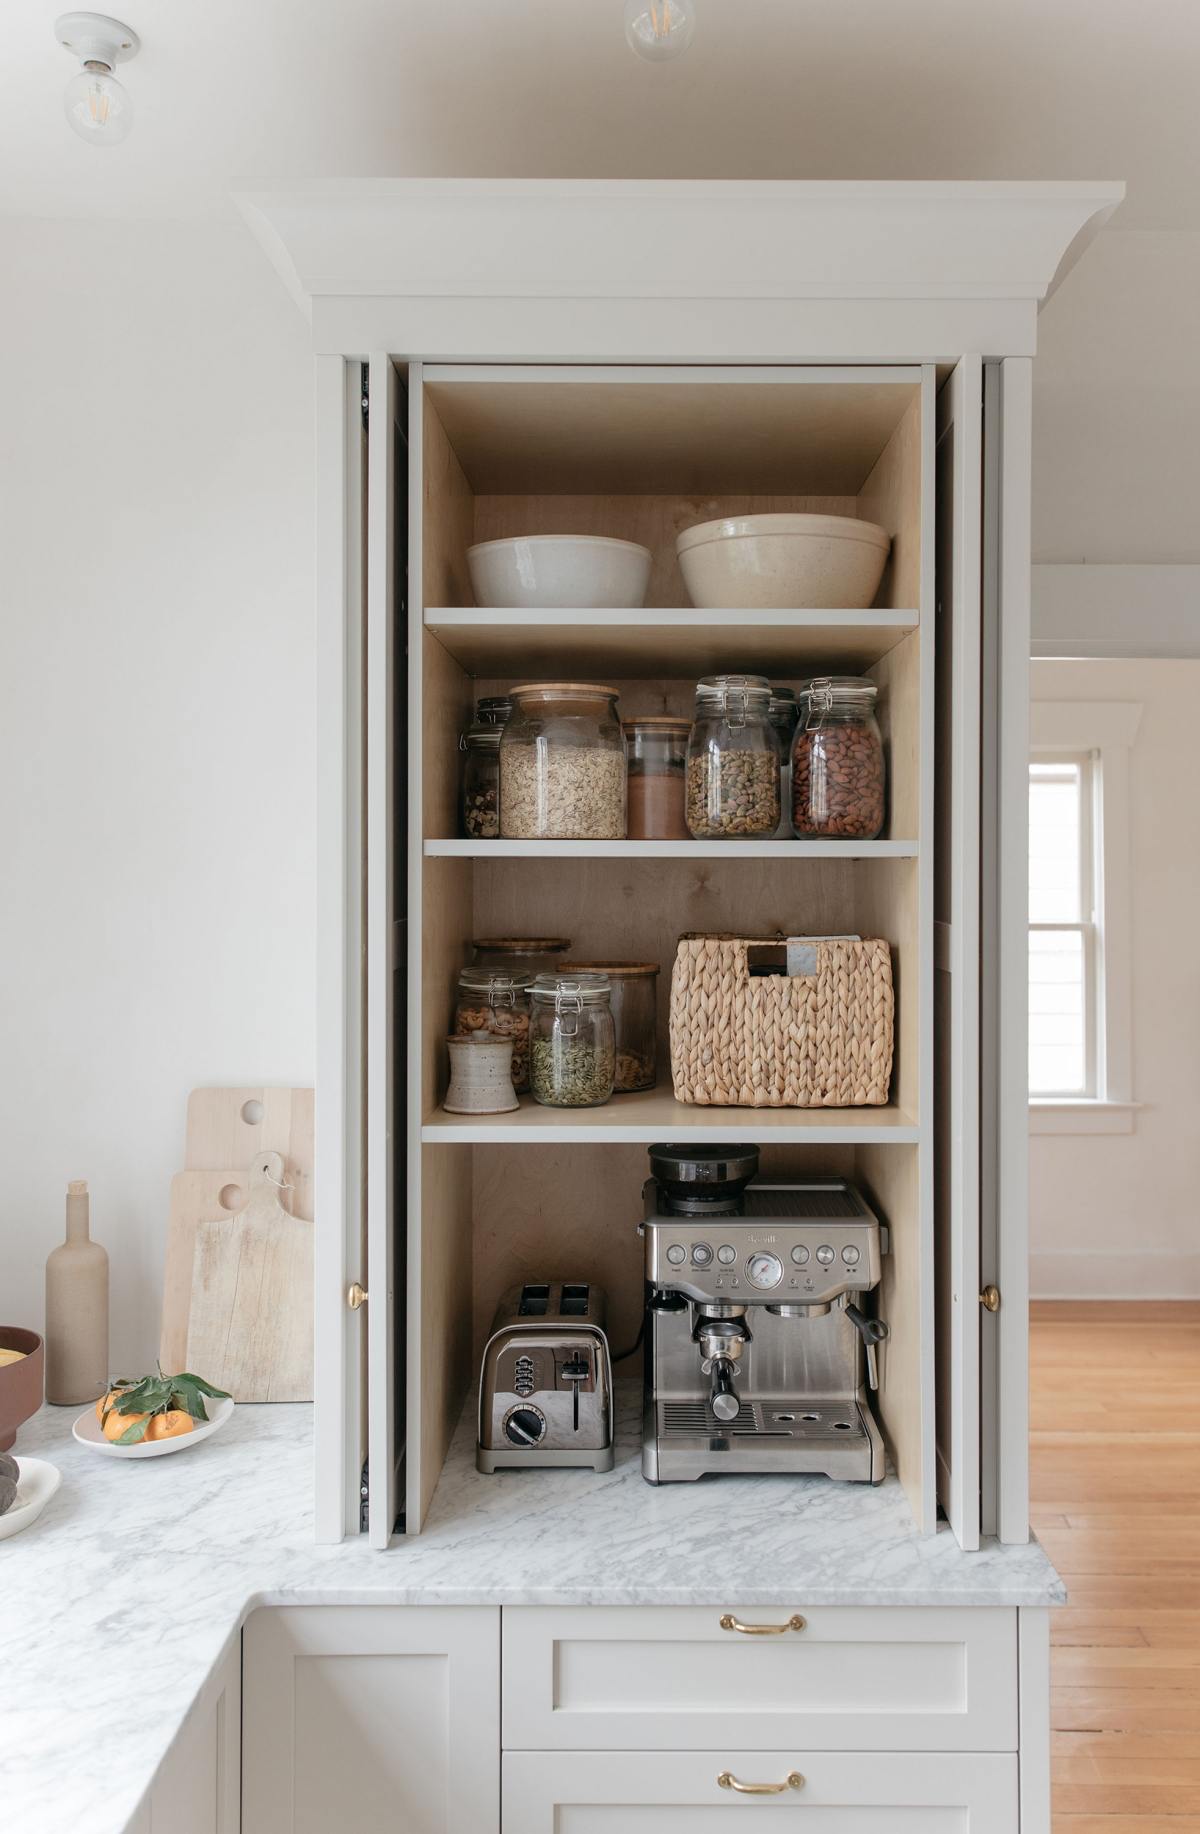
Your appliance storage should support these zones. It sounds obvious, but it’s so often overlooked. Storing your big stand mixer on the opposite side of the room from your flour and sugar means you’re constantly walking back and forth, wasting time. It’s inefficient. We plan storage based on where the work happens. Baking appliances? They go near the pantry and a nice, clear stretch of countertop. The coffee maker and toaster should live together in a breakfast station, hopefully out of the main cooking path to prevent traffic jams.
And then there’s ergonomics, which is just a fancy word for designing for the human body. Bad ergonomics can lead to back pain and shoulder strain. Here are the core rules I live by:
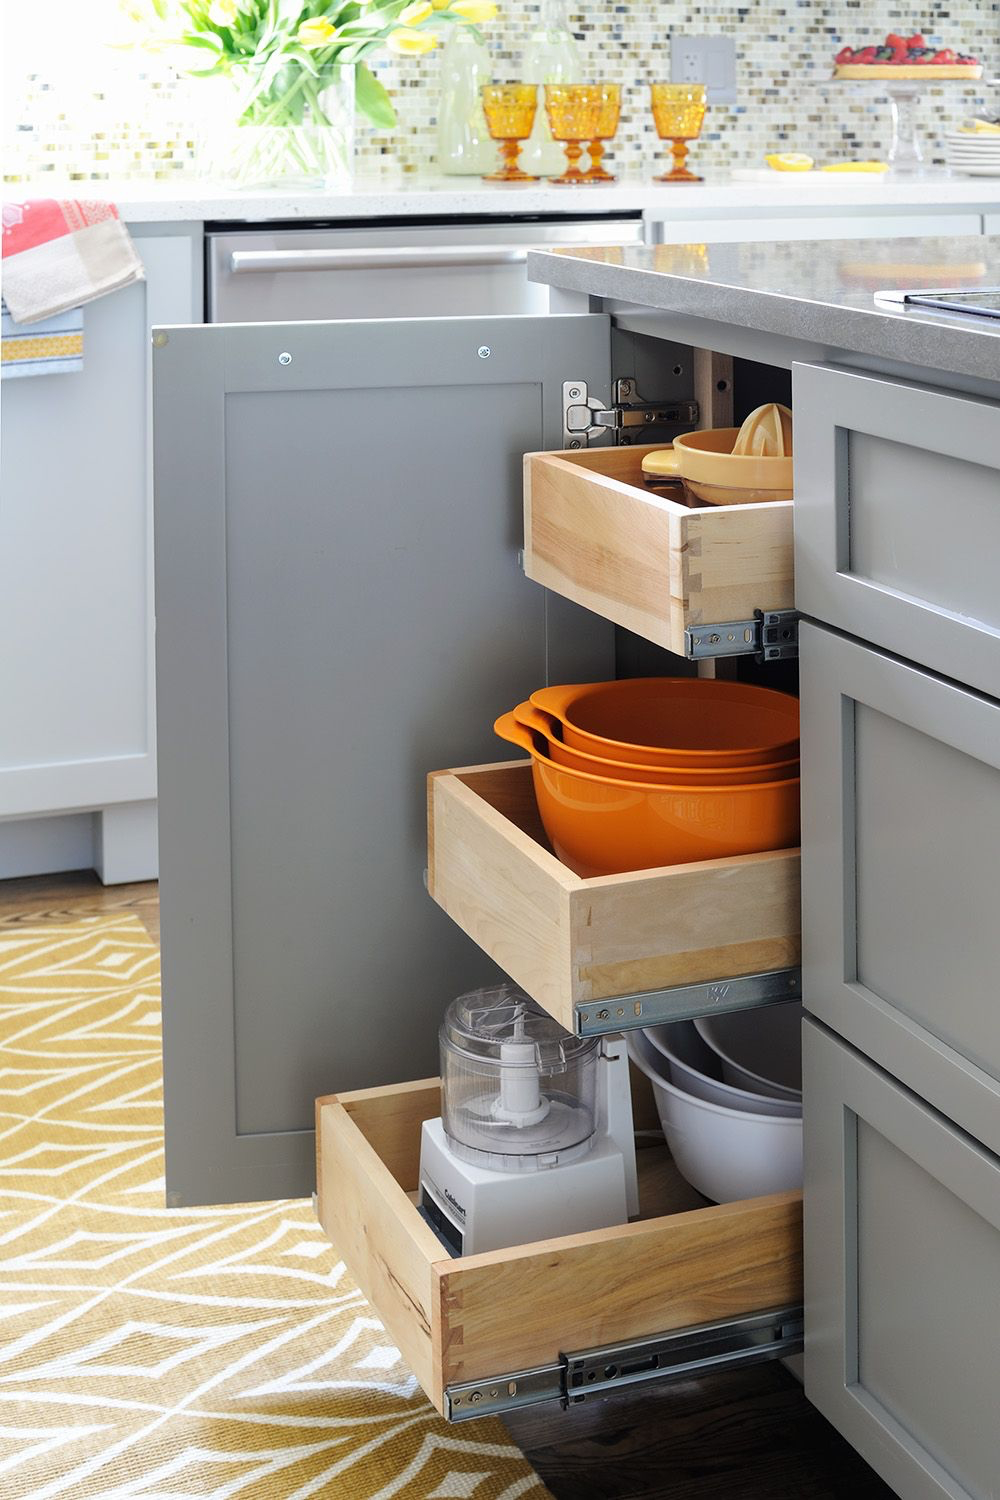
- Heavy Stuff (Below the Waist): Anything with some real heft, like a stand mixer or a big food processor, needs to be stored between your knee and waist height. Seriously. Lifting a 30-pound mixer from an overhead cabinet is a recipe for disaster. A base cabinet, especially with a pull-out shelf, is the way to go.
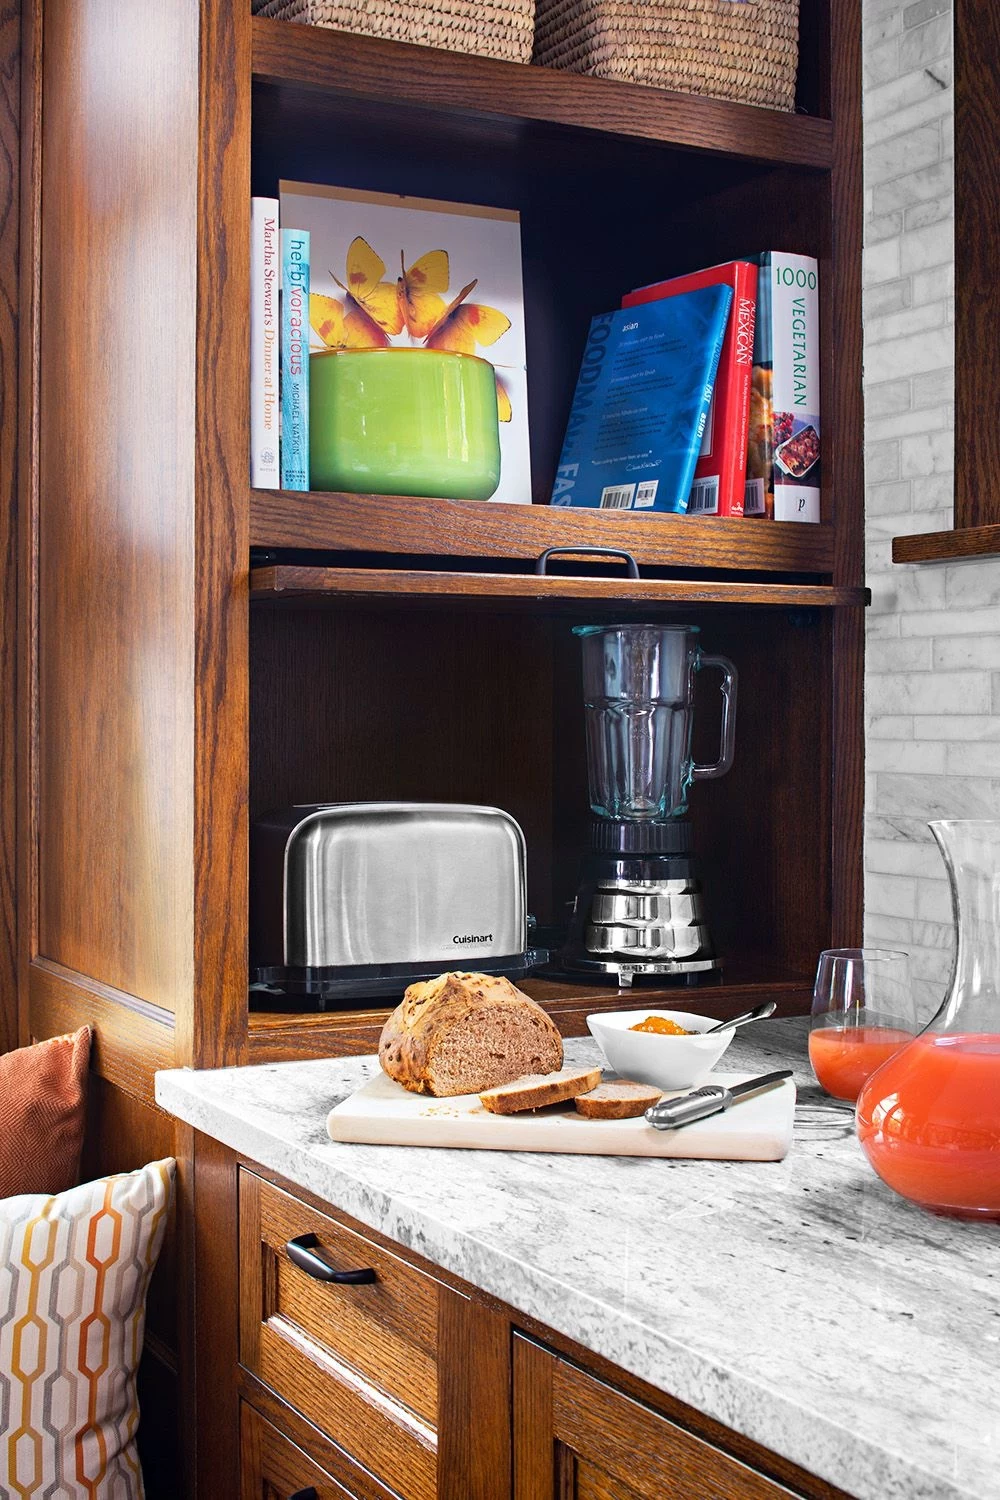
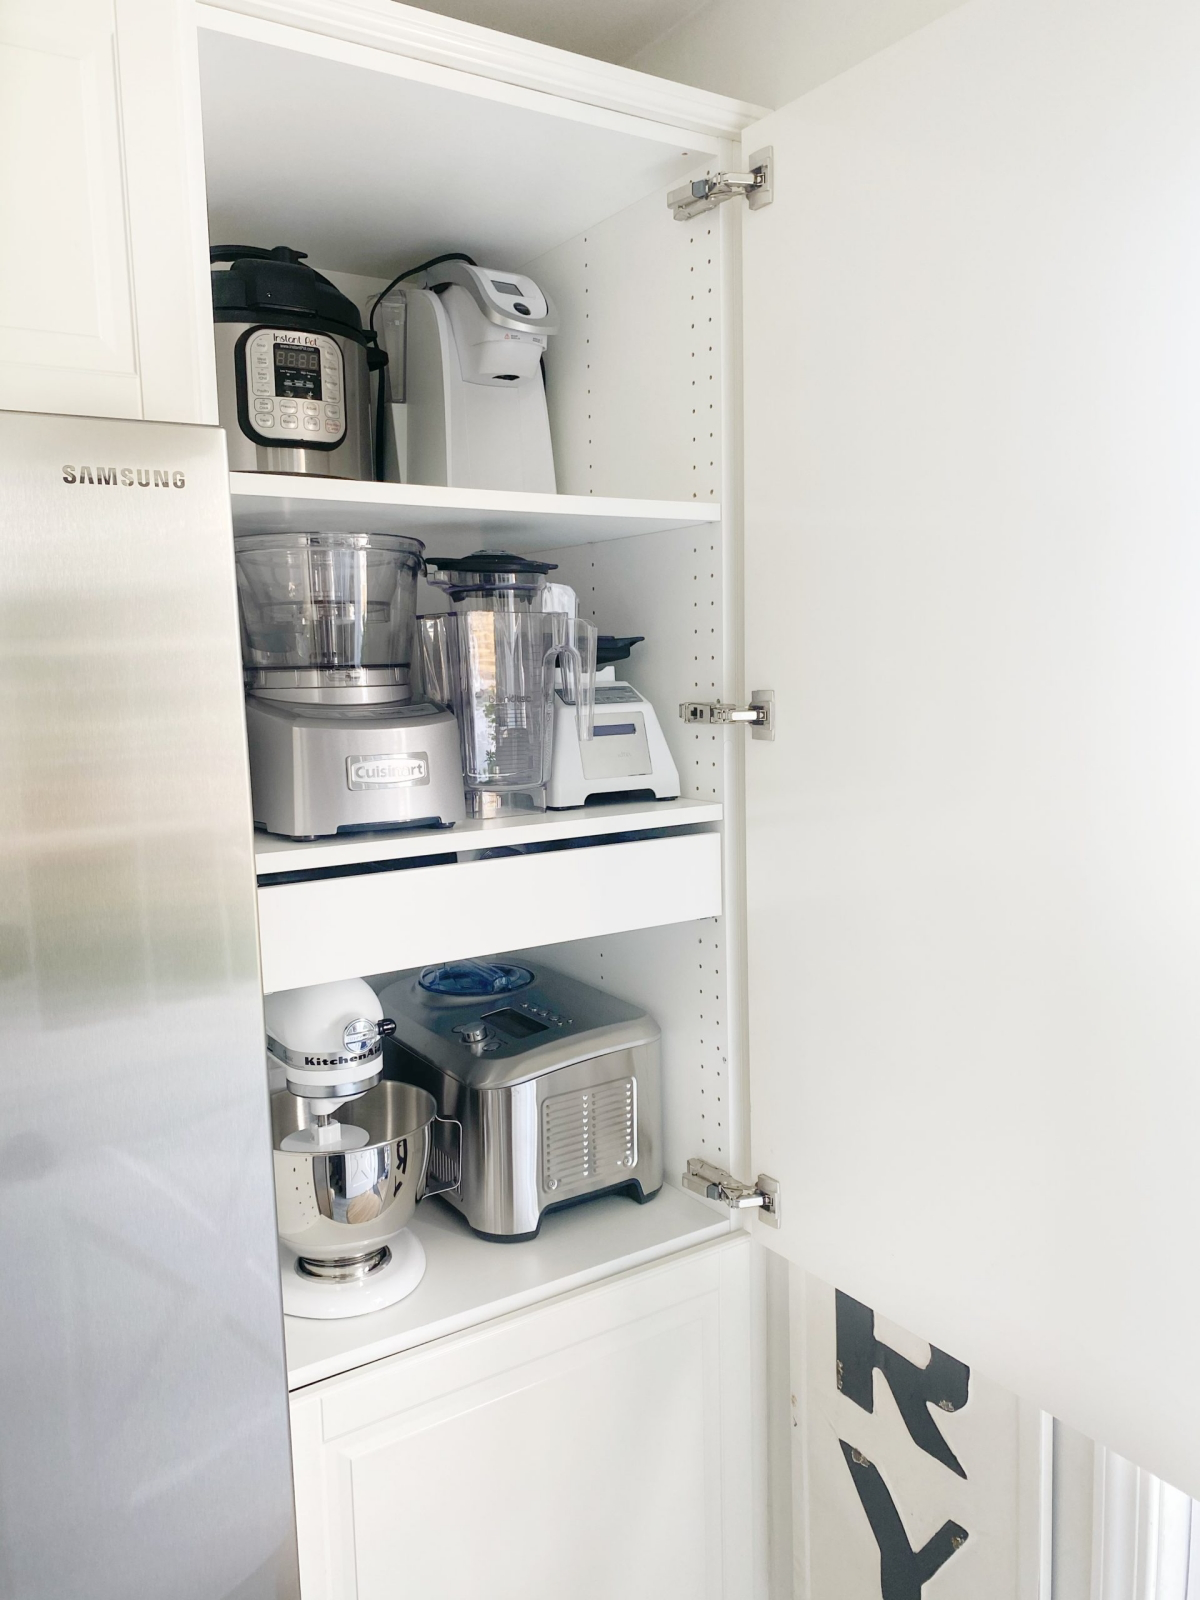
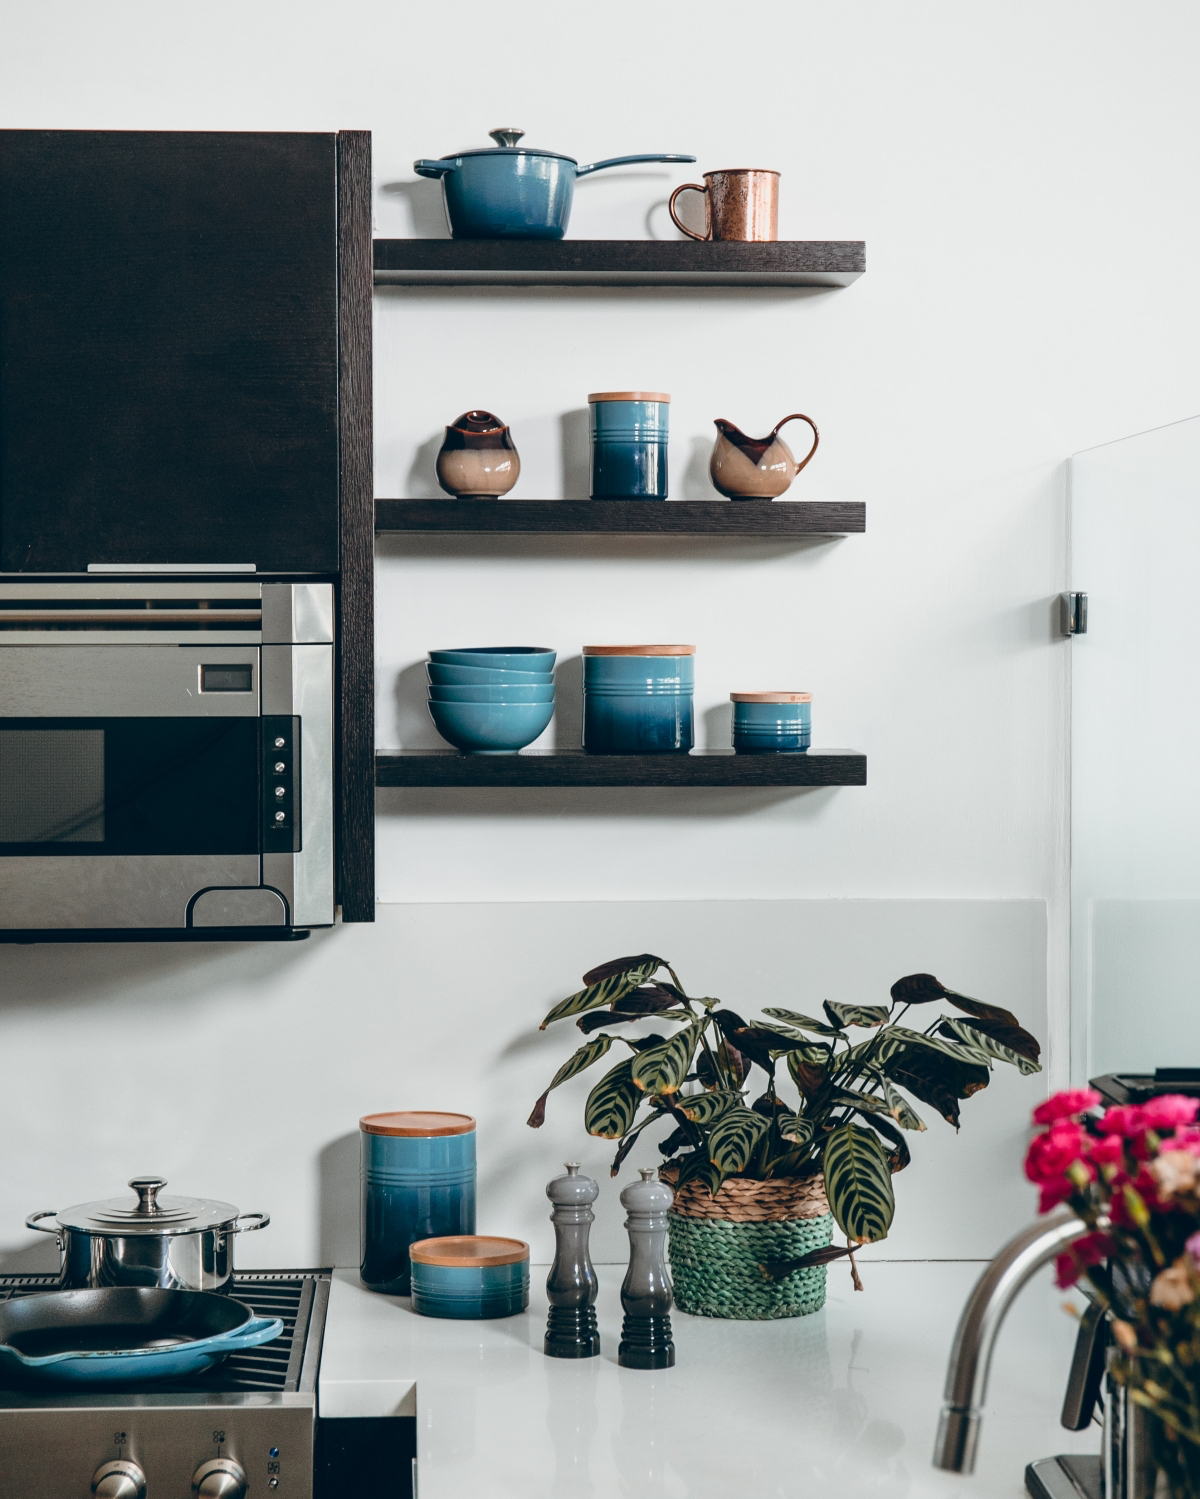
- Frequent Friends (At Counter Level or Just Above): Your daily drivers, like the coffee maker or toaster, can totally live on the counter if you have the space. If not, an “appliance garage” at counter level is your next best bet. Things you use weekly, like a blender, can go in an upper cabinet, but stick to the lowest shelf—somewhere between your shoulder and eye level. You shouldn’t have to get on your tiptoes for something you use often.
- The Once-in-a-Whiles (High or Low): That huge turkey roaster you see once a year? That’s what the cabinet above the fridge is for. The ice cream maker you break out in July? It can live in the very back of a deep pantry shelf. These less-convenient spots are perfect for things you don’t need to grab on a whim.
Your Weekend Project: The Great Appliance Audit
You can’t organize clutter. The very first step is always a full appliance audit. So here’s your homework: pull every single appliance you own out onto the counter. Yes, all of them. Now, sort them into four piles. Get some sticky notes!
Group 1: The Dailies. Your non-negotiables. Coffee maker, toaster, kettle, maybe the microwave. These need prime real estate.
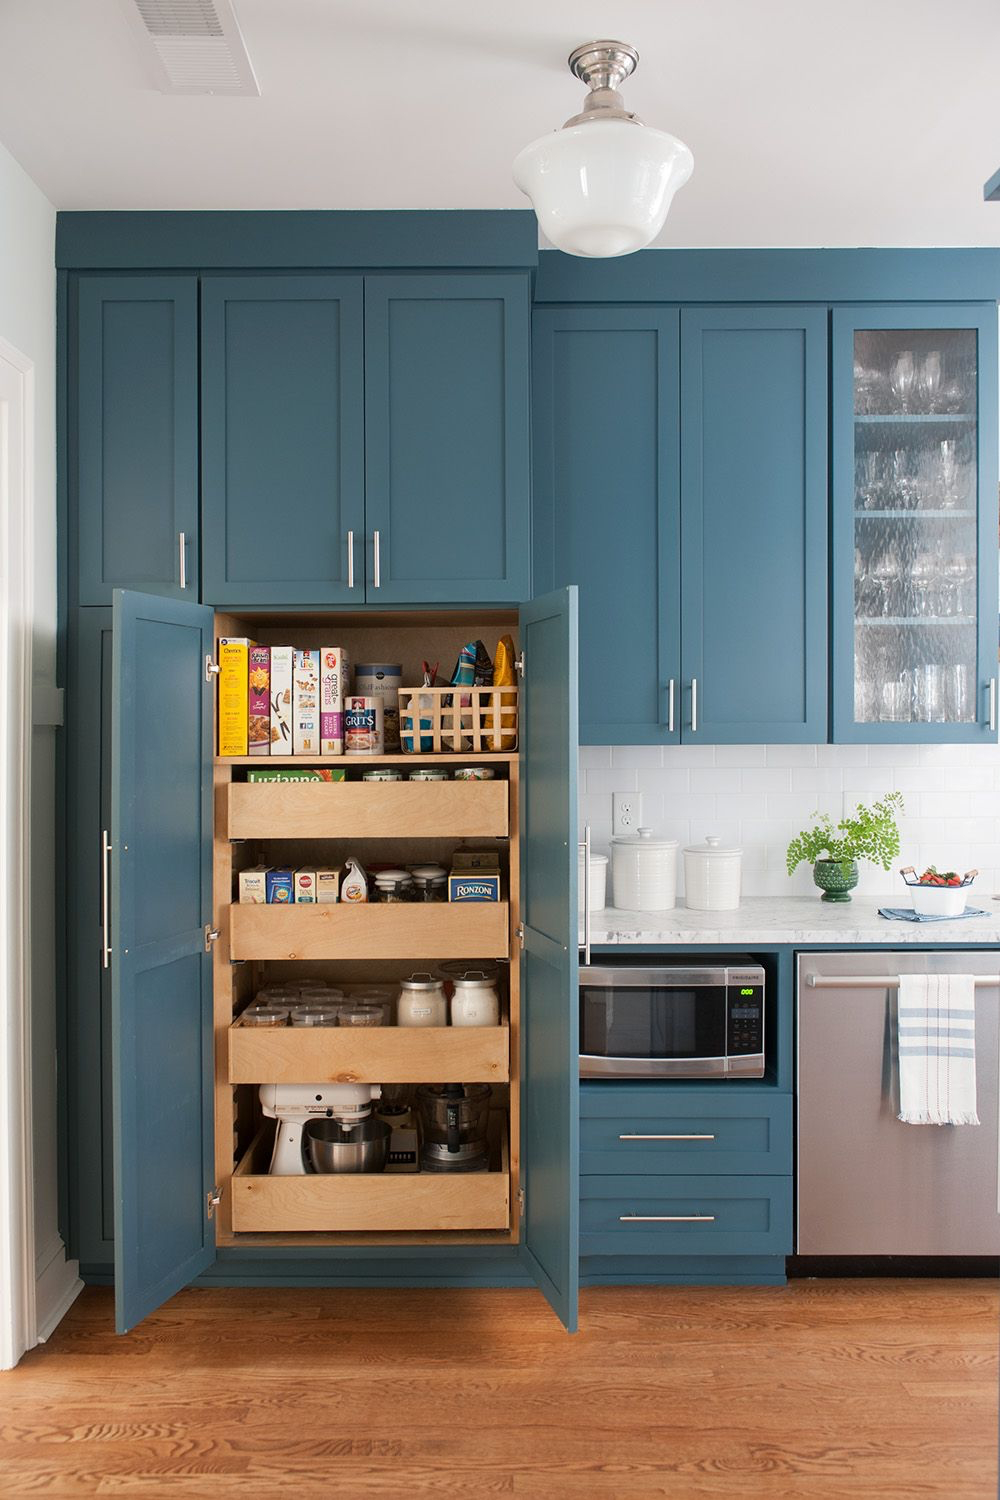
Group 2: The Weeklies. These are your workhorses. The blender for smoothies, the food processor for meal prep, the stand mixer if you’re a regular baker. They need to be easy to get to, but not necessarily on the counter.
Group 3: The Monthlies. These are for specific tasks. The slow cooker, the waffle iron. It’s okay if it takes 30 seconds to retrieve them.
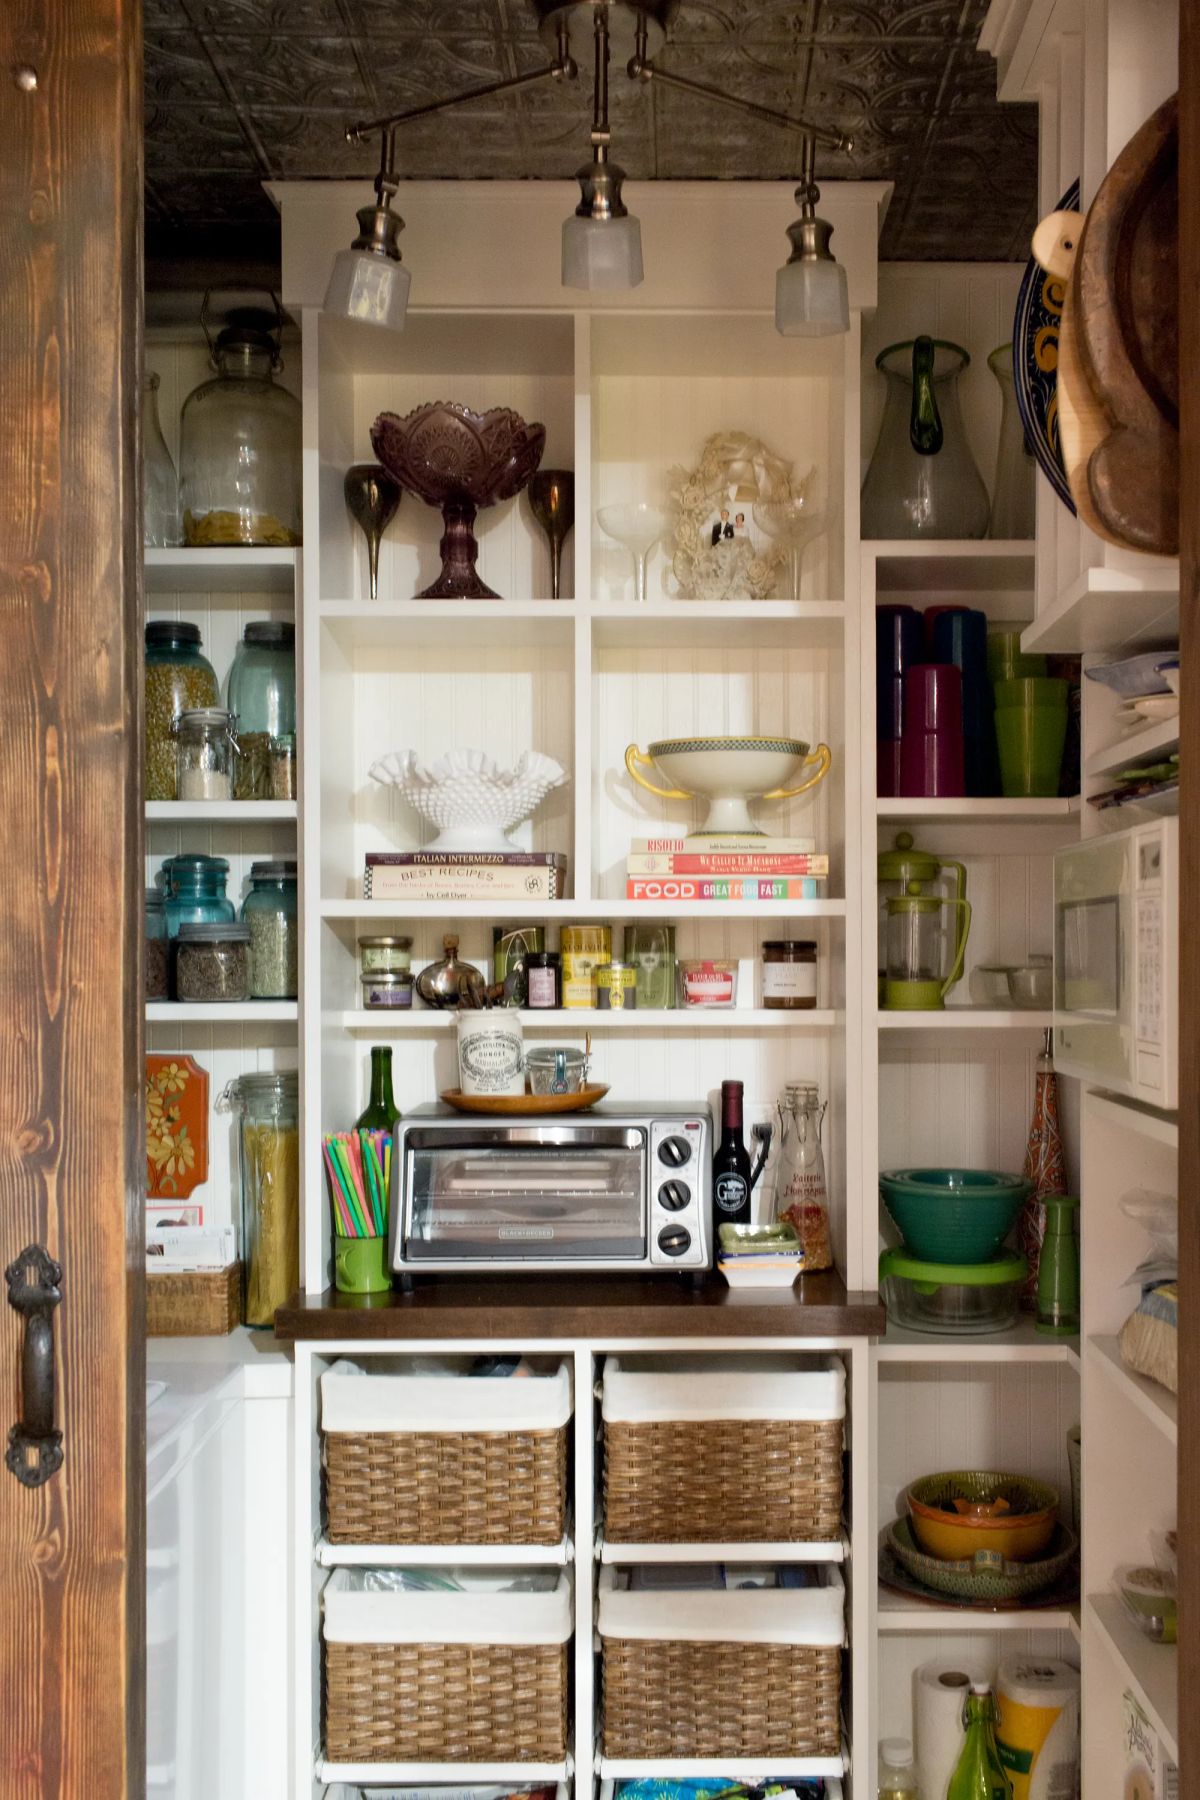
Group 4: The Occasionals. The holiday and specialty crew. Think turkey roasters, deep fryers, and dehydrators. These can go in the garage, the top of a closet, or anywhere out of the way.
Now, be honest with yourself. Do you really use that bread machine, or does your stand mixer with a dough hook do the job better? Could a single high-power blender replace that separate juicer and soup maker? I often nudge clients to consider multi-functional appliances from quality brands. They earn their space. A cheap gadget that does one thing you rarely do is just taking up valuable real estate.
This is your chance to sell or donate what you don’t use. I once had a client with three slow cookers. She had no idea why. We found new homes for two of them and freed up an entire shelf. My rule of thumb? If you haven’t touched it in a year, you probably won’t miss it. Let it go and enjoy the space.
Pro Storage Tricks for Your Cabinets
Okay, here’s where we get into the nuts and bolts. A cabinet is just a box until you outfit it properly. Those standard base cabinets with one shelf halfway up are horribly inefficient. Let’s fix that.
For the Heavy Lifters: The Appliance Lift
For a heavy stand mixer, there is simply no better solution than an appliance lift. It’s a spring-loaded shelf inside a base cabinet. You open the door, pull the shelf out and up, and it locks into place, perfectly level with your countertop. No lifting! When you’re done, you guide it back down into the cabinet.
Heads up! This is not a beginner DIY project. The installation has to be precise. The cabinet needs to be sturdy—I only trust these on 3/4-inch plywood cabinet boxes, never particleboard. The hardware itself from trusted brands like Rev-A-Shelf or Hafele will set you back about $200 to $400, plus installation costs if you hire a pro. But if you bake a lot, it is worth every single penny.
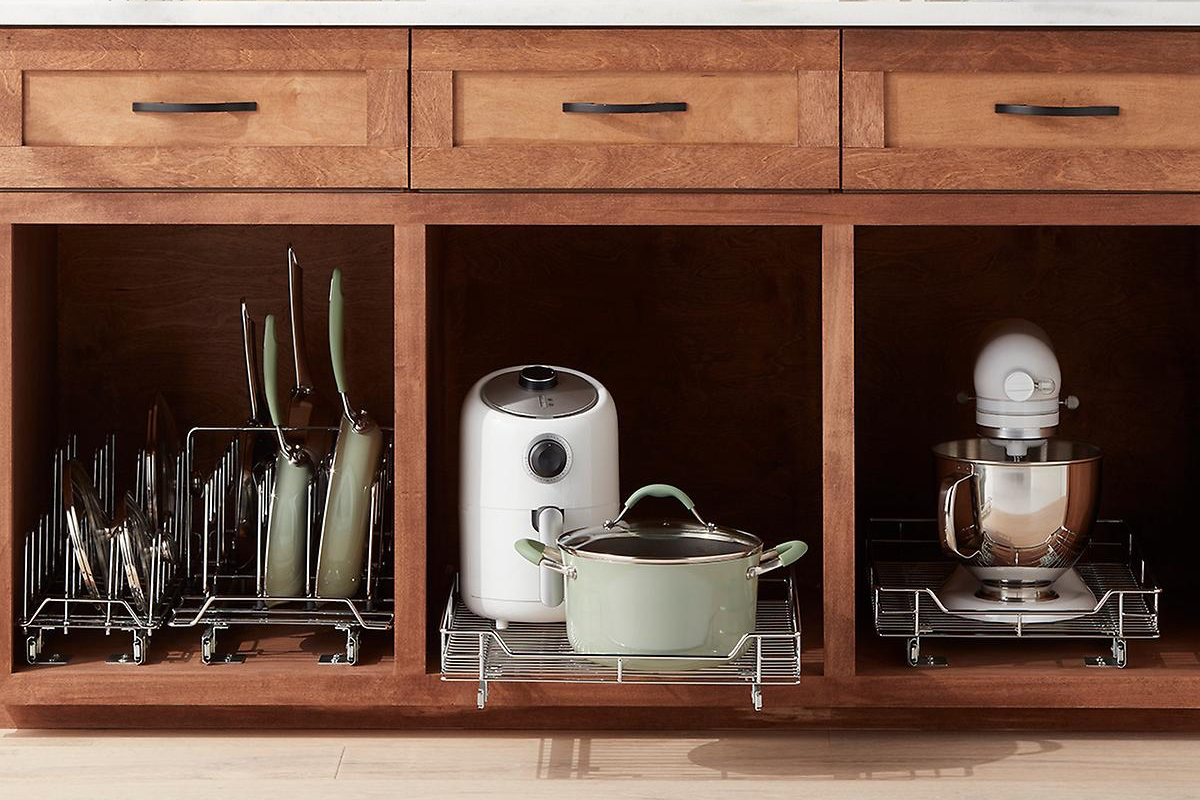
For Medium Appliances: Deep Drawers and Roll-Outs
For things like blenders and slow cookers, I love deep drawers. But the magic is in the hardware. Use full-extension, ball-bearing drawer slides with a minimum weight rating of 100 pounds. That 100-pound rating is non-negotiable; a drawer of appliances is heavy, and cheaper slides will sag and fail. You can find these at specialty woodworking stores like Rockler or even online.
If you have existing cabinets, you can retrofit them with roll-out shelves. Same rule applies: use those heavy-duty, full-extension slides. You can customize the height between shelves to perfectly fit your stuff—a tall bay for the blender, a shorter one for the food processor.
For Small, Awkward Stuff: DIY Vertical Dividers
What about hand mixers and waffle irons? Stacking them is an avalanche waiting to happen. The solution is to store them on their sides in a deep drawer using vertical dividers. This is actually a great, simple DIY project!
- Measure the inside height and depth of your drawer.
- Cut a few pieces of thin (1/4-inch or 1/2-inch) plywood to those dimensions.
- Arrange them in the drawer to create custom slots and secure them with a bead of wood glue. For a stronger hold, a few small brad nails work wonders.
Suddenly, everything has a neat little home and is easy to grab.
No Reno? No Problem. Quick Wins for a Better Kitchen Today
Look, not everyone is doing a full renovation. If you need a fix this weekend and you’re on a budget, you still have options.
- The Makeshift Pull-Out: Grab a sturdy, low-sided bamboo tray or even a baking sheet. Place it on a cabinet shelf and put your appliances on it. Now you can slide the whole tray out to reach what’s in the back. It’s not fancy, but it works.
- Rolling Caddies: For that super heavy mixer that lives in a deep pantry, buy a small, heavy-duty rolling plant caddy for about $20 from a garden center. Put the mixer on it. Now you can just roll it forward instead of trying to drag it out.
- Go Vertical on the Counter: If you’re short on counter space, look for a sturdy, two-tiered shelf (sometimes sold as a ‘microwave shelf’ or ‘baker’s rack’). This lets you stack your microwave and toaster oven, or other appliances, freeing up horizontal space.
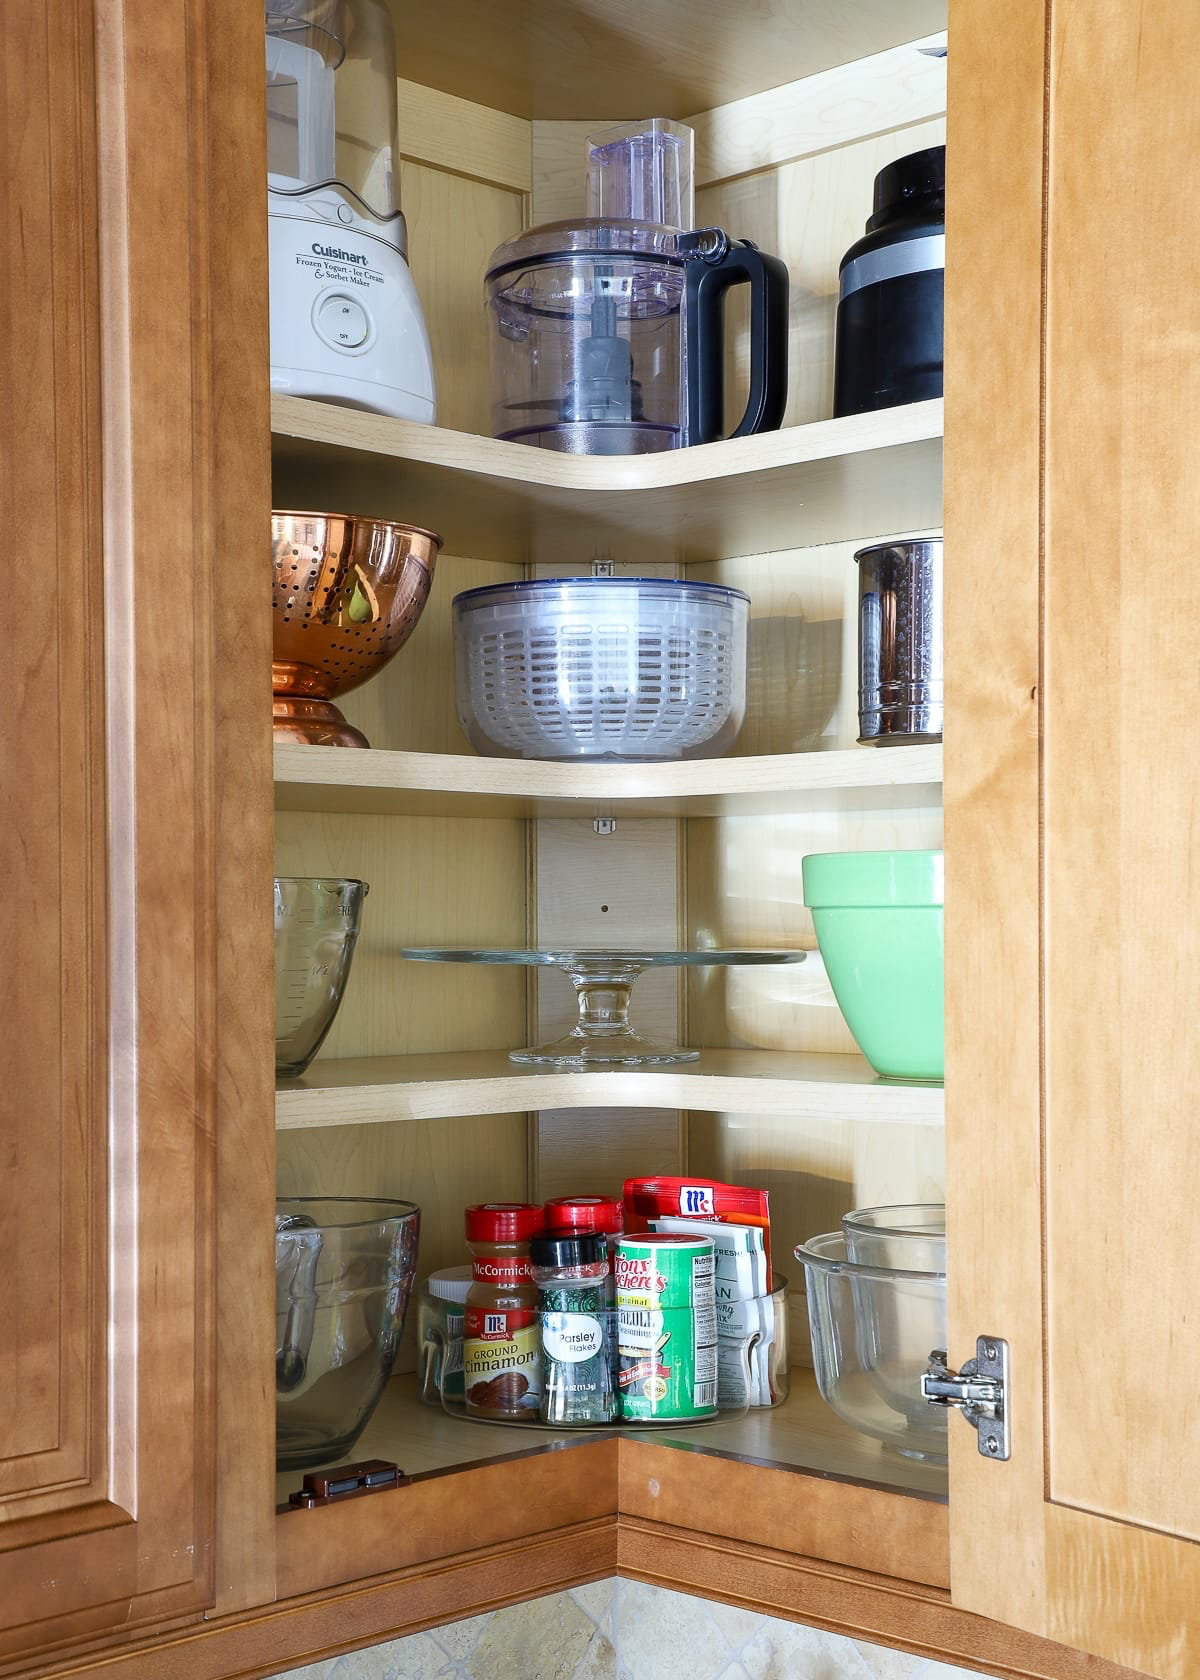
Let’s Talk About That Awkward Corner Cabinet
Ah, the dreaded corner cabinet. It’s a black hole where appliances go to die. But we can make it work. Here are your options, from budget-friendly to top-tier.
First up is the classic Lazy Susan. Modern ones are better than the old wobbly metal ones, but let’s be frank: a lot of space is still wasted around the circular shelves. It’s the most affordable option, usually under $150, and it’s better than nothing for sure.
A big step up is a Blind Corner Pull-Out. This is a system where you pull one set of shelves out, then slide it sideways to access a second set of shelves that was hidden in the back. It gives you access to the whole cabinet, but they can be a bit clunky and installation is tricky. Expect to pay in the $300-$600 range for the hardware.
And then there’s the “Magic Corner.” This is the best of the best. You open the door, and the front set of shelves glides out and to the side, automatically pulling the back shelves forward into the main opening. It’s smooth, robust, and gives you incredible access. It’s a premium solution, often costing $700 or more, but it truly transforms a useless corner into prime appliance storage.
A Quick Word on Safety (Please Read This!)
Function is great, but safety is everything. I’ve seen some scary stuff out there. Please, don’t make these common mistakes.
Mistake
1: Using Extension Cords in Cabinets. I can’t say this enough: DO NOT use a regular power strip or extension cord inside a cabinet for a permanently stored appliance. It’s a major fire hazard and violates electrical codes. If you want an outlet inside a cabinet (for an appliance lift, for example), you MUST hire a licensed electrician to install it properly.
Mistake
2: Forgetting Ventilation. An appliance garage is great for hiding a toaster, but you can’t run it inside a sealed box. The heat buildup is a fire risk. You have to open the doors during use. A good pro will also install a small vent or a power interlock switch that cuts power when the door is closed.
Mistake #3: Ignoring Power Needs. Many countertop appliances are power-hungry. Plugging too many into one circuit will trip the breaker. A licensed electrician can make sure your kitchen is wired to handle the load safely.
Bottom line? For simple projects like building drawer dividers, go for it. For installing complex hardware like a lift or a Magic Corner, call a skilled handyperson or cabinet maker. And for anything involving wiring, ALWAYS call a licensed electrician. No exceptions.
Taking the time to plan your appliance storage is one of the best upgrades you can make to your kitchen. It’s an investment that pays you back every single day with less frustration and more joy in the heart of your home. It’s not about having a perfect kitchen, it’s about having a kitchen that works perfectly for you.
Inspiration:
The eternal dilemma: how to keep daily-use appliances like the coffee maker and toaster accessible without the visual clutter of cords?
The professional’s secret lies in integrating power sources directly into your storage. Instead of trailing wires to a wall outlet, have an electrician install a dedicated outlet strip along the back interior wall of your ‘breakfast station’ cabinet or appliance garage. This way, appliances are plugged in and ready to use the moment you open the door, but completely hidden from view when closed. For a truly seamless countertop, consider a pop-up outlet from a brand like S-Box, which retracts flush with the surface.
A study by the National Kitchen & Bath Association found that over 60% of homeowners undertaking a kitchen remodel prioritize improved storage and organization over all other features.
This statistic highlights a major shift: a beautiful kitchen is no longer enough; it must be effortlessly functional. This desire is driving innovations like dedicated appliance lifts. For heavy items like a KitchenAid stand mixer, a spring-assisted heavy-duty lift mechanism from a brand like Rev-A-Shelf, installed inside a base cabinet, is a game-changer. It swings the appliance up to counter height and locks in place, saving your back and keeping countertops clear.


