Steal These Hotel Secrets for the Best-Made Bed of Your Life
My entire career has revolved around one thing: the perfect night’s sleep. Not as some sleep scientist, but as a hotelier who’s managed housekeeping for some pretty luxurious places. I’ve personally overseen the making of tens of thousands of beds and trained countless new staff who thought they knew how… until they learned our way.
In this article
Here’s the thing. A professionally made bed isn’t just about being tidy. It’s an invitation. It’s a craft that blends technique with a real understanding of what makes someone feel truly cared for. It’s the silent promise of a fantastic night’s rest.
And no, the secret isn’t just yanking the sheets tight. That comes last. The real magic starts with the foundation, the materials, and the order you do things in. This isn’t about making your bedroom feel like a sterile hotel room, but about borrowing a few proven tricks to bring that sense of calm and luxury into your own home. So, let’s walk through the exact method the pros use, and I’ll explain the ‘why’ behind every single step.

The Foundation: Getting the Basics Right
Before you even think about a sheet, you have to understand that a bed is a whole system. Get the base layers right, and everything else falls into place beautifully.
Let’s Talk Linens (And Why Thread Count Isn’t Everything)
People always assume the secret to our beds is some ridiculously high thread count. Honestly, that’s mostly marketing fluff. In the hospitality world, we care way more about durability and how a fabric feels and breathes. Here’s what the experts actually prioritize:
- The Material: We almost always go for 100% long-staple cotton. Why? Because it’s incredibly breathable, it’s strong, and it actually gets softer the more you wash it. Those polyester blends might resist wrinkles, but they just don’t breathe well, which can lead to a hot, sticky night.
- The Weave: This is a big one. It’s usually a choice between percale and sateen. For that classic, crisp hotel-sheet feel, percale is the winner. It has a simple one-over-one-under weave that results in a cool, matte finish that feels amazing on your skin. Sateen is silkier and has a bit of a sheen, which is nice, but it snags more easily and isn’t as durable—not a great choice for heavy use.
- The Real Thread Count: Our sweet spot is usually a 300-thread-count percale. This gives you the perfect mix of softness, strength, and breathability. Super high thread counts often use thinner, weaker threads crammed together, which can feel heavy and block airflow. A good 300-count percale will feel much better and last longer than a cheap 1000-count sheet, guaranteed.
When you’re shopping, look for brands like Parachute or Brooklinen to get an idea of quality, but don’t get hung up on the name. Just focus on finding that 100% long-staple cotton percale. A great set will probably run you between $150 and $250, and it’s an investment that pays off in comfort.

The Easiest Health Upgrade for Your Bed (And It’s Free)
The very first thing my team does in a room is strip the bed. But we don’t remake it right away. We let the mattress sit bare for at least 15-20 minutes while we handle the rest of the room. This is a non-negotiable step for hygiene. Your body releases a surprising amount of moisture overnight. If you pull the covers up immediately, you trap that humidity, creating a paradise for dust mites and bacteria. Letting the mattress air out lets all that moisture evaporate. It’s a simple, free step that makes a huge difference in how clean and fresh your bed feels.
The Professional Method: A Step-by-Step Guide
Okay, here’s the exact process. Once you get the hang of it, you can do a full linen change in under 15 minutes. A daily tidy-up? Less than three minutes.
Step 1: Strip and Inspect
Never, ever make a bed on top of old linens. Strip everything off, piece by piece. This isn’t just about cleaning; it’s your chance to inspect. Shake out each item. Is there a small tear near the elastic on the fitted sheet? A faint stain on the top sheet? Catching these things early at home saves you from a sheet ripping in the middle of the night.
Step 2: The Mattress Protector
A good mattress protector is essential. It’s not just for spills; it protects your mattress—a huge investment!—from body oils and allergens that build up over time. A good, quiet waterproof one will cost you between $40 and $80. Trust me, it’s worth every penny to protect your mattress.
When you put it on, make sure it’s pulled completely taut. Any wrinkles here will be felt right through the sheets.
Step 3: The Fitted Sheet
The fitted sheet is your canvas. If it’s loose, the bed will never look sharp. The key here is tension.
- Find the Tag: On most quality sheets, the tag goes on the bottom-right corner of the mattress. This little trick saves you from that frustrating spin-the-sheet game.
- Anchor the Top: Start with the two corners at the head of the bed, since they’re usually the hardest to get to.
- Create Tension: Move to the bottom corners. As you hook on the third corner, pull the sheet firmly. Then, pull diagonally and down before securing the final corner. This diagonal pull is the secret to a drum-tight surface.
- Final Tuck: Run your hands along the edges, tucking everything deep under the mattress until it’s perfectly smooth.
Step 4: The Top Sheet & Hospital Corners
This is where the real craft comes in. A hospital corner is what gives a bed that clean, polished look and keeps the sheets from coming untucked.
- Place it Upside Down: Lay the top sheet on the bed with the finished, softer side facing down. The top edge should line up with the top of the mattress. Why upside down? So when you fold the top back, the nice side is what’s against your skin.
- Tuck the Bottom: Go to the foot of the bed and tuck the bottom edge of the sheet tightly under the mattress.
- Create the Corner: Standing at the side, about a foot from the end, pick up the edge of the sheet. Lift it up and lay it on top of the bed to form a 45-degree angle.
- The First Tuck: While holding that triangle of fabric up, tuck in the hanging portion of the sheet underneath it. Keep it smooth.
- The Final Fold: Now, let the triangle of fabric fall back down. It should create a perfect vertical crease. Tuck that part neatly under the mattress. Repeat on the other side. This sounds complicated, but after you do it twice, it becomes pure muscle memory.
Good to know: For home use, you’ll probably want to leave the top third of the sheet untucked on the sides so it’s easy to get into bed.
Step 5: The Mid-Layer (Blanket or Coverlet)
If you use a blanket, lay it on top of the sheet, but position its top edge about 6-8 inches down from the top of the mattress. This leaves room for that nice fold-over. You can tuck this layer in with hospital corners, too, or leave it loose for a more relaxed vibe.
Step 6: The Duvet (and the Burrito Trick)
Fighting with a duvet cover is the worst. We teach a simple method that makes it foolproof.
- Turn the duvet cover completely inside out and lay it on the bed with the opening at the foot.
- Lay your duvet insert directly on top, lining up all the corners.
- Starting from the head of the bed, roll the cover and insert together like a tight burrito.
- When you reach the end, reach into the cover’s opening, grab one end of the roll, and flip the cover around it. Do the same on the other side.
- Now, just unroll the burrito back towards the head of the bed. It will unroll perfectly inside the cover.
By the way, this is one of those things that’s way easier to see than to read about. Pop over to YouTube and search for the “burrito duvet cover trick”—it will blow your mind.
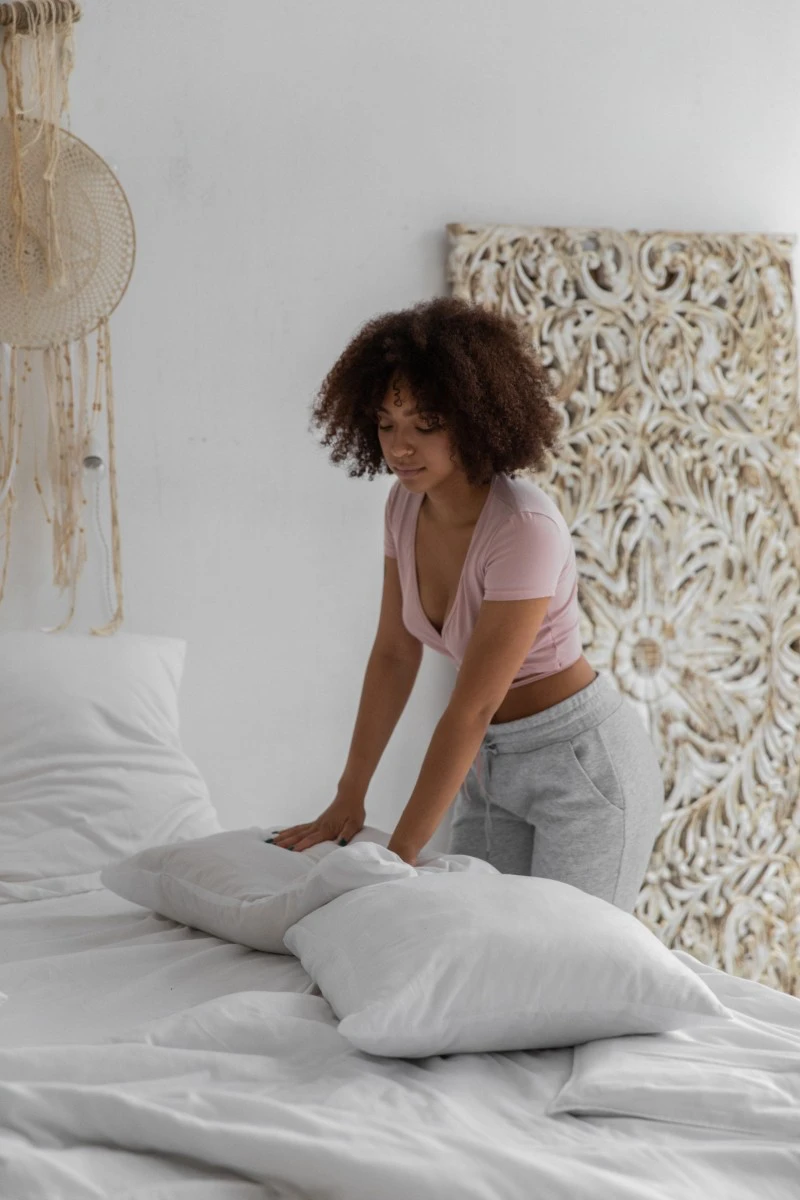
Step 7: Perfect Pillows
Pillows are the finishing touch. For your sleeping pillows, give them a good shake after putting on the case to settle them to the bottom, then stand them up against the headboard. For decorative pillows, a light ‘karate chop’ in the middle creates that plush, designer dent. A little tip: an odd number of decorative pillows almost always looks better.
The Ultimate Hotel Secret: Triple Sheeting
Okay, want to know one of the biggest secrets to that pristine, all-white hotel bed? It’s a technique called ‘triple sheeting,’ and it’s brilliant for both hygiene and efficiency. It actually gets rid of the duvet cover completely.
Here’s how it works:
- Start with your fitted sheet.
- Place a flat sheet on top (Sheet
1).
- Place your blanket or duvet insert on top of that sheet.
- Place a second flat sheet on top of the duvet (Sheet
2).
- Fold the top edges of both flat sheets down over the duvet to create a thick, inviting cuff.
- Tuck everything in together using hospital corners.
The genius here is that the duvet itself never touches the guest. When it’s time to clean, we just strip the two top sheets and the fitted sheet. The duvet stays behind, perfectly clean. It’s faster than wrestling with covers and ensures every layer you touch is freshly laundered.
Oh, and that impossibly crisp feel? We use giant, hot industrial presses that are basically massive irons. But don’t worry—the trick of putting your sheets on the bed while they’re still slightly damp will get you about 80% of the way there at home!
Troubleshooting Common Problems
After doing this for so long, you learn all the fixes. Here are a few common frustrations and how to solve them.
- The Wandering Duvet: If your duvet bunches up, the cover is probably too big. You can sew little fabric ties into the inside corners of the cover and loops onto the duvet to hold it in place. Many quality sets now come with these already.
- The Popping Fitted Sheet: This usually means the pocket depth is wrong for your mattress. Measure the height of your mattress (including any toppers!) and buy sheets with pockets that are at least two inches deeper.
- Lifeless Pillows: What kind of pillows should you even buy? Most luxury spots use a combo: firm feather-and-down pillows for support, with a fluffy down-alternative option for those who prefer it. And heads up, they don’t last forever. We typically replaced ours every 1-2 years. At home, you can do the fold test: fold your pillow in half. If it doesn’t spring right back, it’s time for a new one.
- Stubborn Wrinkles: Take your sheets out of the dryer while they’re still a little damp and put them directly on the bed. The tension will pull most of the wrinkles out as they dry. For any remaining creases, a small handheld steamer is your best friend.
Quick Tip: DIY Linen Water. For that final pro touch, make your own linen spray. Just mix a cup of distilled water with 5-10 drops of your favorite essential oil (lavender is a classic) in a spray bottle. A light mist helps release wrinkles and adds a subtle, calming scent.
A final thought… this is a guide to a professional technique, but the goal in your own home is your comfort. If you hate a top sheet or prefer a looser tuck, that’s your call. Use these methods as a toolkit, not a set of rigid rules. The best-made bed is always the one you can’t wait to climb into at night.
Inspiration:
The secret to that immaculately clean and crisp feel in hotels like the Westin or Four Seasons isn’t just the sheets, but how they are layered. It’s a technique called ‘triple sheeting,’ designed for ultimate hygiene and surprisingly easy maintenance—no more wrestling with a duvet cover!
- Layer 1: The Base. Your standard fitted sheet over the mattress.
- Layer 2: The Comfort Sheet. A flat sheet, placed with the finished side facing down, so its softest side is against your skin.
- Layer 3: The Warmth. The duvet or a lightweight blanket, placed directly on top.
- Layer 4: The Top Sheet. A final flat sheet that acts as the decorative cover. This sheet and the comfort sheet sandwich the duvet, creating a hygienic and easily washable cocoon.