Summer House Showdown: Should You Build It or Buy a Kit?
I’ve spent a good chunk of my life working with wood, building everything from custom garden rooms from scratch to assembling those fancy, high-end kits for clients. And you know, one question pops up more than any other: is it actually cheaper to build a summer house yourself or just buy a kit?
In this article
Everyone wants a simple yes or no, but honestly, it’s not about the number on the final invoice. It’s about what you’re really getting for your money, how long it will last, and what you’re trying to create in your garden. The brochures for kits look great, promising a simple, weekend project. On the flip side, the idea of a custom build feels like total creative freedom. Both can be amazing, but they can also lead to some serious buyer’s remorse if you don’t know the score. Let’s get into what really matters, beyond that initial price tag.
The Foundation: Where It All Goes Right… or Wrong
Before we even dream about walls and windows, we have to talk about the ground. This is, without a doubt, the most critical part of the whole project. It’s also where I see people try to cut corners, which almost always ends in tears.
Think about it: your new summer house has some serious weight, and that weight needs to be spread evenly onto solid, stable ground. If the base isn’t perfectly level and square, the building you put on top will never, ever be right. I’ve been called out to fix so many jobs where doors won’t close, windows jam, and the whole structure starts leaning. An unstable or damp base can also lead to rot, basically cutting the life of your expensive new building in half. It’s a total waste.
The pros have a few go-to methods for a solid base:

- Poured Concrete Slab: This is the undisputed champion for a permanent, stable base. It involves digging out the topsoil, laying and compacting a thick layer of hardcore (crushed stone, often called MOT Type 1), and then pouring about 100mm of concrete into a wooden frame. It’s a lot of work, but it creates a perfect, level surface that won’t budge. Heads up: a freshly poured slab needs at least 7 days before you can even think about carefully starting to build on it, and ideally a full 28 days to cure completely. This is a massive planning detail people forget!
- Paving Slabs on a Sub-Base: A solid choice for smaller, lighter buildings. You still have to do the digging and create that compacted hardcore base, but then you lay a layer of sharp sand and bed paving slabs on top. It’s vital that every single slab is perfectly level.
- Ground Screws: This is a newer technique that’s great for uneven ground. Huge, galvanized steel screws are driven into the ground, and a timber frame is built on top. It’s super fast and makes very little mess, but it requires specialist equipment and isn’t suitable for very rocky soil.
By the way, there’s a great middle-ground for the DIYer who’s a bit intimidated by pouring a whole slab: concrete deck blocks. You can find these at most big-box hardware stores like B&Q. They’re heavy, pre-cast blocks with slots for your floor joists. You still need to level the ground and put them on a firm base of compacted stone, but it’s a much less intensive process than a full concrete pour.

And a quick tip before you go any further. ACTION: Before you even browse for kits, go outside with 4 pegs and some string. Mark out the footprint of your dream summer house. Does it actually fit? How does it feel in the space? This 5-minute task can save you a huge headache.
Just promise me one thing: never, ever place a summer house directly onto grass or soil. I once saw a two-year-old kit that was a complete write-off because the owner just put it on a few loose slabs on their lawn. The floor had soaked up water like a sponge and was totally rotten. A real heartbreaker.
A Guide to Buying Good Wood
The type of timber you choose dictates everything—the look, the warmth, and how many years you’ll get out of it. Let’s talk about the ‘skin’ of the building first.
Cladding Profiles Explained
This is the outer layer of wood that keeps the weather out. The shape of the boards and their thickness are what count.
- Tongue and Groove (T&G): These boards interlock for a tight, windproof seal. This is my go-to for any quality build. You want a thickness of at least 16mm, but the good stuff is 19mm or more.
- Shiplap: A type of T&G with an overlap designed to shed water easily. It’s a classic, effective choice.
- Loglap: This gives you that rustic log cabin look. It’s thicker and chunkier, which often means better insulation.
- Overlap: This is the cheapest you can get, where boards are just nailed over each other like a fence panel. To be frank, I wouldn’t use this for a dog kennel, let alone a summer house you want to spend time in. Avoid it.
Timber Treatment: Your Building’s Lifeline
Wood rots. It’s what it does. Treatment is how we stop it. There are two kinds:
- Dip Treatment: The timber gets a quick bath in preservative. It’s a basic surface coat, and these buildings are usually an orange-y color. You’ll need to re-treat it every single year to keep it from rotting.
- Pressure Treatment: This is far, far better. The wood is put in a vacuum, the air is sucked out, and preservative is forced deep into the grain under high pressure. This stuff is protected from the inside out and often comes with a 10 or 15-year anti-rot guarantee. It’s a no-brainer investment.
When it comes to re-treating, don’t just grab any old fence paint. Look for a good quality wood stain or oil. Oil-based ones penetrate deeper and last longer, while water-based ones are easier to clean up. For high-contact areas like decking or steps, a wax-enriched product can give extra water repellency.
The Real Cost: Kit vs. Scratch Build
Okay, let’s get down to the brass tacks. What’s this actually going to cost you? The sticker price is almost never the final price.
Deep Dive: The True Cost of a Summer House Kit
A typical 3m x 4m kit can seem reasonable at first. You might see a low-end one for £1,500-£3,000, but it’ll have thin cladding and plastic windows. A decent mid-range kit will be more in the £4,000-£8,000 range, with thicker walls and real glass. High-end kits can easily top £9,000.
But then come the hidden costs…
- The Base: This is NOT included. A professionally laid base will set you back anywhere from £700 to £2,500. This is the big shocker for most people.
- Installation: Don’t fancy building it yourself? The company will, for a fee of around £500-£2,000.
- Treatment: If it’s not pressure-treated, you’re immediately spending a weekend and £150-£400 on quality wood preservative and paint.
- Electrics: Want lights and sockets? You MUST hire a qualified electrician. Running power from your house can cost £500-£1,200, and it is absolutely not a DIY job.
So, your £5,000 mid-range kit can easily become a £7,000-£10,000+ project by the time it’s actually usable.
What About Building From Scratch? The Real Numbers
Building it yourself gives you total control. You choose every single component. Here’s a rough idea of material costs for that same 3m x 4m building, but done right.
- The Bones: About £1,700-£3,000 for a solid concrete base, a pressure-treated frame, quality 19mm T&G cladding, and proper roof sheathing.
- The Weatherproofing: A long-lasting EPDM rubber roof and good membranes might be £400-£700.
- Windows & Doors: This varies wildly. Budget around £1,000 for a decent set of doors and a window.
- The Cozy Factor: Rigid foam insulation for the walls, floor, and ceiling will be about £400-£700. This is something most kits just don’t have.
- Fixings & Finishes: All the screws, sealants, and interior lining could add another £200-£400.
Your total DIY materials cost could be in the £4,000-£6,000 range. But, if you hire a carpenter to build it, their labor could add £1,500-£3,500 to the bill. So, what’s the verdict? If you’re doing the work yourself, a scratch build gives you a vastly superior, insulated building for less than the total cost of an installed mid-range kit. If you hire a pro to build it, the price ends up being similar to a high-end kit, but I guarantee the quality of the scratch-built version will be better. You’re investing in the bones of the building, not just the look.
Your DIY Toolkit and a Realistic Timeline
If you’re going the scratch-build or self-assembly route, you need the right tools. Your basic home toolkit isn’t going to cut it.
Let’s be realistic about the timeline, too. A pro team might knock this out in a week, but for a weekend warrior? Double that, at least. Just preparing and digging a base can eat an entire weekend. Then you have the concrete curing time. Assembling the frame might be another weekend. Cladding and roofing? Another one. This isn’t a one-and-done project.
As for tools, here’s what you’ll need:
- The Non-Negotiables (Buy or Borrow These): A good combination drill/driver with plenty of bits, a long spirit level (at least 1200mm!), a tape measure, a hammer, and a good hand saw.
- The Game-Changers (Seriously, Rent These if You Don’t Own Them): A mitre saw will give you perfect, clean, accurate cuts for your frame and cladding—it’s worth its weight in gold. A circular saw is essential for cutting the big OSB sheets for the roof and floor. And if you’re tackling concrete, an SDS drill with a mixer paddle will save your back.
For quality timber, you’re not looking at the standard DIY store. Head to a proper timber merchant like Jewson or Travis Perkins, or find an online specialist. The quality difference is night and day.
Permits, Safety, and When to Call a Pro
Before you buy a single plank, check your local planning rules. Most summer houses fall under ‘Permitted Development’, but there are strict rules on height and how close you can build to your boundary. A quick call to your local council’s planning department will save you a world of pain. Here’s a mini-script for you:
“Hi, I’m at [Your Postcode] and I’d like to put up an outbuilding under permitted development. Could you please confirm the maximum height and distance-from-boundary rules for my property?”
It’s your responsibility to check this. And please, be safe. Wear safety glasses. Know how to use your tools. And remember that any and all electrical work needs a certified pro. No exceptions.
So, should you build or buy? If you value your time, want a predictable result, and aren’t a confident DIYer, buying a good quality kit and paying for professional installation is a great choice. But… if you have the skills, the tools, the time, and a desire for a custom space that’s built better than most kits, then a scratch build is incredibly rewarding. It lets you create a building that will truly stand the test of time.
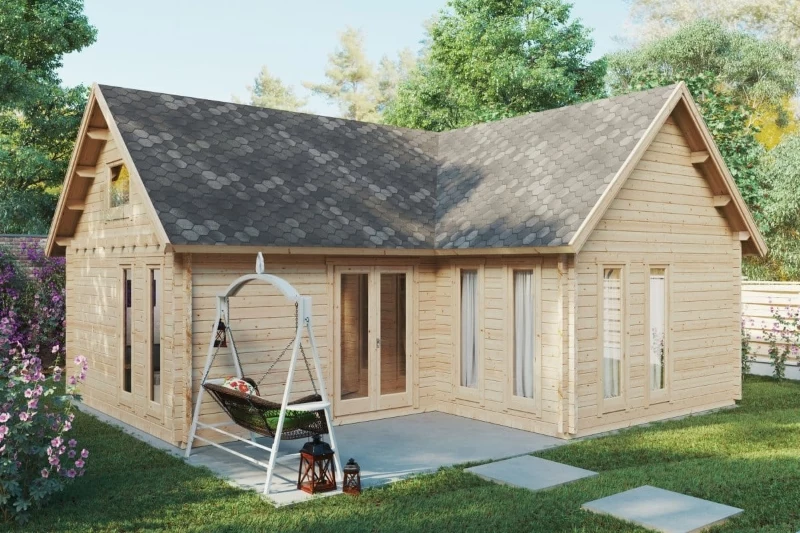
Inspirational Gallery
A well-built garden room can add between 5% and 15% to the value of your property, according to estate agents at Rightmove.
More than just a shed, a properly constructed and insulated summer house is seen by buyers as valuable extra living space—perfect for a home office, gym, or creative studio. The key is quality construction that mirrors the main house’s standards.
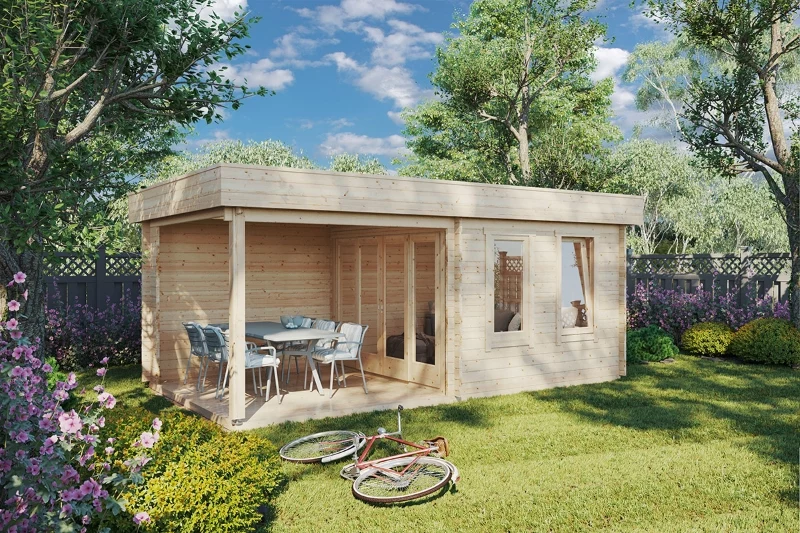
Kit vs. Custom Build: The Wood Debate.
Kit Option: Most kits use slow-grown Nordic Pine or Spruce. It’s cost-effective and strong, but absolutely requires annual treatment with a quality product like Sadolin or Osmo UV-Protection-Oil to prevent rot and sun damage.
Custom Build Option: You have more choice. Western Red Cedar offers incredible natural resistance to rot and insects with minimal upkeep, but costs significantly more. Larch is a great middle-ground, known for its durability.
Ultimately, your choice impacts both your budget and your future maintenance schedule.
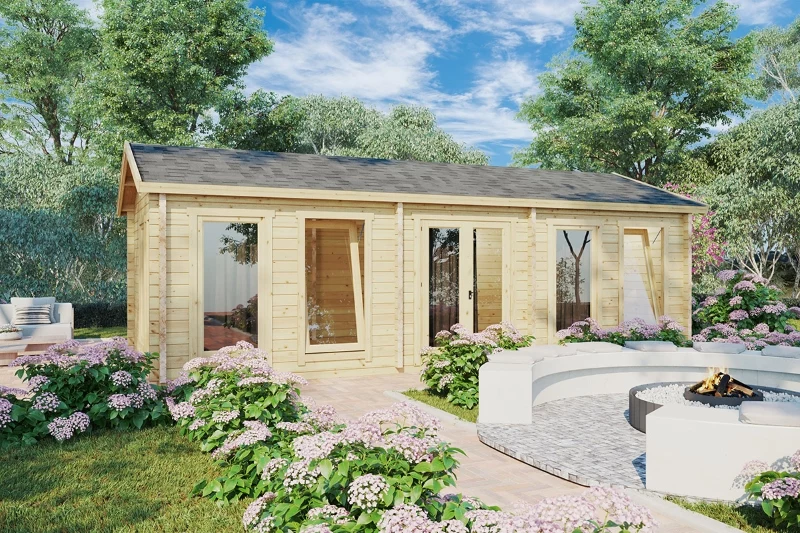
Thinking about a specific look? The cladding profile is your secret weapon. It does more than just keep the weather out; it defines the entire character of your summer house.
- Shiplap: Features a small overlap (a ‘rabbet’) that creates a classic, slightly rustic look with strong shadow lines. Excellent for traditional designs.
- Tongue & Groove: Boards interlock tightly for a flat, smooth, and contemporary finish. Ideal for modern, minimalist garden rooms.
- Featheredge: Tapered boards overlap like tiles, creating a robust, agricultural feel often seen on barns. Perfect for a more rugged, naturalistic style.
A common mistake: Forgetting about ventilation. An airtight summer house might seem great for warmth, but it’s a recipe for condensation, dampness, and musty smells, especially during the UK’s fluctuating seasons. A couple of strategically placed trickle vents in the window frames or a small wall vent can make all the difference, allowing the structure to breathe without creating a draught.
How do I safely get power to my new garden office?
This is a job for a professional, no exceptions. To comply with UK building regulations (specifically Part P), you’ll need a qualified electrician. They will typically run a steel-wire armoured (SWA) cable from your home’s consumer unit to a new, separate consumer unit inside the summer house. This cable must be buried at the correct depth to avoid being struck by a spade. It’s an extra cost, but non-negotiable for safety and for any future property sale.
- Prevents musty odours from taking hold.
- Stops condensation from forming on windows.
- Protects the timber frame from internal damp and potential rot.
- Keeps the air fresh and healthy for you to work or relax in.
The secret? Consistent airflow. Even cracking a window for 20 minutes a day or installing simple air vents can massively extend the life and comfort of your garden retreat.
The typical felt supplied with a standard summer house kit has a life expectancy of just 2-5 years before it needs replacing.
It’s one of the first things to fail. For a truly long-lasting roof, consider upgrading from the start. EPDM, a synthetic rubber membrane often used by brands like Firestone, can last over 20 years and is far more resistant to tears and UV damage. It’s a smart investment for a ‘fit and forget’ finish.
Don’t let your beautiful new summer house become a seasonal one-hit wonder. A layer of rigid insulation board, like Celotex or Kingspan, in the floor, walls, and ceiling will transform it into a year-round space. Focus on 50mm thickness for the walls and 100mm for the roof and floor, where most heat is lost. It’s the difference between a simple shelter and a true garden room.
Permitted Development isn’t a blank cheque: While most summer houses under 2.5 metres high don’t need planning permission, there are crucial exceptions. If you live in a Conservation Area, an Area of Outstanding Natural Beauty (AONB), or if the building will be positioned forward of the principal elevation of your house, you will almost certainly need to apply. Always check your local council’s planning portal before a single spade hits the ground.
To nail that coveted Scandinavian ‘hygge’ retreat feel, think texture and light. Pair pale, untreated-looking pine walls with soft, chunky-knit throws and sheepskin rugs. Instead of harsh overhead lighting, use a floor lamp with a warm bulb and add plenty of candles. A simple armchair, like IKEA’s classic POÄNG, and a small side table are all you need to create a perfect corner for reading and relaxing.


