The Real-Deal Guide to Bathroom Remodeling (That Won’t End in Disaster)
I’ve been swinging a hammer and building things for a long time. In all those years, I’ve torn out and rebuilt more bathrooms than I can even remember. I’ve seen the good, the bad, and the truly ugly stuff hidden behind brand-new tile. One of my first solo jobs was in an older bungalow. Looked simple enough. But when I pulled off the tile, the wall studs behind it had the consistency of wet cardboard from decades of tiny, unseen leaks. That job taught me the single most important lesson about this work: a great bathroom isn’t about the fancy faucet you see. It’s about the rock-solid, waterproof foundation you don’t.
In this article
- First Things First: Planning and a Realistic Budget
- The Actual Flow of Work (And How Long It Takes)
- Layout, Function, and a Quick Challenge
- The Guts of the Bathroom: Plumbing & Electrical
- The Waterproof Shell: Your Best Friend Against Mold
- Picking Your Finishes for the Long Haul
- Knowing When to DIY and When to Call a Pro
So many people get excited about a new look for their bathroom after scrolling through stylish photos online. But a real remodel is so much more than just cosmetic touches. You’re dealing with plumbing, electrical, and some pretty intense waterproofing. Getting these hidden parts right is what makes a bathroom last for decades instead of just a few years before it starts falling apart.
This guide is my attempt to walk you through the process like I was right there with you, focusing on the stuff that actually matters for a project that’s safe, durable, and won’t give you nightmares later.
First Things First: Planning and a Realistic Budget
Before you even think about picking up a sledgehammer, the most important work happens with a pencil and paper. Seriously. Rushing the planning phase is the biggest and most costly mistake you can make.
Let’s talk money, because that’s what everyone wants to know. A full bathroom gut job is a real investment. While averages can be tricky, it helps to see some actual numbers. For a standard 5×8 foot guest bathroom, hiring a professional crew for a full gut and remodel often lands somewhere in the $12,000 to $20,000 range. If you’re handy and plan to do most of the work yourself—but still hire out the critical plumbing and electrical—you might be looking at $5,000 to $9,000 just for materials.
And if you’re dreaming of a spacious primary bathroom with a freestanding tub, a custom walk-in shower, and moving walls? Well, the sky’s the limit, but you should probably start thinking in the $30,000+ ballpark.
Heads up: The biggest budget killers are almost always moving the main fixtures. Want to move your toilet six feet to the left? That’s not a simple swap. It means a plumber has to rework large drain lines, which could involve jackhammering a concrete slab or completely re-framing your floor joists. That one change can add thousands to the bill. Keeping your toilet, shower, and sink in their original spots is the number one way to keep costs down.
I always, always tell my clients to set aside a contingency fund of 15-20% of the total budget. This isn’t for a surprise faucet upgrade; it’s for the nasty surprises lurking in your walls. On one job in an older home, we opened a wall for a new shower valve and found the main plumbing stack was corroded cast iron, just waiting to fail. That contingency fund meant we could replace it with modern PVC without derailing the whole project.
The Actual Flow of Work (And How Long It Takes)
People always ask, “What do I do first?” It’s a great question, because the order of operations is critical. Doing things out of sequence leads to rework and frustration. Here’s the general flow:
- Planning & Design: This is where you are now. Finalize your layout and budget.
- Order Everything: Get your tile, vanity, tub, and fixtures ordered. Don’t start demo until you have most of your materials on-site! Supply chain delays are real.
- Demolition: Tear out the old stuff down to the studs.
- Rough-in Work: This is for the pros. Plumbers and electricians come in to move pipes and wires while the walls are open. Any framing changes happen here, too.
- Insulation & Closing Walls: Once inspections are passed, you insulate and hang your new backerboard and drywall.
- Waterproofing: The most critical step before any tile goes up. We’ll get to this in a bit.
- Tile & Grout: The transformation really starts to happen.
- Painting: Paint before the final fixtures go in. It’s much easier than trying to cut in around a new vanity and toilet.
- Final Installation: The vanity, toilet, and plumbing fixtures are installed.
- Finishing Touches: Install your lights, mirror, trim, and accessories.
So, how long does all this take? For a pro crew doing a straightforward replacement, it could be 1-2 weeks of active work. For a larger, custom job with relocated fixtures, plan for 4-8 weeks or even more. And that’s not counting the time waiting for materials to arrive.
Layout, Function, and a Quick Challenge
Function has to come before trends. How do you actually use the bathroom every day? Do you need a tub for the kids, or would a big, accessible shower make more sense for you? That gorgeous freestanding tub might look amazing online, but they take up a ton of space and, frankly, are a pain to clean around.
Building codes exist for a reason—safety and basic comfort. For example, you need at least 21 inches of clear space in front of your toilet and vanity to not feel totally cramped. And a toilet needs at least 15 inches of space from its centerline to any wall or fixture on either side.
Try this right now: Grab a tape measure. Measure from the very center of your toilet bowl to the vanity or wall next to it. Do you have at least 15 inches? If it’s less, you’ve just figured out one of the main reasons your bathroom might feel uncomfortably tight!
The Guts of the Bathroom: Plumbing & Electrical
This is where things can go very, very wrong. The work inside your walls is the heart of the whole project.
Your plumbing is all about gravity and air. Every drain line needs a steady downward slope—the standard is 1/4 inch of drop for every foot of pipe. Too little slope, and things… get stuck. Too much, and the water rushes past the solids, leaving them behind. It’s a science. Also, every drain needs to be connected to a vent pipe that goes up through your roof. This lets air into the system to prevent gurgling and keeps nasty sewer gases from invading your home.
A quick, stern warning on plumbing: Unless you are a highly experienced DIYer, please don’t try to move drain or supply lines yourself. A tiny leak from a bad connection inside a wall can go unnoticed for years, causing thousands in mold and rot damage. Hiring a licensed, insured plumber is the best insurance policy you can buy for your home.
The same goes for electrical. Water and electricity are a fatal mix, so codes are incredibly strict. Every outlet in a bathroom MUST have GFCI (Ground Fault Circuit Interrupter) protection. It’s a life-saving device that shuts off power in a millisecond if it detects a fault. And any light fixture inside a shower must be specifically “wet-rated” to keep water out. I once saw a DIY job where someone had hung a regular decorative chandelier directly over a bathtub. It was beautiful, but it was also a terrifying hazard just waiting to happen.
The Waterproof Shell: Your Best Friend Against Mold
Okay, this is my specialty. The most important part of any tile job is the waterproofing you’ll never see. Grout is not waterproof. Tile is not waterproof. Water WILL get behind them, and you need a bulletproof system to handle it.
For walls in a shower, regular drywall is a huge no-no. We use special tile backer boards. You’ve basically got two main choices:
- Cement-Based Backerboard: This is the traditional, reliable workhorse. It’s made of cement, so it won’t fall apart when it gets wet. But here’s the key: it’s not waterproof. Water can pass right through it, so you have to waterproof its surface.
- High-Density Foam Board: These are newer, lighter, and easier to cut. The big advantage is that the boards themselves are 100% waterproof. They also act as a thermal break, helping your shower warm up a bit faster.
So which one should you choose? Honestly, it depends on your budget and skill level. Cement board with a paint-on waterproofing membrane (those red or blue coatings you see) is cheaper on materials but takes more time and care to get the membrane thickness right. The foam board systems are more expensive upfront but are often faster to install and pretty much foolproof when you follow the instructions. For my money, if I’m building a custom shower that needs to last forever, I’m reaching for a foam board system every time.
No matter which you choose, you absolutely MUST have a waterproofing system. I was hired to find a leak in a stunning two-year-old bathroom. When we pulled off a few tiles, it was obvious: the installer had put expensive tile directly onto cement board with no membrane. They saved maybe $200 and a few hours of labor. The repair cost the homeowner thousands. Don’t skip this step.
By the way, here’s my quick shopping list for a truly bulletproof shower assembly:
- Cement or Foam Backer Board
- The Right Screws (they’re specially coated)
- Seam Tape for joints
- A Waterproofing Membrane (either a paint-on liquid or a fabric sheet system)
- 100% Silicone Sealant for corners and fixture openings
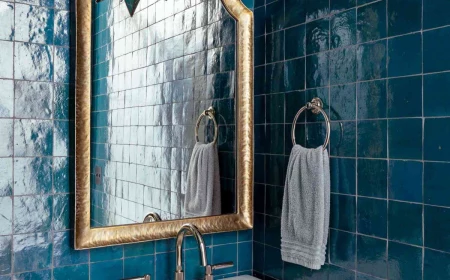
Picking Your Finishes for the Long Haul
Now for the fun part! For tile, porcelain is the king. It’s incredibly dense, durable, and absorbs almost no water, making it perfect for floors and showers. Natural stone is gorgeous, but it’s porous and needs to be sealed regularly to prevent stains.
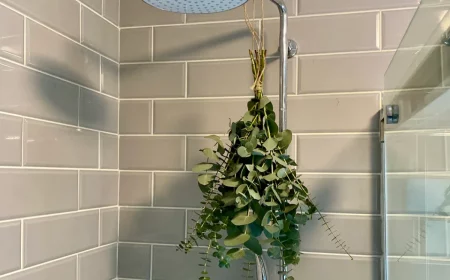
And don’t forget ventilation! A noisy, cheap fan is useless because no one will turn it on. Look for two numbers: CFM (Cubic Feet per Minute) and Sones (sound level). For CFM, just calculate your bathroom’s square footage. For example, a 7-foot by 10-foot room is 70 square feet, so you need a fan rated for at least 70 CFM. Simple as that. For sound, look for a rating of 1.0 sones or less—that’s considered whisper-quiet. Expect to pay between $100 and $250 for a good, quiet model. It’s worth it.
Quick Win Tip: Want an immediate, cheap upgrade? Go buy a curved shower rod. It’ll cost you under $50 at any big box store, installs in 20 minutes, and gives you a surprising amount of extra elbow room in the shower. It’s the best bang-for-your-buck improvement you can make.
Knowing When to DIY and When to Call a Pro
A skilled DIYer can definitely handle painting, installing a pre-built vanity, or even laying a simple floor tile. But there are a few jobs where the risk is just too high if you don’t have the experience. I strongly advise hiring a licensed and insured pro for:
- Any and all shower waterproofing.
- Moving any plumbing supply or drain lines.
- All electrical work.
When you do hire someone, get at least three written estimates, check that their license and insurance are current, and call their recent references. A detailed contract isn’t an insult; it’s a tool that protects both of you.
A bathroom remodel is a complicated puzzle, but it’s one of the most rewarding projects you can do. By focusing on the quality of the work behind the walls, you’re not just getting a pretty space—you’re investing in the health and value of your home for decades to come.