Don’t Just Paint Your Small Bathroom—Transform It. Here’s the Pro-Level Guide.
I’ve spent more time with a paintbrush in my hand than I can count, working in every kind of bathroom you can imagine—from huge, spa-like master suites to those tiny powder rooms crammed under a staircase. And I’ll tell you what, the small ones are always the trickiest.
In this article
So many people come to me clutching a fistful of paint chips, terrified that one wrong move will make their bathroom feel like a broom closet. And honestly? They’re not totally wrong. But the fix isn’t as simple as just picking a “light” color and calling it a day.
The real secret, the thing that separates a job that looks good for a few months from one that looks great for years, is understanding how color, light, and the paint’s finish all play together. I learned this the hard way. Early in my career, a client was set on this beautiful, trendy matte gray for their small, windowless bathroom. It looked incredible… for about six months. Then, the shower steam started causing ugly streaks, and you couldn’t wipe the walls without leaving shiny, buffed spots. We had to redo the entire thing. That lesson stuck. This isn’t just about decorating; it’s about building a tough, functional surface that also happens to look amazing.
So, let’s get into how to do it right. We’re going way beyond color swatches and into the stuff that really makes a difference.
The Two Numbers That Matter More Than the Color Name
Before we even dream about colors, you need to know about two little acronyms: LRV and Sheen. Think of these as the secret weapons pros use to manipulate how a room feels. Ignoring them is like trying to bake a cake without knowing the difference between flour and sugar.
LRV: Your New Best Friend
Every single paint color has a Light Reflectance Value, or LRV. It’s a number on a scale from 0 (think absolute, light-sucking black) to 100 (the purest, most reflective white). This number simply tells you how much light a color will bounce back into the room.
A higher LRV means more light bouncing around, which makes a space feel brighter and, you guessed it, bigger. A low LRV absorbs light, creating a cozier, more intimate vibe—which can be great, but it has to be done right.
- High LRV (70 and up): These are your whites, off-whites, and super pale pastels. They’re champions at making the most out of any light source, natural or artificial. A no-brainer for a dark little bathroom.
- Mid-Range LRV (around 40-69): This is where most popular grays, beiges, and muted colors live. They give you a dose of color without feeling like the walls are closing in.
- Low LRV (below 40): We’re talking deep, moody colors like navy, charcoal, or emerald green. They drink up light, so using them in a small space is a bold move that requires a specific strategy (we’ll get to that!).
When you’re at the store, flip over the paint chip. The LRV is almost always printed right on the back. You might be looking at two grays that seem identical on a tiny paper square, but one has an LRV of 62 and the other is 48. On a full wall, that difference is massive and will completely change the room’s atmosphere. This little number is your key to making a smart choice, not just an emotional one.
Paint Sheen: The Secret to Durability
Sheen (or finish) is just a fancy word for how shiny the paint is. In a bathroom, this decision is arguably just as important as the color. The right sheen protects your walls from moisture and makes them scrubbable. It also plays a huge role in how light interacts with your chosen color.
Instead of a boring chart, let’s just talk about them one by one:
Flat or Matte: These have zero shine, which is great for hiding imperfections on old, lumpy walls. But—and this is a big but—they are like a sponge for moisture. I almost never recommend a standard matte paint for a bathroom with a shower. It will stain, scuff, and mildew over time.
Eggshell: Just like it sounds, it has a tiny bit of luster, like a chicken’s egg. It’s a step up in washability from matte and can work in a powder room that doesn’t have a bath or shower. In a main bathroom, though, it’s still not my first choice for long-term durability against daily steam.
Satin: This is my go-to for most bathroom walls. It has a smooth, almost velvety sheen that is super durable and moisture-resistant. You can easily wipe off toothpaste splatters or water drips without a trace. Plus, it reflects a little bit of light, which helps brighten the room without creating a harsh glare. It’s the perfect middle ground.
Semi-Gloss: Very shiny and reflective, this finish is the undisputed king of durability and cleanability. For decades, it was the standard for all bathrooms. The major downside? That high shine will spotlight every single bump, crack, or slightly imperfect drywall patch on your walls. I stick to using semi-gloss for trim, doors, and maybe cabinets—surfaces that are smooth and need to be bomb-proof.
Good to know: Major paint brands now offer special “Bathroom Paint” lines. These are often engineered to have a beautiful matte or satin look but with the moisture-blocking and mildew-resistant qualities of a glossier paint. They cost a bit more, usually around $70-$90 per gallon, but if you’re dead-set on a less-shiny look, they are the ONLY way to go. It’s a fantastic product that solves a classic design dilemma.
Three Proven Color Strategies for Small Bathrooms
Okay, with LRV and sheen in your back pocket, we can finally talk color. The old “just paint it white” rule isn’t wrong, but it’s definitely boring. Let’s look at a few approaches.
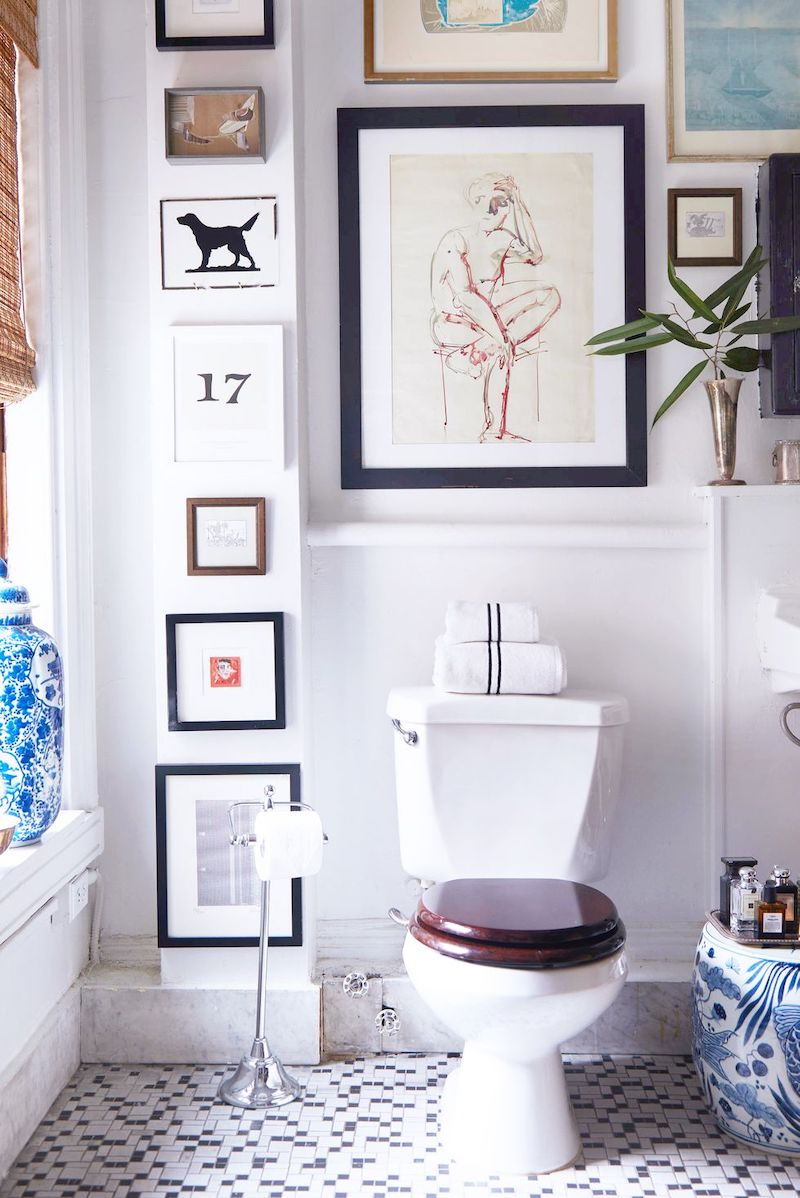
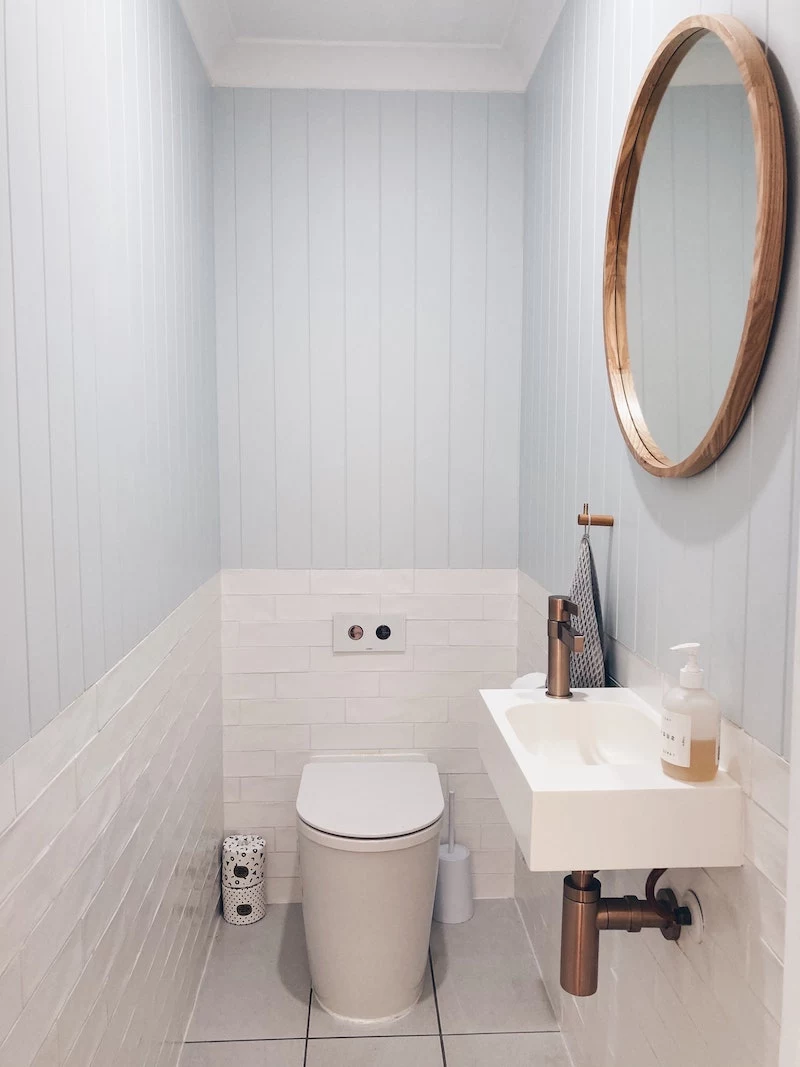
Strategy 1: The Classic Bright & Airy Vibe
This approach works for a reason. Using light colors with a high LRV is a foolproof way to make a room feel spacious and squeaky clean. The trick is to pick the right white.
Cool whites have hints of blue or gray and feel crisp and modern. Warm whites have undertones of yellow or cream, making the space feel cozier. A quick tip before you commit: check your lightbulbs! A warm-toned bulb (around 2700K) can make a cool white look dingy, while a cool, daylight bulb (4000K-5000K) will make a warm white look its best. In fact, swapping your bulbs to a brighter, cleaner light might solve half your problem before you even open a can of paint!
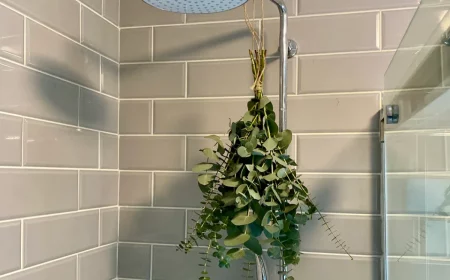
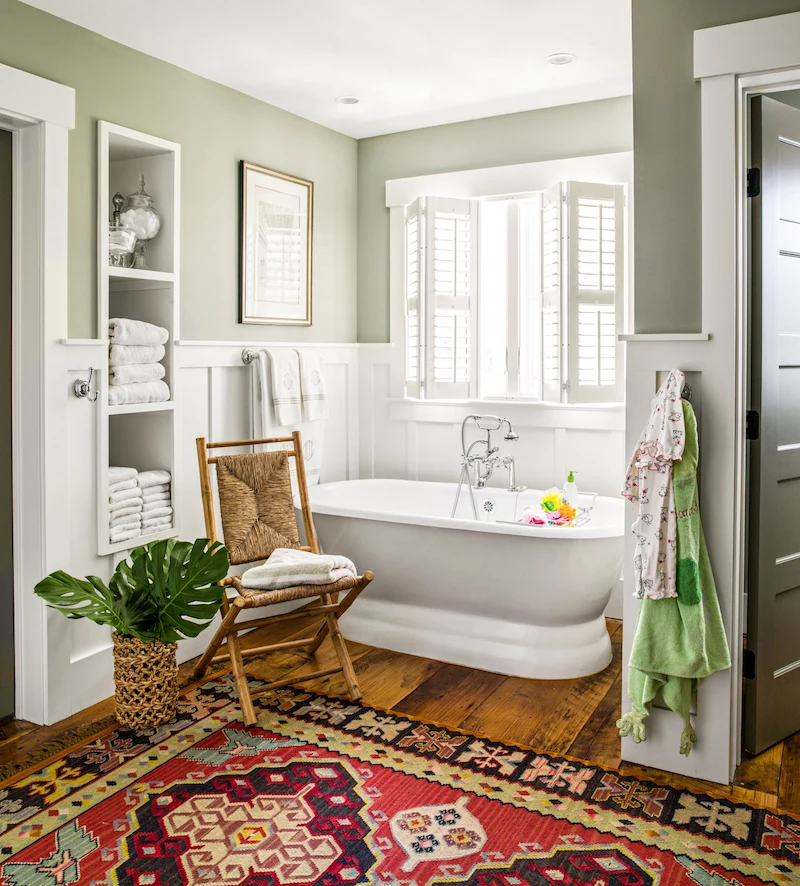
Strategy 2: The Calming Home Spa
Soft blues, greens, and grays are amazing for creating a relaxing, spa-like atmosphere. These colors are often found in nature and have a way of visually receding, which can make the walls feel a bit farther away. Think about a soothing sage green, a light and airy sky blue, or a sophisticated light gray. These colors provide a beautiful backdrop for white tile and chrome or brushed nickel fixtures.
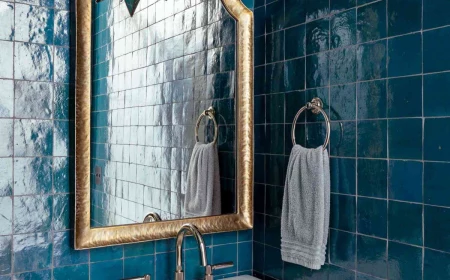
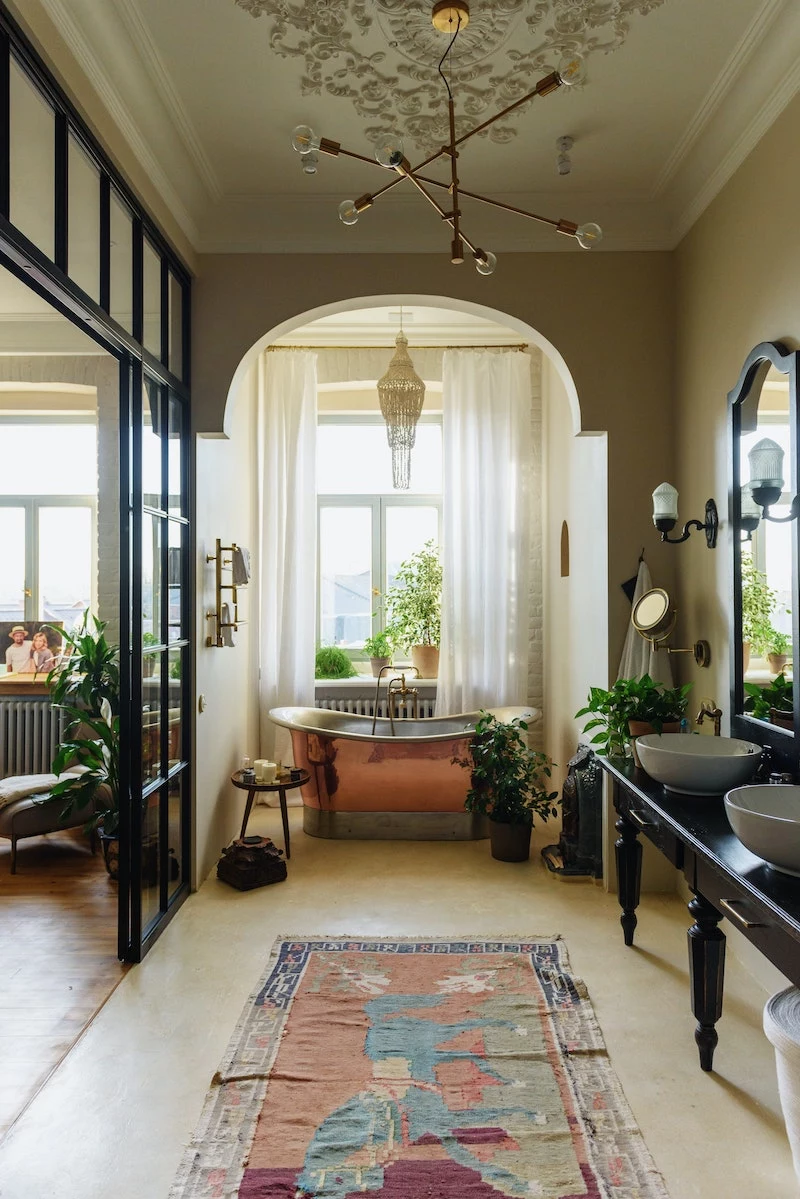
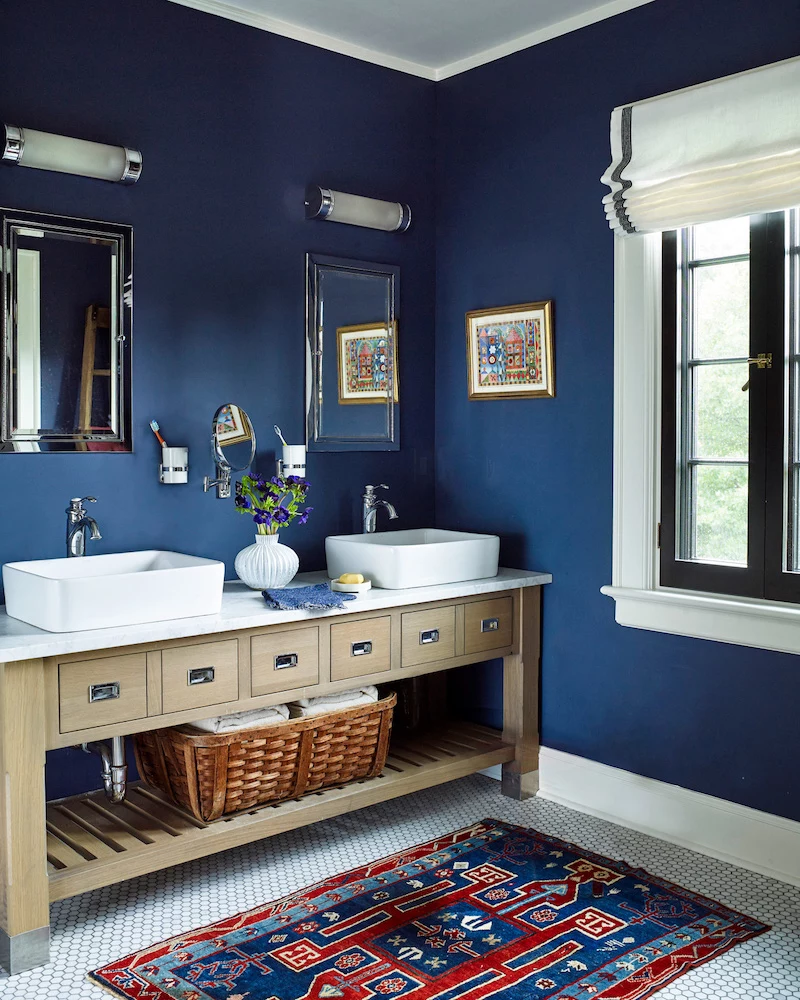
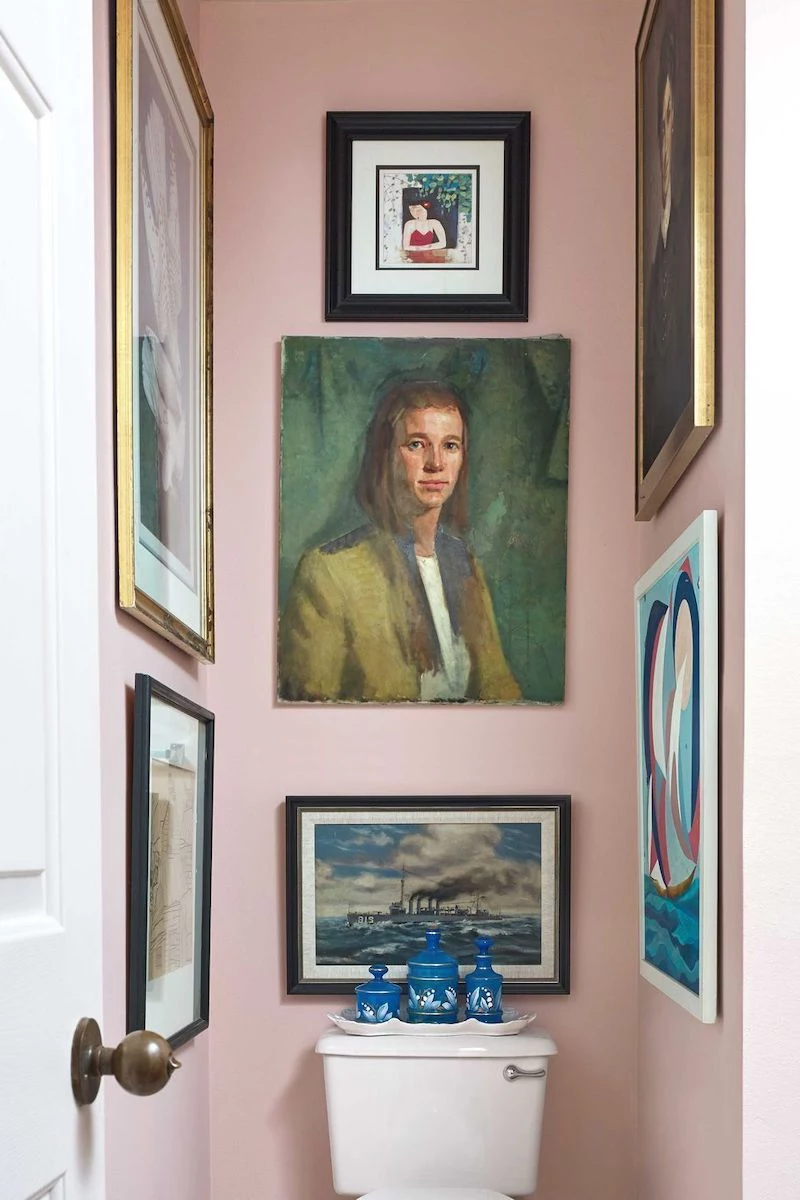
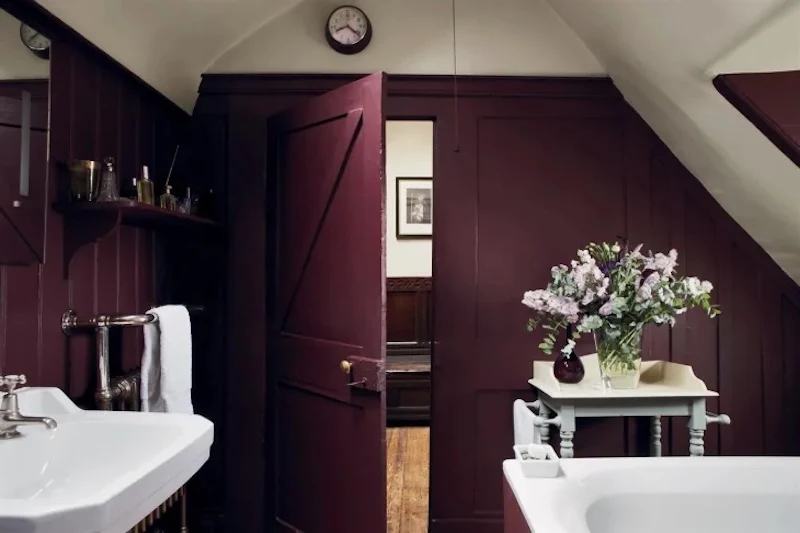
Strategy 3: The Bold and Beautiful Jewel Box
And now, we break the rules. Sometimes, the best thing you can do in a tiny, windowless powder room is not to fight its size, but to embrace it. Painting a small room a dark, dramatic color can be absolutely stunning. Instead of trying to make it feel big, you lean into the coziness and create a luxurious, moody space.
Deep navy, charcoal gray, or even a rich forest green can look incredibly chic. The key is to use a satin finish to bounce just a little light around. Then, pair it with bright white trim and shiny metallic fixtures that pop against the dark canvas. This strategy lives or dies by your lighting—you need excellent artificial light from your vanity to make the rich color glow instead of just feeling like a cave.
Your Weekend Project Plan: Budget, Time & Shopping List
Feeling inspired? A small bathroom is a totally doable DIY project. Here’s a realistic breakdown of what you’re getting into.
Time Commitment: This isn’t a one-afternoon job if you do it right. Plan for a weekend.
- Day 1: Prep & Clean (2-3 hours). This is scrubbing walls, patching holes, and taping. Let everything dry completely.
- Day 2: Prime & First Coat (3-4 hours). This includes waiting for the primer to dry before you can paint.
- Day 3: Second Coat & Cleanup (2 hours). The final coat, removing tape, and admiring your work.
The Budget: Doing it yourself can save a ton of money. You can get all the high-quality materials you need for around $150-$200. Hiring a pro for a small, straightforward bathroom will likely run you somewhere between $400 and $700, depending on your location and the condition of the walls.

Your Shopping List:
- Primer: A quart of quality stain-blocking, mold-resistant primer is usually enough. ($15-$25)
- Paint: One gallon is plenty for two coats in most small bathrooms (under 50 sq ft of wall space). ($50-$90 for premium bathroom paint)
- Cleaner: A TSP substitute for washing the walls. ($5-$10)
- Spackle & Putty Knife: For filling any dings or nail holes. ($10)
- Sandpaper: A small pack of 120-grit. ($5)
- Painter’s Tape: Spend the extra few bucks on the green or blue stuff from a premium brand. The kind with edge-locking tech is worth every penny for crisp lines. ($8-$12)
- Brushes & Rollers: Get a good 2.5-inch angled brush for cutting in and a 3/8-inch nap roller kit. Quality tools prevent shedding and streaks. ($20-$30)
- Drop cloths and rags. You’ll need them!
The Nitty-Gritty: How to Get That Pro Finish
I tell every new painter I train the same thing: painting is 90% prep and 10% actually painting. Rushing the prep will ruin even the best paint job.
- Clean Everything: Wash the walls thoroughly with a TSP substitute to get rid of any soap scum, hairspray residue, or grime. Rinse with clean water afterward. If you see any mildew, kill it with a 1-part bleach to 3-parts water solution before you do anything else. Just be sure to ventilate well!
- Patch and Sand: Fill any holes with spackle. Once it’s dry, sand the patches smooth so they’re perfectly flush with the wall.
- Prime for Success: Use a mold-and-mildew-resistant primer. It’s your insurance policy against moisture problems down the line.
- Cut In, Then Roll: Use your angled brush to paint a 2-3 inch border along the ceiling, corners, and trim. Then, use your roller for the big open areas. A pro tip for that tricky spot behind the toilet: you don’t need to remove it! Just use a mini-roller or a flat painter’s pad to carefully work the paint in behind the tank.
Oops! How to Fix Common Mistakes
Even pros mess up sometimes. Don’t panic.
- Paint Drips: If you catch a drip while the paint is still wet, just smooth it out with your brush. If it’s already dried, wait for it to fully cure, then lightly sand the drip down until it’s smooth and touch it up with a little more paint.
- Roller Marks (Holidays): Those annoying lines or patches you missed usually happen when you don’t load your roller with enough paint or press too hard. The fix is simple: let the paint dry completely, then apply another thin, even coat. Two topcoats are not optional—they’re required for full color and durability!
A Quick Word on Safety (And When to Call a Pro)
Heads up on Lead Paint: If your house was built before the late 1970s, you might have lead-based paint. Sanding this creates toxic dust that is incredibly dangerous. You can get a simple test kit at any hardware store. If it’s positive, stop. Do not scrape or sand. This is a job for a certified lead-safe professional. It’s not worth the risk.
And please, ventilate! Even with low-odor paints, you need airflow. Keep the exhaust fan running and crack a window or place a fan in the doorway. It’s a simple step that prevents headaches and accidents.
By thinking about LRV, sheen, and proper prep, you’re not just slapping color on a wall. You’re designing a space that’s tough, beautiful, and feels intentionally crafted—no matter how small it is.
Inspirational Gallery
Satin Finish: Offers a soft, velvety glow and is significantly more durable and scrubbable than matte or eggshell. It’s an excellent choice for most small bathrooms with a good ventilation fan.
Semi-Gloss Finish: Bounces back even more light and is extremely tough against moisture and stains. It’s the go-to for high-humidity, high-traffic family bathrooms, but be warned: its sheen will highlight any imperfections on the wall.
For most modern renovations, satin provides the best balance of aesthetics and performance.
A high-quality paint job in a bathroom is 80% preparation, 20% application.
Pros live by this rule. Don’t even think about opening a can of paint until you’ve thoroughly cleaned the walls with a TSP substitute to remove any soap scum or hairspray residue, filled any holes, and lightly sanded glossy surfaces. This unglamorous work is what ensures the paint actually sticks and lasts.
Should I really paint my ceiling something other than white?
Absolutely. In a small bathroom, a stark white ceiling can sometimes visually shrink the space by creating a harsh line that stops the eye. Painting the ceiling the same color as the walls—a technique called ‘color drenching’—can blur the edges and make the room feel taller and more cohesive. For a touch of drama, try a color two shades lighter or a soft, complementary tone.
Don’t neglect the fifth wall. Painting the ceiling in a high-gloss finish can be a game-changer in a windowless bathroom. It will reflect all available artificial light, adding unexpected depth and a touch of glamour. Imagine a deep navy ceiling with a subtle sheen—it’s like adding a piece of statement art.
The secret weapon for tricky spots: A 4-inch “cigar” roller. This slim foam roller is your best friend for painting behind the toilet tank and around narrow pedestal sink pipes. It provides a smooth, brush-stroke-free finish in spaces where a standard roller or brush can’t possibly fit.
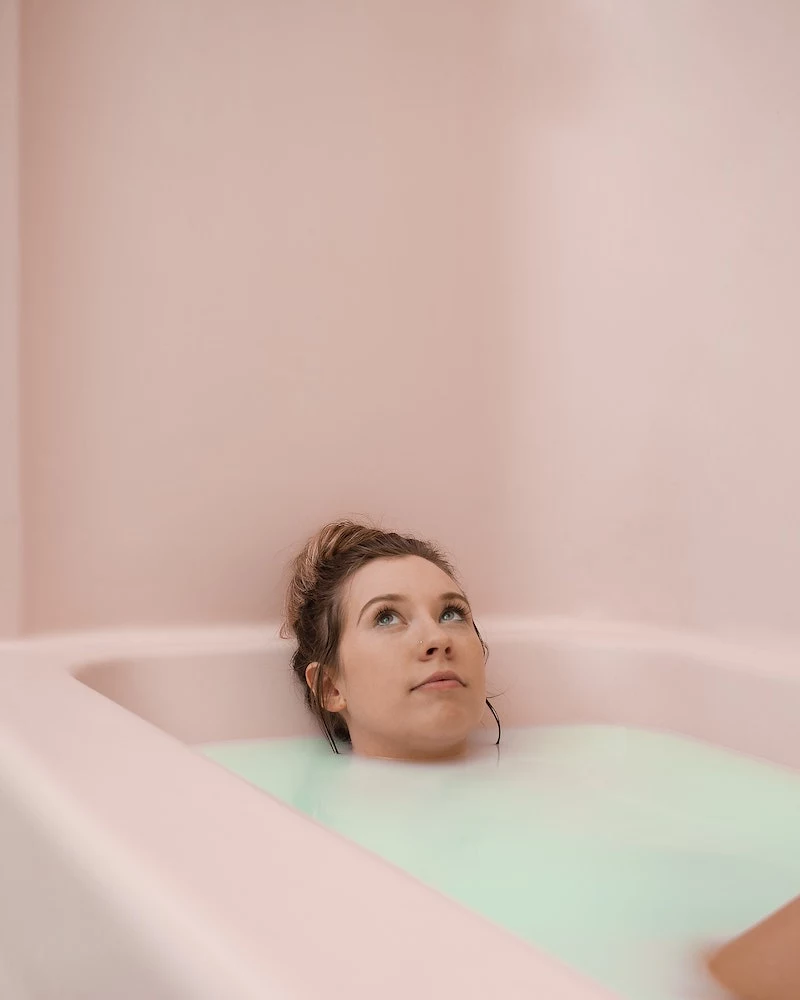
According to a study on environmental psychology, the color green is proven to have a calming effect and can reduce stress.
This makes it a perfect candidate for a bathroom, transforming it into a personal sanctuary. Forget institutional mint. Think about a deep, moody forest green for a dramatic powder room, or a soft, earthy sage like Benjamin Moore’s ‘October Mist’ to create a serene, spa-like atmosphere for your morning routine.
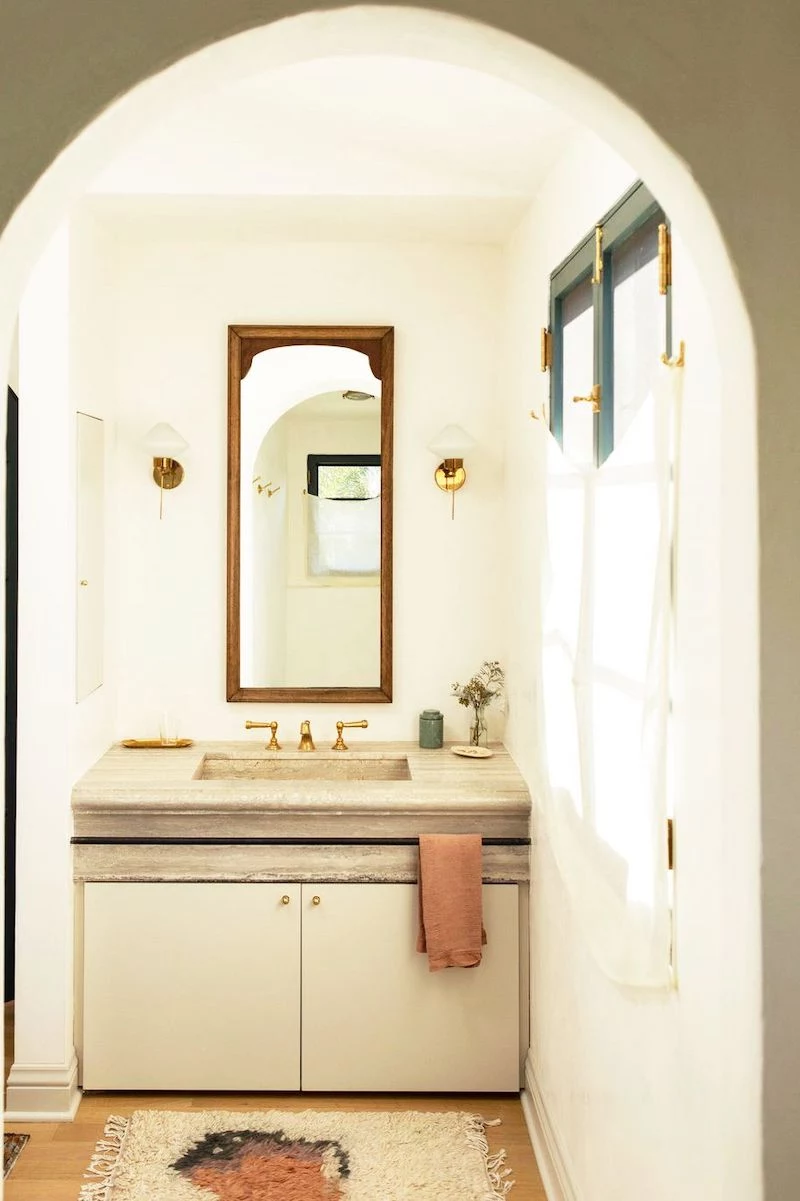
Think beyond just the walls. A fresh coat of paint on a dated vanity is the fastest, most cost-effective way to update the entire room. Use a specialty cabinet paint like Farrow & Ball’s Modern Eggshell or Sherwin-Williams’ Emerald Urethane Trim Enamel for a rock-hard, factory-like finish that withstands nicks and splashes.
- Creates a sharp, flawless line between colors or where the wall meets the trim.
- Prevents paint from bleeding underneath, even on lightly textured surfaces.
- Releases cleanly without pulling off the fresh paint underneath.
The key? Use the right painter’s tape. For delicate surfaces or freshly painted trim, a specialty tape like FrogTape (the yellow one) is a worthwhile investment over standard blue tape.
One critical step everyone forgets: the primer. If your bathroom walls have any history of mildew stains, or if you’re painting over a dark color, a quality stain-blocking and mold-resistant primer is non-negotiable. A product like Zinsser B-I-N Shellac-Based Primer seals everything in, prevents old stains from bleeding through your new color, and gives your topcoat a flawless, uniform base to adhere to.
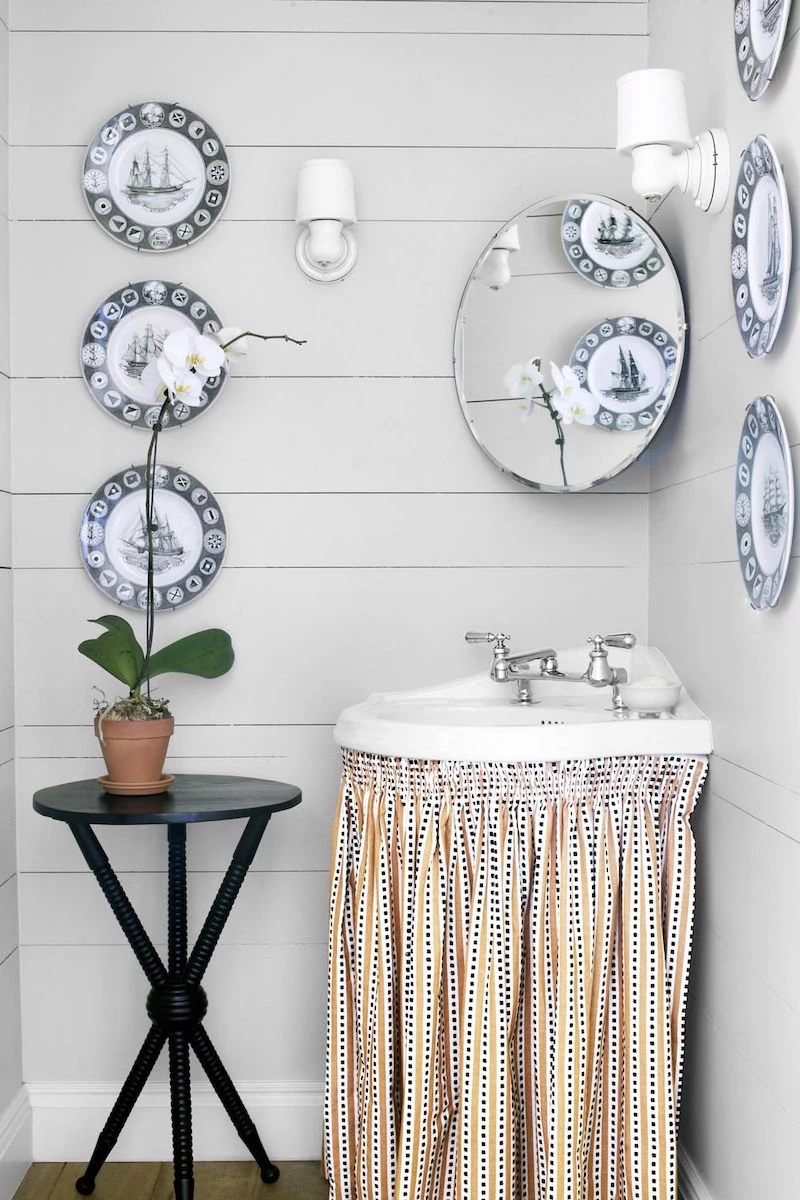
Go bold, not big. A tiny powder room is the perfect place to experiment with a dramatic, saturated color you’d be afraid to use in a larger space. A rich plum, an inky teal, or a warm terracotta can turn a forgotten room into a jewel box.