Don’t Just ‘Make Do’: How to Actually Love Your Small Bathroom
Let’s be honest, no room in the house causes more stress than a tiny bathroom. It feels like a puzzle with all the wrong pieces. I’ve seen homeowners with pictures of grand, spa-like bathrooms, wondering how to squeeze all that luxury into a space that’s barely bigger than a closet. The truth? It’s not about magic tricks. It’s about being smart, understanding how space really works, and using some pro-level strategies to make every single inch count.
In this article
Over the years, I’ve seen some real horror stories. Pocket doors installed right into walls packed with plumbing, and shower niches that weren’t waterproofed, leading to thousands in rot repair. These jobs taught me a crucial lesson: a great small bathroom isn’t just about pretty tile. It’s a technical project where design and construction have to be perfectly in sync. Guesswork is not your friend here.
So, let’s walk through how the pros get it done. We’ll cover the core principles, the nitty-gritty details, and the real-world trade-offs you’ll have to make. My goal is to give you the confidence to plan your project right, whether you hire a team or decide to get your hands dirty with some of it yourself.
The Real Secret to Making a Room Feel Bigger
You’ve heard the basic advice a million times: use light colors and a big mirror. And yeah, that helps. But it barely scratches the surface. To really make a difference, you need to understand why these things work. It’s less about optical illusions and more about playing with how our brains perceive light and lines.
Light is Your Secret Weapon
Forget everything else for a second—light is the most powerful tool you have. But it’s not just about slapping a bright bulb in the ceiling. You need to think like a lighting designer.
Here’s what truly matters:
- Brightness (Lumens): A dim bathroom is a sad bathroom. For a typical 5×8 foot space (that’s 40 square feet), you should be aiming for a total of around 3,200 lumens. That might sound like a lot, but you can get there with a good ceiling fixture plus vanity lights. And here’s a non-negotiable tip: ALWAYS install a dimmer switch. It gives you that bright, energizing light for your morning routine and a soft, relaxing glow for an evening soak.
- Color Temperature (Kelvin): This is the color of the light itself. You’ll see it listed in Kelvin (K). Low numbers (around 2700K) are warm and yellow, like old-school incandescent bulbs. High numbers (5000K+) are cool and blue, like harsh office lighting. The sweet spot for a bathroom is right in the middle, between 3000K and 3500K. This gives you a clean, neutral light that’s flattering for skin tones and perfect for tasks like applying makeup.
- Color Rendering Index (CRI): This is the one detail most people miss, and it’s a game-changer. CRI tells you how accurately a light source shows the true colors of things. On a scale of 0 to 100, you should never, ever settle for less than 90 CRI in a bathroom. A cheap, low-CRI bulb can make your beautiful new beige tiles look sickly green and your skin look washed out. It’s a classic mistake that makes people hate their new renovation until the bulbs are changed.
Quick Win: Want a 10-minute, $30 upgrade? Go to Home Depot or order online and swap your existing bulbs for 90+ CRI, 3000K-3500K LEDs. I promise your paint and tile colors will suddenly look exactly like you imagined they would.
The Magic of Unbroken Lines
Your brain registers a space as bigger when your eye can scan across it without being interrupted. This is the simple concept behind some of the most effective small-bathroom designs.
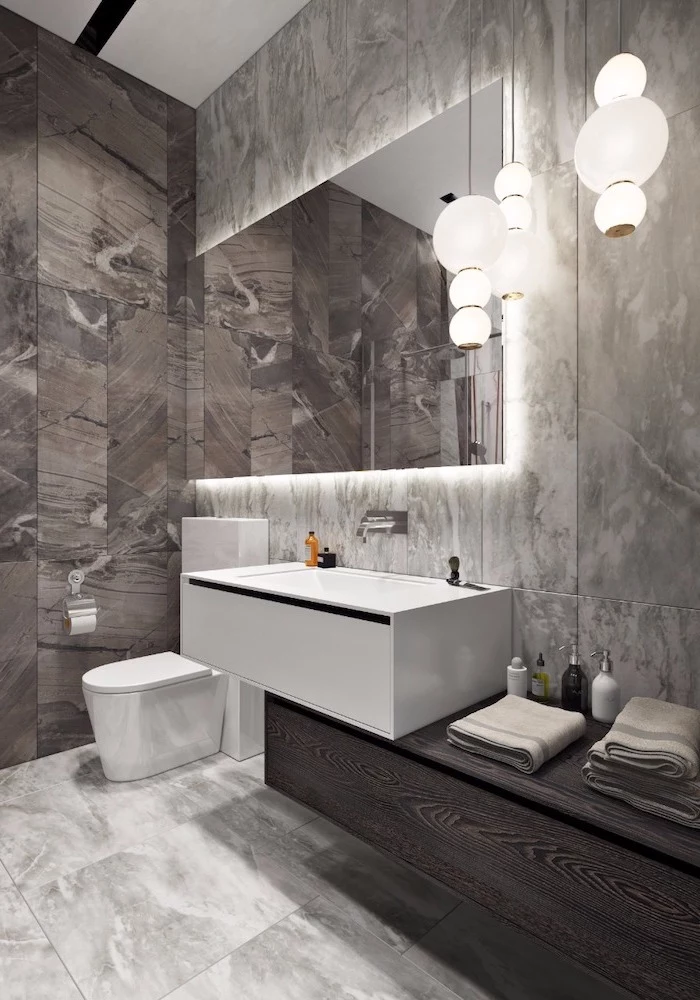
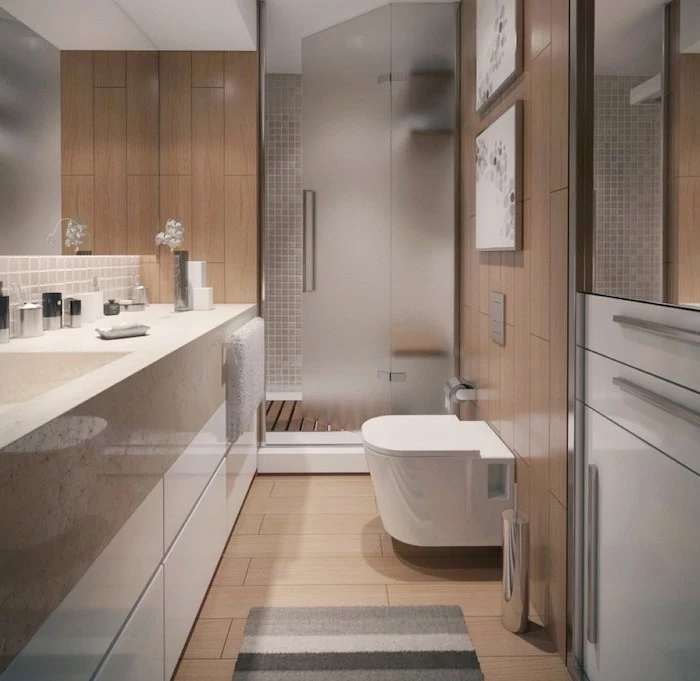
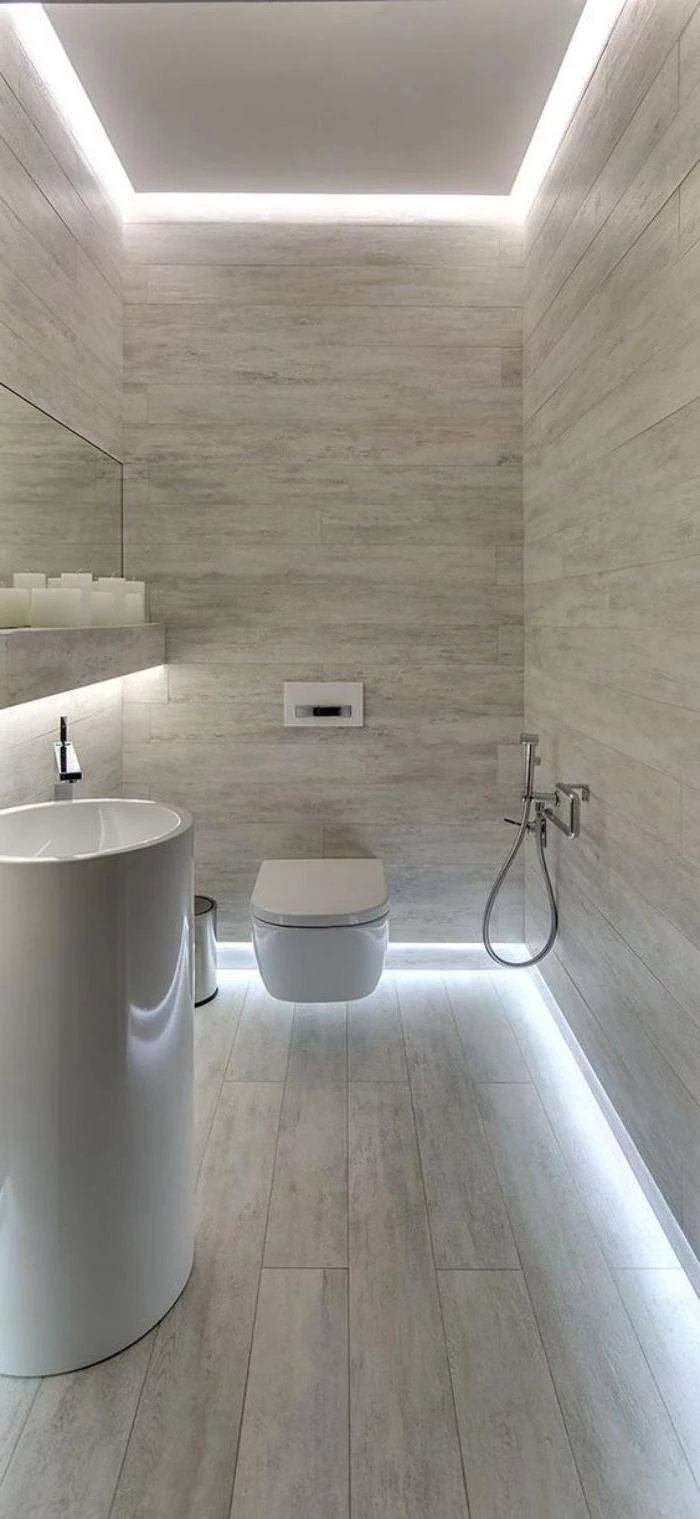
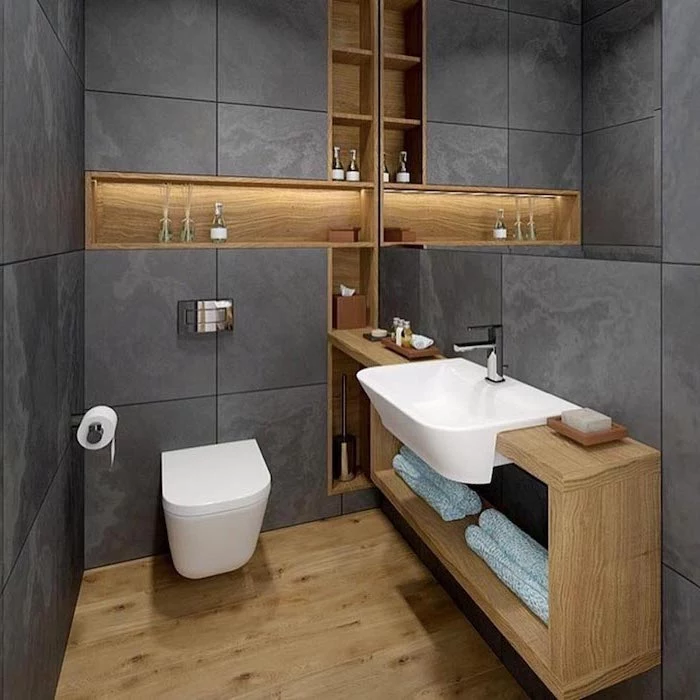
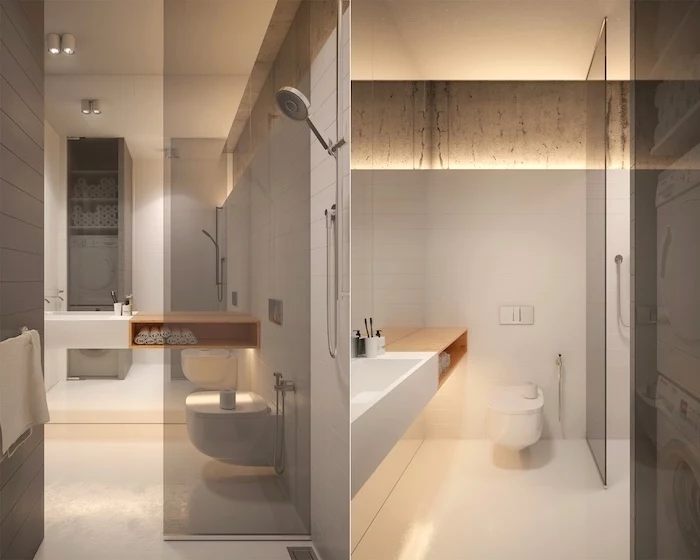
- Floating Fixtures: A wall-hung vanity or toilet is a fantastic choice because it lets you see the floor continue all the way to the wall. This unbroken floor plan instantly makes the room feel wider and more open. Bonus: it’s a thousand times easier to clean the floor without a bulky vanity base in the way.
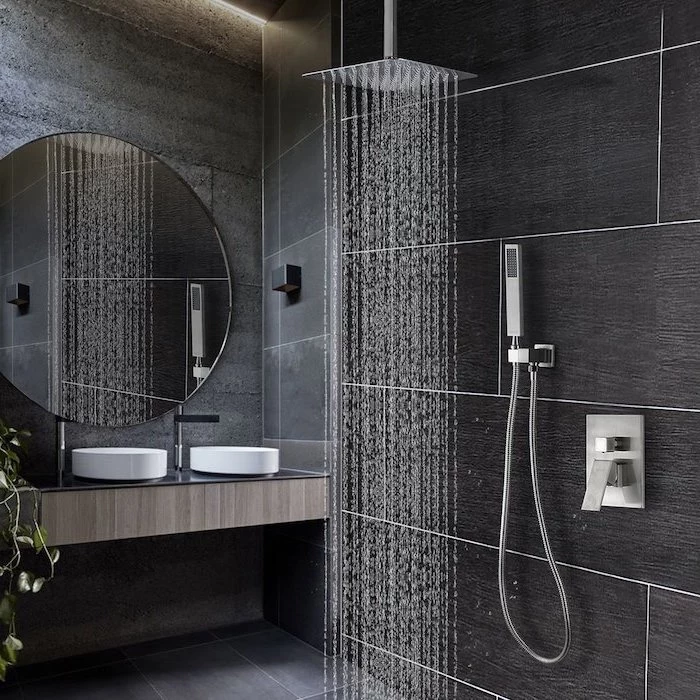
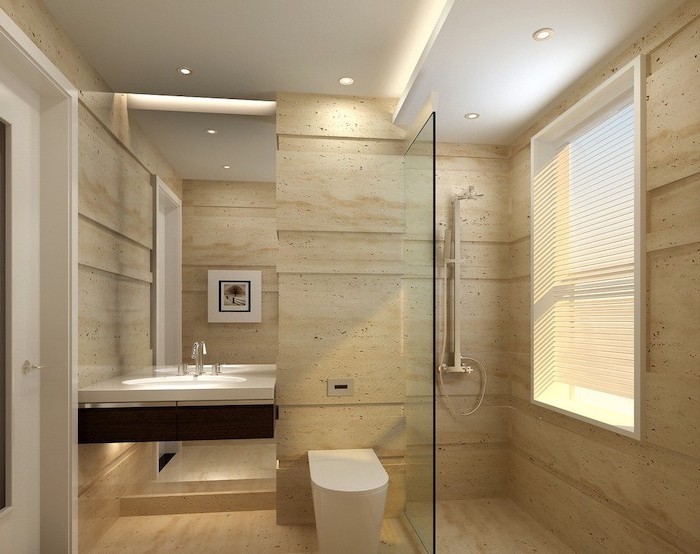
- Curb-less Showers: This is the ultimate expression of an unbroken sightline. When you get rid of the shower curb and run the same floor tile straight into the shower, you remove a major visual barrier. It creates one seamless, unified space. Heads up, though—this is a high-skill job that requires expert waterproofing and floor sloping to work.
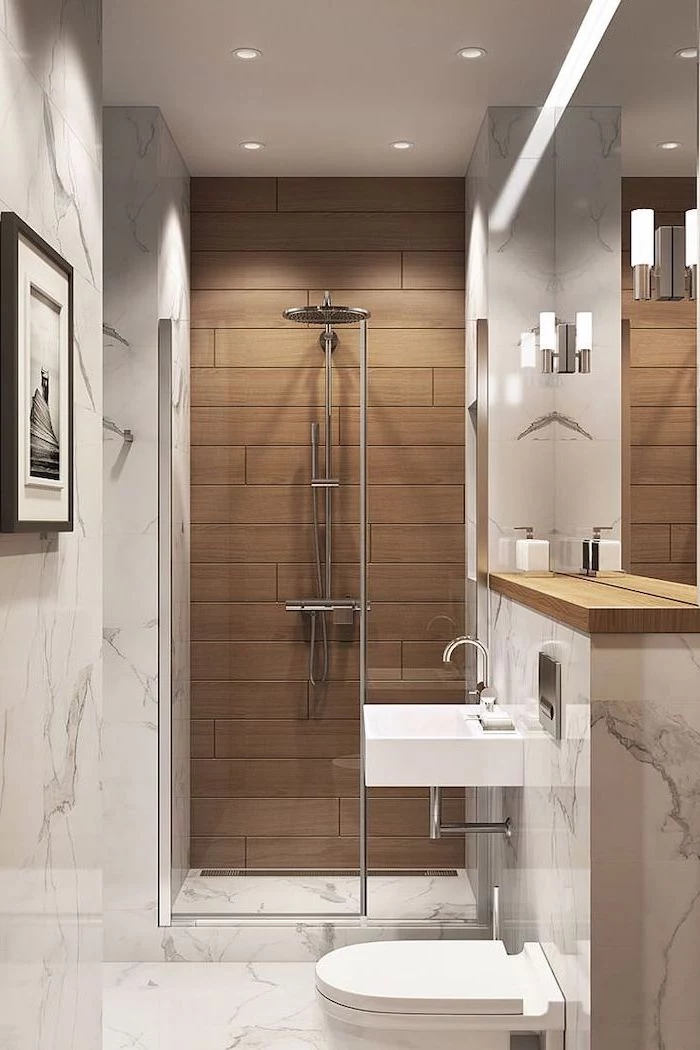
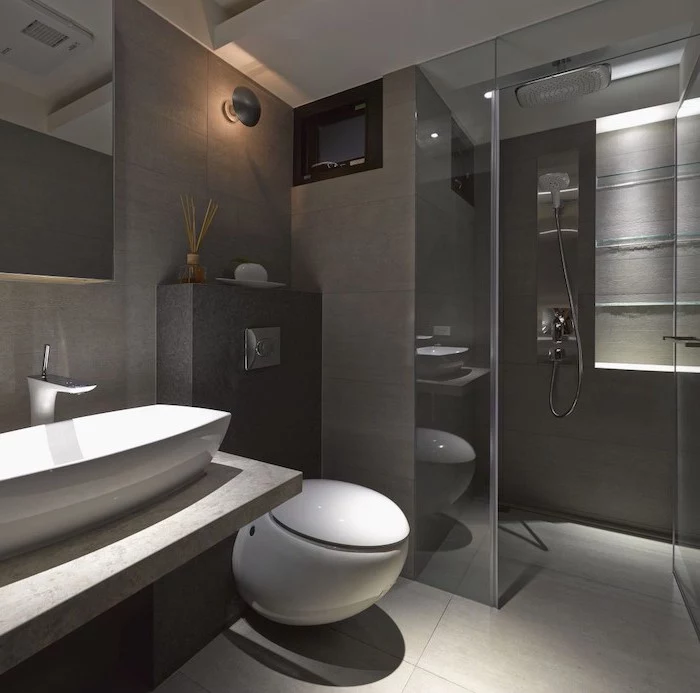
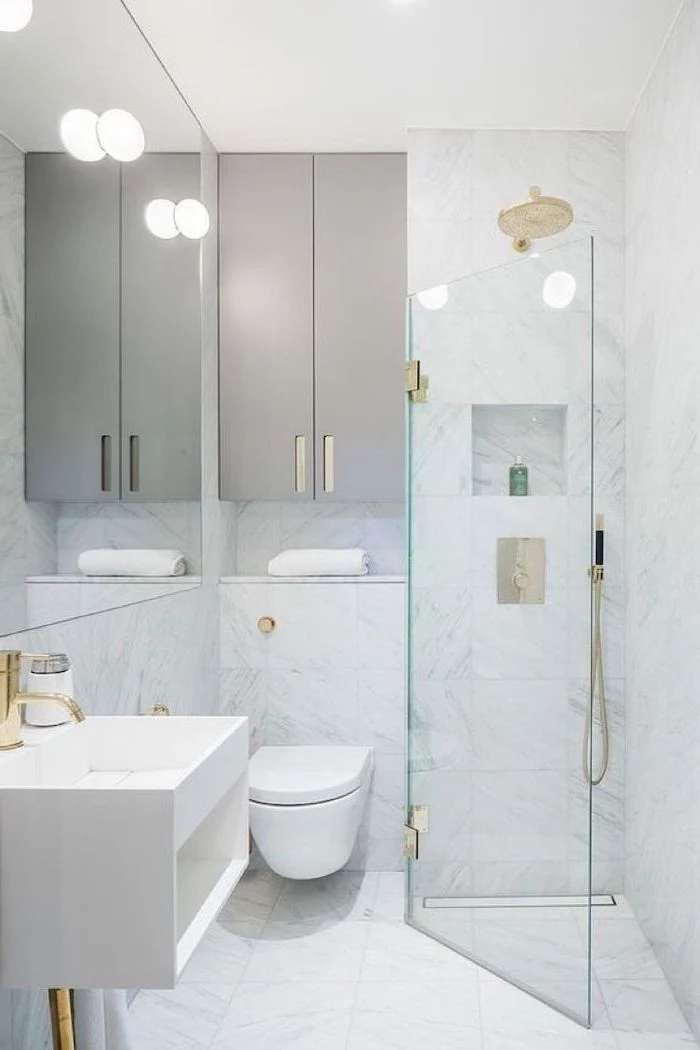
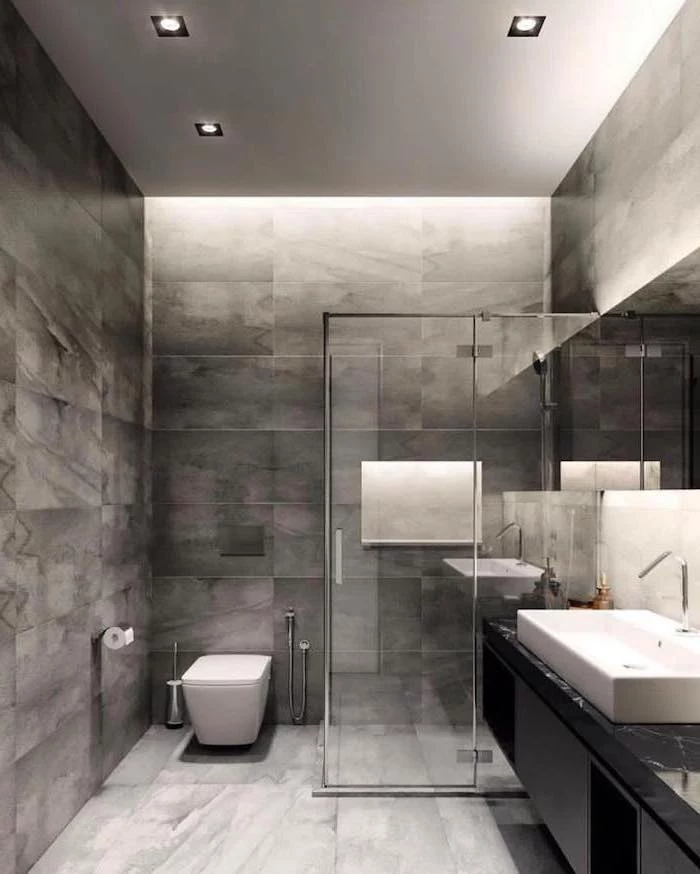
- Glass Panels: A simple, frameless glass shower panel is always better than a shower curtain or a chunky framed door. Why? Because your eye doesn’t stop at the glass; it travels all the way to the back wall of the shower, visually adding those extra square feet to the room.
Planning Your Layout: A Game of Inches
Before you fall in love with a tile pattern, you have to nail the floor plan. In a small bathroom, this is a puzzle governed by building codes, the reality of your plumbing, and simple ergonomics.
First, Respect the Building Codes
This is where I start with every client, and it’s non-negotiable. Codes exist for safety and basic function. You absolutely must check your local requirements, but here are some common minimums that pros live by:
- Toilet Space: You need at least 21 inches of clear legroom in front of the toilet bowl. From the center of the toilet, you need 15 inches of space to any wall or vanity on either side. I’ve seen people try to cram a toilet into a 28-inch-wide nook, and it’s basically unusable.
- Sink Space: You also need 21 inches of clear space in front of your sink.
- Shower Size: The absolute minimum interior for a shower is 30×30 inches. To be frank, that’s incredibly tight. I always push my clients to find a way to get at least 36 inches in one direction for comfort.
Ignoring these rules can mean failing your final inspection and having to tear out finished work. It’s a heartbreaking and expensive mistake.
The Wet Wall Strategy
In most bathrooms, all the main plumbing for the sink, toilet, and shower is located in one single wall—we call this the “wet wall.” Keeping your fixtures on this wall is the most budget-friendly way to renovate. If you start wanting to move a toilet, for example, you’re looking at a major job that involves cutting into your floor and possibly your support joists. Unless the current layout is a complete disaster, it’s usually not worth it.
Good to know: If you absolutely have to move a toilet, be prepared to add an extra $1,500 to $3,000 to your budget just for the plumber and the necessary floor work.
Solving the Door Dilemma
A standard door that swings into the bathroom can gobble up 9 square feet of precious floor space. That’s a huge waste! Here are the three main solutions I propose:
- The Out-Swinging Door: This is the simplest and cheapest fix. If you have space in the hallway, just have your contractor reverse the door swing. It’s a quick job and instantly reclaims all that floor space.
- The Pocket Door: This is the classic space-saver, sliding neatly into the wall. It’s a fantastic solution, but it requires planning. The wall needs to be free of plumbing and major electrical lines. Installation is also more involved and best left to a pro. Expect to pay a few hundred dollars more in labor compared to a standard door.
- The Barn Door: A trendy option that slides along the outside of the wall. It saves interior space, but you need a clear patch of wall next to the doorway for it to slide over. The biggest drawback? Barn doors offer the least privacy and sound insulation, which can be a deal-breaker for a main bathroom.
Choosing Fixtures: Smart, Space-Saving Picks
When you’re shopping for fixtures, you have to be disciplined. That gorgeous double vanity in the showroom is not your friend. Scale and smart design are what matter here.
Toilets: Wall-Hung vs. Compact
The toilet is a big piece of porcelain, so choosing the right one is critical.
- Wall-Hung Toilets: These are the champions of space-saving. The tank is hidden inside the wall, which can save you up to 10 inches of floor space. The downside? They’re pricey and complex. You need an in-wall carrier system that requires professional installation into a thicker 2×6 wall (not the standard 2×4). Expect the toilet and carrier system to run you between $900 and $2,000 for parts alone, plus a full day of skilled labor.
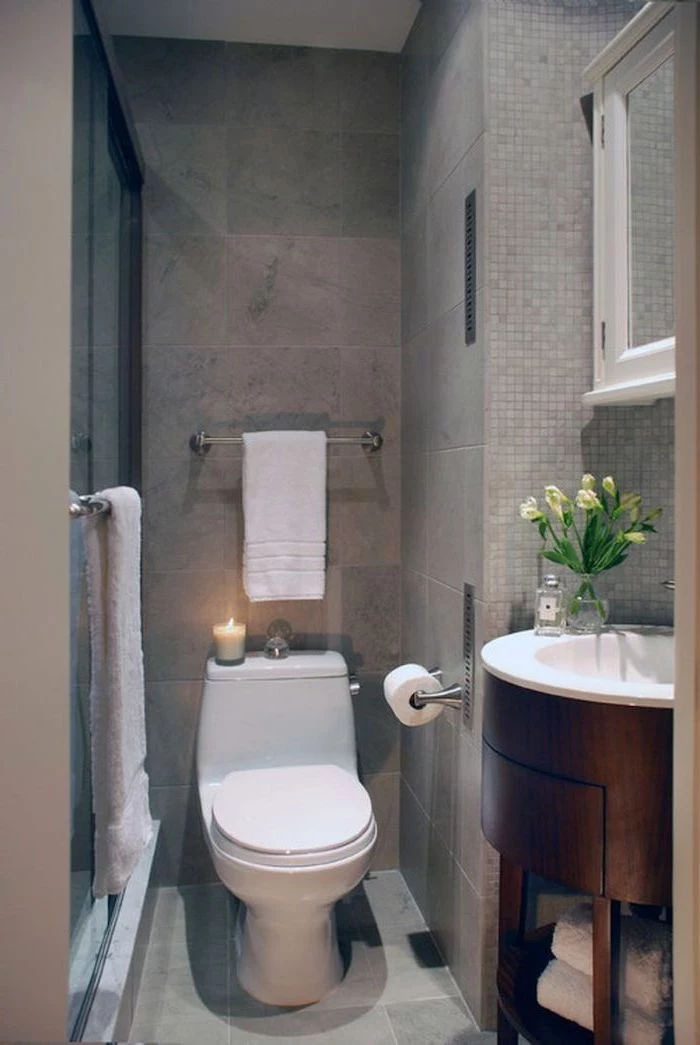
- Compact Elongated Toilets: This is the best compromise for most people. You get the comfort of an elongated bowl (which most adults prefer) but in a smaller footprint that’s closer to a traditional round-bowl toilet. Look for models with a total depth of 28 inches or less. A great one will cost you between $300 and $500, and it’s a straightforward installation.
Vanities: The Storage vs. Space Trade-Off
This is where you can make a huge visual impact. A floating vanity is a top choice, but remember, it needs to be anchored to solid wood blocking inside the wall, not just drywall anchors.
By the way, if you’re installing a floating vanity, here’s a rough shopping list: the vanity itself, a faucet, a P-trap kit, new braided water supply lines, a 2×6 piece of lumber for blocking, a few 3-inch lag bolts, and some silicone caulk.
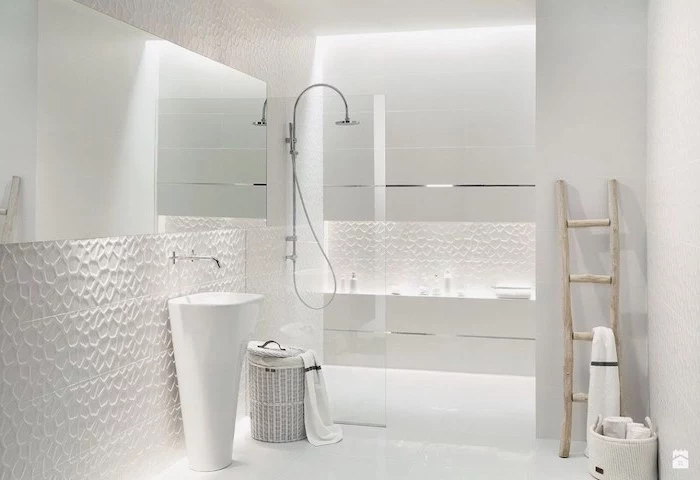
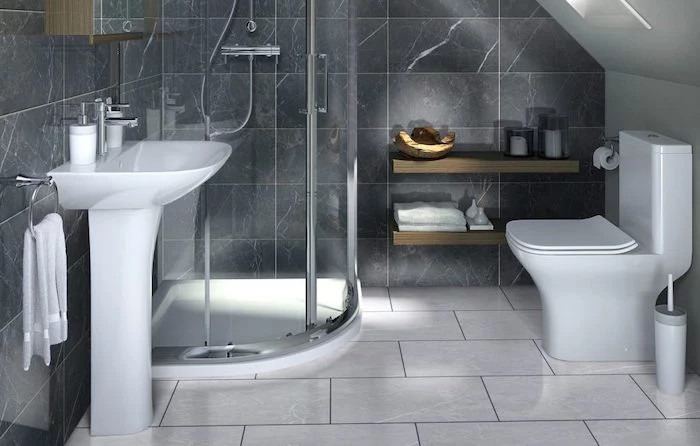
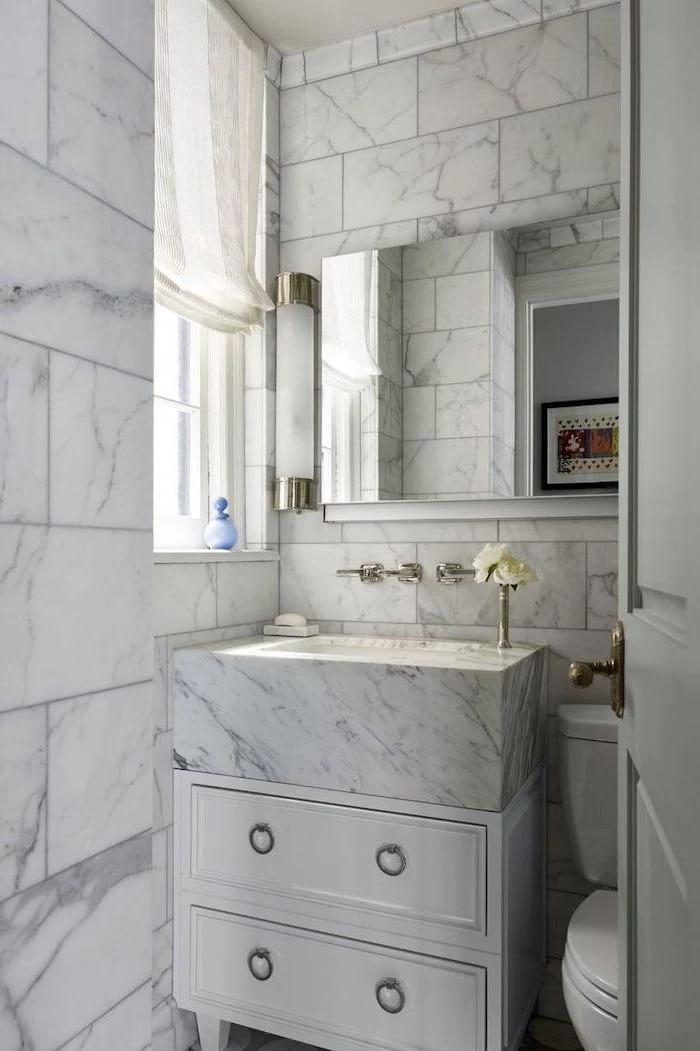
If you don’t need the storage, a classic pedestal sink makes a tiny powder room feel much more open. A great middle-ground option is a console sink, which has an open metal or wood frame that feels light and airy but still gives you a shelf for a basket or some towels.
Showers: What It Really Takes to Go Curb-less
If you have the budget and can find a great installer, a curb-less, walk-in shower is the number one thing you can do for a small bathroom. But doing it right is a serious undertaking.
- Waterproofing is Everything: This isn’t just about tile and grout. A proper curb-less shower requires a continuous, high-tech waterproofing membrane (like the bright orange stuff from Schluter-KERDI) across the entire floor and up the walls. Every seam and corner must be perfectly sealed. This is NOT a place to cut corners or hire a handyman. A single pinhole can cause a catastrophic leak. You’ll find these systems at specialty tile shops or professional plumbing supply houses, not usually at big-box stores.
- The Structural Slope: To drain properly, the floor has to be sloped toward the drain. To get this slope right while keeping the entrance level, the shower subfloor often has to be recessed, which can involve structurally modifying the floor joists.
Because of this specialized labor and the expensive materials, you should budget for a curb-less shower to add between $2,500 and $5,000 to your total project cost compared to a standard shower with a curb.
Smart Material Choices for a Cohesive Look
The right materials can tie the whole room together and make it feel unified and calm.
The Great Tile Debate: Go Big (Usually)
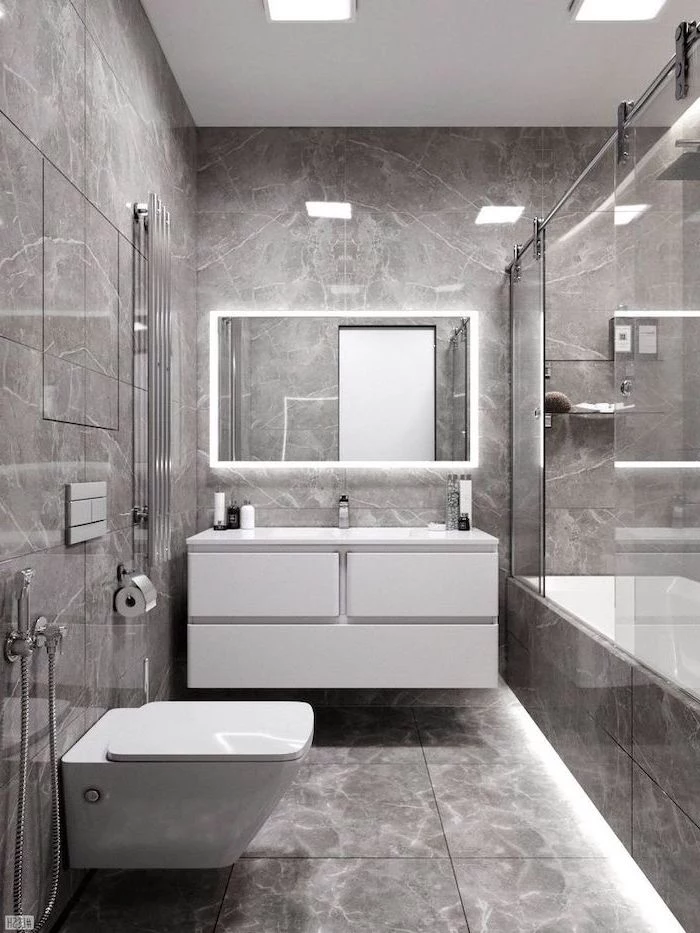
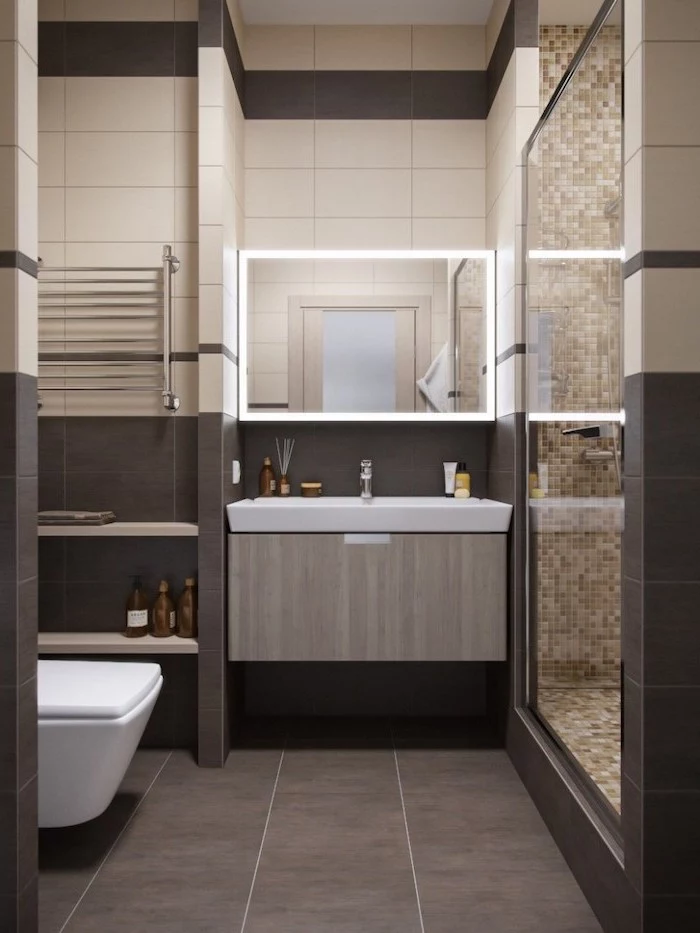
It’s true: using large-format tiles (like 12×24 or even 24×24 inches) makes a small room feel bigger because there are fewer grout lines to distract your eye. For a really seamless look, I often use the same large tile on the floor and right up the shower walls. It blurs the edges of the room and makes it feel more expansive.
The one major exception is the shower floor itself. For safety, you need smaller tiles here, usually 2×2 inch mosaics. The extra grout lines provide essential grip and slip resistance. Trying to use a large tile on a sloped shower floor is an amateur move; it’s almost impossible to slope correctly and can be a slipping hazard.
Grout: The Unsung Hero
Grout color matters more than you’d think. To make the room feel bigger, match the grout color as closely as you can to the tile. This makes the grout lines visually disappear. Using a dark, contrasting grout with a light tile creates a busy grid pattern that chops up the space and makes it feel smaller.
The DIY vs. Pro Divide: An Honest Breakdown
So, what can you actually do yourself? Here’s my honest advice:
- Safe for a Confident DIYer: Painting, swapping out a vanity light fixture (after turning off the power!), replacing a faucet on an existing vanity, installing a standard toilet, and putting up towel bars and mirrors.
- Call a Professional, No Exceptions: Any and all waterproofing (especially in a shower), moving any plumbing supply or drain lines, any major electrical work, installing a pocket door, and any structural changes to the floor for a curb-less shower. Trying to DIY these tasks is a recipe for disaster and can cost you thousands to fix.
The Reality Check: Timelines and Common Pitfalls
So, how long will you be without a bathroom? For a complete gut renovation of a small bathroom, a professional crew will typically take 2 to 4 weeks from demolition day to final polish. This assumes all your tile, fixtures, and materials are already on-site before the work begins. Delays in shipping can add weeks to a project.
And finally, here are the top three mistakes I’m constantly called in to fix:
- Buying fixtures before the layout is 100% final. That beautiful vanity you got on sale might not fit once the walls are framed correctly.
- Forgetting to plan for blocking. Not adding solid wood supports in the walls for a floating vanity or a grab bar is a huge oversight.
- Choosing dark, contrasting grout. It’s a popular look, but in a small space, it almost always makes the room feel cramped and busy. Stick with a matching grout for an open, airy feel.
Inspiration Gallery
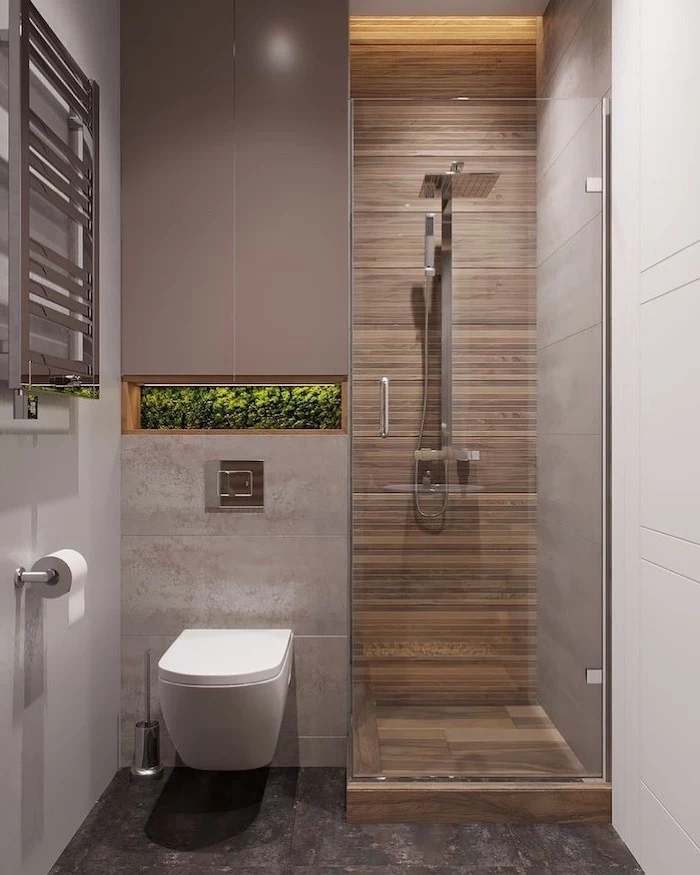
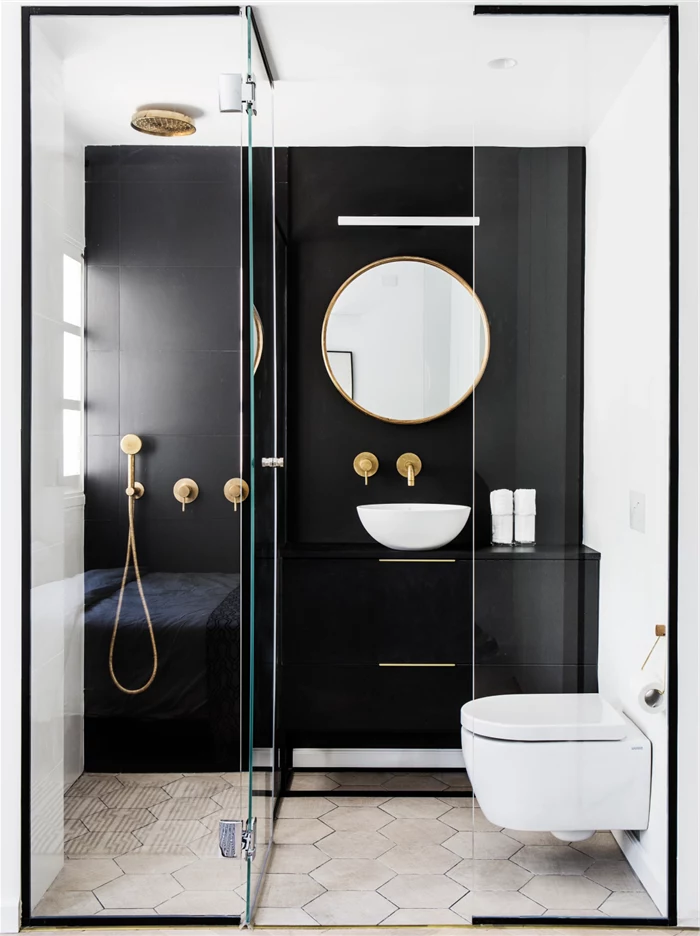
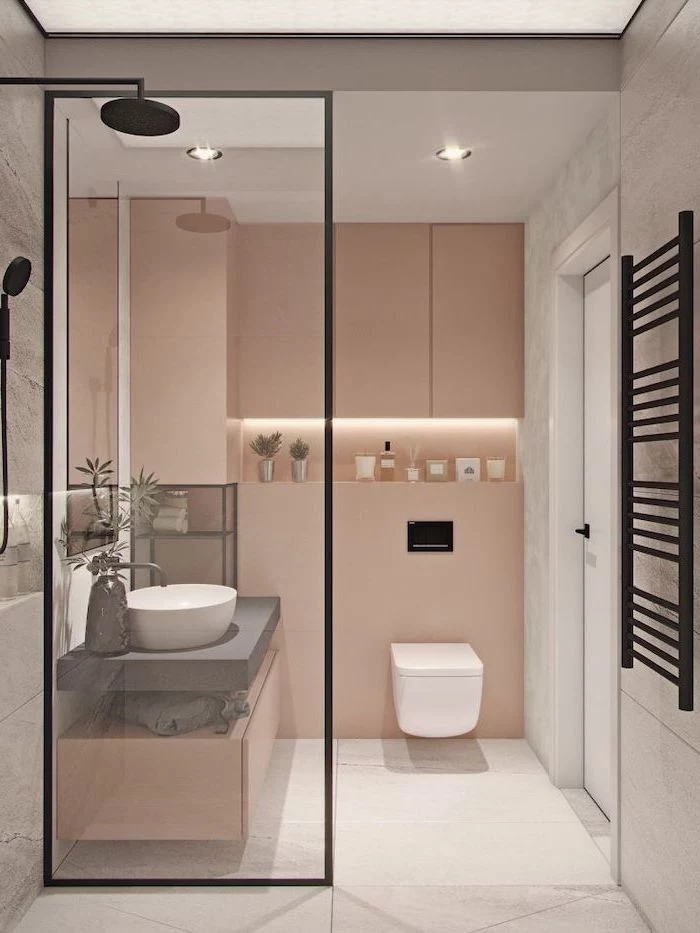
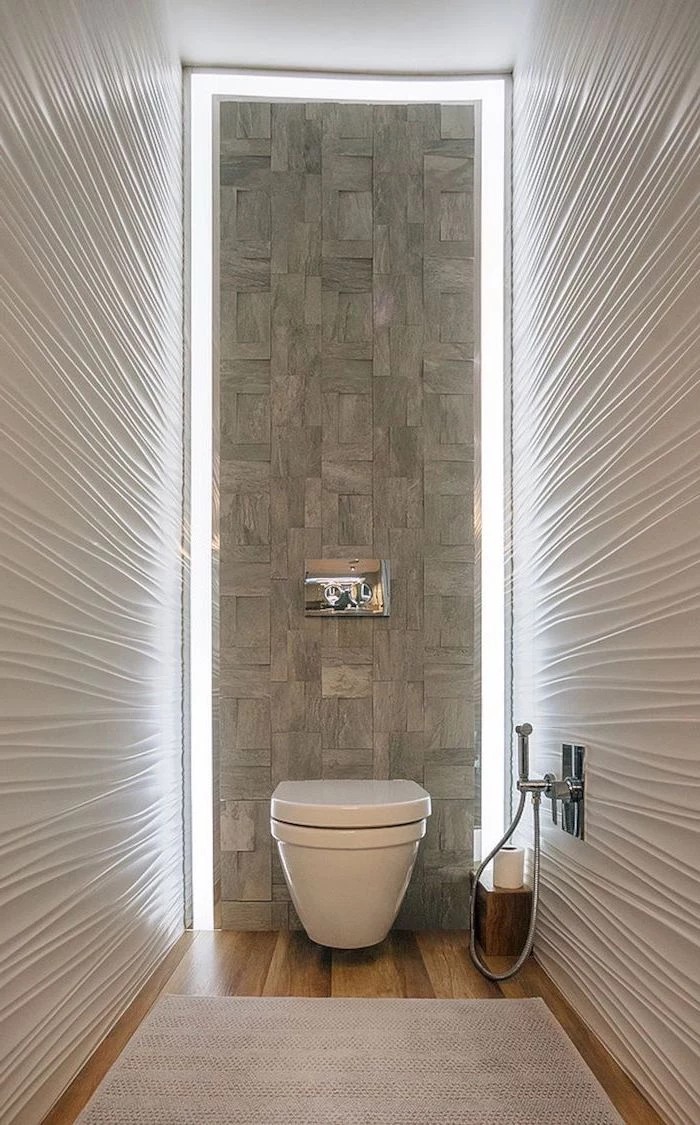
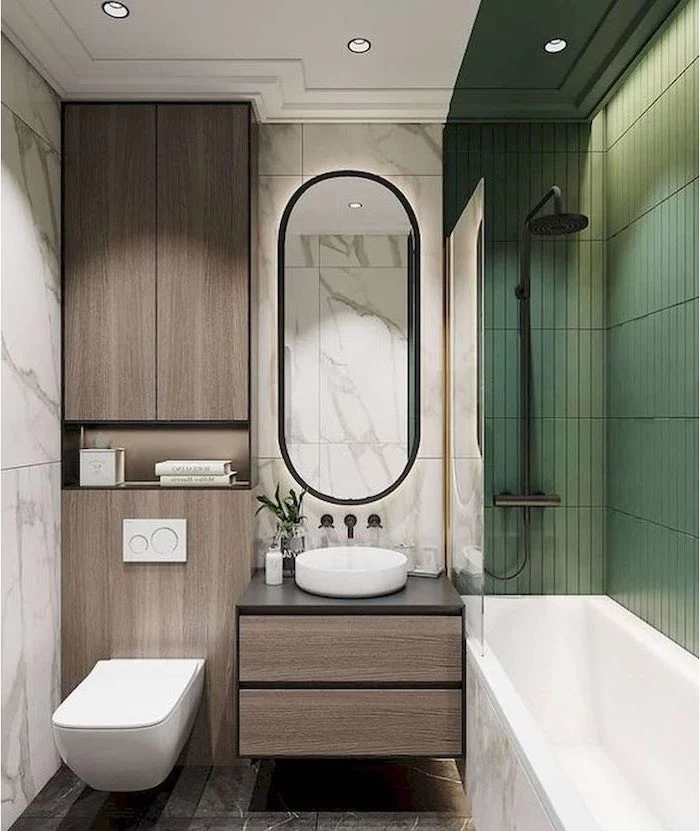
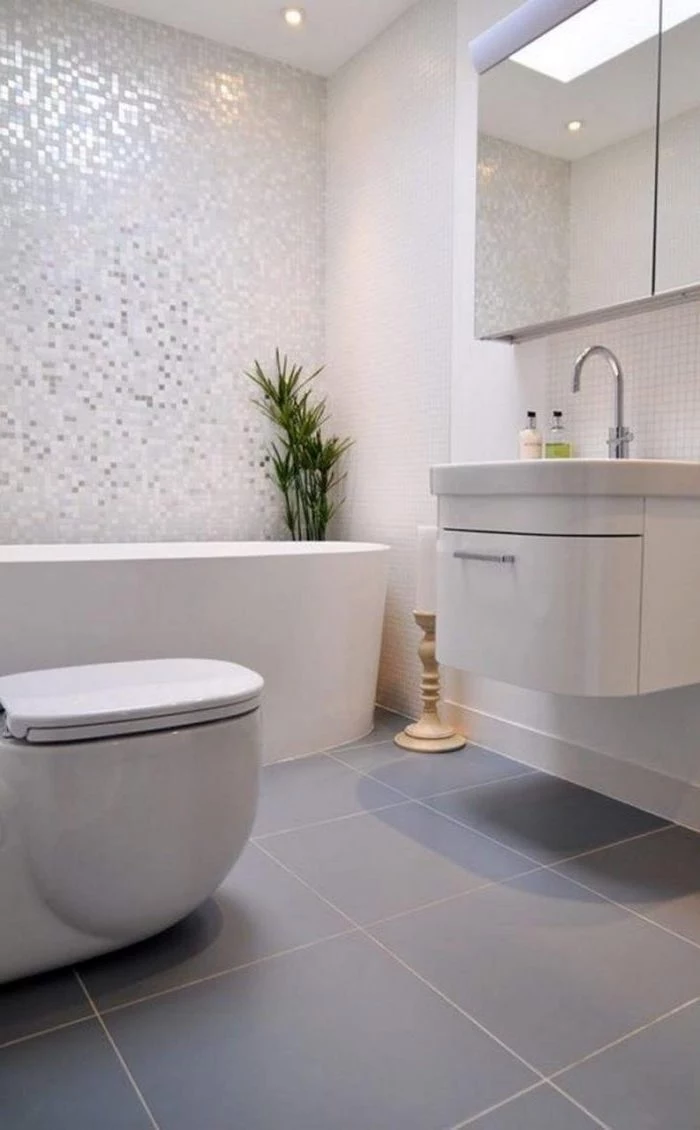
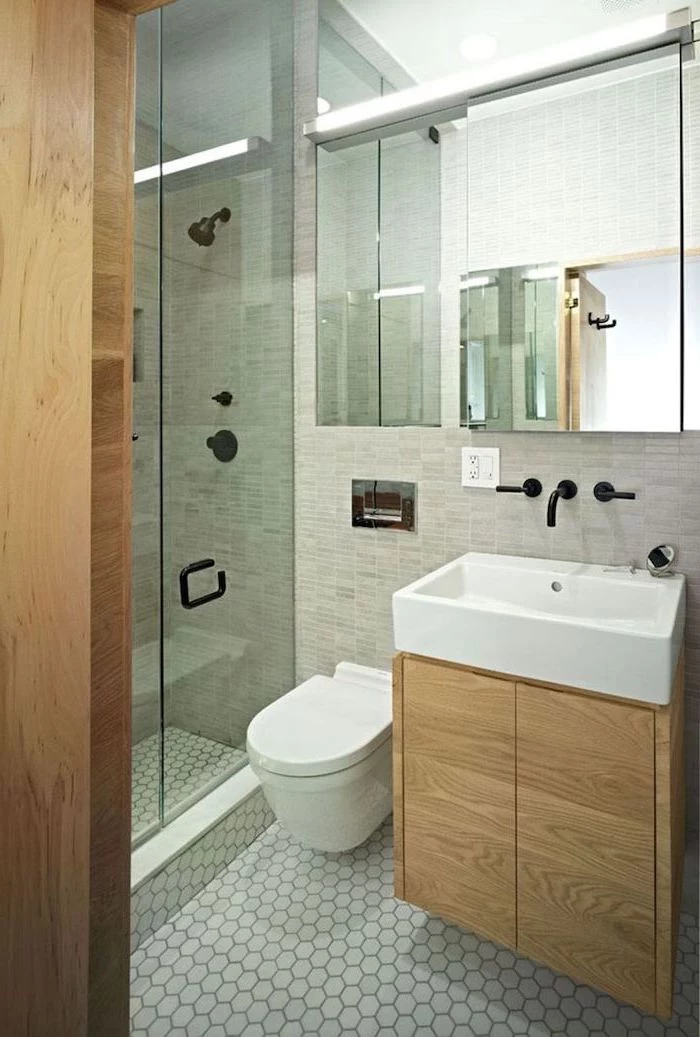
Wall-Hung Toilet: Frees up floor space, making the room feel larger and cleaning a breeze. Installation is more complex and costly, often requiring a thicker wall for the in-wall tank carrier system from brands like Geberit or Toto.
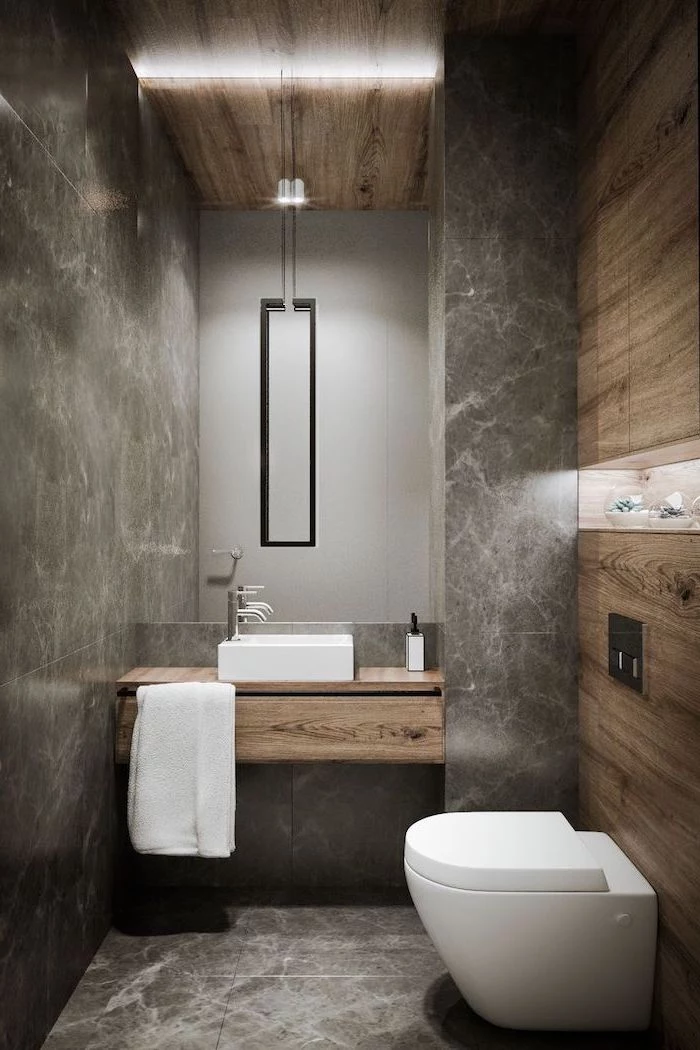
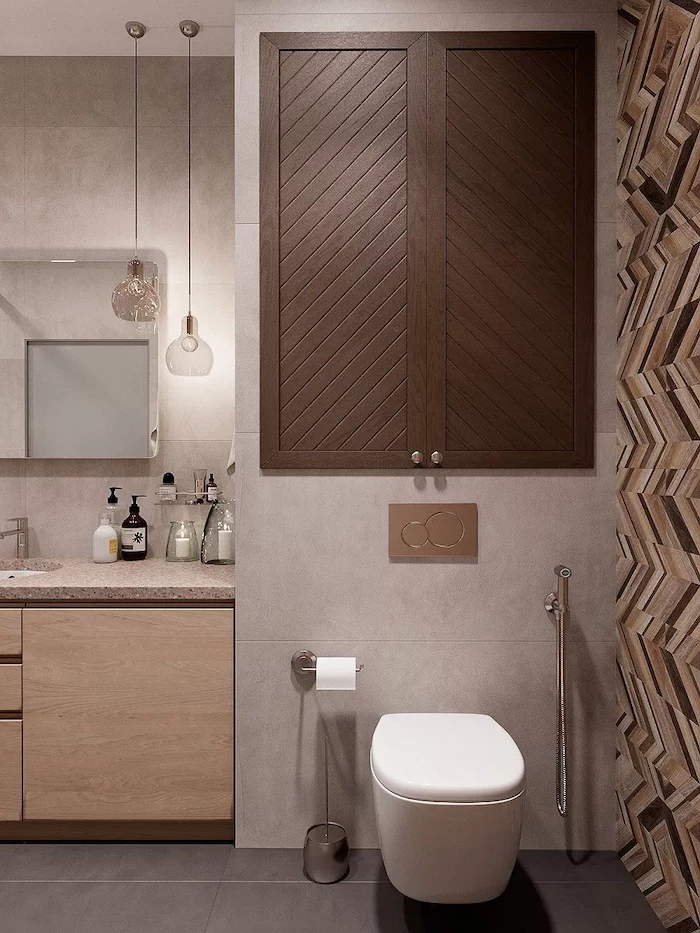
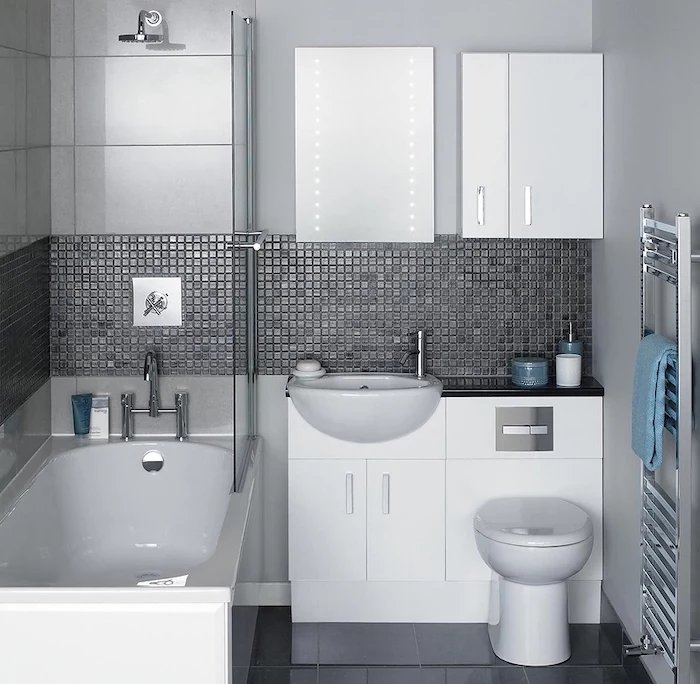
Compact Floor-Mount Toilet: A more budget-friendly and straightforward option. Look for models with a ’round front’ instead of an ‘elongated’ bowl and a shorter projection from the wall, like the Kohler Santa Rosa, to save precious inches.
The average bathroom door swing occupies about 9 square feet of floor space.
In a tiny bathroom, that’s a huge sacrifice. If plumbing allows, a pocket door is the ultimate space-saver, sliding away to nothing. For an easier, more affordable retrofit, consider re-hinging the door to swing outwards into the hallway, instantly freeing up the interior for better flow.
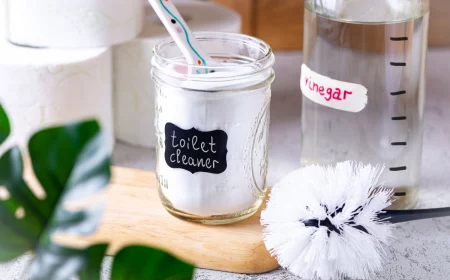
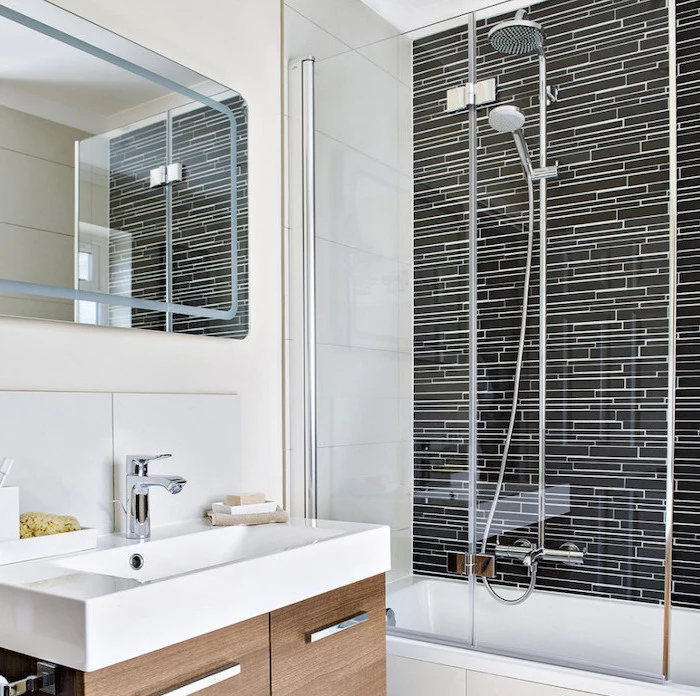
Don’t underestimate the power of grout. While a contrasting grout can create a cool graphic pattern, it can also make a small space feel visually cluttered. For an expansive, seamless look, match your grout color as closely as possible to your tile. Using a high-quality epoxy grout in wet areas will also resist stains and mold, keeping those lines looking clean for years.
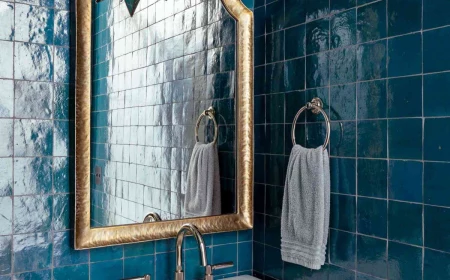
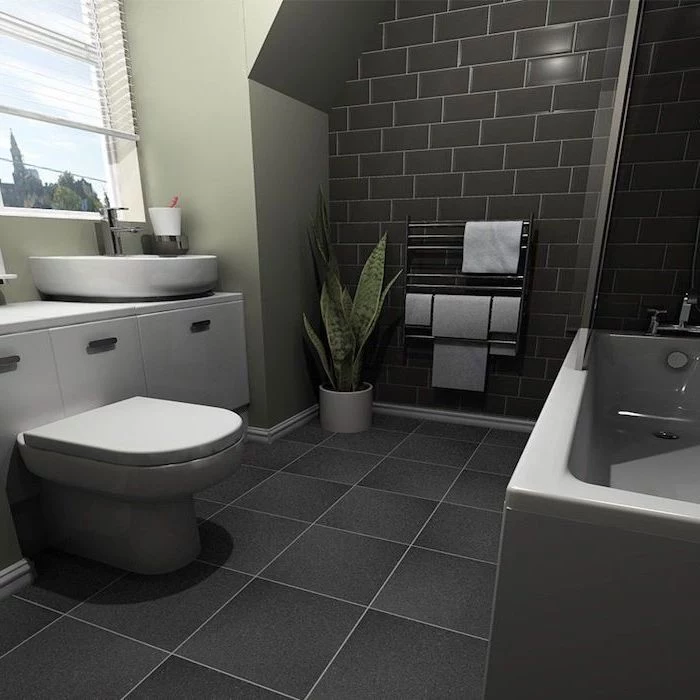
Is a dark color really a mistake in a small bathroom?
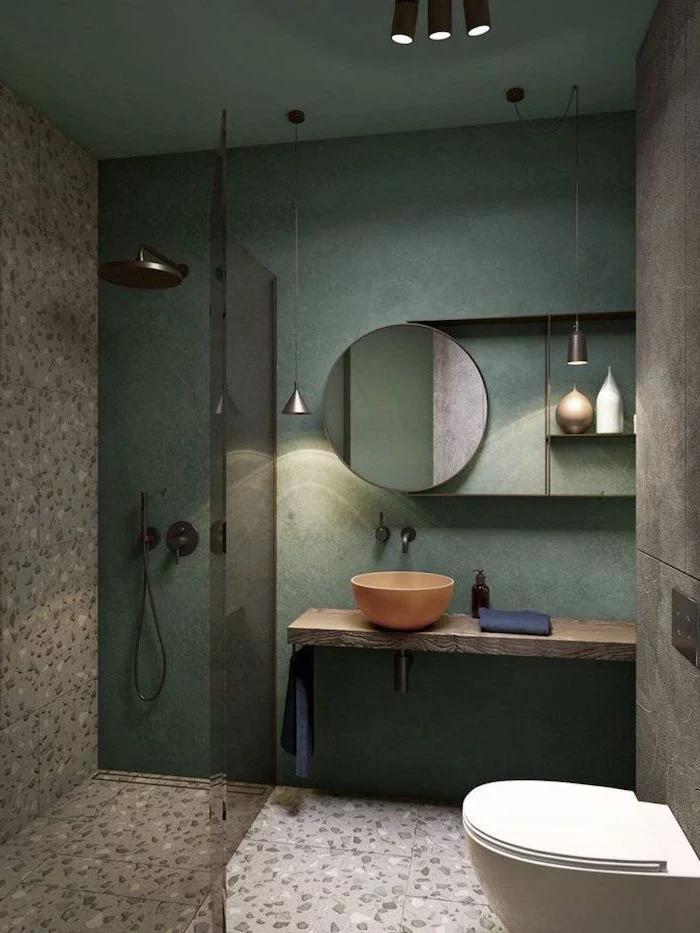
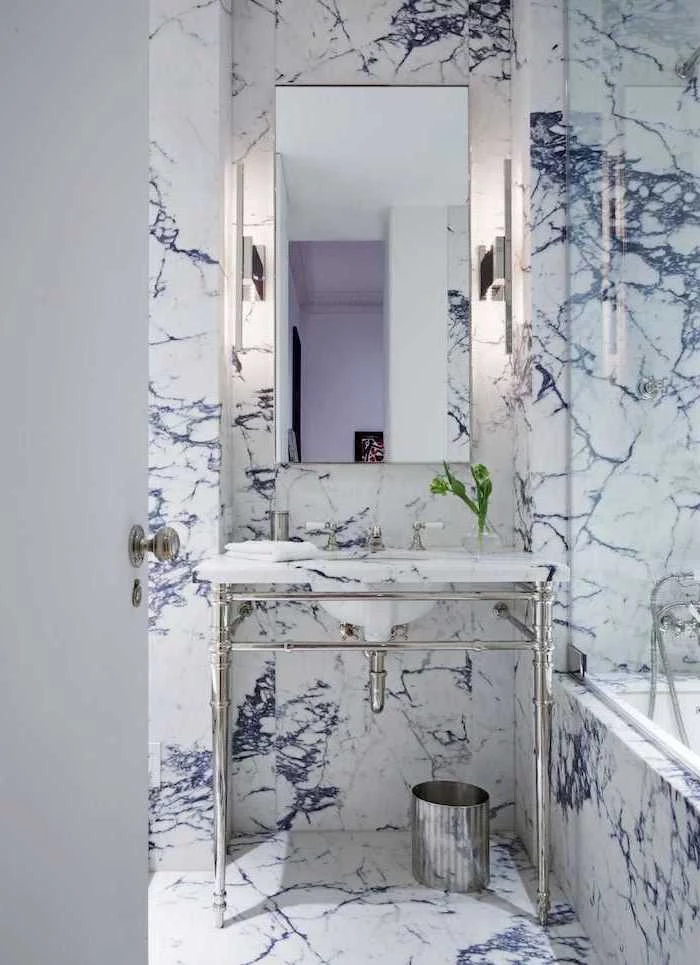
Not at all! The old rule to only use white is outdated. A deep navy, charcoal, or forest green on a single accent wall—typically the one behind the vanity or toilet—can add incredible depth and a touch of drama. The key is to balance it with excellent lighting, a large mirror to reflect it, and crisp white or light-colored fixtures to prevent the space from feeling cavernous.

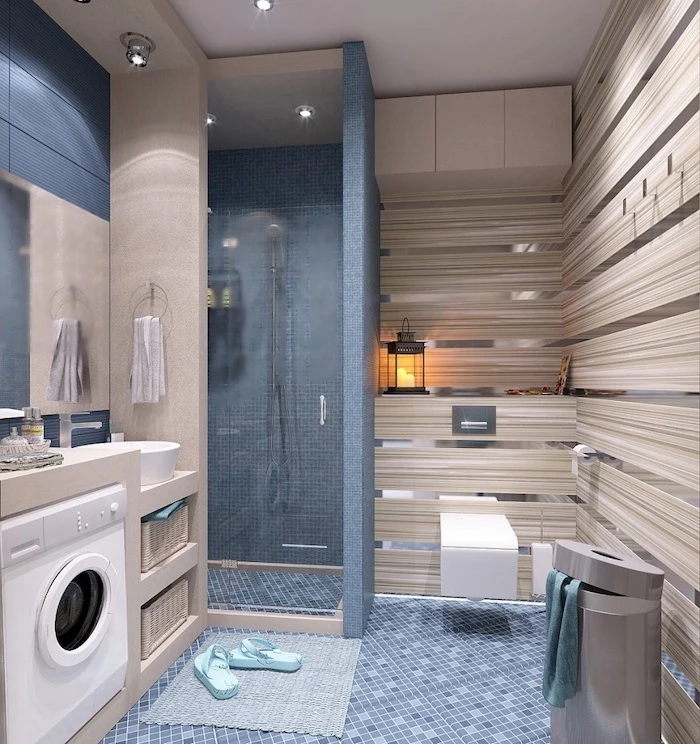
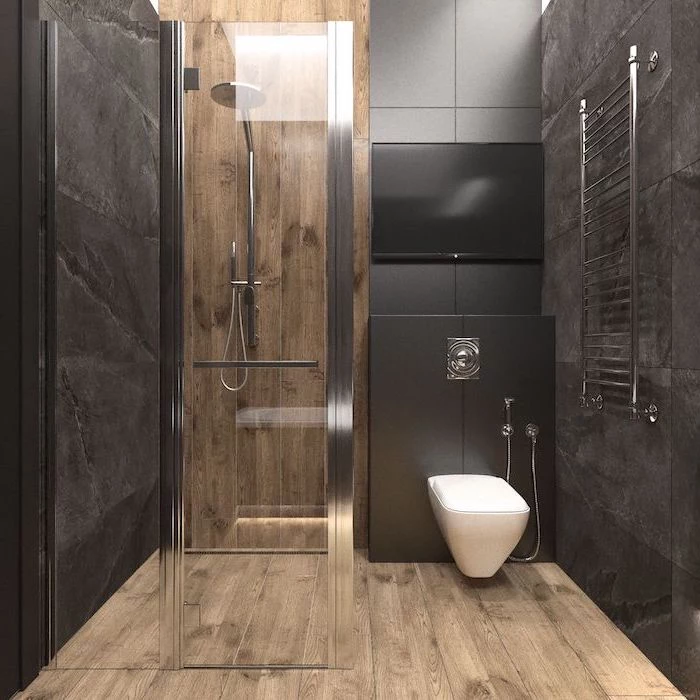
- Adds a warm, luxurious feeling underfoot on cold mornings.
- Dries floors faster after a shower, reducing slip hazards.
- Provides gentle, radiant heat that warms the whole room efficiently.
The secret? Electric heated flooring systems. Thin mats like those from Schluter-DITRA-HEAT or Nuheat can be installed directly under tile for a relatively low-cost upgrade that delivers a huge return in daily comfort.
A word on waterproofing: This is the one area where you cannot cut corners. A leak behind a wall can lead to thousands in mold and rot repair. Professionals rely on membrane systems like the orange Schluter-KERDI fabric, which is applied to walls before tiling. It creates a fully sealed, waterproof, and vapor-proof barrier that protects your home’s structure. It’s the gold standard for a reason.
According to the EPA, a WaterSense labeled faucet can save an average family 700 gallons of water per year.
This is more than just an eco-friendly choice; it’s a smart one. Modern low-flow fixtures from brands like Delta, Moen, and Brizo use aerators that mix air into the water stream, so you get a strong, full-feeling spray while using significantly less water. There’s no compromise on performance.
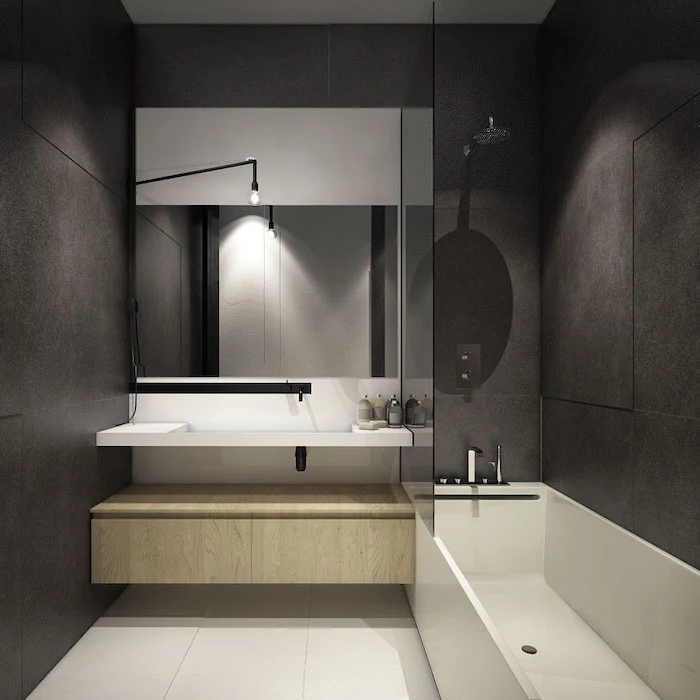
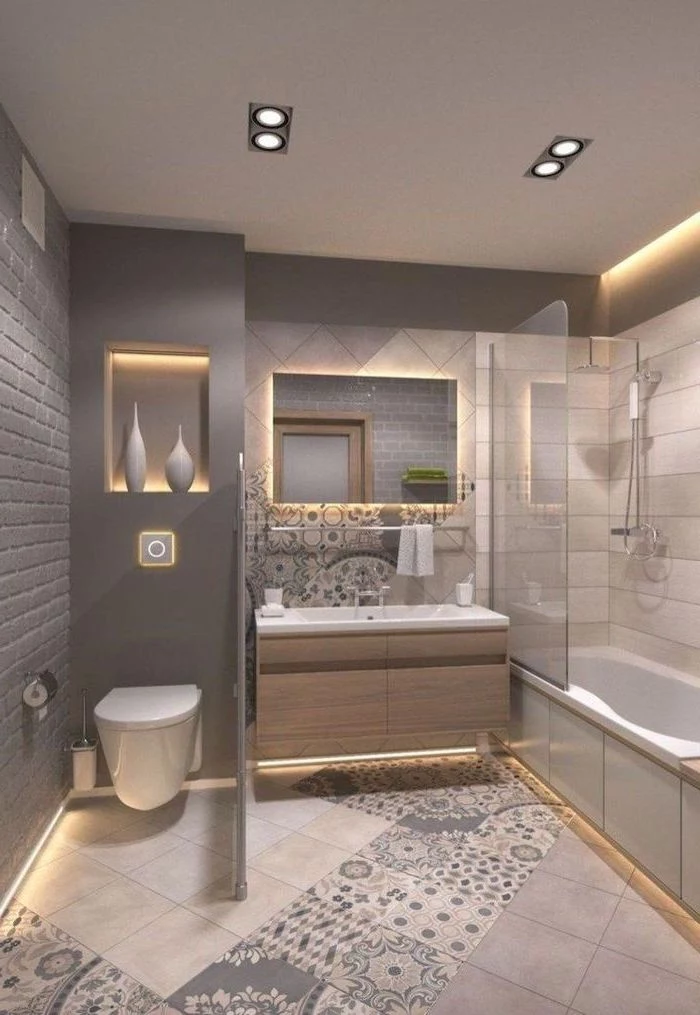
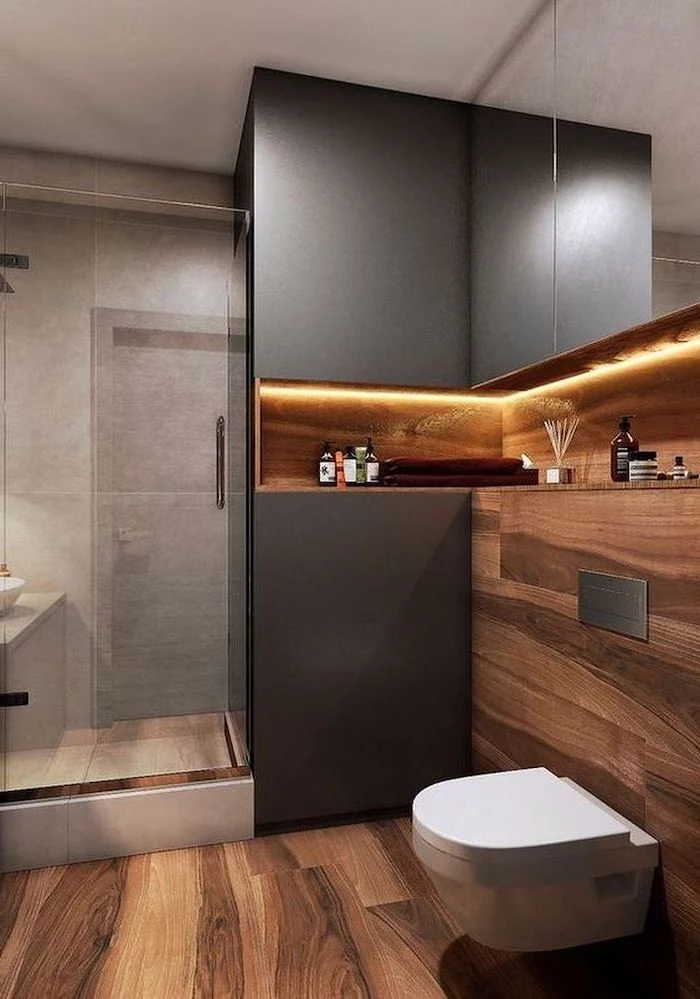
Beyond the main light, consider adding layers. A small, well-placed LED strip tucked under a floating vanity or inside a shower niche provides a soft, ambient glow. It’s perfect as a nightlight and adds an instant touch of high-end, hotel-inspired design without taking up any visual space.
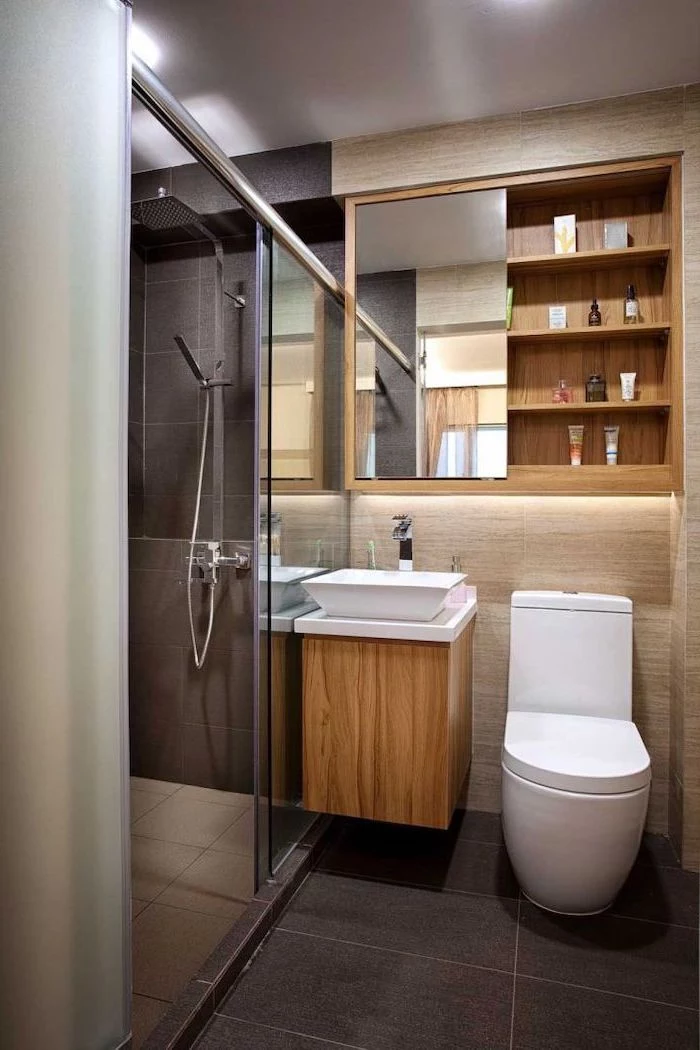
- Recessed Medicine Cabinet: A classic for a reason. Models from Robern or Kohler can be installed between wall studs, giving you deep storage that sits flush with the wall, eliminating the bulk of a surface-mounted cabinet.
- Glass Shelving: Using glass for open shelves above the toilet keeps the feel light and airy, preventing the visual weight that solid wood or metal shelves can add.
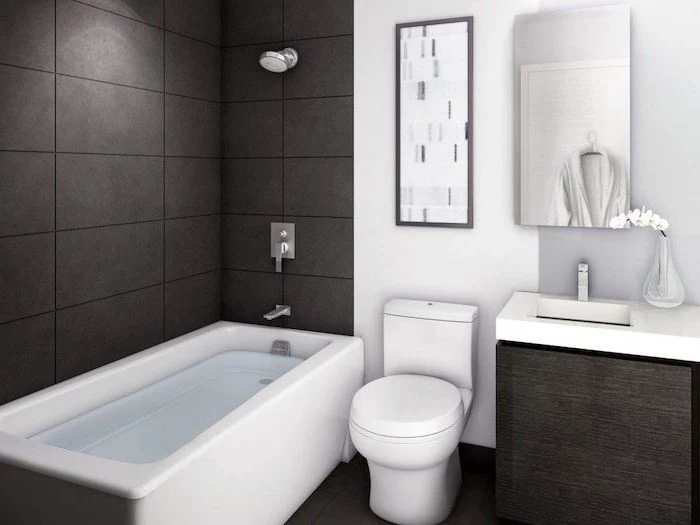
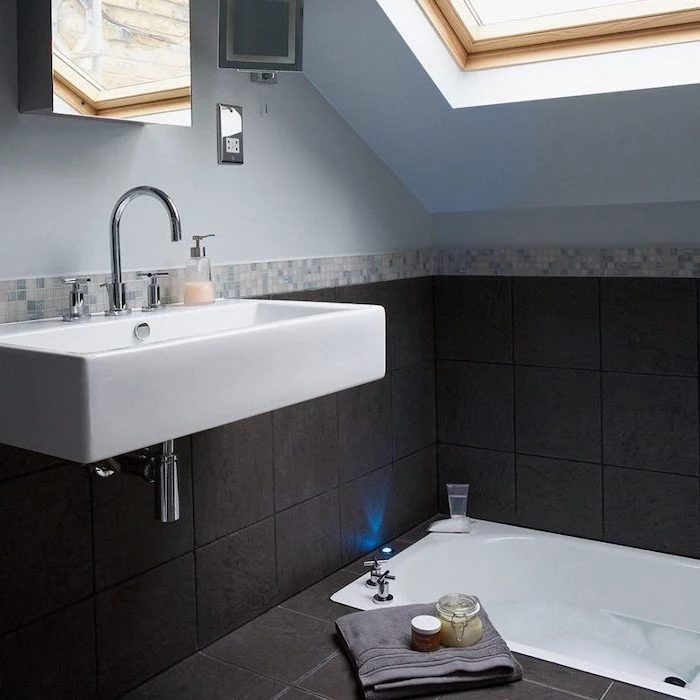
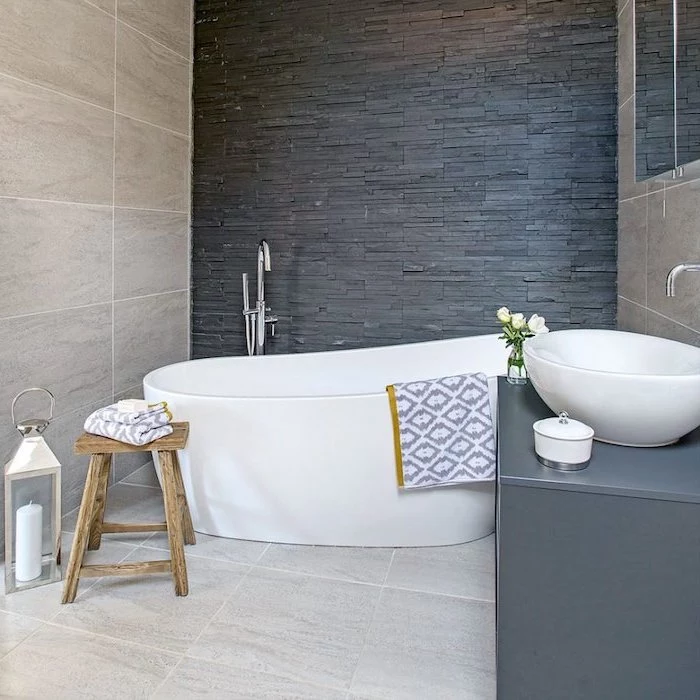
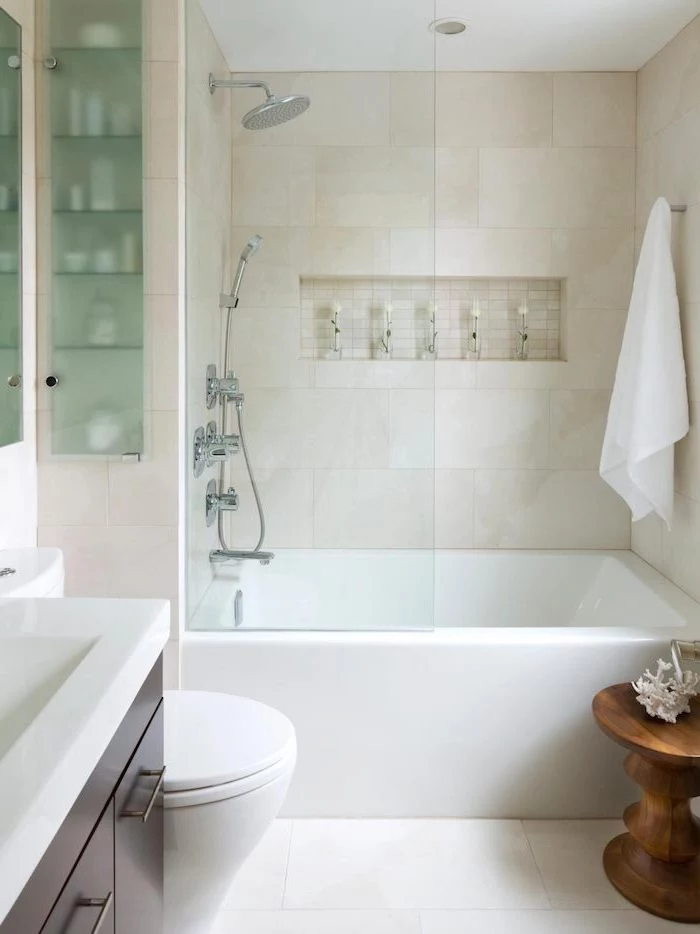
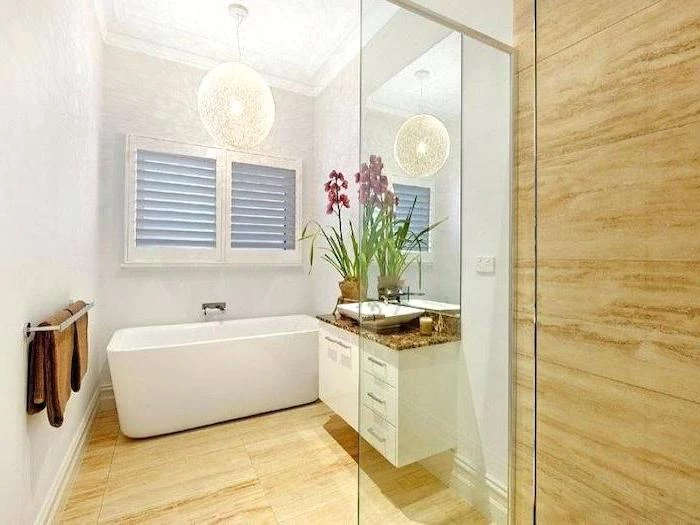
Dreaming of a tub but short on space?
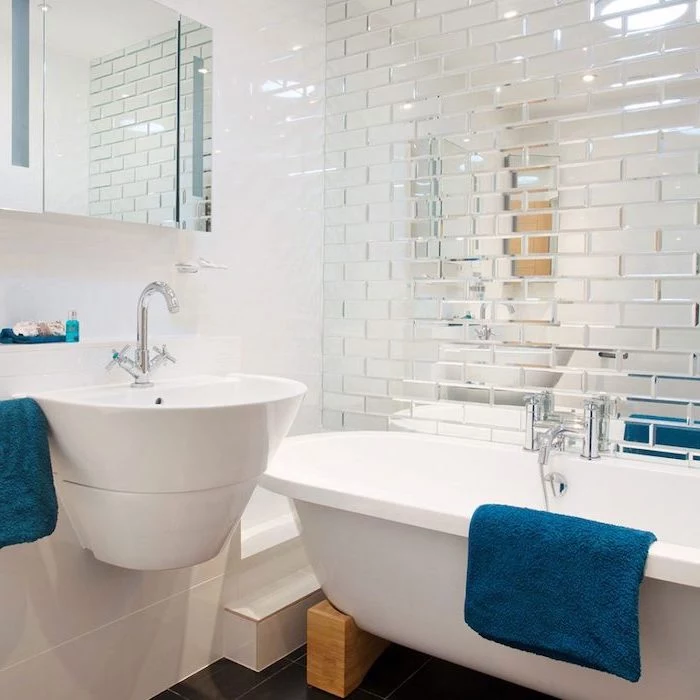
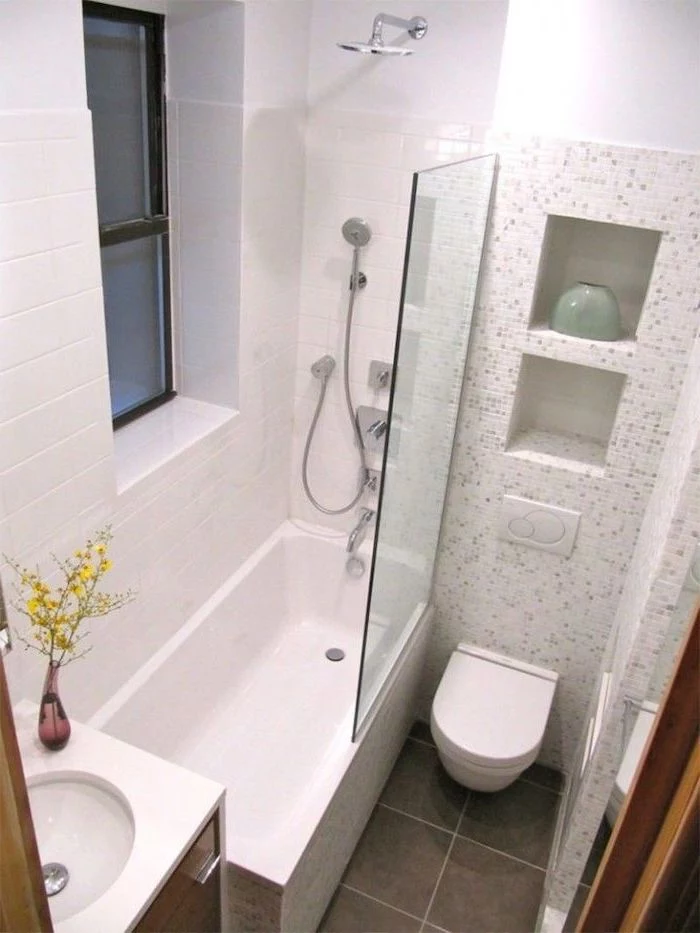
Don’t assume you have to switch to a shower-only layout. Many brands now offer compact ‘alcove’ bathtubs designed for smaller bathrooms. Look for models that are 54 inches long instead of the standard 60 inches. Brands like Duravit, Kaldewei, and American Standard have sleek, deep-soaking options that can fit into a tight spot, giving you the best of both worlds.
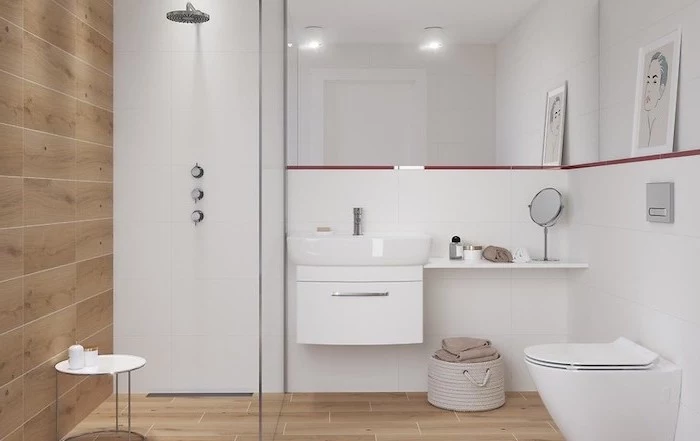
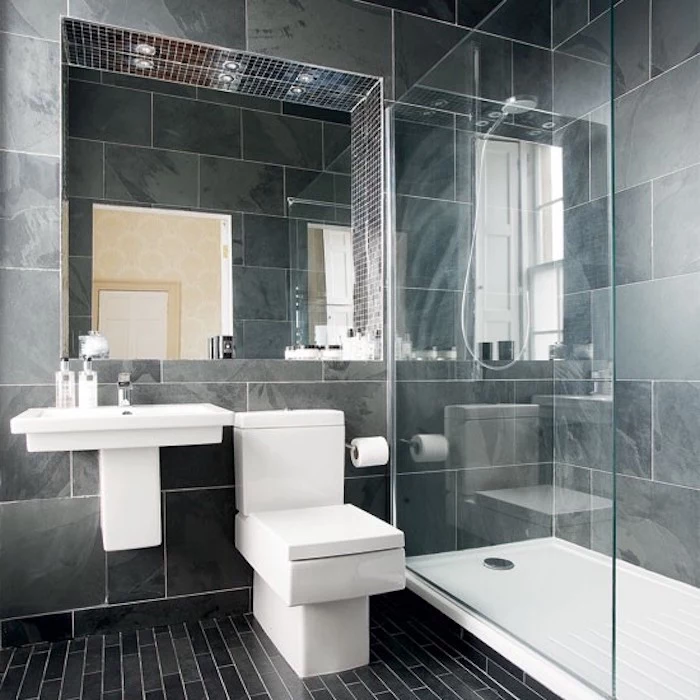
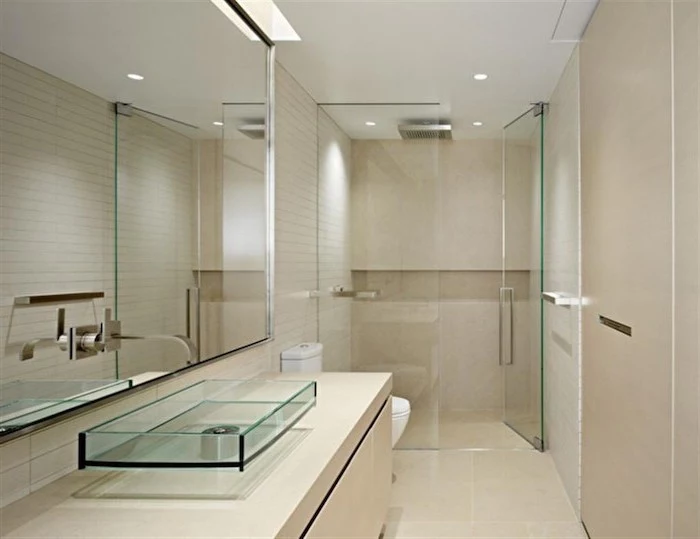
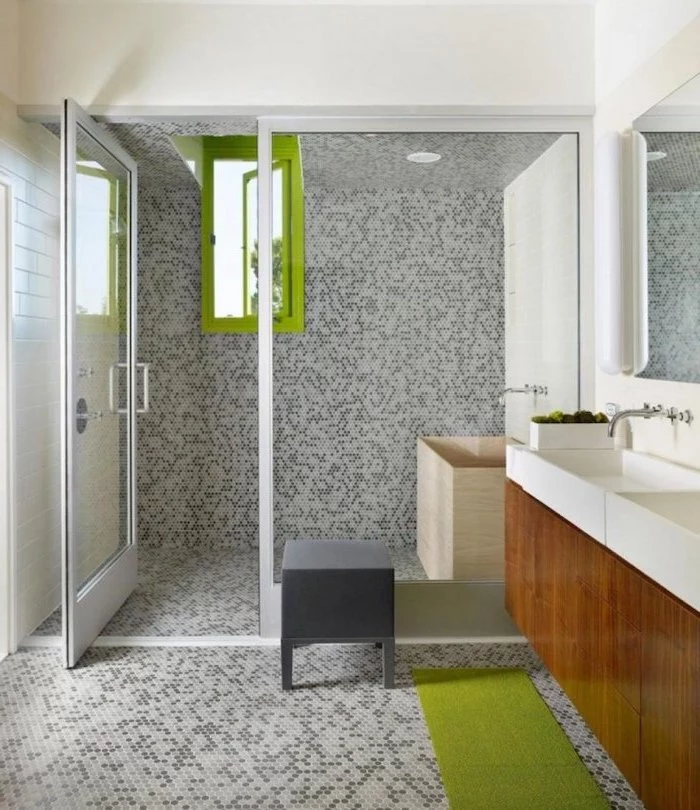
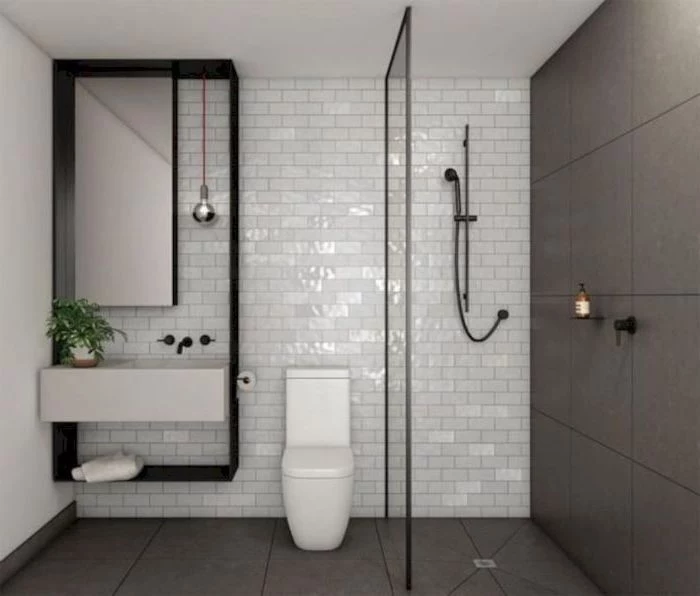
The ‘wet room’ concept, where the shower area is not enclosed by a curb, is gaining popularity in small spaces.
By waterproofing the entire bathroom floor and using a sleek linear drain, you eliminate visual barriers. This not only makes the room feel vastly larger and more open but also provides a major accessibility benefit for users of all ages and abilities.
The finish of your fixtures has a big impact on maintenance.
- Polished Chrome: Timeless, durable, and easy to match with accessories. Its main drawback is that it shows water spots and fingerprints easily, requiring frequent wiping.
- Matte Black: Modern and dramatic. While it hides water spots better than chrome, it can be susceptible to showing dust and mineral deposits from hard water. Use a gentle, pH-neutral cleaner to protect the finish.
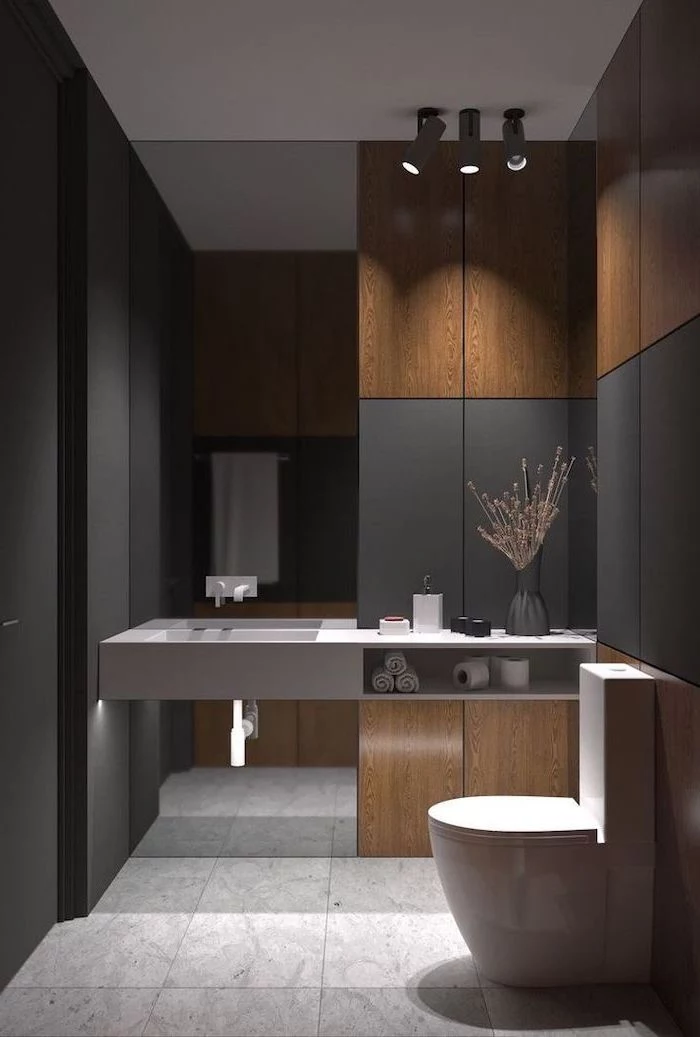
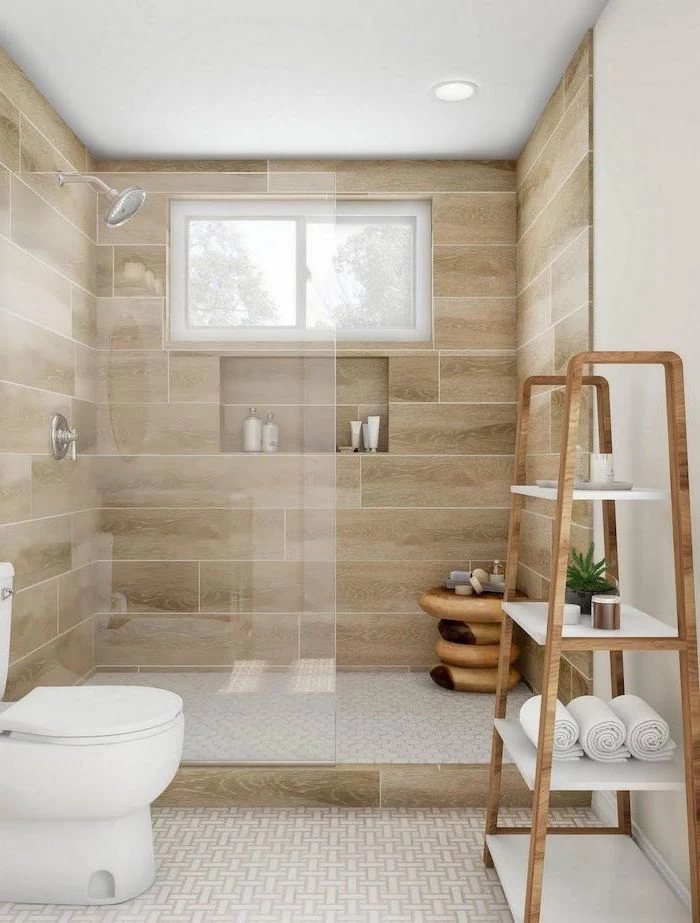
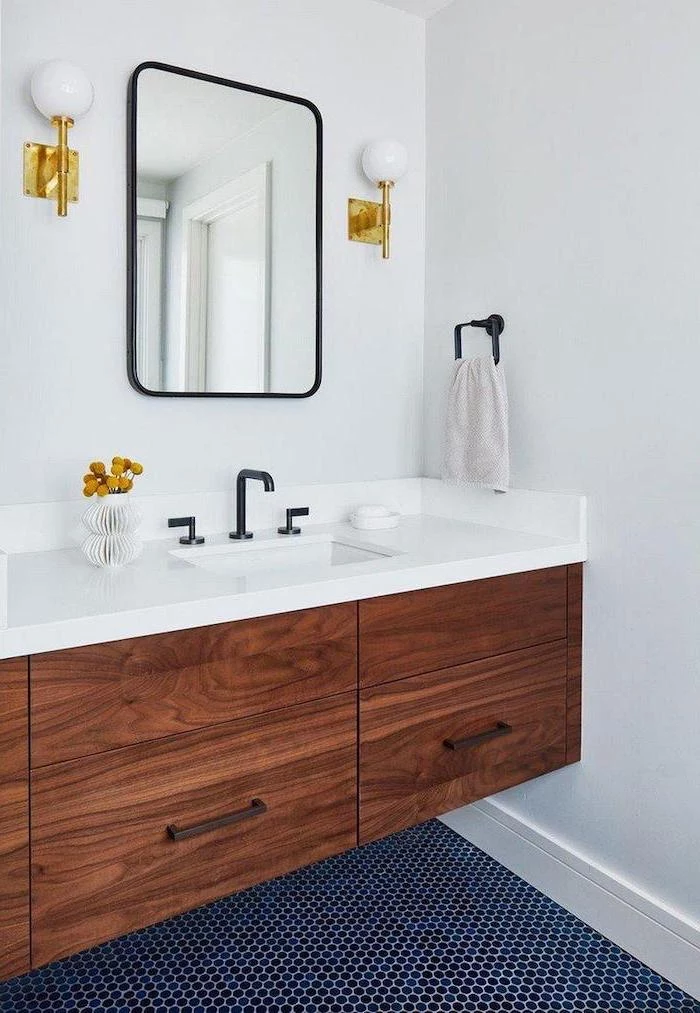
Think vertically. Instead of a wide, short vanity that eats up floor space, consider a taller, narrower storage cabinet or ladder-style shelving unit. This draws the eye upward, creating an illusion of height and offering ample storage for towels and toiletries without cramping the room’s footprint.
When selecting tile, think about scale. While tiny mosaic tiles can look busy, you don’t always have to go huge. Sometimes, a medium format tile, like a 4×12 inch subway tile, laid in a vertical stack bond pattern, can draw the eye upward and make the ceiling feel higher. The key is minimizing visual noise through simple patterns and matching grout.
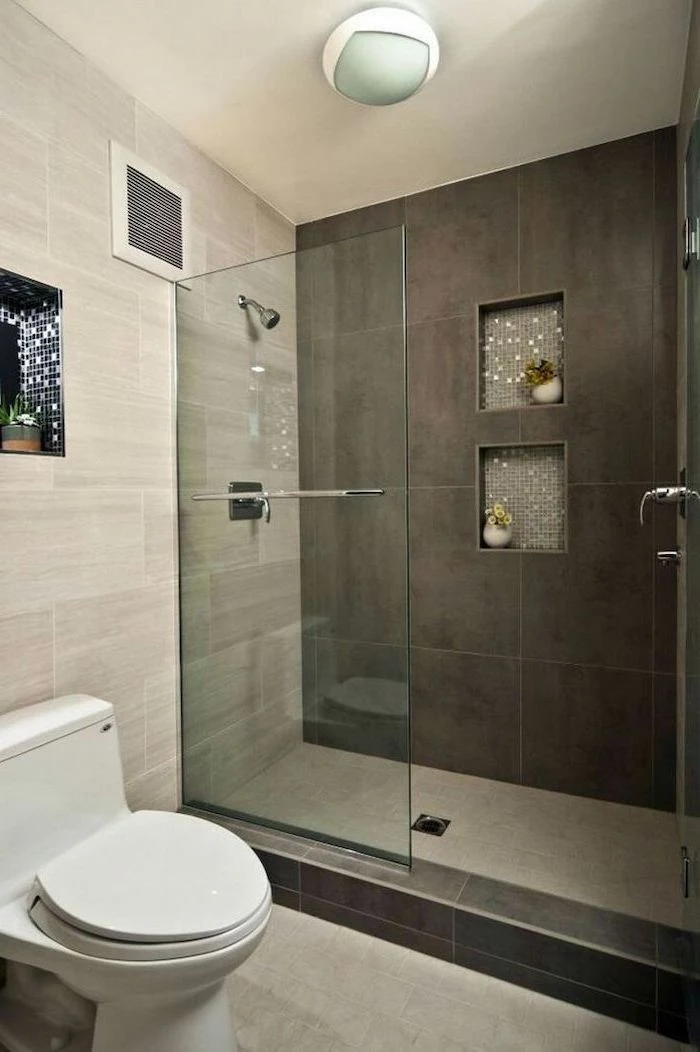
- Eliminates the need for a separate, often bulky shower caddy.
- Provides a sleek, integrated spot for soaps and shampoos.
- Can be a design feature when tiled with an accent pattern.
A built-in shower niche is one of the most functional upgrades you can make. Just ensure it’s planned before tiling and is fully waterproofed, with a slight slope on the base to allow for drainage.

The one thing to splurge on? A high-quality thermostatic shower valve. Unlike a standard pressure-balance valve, a thermostatic one (from brands like Grohe or Hansgrohe) lets you set an exact temperature and keeps it constant, even if someone flushes a toilet elsewhere. It’s a small daily luxury and a safety feature that elevates your entire shower experience.
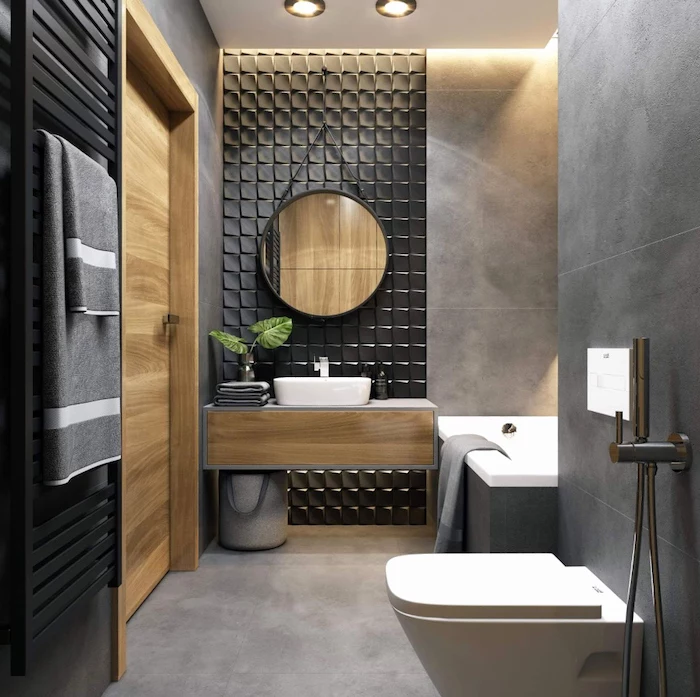
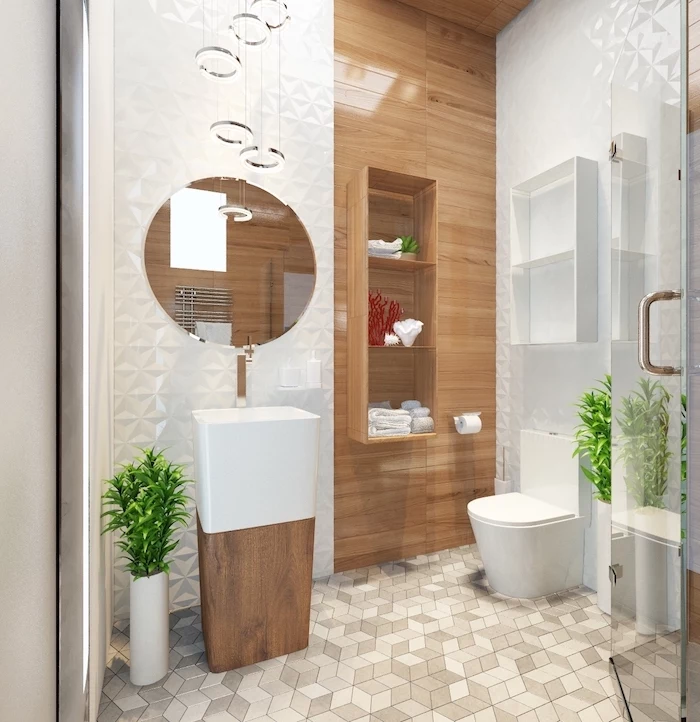
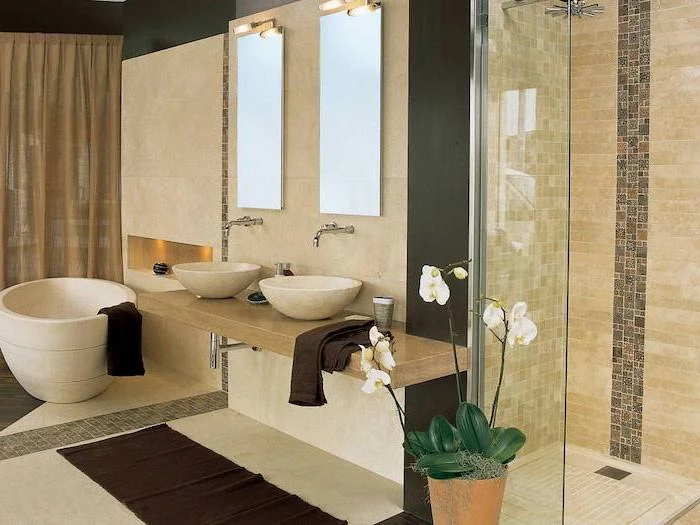
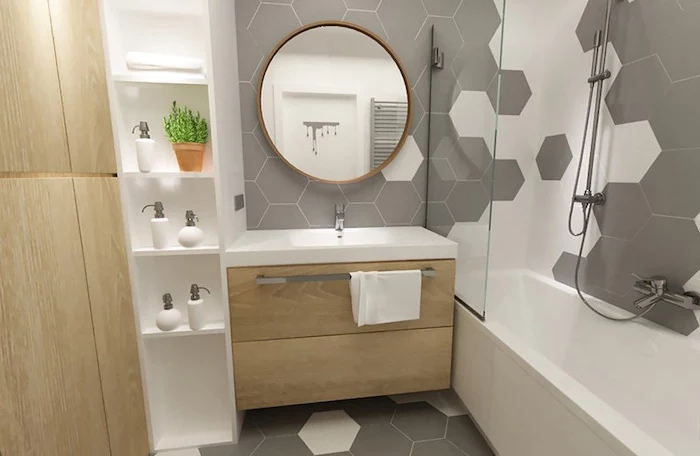
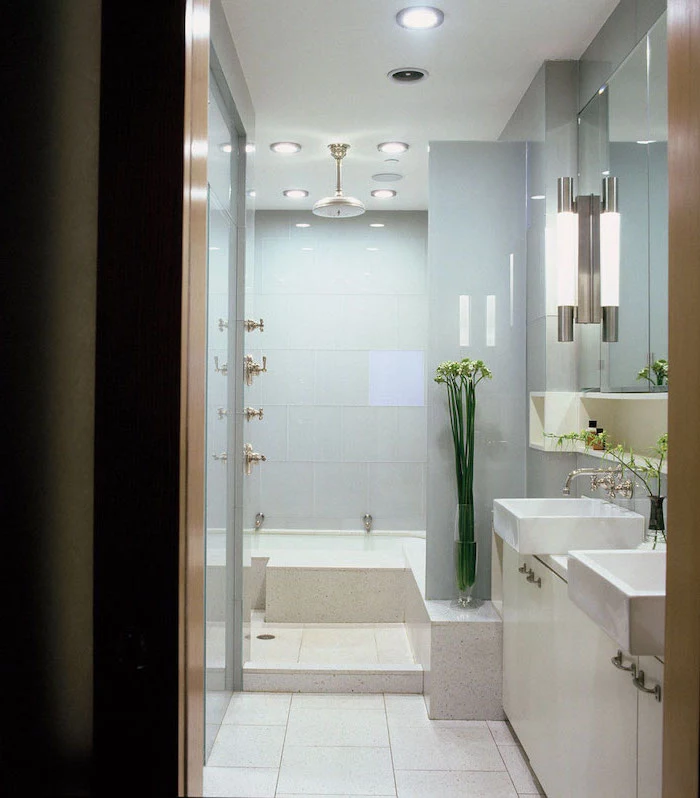
A round mirror can soften the hard lines and angles of a small, boxy bathroom.
It creates a focal point without adding visual weight. For very narrow bathrooms, consider two tall, slim mirrors side-by-side over a double vanity or a single wider one. This can create a sense of width and break up a large, tiled wall.

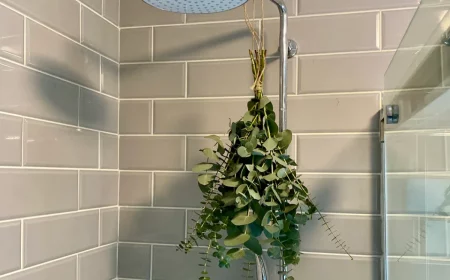
Don’t forget the sensory details. Texture adds warmth and prevents a minimalist space from feeling sterile. Consider a reeded or fluted glass shower screen, a vanity with a tactile wood grain, or plush, high-quality towels. These elements don’t take up space but add a layer of perceived luxury and comfort.
Need a high-impact update on a tight budget?
Focus on the ‘jewelry’ of the bathroom. Changing out an old, builder-grade vanity light for a modern sconce, replacing the faucet with a sleek new model, and swapping cabinet knobs and drawer pulls can completely transform the feel of the room for a few hundred dollars and a weekend of work.
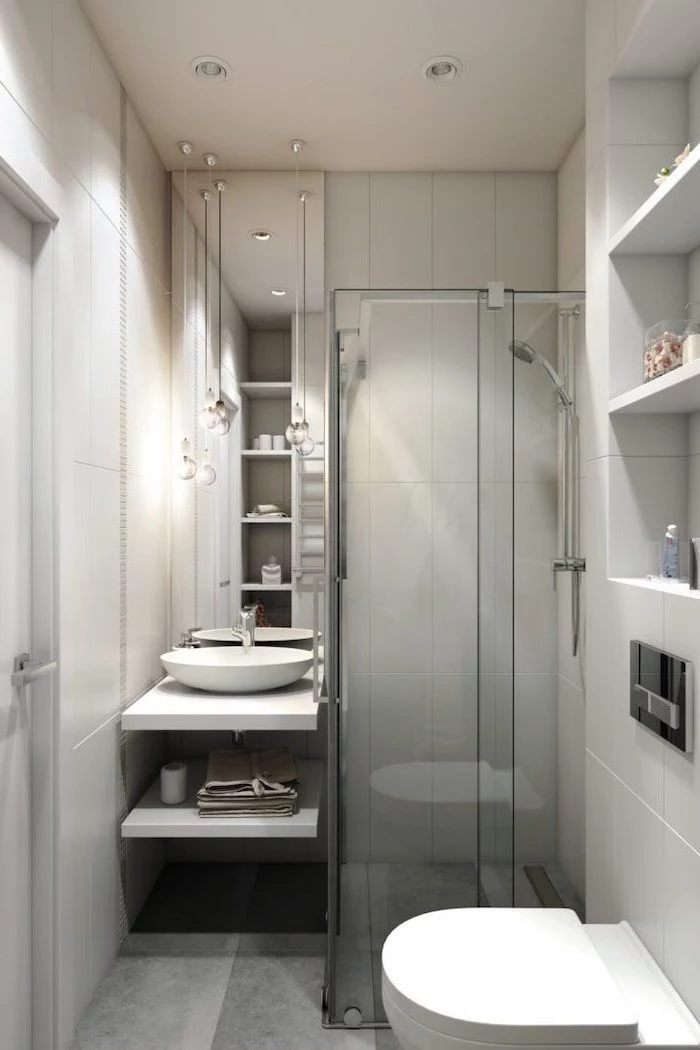
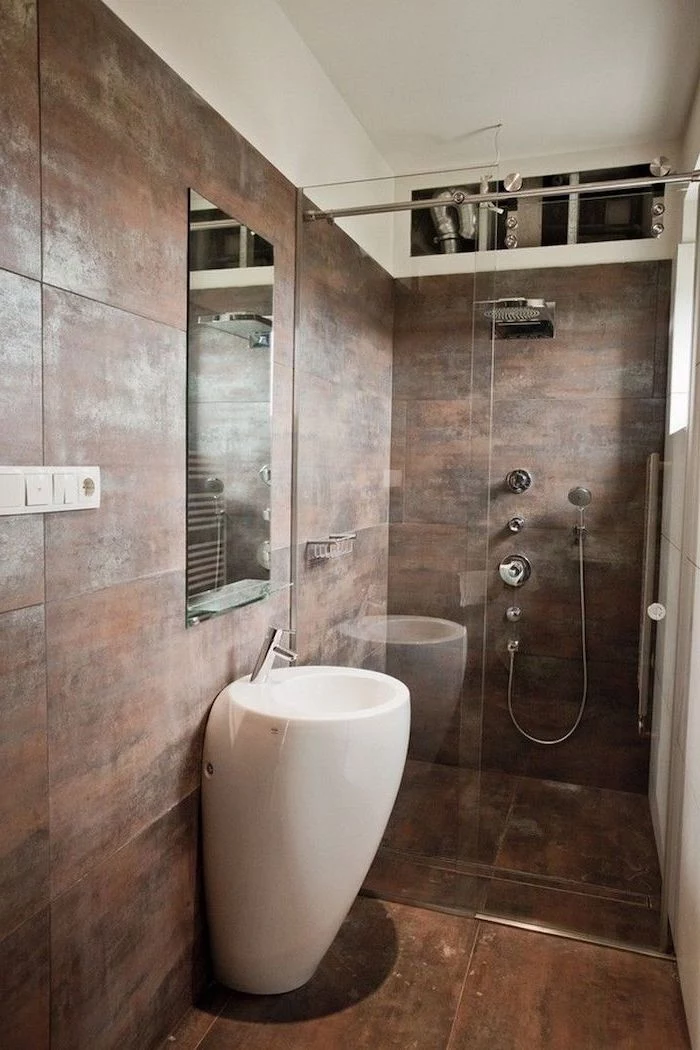
Glass Panel: A single, fixed glass panel is a minimalist and cost-effective alternative to a full shower door. It contains most of the water splash while keeping the room feeling open and bright.
Sliding Door: Ideal for tight spaces where a swinging door would hit a toilet or vanity. Look for modern, frameless versions with high-quality rollers for a smooth, quiet operation.
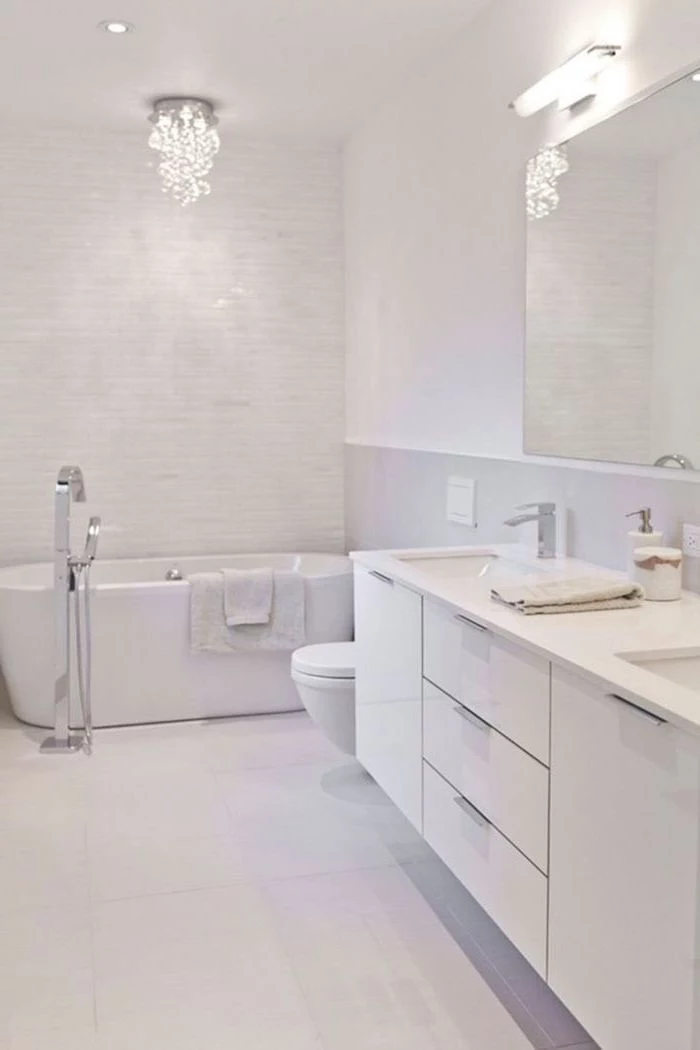
- It makes cleaning the floor underneath effortless—no awkward corners to navigate.
- It exposes more flooring, creating an uninterrupted line that makes the room feel wider.
- It provides a lighter, more ‘architectural’ aesthetic than a heavy, boxy cabinet.
The key is the floating vanity. Even a small one, like IKEA’s GODMORGON series, can dramatically alter the perception of space in a tight bathroom.
A common mistake: Inadequate ventilation. A noisy, ineffective fan is more than an annoyance; it’s a recipe for mold, mildew, and peeling paint. Invest in a quiet, high-capacity fan rated for your room’s square footage. Models from Panasonic’s Whisper series are renowned for being powerful yet nearly silent, and many include timers or humidity sensors for automatic operation.
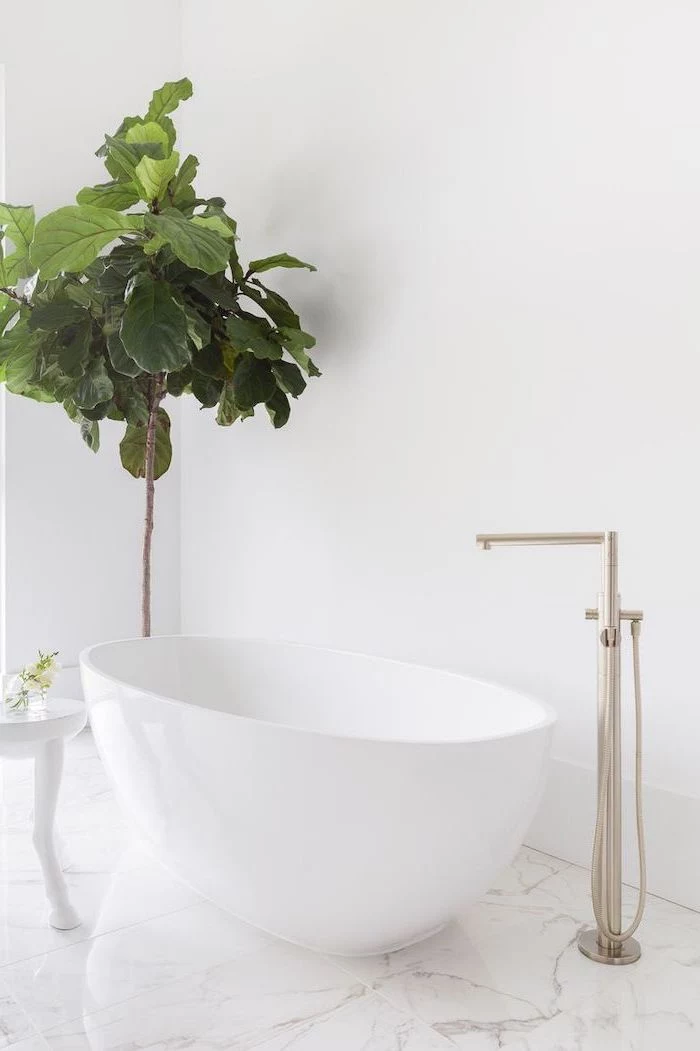
Look for inspiration in Japanese design, which has mastered the art of the small, functional bathroom. Principles like using natural materials (light wood, stone), maximizing natural light, and incorporating deep ‘ofuro’ style soaking tubs that often have a smaller footprint than standard Western tubs can be beautifully adapted.
For an ultra-clean look, consider outlets inside drawers or medicine cabinets. This allows you to keep electric toothbrushes and shavers plugged in and charging but completely out of sight, freeing your countertop from the clutter of cords and devices. It’s a small custom detail that makes a big difference in daily use.