Your Complete Guide to Pampas Grass (Without the Mess)
I’ve worked with all kinds of flowers and branches over the years, and let me tell you, few things make a statement quite like pampas grass. I’ll never forget the first time I really handled it for a big project. I was still learning the ropes and my mentor tasked me with creating this huge, dramatic entrance piece. The moment I saw the giant, feathery plumes, I was in awe. I was also completely unprepared for the leaves.
In this article
- First Things First: You Just Bought Some Pampas Grass… Now What?
- Understanding What You’re Working With
- How to Harvest and Preserve Pampas Like a Pro
- The Great Debate: Hairspray vs. Floral Sealant
- Choosing the Perfect Vase and Arranging Your Stems
- Project Idea: A Stunning Pampas Grass Wreath
- The Really Important Stuff: Safety
- Inspirational Gallery
One careless swipe and a razor-thin leaf left a fiery red line across my arm. Ouch. It was a fast lesson: this plant is beautiful, but it demands respect.
These days, you see pampas grass everywhere. It’s a designer’s dream for adding height, texture, and a soft, neutral vibe to any space. But there’s a bit of an art and science to it. If you want that high-end look without a constant snowstorm of shedding, you need to know how to handle it properly. So, let’s get into the nitty-gritty of what the pros do, from harvesting it right to making it last for years.
First Things First: You Just Bought Some Pampas Grass… Now What?
Okay, let’s tackle the most common scenario. You just bought a bundle of pampas, brought it home, and now your floor is covered in fluff. Don’t panic! This is totally normal, and here’s the quick-fix guide to get it under control.
First, take it outside. Seriously, do not skip this step. Give each stem a gentle but firm shake to dislodge all the loose bits. You’ll be surprised how much comes off.
Next, it’s time to fluff it up. If your pampas arrived looking a little flat or compressed (especially if you ordered it online), a hairdryer is your best friend. Set it to a low heat and low speed, and gently blow-dry the plumes from about a foot away. You’ll see them open up beautifully. It’s a game-changer.
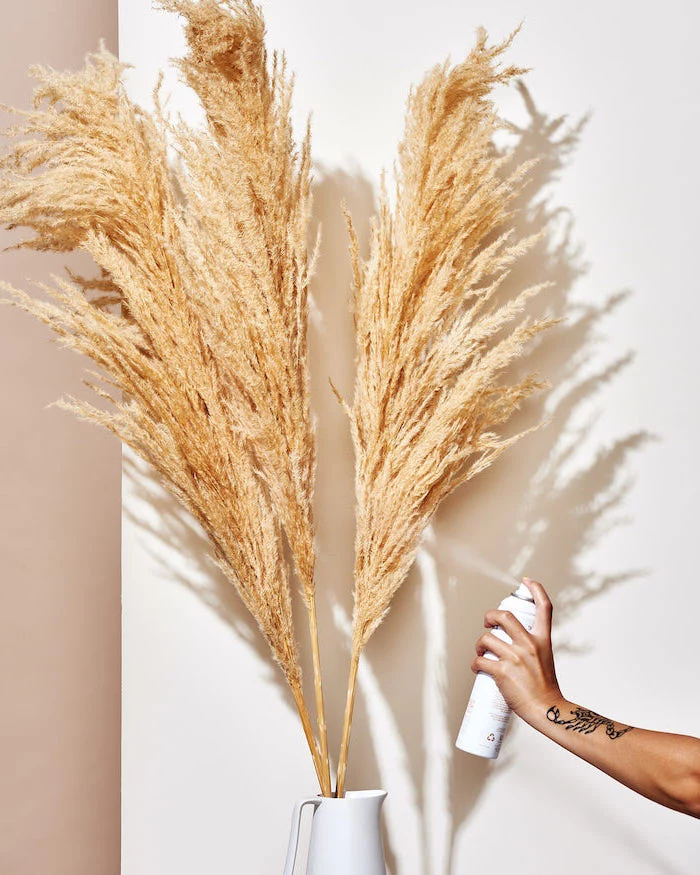
Finally, you need to seal it. We’ll get into the details of this later, but a light coat of a floral sealant or even a strong-hold hairspray will lock everything in place. Once it’s dry, you can bring it inside, mess-free.
Understanding What You’re Working With
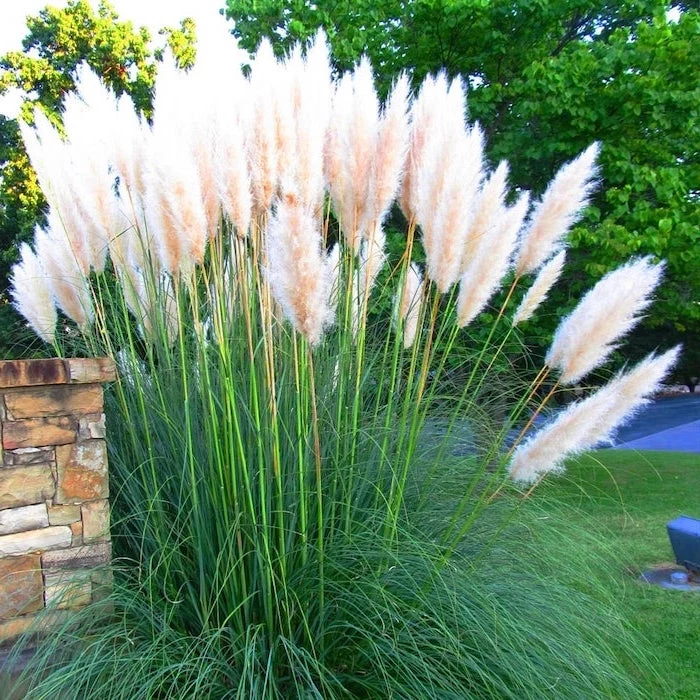
Before you start arranging, it helps to know a little about the plant itself. Pampas grass is a perennial that grows in these massive clumps, sending up those gorgeous plumes we love. But those plumes have a job: to spread seeds. The fluffy, silky hairs are designed to catch the wind and carry seeds far and wide. That’s why it sheds so much! It’s literally built to fall apart.
And those leaves? They are no joke. The edges are finely serrated, like a tiny saw. This is the plant’s defense mechanism. A quick tip: Always wear thick gloves when you’re handling the raw plant, and always hold it by the main stem, far away from the leafy base. I recommend sturdy leather or suede gloves, not the thin fabric kind. Your hands will thank you.
Heads up! The common variety of pampas grass is actually considered an invasive species in many warmer climates because it spreads so aggressively and can be a fire risk. Before you think about planting it in your yard, it’s a good idea to check your local guidelines. Many experts now recommend using sterile varieties or amazing regional alternatives instead.

How to Harvest and Preserve Pampas Like a Pro
If you’re lucky enough to have access to pampas you can cut yourself, timing and technique are everything. The difference between cheap, shedding pampas and the high-quality stuff you see in boutiques often comes down to this process.
When to Cut: The sweet spot is late summer or early fall, right before the rainy season starts. You want plumes that look full and have their color, but still feel a bit tight and compact. If you wait too long, they’ll already be in full-on shed mode.
The Right Tools: You’ll need more than kitchen scissors. The stems are tough and fibrous. Grab a pair of long-handled loppers or sharp pruning shears—they’ll run you about $30 to $50 at a hardware store but are a fantastic investment for any yard work. Don’t forget those thick gloves and maybe even some safety glasses to protect your eyes from dust and debris.
Drying for Durability:
To get that long-lasting, no-mess result, you need to dry the stems properly. Gather three to five stems and tie them together with twine (rubber bands can rot and break). Hang these bundles upside down in a dark, dry place with good airflow, like a garage or a basement. Darkness prevents the color from fading, and the airflow stops mold. Give it about two to three weeks. You’ll know they’re ready when the stems feel stiff and snap cleanly.
The Great Debate: Hairspray vs. Floral Sealant
Once your pampas is perfectly dry, you have to seal it. This is the magic step. So what should you use?
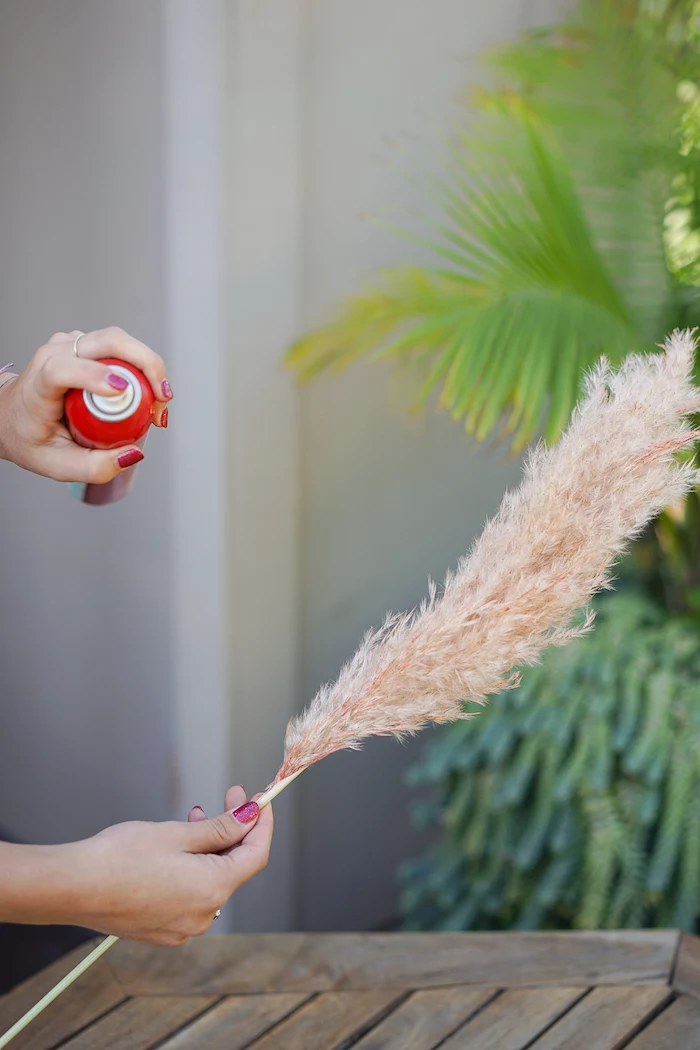
Honestly, a lot of people recommend a strong-hold aerosol hairspray, and it works in a pinch. It’s cheap and you probably already have some. The downside? Hairspray is sticky, which means it can attract and hold onto dust over time, and some formulas can yellow a bit. It’s a good-enough solution, but not a great one.
For a truly professional finish, you’ll want to use a clear matte floral sealant or spray lacquer. Look for brands like Krylon Matte Finish or Design Master Super Surface Sealer, which you can find in the spray paint aisle at places like Home Depot or Michaels for around $8 to $12 a can. This stuff creates a durable, non-sticky finish that locks in the seeds without attracting dust. Just hold the can about 12 inches away and give the plume a light, even mist all around. Let it dry for an hour or two, and you’re golden.
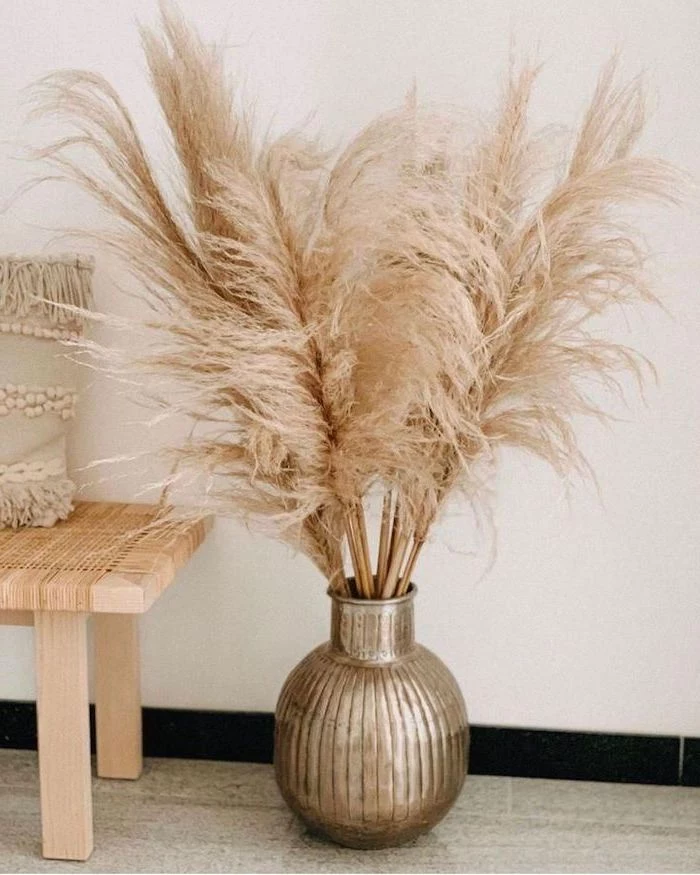
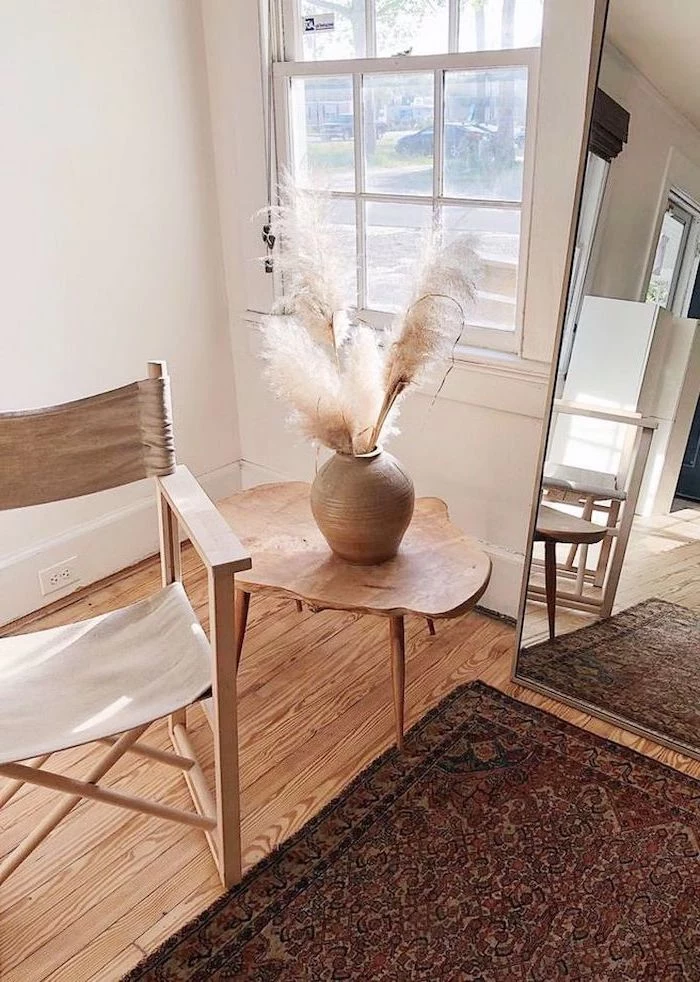
Choosing the Perfect Vase and Arranging Your Stems
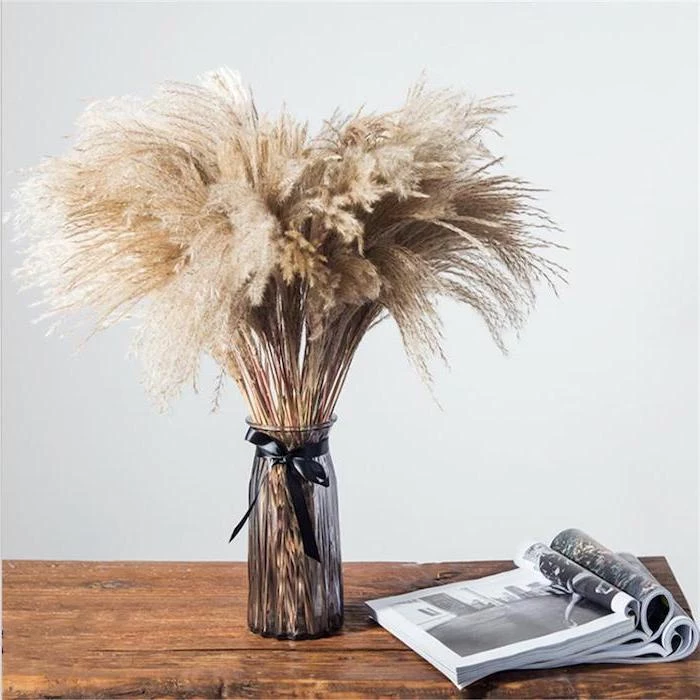
With your pampas all prepped, it’s time for the fun part. Because pampas plumes are so tall and airy, they’re top-heavy. You need a vase that can handle them. Look for something with a solid, heavy base made of thick ceramic, stone, or glass. A flimsy vase is just asking to be tipped over. As a general rule of thumb, the vase should be about one-third the total height of the arrangement for good stability and visual balance.
When arranging:
- Vary the Heights: Use your pruners to trim the stems to different lengths. This creates a much more natural and dynamic look.
- Build a Foundation: Start with your tallest stems in the center and then build outward with the shorter ones.
- Give Them Space: Don’t cram too many stems into one vase! The beauty of pampas is its fluffy shape. Sometimes five perfectly placed stems look way more elegant than fifteen stuffed together.
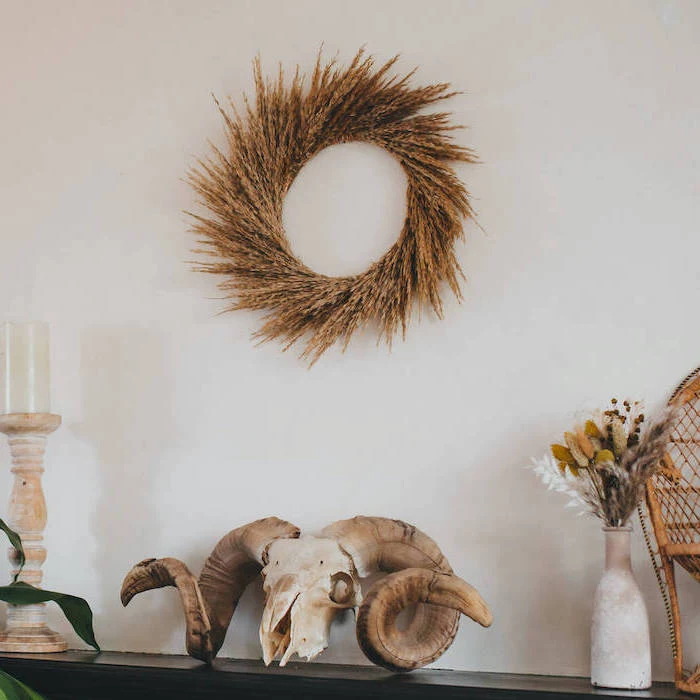
Project Idea: A Stunning Pampas Grass Wreath
Feeling ambitious? A pampas wreath is a gorgeous statement piece. It takes a bit more effort, but it’s totally doable. For a beginner, set aside a good 2-3 hours for this project so you don’t feel rushed.
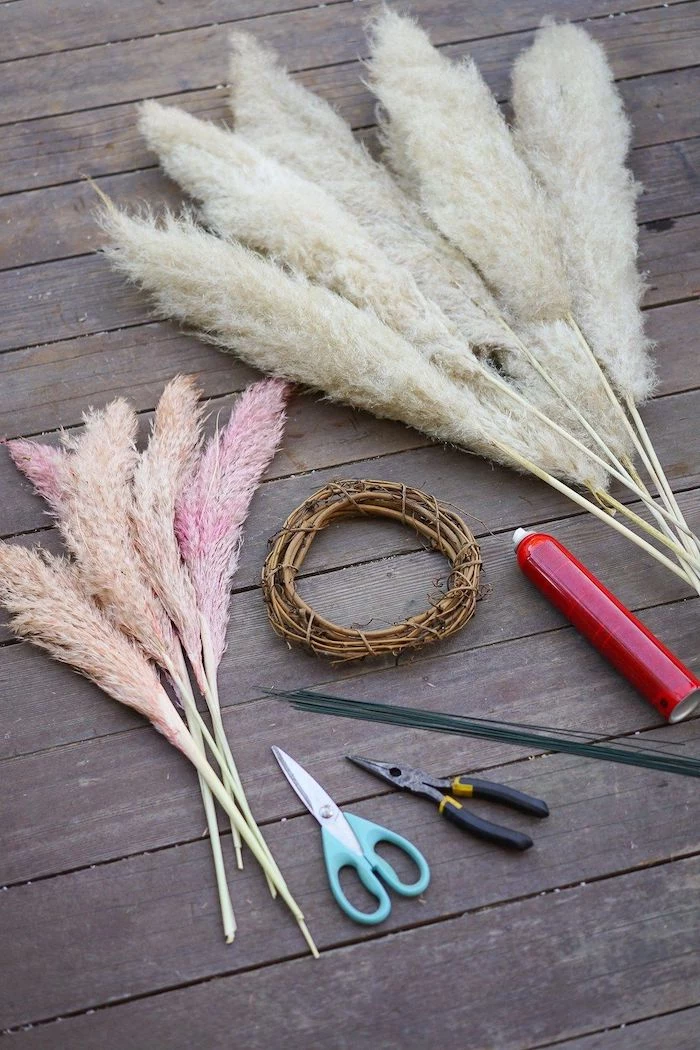
Here’s what you’ll need:
- Wire Wreath Frame: A 14-inch double-rail frame is perfect and costs about $5-$8.
- Pampas Plumes: About 15-20 small to medium plumes, all dried and sealed. This might run you $25-$50 depending on where you source them.
- Paddle Wire: A roll of 22-gauge floral wire is essential. You can get this for $3-$5.
- The Usual Tools: Wire cutters and pruning shears.
Let’s build it:
- Prep your plumes. Cut the stems down to about 6-8 inches long.
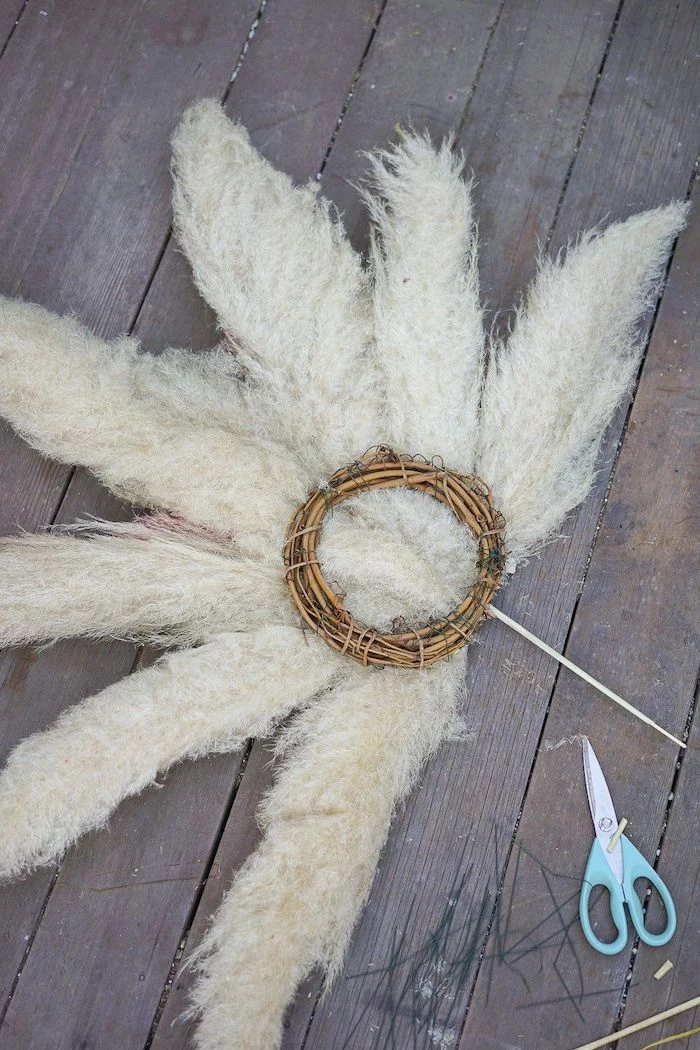
- Make mini-bundles. Group two or three plumes together and fan them out slightly.
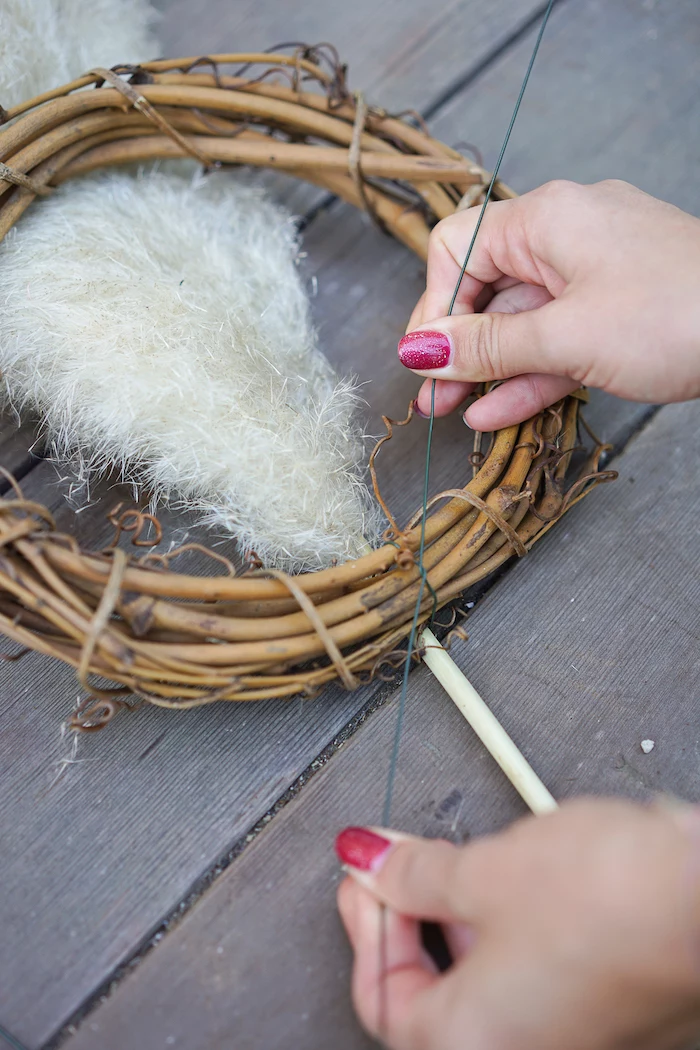
- Attach the first bundle. Secure your wire to the frame by twisting it. Lay your first bundle on the frame and wrap the wire tightly around the stems and the frame 3-4 times. Don’t cut the wire yet!
- Layer and wrap. Place your next bundle so its fluffy tops hide the wired stems of the first one. Wrap it tightly. Continue this pattern all the way around the wreath.
A common beginner mistake: Not pulling the wire tight enough. If the wire feels even a little loose as you go, your wreath will be floppy and sad. Pull that wire TIGHTER than you think you need to after every single wrap. It’s the key to a sturdy, professional-looking wreath.
The Really Important Stuff: Safety
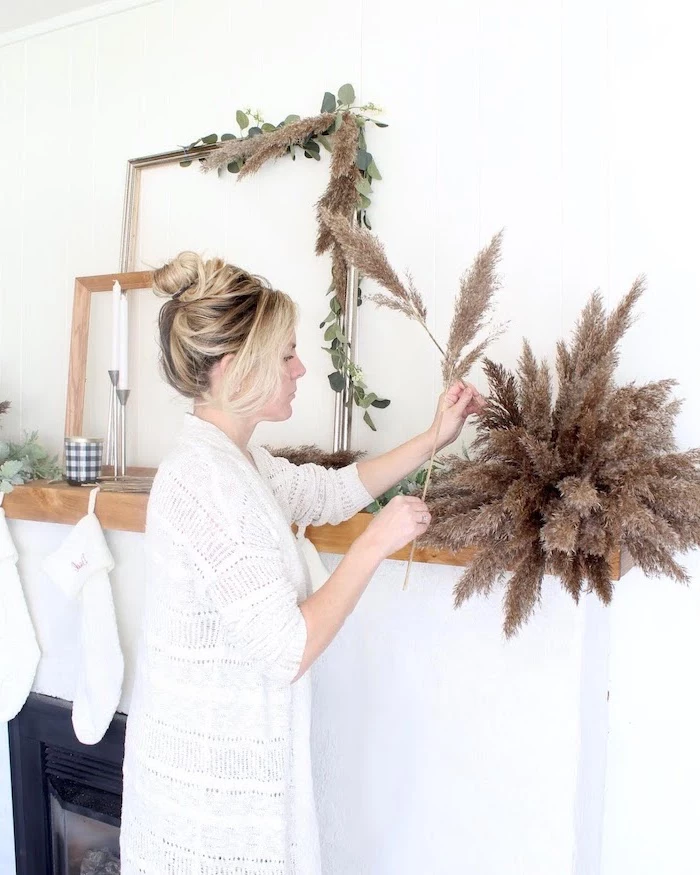
Okay, let’s have a serious chat about safety. Dried pampas grass is extremely flammable. I can’t stress this enough. It should NEVER be placed near open flames like candles, fireplaces, or gas stoves. Keep it away from intense heat sources, too.
By the way, for commercial jobs in public spaces, we often have to treat it with a fire-retardant spray to meet fire codes. If you’re really concerned, you can find products like ‘No-Burn’ online, but for home use, just being smart about placement is usually enough. Always test a spray on a small, hidden piece first.
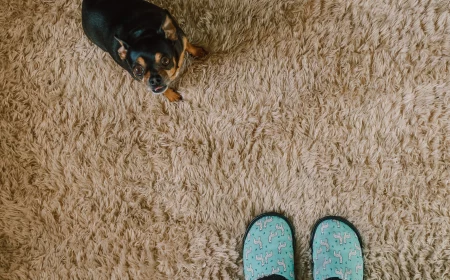
Also, think about allergies and pets. The pollen can be an issue for people with grass allergies. And while it’s not super toxic to cats and dogs, those sharp leaves could be a problem if chewed, so it’s best to keep your arrangements out of reach of curious pets and kids.
With just a little bit of care, a good pampas grass arrangement can last for years, serving as a beautiful, low-maintenance piece of decor. It’s a wonderful way to bring a touch of the natural world inside.
Inspirational Gallery
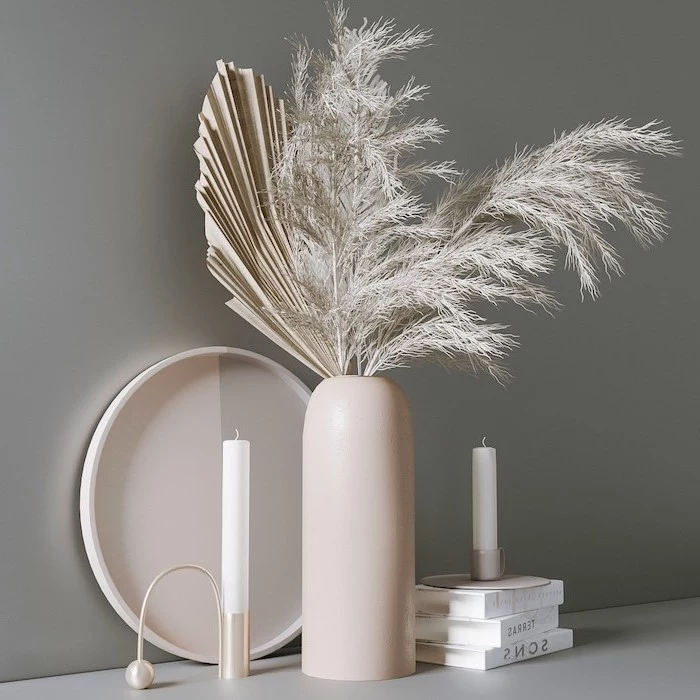
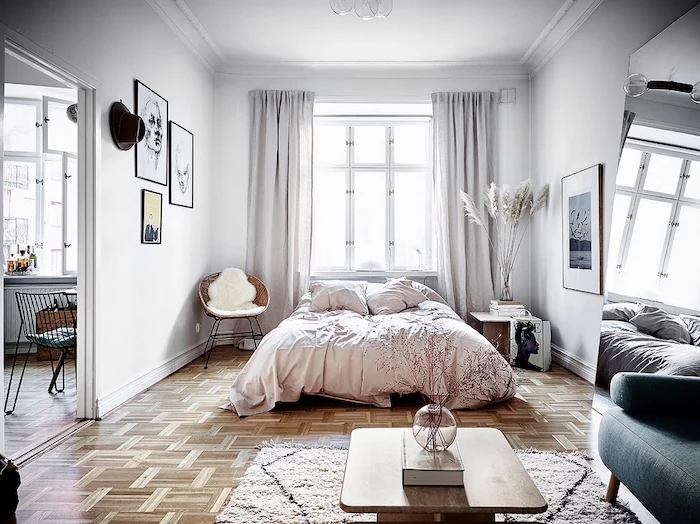
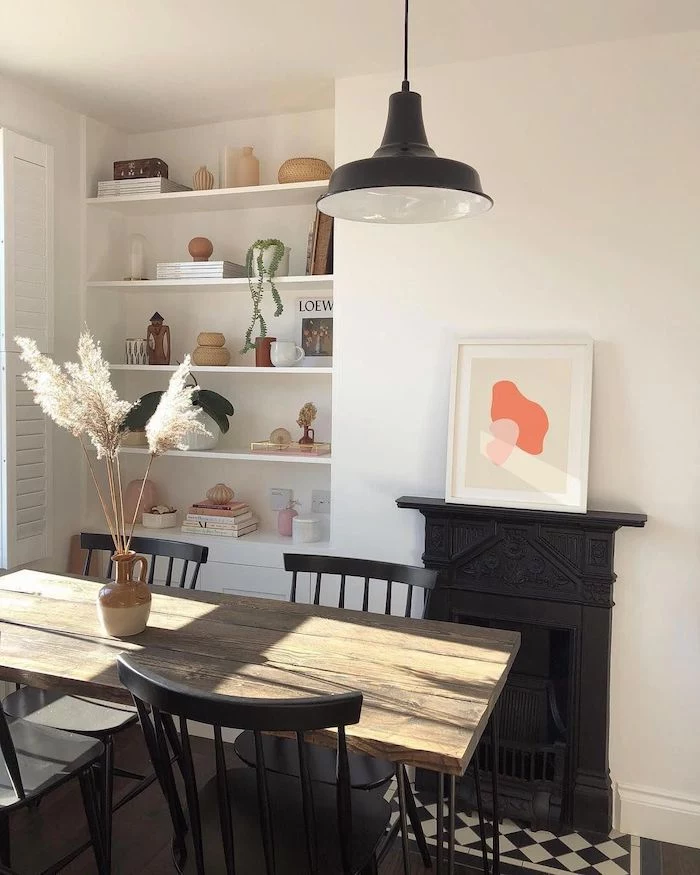
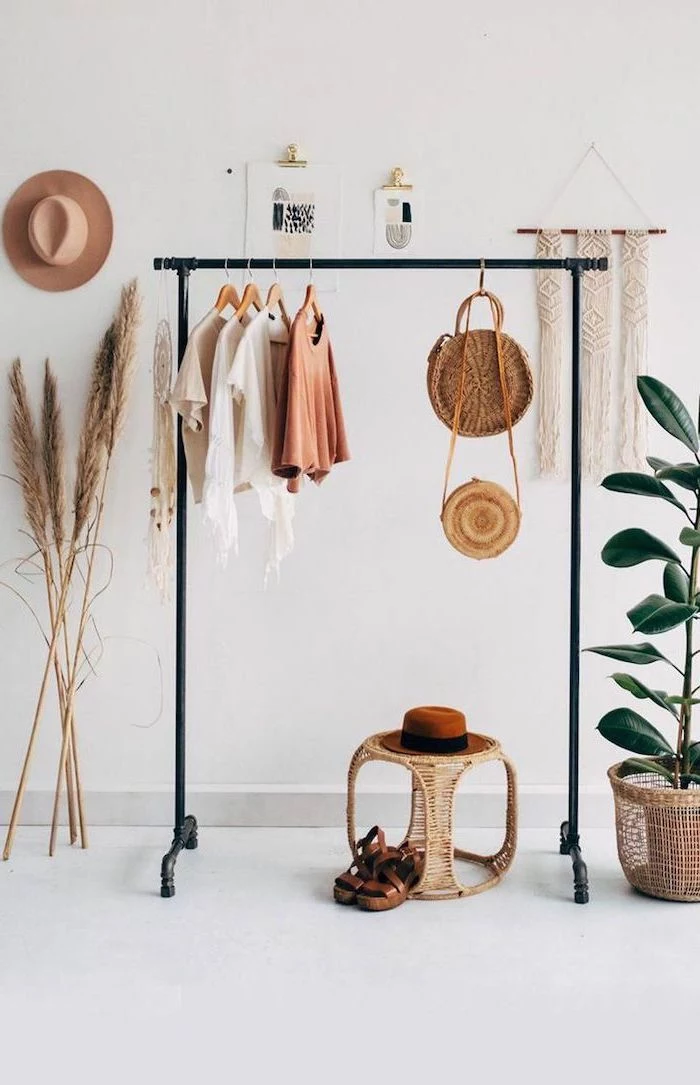
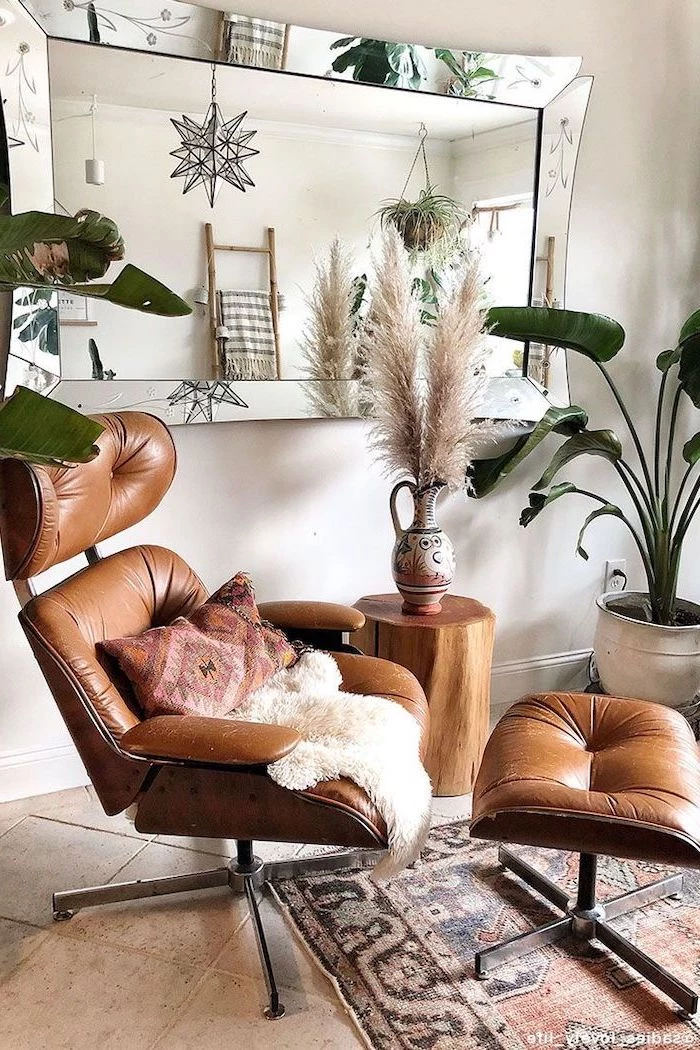
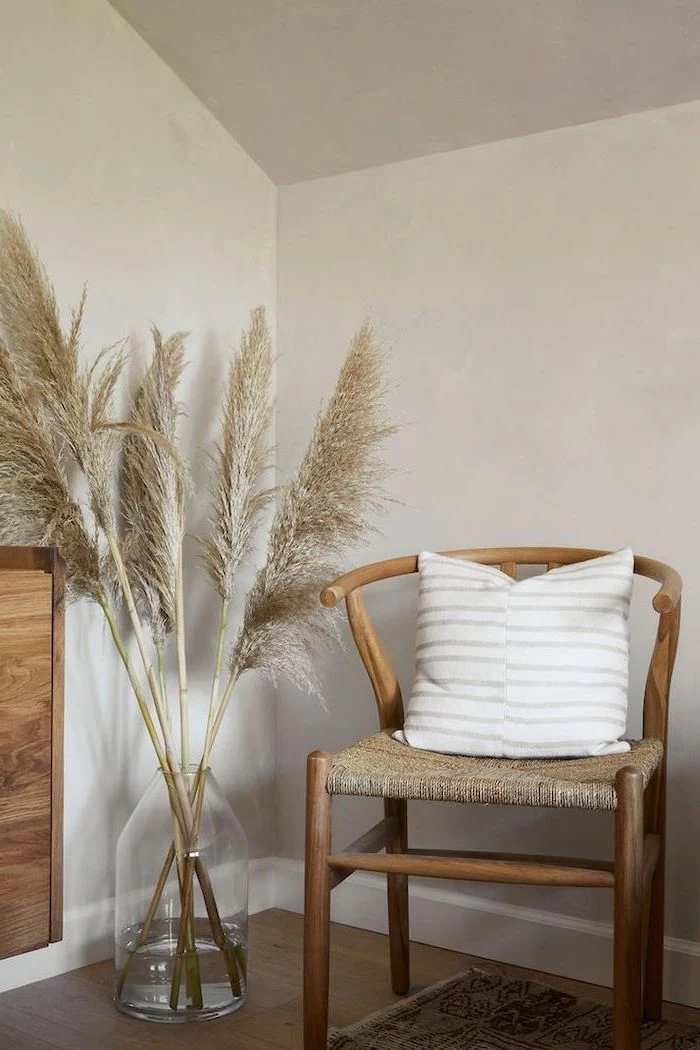
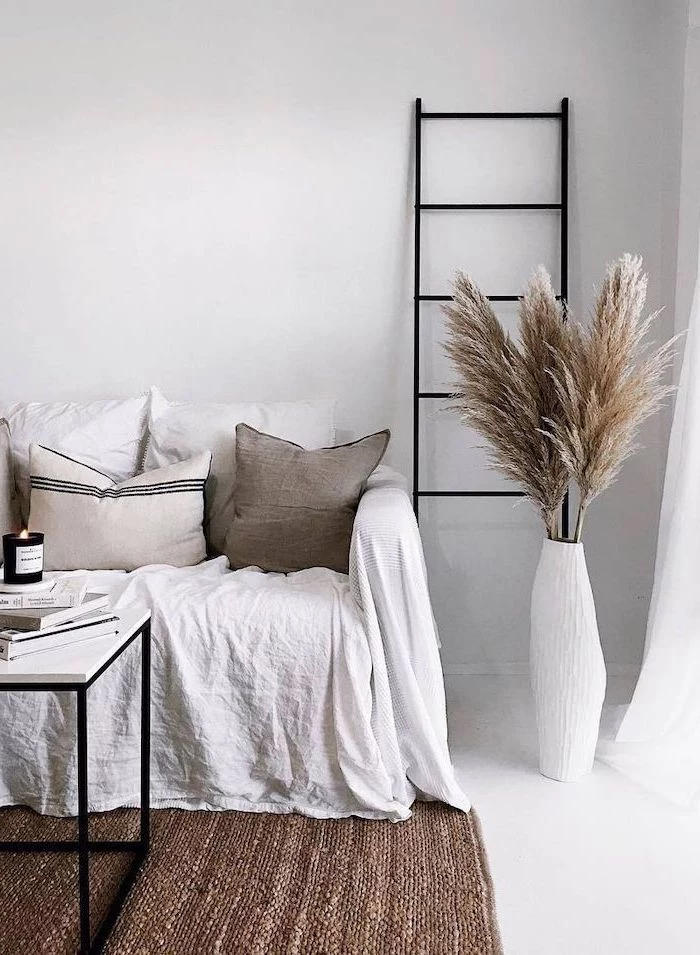
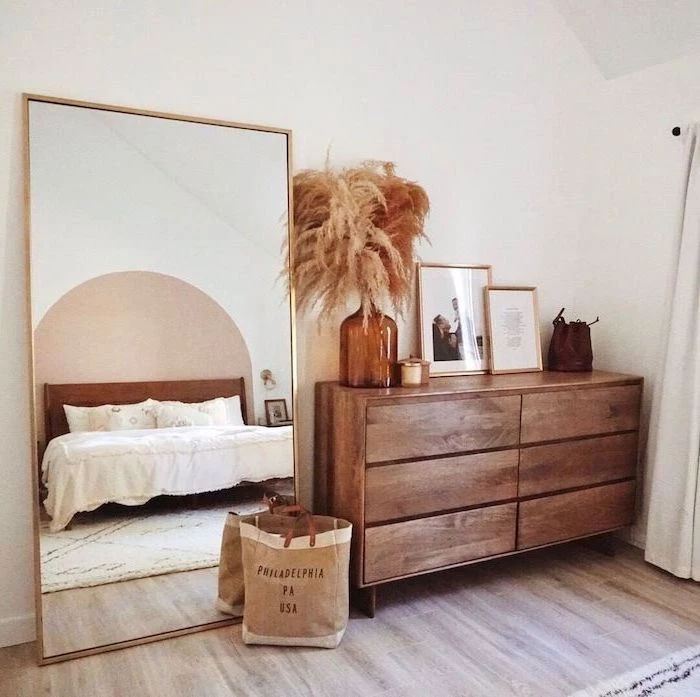
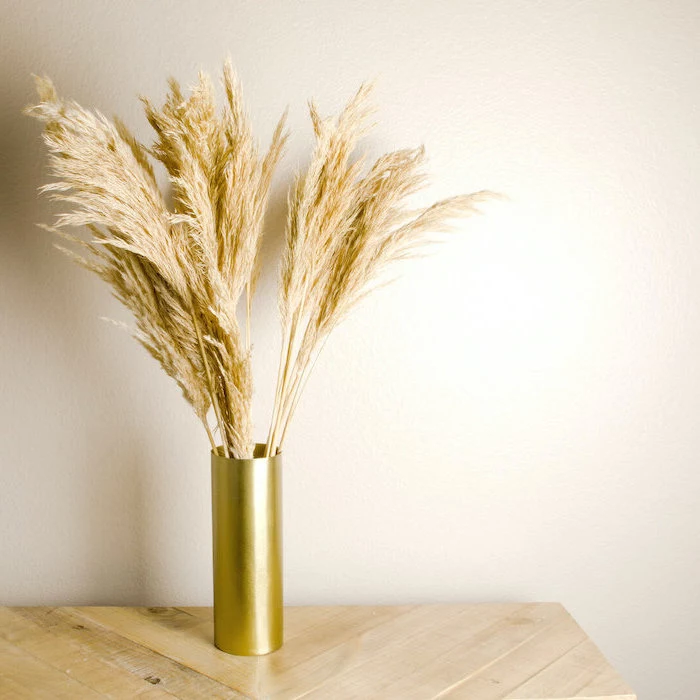
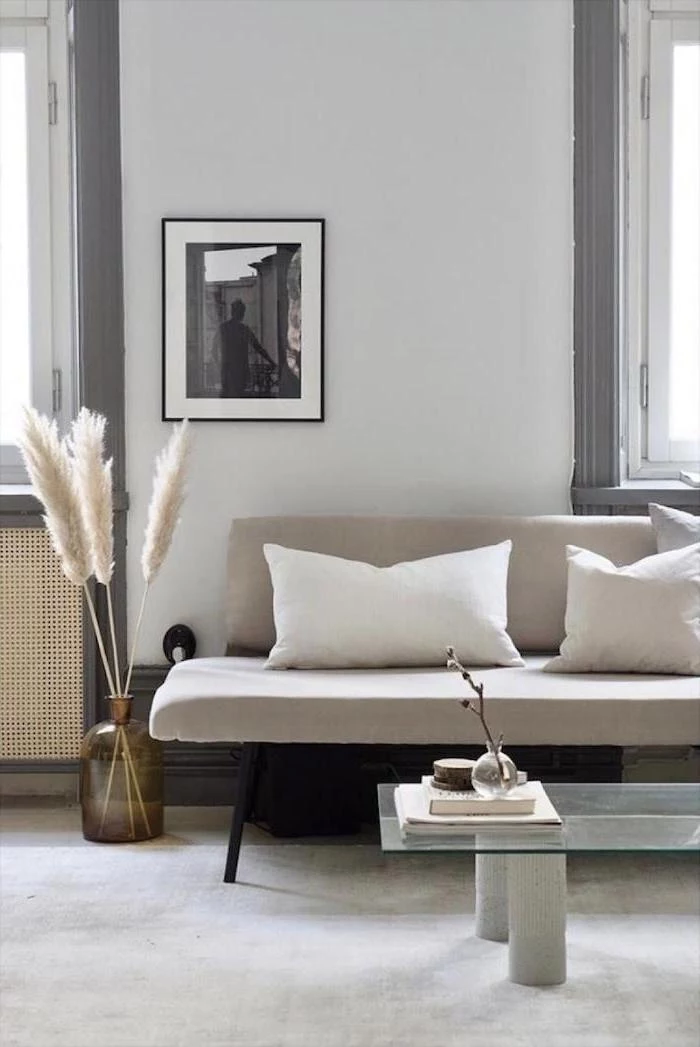
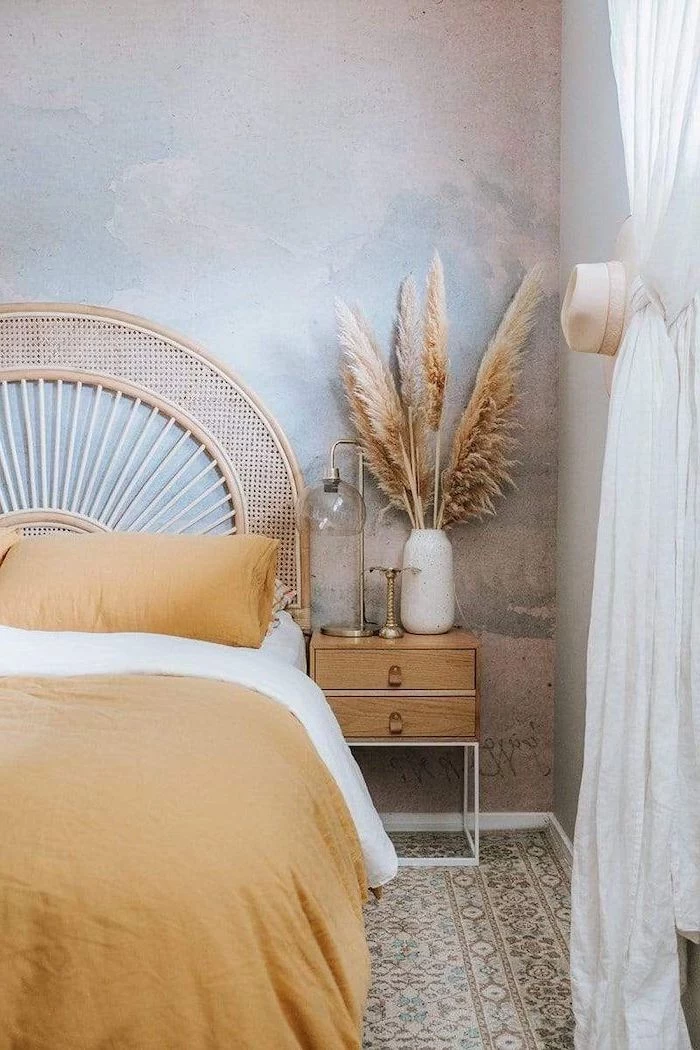
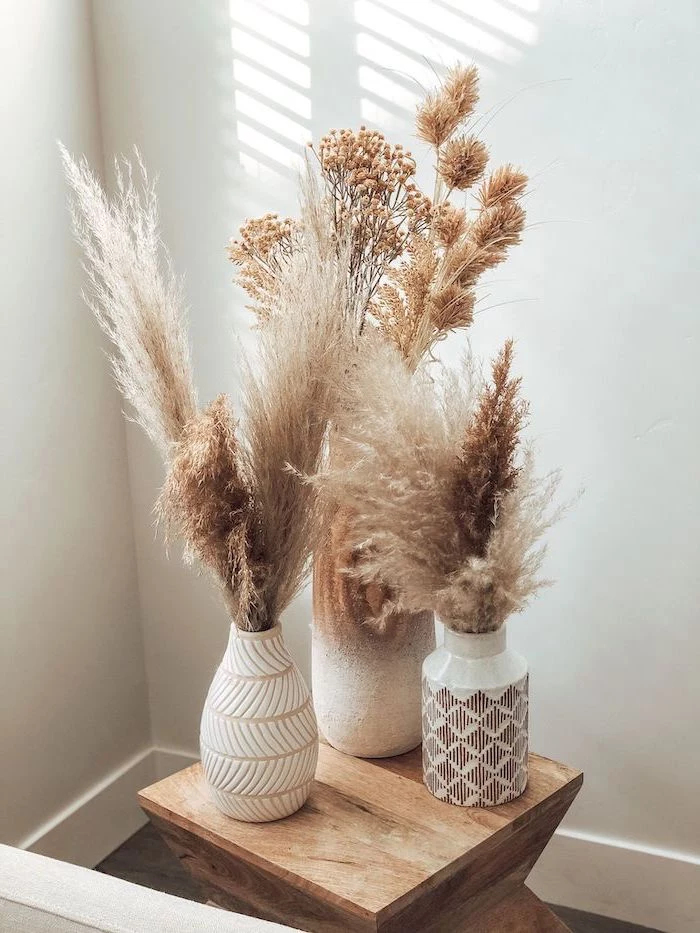
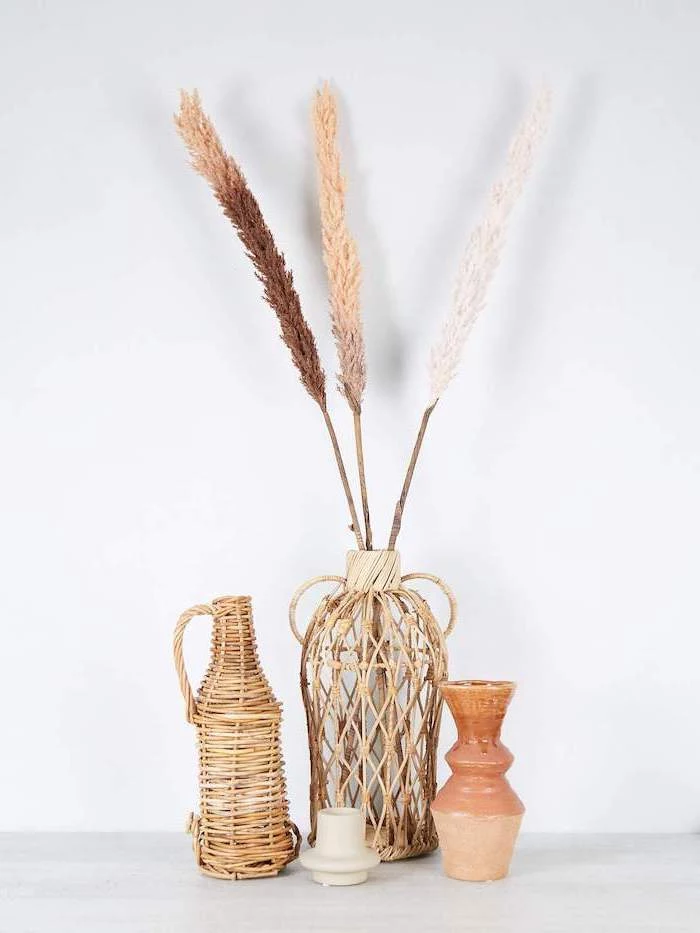
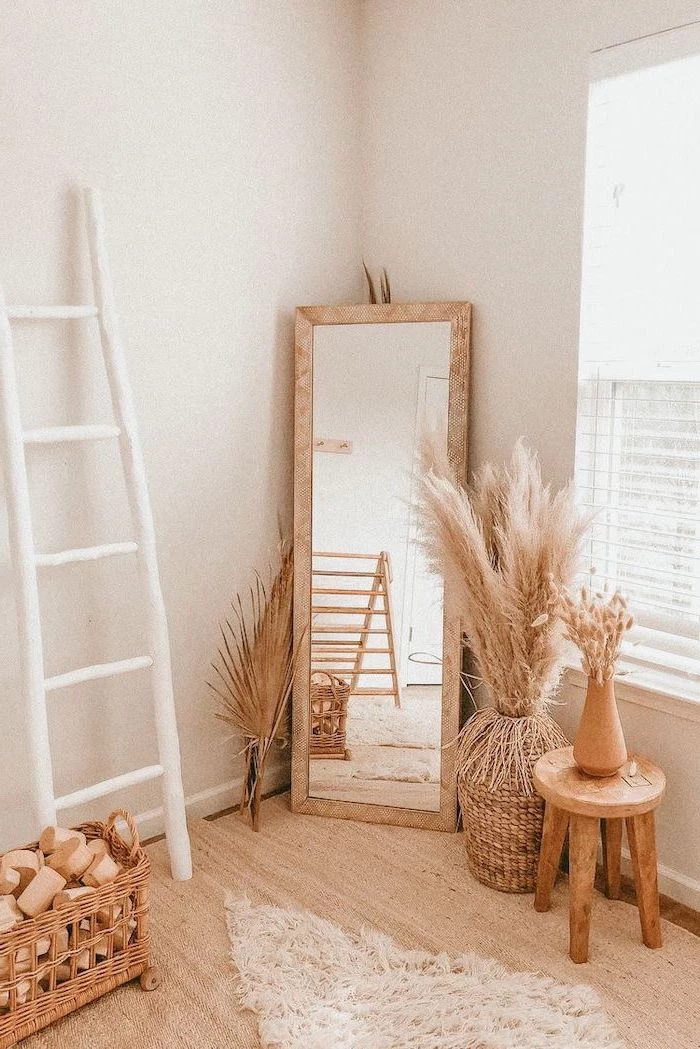
The Vase Matters: The secret to a high-end pampas look often lies in the vessel. For a modern, minimalist vibe, opt for a matte black or white ceramic vase with a narrow neck; this helps prop the stems up for a structured, architectural feel. If you’re aiming for a warmer, more rustic or boho style, a clear, wide-mouthed glass demijohn or a textured terracotta pot allows the plumes to fan out naturally and creates a softer silhouette.
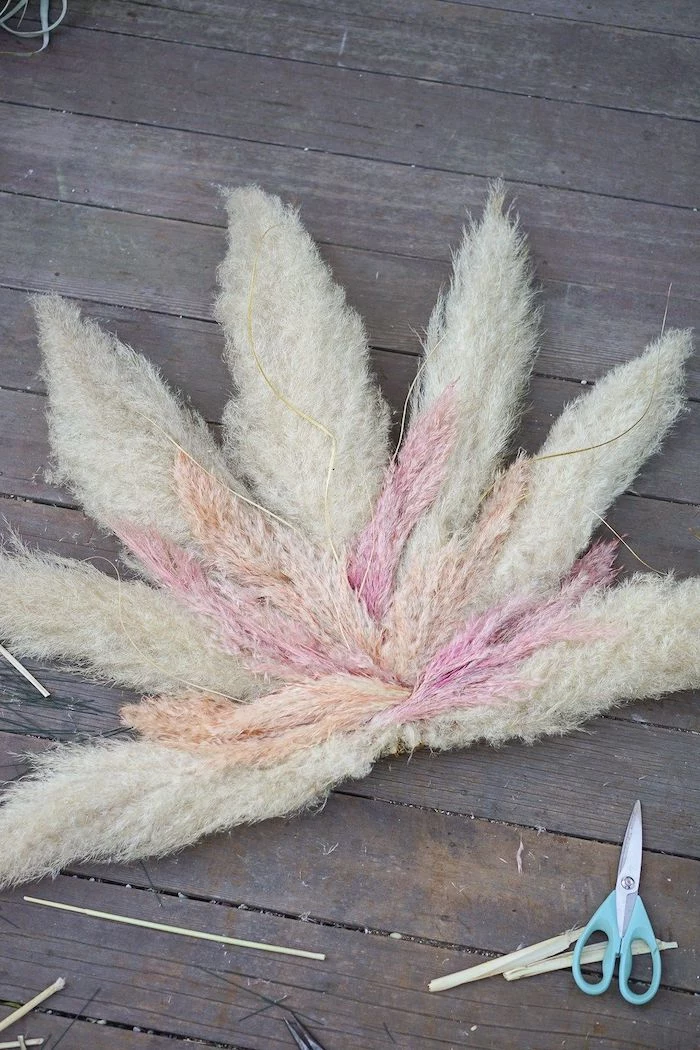
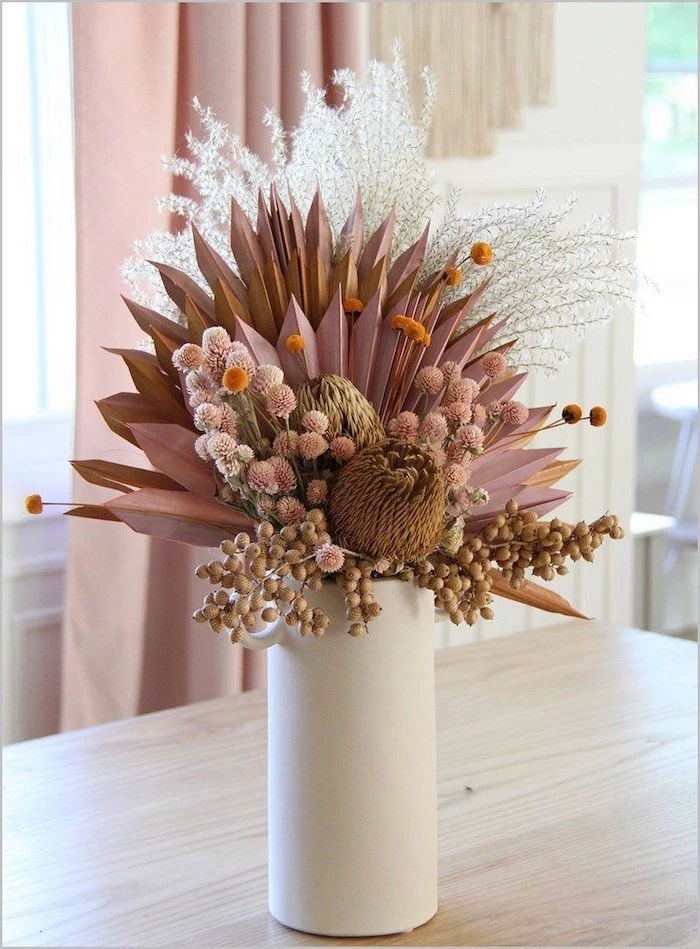
- Create stunning tonal variety by mixing different types of pampas grass.
- Pair the fluffy texture of standard pampas with the sleeker, reed-like forms of ‘Saccharum ravennae’ (Ravenna Grass).
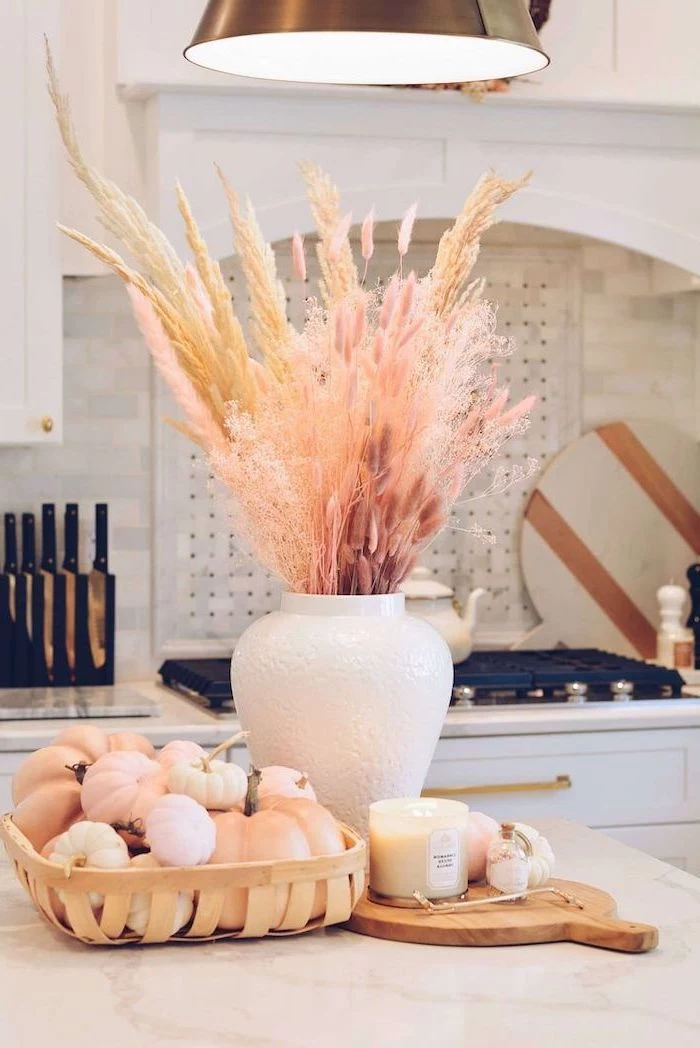
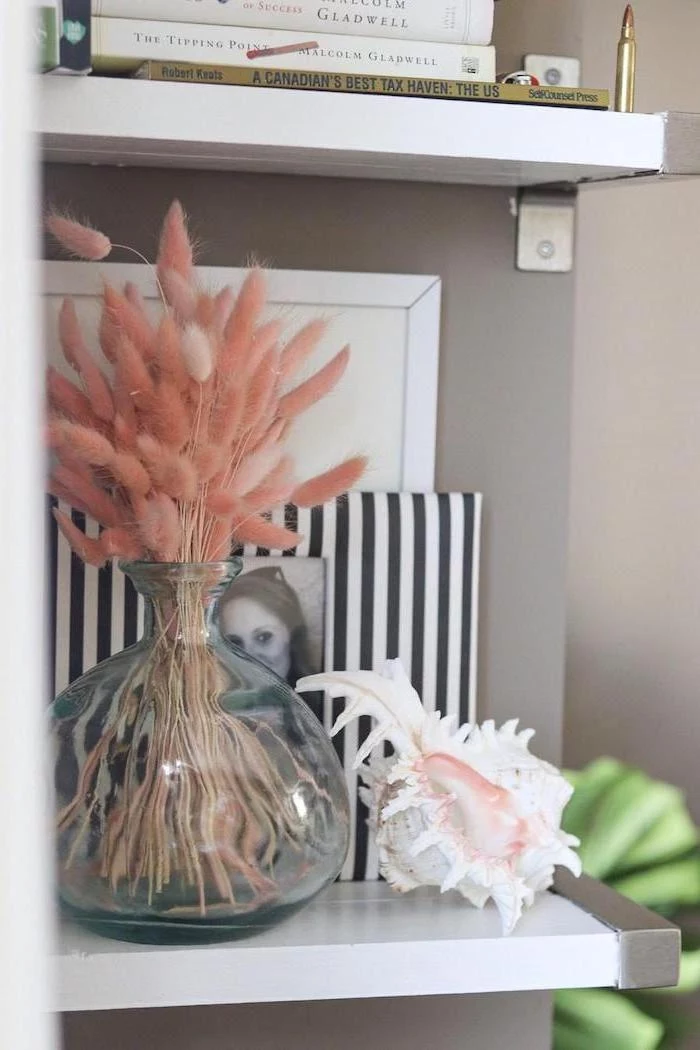
- Incorporate some stems of pink-hued pampas for a gentle, romantic blush of color.
The result? An arrangement with depth, complexity, and a truly professional touch.

A single pampas grass plume can produce over 100,000 seeds, contributing to its status as an invasive species in regions like California and New Zealand.
This is why responsible sourcing is key. Opt for sterile cultivars or high-quality faux pampas from reputable sellers like Afloral to get the look without the ecological risk. If you forage, never discard old plumes in your garden or local wild areas.
Can you trim the fluffy plumes themselves?
Yes, you absolutely can! If a plume is too wide or has an awkward shape for your arrangement, don’t be afraid to give it a ‘haircut’. Use a sharp pair of scissors to carefully snip away at the sides of the plume, shaping it to your desired form. Do this over a bin or outside before you’ve sealed it with hairspray to minimize mess.
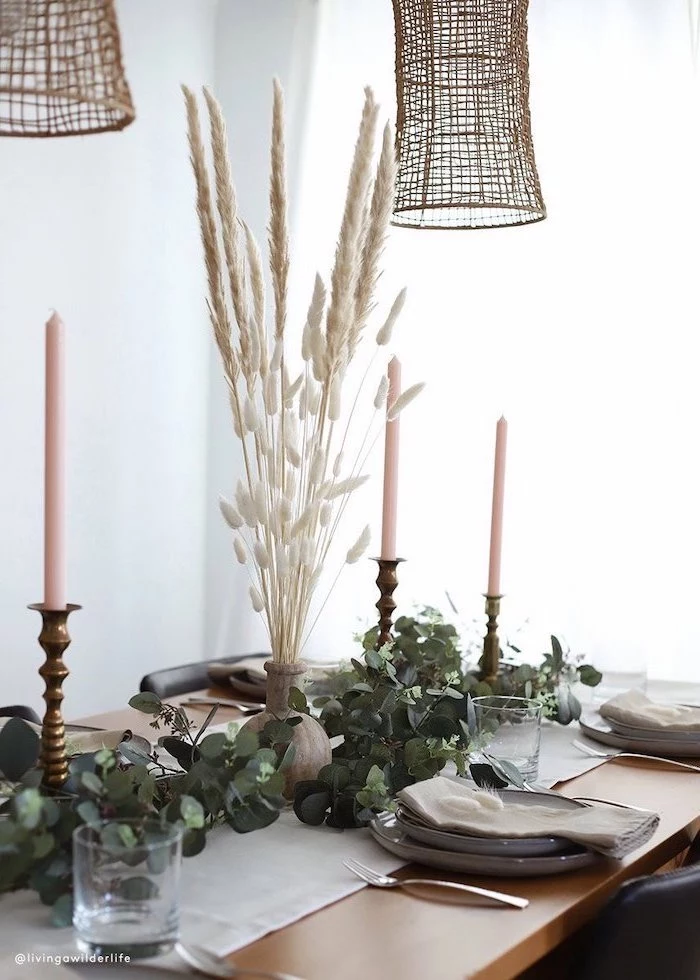
For an arrangement that lasts, think beyond just pampas. Create a richer texture by adding other dried elements. Some of the best companions are:
- Silver Dollar or ‘Baby Blue’ Eucalyptus stems
- Delicate white or pink Bunny Tail Grass (Lagurus ovatus)
- Architectural dried palm spears or sun palms
- Wispy branches of dried Gypsophila (Baby’s Breath)
Pro Tip: Don’t throw away the small, fluffy bits that shed when you first shake out your stems! Collect them in a small decorative bowl or a clear glass lidded jar. It creates a beautiful, textural accent piece for a coffee table or bookshelf, ensuring nothing goes to waste.

Natural Pampas: Offers an authentic, slightly imperfect look with subtle variations in color and texture. Requires shaking and sealing to prevent shedding. The ultimate choice for rustic and boho aesthetics.
Faux Pampas: Zero shedding, perfect for high-traffic areas or homes with pets and allergies. Often more uniform in appearance, but high-end versions from brands like Pottery Barn or West Elm are incredibly realistic.
The best choice depends on your priority: pure authenticity or mess-free convenience.
The secret to the perfect hold: Not all hairsprays are created equal. While any strong-hold spray will work in a pinch, many professional florists swear by L’Oréal’s Elnett Satin hairspray. Its ultra-fine mist provides a strong yet flexible hold without the heavy, sticky residue or ‘wet’ look that cheaper aerosols can leave behind. A light, even coating is all you need.
- They remain perfectly upright and separated.
- The arrangement looks fuller and more intentional.
- Air can circulate between the stems, preventing any mustiness.
The secret? A simple florist’s trick: create a grid of clear tape across the mouth of your wide vase. This gives you small sections to place each stem into, providing structure and control.

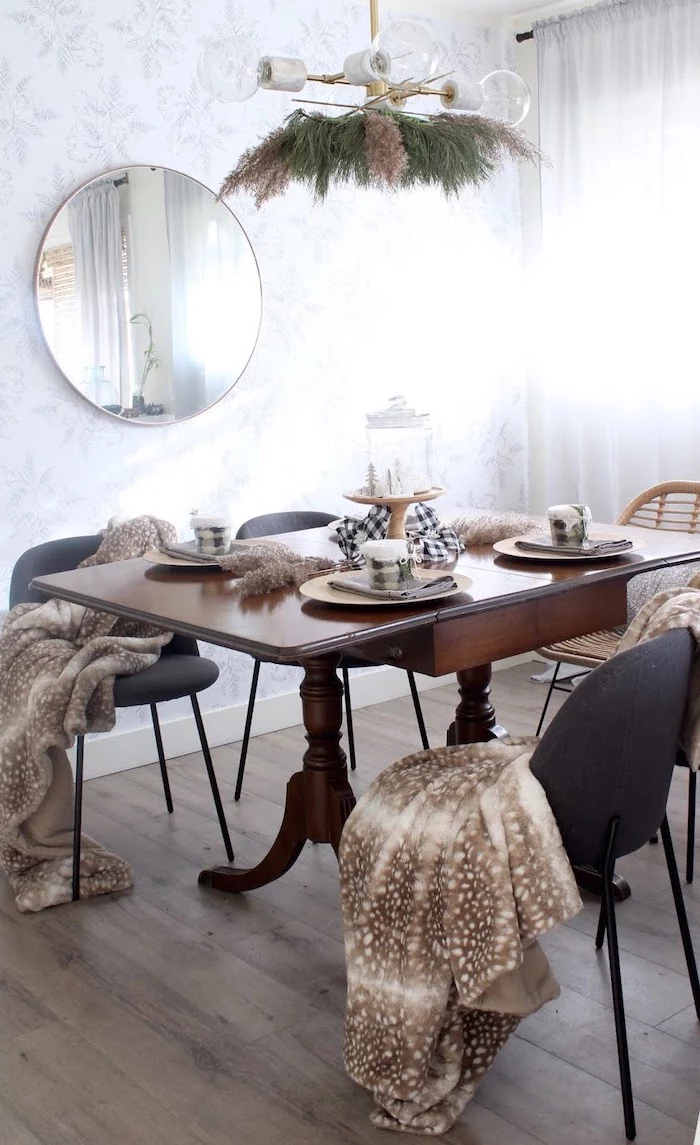
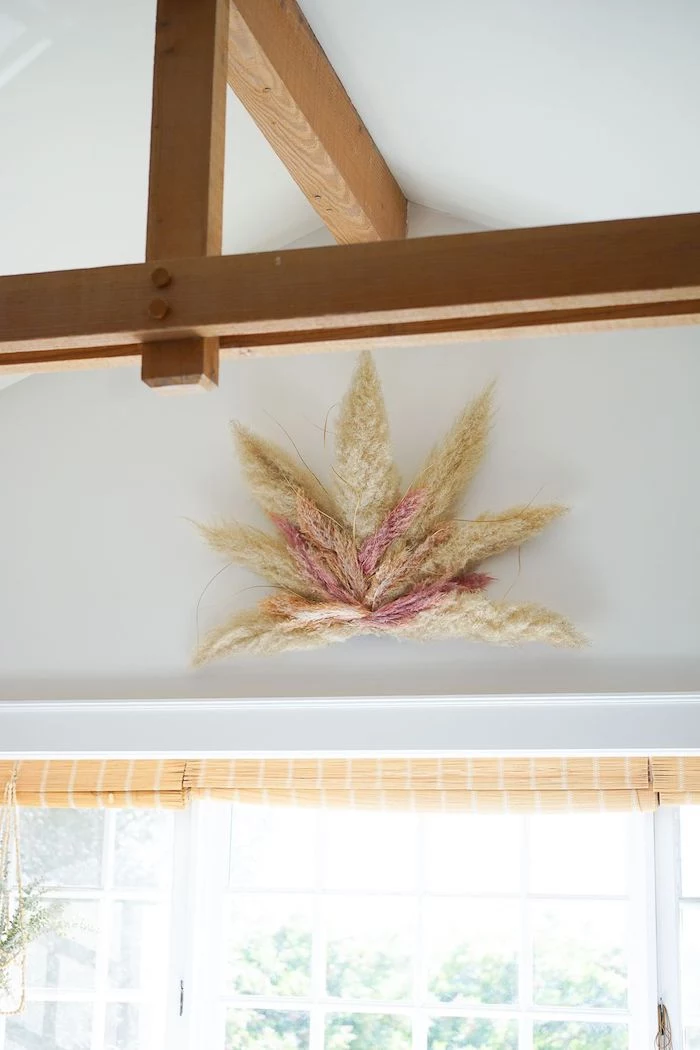
Go beyond the vase and create a breathtaking ‘pampas cloud’ installation. This is perfect for hanging over a dining table or in the corner of a room with high ceilings. You’ll need a length of chicken wire, which you can shape into a cloud-like form, and then simply insert the pampas stems into the holes. Hang it securely from the ceiling with clear fishing line for a magical, floating effect.
My pampas grass is dusty. How do I clean it?
Never use water or a damp cloth, as this can ruin the plumes. Instead, take the arrangement outside on a calm day. Set a hairdryer to its coolest, lowest-speed setting. Holding it at least a foot away, gently blow the dust off the plumes. It’s a quick, effective refresh that won’t cause damage.
A common mistake: Placing your beautiful pampas arrangement in direct, harsh sunlight. While it’s a dried product, intense UV rays can cause the natural beige and cream tones to fade and become brittle over time. A spot with bright, indirect light is ideal to preserve its color and texture for years.
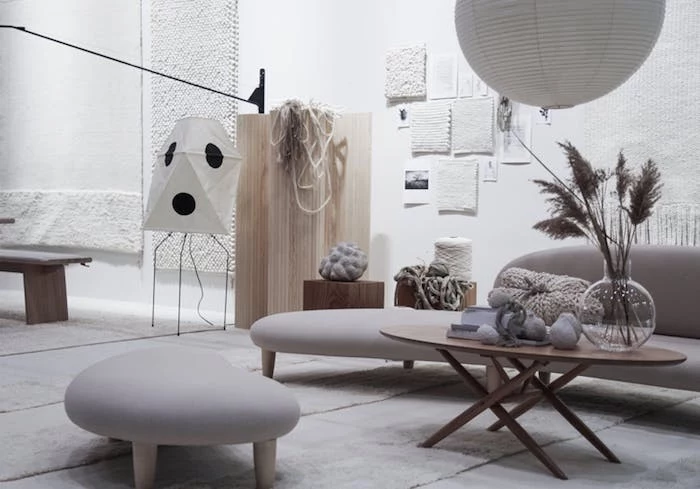
The ‘Japandi’ design trend—a hybrid of Japanese rusticism and Scandinavian functionality—is the perfect home for pampas grass. Its natural form and neutral color palette align perfectly with the trend’s focus on nature, simplicity, and wabi-sabi (the beauty of imperfection). Pair it with light woods, clean lines, and handcrafted ceramics for a serene and stylish look.
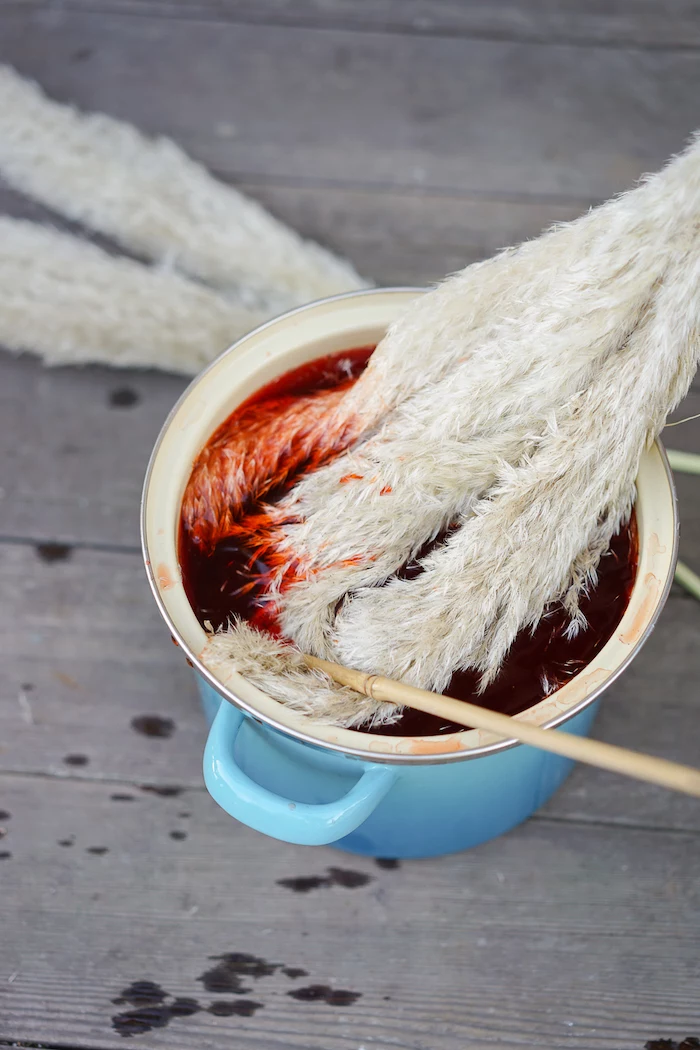
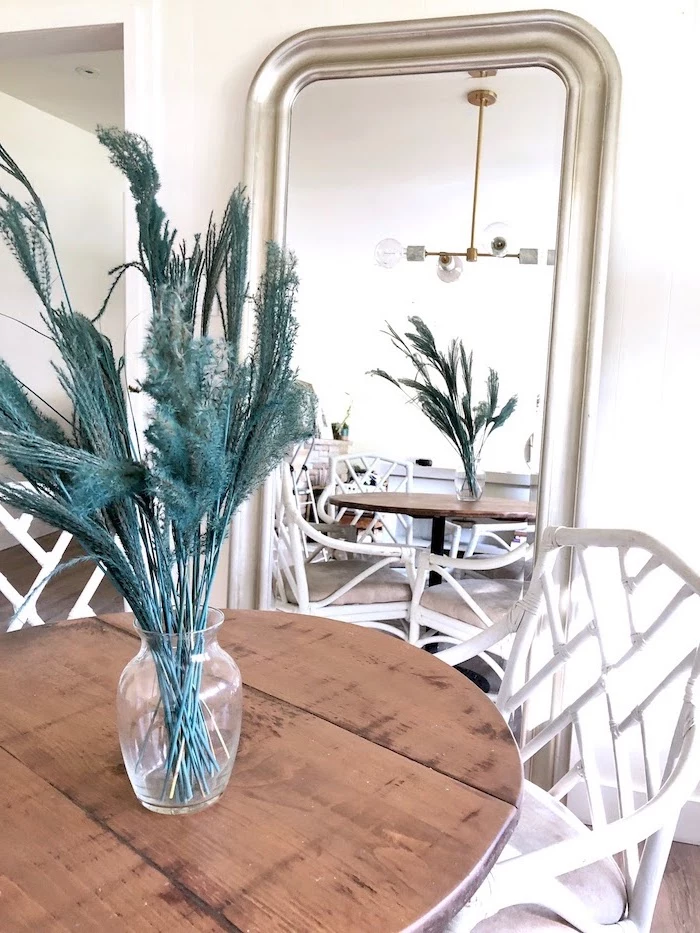
Want a custom color? You can easily dye pampas grass using fabric dye or even diluted craft paint.
- Start with light-colored, natural pampas for the most vibrant results.
- Mix your dye in a tall bucket or container according to the package directions.
- Dip the plumes into the dye, holding them there for a few minutes until they reach your desired shade.
- Hang them upside down to dry completely before fluffing and sealing.

The botanical name, *Cortaderia selloana*, comes from the Argentinian Spanish word ‘cortadera’, meaning ‘cutter’, a direct reference to its razor-sharp leaf margins. Handle the leaves with care!
When cutting pampas stems to fit your vase, always cut them at a sharp angle. A 45-degree cut with a sturdy pair of secateurs or garden shears provides a pointed end that’s much easier to slide into a narrow-necked vase or a floral foam block without crushing the hollow stem.
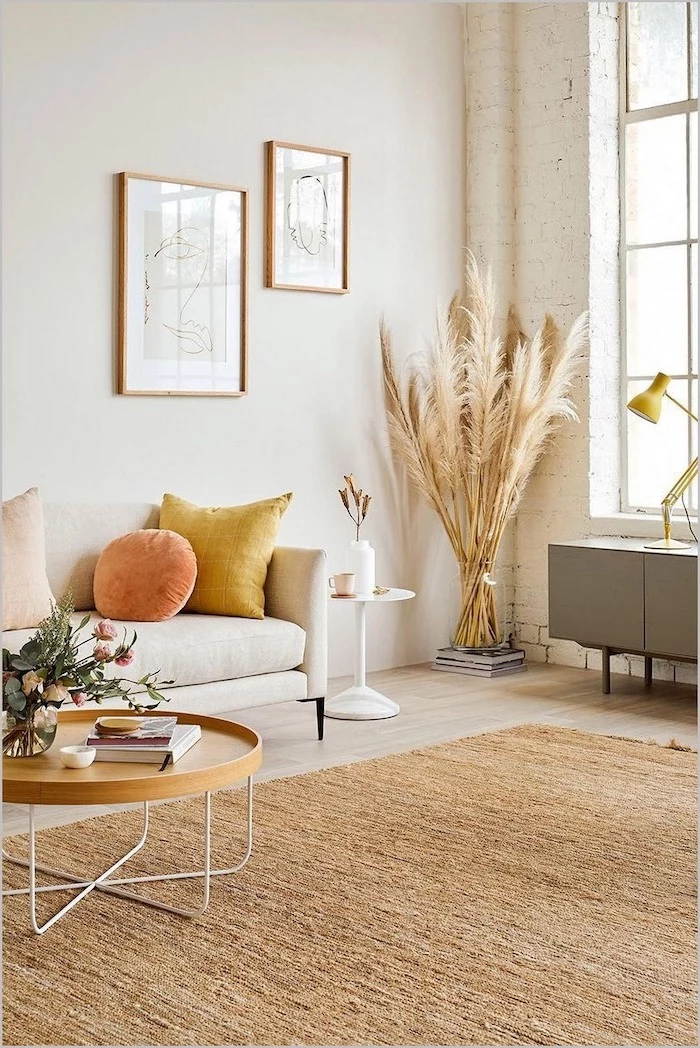
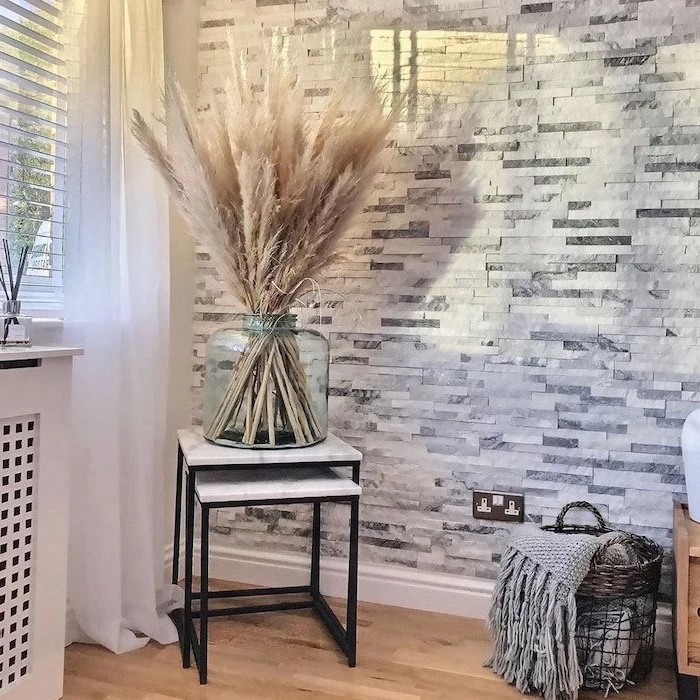
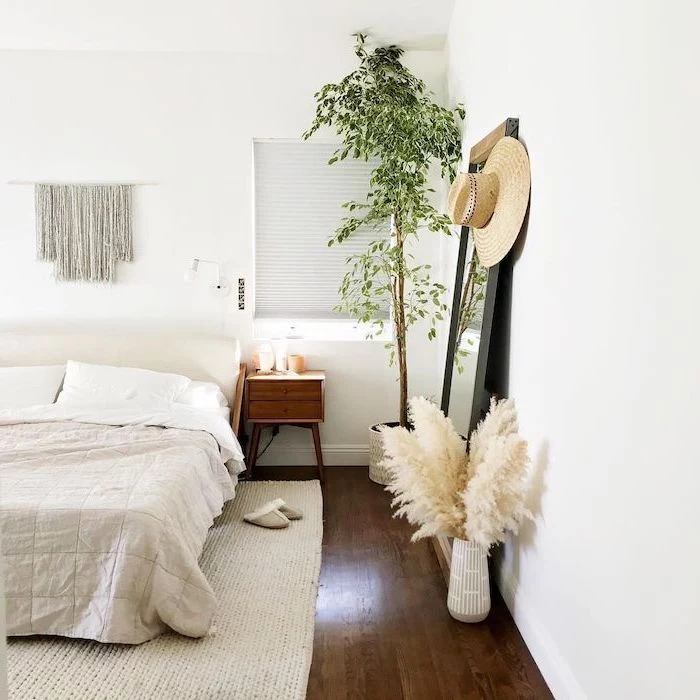
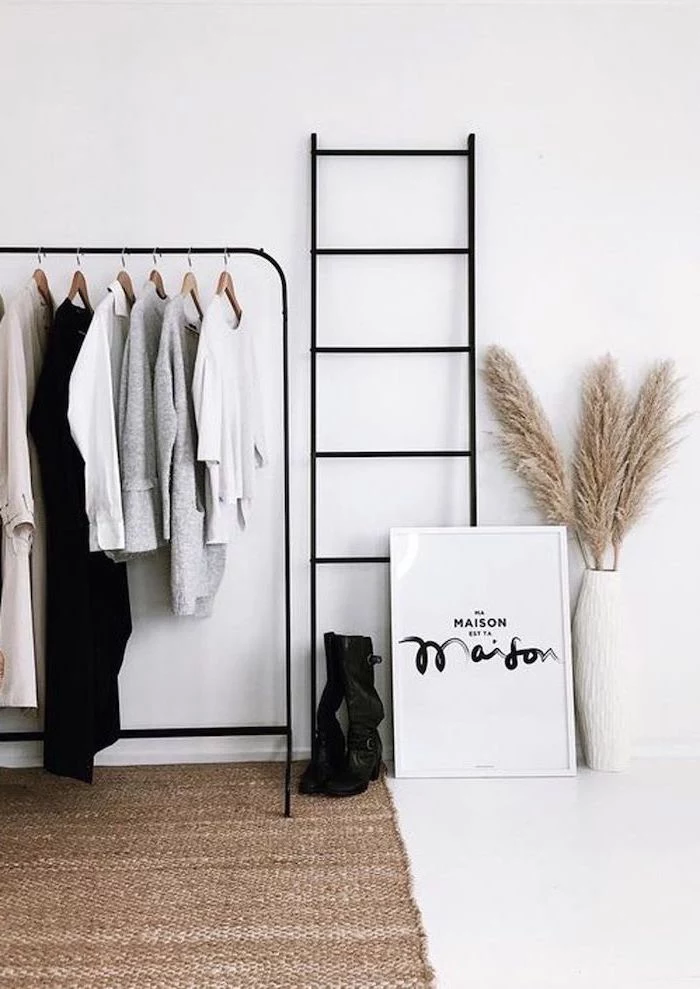
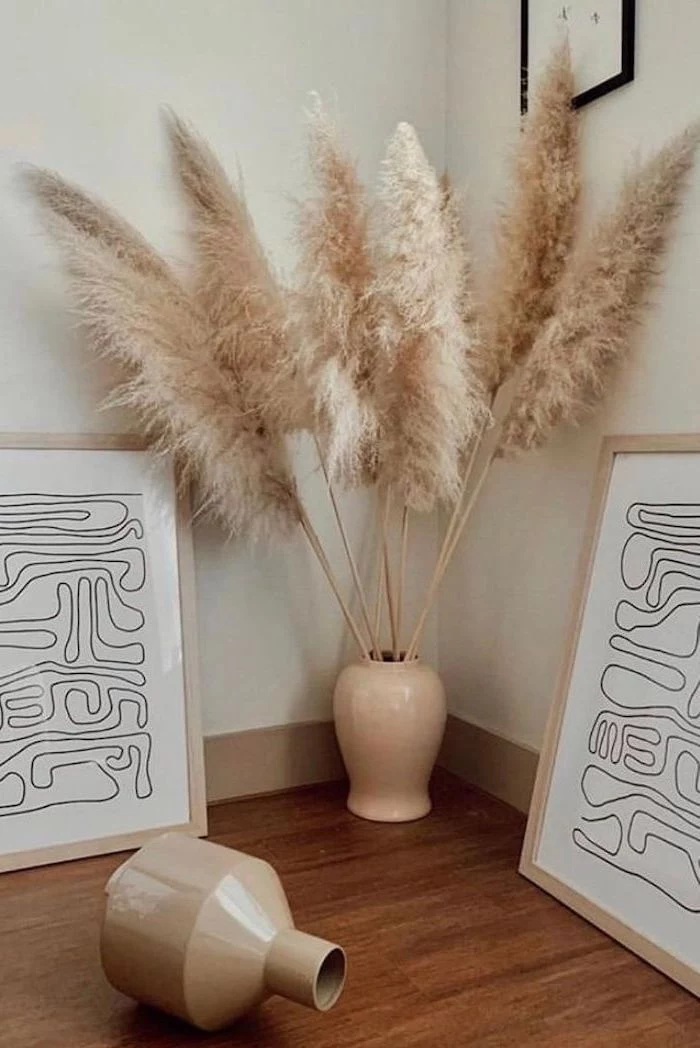
Tall Stems (4-6 feet): Ideal for making a dramatic statement in floor vases. Use them in corners, next to a fireplace, or in an entryway to draw the eye upward and add height to a room.
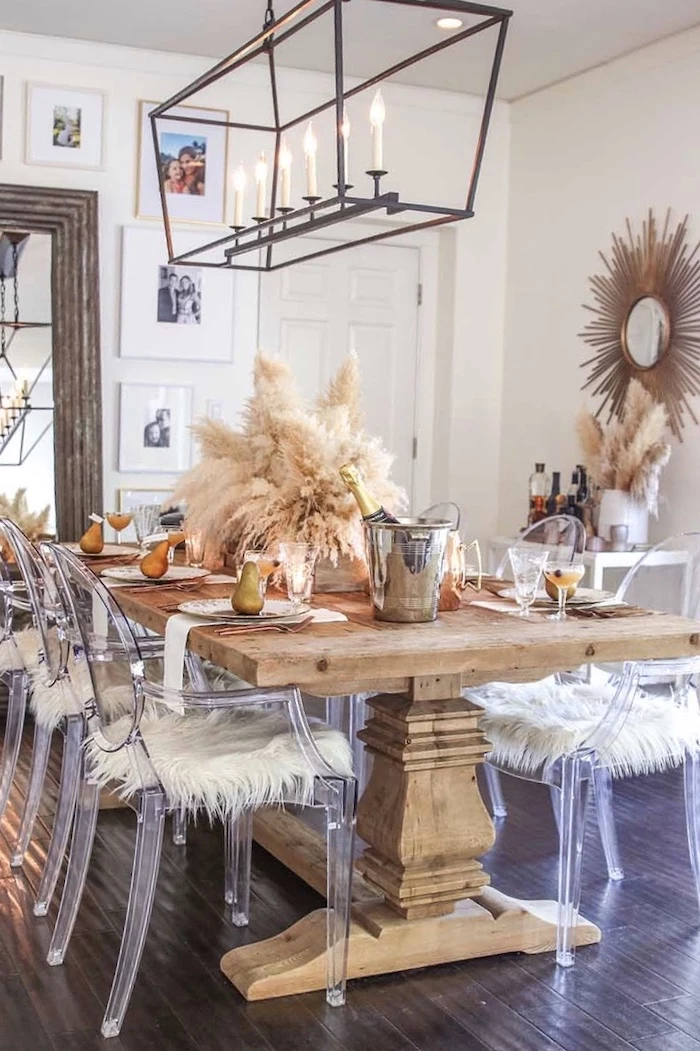
Shorter Stems (2-3 feet): Perfect for tabletop arrangements on dining tables, consoles, or sideboards. They add texture and interest without obstructing views or conversation.
Always choose the scale that complements your space and furniture.
Pampas grass thrives in dry conditions. Avoid placing your arrangement in areas with high humidity, like a steamy bathroom. Excess moisture in the air can cause the plumes to droop and can even lead to a musty smell or mildew over time. A dry, well-ventilated space is its happy place.
The rise of boho-chic weddings has made pampas grass a floral superstar. According to a 2023 wedding trend report, search interest for ‘pampas grass wedding decor’ has increased by over 200% in the last three years. It’s used for everything from ceremony arches and bouquets to table centerpieces, prized for its romantic, ethereal, and budget-friendly appeal.
- Don’t block the TV or a favorite piece of art.
- Avoid high-traffic hallways where it will be constantly brushed against.
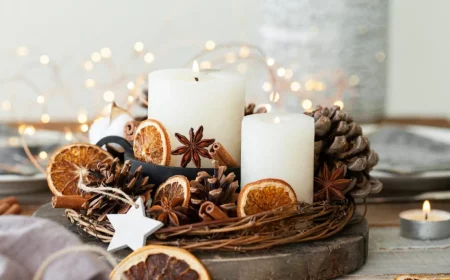
- Keep it away from open flames, as dried grasses are highly flammable.
- Ensure it’s out of reach of curious pets or toddlers.

If you’re storing extra pampas stems for future use, the best method is to loosely wrap them in newspaper or kraft paper and lay them flat in a dry, dark place, like the bottom of a closet or under a bed. Storing them upright in a box can cause the plumes to get compressed and misshapen.
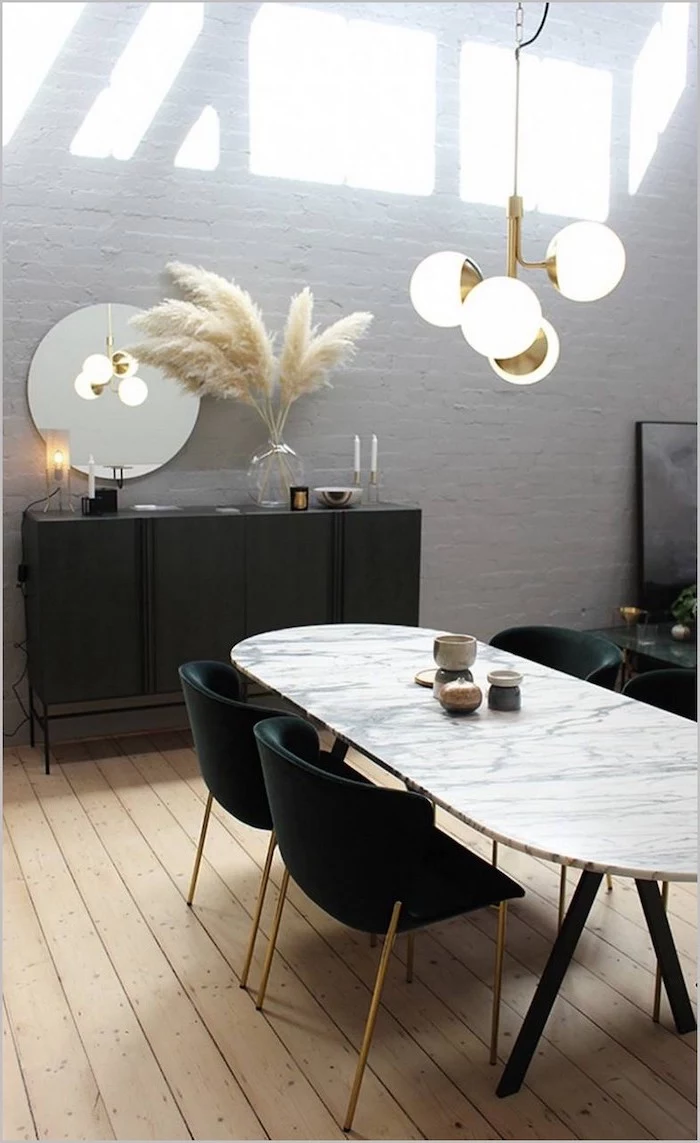
Glass Vases: Offer a light, airy feel that doesn’t distract from the plumes themselves. They work beautifully in modern, coastal, or minimalist interiors. The downside? You can see the stems, so they need to be perfectly clean and arranged.
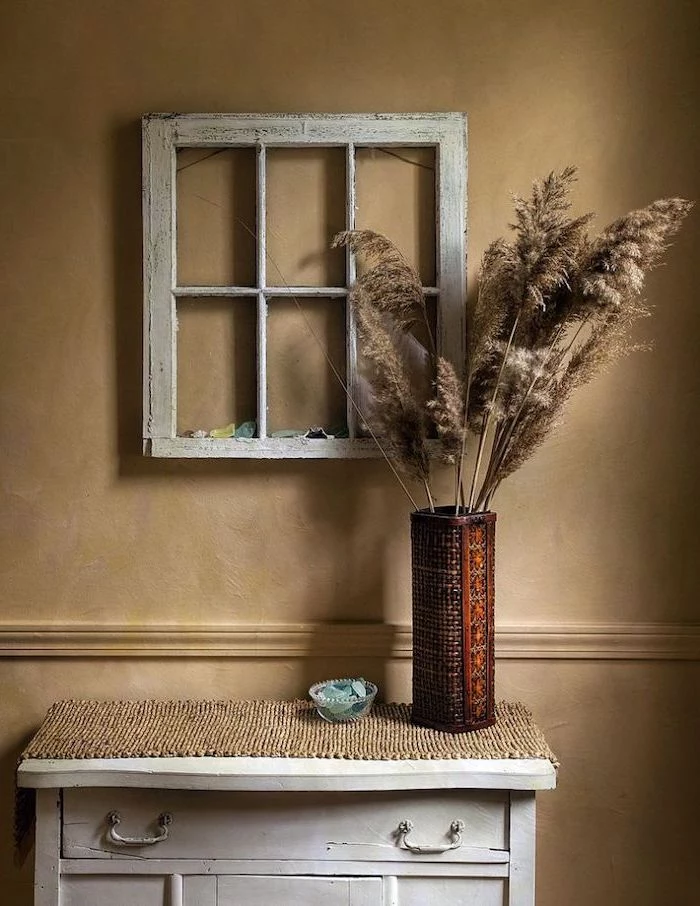
Ceramic Vases: Provide visual weight and can act as a color or textural accent. They hide the stems, offering a cleaner look. A great choice for rustic, Japandi, or modern farmhouse styles.
For a professional-grade seal that’s completely invisible and non-sticky, skip the hairspray and grab a can of Krylon Clear Matte Finish spray. It’s designed for arts and crafts, providing a durable, moisture-resistant coating that locks down shedding for good.
Love the look but not the price? You can achieve a similar feathery, textural effect with more budget-friendly dried grasses. Consider looking for:
- Dried Wheat or Oat Stalks
- Fluffy Awned Canary Grass (Phalaris canariensis)
- Spear Grass (Stipa)
- Even local wild grasses (check foraging regulations first!)