Skip the Craft Kits: Pro Secrets for High-End Spring & Easter Decor
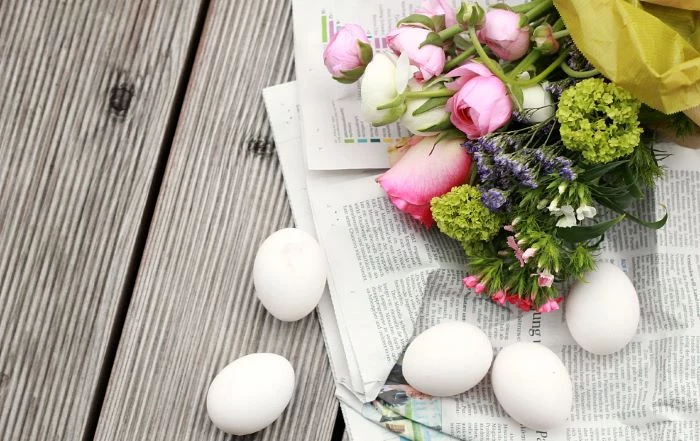
You know that feeling when winter finally breaks? It’s more than just a date on the calendar. The light changes, the air feels different, and for me, the stuff on my workbench gets a whole lot more colorful. Spring, and Easter especially, is all about celebrating those first hints of new life. It’s a chance to work with delicate materials and create decor that feels genuinely alive.
In this article
So many people think of Easter decorating as a one-and-done craft project for the kids. But I see it as a perfect opportunity to use professional techniques on a smaller scale. The goal isn’t just to make something cute for the holiday, but to create pieces with intention that really show off the beauty of the materials. Forget the flimsy tutorials—I’m going to walk you through how the pros do it, adapted for your home. We’ll get into the ‘why’ behind each step, so you’re not just copying instructions, you’re actually learning the craft.
First Things First: Getting to Know Your Materials
Before you even think about gluing or painting, you have to understand what you’re working with. Seriously, great design starts with respecting your materials. It’s the foundation for everything else.
The Humble Eggshell: More Than Just Fragile
An egg is a little marvel of natural design. That curve gives it amazing strength when you squeeze it, but we all know how fragile it is against a sharp tap. When we use real eggshells for decor, we have to keep that duality in mind.
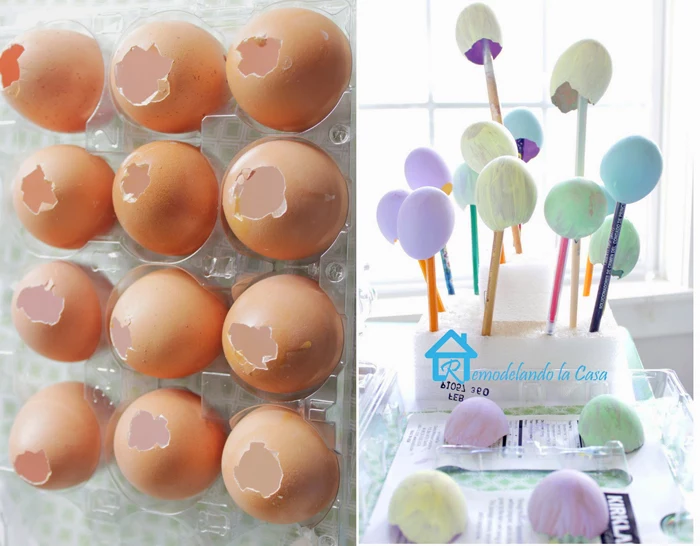
Here’s a little science for you: the shell is mostly calcium carbonate, which is porous. That’s why it takes dye and paint so well! But that porosity can also be a problem. Good to know: If you’re using real eggshells, sanitation is non-negotiable, especially if they’ll be on your dining table. Always give them a thorough wash inside and out with warm, soapy water to handle any potential bacteria. Just let them air dry completely before you start your project.
Let’s Talk Flowers and Greenery
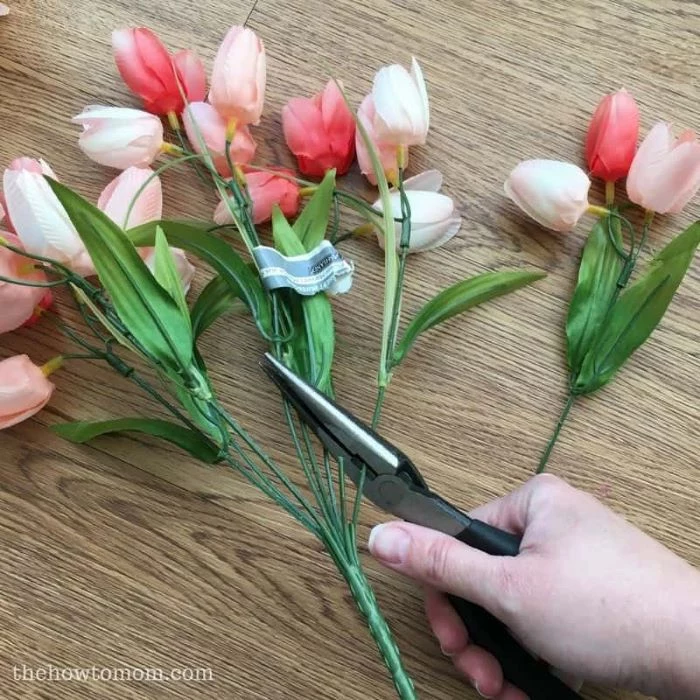
Not all flowers are cut out for this kind of detailed work. For spring arrangements, you want to look for flowers with delicate shapes that can last a while out of a big vase.
A quick tip that makes all the difference: you have to condition your flowers. This just means prepping them to drink as much water as possible. The moment they come inside, re-cut every stem at a sharp 45-degree angle while holding it under running water. This little trick prevents air bubbles from blocking the stem. Then, pop them into a clean bucket with cool water and a packet of floral preservative (you get it free with most bouquets) for a few hours. Your arrangements will last for days instead of hours.
Heads up! Some classic spring flowers, like daffodils and narcissus, release a slimy sap that’s toxic to other flowers and makes them wilt fast. If you want to mix them in, you have to let them sit in their own container of water for at least 6-8 hours first. After that, you can dump the sappy water and safely add them to your main arrangement.
Choosing the Right Base
Your base is the hidden structure that holds your masterpiece together. For something like a topiary, you’ll probably use a Styrofoam cone. For a fresh wreath, you’ll need wet floral foam. The industry standard is that green foam block you see at craft stores. When you soak it, just let it float on the surface of the water and sink on its own. Never push it down! Forcing it creates dry pockets inside that will be a death sentence for any flower you stick in there.
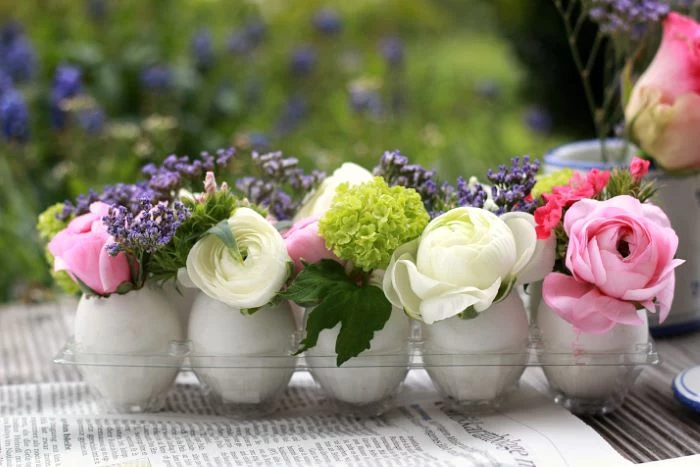
Project 1: The Elegant Eggshell Bud Vase
New to this? Start here! The eggshell bud vase is a quick, 20-minute project that teaches you the basics of delicate handling and simple arranging. It’s a classic for a reason, but the secret to making it look elegant instead of clumsy is all in how you open the egg.
What You’ll Need:
- Eggs (any color you like)
- An egg topper tool (around $10 online), a small serrated knife, or a Dremel
- A small bowl for the egg guts
- Soapy water for cleaning
- Tiny, delicate flowers like grape hyacinth, forget-me-nots, or a bit of waxflower
- Something to keep it steady: a pinch of modeling clay, floral wax, or a tray of salt or sand

Making the Perfect Little Vessel
The goal here is a clean, straight opening, not a jagged mess from a spoon. An egg topper, which you can find in most kitchen supply stores, is honestly the easiest way to go. It scores a perfect circle you can just lift off. Another option is to gently saw through the top with a small serrated knife. Just go slow and use light pressure.
For a truly professional edge, the experts often use a Dremel rotary tool with a small cutting wheel. You lightly score a line and then cut through for a perfect finish. A word of caution: if you go this route, ALWAYS wear safety glasses. Tiny bits of shell can go flying.
Once it’s open, empty the contents (omelet time!), wash the shell, and let it dry completely.
Keeping it Stable
An empty eggshell is wobbly. A tiny ball of poster tack or modeling clay on the bottom is the simplest solution. You can also get a bit fancier by arranging a few of them in a shallow dish filled with decorative sand, salt, or fine pebbles. It looks beautiful and keeps them perfectly upright.
When you add the flowers, remember that less is more. Fill the shell about halfway with water and add just one to three tiny stems. You want it to feel airy and light, not stuffed.
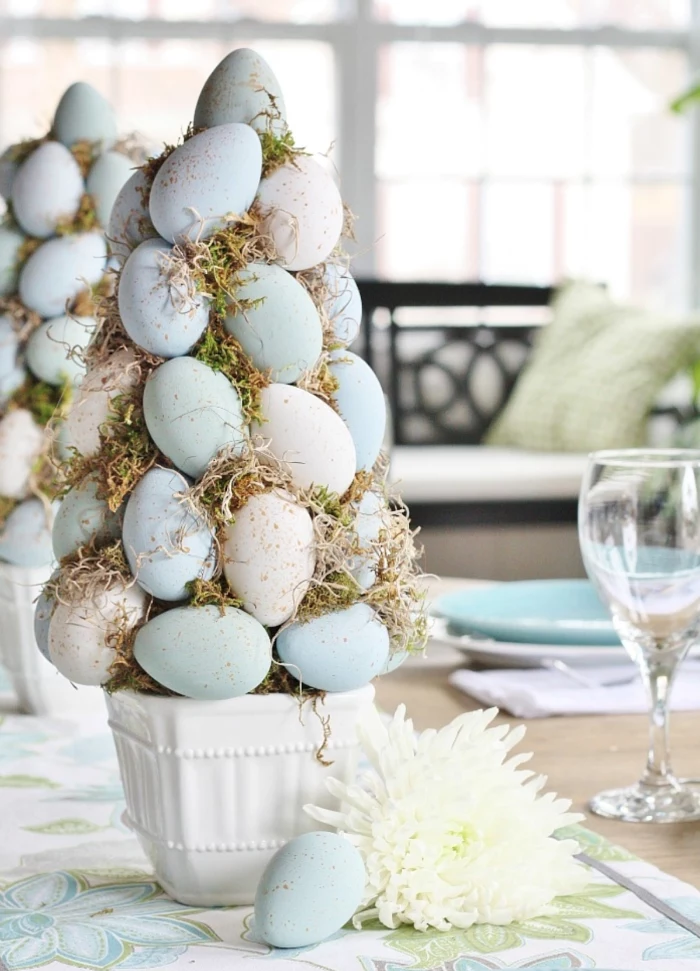
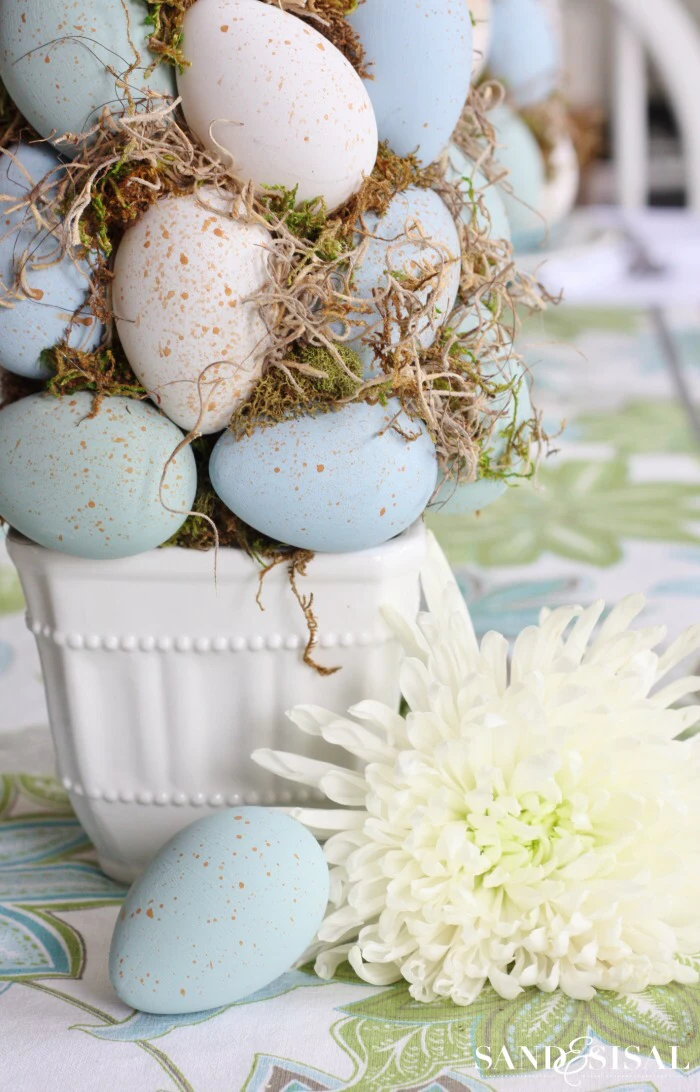
Project 2: The Perfectly Balanced Egg Topiary
A topiary can be a stunning centerpiece, but I’ve seen so many DIY attempts turn into wobbly disasters. A great topiary is all about a solid structure and a good finish—not just gluing eggs to a cone.
Time: About 2-3 hours (most of this is drying time)
Estimated Cost: $25 – $40, depending on the supplies you already have.
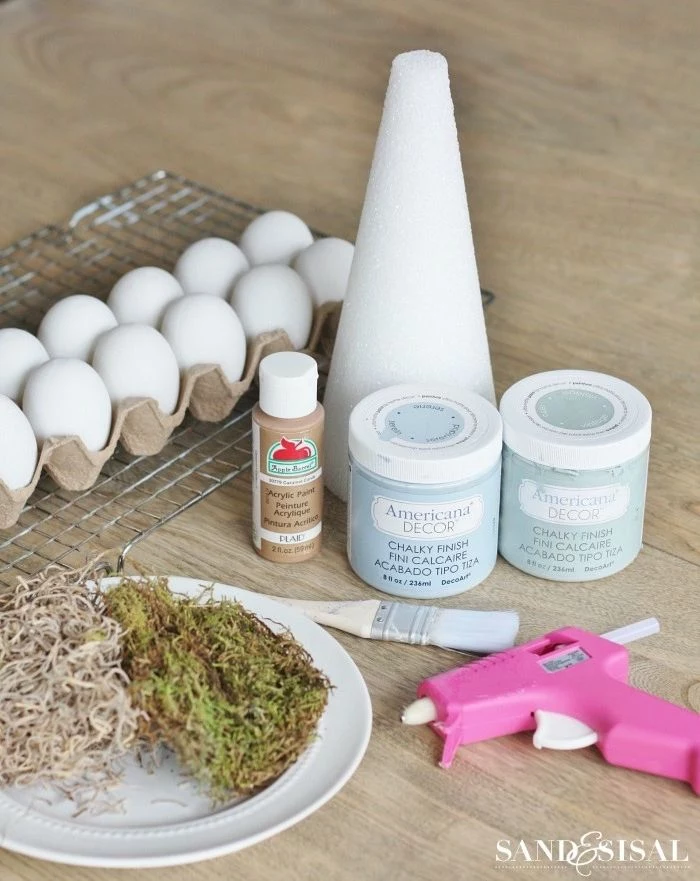
What You’ll Need:
- Styrofoam cone (a 9 to 12-inch one is a great size to start) – $3-$5
- Wooden dowel (just a bit shorter than the cone) – $1
- Small terracotta or ceramic pot – $2-$5
- Plaster of Paris (you can get a small box at any hardware store) – $5
- Craft eggs (paper-mâché or unpainted wood look best) – $5-$8 a dozen
- Acrylic craft paint in your chosen colors (pale blues, creams, soft greens)
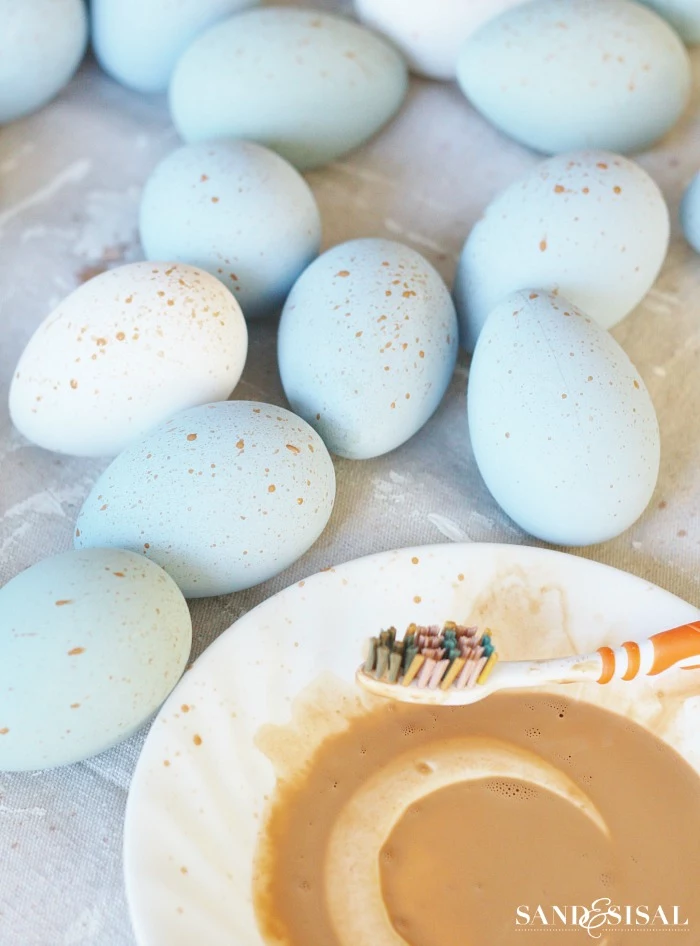
- A bit of dark brown paint for speckling
- An old toothbrush or a stiff-bristled brush
- Low-temperature hot glue gun and glue sticks
- Preserved sheet moss or Spanish moss
- Matte spray varnish (optional, but it gives a nice finish)
The Secret is the Prep Work
First, build a base that won’t fall over. Trust me on this—my first topiary attempt ended up a wobbly mess that tipped over because I just stuck the dowel into a piece of floral foam. Plaster is the only way to go! Sharpen one end of the dowel and push it about two-thirds of the way into the bottom of the cone. Mix the plaster, place the other end of the dowel in your pot, and pour the plaster around it. Use a level or just eyeball it to make sure the dowel is straight up and down while it sets.
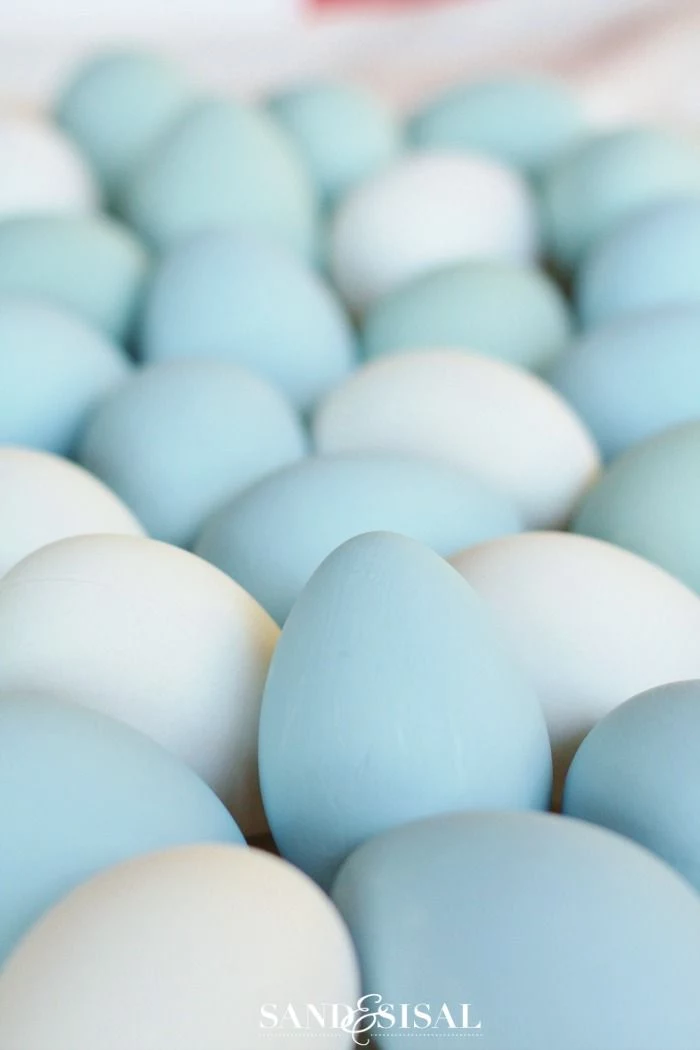
Next, paint your eggs. For a 12-inch cone, I find I usually need about 40-50 craft eggs. It’s always better to buy an extra dozen than to run out! Apply two thin coats of your base colors. For that classic speckled look, thin your brown paint with a little water, dip the toothbrush in, and run your thumb over the bristles to flick tiny droplets onto the eggs. Practice on a piece of paper first to get the hang of it. Once dry, a quick coat of matte varnish will protect the finish.
Putting It All Together
Use a low-temp glue gun so you don’t melt the foam. Start at the bottom of the cone and glue a ring of eggs all the way around. For the next row, stagger the eggs to cover the gaps, almost like you’re laying bricks. Continue that pattern all the way to the top. The final touch that makes it look professional is the moss. Gently poke small bits of moss into all the gaps between the eggs. You can use a pencil or the end of a paintbrush. Finally, cover the plaster in the pot with moss, and you’re done!
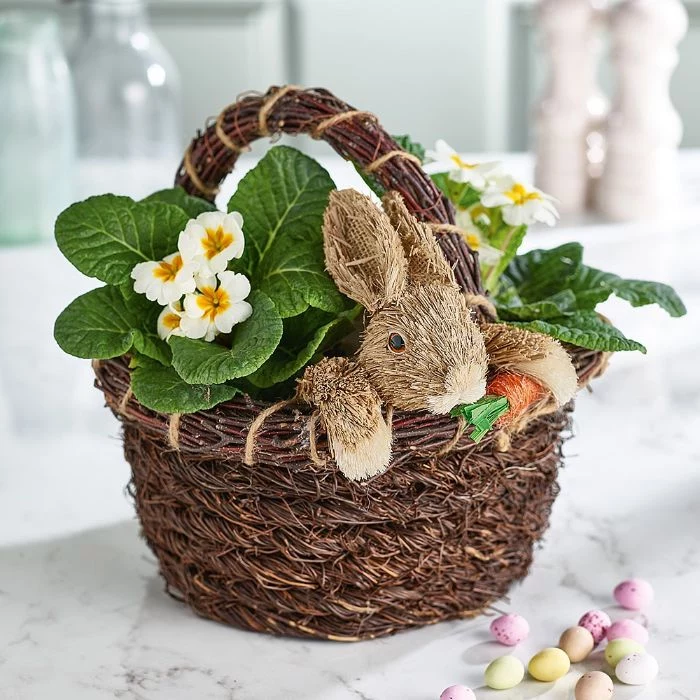
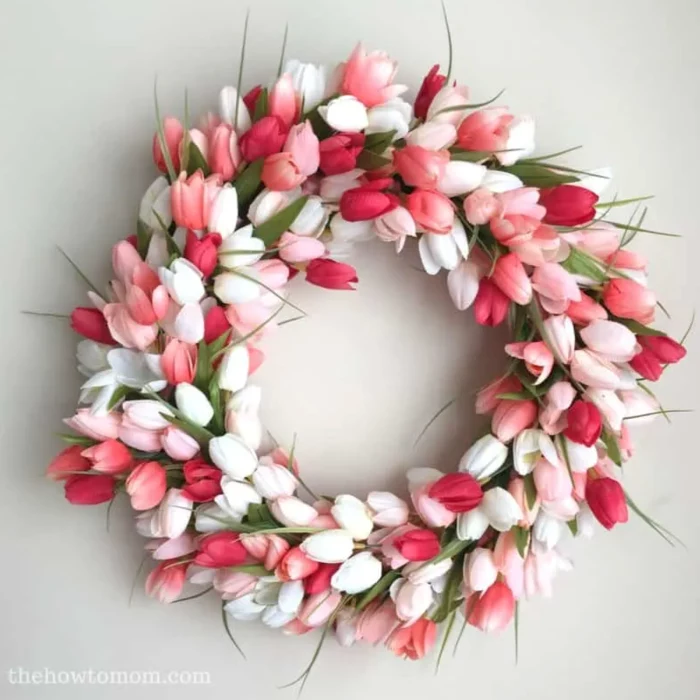
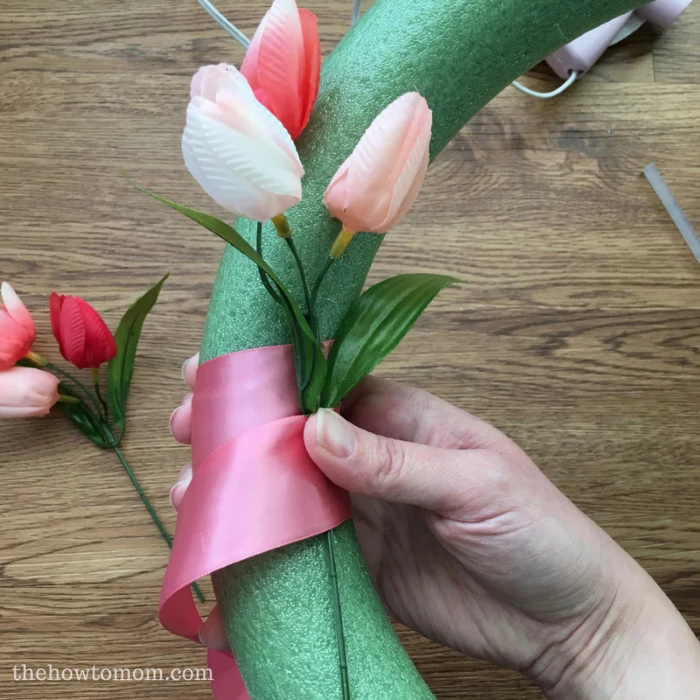
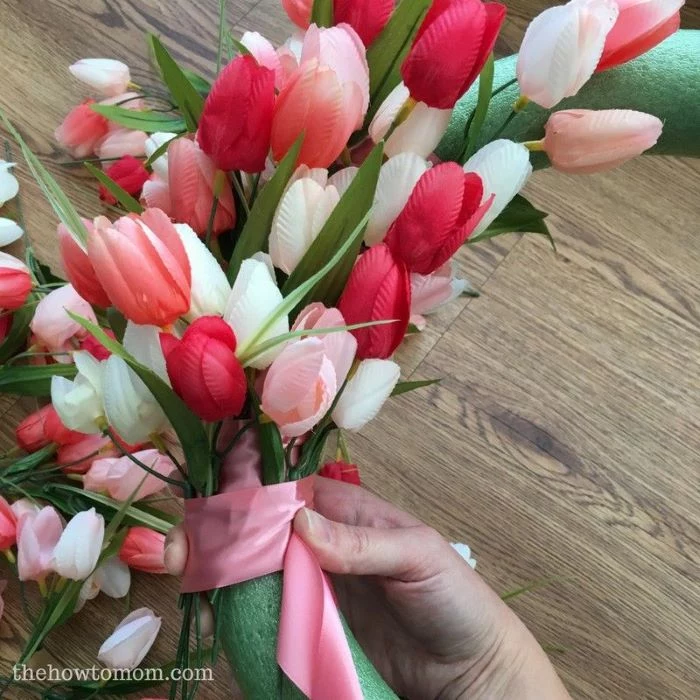
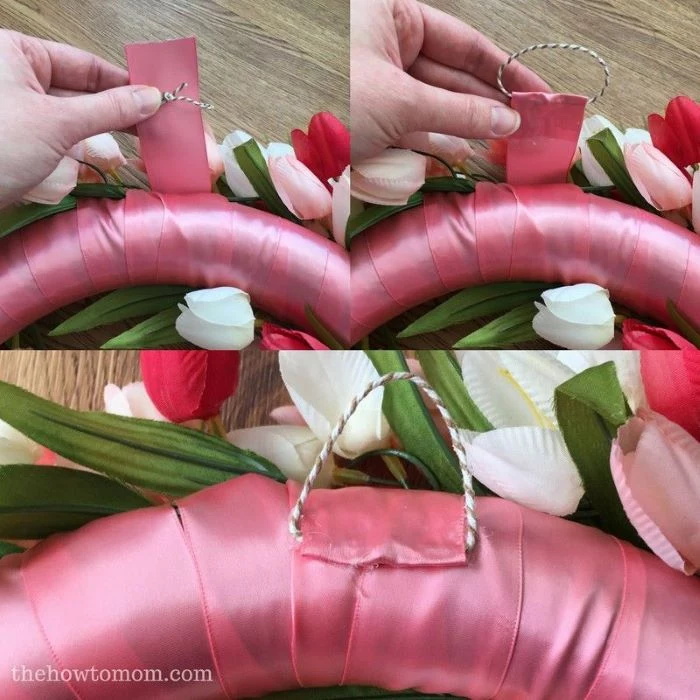
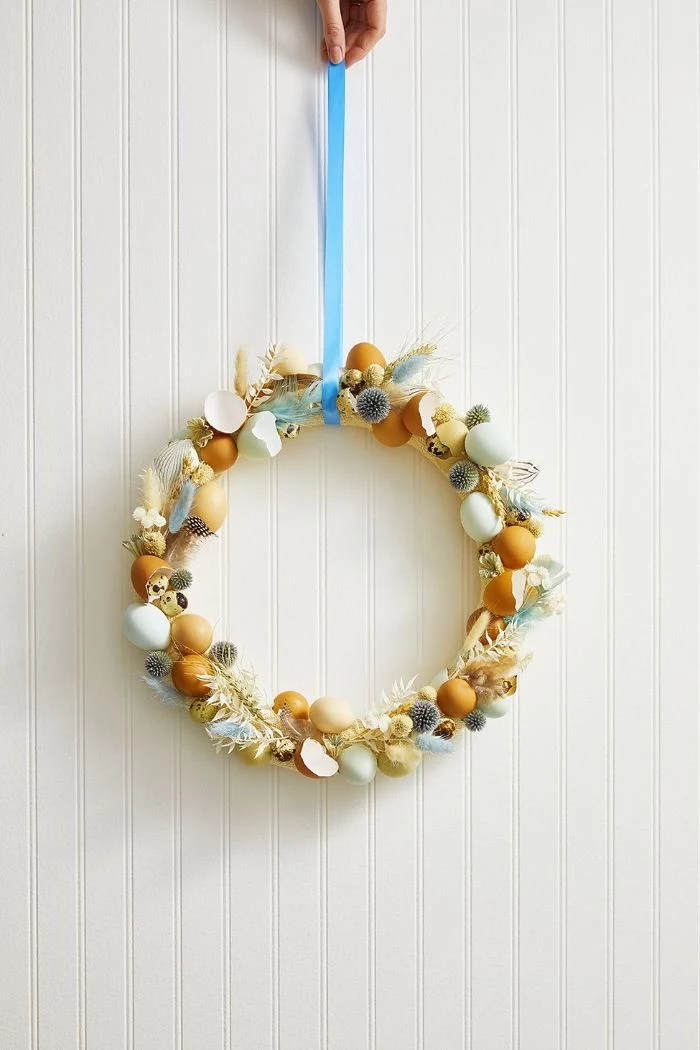
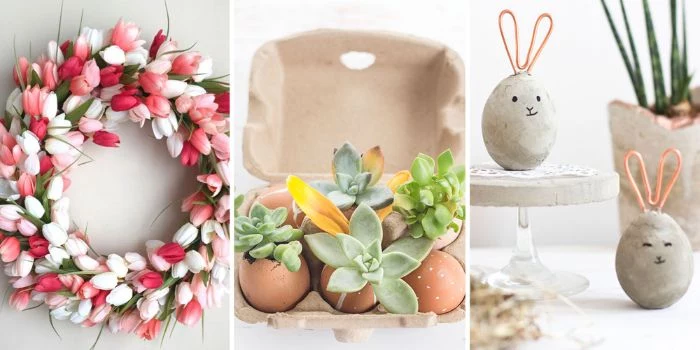
Project 3: The Living Wreath That Keeps on Giving
Faux wreaths are fine, but a living wreath is something special. It celebrates life itself, and the best part is that you can deconstruct it after the holiday and move the plants to your garden. It’s a bit more work, but so rewarding.
What You’ll Need:
- Wire wreath frame (12 or 14 inches) – $4-$6
- Sphagnum moss (the stringy kind, not decorative sheet moss)
- Floral wire or sturdy fishing line
- Small, hardy plants. For a 12-inch frame, you’ll want about 8-10 small plants (like a mix of 4 succulents, 3 pansies, and 3 trailing ivy starters).
- A bucket for soaking the moss
- A pencil or a dibber for planting
Building the Base
First, soak your sphagnum moss in water and then squeeze out the excess so it’s damp, not dripping. Pack it firmly onto your wire frame, creating a dense, doughnut-shaped base. Now, wrap the whole thing tightly with floral wire, crisscrossing as you go. This creates a secure planting medium for your little plants.
Planting Your Wreath
Gently pop your plants out of their nursery pots and shake off most of the soil, keeping the root ball intact. Poke a hole in the moss base with your finger or a pencil, tuck the root ball in, and pack more moss around it to hold it in place. I like to group plants in little clusters of three or five for a more natural look. Add any trailing plants like ivy last to soften the edges.

To care for it, just lay the wreath flat in a shallow pan of water for about 20 minutes once a week. Let the moss soak up the moisture, then hang it back up in a spot with bright, indirect light. It should look great for weeks!
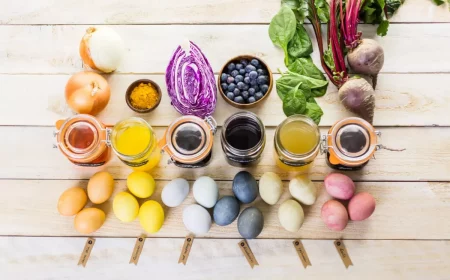
Old-School Cool: Dyeing Eggs with Kitchen Scraps
Before there were fizzy tablets and neon kits, people used everyday plants and vegetables to dye eggs. This traditional method creates these gorgeous, muted colors that feel so much more organic and special.
It works because of pigments in common foods, and we use a little white vinegar as a ‘mordant’ to help the color bind to the shell. You’ll want to use a separate non-reactive pot (like stainless steel) for each color.
Here are a few simple recipes. And yes, since you’re just using food and vinegar, these hard-boiled eggs are totally safe to eat! Just be sure to keep them refrigerated if they’re out for more than two hours.
- For a Rich Blue: Chop up 1/4 head of red cabbage and simmer it in 4 cups of water for about 30 minutes. Strain out the cabbage, add 2 tablespoons of vinegar to the water, and submerge your eggs. For the deepest, most stunning blue, let them soak in the fridge overnight.
- For a Sunny Yellow: Add 2 tablespoons of turmeric to 4 cups of water, simmer for 15 minutes, and then add your vinegar and eggs. This one works pretty fast, giving you a vibrant yellow in just a couple of hours.
- For an Earthy Brown: Use the dry, papery skins from about 6 yellow onions. Simmer them in 4 cups of water for 30 minutes. The resulting dye gives a beautiful, rich terracotta or brown color, depending on how long you soak.
- For a Pale Pink/Lavender: Use one chopped raw beet in 4 cups of water. Simmer for 30 minutes. This dye is a bit more subtle and can give you a lovely pale pink after a few hours of soaking.
A Few Final Thoughts and a Dose of Reality
Remember, you’re working with your hands, not a machine. Your creations will have little quirks and imperfections, and honestly, that’s what makes them beautiful. Don’t compare your work to something from a big-box store. The time and care you put in are what give it real value.
And please, be safe! Hot glue guns deliver nasty burns, so keep a bowl of cold water nearby just in case. When you’re using cutting tools, go slow.
Oh yeah, and a big one for pet owners: many common spring plants are toxic to our furry friends. Lilies are extremely dangerous for cats, and things like daffodils and tulips can be harmful if they’re chewed on. Always do a quick search to make sure your chosen flowers are safe for your pets.
I hope these ideas inspire you to go beyond the basics this spring. By taking the time to understand the materials and use thoughtful techniques, you can create decor that’s not just beautiful, but a genuine expression of your own creativity.
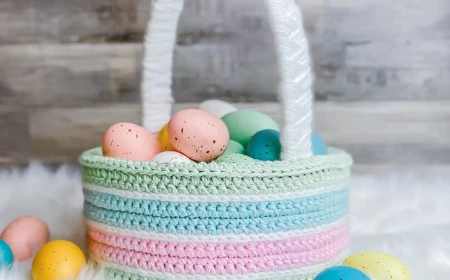
Inspirational Gallery
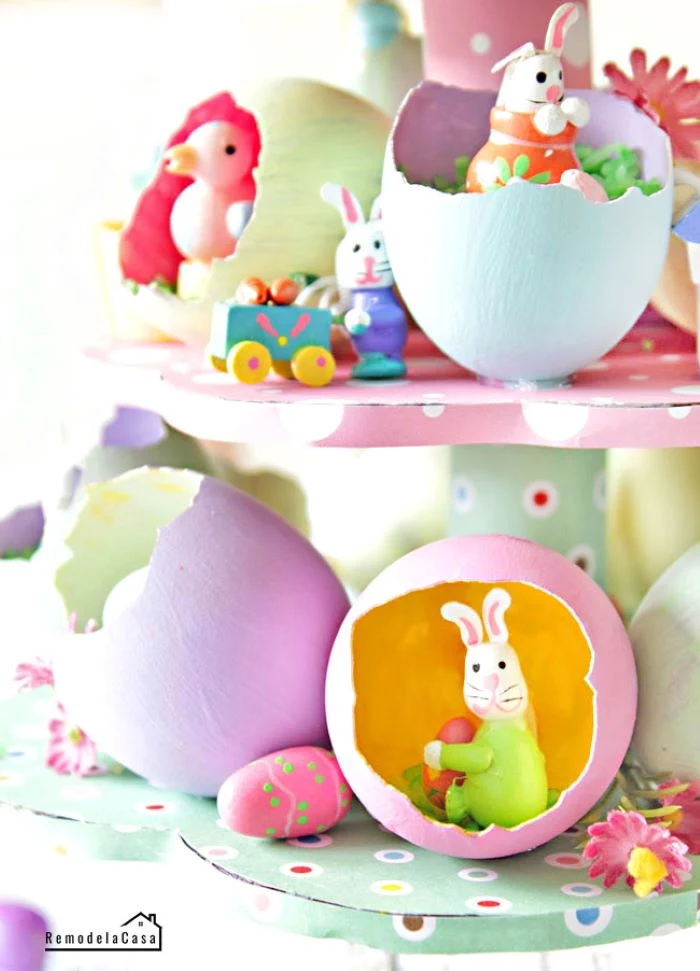
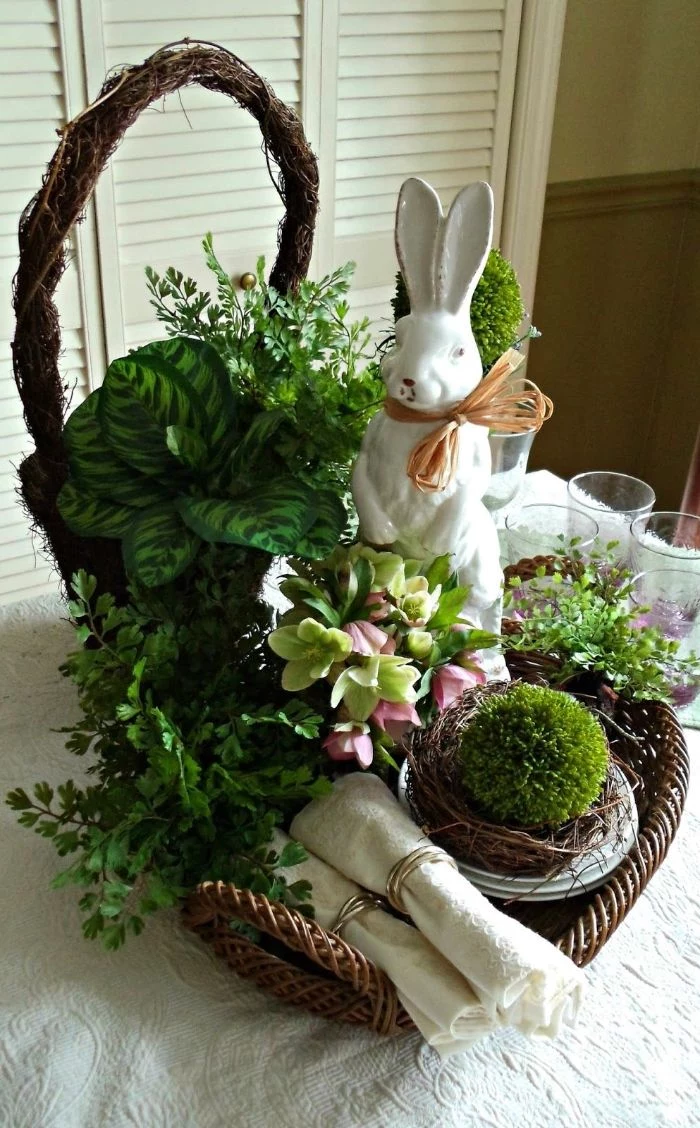
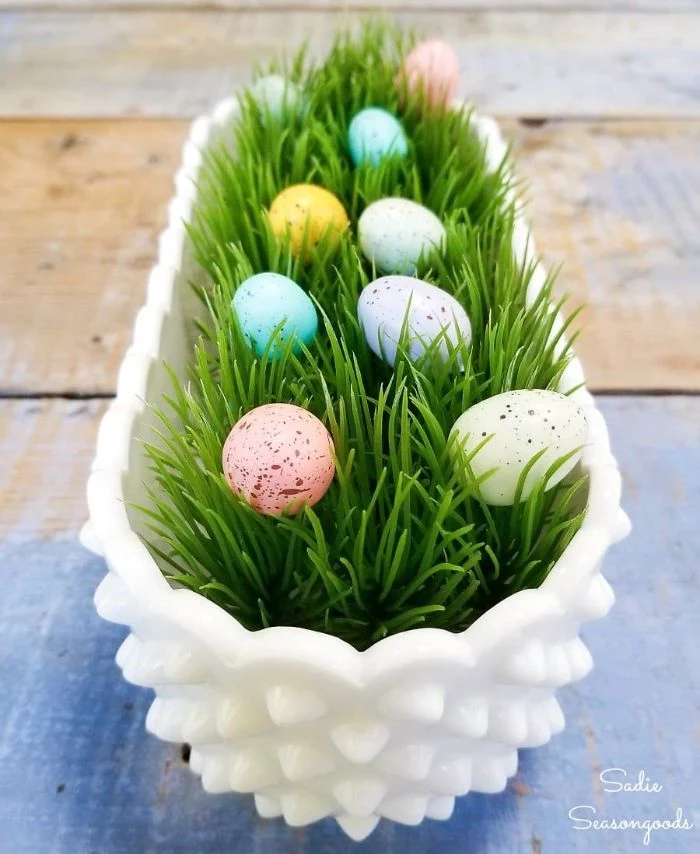
Beyond the plastic grass, a truly luxurious Easter basket is all about texture. Think shredded aspen wood, natural moss, or even finely crinkled kraft paper as a base. It creates a sophisticated, organic nest that makes even the simplest chocolate egg feel like a treasure.
- The deep, earthy red from boiled beet water.
- A sunny, vibrant yellow from turmeric powder.
- Rich, terracotta tones from yellow onion skins.
- A subtle lavender-grey from a small amount of blueberry juice.
The secret to natural dyes? A splash of white vinegar in the water helps the color bind beautifully to the eggshell.
The one-inch rule: When creating a floral arrangement in an opaque vessel, like a ceramic vase, the height of the tallest flower should be no more than 1.5 to 2 times the height of the container. For low bowls, think width. This simple guideline of proportion is what separates amateur displays from professional, balanced designs.
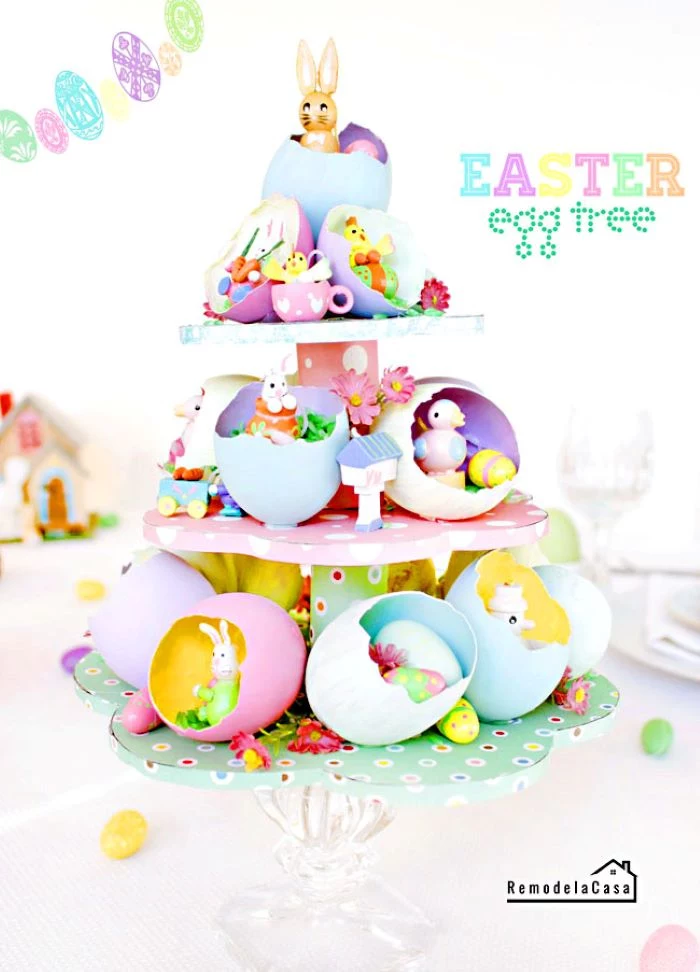
The Scandinavian Påskris, or Easter Tree, isn’t decorated with eggs, but with brightly colored feathers. It’s a joyful, graphic celebration of spring’s return, dating back to the 17th century.
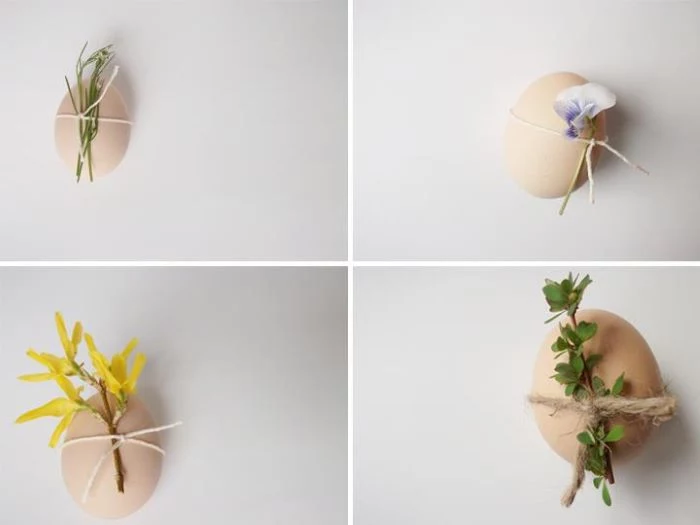
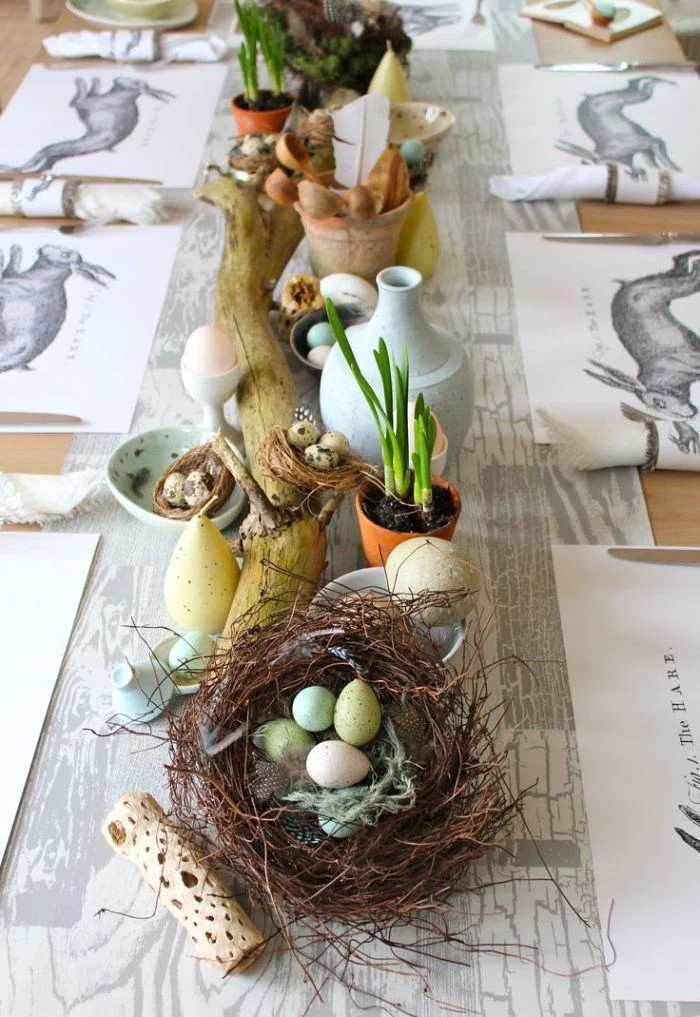
For an effortlessly chic centerpiece, forage for branches. The key is to look for interesting shapes and nascent buds. The best choices for a simple, architectural display are:
- Pussy Willow: For its soft, tactile catkins.
- Forsythia: Its early yellow blooms are pure sunshine.
- Quince or Cherry Blossom: The ultimate in delicate, ephemeral beauty.
- Contorted Hazel: For dramatic, sculptural lines even without leaves or flowers.
Tired of predictable pastels?
Embrace a moodier, more sophisticated spring palette. Think deep, bruised purples of hellebores, the inky center of a ‘Queen of Night’ tulip, and the rich, dark green of ivy. Pair these tones with accents of brass or tarnished silver for a look that is dramatic, elegant, and entirely unexpected.

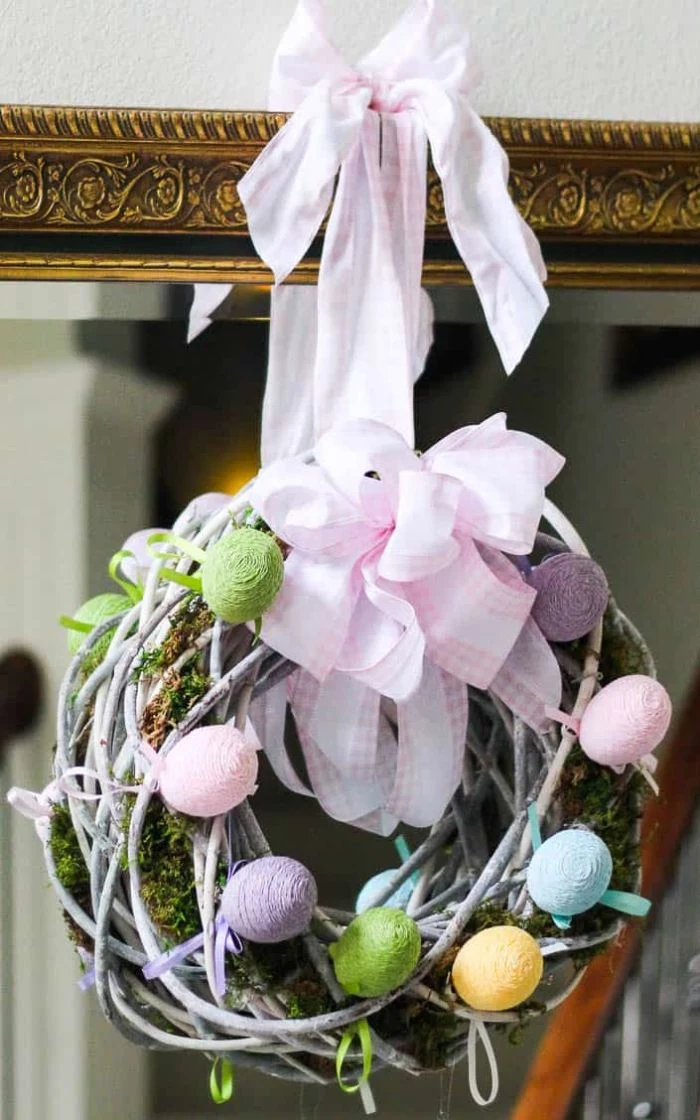
Real Silk Ribbon: It has an unmatched softness and drapes beautifully, catching the light with a subtle sheen. Perfect for a single, luxurious bow on a basket or wreath. Brands like May Arts offer exquisite, high-quality options.
Velvet Ribbon: Offers a deep, rich texture and saturated color. It adds a touch of old-world weight and opulence, ideal for tying around napkins or as a contrasting texture on a smooth ceramic vase.
A single block of traditional green floral foam can take over 500 years to decompose, releasing microplastics into the environment.
Pro floral designers are increasingly turning to sustainable alternatives. For your home arrangements, try a Japanese ‘kenzan’ (a metal pin frog) to hold stems firmly in place in a shallow dish, or create a ball of chicken wire inside your vase. Both are reusable and far kinder to the planet.
- Creates unique, one-of-a-kind organic patterns.
- Allows for a beautiful blend of multiple colors.
- Feels like a fun, high-end science experiment.
The technique? Marbling with shaving foam. Simply spread cheap shaving foam in a shallow tray, add drops of food coloring, swirl with a skewer, and gently roll a hard-boiled egg over the surface. Let it sit for 15 minutes, then wipe clean.
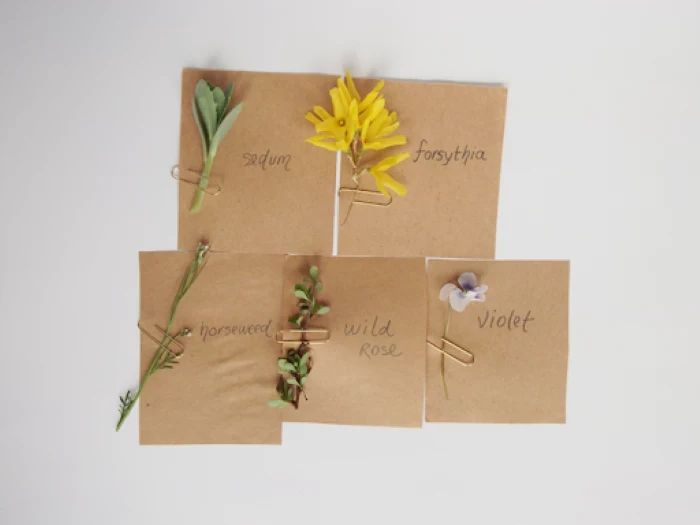
There’s a quiet magic in foraging for your decor. It’s the feeling of damp earth underfoot, the crisp spring air, and the thrill of spotting the perfect, gnarled branch or the first sprigs of moss. This act of discovery connects your final creation to the season in a way no store-bought item ever could.
To make your decorated eggs last for years, sealing is key. A light coat of matte varnish spray, like Krylon’s Matte Finish, will protect natural dyes from fading and paint from chipping. For a subtle sheen, you can also gently rub a small amount of neutral oil (like mineral or coconut oil) onto the shell with a soft cloth. Store them in an egg carton in a cool, dry place.
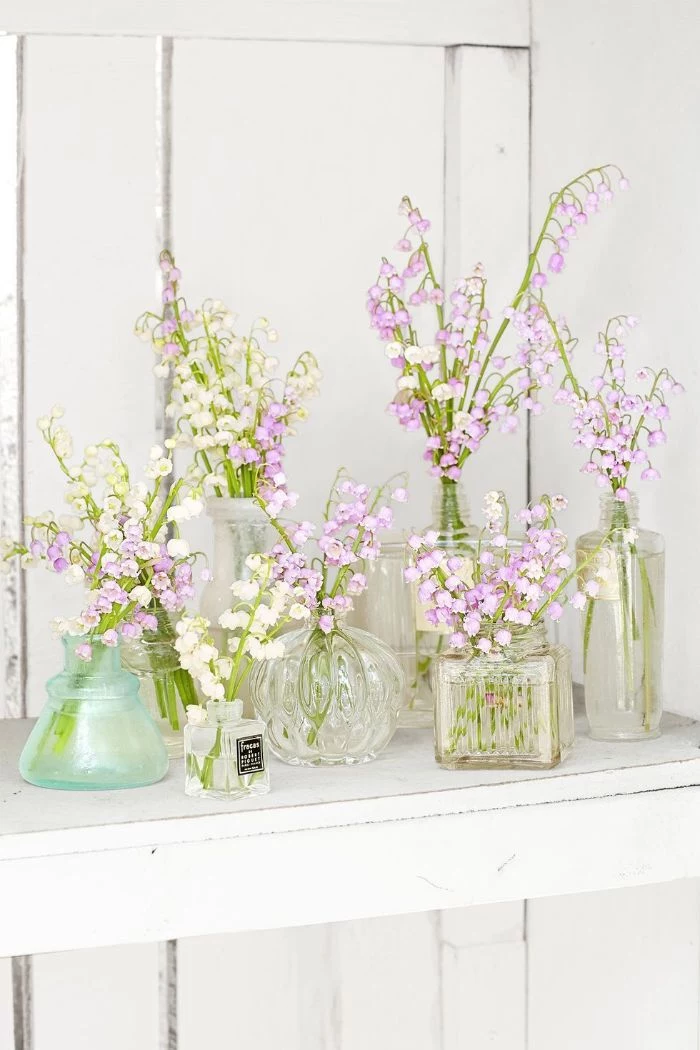
The single stem statement: Forget a cluttered bouquet of mediocre flowers. One perfect, arching branch of cherry blossom in a tall, clear glass vase can be infinitely more powerful. It’s a lesson in restraint and an appreciation for the simple, perfect forms found in nature.

Looking for a truly elevated egg?
Instead of paint, consider the ancient art of Pysanky (Ukrainian egg decorating). This method uses a wax-resist (batik) method. You write on the egg with hot beeswax using a special stylus called a ‘kistka’, then dip it in dye. The wax protects the covered areas from the dye. The process is repeated with different colors to create intricate, symbolic patterns. Starter kits are available online for those new to the craft.
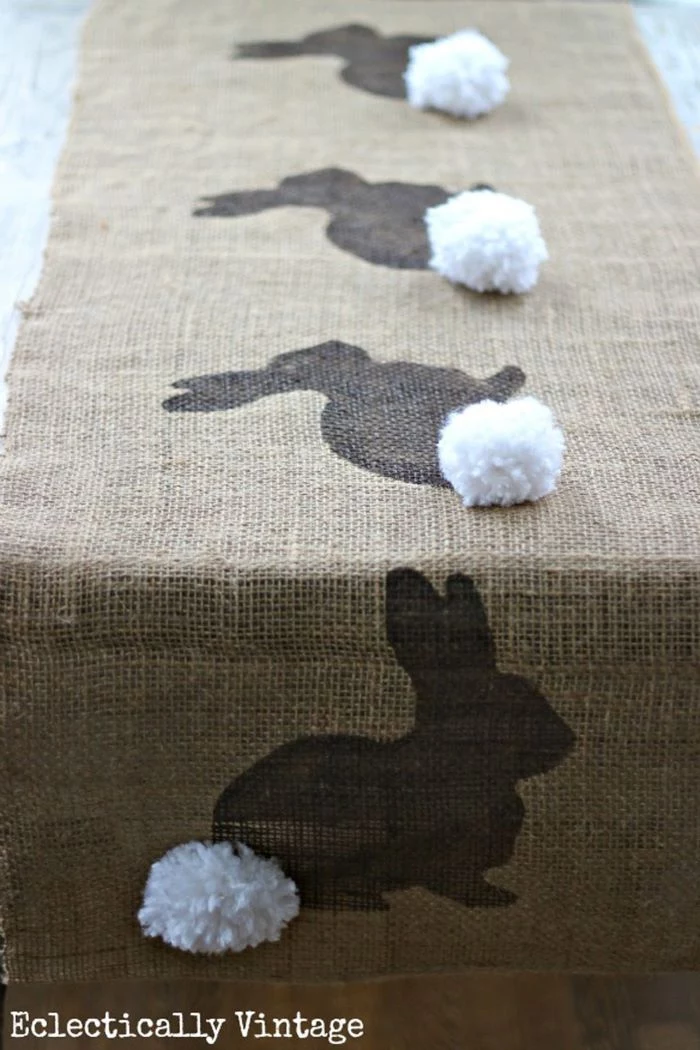
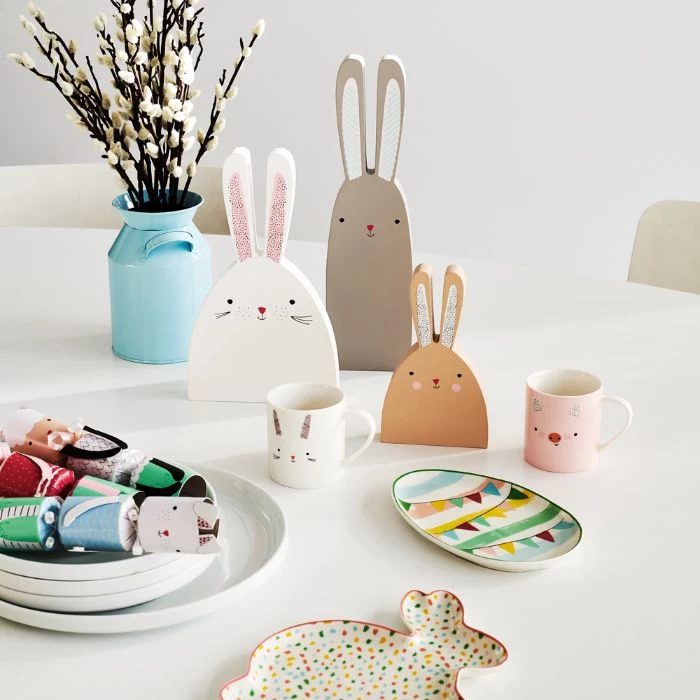
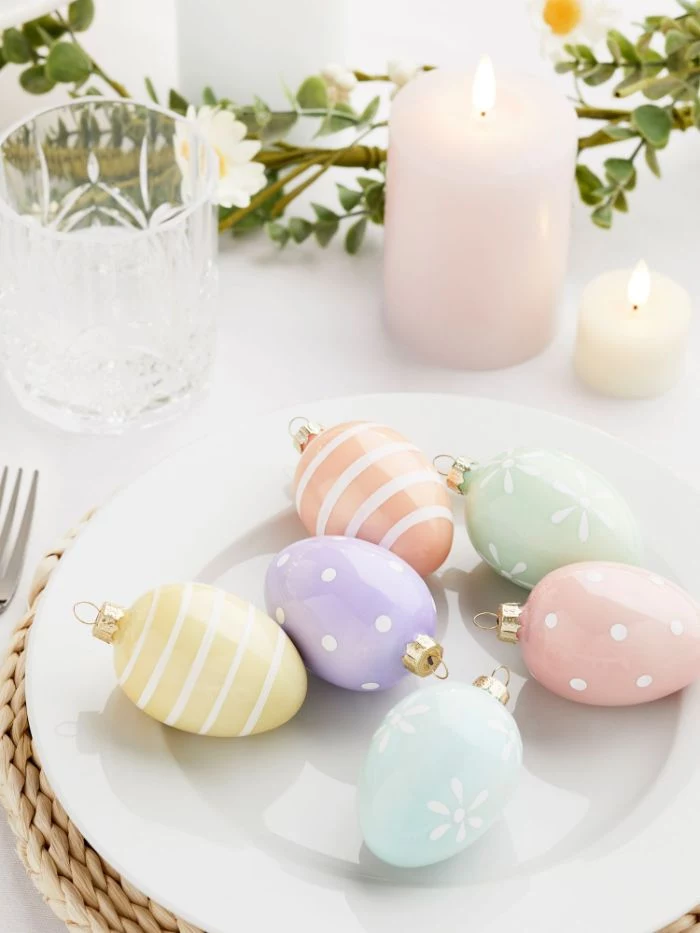
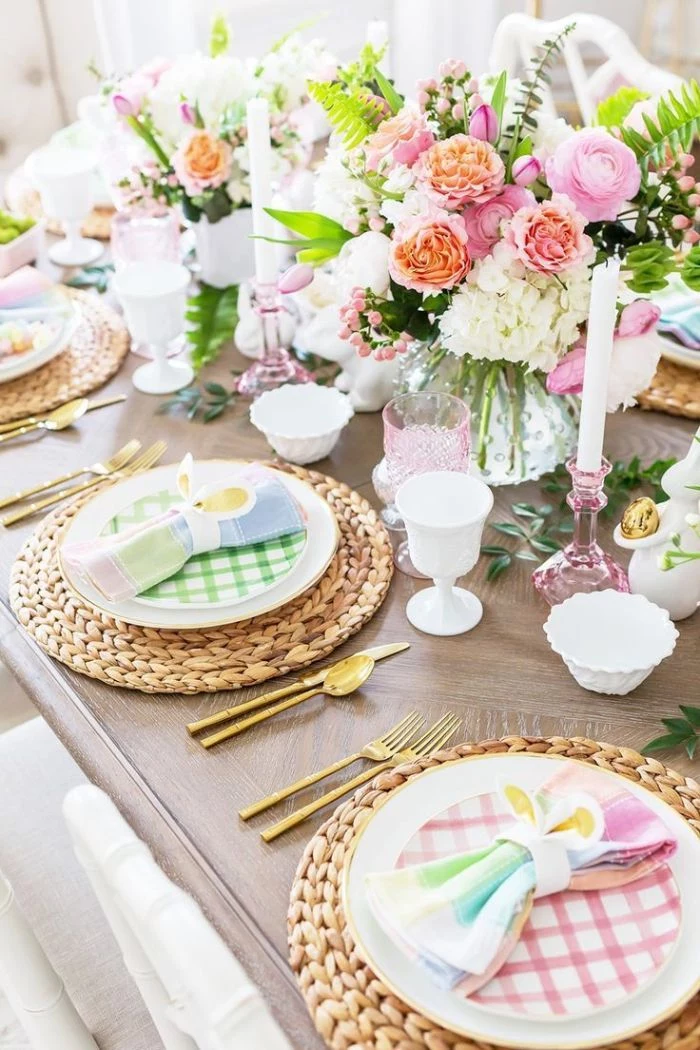
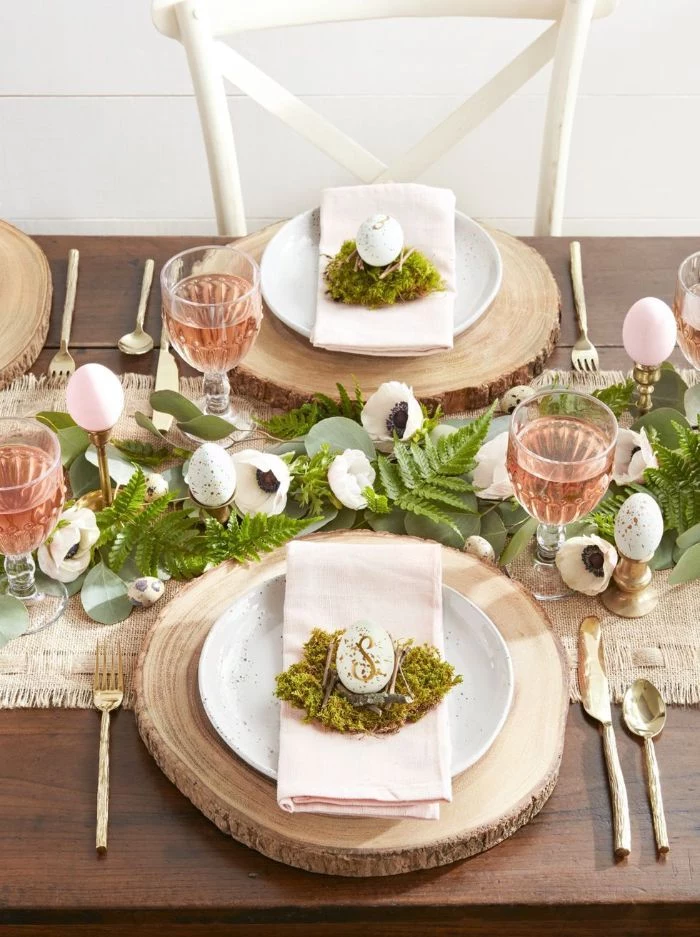
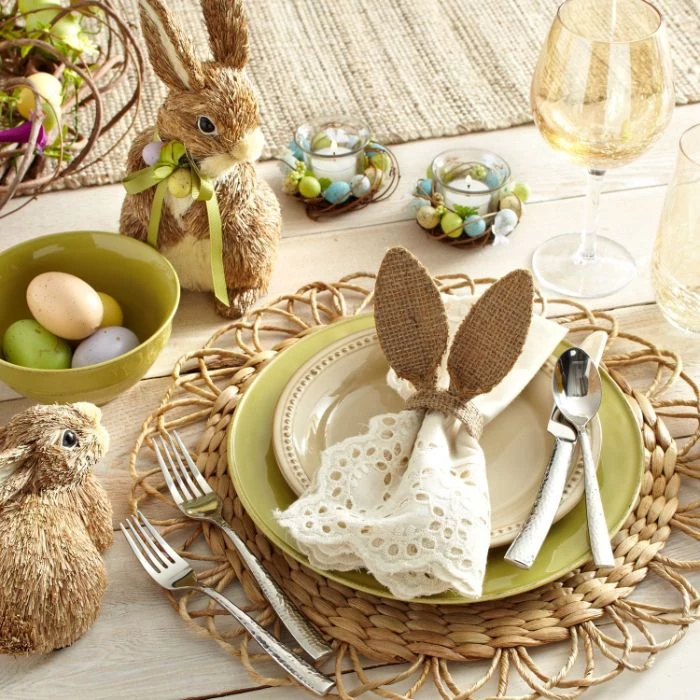
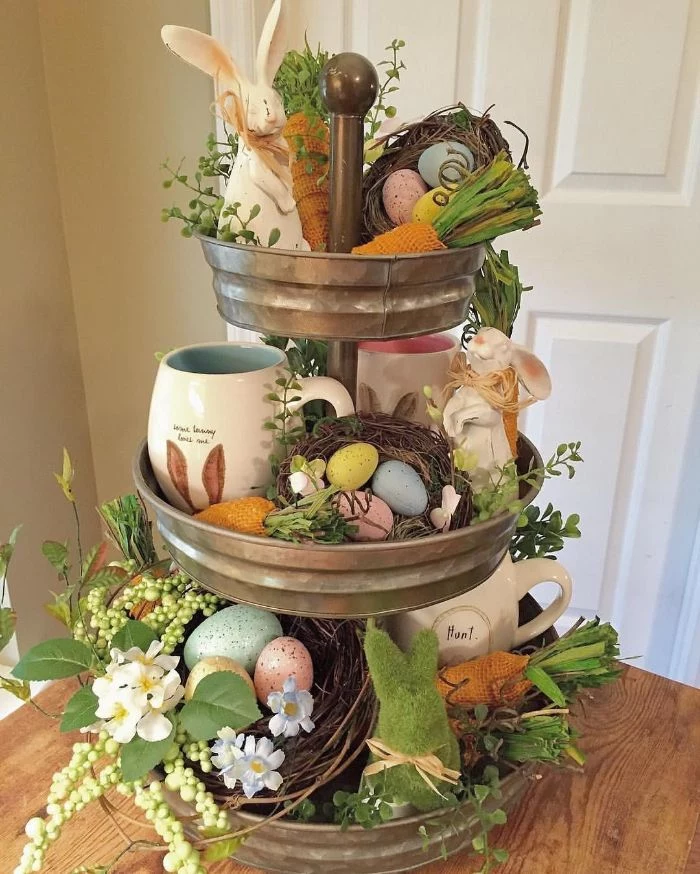
The foundation of a high-end Easter table isn’t bunnies, but quality basics. Start with great textiles. A pure linen tablecloth or runner in a neutral shade like oatmeal or slate grey provides the perfect canvas. From there, it’s about layering thoughtful details.
- Ironed cloth napkins.
- A single, perfect bloom in a tiny bud vase at each setting.
- Place cards handwritten with a quality ink pen.
- Heavy, quality flatware.
Gold Leaf: Provides an authentic, brilliant metallic shine that paint can’t replicate. It’s more delicate to apply but the result is unparalleled luxury. A kit like the Speedball Mona Lisa Metal Leaf Starter Kit has everything you need to start.
Gold Paint Pen: Offers control and ease for fine lines or lettering. The finish is flatter and less brilliant than leafing. Look for oil-based pens like those from Sharpie or DecoColor for the best adhesion on a smooth shell.
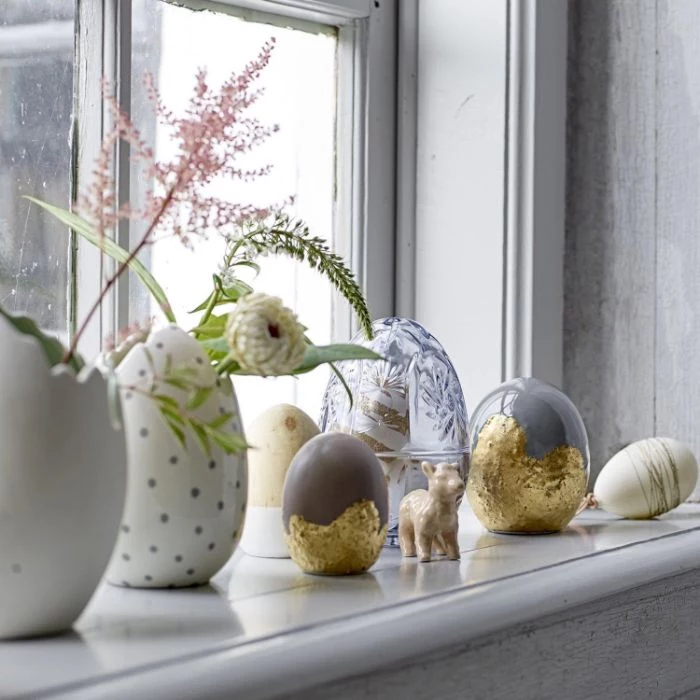
Don’t just decorate the egg—consider its display. A single, beautiful egg becomes an object of art when placed in a simple ceramic pinch pot, a brass napkin ring, or even a tiny nest of Spanish moss. Giving it its own ‘stage’ elevates it from a simple craft to a decorative focal point.

- It adds instant depth and visual interest.
- It makes your color choices look intentional and sophisticated.
- It creates a cohesive look without being boring.
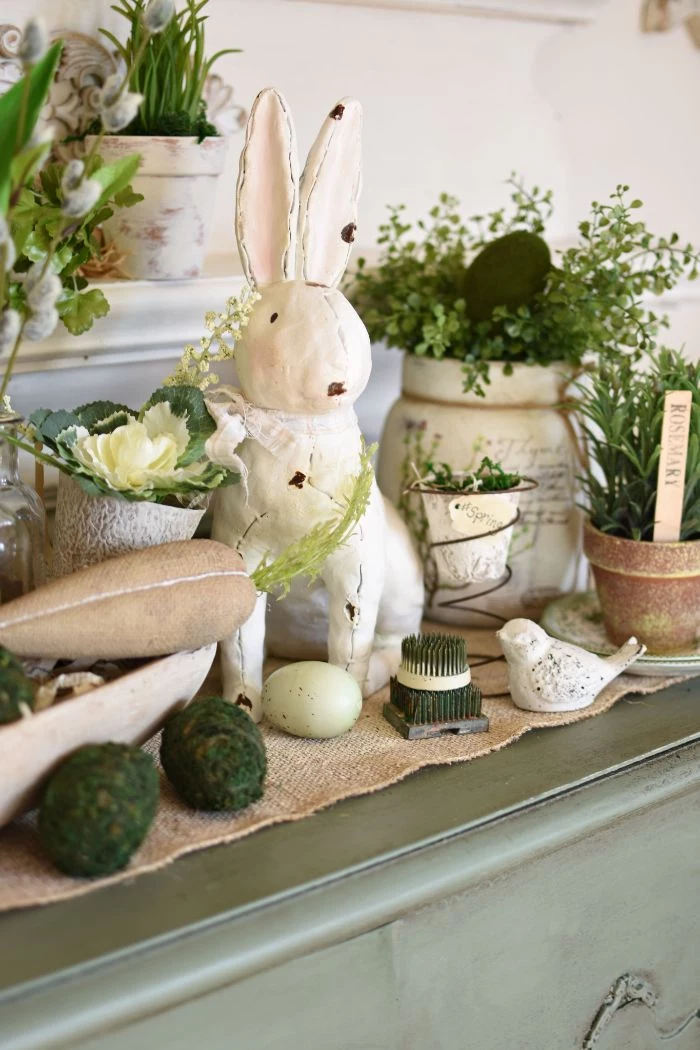
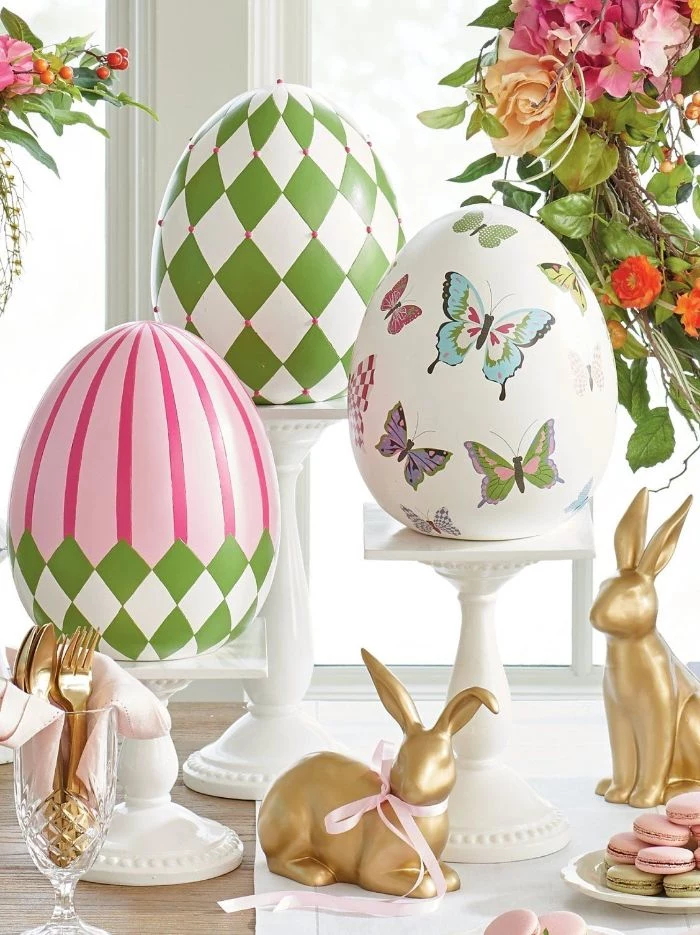
The secret is a monochromatic palette. Instead of mixing many different colors, choose one—like green—and use its full range. Pair deep forest green with fresh mint, soft sage, and chartreuse. The variation in shades and textures creates a rich, harmonious effect.
“The Japanese philosophy of Wabi-sabi is a beauty of things imperfect, impermanent, and incomplete.” – Leonard Koren
Don’t discard an eggshell if it has a small crack. Instead, highlight it. Using the Japanese Kintsugi philosophy, you can repair the crack with a gold lacquer (or, for a DIY version, strong glue mixed with gold mica powder). This transforms the ‘flaw’ into a beautiful, celebrated part of the object’s history.
For an elegant place setting that smells as good as it looks, tie a single sprig of rosemary and a sliver of dried orange peel to a rolled linen napkin using natural baker’s twine. It’s a simple, multi-sensory detail that feels both rustic and refined.
Why does my display feel ‘off’?
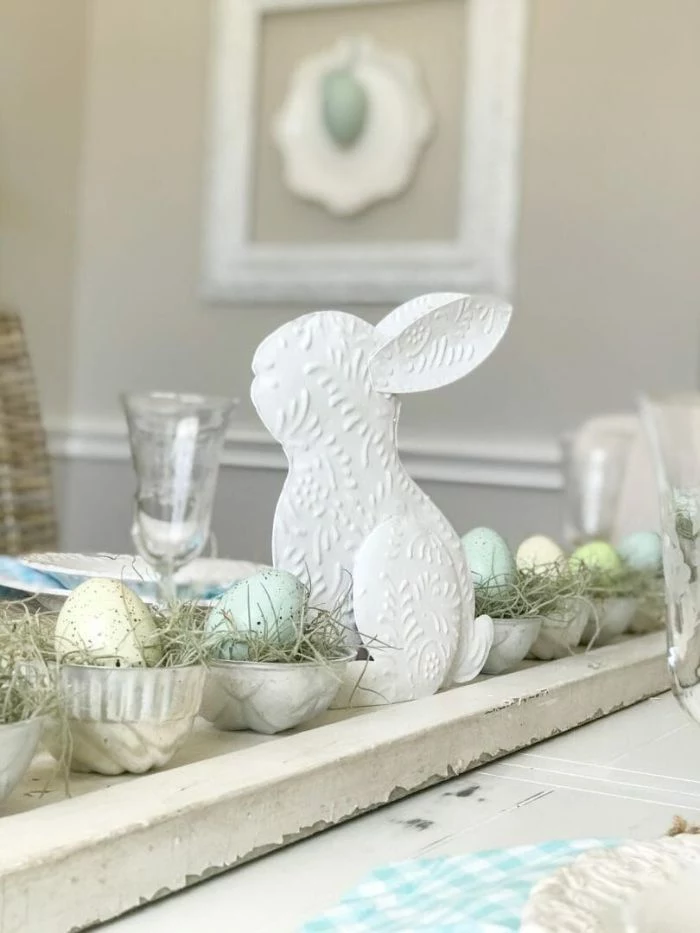
Often, the problem is scale. A tiny nest with miniature eggs will get lost on a large dining table, while an enormous floral arrangement will overwhelm a small entryway console. Before you start, consider the space where your creation will live. Take a step back and ensure your decor is in proportion to its surroundings.
To achieve that coveted, chalky, ultra-matte finish seen in high-end decor magazines, skip the standard acrylic craft paints. Instead, use a quality chalk paint, like Annie Sloan or Farrow & Ball’s Estate Emulsion, on wooden or ceramic eggs. It provides a velvety, pigment-rich surface that absorbs light beautifully.
The problem: Using hot glue on delicate natural elements like fresh flowers, thin branches, or eggshells. The heat can scorch the material, and the thick, opaque bead of glue looks clumsy and unprofessional.
The pro solution: Florist’s Oasis Floral Adhesive. It’s a clear, waterproof glue that bonds quickly without heat. It’s ideal for securing delicate blossoms to a wreath or attaching tiny details with precision.
Blown-out eggshells are a natural calcium supplement for your garden. After Easter, crush the decorated shells and sprinkle them into the soil around your tomatoes or peppers to help prevent blossom-end rot.
Give your decor an unexpected twist by incorporating elements from the vegetable garden. The feathery tops of carrots, the purple florets on an artichoke, or a small head of ornamental cabbage can add surprising texture and color to a spring arrangement. It’s a nod to the earth and the full spectrum of the season’s bounty.
A touch of glass: For a modern, clean aesthetic, use glass laboratory vessels instead of traditional vases. A single daffodil in an Erlenmeyer flask or a few sprigs of lily-of-the-valley in a set of test tubes on a rack creates a display that is scientific, minimalist, and beautifully chic.