The No-Nonsense Guide to a Seriously Thick Lawn
For years, I’ve been hands-deep in dirt, turning sad, patchy yards into the kind of lawns you want to walk on barefoot. When I first started, I thought a green lawn was the finish line. Turns out, I was wrong. The real secret isn’t just about what you see on top; it’s about building a tough, resilient ecosystem from the ground up.
In this article
A genuinely thick lawn does more than just look good. It’s a powerhouse. It naturally crowds out weeds, laughs off a dry spell, and can handle the chaos of a summer barbecue. It has that dense, springy feel under your feet. This kind of lawn doesn’t come from a single magic product. It’s built on a few core principles that pros use, applied with a bit of patience. So, let’s get into the “why” behind each step, so you can build a lawn that truly lasts.
1. It All Starts with the Soil (No, Really)
Honestly, most people fixate on the grass itself. But the pros? We know the game is won or lost in the soil. If you ignore what’s happening underneath, you’re setting yourself up for a constant, expensive battle. You’ll just keep throwing fertilizer and water at the problem for temporary results.

What’s Actually in Your Dirt?
Soil isn’t just… well, dirt. It’s a living mix of minerals (sand, silt, and clay), organic matter, water, and air. Sandy soil drains like a sieve and can’t hold onto nutrients. Heavy clay soil holds everything, but it gets so dense and compacted that it can suffocate the roots. The sweet spot is a balanced loam, which has a bit of everything.
Then there’s pH, which is just a fancy way of measuring how acidic or alkaline your soil is. Most lawn grasses are happiest in a slightly acidic to neutral zone, somewhere between 6.0 and 7.0 on the scale. If your pH is out of whack, the grass can’t absorb the nutrients in the soil. It’s like putting a feast in front of someone with their hands tied. This is the #1 reason I see lawns that don’t respond to fertilizer.
The Single Best Investment: A Soil Test
Guessing about your soil is a total waste of time and money. A professional soil test is, without a doubt, the most valuable tool you can have. For about $15 to $30—less than a single bag of premium fertilizer—you get a detailed report card for your lawn. It tells you your soil’s pH, nutrient levels, and how much organic matter it has. I always recommend using a local university extension service. Their recommendations are tailored for your specific area.
To take a sample, just grab a clean trowel and a bucket. Dig down about 4 to 6 inches and collect small samples from 6-8 different spots around your lawn. Mix them all together in the bucket, let the soil air dry, and mail it off. The results are your roadmap.
Making Real Soil Improvements
Once you have your report, you can make smart changes. Low pH? The report will tell you exactly how much lime to add. Too high? It might suggest sulfur. The key is to follow the instructions and be patient; changing pH is a slow dance that can take a season or more.
But my favorite long-term fix is topdressing with high-quality compost. After aerating in the fall (more on that later), we spread a thin layer—about a quarter-inch—of fine compost over the lawn and rake it in. This slowly builds up organic matter, which helps clay soil drain better and sandy soil hold water. It’s like a superfood for your soil’s ecosystem.
Quick tip: Want to know how much compost to order? Here’s a simple formula the pros use. To get a 1/4 inch layer, multiply your lawn’s square footage by 0.0077. That gives you the cubic yards of compost you’ll need. For a 2,000 sq. ft. lawn, that’s about 1.5 cubic yards.
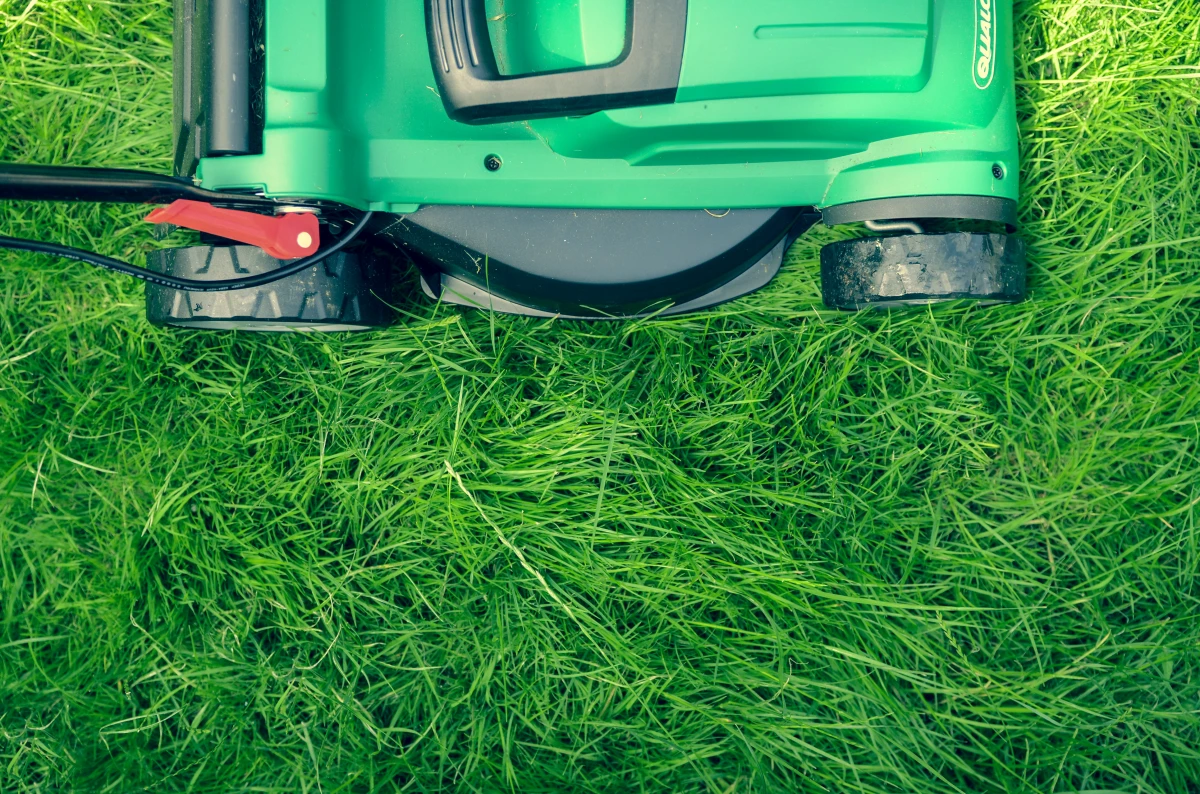
2. Mowing: Stop Stressing Your Grass Out
Mowing seems like the simplest chore, but how you do it directly affects your lawn’s thickness. Bad mowing habits are probably the most common mistake I see, and they leave the door wide open for weeds, disease, and drought damage.
Here’s the deal: each blade of grass is a tiny solar panel, making energy for strong roots. When you scalp the lawn, you’re yanking away its energy source. The plant panics and uses up all its reserves to regrow leaves, completely ignoring its roots. That’s why the “one-third rule” is gospel. Never, ever remove more than one-third of the grass blade’s height in a single mow.
And by the way, taller grass is healthier grass. It grows deeper roots, making it tougher during dry spells. The taller blades also shade the soil, which helps prevent weed seeds from sprouting. For most common lawns, a mowing height of 3 to 4 inches is perfect.
The easiest thing you can do for your lawn today? Go raise your mower deck to the highest setting. It takes 30 seconds and instantly reduces stress on the grass.
Pro Habits: Sharp Blades and New Paths
A sharp mower blade is absolutely non-negotiable. A dull blade tears the grass, leaving a shredded, tan-colored tip that’s a perfect entry point for fungus. You should aim to sharpen your blade two or three times a season. It makes a huge difference.
Another pro move is to vary your mowing pattern every time you cut. Mowing the same way every week encourages the grass to lean over and can create ruts. Mix it up—go vertical one week, horizontal the next, then diagonal. It encourages the grass to grow straight and strong.
3. Aeration: Give Your Roots Room to Breathe
Over time, especially in high-traffic areas or yards with clay soil, the ground gets squished together. This is called compaction. It squeezes out the tiny pockets of air and water that roots need to survive. Water runs off instead of soaking in, and roots can’t grow deep. It’s a primary cause of thinning turf.
Spike vs. Core: Only One Is the Real Deal
You’ll see two kinds of aerators out there. Spike aerators just poke holes in the ground. I mean, it’s better than nothing, but they can actually make the soil more compacted around the edges of the hole. It’s a temporary fix at best.
The professional standard is a core aerator. This machine has hollow tines that physically pull out small plugs of soil, about 2 to 3 inches long. This is the real deal. It actually removes the compacted soil, creating channels for air, water, and nutrients to get down to the roots where they’re needed.

Heads up! Renting a core aerator from a place like Home Depot or a local tool shop will run you about $50 to $75 for a half-day. But be warned, these things are absolute beasts. They’re heavy, awkward, and you’ll definitely need an SUV or a truck to haul it home. It’s a workout, for sure.
The best time to aerate is when the grass is actively growing—early fall or spring for most northern lawns, and early summer for southern ones. And what do you do with all those little dirt plugs it leaves on your lawn? Just leave them! They’ll break down naturally in a week or two and return nutrients to the soil.
A Critical Safety Warning
Before you even think about starting that aerator, you have to mark what’s underground. I once had a new guy on my crew shear off three sprinkler heads in five minutes because he skipped this step. It was a costly and embarrassing lesson. Call 811 a few days ahead of time—it’s a free service that marks public utility lines. But they don’t mark your stuff. For your own sprinkler lines or an invisible dog fence, the easiest way is to run your sprinkler system for a few minutes and stick a small flag next to every single head before you begin.
4. Seeding: It’s All About the Right Genetics
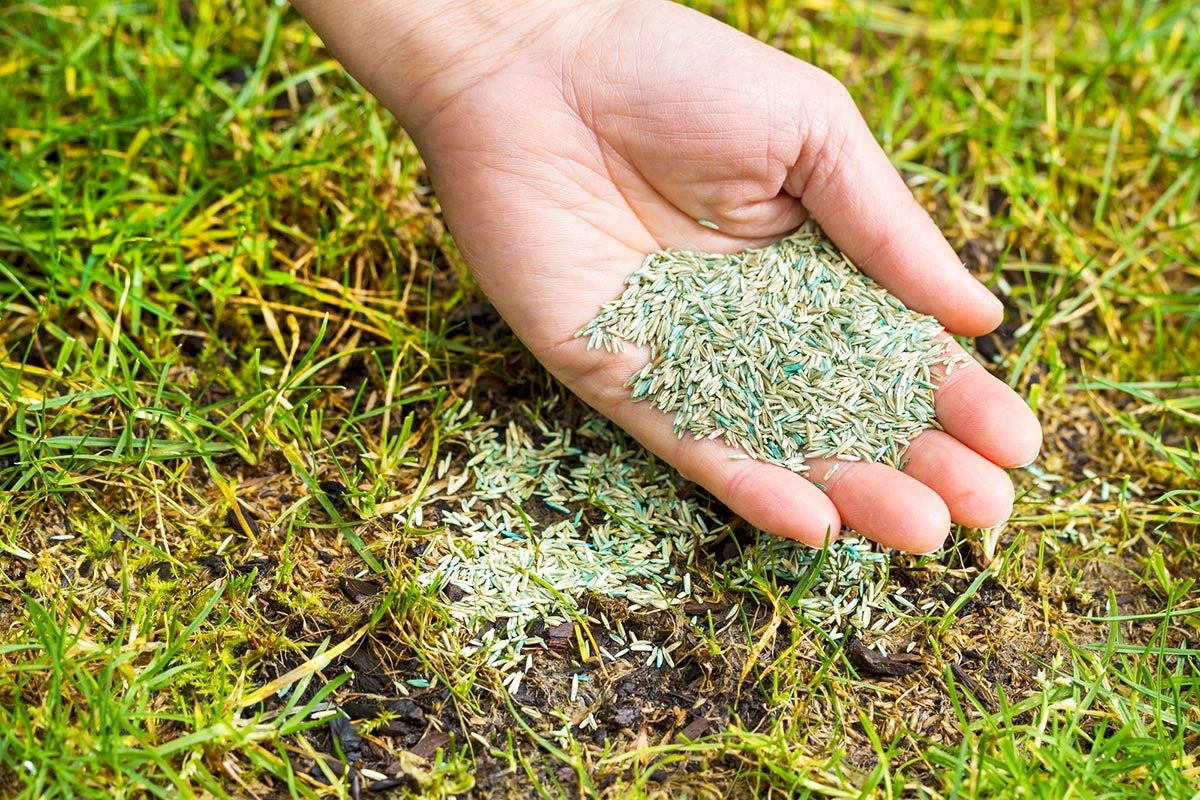
Overseeding—spreading new seed over your existing lawn—is the key to filling in thin spots and building density. But throwing down the wrong seed is like trying to plant a palm tree in Alaska. It just won’t work.
Always buy high-quality, certified seed from a good supplier, not the generic stuff from a big-box store. Look at the analysis tag on the bag. You want to see a high germination rate (over 85%), high purity, and very low percentages of “other crop” and “weed seed.” A cheap bag of seed is never a bargain.
The Professional Overseeding Playbook
The perfect time to overseed a cool-season lawn is in late summer or early fall, right after you’ve core aerated. The combination of warm soil and cool air is ideal for new growth.
To do this right, you’ll need a few things. Think of it as a shopping list: a rented core aerator, a broadcast spreader, enough quality seed for the “overseeding rate” on the bag, and a starter fertilizer. Got it? Okay, here’s the process.

- Mow Low: Cut the grass shorter than usual, down to about 2 inches, so sunlight can hit the soil.
- Aerate: Go over the entire lawn thoroughly with the core aerator. Multiple passes are your friend here.
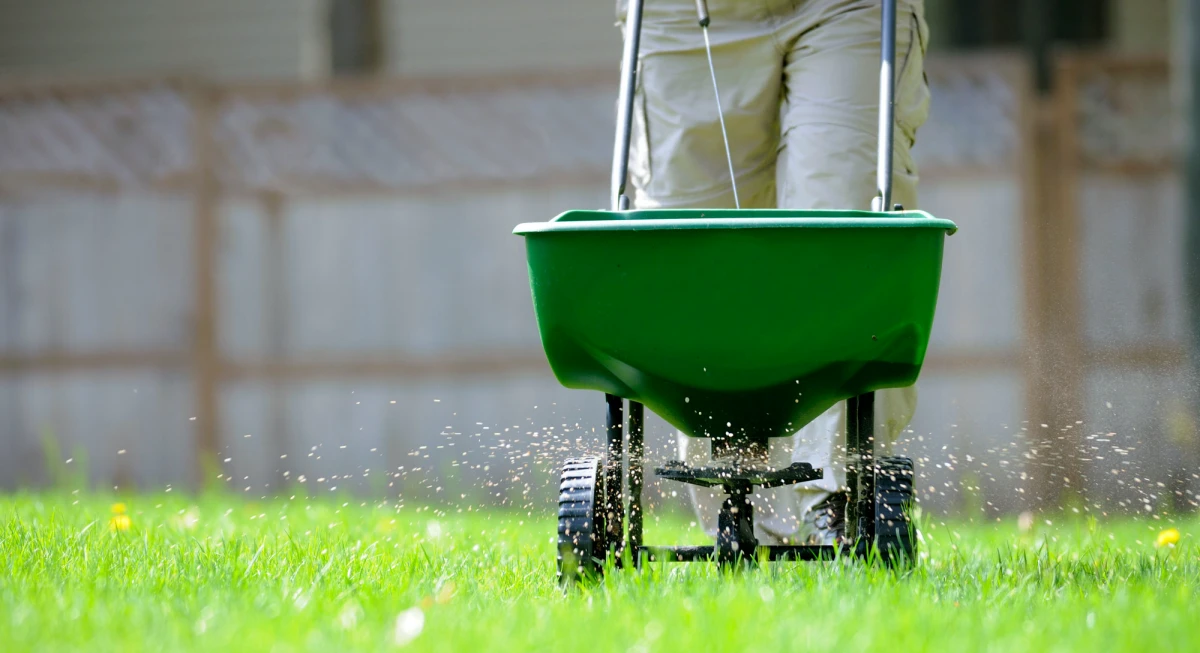
- Spread Seed & Fertilizer: Use your broadcast spreader to apply the seed, then apply a starter fertilizer. For a starter, look for a bag where the middle number (the ‘P’ for Phosphorus) is the biggest one—that’s the nutrient for new roots.
- Water, Water, Water: This is the most crucial part. You have to keep the seed consistently moist until it sprouts. That usually means light watering once or twice a day for the first couple of weeks. Don’t let it dry out!
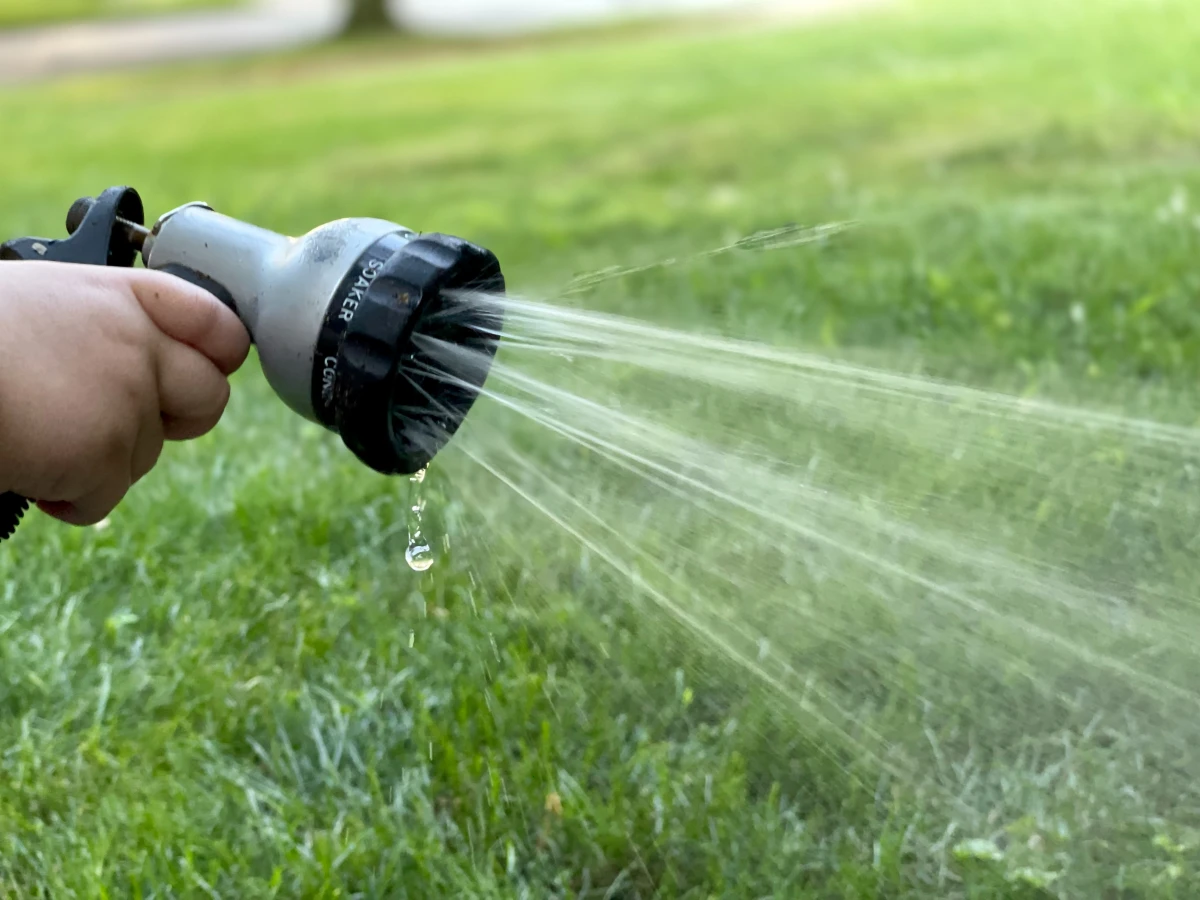
5. Watering: Deep and Infrequent is the Mantra
So many people water their lawns for 10 minutes every day. This creates weak, shallow roots that can’t handle any stress. You want to train your lawn’s roots to dig deep for water.
The goal is to water deeply but infrequently. This forces moisture down into the soil, and the roots have to grow down to find it. This creates a deep, strong root system that can survive when the top layer of soil gets bone dry in a heatwave.
How Much and When?
Most lawns need about 1 to 1.5 inches of water a week, from rain or your sprinkler. Don’t guess! Do the “tuna can test.” Set a few empty, flat-bottomed cans around your lawn, run the sprinkler for 30 minutes, and measure the water inside. This will tell you exactly how long it takes to put down a half-inch or an inch of water.
The best time to water is always early in the morning, between 4 a.m. and 9 a.m. This minimizes evaporation and allows the grass blades to dry during the day. Watering at night leaves the grass wet for hours, creating a perfect breeding ground for fungal diseases. It’s a rookie mistake that causes a ton of problems.
Bringing It All Together
Look, building a great lawn is a marathon, not a sprint. It’s about getting the system right from the soil up. So, get a soil test, mow high with a sharp blade, aerate to break up compaction, use the right seed, and water deeply. Be patient. You won’t have a golf course overnight. But within a season or two of following this approach, you’ll see a real, lasting transformation—a thick, healthy lawn that you can truly enjoy.
Inspirational Gallery
So, why shouldn’t I cut my grass super short for that clean, golf-course look?
It’s a common temptation, but mowing too low is one of the quickest ways to weaken your lawn. Taller grass blades (aim for 3-4 inches) mean a deeper, more extensive root system. Those deep roots can access water far below the surface, making your lawn dramatically more resilient during a hot, dry spell. Taller grass also shades the soil, keeping it cool and preventing opportunistic weed seeds, like crabgrass, from sprouting.
- Creates a lush, carpet-like texture.
- Fills in bare spots on its own.
- Offers a classic, deep green color.
The secret? A high-quality Kentucky Bluegrass seed. While it requires more sun and water than Fescue, its ability to spread via rhizomes means it actively repairs itself, forming the dense turf every homeowner dreams of.
A single, sharp mower blade can make a bigger difference to your lawn’s health than a bag of fertilizer.
It sounds dramatic, but it’s true. A dull blade tears and rips the grass, leaving a jagged, shredded edge that stresses the plant and creates an entry point for disease. A sharp blade makes a clean, surgical cut, which heals quickly and keeps the grass looking vibrant and green. Check your blade monthly; a quick sharpening is a game-changer.
Tall Fescue: The workhorse. Its deep roots make it incredibly drought-tolerant and tough enough for high-traffic areas where kids and pets play. Modern varieties, like those in Jonathan Green’s Black Beauty mix, are much finer-bladed than older types.
Perennial Ryegrass: The sprinter. It germinates incredibly fast, making it perfect for quick repairs or overseeding. It provides a beautiful, shiny green color but is less tolerant of extreme heat or cold.
For most lawns, a blend of these offers the best of both worlds: resilience and rapid establishment.
Beyond just feeding the grass, think about feeding the soil. That’s the philosophy behind organic, slow-release fertilizers like Milorganite. Instead of a quick, chemical jolt of green, it nourishes the microbial life in your soil. These microbes then break down the nutrients, making them available to the grass roots naturally. The result is a steadier, more sustainable growth without the risk of burning your lawn.
Did you know? Just a half-inch layer of compacted soil can curb a root’s ability to absorb water and nutrients by more than 50%.
This is why core aeration is so crucial. By pulling out small plugs of soil, you’re not just loosening compaction; you’re creating channels for oxygen, water, and fertilizer to get directly to the root zone where they’re needed most. It’s the single most effective thing you can do for a lawn that feels hard as a rock.
The biggest watering mistake: A light, daily sprinkle. This encourages shallow, lazy roots that are vulnerable to heat and drought. The goal is to train your roots to dig deep. Water deeply and infrequently—a good soaking that wets the soil 6-8 inches down, but only once or twice a week, depending on the heat. This forces the roots to search downward for moisture, building a stronger, more self-sufficient lawn.
Filling in thin spots is easier than you think. A late summer or early fall overseeding campaign works wonders for density.
- Mow the existing lawn one setting lower than usual and bag the clippings.
- Rake the bare areas vigorously with a stiff garden rake to remove debris and loosen the soil surface.
- Spread a high-quality seed, like Scotts Turf Builder Thick’R Lawn, which combines seed, fertilizer, and a soil improver.
- Keep the seeded areas consistently moist with light watering sessions until the new grass is established.
That professional, ballpark-striped look isn’t created with different grass colors; it’s just an illusion of light. Lawn striping is achieved by bending the blades of grass in different directions with a roller, which is often a simple attachment on the back of a mower. When the blades are bent away from you, you see the full, light-reflecting blade. When they’re bent towards you, you see the darker, shadowed side. That’s it!


