Skip the Trends: Home Upgrades That Actually Pay Off, From a Pro’s Playbook
After you’ve spent a couple of decades building and renovating homes, you learn to see things differently. You start to spot the difference between a trendy, temporary fix and a change that adds real, lasting value. I’ve worked with countless homeowners, and so many come to me feeling totally overwhelmed by all the options out there. They’ll see a stunning photo in a magazine and want that exact look, but they don’t see the tiny, crucial details that make it all work.
In this article
But here’s the secret: the best projects aren’t always the most expensive. They’re the most thoughtful.
It’s really about understanding the materials, respecting the home’s bones, and making smart choices that will look and feel fantastic for years to come. This isn’t about chasing a fleeting style. It’s about fundamentally improving how your home works and feels. So, I want to pull back the curtain on some of the key areas I focus on with clients, moving beyond simple paint jobs to explore the principles that genuinely elevate a space.

1. Millwork and Wainscoting: The Bones of a High-End Room
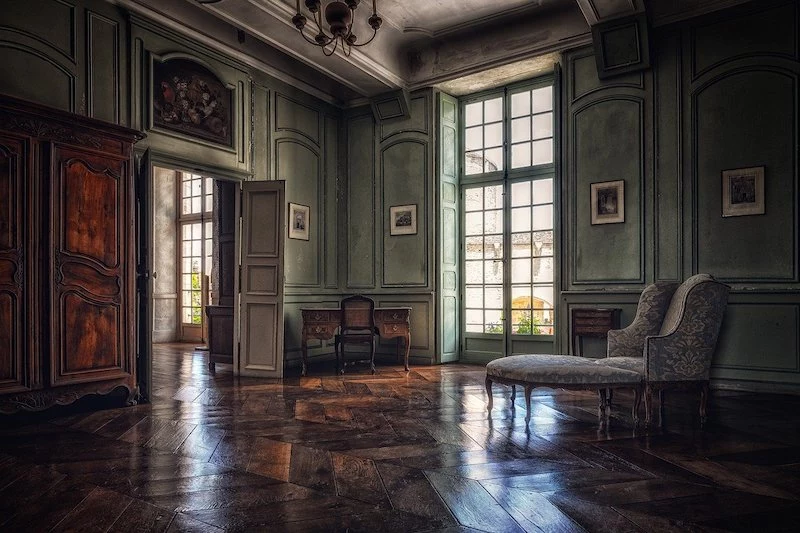
One of the clearest dividing lines between a basic, builder-grade room and a custom-finished space is the quality of the millwork. We’re talking about the baseboards, door casings, crown molding, and especially wainscoting. People often treat this as an afterthought, but for the pros, it’s the frame that holds the entire picture together.
Thinking about tackling wainscoting? Here’s a quick reality check. For a professional, installing it in a standard dining room is a solid 2-3 day job. If you’re a careful DIYer, you should probably set aside two full weekends to get it right. As for cost, you can expect to pay between $8 and $15 per linear foot for the materials alone, depending on what you choose. The most important tool you’ll need? Patience.
Why Wainscoting Works
Wainscoting isn’t just a pretty wall treatment. It originally had a very practical job: protecting fragile plaster walls from getting scuffed up by chairs and general traffic. That’s why the traditional height is usually somewhere between 32 and 36 inches—right about where the back of a dining chair hits. Modern drywall is tougher, sure, but the visual effect is timeless. It creates a strong horizontal line that grounds the room, adding a sense of substance and permanence that a simple coat of paint just can’t replicate.

How the Pros Get It Right
A flawless wainscoting job is all about precision. Here’s how we approach it on a professional site to avoid those rookie mistakes:
- Let the Wood Breathe: Wood and even MDF (Medium-Density Fiberboard) will expand and contract with humidity. We ALWAYS bring the materials into the house and let them sit for at least 48 to 72 hours before a single cut is made. This lets the wood acclimate to your home’s specific environment, preventing ugly gaps from showing up a month after you’re done. Seriously, don’t skip this step.
- Plan Your Layout: We never just start nailing boards in a corner. First, we measure the entire room and plan the spacing of the panels to make sure they look balanced. The goal is to avoid leaving a tiny, awkward sliver of a panel in a highly visible corner. The top rail of the wainscoting needs to be perfectly level around the room. Heads up: your floor probably isn’t level, so measuring up from the floor is a mistake. We use a laser level for this, but don’t worry if you don’t own one. A good 4-foot spirit level and a chalk line will get you there; it just takes a bit more time and double-checking.
- Cope Your Inside Corners: When two pieces of molding meet in an inside corner, amateurs often just miter them both at 45 degrees. This joint will almost always open up as the house settles. Professionals cope the joint. One piece is cut square and fits flat against the wall. The other piece is mitered, and then the profile is carefully cut out with a coping saw so it fits perfectly against the face of the first piece. It creates a tight seam that stays tight.
- Scribe for a Perfect Fit: No wall is perfectly straight and no floor is perfectly level. Instead of hiding a gap with caulk, we scribe the baseboard. We set the board in place and use a compass to trace the wavy contour of the floor onto the wood. Then, a quick pass with a jigsaw gives you a perfect, gap-free fit.

Choosing Your Material: A Quick Guide
The material you pick directly impacts your budget and the project’s durability. There’s no right or wrong answer, just trade-offs. For a painted finish, Poplar is a fantastic wood—it’s stable, not too expensive, and holds sharp details well. If you’re looking to save money, MDF is a good option; it’s very stable and won’t warp, but it hates water and the cut edges need to be sealed well before painting. If you’re dreaming of a classic stained look, you’ll need to use a hardwood like oak or cherry, which is the most expensive route but offers unmatched beauty.
2. Rethinking a Room’s Flow and Function
I sometimes get funny looks when I spend the first part of a consultation just watching how a family uses their space. But moving furniture around isn’t just about making things look different—it’s about making them work better. Good space planning is a science.

The Unspoken Rules of a Good Layout
A room that feels right usually follows a few key principles you might not even notice:
- Clear Pathways: Every room needs clear lanes for traffic. A major walkway should be at least 36 inches wide. This lets people move around without turning sideways or bumping into the coffee table. Quick exercise: Go grab a tape measure and check the main path through your living room. Is it 36 inches? If not, what’s in the way? Sometimes just seeing the number makes the problem obvious.
- Create Functional Zones: In a big, open room, don’t just scatter furniture around. Create zones. You might have a primary conversation area with a sofa and chairs anchored on a rug. Over in a corner, you could have a secondary zone with a single comfy chair, a small table, and a good reading lamp. It makes the space feel intentional.
- Get the Scale Right: This is where so many people go wrong. A gigantic, overstuffed sectional can make a small room feel suffocating, while tiny furniture looks lost and silly in a huge space. Before buying anything, measure your room and create a to-scale floor plan. If you’re a visual person, there are some great free online room planning tools that can help you map this all out before you move a single heavy thing.
I remember a client who was dead-set on a massive media cabinet for their living room. I drew up the plan and showed them it would leave less than two feet of clearance to their balcony door. They were so focused on the cabinet they hadn’t thought about the daily annoyance of squeezing by it. We found a slimmer, wall-mounted console instead. A few months later, they told me it was the best decision they’d made. Sometimes, the best addition is actually subtraction.
3. Hardware: The Handshake of Your Home
People call hardware—knobs, pulls, hinges—the “jewelry of a room.” I think of it more like the handshake. It’s one of the few things you physically touch every single day. Flimsy, cheap-feeling hardware sends a subtle but powerful message about the quality of the entire home.
What to Look for in Quality Hardware
When we’re choosing hardware for a high-end project, we look past the finish.
First is the material. Solid brass is the gold standard. It’s heavy, incredibly durable, and develops a beautiful, natural patina. Zinc or aluminum hardware is much lighter and cheaper. The difference in price is significant: expect to pay $2-$5 for a basic, plated zinc pull from a big-box store, whereas a solid brass one will likely run you $15-$40 apiece. You’ll feel the difference the second you hold it.
Second, we look at the durability of the finish. For trendy finishes like matte black or satin brass, we look for products with a PVD (Physical Vapor Deposition) coating. It’s a process that creates a much tougher surface that resists scratches and tarnish way better than a simple powder coat.
And finally, we always stick to standard sizing for cabinet pulls. This is a HUGE deal for you down the road. If your pulls have a standard center-to-center screw measurement (like 96mm, 128mm, or even 3 inches), replacing them in five years is a simple, ten-minute job. If you pick some odd, non-standard size, you’re stuck either hunting for a rare replacement or drilling new holes and patching the old ones. Trust me, it’s a headache you want to avoid.
By the way, swapping out old cabinet hardware is one of the fastest and most satisfying updates you can make. It’s a perfect one-hour project for a weekend. Just measure the distance between the centers of the two screw holes on one of your current pulls—write that number down! Then, simply buy new hardware with the exact same measurement. That way, you can just unscrew the old pieces and pop the new ones right in. Boom, an instant kitchen refresh without a single drill bit.
Inspirational Gallery
The unseen upgrade that changes everything: solid core doors. While hollow core doors are standard, upgrading to solid core completely transforms the feel of a home. The satisfying weight, the substantial ‘thud’ when they close, and the superior sound insulation provide a daily, tangible sense of quality that far outweighs the initial cost.
More than 75% of a room’s impression comes from its lighting, yet it’s often the last element considered in a renovation.
A professional lighting plan isn’t just about fixtures; it’s about layers. A well-lit room always combines ambient (overall), task (for activities like reading), and accent (to highlight art or architecture) lighting. Getting this balance right is a hallmark of high-end design.
What’s the one detail that quietly signals a custom kitchen?
Look at the countertop edges. A standard builder-grade installation often uses a simple bullnose or rounded edge. A high-end finish, however, frequently features a mitered edge. This technique joins two pieces of stone at a 45-degree angle to create a seamless, thick-slab look without the weight or cost. It’s a subtle but powerful detail that adds immense visual substance.
- Creates a seamless, expansive flow.
- Makes smaller spaces feel larger and more cohesive.
- Provides a clean, uncluttered foundation for furnishings.
The secret? Running the same flooring material continuously through common areas. Avoid breaking up the floor plan with different materials between the kitchen, dining, and living rooms. This single decision creates an architectural unity that always feels intentional and sophisticated.
Think of hardware as the jewelry of your home. Upgrading flimsy, contractor-grade cabinet pulls and doorknobs to solid brass or forged iron options from brands like Emtek or Rejuvenation is a small project with a huge payoff. The tactile experience of a heavy, well-crafted handle is a constant reminder of quality and attention to detail.
A minor kitchen remodel, which includes cabinet refacing, new hardware, countertops, and appliances, consistently recoups over 70% of its cost at resale—one of the highest returns of any home project.
When planning your bathroom budget, think like a pro and prioritize the ‘wet wall’ fixtures that are difficult and expensive to change later.
- Splurge: Invest in a high-quality thermostatic shower valve from a reputable brand like Grohe or Kohler. It provides precise temperature control and is built to last.
- Save: You can find beautiful, durable field tiles for the walls or floor without opting for the most expensive artisanal options. The installation quality matters more than the price per square foot.
Plaster vs. Drywall: For a truly premium finish, especially in prominent rooms or historic homes, consider a skim coat of plaster over the drywall. It provides a seamless, monolithic surface with a subtle depth and luminosity that paint on drywall can’t replicate. It’s an old-world technique that adds undeniable character and permanence.
Drywall Finish: If sticking with drywall, insist on a Level 5 finish. This is the highest grade, involving a thin skim coat of joint compound over the entire surface. It eliminates imperfections and is the standard for rooms with dramatic lighting or gloss paints.
For trim, doors, and cabinetry that will truly stand up to life, move beyond standard latex paint. Pros often turn to urethane alkyd enamels, such as Sherwin-Williams’ Emerald Urethane Trim Enamel or Benjamin Moore’s ADVANCE. These water-based formulas cure to a hard, furniture-like finish that resists scuffs, yellowing, and daily wear and tear far better than their conventional counterparts.


