Your Guide to Hand-Painted Nail Art (From a Pro Who’s Seen It All)
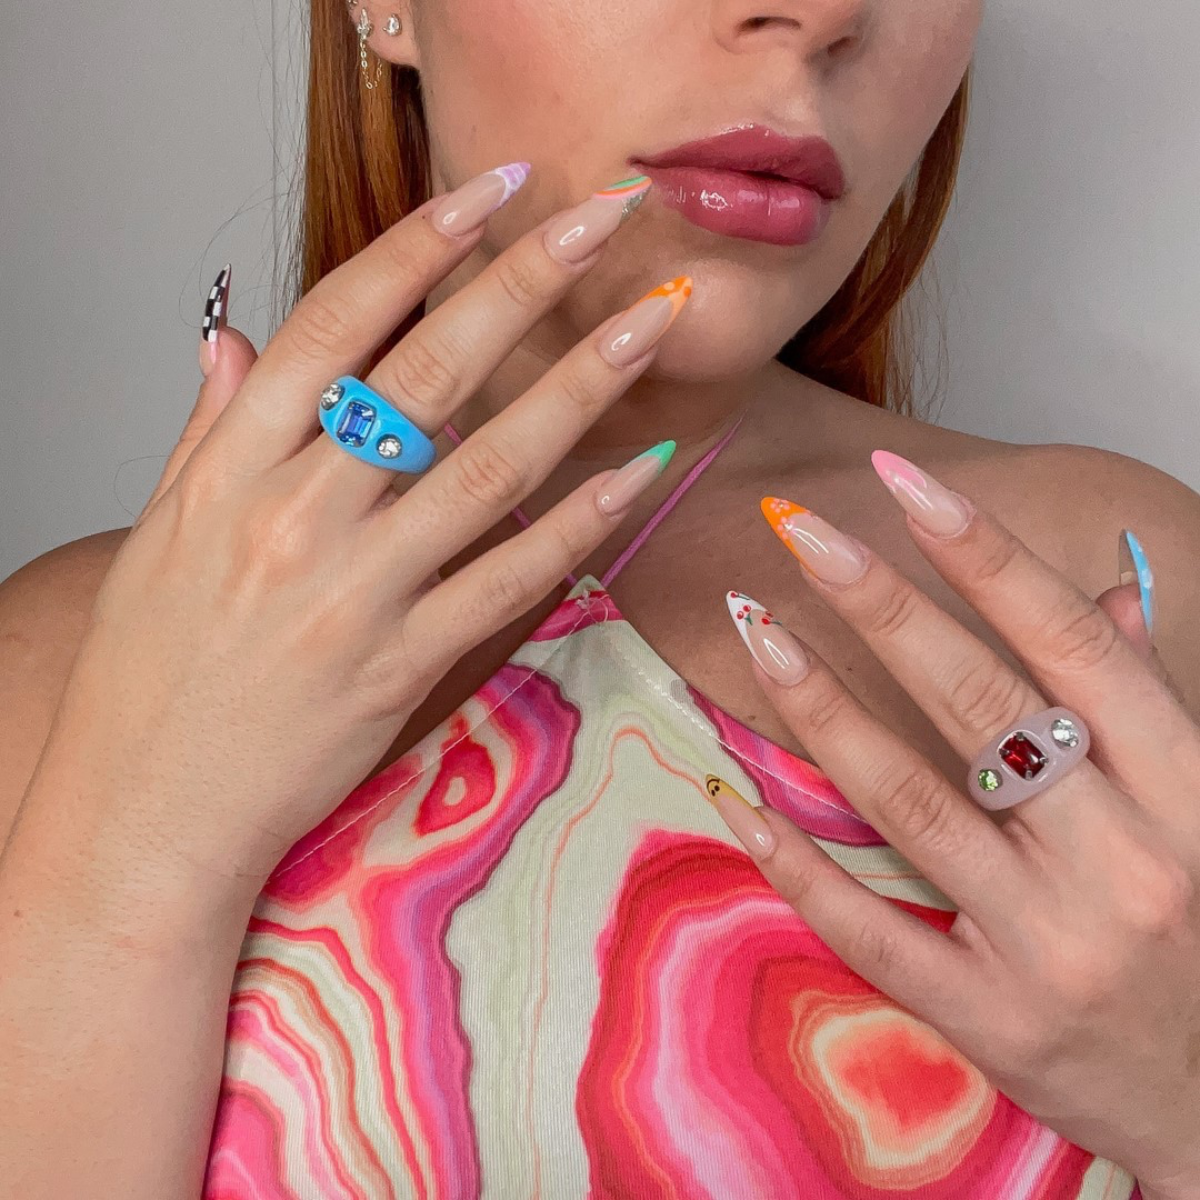
I’ve been a professional nail tech for well over a decade, and let me tell you, I’ve seen trends come and go. From the classic French manicure to those wild, mirror-finish chrome nails, it’s been a ride. But the work that really gets my heart going? It’s the intricate, hand-painted designs. Some people call them “whimsical,” but I just see them as ten tiny canvases for telling a story.
In this article
This isn’t about slapping a sticker on a nail and calling it a day. Honestly, it’s about diving deep into color theory, mastering your brush until it feels like an extension of your hand, and knowing your materials inside and out. It’s a skill that took me years of practice, countless hours learning from amazing mentors, and, yes, a few spectacular (and frustrating) failures to finally get right.
When a client sits in my chair and asks for a tiny galaxy or a miniature garden on their fingertips, they’re trusting me with a piece of their personality. My goal here is to share the real-deal professional knowledge behind making these designs happen. We’ll get into the science of the materials, the exact techniques I use every day, and how to make sure the art isn’t just beautiful, but tough enough to last. This is the good stuff, the info I share with my own apprentices when they’re ready to level up.
The Foundation: Why Your Canvas Is Everything
Before a single drop of art gel even comes out, the base has to be absolutely perfect. Think about it: the most stunning painting in the world would look terrible on a flimsy, poorly prepped canvas. This is a non-negotiable rule in my studio. Durability starts with chemistry and structure, not the shiny top coat you put on at the end.
The Science Behind a Strong Manicure
We work with a few core products, and each one has a very specific job. Getting this is key. I’m a gel-focused tech because it offers incredible versatility for art without the strong fumes you get with acrylics.
- Builder Gel: This is the workhorse, our main structural material. It’s a thick gel we use to build nail extensions or just add a strong, protective layer over the natural nail. Its job is to create a perfectly shaped foundation with a proper apex. What’s an apex? It’s the highest, thickest point of the enhancement that gives the nail strength to absorb shocks. Without it, nails are way more likely to snap right at the stress point. Good builder gels, like Luminary or Kokoist for the pros, have a perfect balance of hardness and flexibility. For a more budget-friendly but still solid option, you could check out the IBD Builder Gel you can find online.
- Gel Polish: This is the stuff most people are familiar with—the color! It’s a thin, pigmented gel that has almost no structural strength on its own. It’s the paint, not the canvas. We use it as the base color before getting into the detailed artwork on top.
- Art Gels: Oh yeah, these are a total game-changer for tiny details. They’re super-pigmented gels, usually sold in little pots, and they are much thicker than regular gel polish. This means they don’t run or bleed. You can draw a super fine line, and it will stay exactly where you put it until you stick it in the lamp. Trust me, trying to paint a tiny face with runny gel polish is a fast track to wanting to throw your brushes across the room.
And let’s talk about curing for a second. It’s so important. Every gel is made to cure under a specific wavelength of UV/LED light. A professional 48-watt lamp is pretty much the standard. Under-curing is a huge problem—it can cause smudging, lifting, and even lead to nasty skin allergies over time. Uncured gel can seep into the skin and cause contact dermatitis. I always, always follow the manufacturer’s cure time, which is usually 60 seconds for highly pigmented gels.
My Must-Do Prep Routine
A full set of detailed nail art can easily take me three hours. And you know what? Less than 10% of that time is the actual “art.” Most of it is prep and structural work. Rushing this is the biggest mistake I see new techs make.
- Cuticle Care: We start with dry prep, never soaking. I use an e-file with a fine-grit diamond bit, usually a flame-shaped one, at a low speed (around 5,000-7,000 RPMs) to gently buff away any dead tissue from the nail plate. This is NOT about cutting live skin; it’s about getting a perfectly clean surface. Any skin left behind is a guaranteed recipe for lifting.
- Dehydration and Priming: After shaping, I scrub the nail plate with 99% isopropyl alcohol to remove all oils. Then, I apply a pH bonder, followed by a primer. Think of the primer as heavy-duty, double-sided tape for your nails—it creates a super strong bond between the natural nail and the gel.
- Base Coat Application: Finally, a thin layer of base gel gets scrubbed into the nail and cured. This gives the builder gel something to really grab onto. Skipping this is like painting a wall without primer; it’s just not going to last.
Only after all of this is done do I even think about starting the fun part. This meticulous process is why pro nail art can last for three, four, or even more weeks without a single issue.
The Pro’s Toolkit for Amazing Designs
Having the right tools is just as critical as having good technique. I’ve spent years building a collection of brushes and materials that I can rely on. Heads up: investing in quality tools really does save you time and headaches. It’s the difference between fighting your materials and having them work with you.
My Go-To Brushes
I probably have a dozen brushes on my desk, but these are the ones I reach for constantly for art:
- 11mm Liner Brush: This is my favorite for long, sweeping lines and elegant curves. The long bristles hold more gel, which lets you pull a smooth, consistent line without having to reload. Perfect for swirls or the long stems on flowers.
- 7mm Detailer Brush: For all the tiny, tiny stuff. I’m talking individual eyelashes on a character, the delicate veins in a leaf, or crisp lettering. Its short length gives you maximum control for tight, precise movements.
- Oval Gel Brush: This is what I use to apply the base color and builder gel. The curved, oval shape is amazing for getting the product near the cuticle line without flooding it.
- Small Square Brush: This is my magic eraser. I dip it in a little alcohol to create a perfectly sharp smile line or to clean up any stray polish before curing.
Quick tip: I never clean my art brushes with alcohol or acetone—it completely dries them out and ruins the bristles. I learned that the hard way after destroying an expensive brush early in my career. Instead, I clean them with a drop of clear builder gel. Just work the clear gel through the bristles on a palette until all the color is out, then wipe it clean with a lint-free wipe. It keeps them in perfect shape!
More Fun Stuff: Embellishments and Effects
Imaginative designs often need more than just paint. Texture and sparkle are where the magic happens.
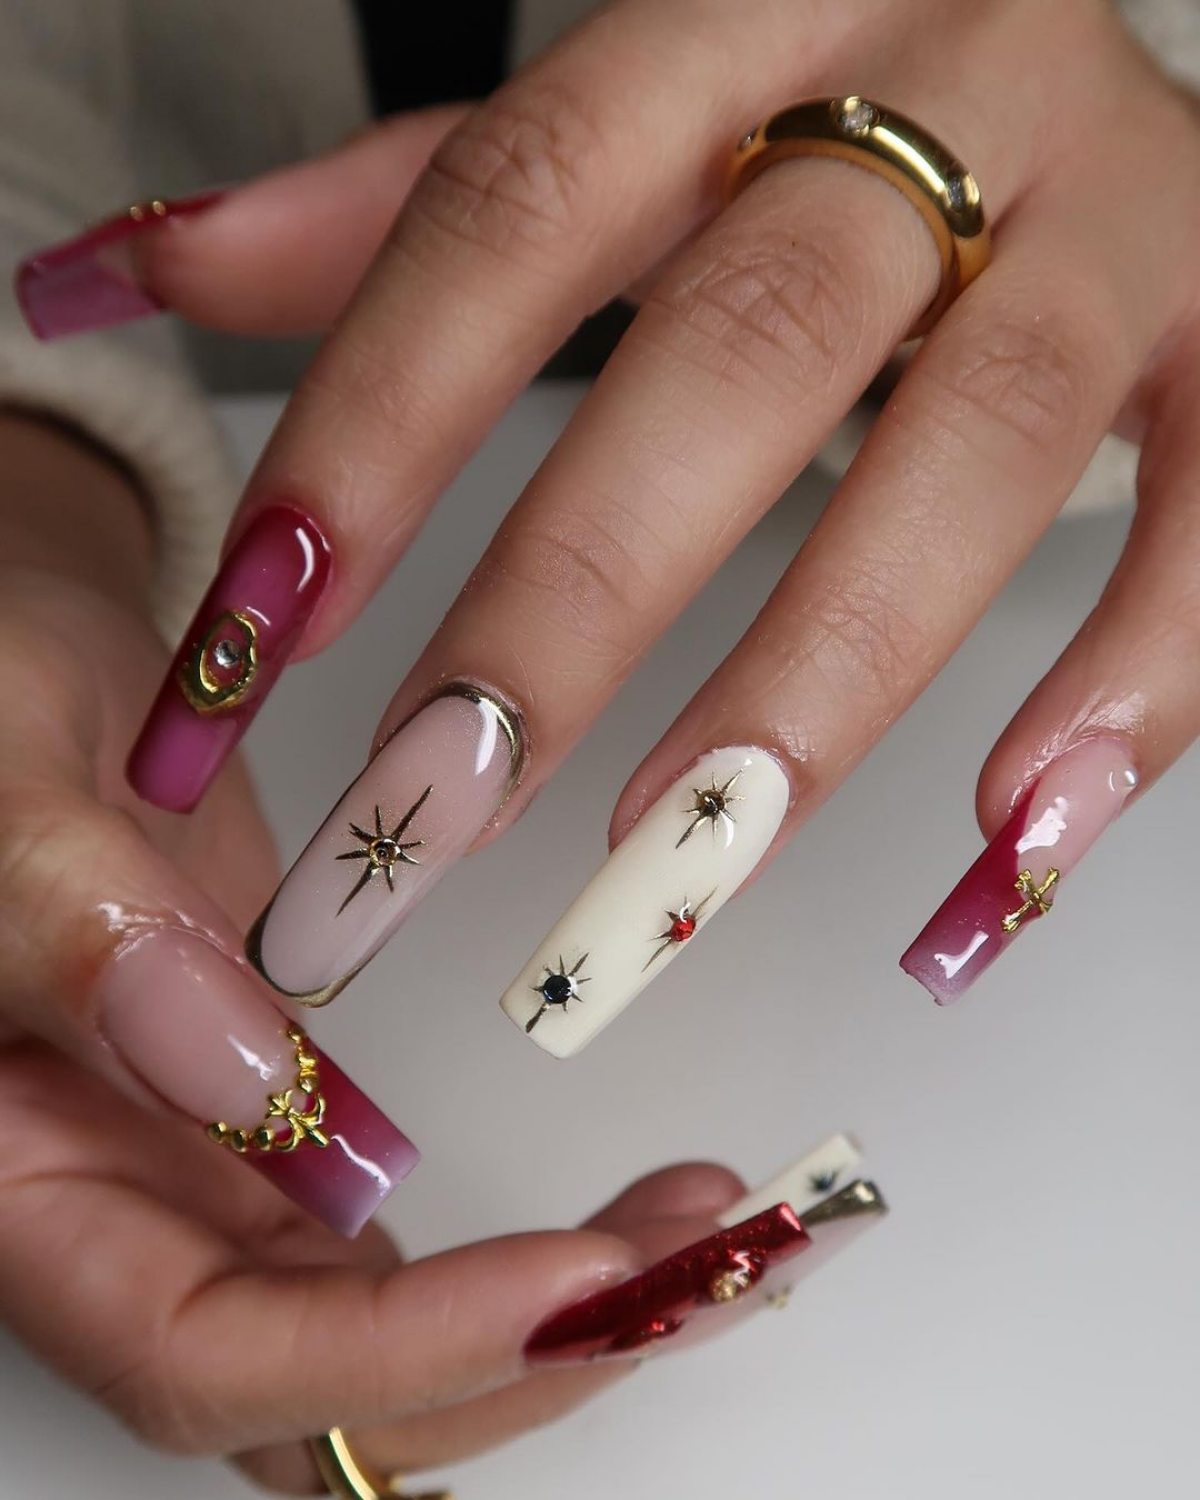
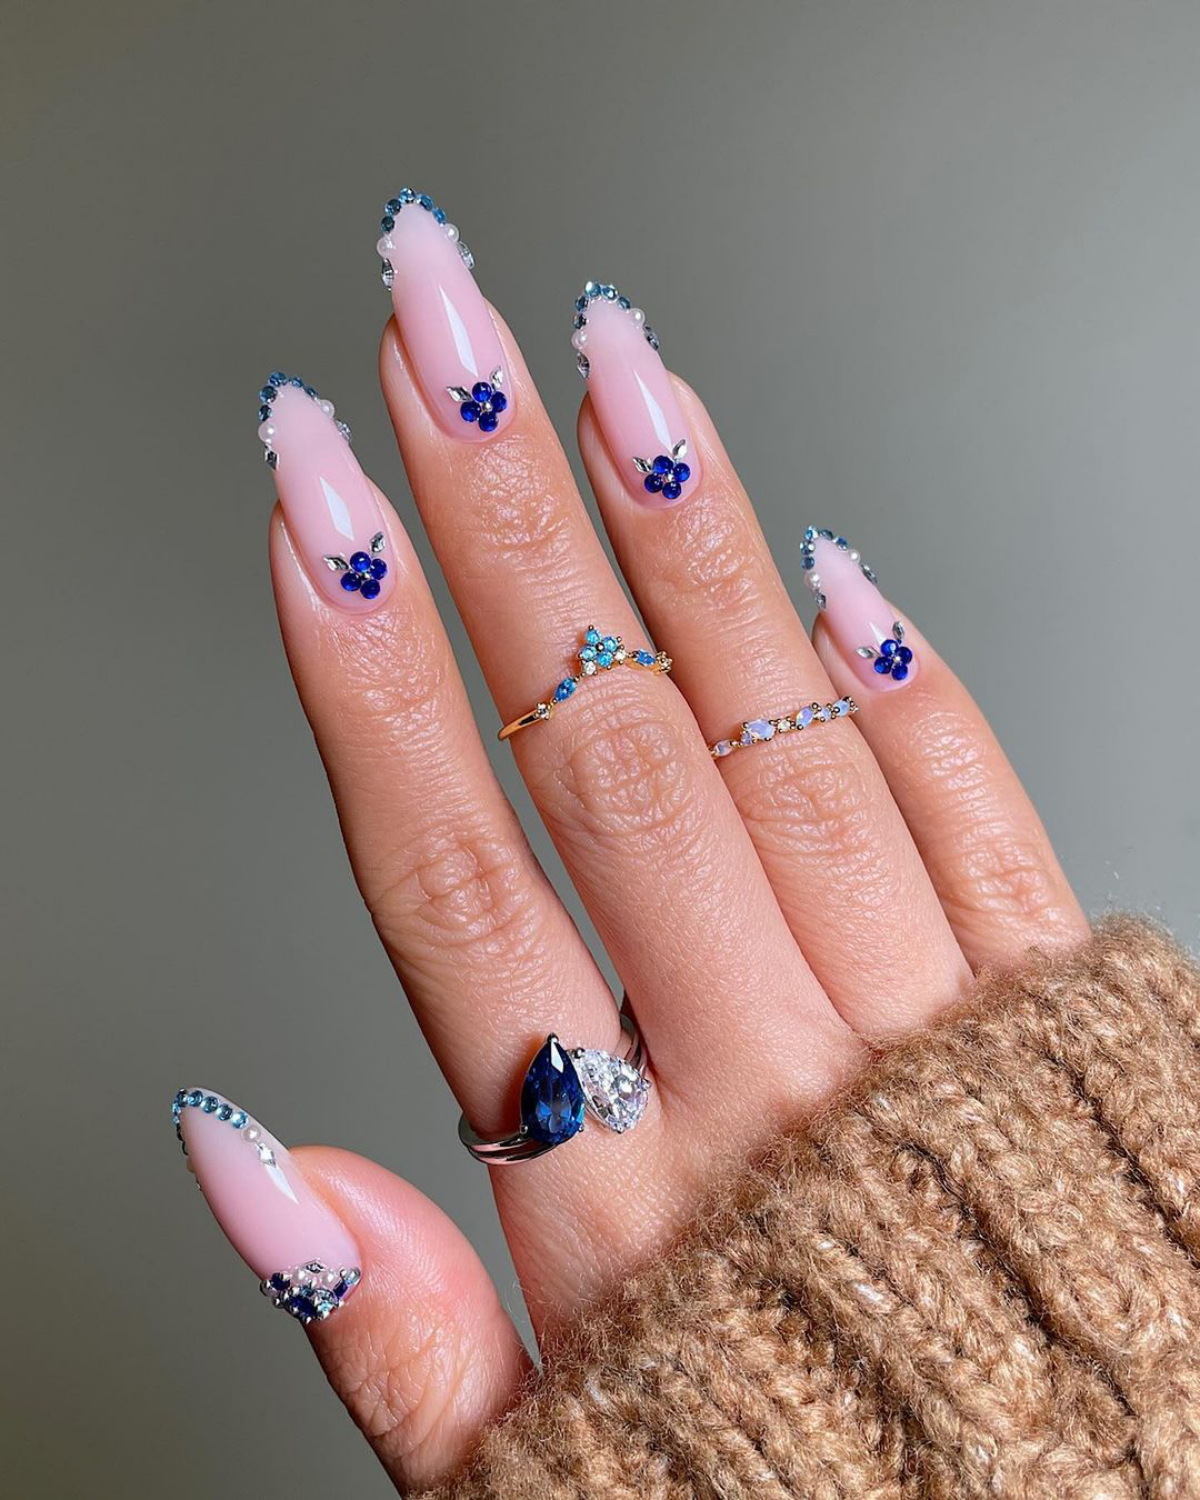
- Rhinestones and Charms: There’s a huge difference in quality here. I always use glass or crystal rhinestones, not the cheap acrylic ones. They catch the light beautifully and don’t look like plastic. To apply them, I use a dedicated jewel gel—it’s a thick, sticky gel that holds stones securely. After placing the stone, I use my tiny detailer brush to apply top coat around the base of the stone to seal it in, being careful not to cover the sparkly facets.
- Chrome and Pigment Powders: These powders create incredible effects you just can’t paint by hand. Chrome powder gives you that true mirror finish when you rub it onto a cured, non-wipe top coat. My go-to is the one from Daily Charme; it’s flawless.
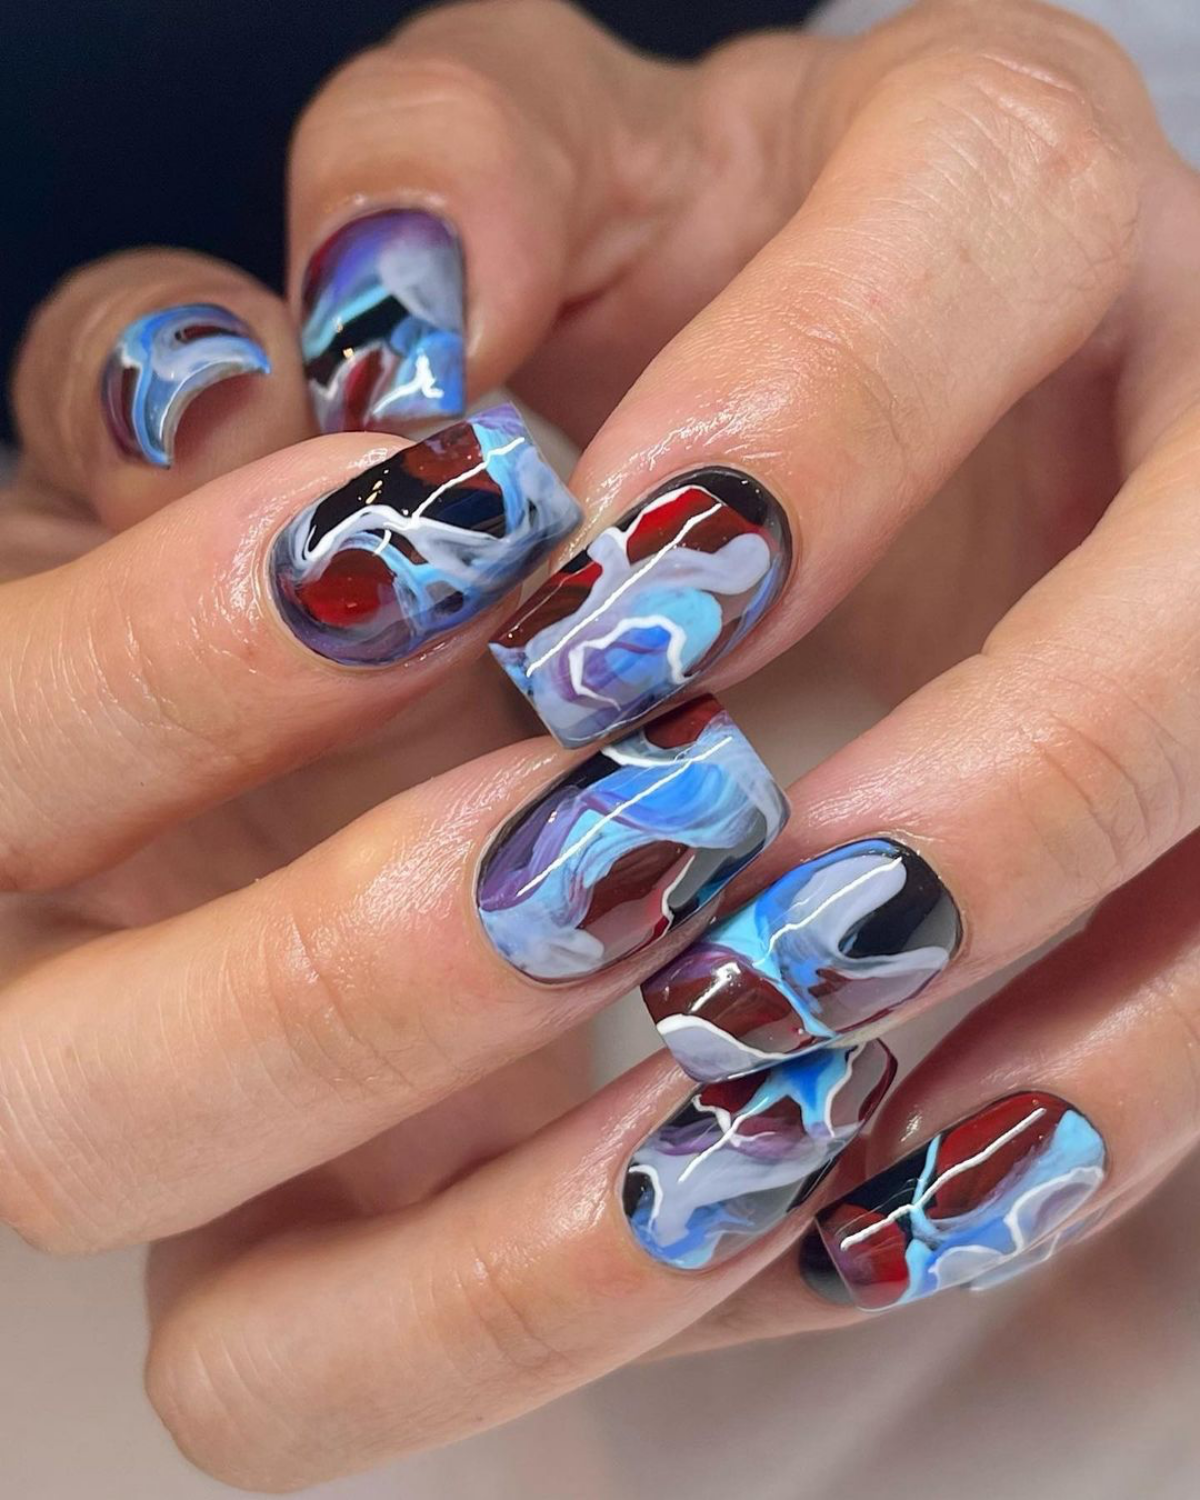
- Blooming Gel: This stuff is so cool. You apply a thin layer (don’t cure it!), then dot other colors on top. The colors will gently spread and “bloom” into each other, creating soft, watercolor-style effects. It’s perfect for marble, aura nails, or galaxy designs.
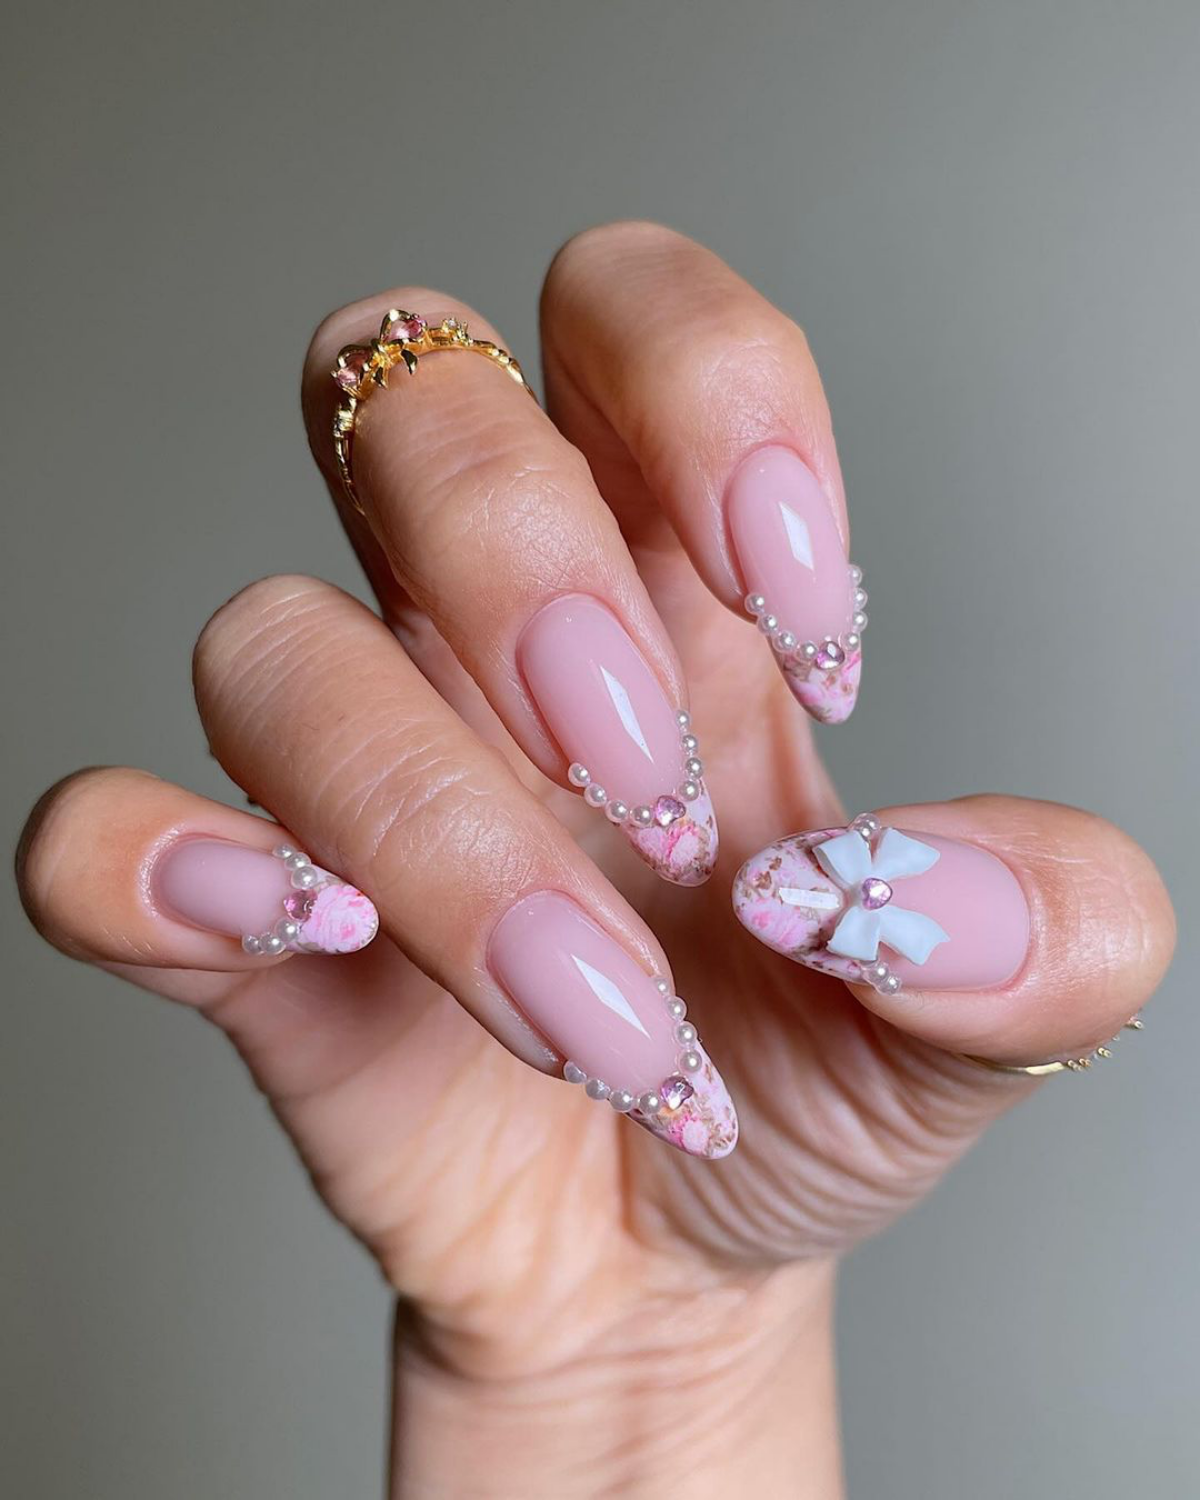
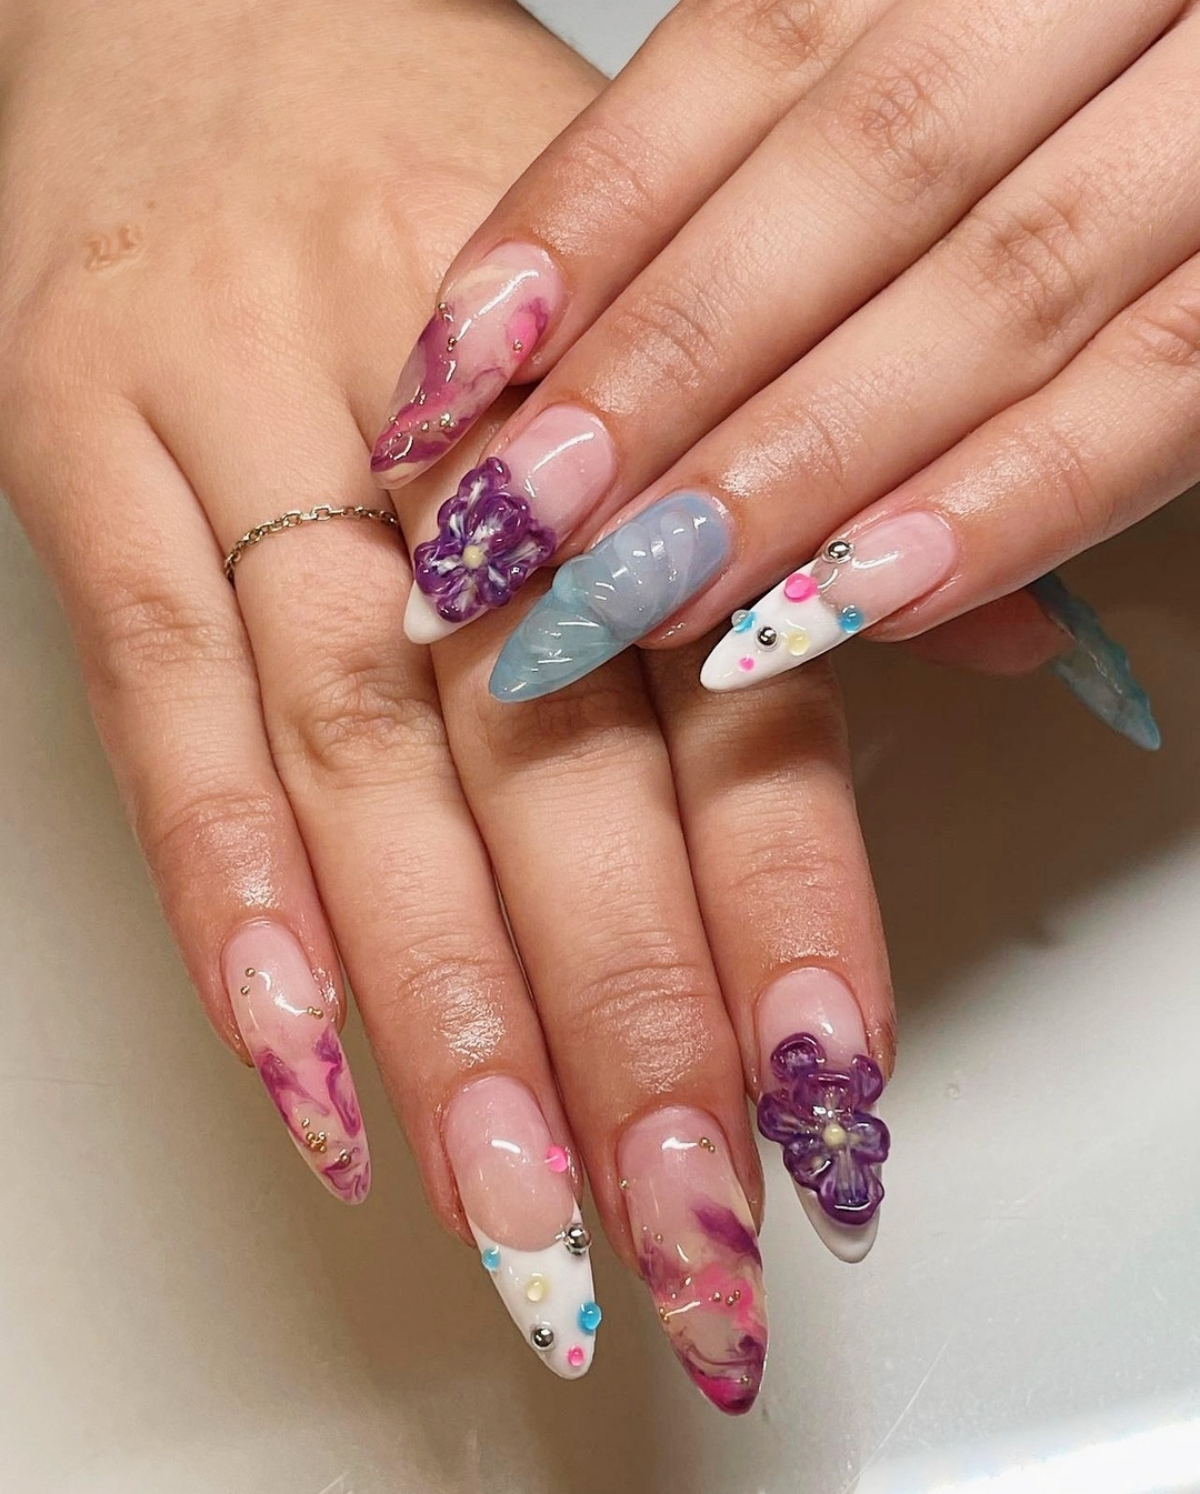
- 3D Sculpting Gel: This is basically like putty in a pot. It has an ultra-high viscosity, so you can scoop out a tiny bit and sculpt it into shapes like bows, flowers, or seashells right on the nail before curing. You’ll need a silicone-tipped tool to work with it.
By the way, if you’re looking for where to buy these professional-grade supplies, you won’t find most of them at your local beauty store. I get most of my specialty gels and tools from online suppliers like Zillabeau, The Nail Hub, or Kokoist USA. They’re my go-to spots for the good stuff.
Techniques in Action: Breaking Down a Few Designs
Okay, let’s get practical. Here’s how I actually approach some popular requests, including the specific steps and what can go wrong.
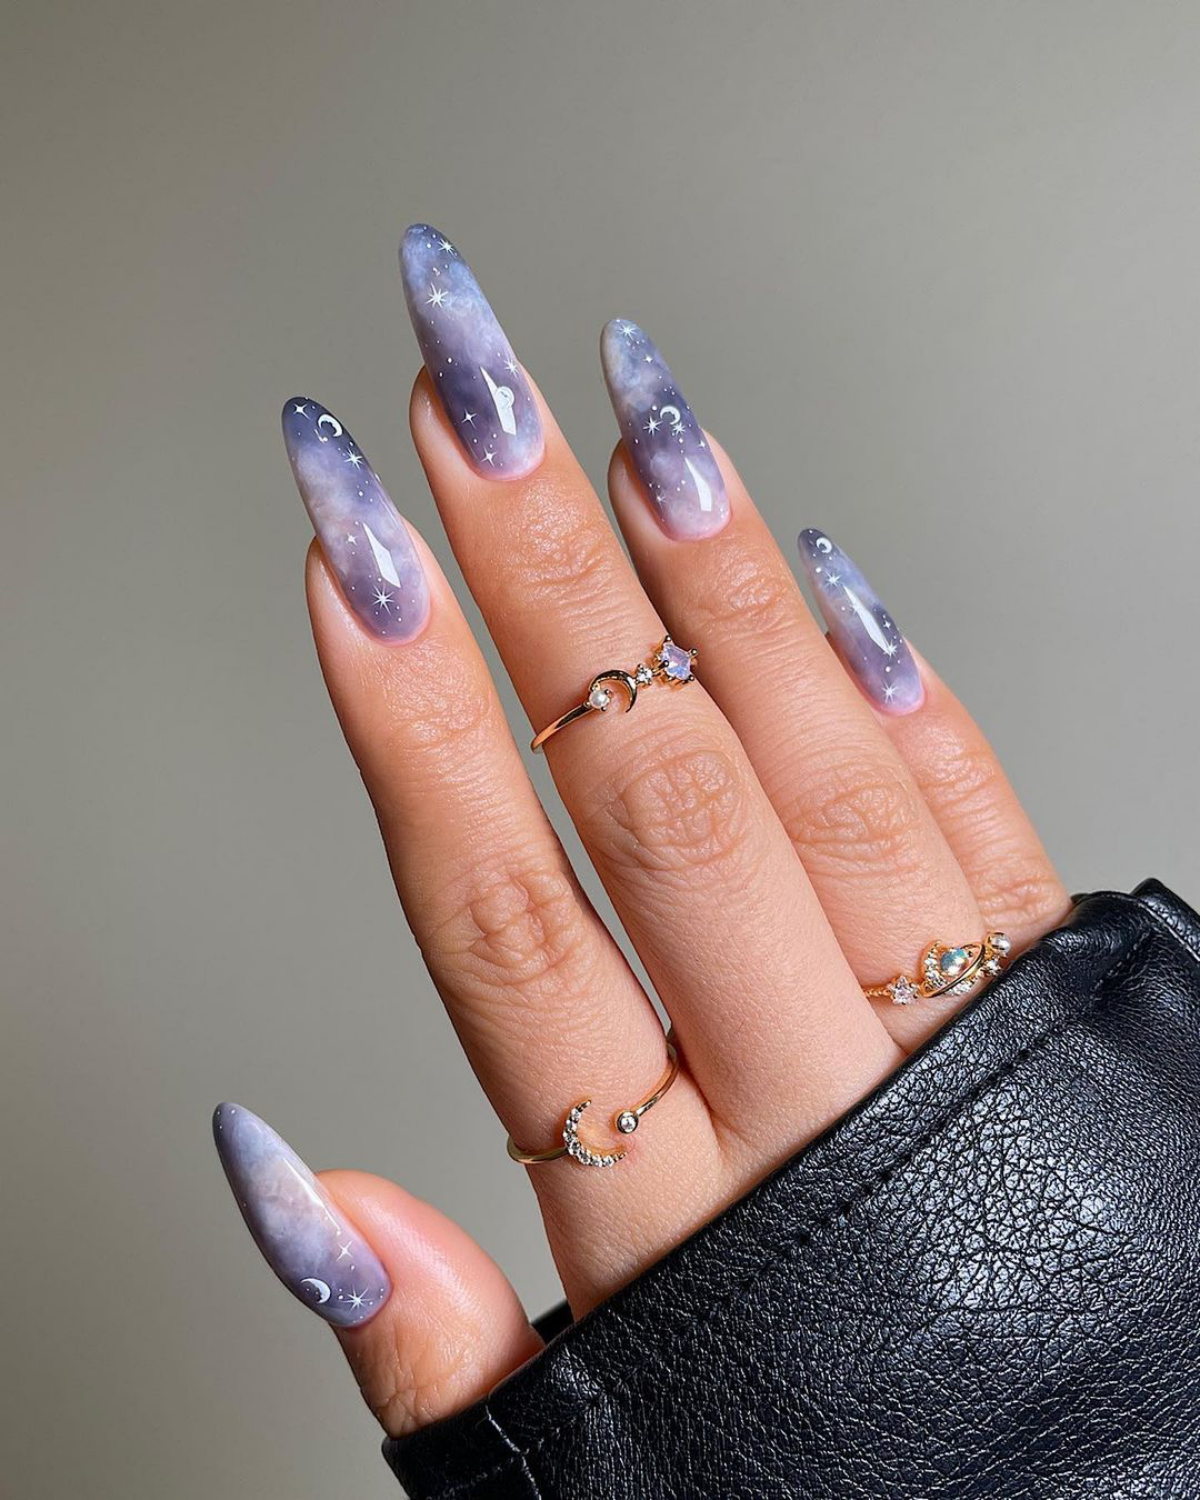
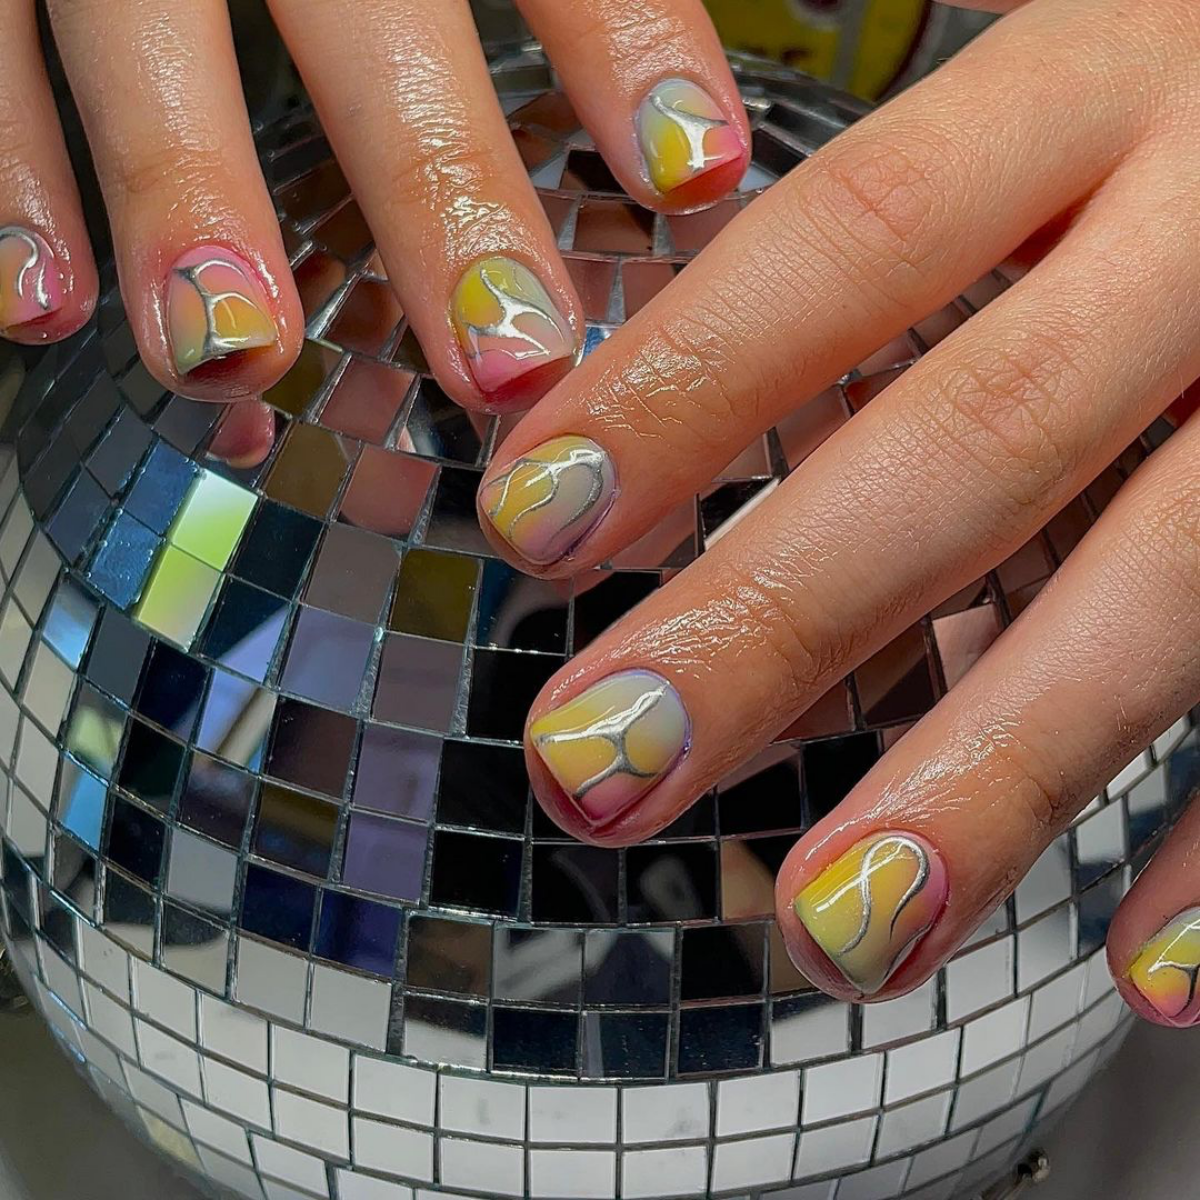
Case Study 1: The Celestial Night Sky
This is a super common request, and it can be as simple or as complex as you want.
What You’ll Need: Black or navy gel polish, blooming gel, a few shades of purple/pink/blue gel polish, a dotting tool, a detailer brush, high-pigment white art gel, and clear builder gel for encapsulating.
The Technique:
1. After all the prep and structure work, I apply two thin coats of a deep navy or black gel, curing each coat.
2. For a nebula effect, I’ll brush on a thin, uncured layer of blooming gel.
3. Using a dotting tool, I place tiny drops of purple, pink, and blue into the wet gel and just watch them soften and spread. Sometimes I’ll give them a gentle swirl with my detailer brush before curing for a full 60 seconds.
4. For the stars, I use a super-pigmented white art gel and my 7mm detailer brush to paint tiny dots and little four-pointed stars.
5. The final step is encapsulation. I apply a layer of clear builder gel over the whole design. This not only protects the art but also adds this incredible sense of depth. After curing and a final shaping, I finish with a high-shine top coat.
Troubleshooting: I remember one time the nebula colors turned into a muddy mess on a client. I realized I had used way too much color on the blooming gel and over-mixed it. The key is to use less product than you think and just let the gel do the work for you.
Quick Win: Don’t have time for all that? You can get a similar vibe in minutes! Just polish the nail with black, add a glitter topcoat with different-sized sparkles, and use a dotting tool to add a few simple white dots. Boom—instant galaxy!
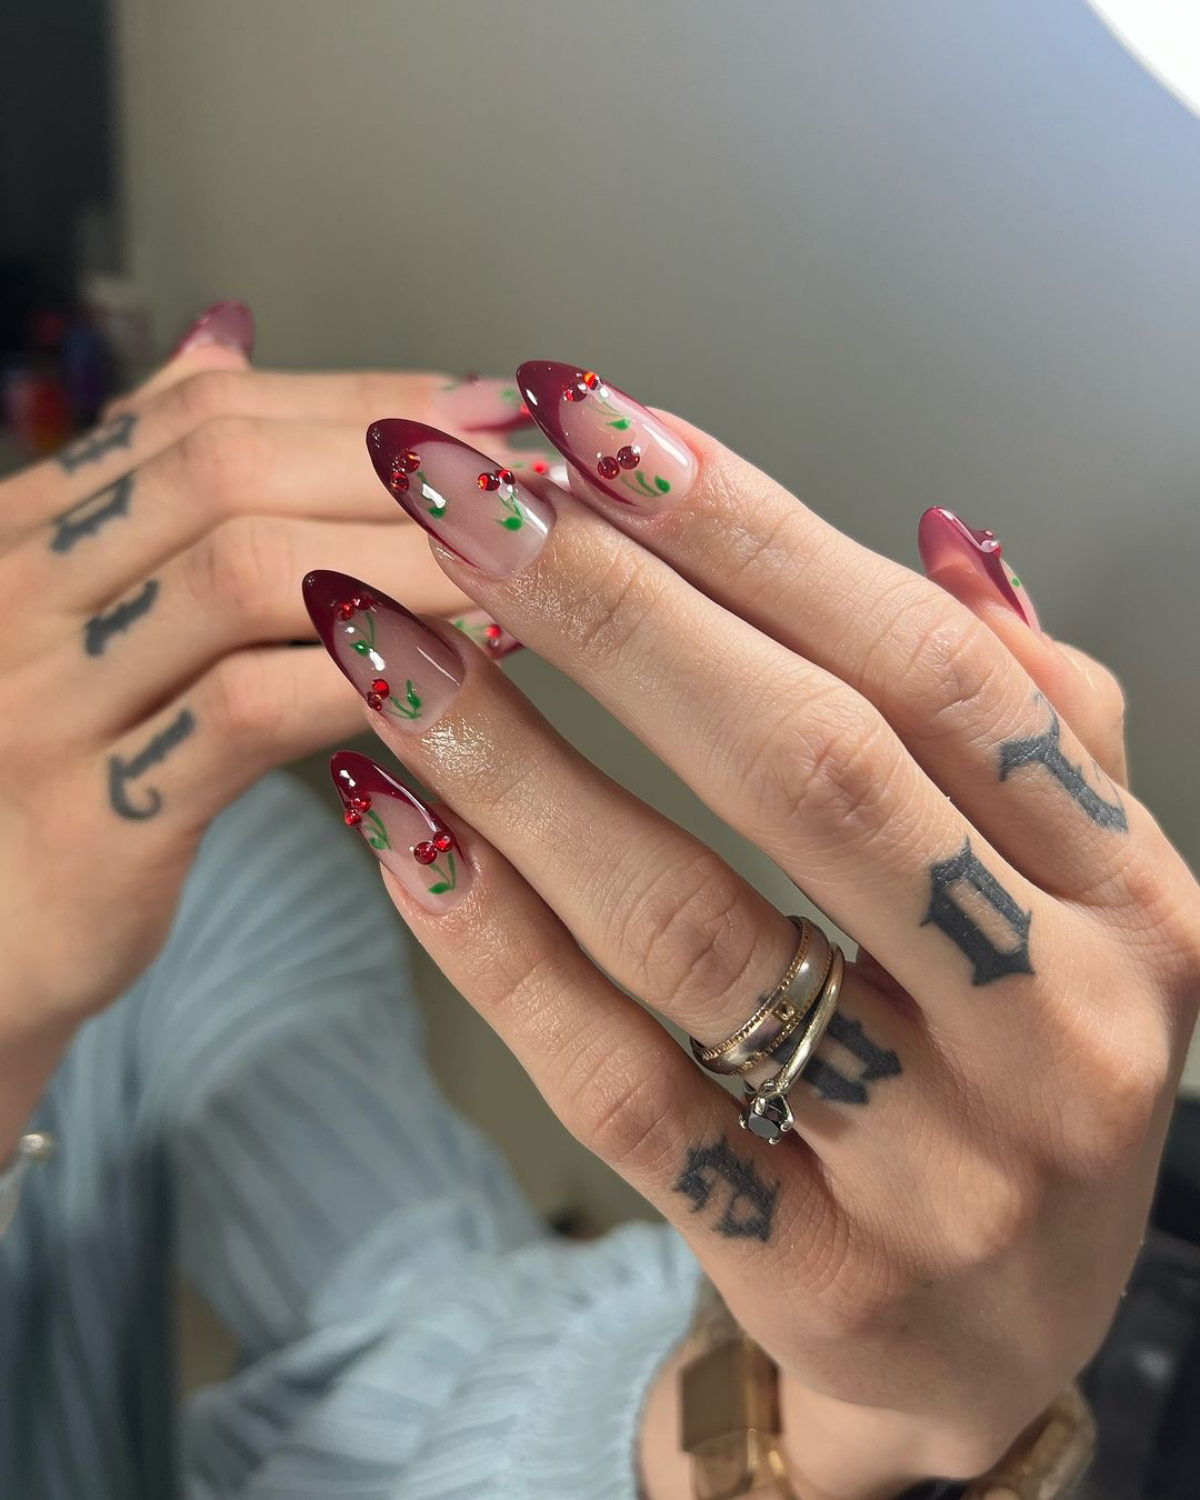
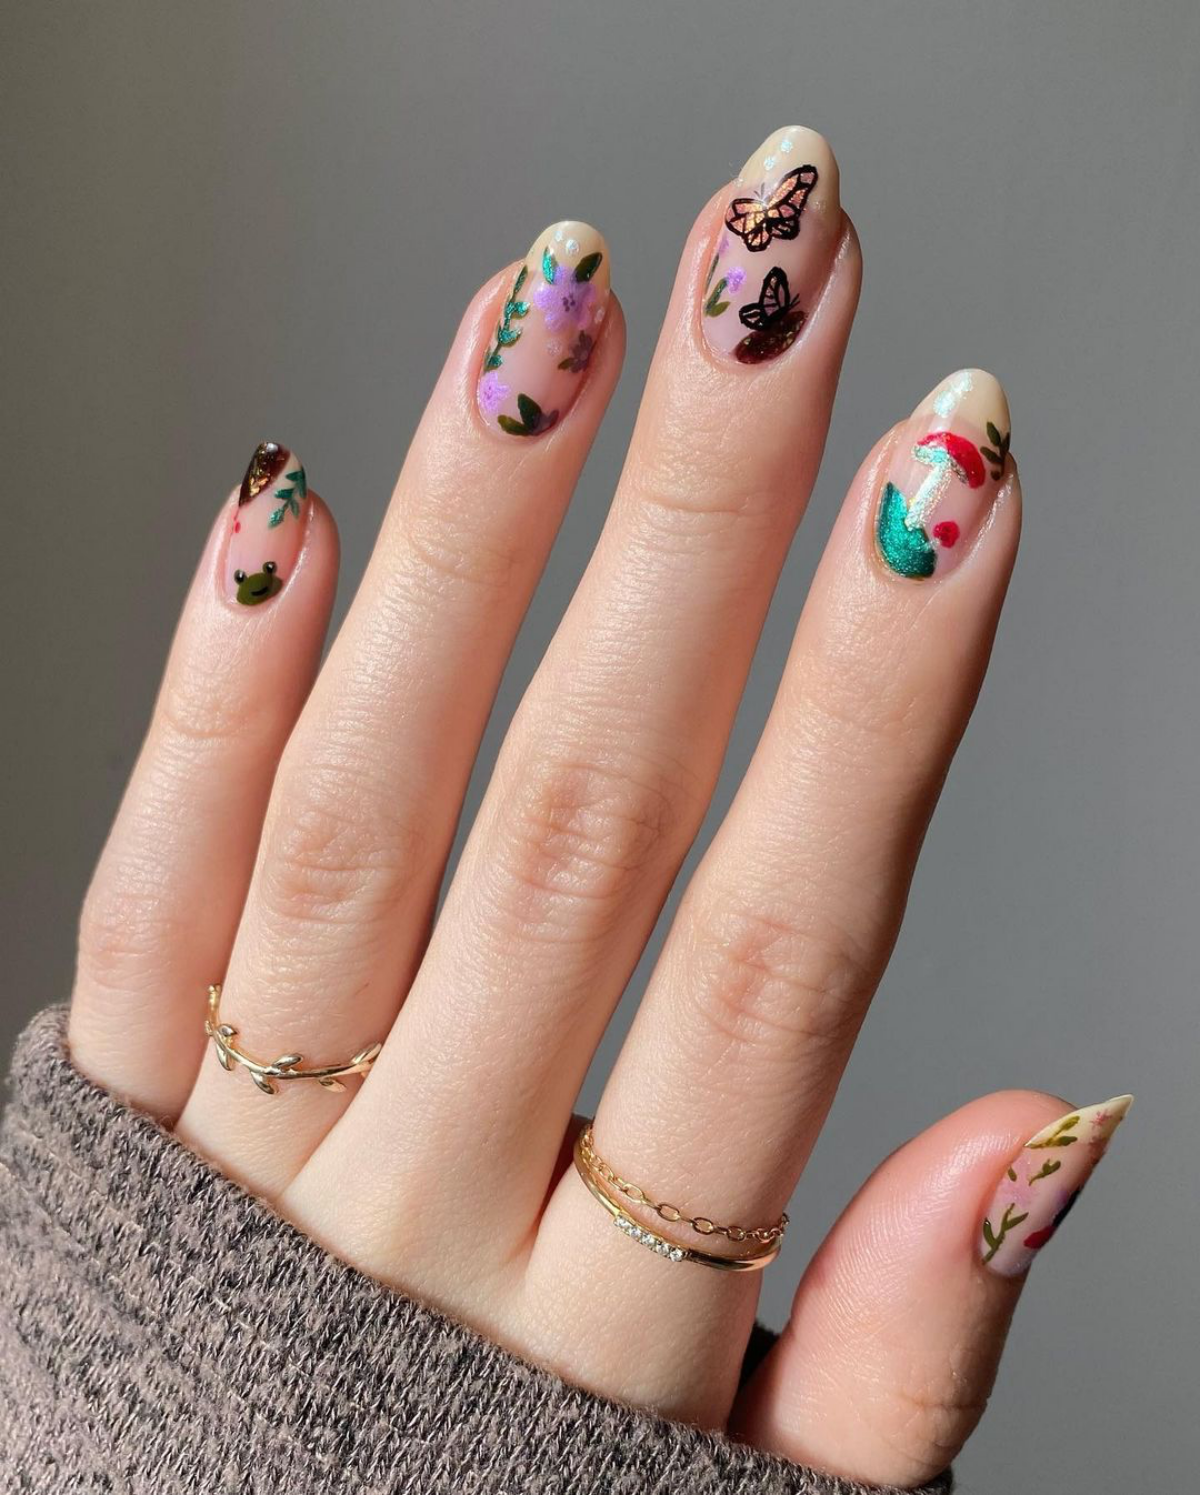
Case Study 2: The Encapsulated Fairy Garden
This design is all about layering, combining painting with embedding little things like dried flowers. You have to really understand encapsulation to get a smooth finish.
What You’ll Need: A sheer nude gel polish, green and brown art gels, tiny dried flowers (you can find these on Etsy!), clear builder gel, and a detailer brush.
The Technique:
1. I start with a sheer, neutral base color.
2. I paint the background elements first, like tiny blades of grass or mushroom stems, and cure.
3. For the encapsulated flowers, I use real, tiny dried flowers. It’s critical that they are completely dry, or they can turn brown inside the gel over time.
4. I place the flowers onto a thin, wet layer of builder gel to stick them in place, then cure.
5. Now for the most important part: building the encapsulation layer. I carefully float a layer of clear builder gel over the entire nail, making sure to fully cover all the 3D elements without making the nail too bulky. This takes practice to get smooth.
6. After curing, I file and buff the nail to refine the shape. The goal is a perfectly smooth surface where the art looks like it’s deep inside. If there are bumps, I know I need to file more carefully or add another thin layer of gel.
7. Finish with a top coat and cure.
Good to know: I always explain to clients that encapsulated designs will be a bit thicker than a regular gel manicure. It’s part of the consultation, so they know exactly what to expect.
The Business Side: Consultations, Pricing, and Aftercare
Being a nail artist is also about being a business owner. Clear communication is just as important as a steady hand—it builds trust and makes sure everyone leaves happy.
The Art of the Consultation
When a client shows me an inspiration picture, my first job is to manage expectations. I’ll look at their nail length and shape and say something like, “I love this! On your shorter nails, we might need to simplify the pattern a little to keep it looking balanced. How does that sound?” We also talk about the time commitment. A full set of intricate art isn’t a quick service; I block out at least 2.5 to 3 hours for it.
My Pricing, Demystified
Pricing for nail art can be confusing, so I’m super transparent. My prices are based on time and complexity. For example, my base price for a structured gel manicure might be $65. From there, I use tiers:
- Tier 1 (Simple): Adds about $15-$20. This is for a few lines, some dots, or a simple accent nail. It takes an extra 15-20 minutes.
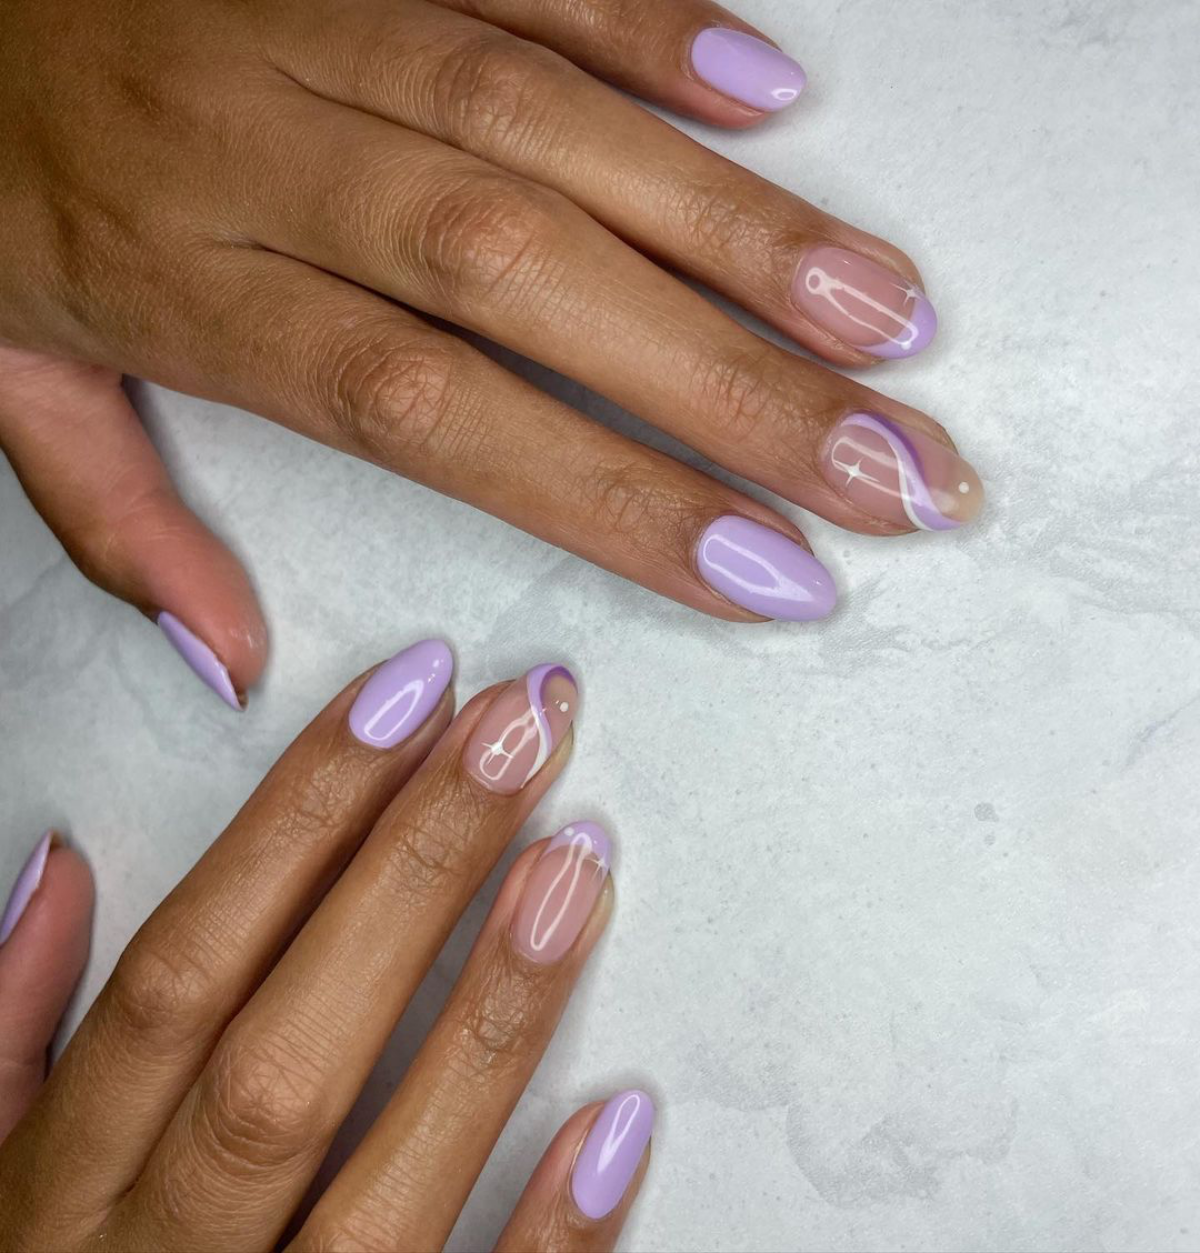
- Tier 2 (Detailed): Adds about $35-$50. This covers things like chrome on all nails, simple florals, or abstract swirls. This usually adds 30-45 minutes.
- Tier 3 (Complex): This is for the really intricate stuff—characters, encapsulation, full 3D art. This is priced hourly on top of the base service, usually around $75/hour, since it can take an extra hour or two.
This way, my clients can choose designs that fit their budget, and there are never any surprise charges at the end.
Aftercare: A Team Effort
I always finish a service by explaining aftercare. The work is tough, but it’s not indestructible!
- Be gentle for the first 24 hours. The gel is cured, but the bond to the nail is still settling.
- Use cuticle oil daily. This is my #1 rule. It keeps your skin hydrated and the gel flexible, which prevents chipping.
- Your nails are jewels, not tools. Seriously. Don’t use them to open soda cans or scrape off stickers. I can always tell who does—they come back with tiny fractures at the tips.
Safety First, Always
As a professional, my top priority is the health and safety of my clients. This is one area where you can’t cut corners.
The biggest risk in my line of work is the potential for developing gel allergies. This happens when uncured gel repeatedly touches the skin. I am militant about keeping products off the skin. If any gel gets on the skin, I wipe it away with alcohol before curing. I also wear nitrile gloves to protect my own hands. I’ve seen too many talented techs have to leave the industry because they developed sensitivities. This is why I’m always cautious about at-home gel kits for beginners who might not understand these risks.

My workspace is always up to state board standards. All my metal tools are scrubbed and then sterilized in a medical-grade autoclave after every single client. Anything that can’t be sterilized, like files and buffers, is single-use and either goes home with the client or into the trash. When you’re looking for a tech, always look for proof of proper sanitation, like them opening a sealed tool pouch right in front of you. It’s a huge green flag.
Creating imaginative nail art is such a rewarding craft that blends technical skill with pure creativity. Every set is a new challenge and a chance to bring a little piece of art into the world. It demands patience, a love for learning, and a deep respect for the health of the nail itself. Whether you’re an aspiring tech or just someone who loves beautiful nails, understanding the care that goes into this work is the first step to truly appreciating the art at your fingertips.
Galerie d’inspiration

Your art brushes are an extension of your hand, and they’re an investment worth protecting. Acetone is their worst enemy—it dries out the natural or synthetic bristles, causing them to splay and lose their fine point. To keep your tools pristine:
- Clean brushes immediately after use with a dedicated gel brush cleanser or a bit of clear base coat on a lint-free wipe.
- Gently reshape the bristles to a perfect point before replacing the cap.
- Store them horizontally or with the bristles pointing down to prevent any leftover gel from seeping into the ferrule (the metal part) and hardening.
The secret to crisp, vibrant color that doesn’t bleed: It’s called flash curing. After painting a delicate line or a small detail, don’t wait to complete the entire design. Pop the nail under your LED lamp for just 5 to 10 seconds. This isn’t a full cure, but it’s enough to set the gel paint so it won’t smudge or mix with the next color you apply, keeping your artwork sharp and clean.
There are over 3,000 nail salons in New York City alone, but the artists specializing in intricate, freehand designs represent a small, highly sought-after niche.
This exclusivity is why clients are willing to wait weeks and invest more in a manicure. It’s not just about getting nails done; it’s about wearing a custom piece of art. For a nail tech, mastering this skill moves you from a service provider to a commissioned artist, opening up a new world of creativity and client loyalty.
How do you make nail art go beyond the visual?
By playing with texture. The final top coat is your secret weapon for creating a tactile experience. For a dreamy, velvety finish on a celestial or floral design, a true matte top coat, like the one from OPI, absorbs light and feels soft to the touch. For a high-impact, ‘wet look’ on abstract art, a high-shine, no-wipe top coat creates a glassy surface. Want something truly different? Try the ‘sugar’ effect: sprinkle fine, clear acrylic powder or glitter over an uncured top coat, then cure fully without a final top layer for a gritty, sparkling texture that begs to be touched.


