The Real Secret to Flawless Valentine’s Nails (That Actually Last)
After more than a decade behind a nail desk, I can tell you that February brings a certain kind of buzz into the salon. It’s a flurry of requests for every shade of red and pink imaginable, with hearts galore. And while it’s a super fun season for nail art, a beautiful design is only as strong as its foundation. I’ve seen it a thousand times: someone comes in with a photo of a super intricate design, not realizing the real work happens long before we even think about color.
In this article
So, my goal here isn’t just to show you pretty pictures. It’s to walk you through the entire process, just like I would with a new apprentice. We’ll cover everything from the nitty-gritty prep work to some advanced art techniques and, most importantly, how to keep your natural nails happy and healthy underneath it all. A great manicure should be a joy to wear and, honestly, just as safe to take off.
Let’s get our tools ready and dive into how to create Valentine’s nails that you’ll love for weeks.
Part 1: The Foundation is Everything
Clients always compliment the shiny top coat, but my fellow techs and I know the secret. The most critical work happens in the first 20 minutes of any appointment. A perfectly prepped nail isn’t just a suggestion; it’s a requirement. Without it, even a pricey gel polish will lift or chip in a few days. It all boils down to some pretty simple science.
Why Your Prep Matters So Much
Think of your nail like a wall you’re about to paint. You wouldn’t just slap a coat of paint on a dusty, oily surface, right? Of course not. You’d clean and prime it first. Your nails are exactly the same. They’re made of keratin and naturally produce oils that act as a barrier between your nail and the polish.
Here’s what we’re up against:
- Oils and Moisture: The number one enemy of a long-lasting manicure. They prevent the product from getting a good grip on your nail.
- pH Balance: Your natural nail is slightly acidic. Pro nail products are formulated to stick to a nail that has been properly balanced with dehydrators and primers. A dehydrator temporarily zaps the oils and moisture, while a non-acid primer works like double-sided tape, creating a super-strong bond.
- The Cuticle Situation: Okay, quick lesson. The eponychium is the living skin at the base of your nail—we NEVER cut this. The cuticle, however, is the non-living, sticky tissue that gets dragged up as your nail grows. This is what needs to be gently removed. If you paint over it, the polish will lift right off as your nail grows out.
Pro-Level Prep Techniques
A professional manicure is a systematic process, and rushing this stage is a guaranteed recipe for disappointment. This is where a good tech builds trust.
Step 1: Gentle Cuticle Work
The difference between a DIY mani and a salon one often comes down to the cuticle work. Done right, it makes your nail beds look clean and long. Done wrong, it’s a fast track to damage and infection.
- The Pro Method: After using a cuticle remover to soften the area, I use a sterilized metal pusher to gently lift the dead tissue. For my fellow nail nerds wondering about the specifics, on clients with stubborn cuticles, I sometimes use an e-file with a fine diamond flame bit on a very low speed (around 5,000 RPM) to carefully exfoliate the nail plate. This requires a ton of training, because in the wrong hands, it can cause friction burns or cuts.
- The Safe At-Home Method: Stick to a liquid cuticle remover (you can find this at any drugstore for about $5) and a wooden orange stick. Let the remover sit for about 30-60 seconds, then gently push back the skin. You’ll see the transparent cuticle tissue bunch up. Carefully scrape that away. Seriously, never cut the living skin. It’s your nail’s personal bodyguard against bacteria.
Heads up! If you ever leave a salon with red, puffy, or painful skin around your nails, that’s a major red flag. Proper cuticle work should never, ever hurt.
Step 2: Shaping Your Nails
The nail shape is the frame for your masterpiece. Soft almond and oval shapes are huge for romantic looks, but a sharp coffin can give a heart design a cool, modern edge. The key is consistent filing. Always file from the side of the nail toward the center in one direction. That back-and-forth sawing motion might feel faster, but it creates tiny fractures that lead to peeling. For natural nails, a 180 or 240-grit file is your best bet—it’s gentle but effective.
Step 3: Cleansing and Priming
The final, crucial step before color. I lightly buff the nail surface with a 180-grit buffer, just enough to remove the shine. Then, I scrub the nail plate with a lint-free wipe soaked in 99% isopropyl alcohol to remove all dust and oils. For clients who are prone to lifting, a little bit of non-acid primer on the nail tip is my secret weapon.
Part 2: Choosing the Right Polish for Your Design
Now for the fun part. The type of polish you choose will determine how long your manicure lasts, what it looks like, and how complex you can get with the art. Let’s break down the options.
Comparing Your Options: Polish vs. Gel vs. Acrylic
Trying to decide what’s right for you? It really comes down to three things: durability, cost, and how much work you want to do yourself.
- Regular Nail Lacquer: This is your classic, air-dry polish. It’s fantastic if you love changing your color weekly. For durability, thin coats are your friend—two or three thin layers are much stronger than one thick one. At a salon, a simple lacquer manicure might run you $20-$35. Doing it yourself is cheap, with bottles costing anywhere from $5 to $18. The downside? It can chip easily and isn’t great for detailed art since it dries so fast.
- Gel Polish: This is the salon workhorse. It cures (or hardens) under an LED lamp in about 30-60 seconds, which means it stays wet until you’re ready. This is a game-changer for nail art! If you mess up a heart, you can just wipe it off and try again. A salon gel manicure typically costs between $50 and $85, depending on the art. It’s super durable, lasting 2-3 weeks without chips.
- Acrylic & Hard Gel: These are enhancements used to add length and strength. They’re the most durable and also the most expensive option, often starting at $70+ for a full set plus extra for detailed art. This is definitely not a DIY-for-beginners situation and requires a pro for both application and removal.
Getting Started with Gel at Home
If you’re serious about at-home nail art, investing in a gel kit is the way to go. You can find starter kits on Amazon or at places like Sally Beauty. Expect to invest about $75-$100 for a solid setup.
A good beginner kit should include:
- An LED Curing Lamp (at least 48w)
- Base Coat and Top Coat
- A few Gel Colors
- 99% Isopropyl Alcohol
- Lint-Free Wipes
- Files and a Buffer
Plan for your first time to take a while—maybe 1.5 to 2 hours from prep to the final top coat. But once you get the hang of it, it’s a total game-changer.
A Critical Safety Note on HEMA Allergies: This is important. Many gel polishes contain an ingredient called HEMA, which is a known allergen. An allergy can develop if uncured gel repeatedly touches your skin. This is why it’s SO important to be neat and to clean up any gel that gets on your skin before you cure it. To be extra safe, look for HEMA-free brands. I love using brands like Light Lacquer, Madam Glam, and DND for my sensitive clients.
Part 3: Fun Valentine’s Designs, From Easy to Advanced
Okay, with our flawless foundation, let’s get to the art!
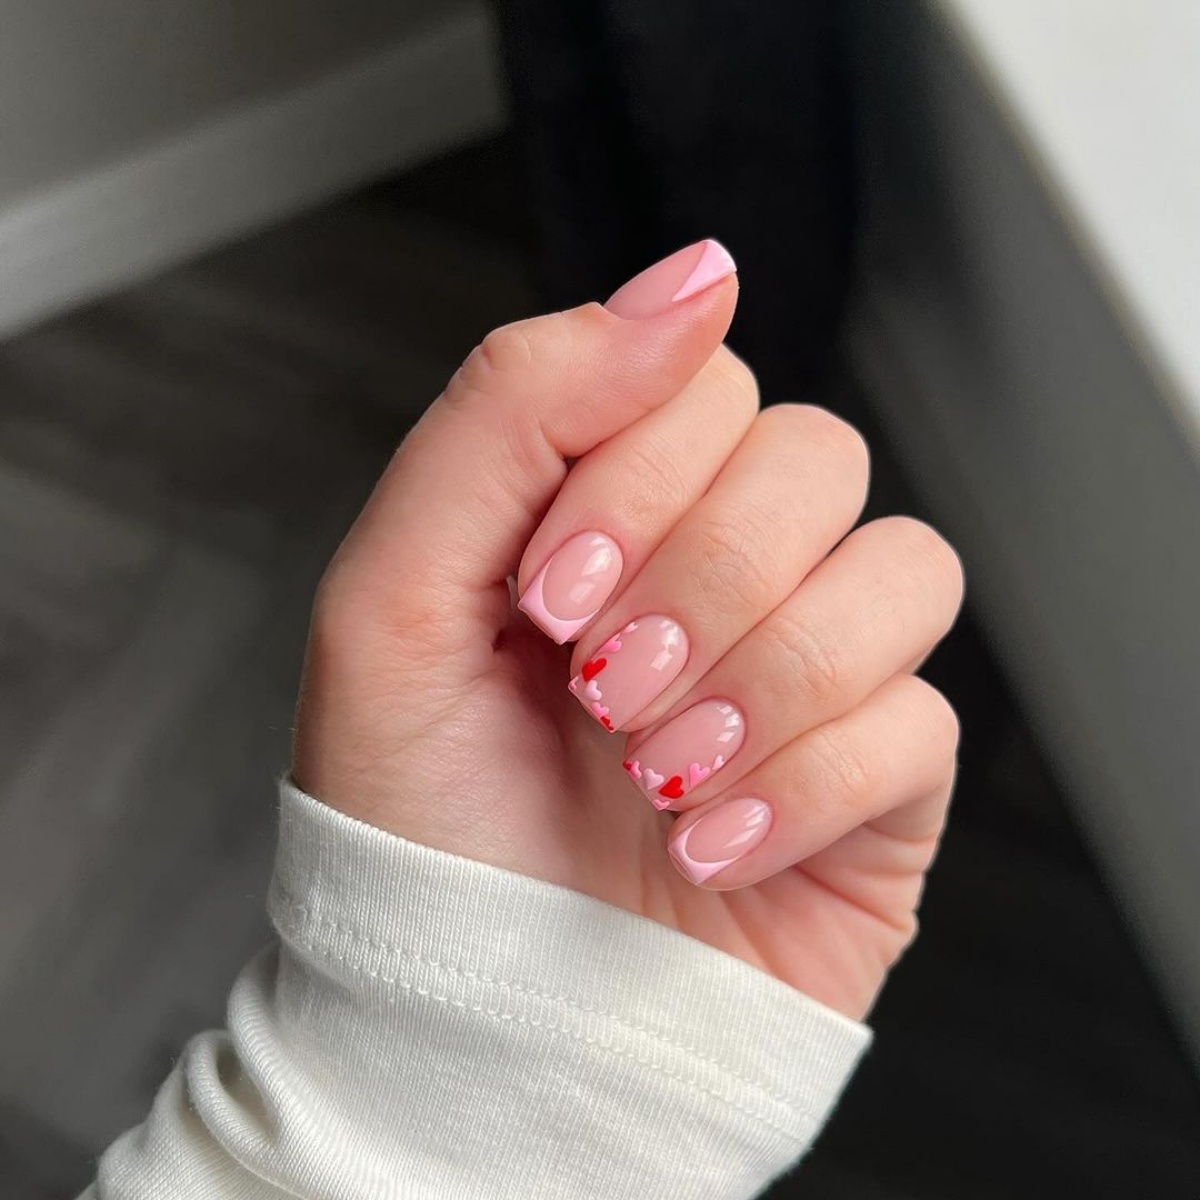
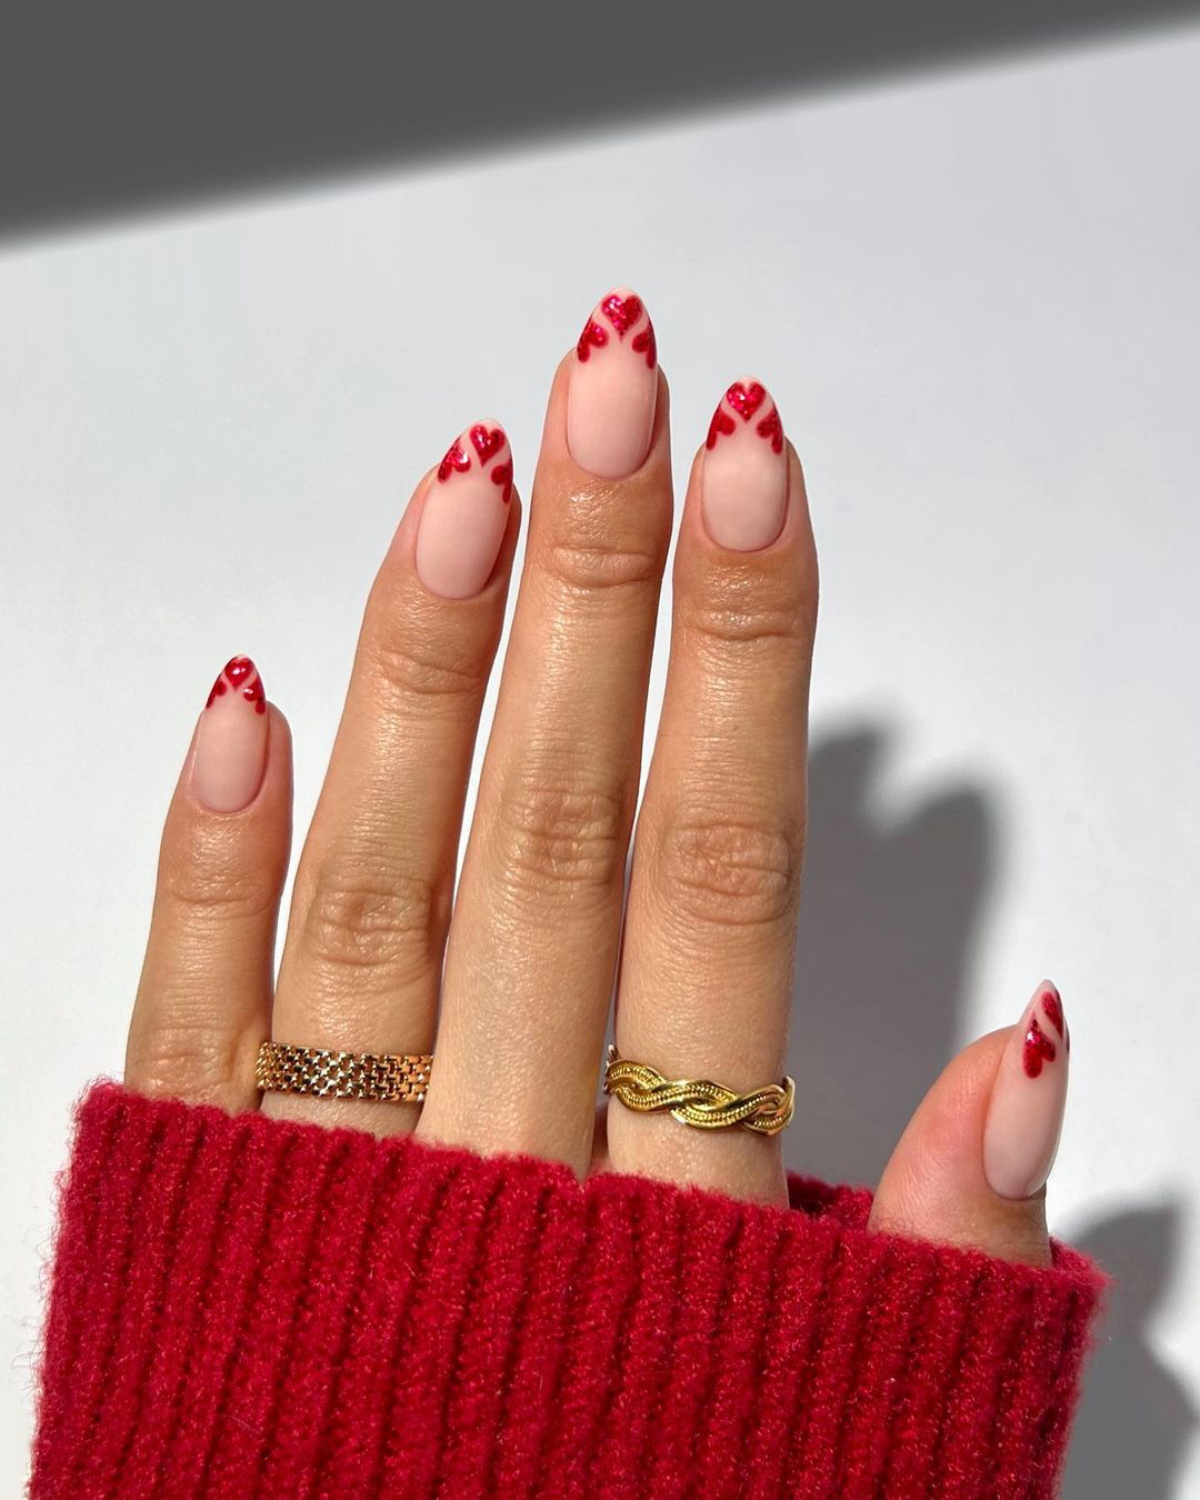
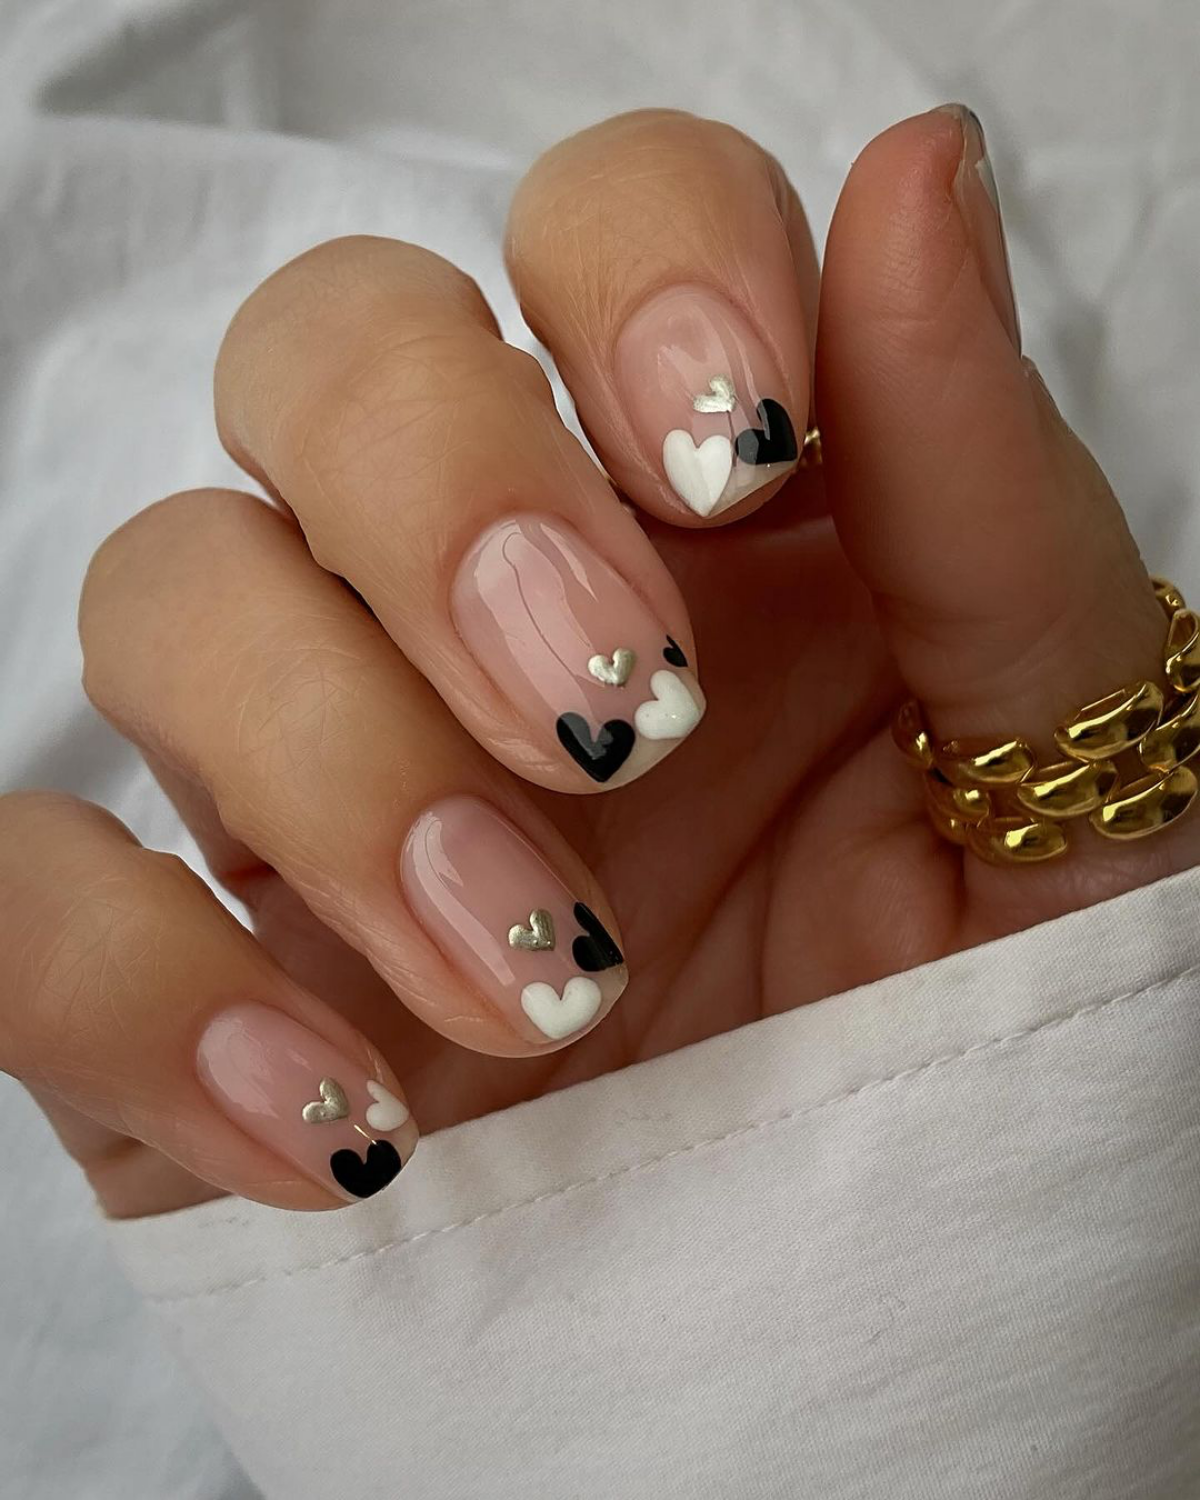
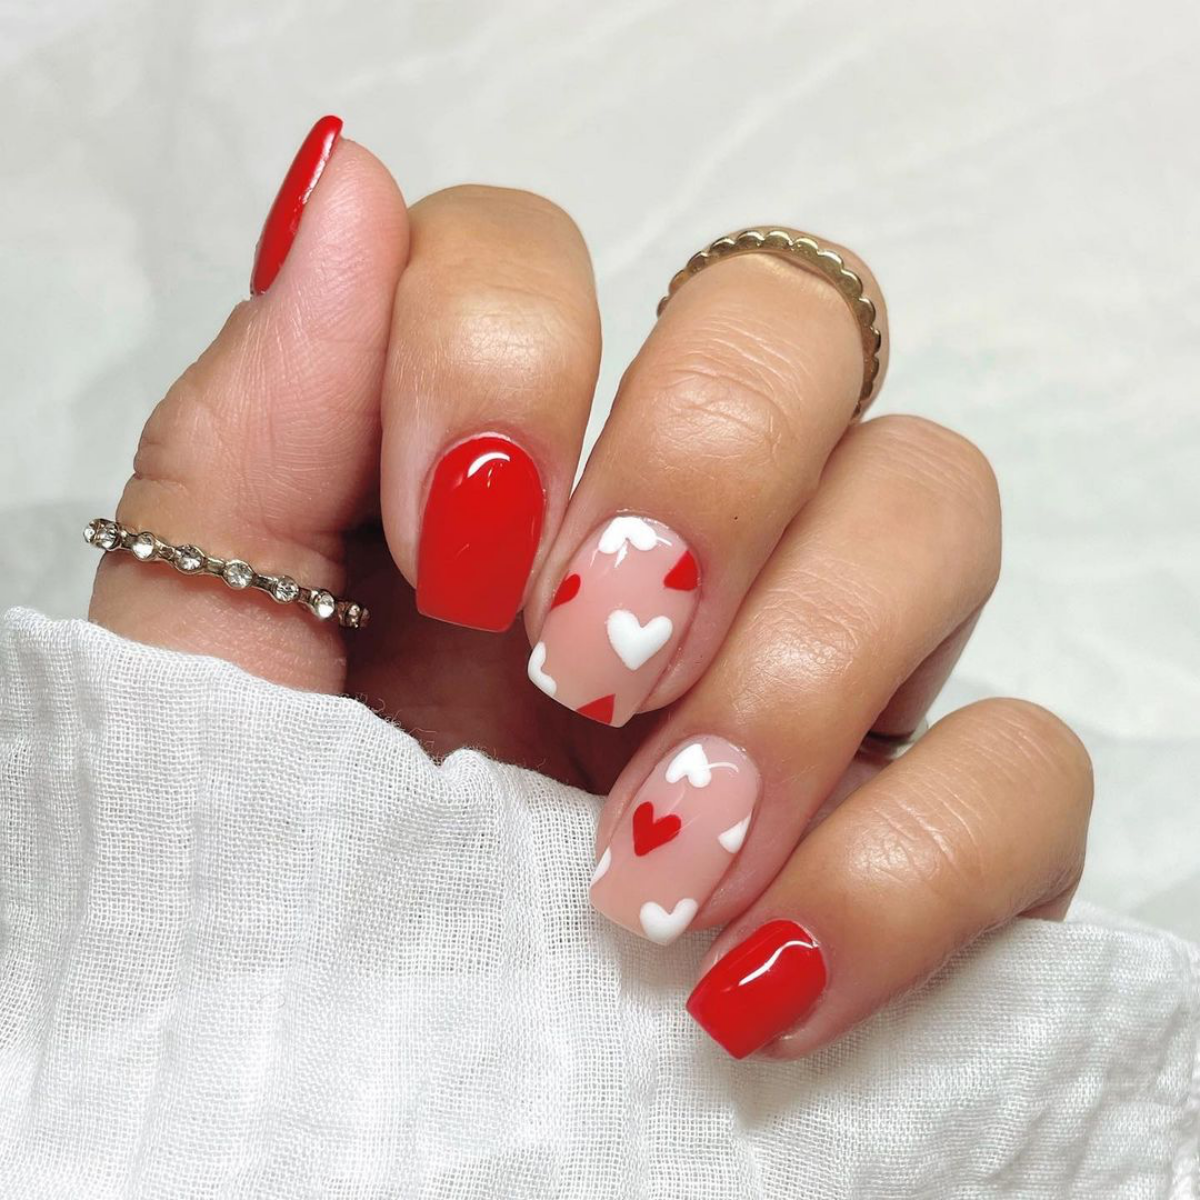
Design Focus: The Reinvented French Manicure
A French mani is timeless, but for a romantic twist, think red tips or cute little hearts.
Technique: The Heart-Tipped French
- At Home: This is easier than it looks! Use a dotting tool to place two dots of red polish side-by-side. Then, with a toothpick or a tiny brush, drag each dot down to meet at a single point. Voila, a charming little heart.
- In the Salon: For those razor-sharp hearts, I use a long, thin liner brush and a highly pigmented art gel. This gives me the control to create a perfect, crisp shape.
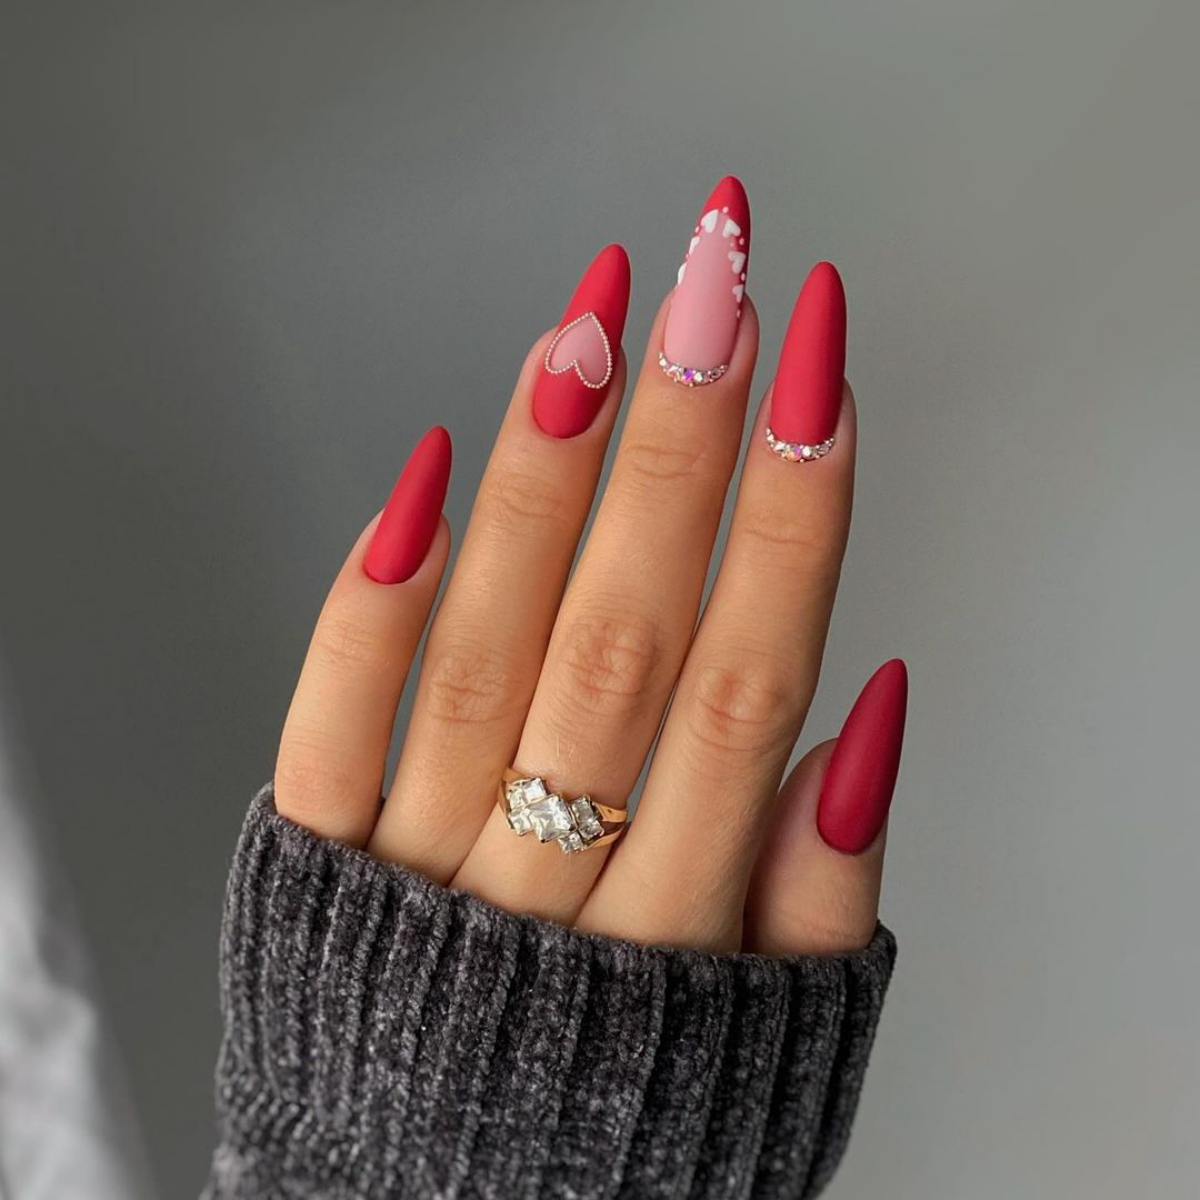
Design Focus: Adding Some Sparkle & Texture
A few gems or a change in finish can make a simple design look incredibly luxe.
Technique: Rhinestones That Actually Stay Put
I can’t tell you how many people I see just stick gems on with a top coat. They fall off in a day and lose their sparkle. Don’t do it!
- The Pro Way: We use a dedicated gem adhesive gel, which is super thick. I use a wax-tipped pen to place the stone into a dab of the gel, then use a tiny brush to pull the gel up around the base of the stone, like tiny prongs. Cure it, then apply your top coat around the gems, never over them. I often use a brand like Makartt’s Rhinestone Glue; a tube will run you about $8-$15 online and lasts forever.
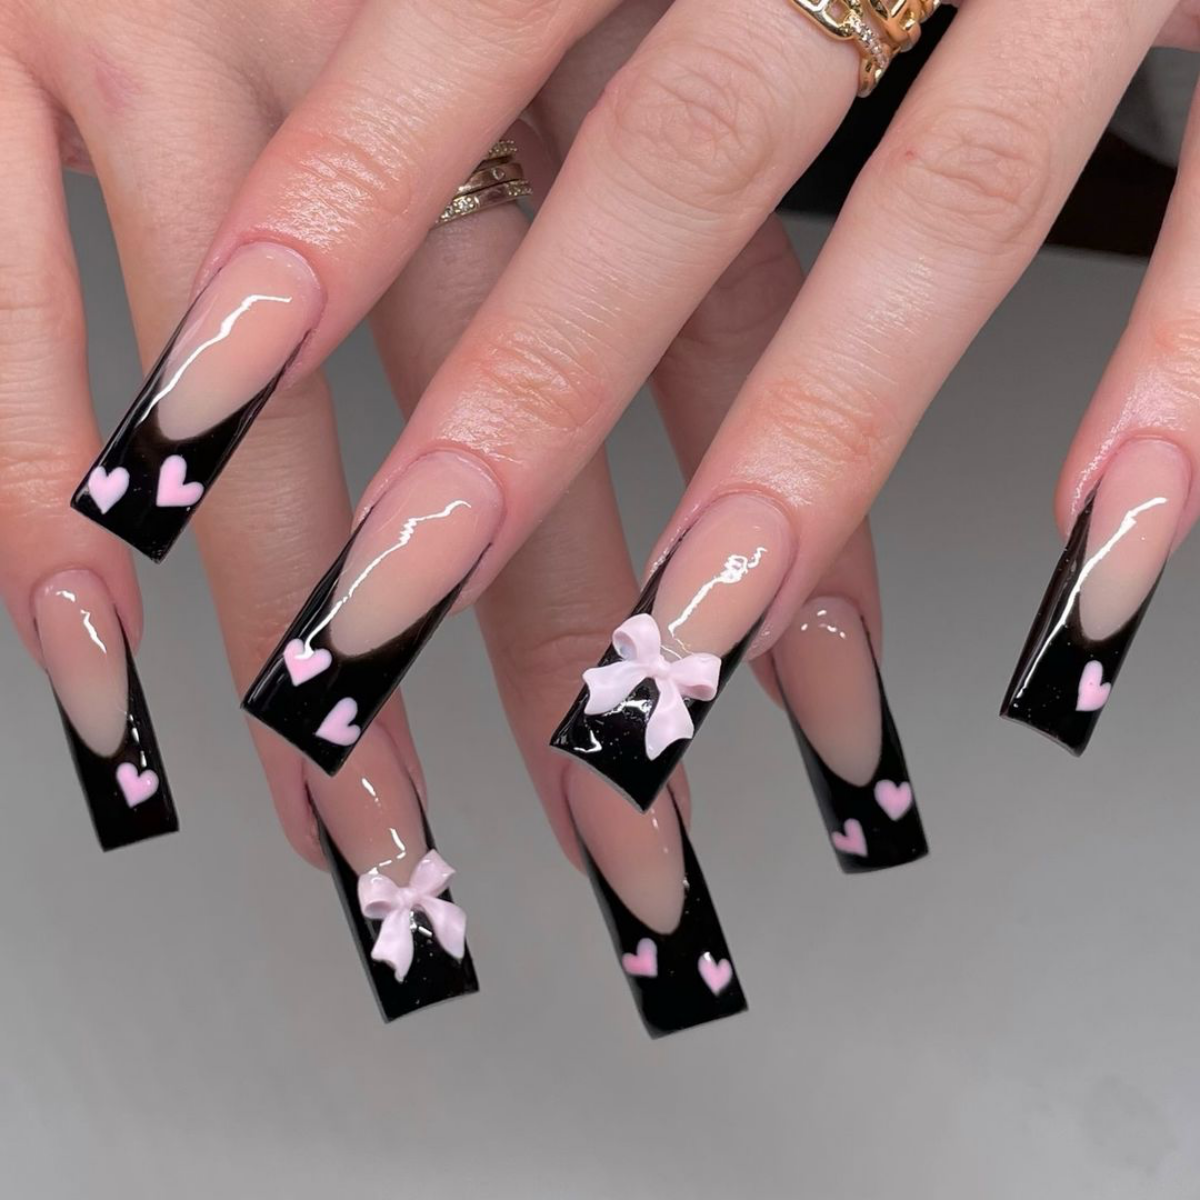
Technique: The 3D Bow Look
- Advanced Application: Creating those tiny, perfect bows is a pro-only technique using colored acrylic. It takes a deep understanding of the material to sculpt them.
- DIY Alternative: The good news is you can buy pre-made 3D bows online or at beauty supply stores! Just stick them on with nail glue for a similar, though less permanent, look.
Design Focus: Fun Hand-Painted Details
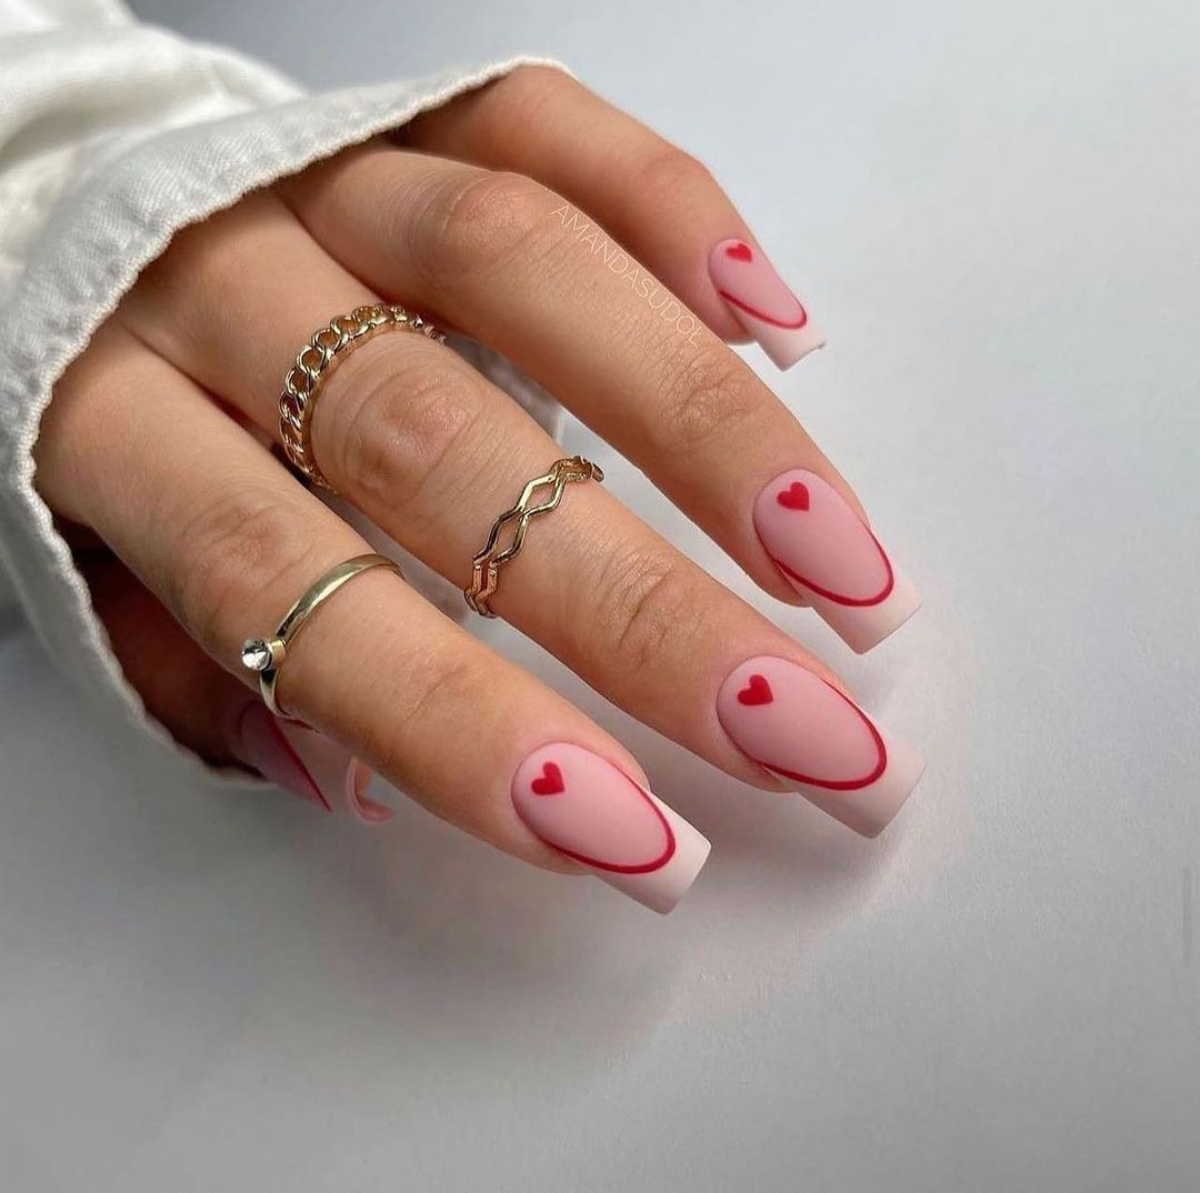
Technique: Effortless-Looking Swirls
- The Easy Way (Blooming Gel): This stuff is magic. You apply a layer of this special gel over your color (don’t cure it!), then draw your swirls into the wet layer. The colors gently spread, or “bloom,” creating a beautiful watercolor effect. It’s almost impossible to mess up and so much fun to play with.
Part 4: The Aftercare and Removal Rules
The job isn’t done when the top coat is cured. How you treat your nails for the next few weeks is everything.
Making Your Manicure Last
I tell every single client these three rules:
- Use Cuticle Oil Every Day. Quick tip: Go put some on right now. Seriously. Your nails will thank you. A good jojoba-based oil keeps the gel flexible and your skin moisturized.
- Your Nails are Jewels, Not Tools. Don’t use them to open soda cans or scrape labels. Be mindful!
- Wear Gloves for Chores. Harsh chemicals and lots of water are the fastest way to ruin your manicure.
The Most Important Step: Safe Removal
Improper removal is, without a doubt, the #1 cause of nail damage I see. From my experience, nothing makes me sadder than seeing a client come in with thin, damaged nails because they peeled off their last set. I once had to do a series of strengthening treatments for a client who had peeled off her gel so aggressively that she took off layers of her natural nail, leaving them paper-thin and painful. Don’t let this be you!
- Safe Gel Removal at Home: First, gently file off the shiny top coat. This lets the acetone get in. Soak a piece of cotton in 100% acetone, place it on the nail, and wrap your fingertip in foil. Wait 10-15 minutes. The gel should look soft and flaky. Use a wooden stick to gently push it off. If it resists, re-wrap for another 5 minutes. Never force it!
- Acrylic or Hard Gel Removal: Please, leave this to a professional. We use an e-file to safely remove the bulk of the product before a brief soak. Trying to do this at home is a recipe for drilling right into your natural nail.
Part 5: Finding a Salon You Can Trust
Choosing where to get your nails done is a big deal. Remember the old saying: a good manicure isn’t cheap, and a cheap manicure isn’t good. Your health is on the line.
What to Look For:
- Proper Sterilization: This is non-negotiable. Metal tools MUST be sterilized, ideally in an autoclave. Ask to see their sealed sterilization pouches. Files and buffers should be brand new for every client.
- A Clean Space: The desk should be clean, and there should be good ventilation to remove dust and fumes.
- A Consultation: A great tech will ask about your lifestyle and nail goals to recommend what’s truly best for you, not just what’s most expensive.
At the end of the day, a beautiful Valentine’s manicure is a fantastic way to express yourself. Whether it’s a simple red or a set covered in art, just remember that healthy nails are the ultimate luxury. Invest in good prep, choose your artist wisely, and for the love of all that is holy, don’t peel off your polish!
Galerie d’inspiration
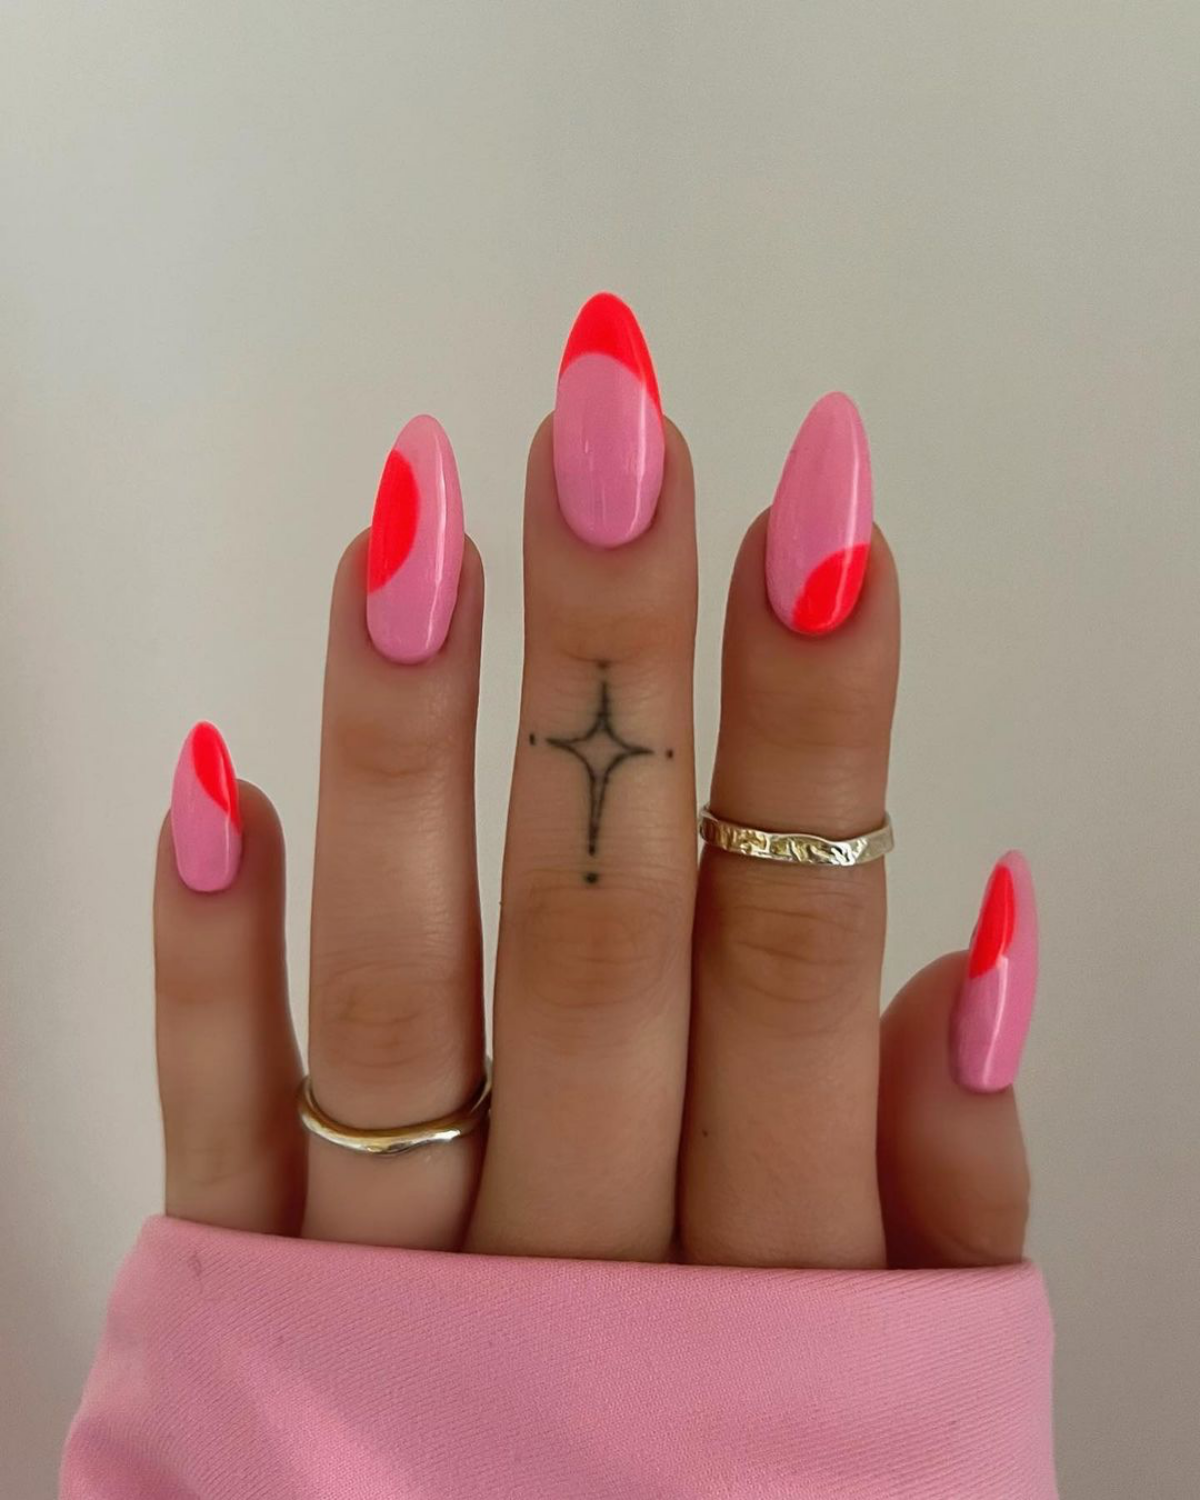
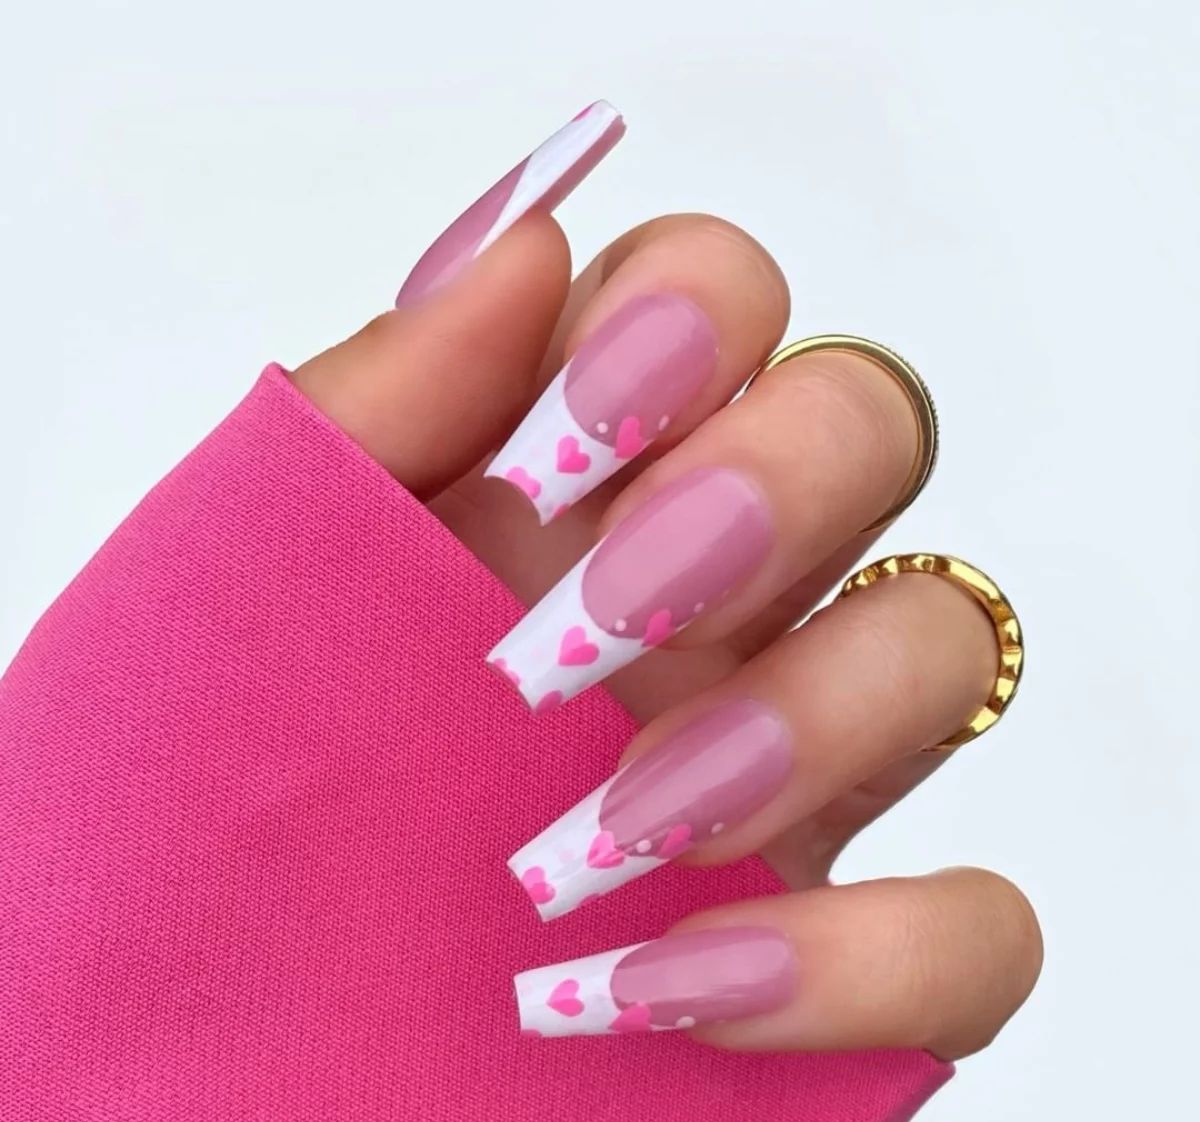
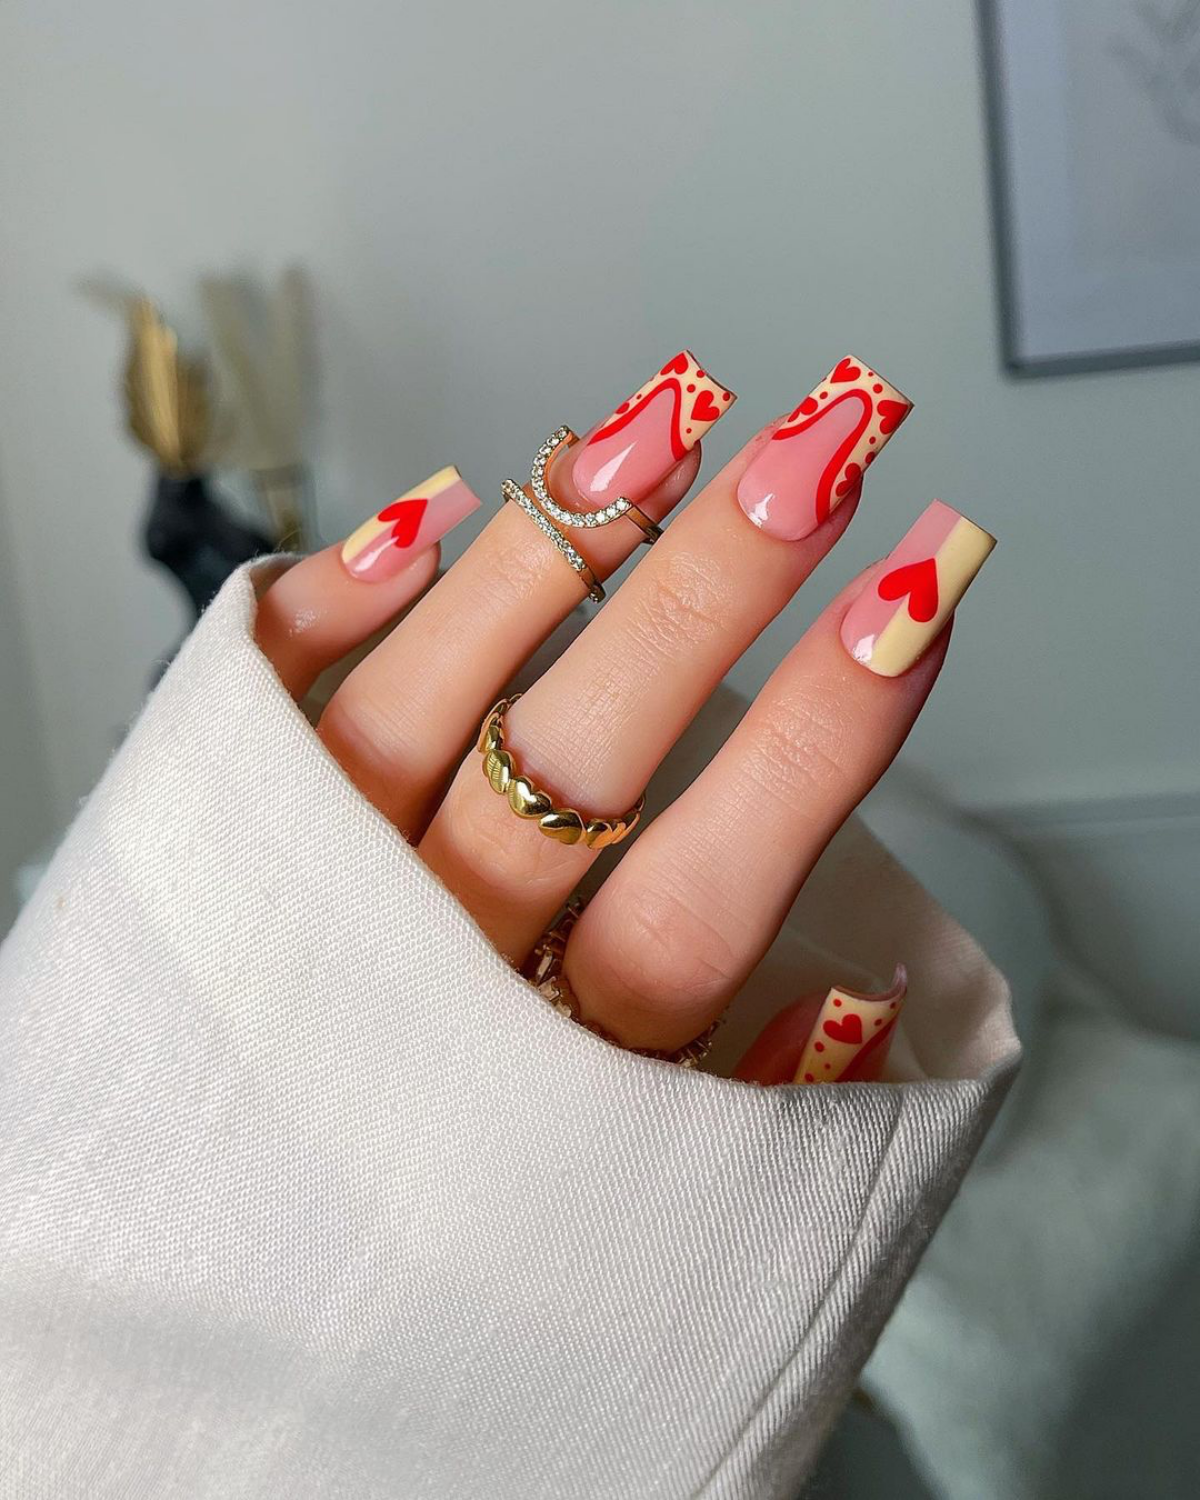
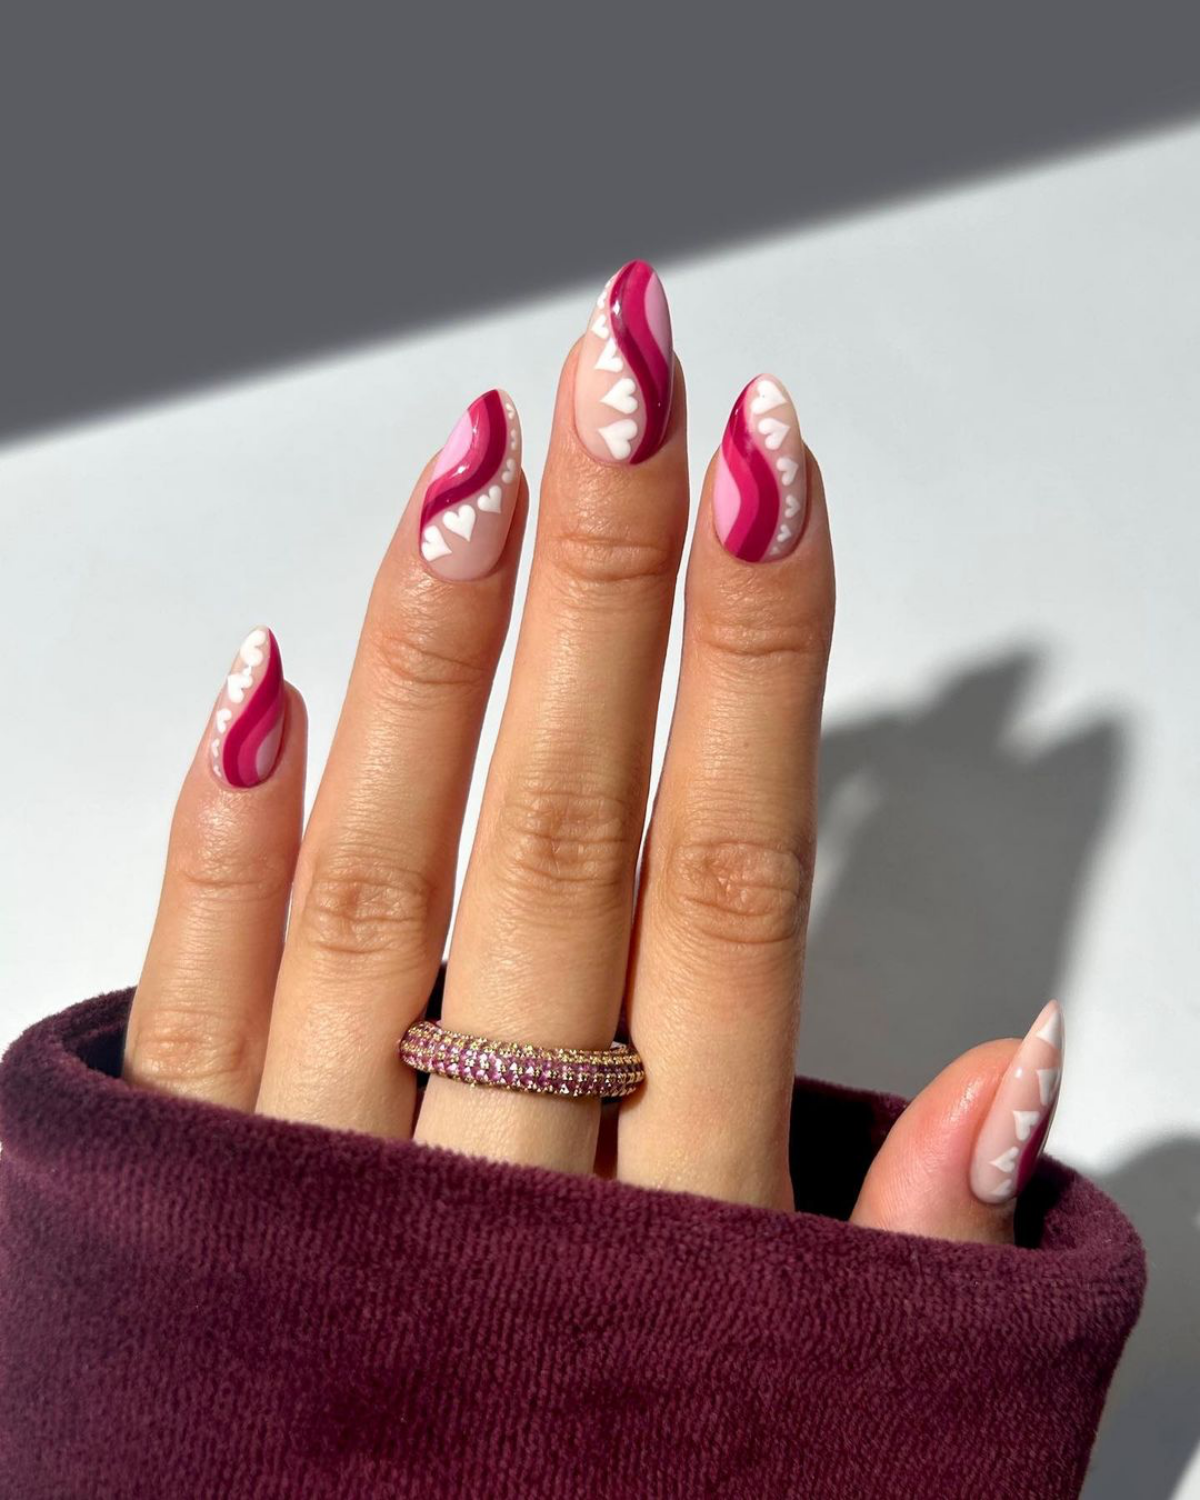
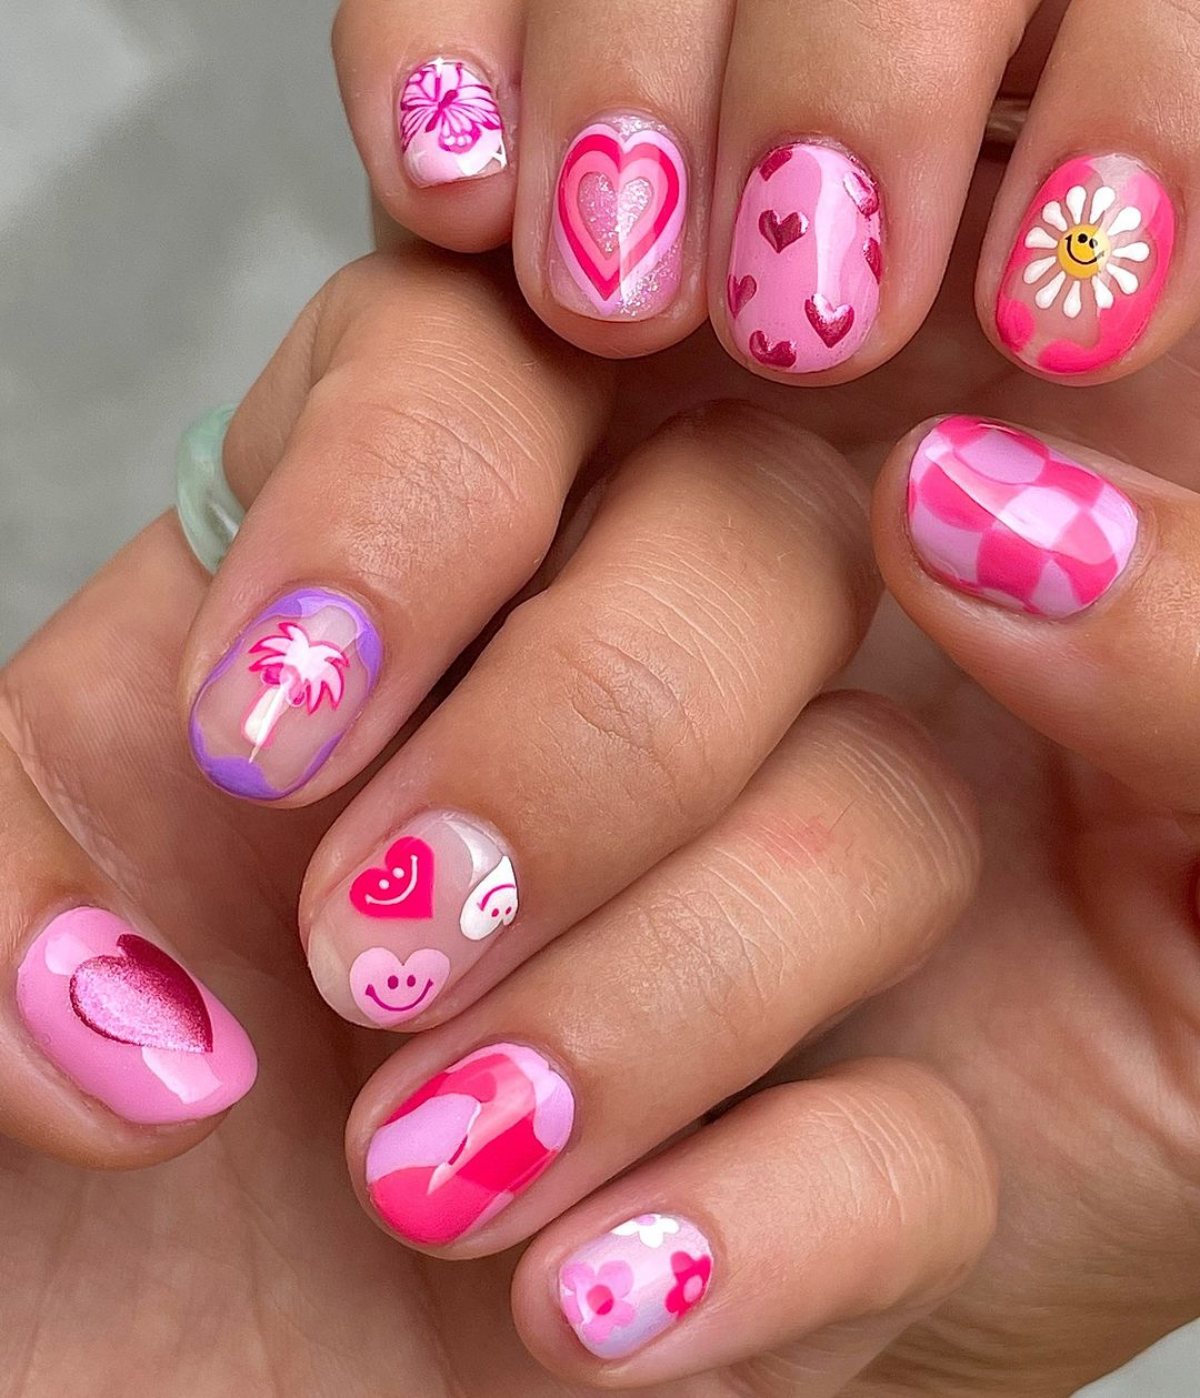
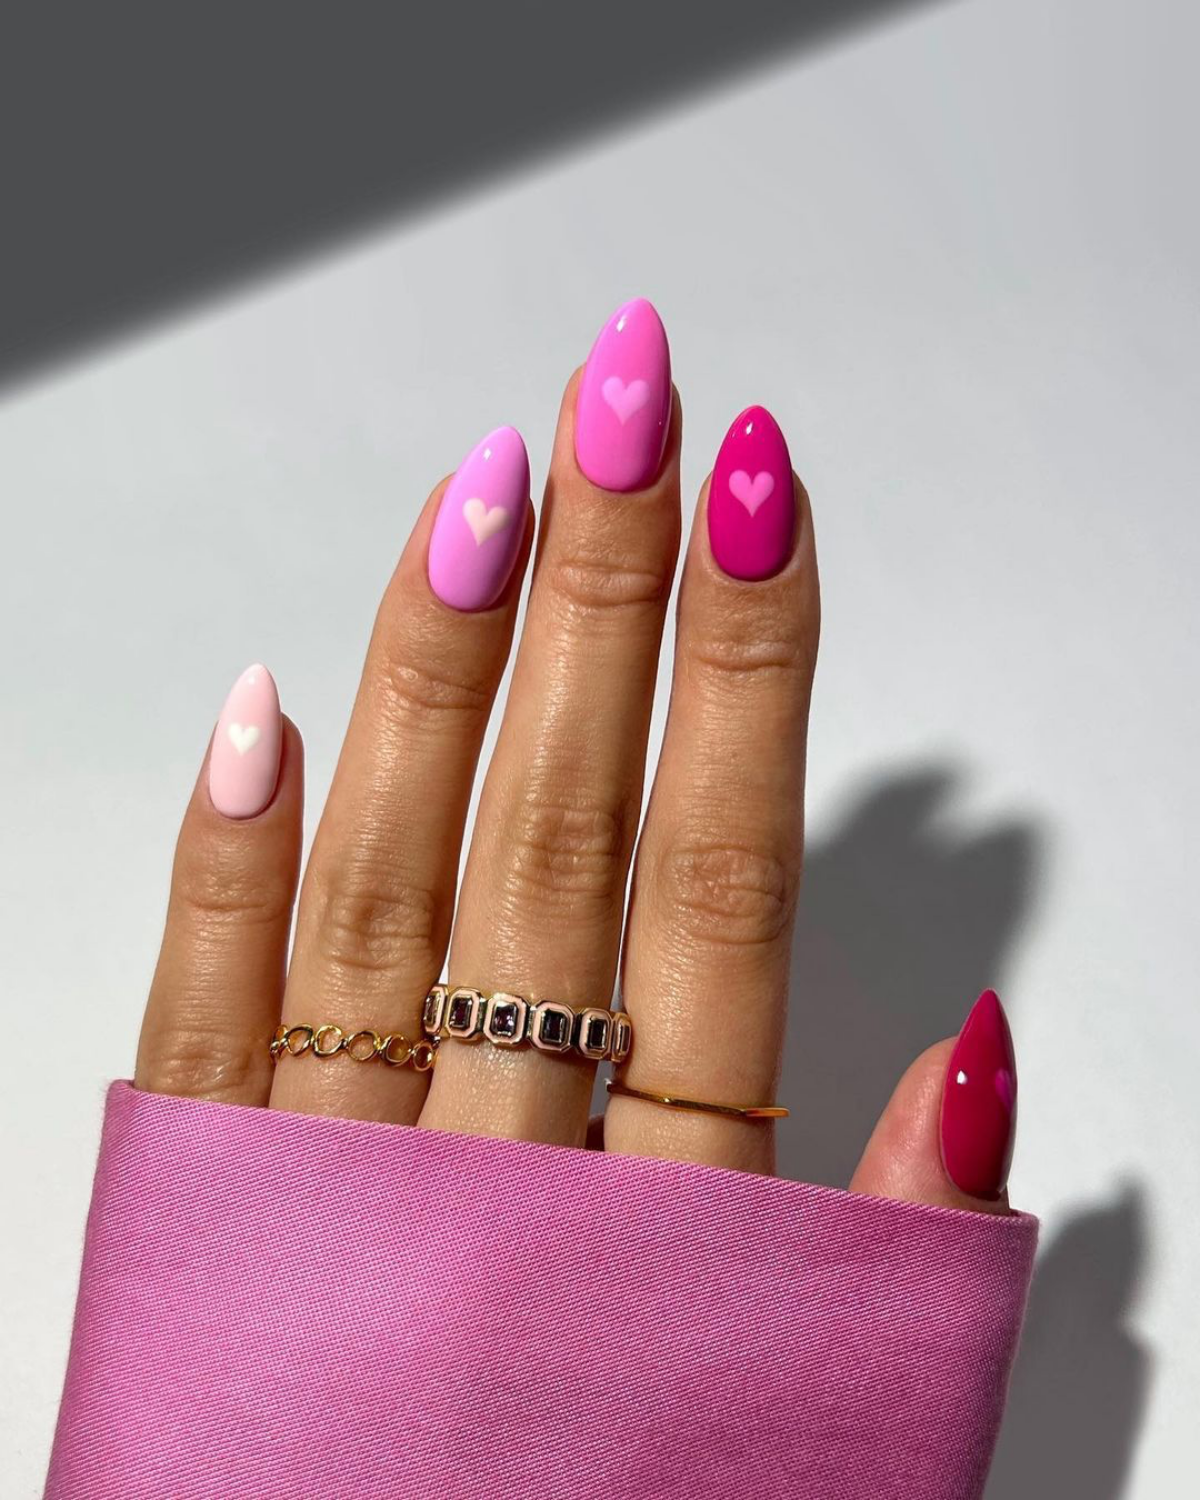
Looking for a modern twist on the classic Valentine’s heart?
Ask your technician for an
More than 73% of nail salon clients opt for gel polish due to its durability.
But that durability means removal requires care. Tearing or peeling off gel is the fastest way to damage your natural nails. For a safe at-home removal, soak cotton pads in pure acetone, place them on each nail, and wrap tightly with foil. After 15-20 minutes, the gel should gently flake off with an orangewood stick. Finish by lavishing your nails and cuticles with a high-quality oil, like CND’s SolarOil, to restore moisture.
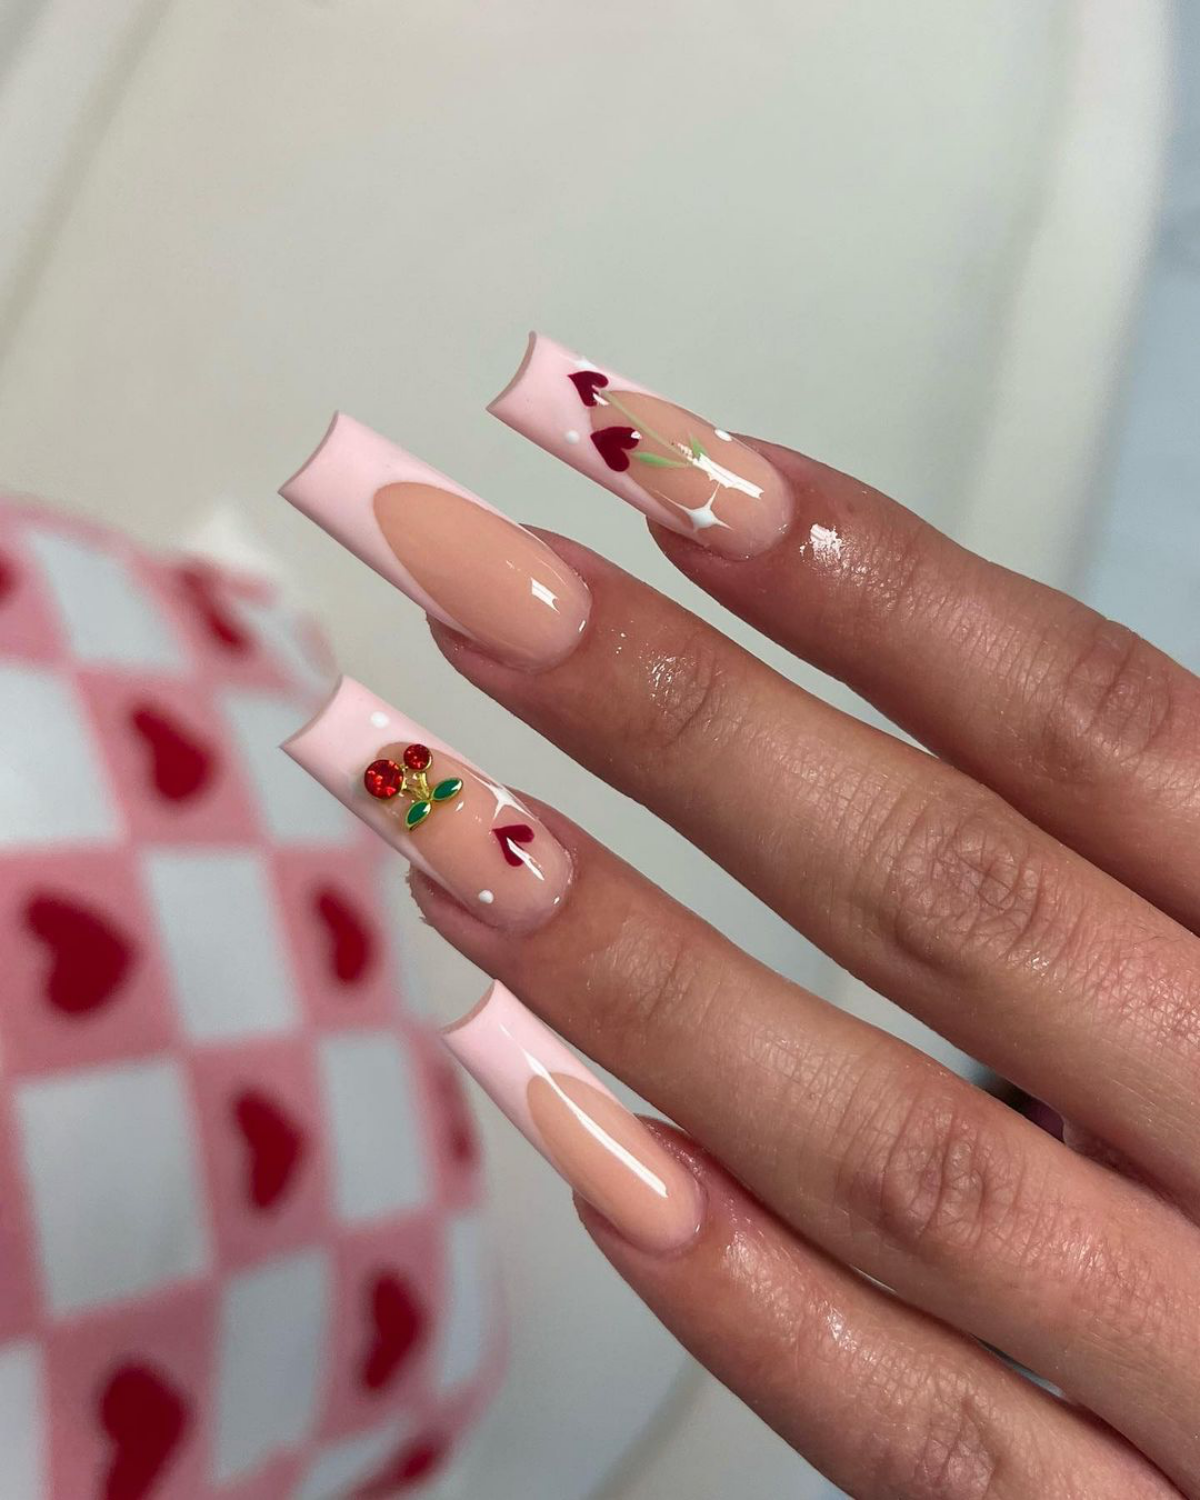
For the perfect Cupid’s arrow or micro-heart detail: Ditch the shaky hand and grab high-quality nail art stickers. Brands like Deco Miami or Olive & June offer intricate, ultra-thin decals that look professionally painted on. Apply them to a dry polish or cured gel base, press firmly to eliminate air bubbles, and seal with two layers of a good top coat for a seamless, long-lasting finish.


