Nail Tech Secrets: How to Get Salon Nails That Actually Last
I’ve been doing nails for a long, long time—over fifteen years now. And let me tell you, I’ve seen it all. Trends pop up on social media, flash across the runways, and then disappear, only to come back a few years later. But here’s the secret that never changes: a great manicure is all about the foundation.
In this article
Honestly, you can have the trendiest color or the most intricate design, but if the nail is weak or the structure is off, it just won’t look right. Or worse, it won’t last. The best nail art is always built on solid, expert technique.
I’ve trained my fair share of new techs and fixed more manicures than I can count—the kind that look amazing in a filtered photo but start chipping the next day. So, this guide isn’t about chasing the latest fad. It’s about peeling back the curtain on the core techniques that create gorgeous, healthy, and durable nails. We’ll look at the popular styles, sure, but from a pro’s perspective. This is the stuff that separates a quick paint job from true craftsmanship.

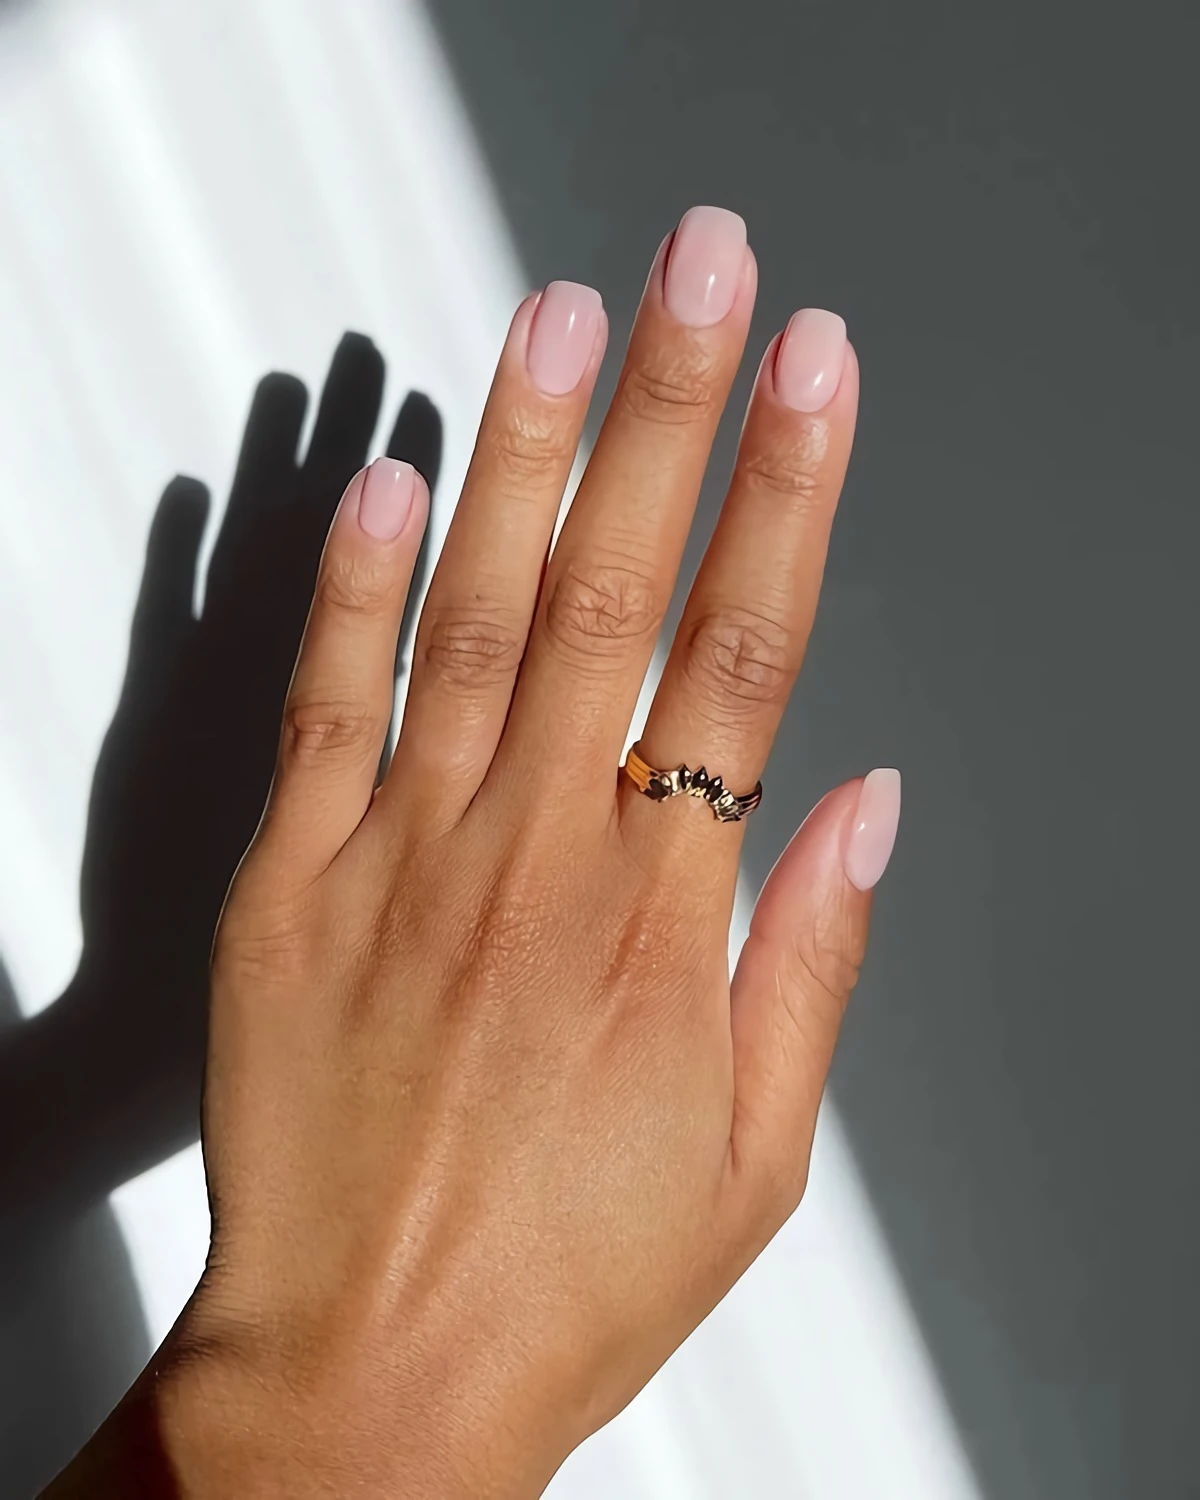
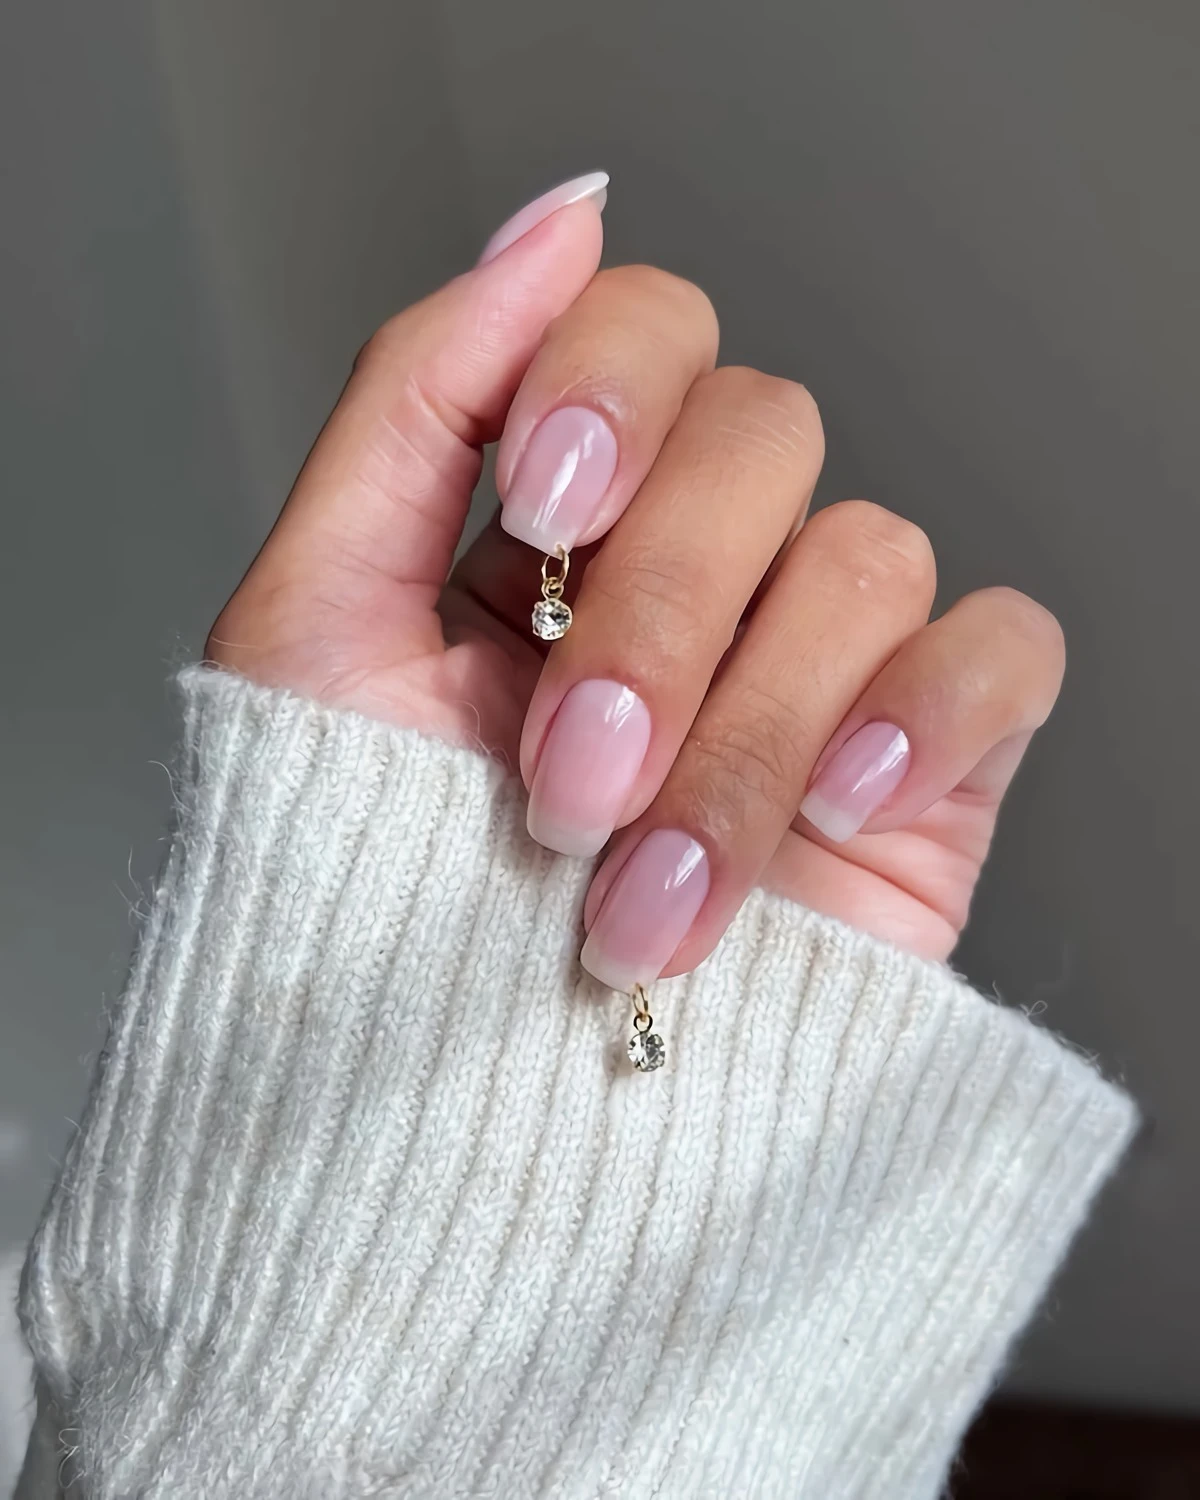
Mastering the “Barely There” Look (It’s Harder Than It Looks!)
One of the top requests in my studio right now is that super clean, “lip gloss nail” or “quiet luxury” look. It’s all about making your natural nails look absolutely perfect, but better. It seems simple, right? To be frank, creating that flawless, healthy-looking finish takes way more skill than some of the craziest art.
It’s all about meticulous prep and building an elegant, invisible structure.
The Secret to a Flawless Foundation
A great manicure starts with knowing what you’re working with. What most people call the cuticle is actually two different things: the real cuticle (non-living tissue stuck to your nail) and the eponychium (the living skin at the base). A good tech will NEVER cut that living skin. It’s a fast track to irritation and infection. Our job is to gently remove only the dead tissue, which gives us a clean slate for the gel to stick to.

For most of my clients, especially those with nails that are a bit bendy or weak, we use a builder gel to add strength. This is often called BIAB, or “builder in a bottle.” It’s a thick gel that lets us create a perfect “apex”—a subtle, high point on the nail that provides structural support right where you need it most. When you look at your nail from the side, a proper apex creates this gorgeous, graceful curve that not only prevents breaks but also makes the light reflect in a way that’s just… chef’s kiss.
How We Build That Perfect Nail
Achieving this look is a detailed service, not just a polish change. Here’s a peek behind my process:
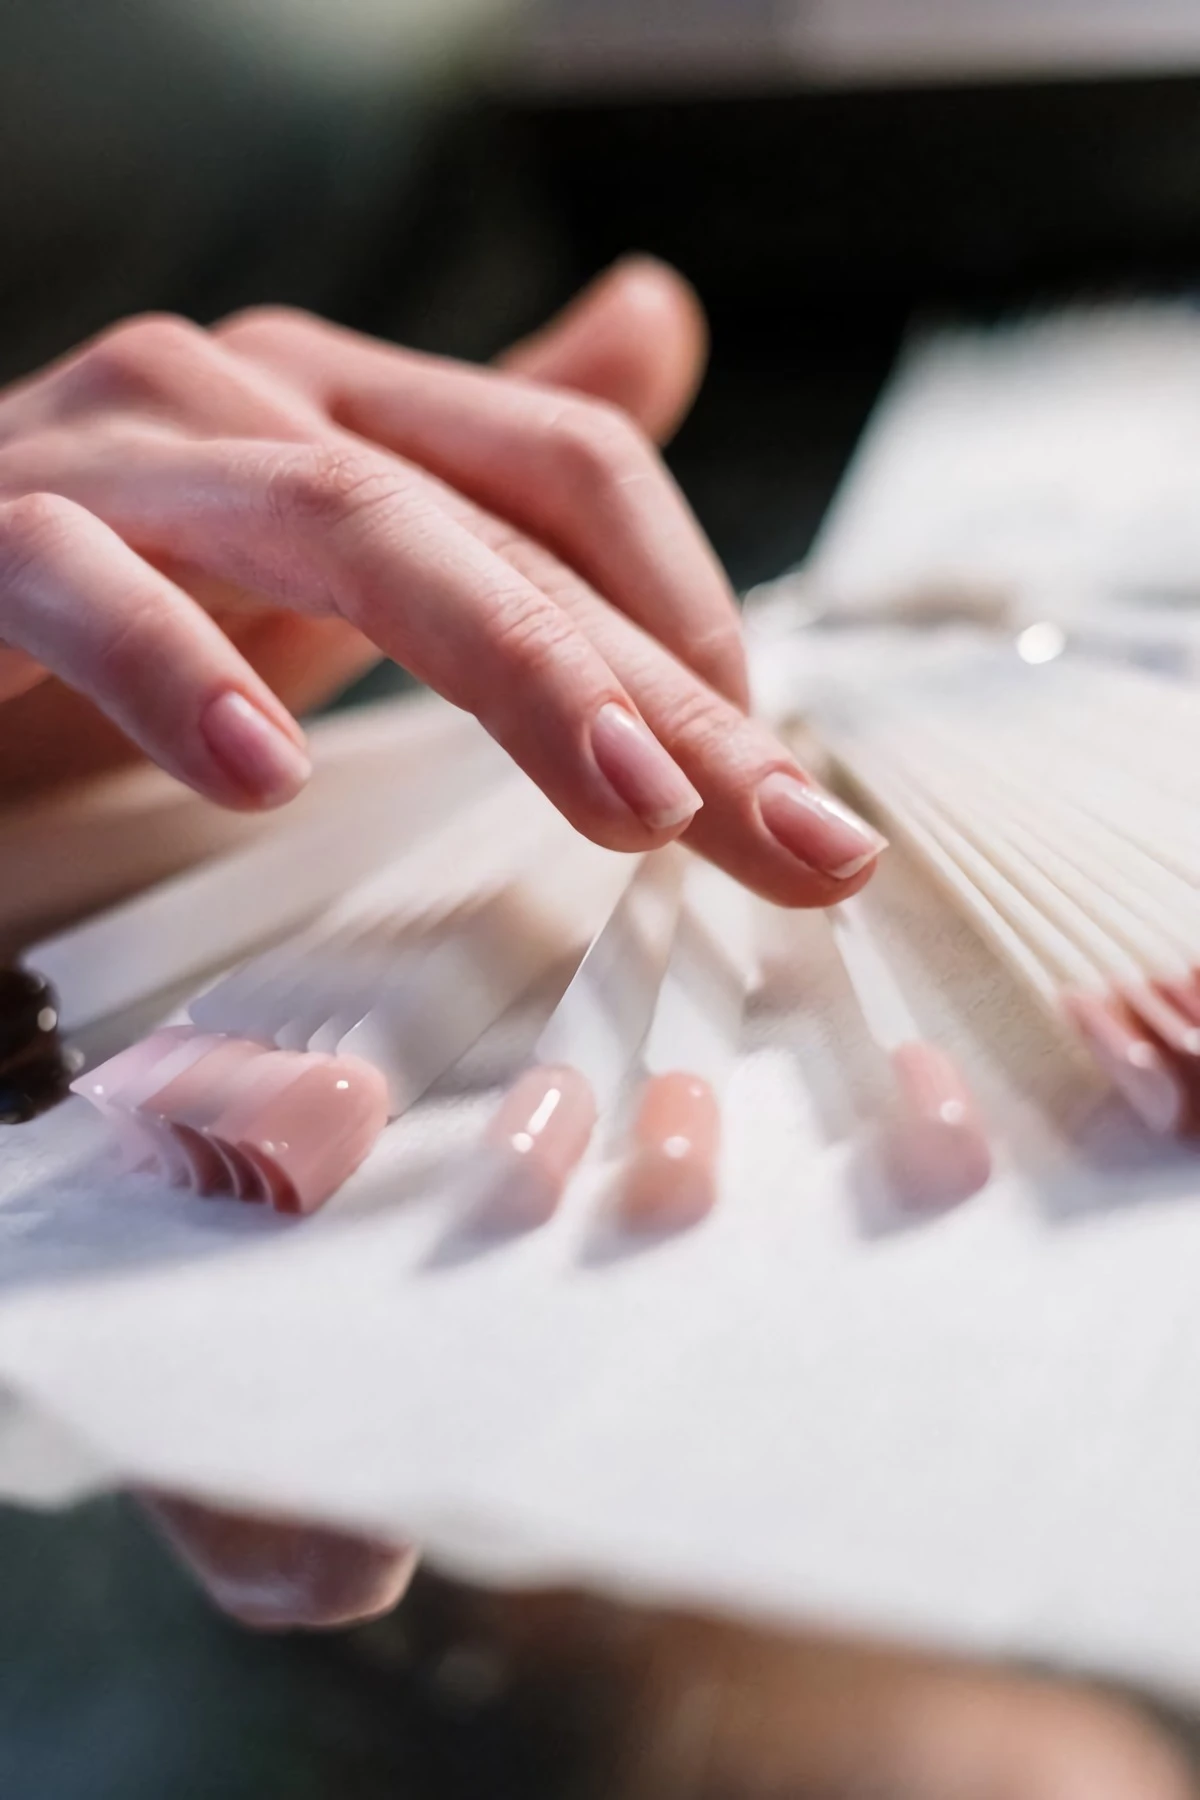
- Meticulous Prep: I start with a dry e-file manicure. Using a very fine diamond bit on a low setting, I carefully lift the eponychium and buff away any non-living tissue from the nail plate. It’s far more precise and gentle than nippers when done by a trained professional.
- Building the Structure: After prepping the nail, I apply a builder gel. I’ll brush on a thin “slip layer” first, and then, without curing, place a small bead of gel near the stress area of the nail. I gently guide it into place and let it self-level. Quick tip: I often have my client flip their hand upside down for a few seconds. Gravity is a nail tech’s best friend and helps pull that gel into the perfect apex!
- The Perfect Color: For this style, we lean on sheer, milky, or nude-pink gels. I absolutely love using shades like The Gel Bottle’s BIAB 19 or a timeless sheer like OPI’s Bubble Bath. They’re forgiving, but because they’re translucent, any mistake in the underlying structure will show right through. The application has to be buttery smooth.
- The Glassy Finish: After the color is cured, a high-quality top coat is a must. The goal is a surface so smooth that light reflects in a single, unbroken line down the nail. That’s how you know the shape is perfect.
Good to know: A true structured manicure is a more involved service. While a basic gel polish might cost you around $45 and take 45 minutes, expect a structured manicure to run between $65 and $85+ and take about 90 minutes. In my opinion, the added strength and longevity are worth every penny.
How to Find a Pro & Maintain at Home
While you can use sheer polish at home, you really can’t replicate a structured gel manicure without professional training. If your nails are always breaking, a structured manicure is the answer. It acts like a protective shield, letting your natural nails grow out strong underneath.
But how do you find a tech who actually knows what they’re doing? After seeing some horror stories (like aggressive drilling that thins the nail—ouch!), I tell people to ask a few key questions:
- “What is your sterilization process?” They should be able to proudly show you their multi-step process, which should include a medical-grade autoclave for sterilizing metal tools.
- “Are you certified for e-file manicures?” An e-file is a powerful tool; your tech should have specific training on how to use it safely. It should NEVER hurt.
- “Can I see a side-view photo of your structured manicures?” A good tech will have photos showing off that beautiful, subtle apex.
And for home care? Keep your nails and skin hydrated with a good cuticle oil. Jojoba-based oils are fantastic because their molecules are tiny enough to actually penetrate the nail plate. You can find a decent one online or at Sally Beauty for about $10-$15. A soft file ($2) for snags and a little brush for cleaning is all you really need.
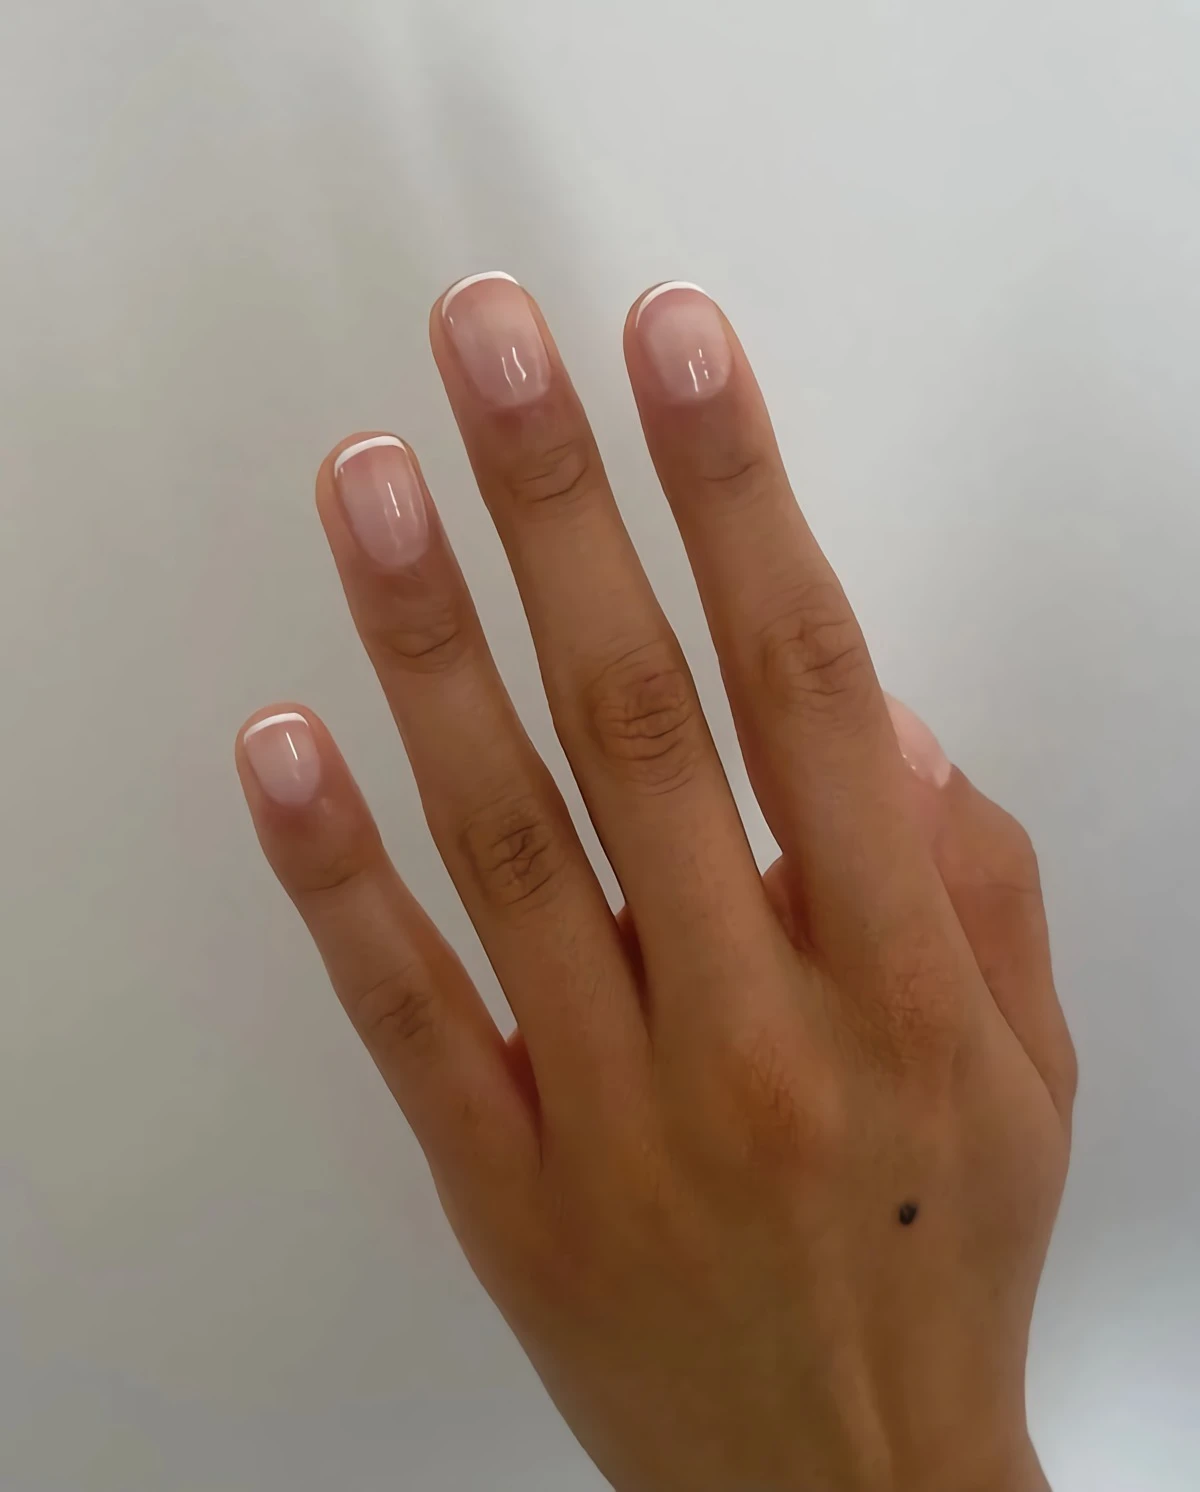
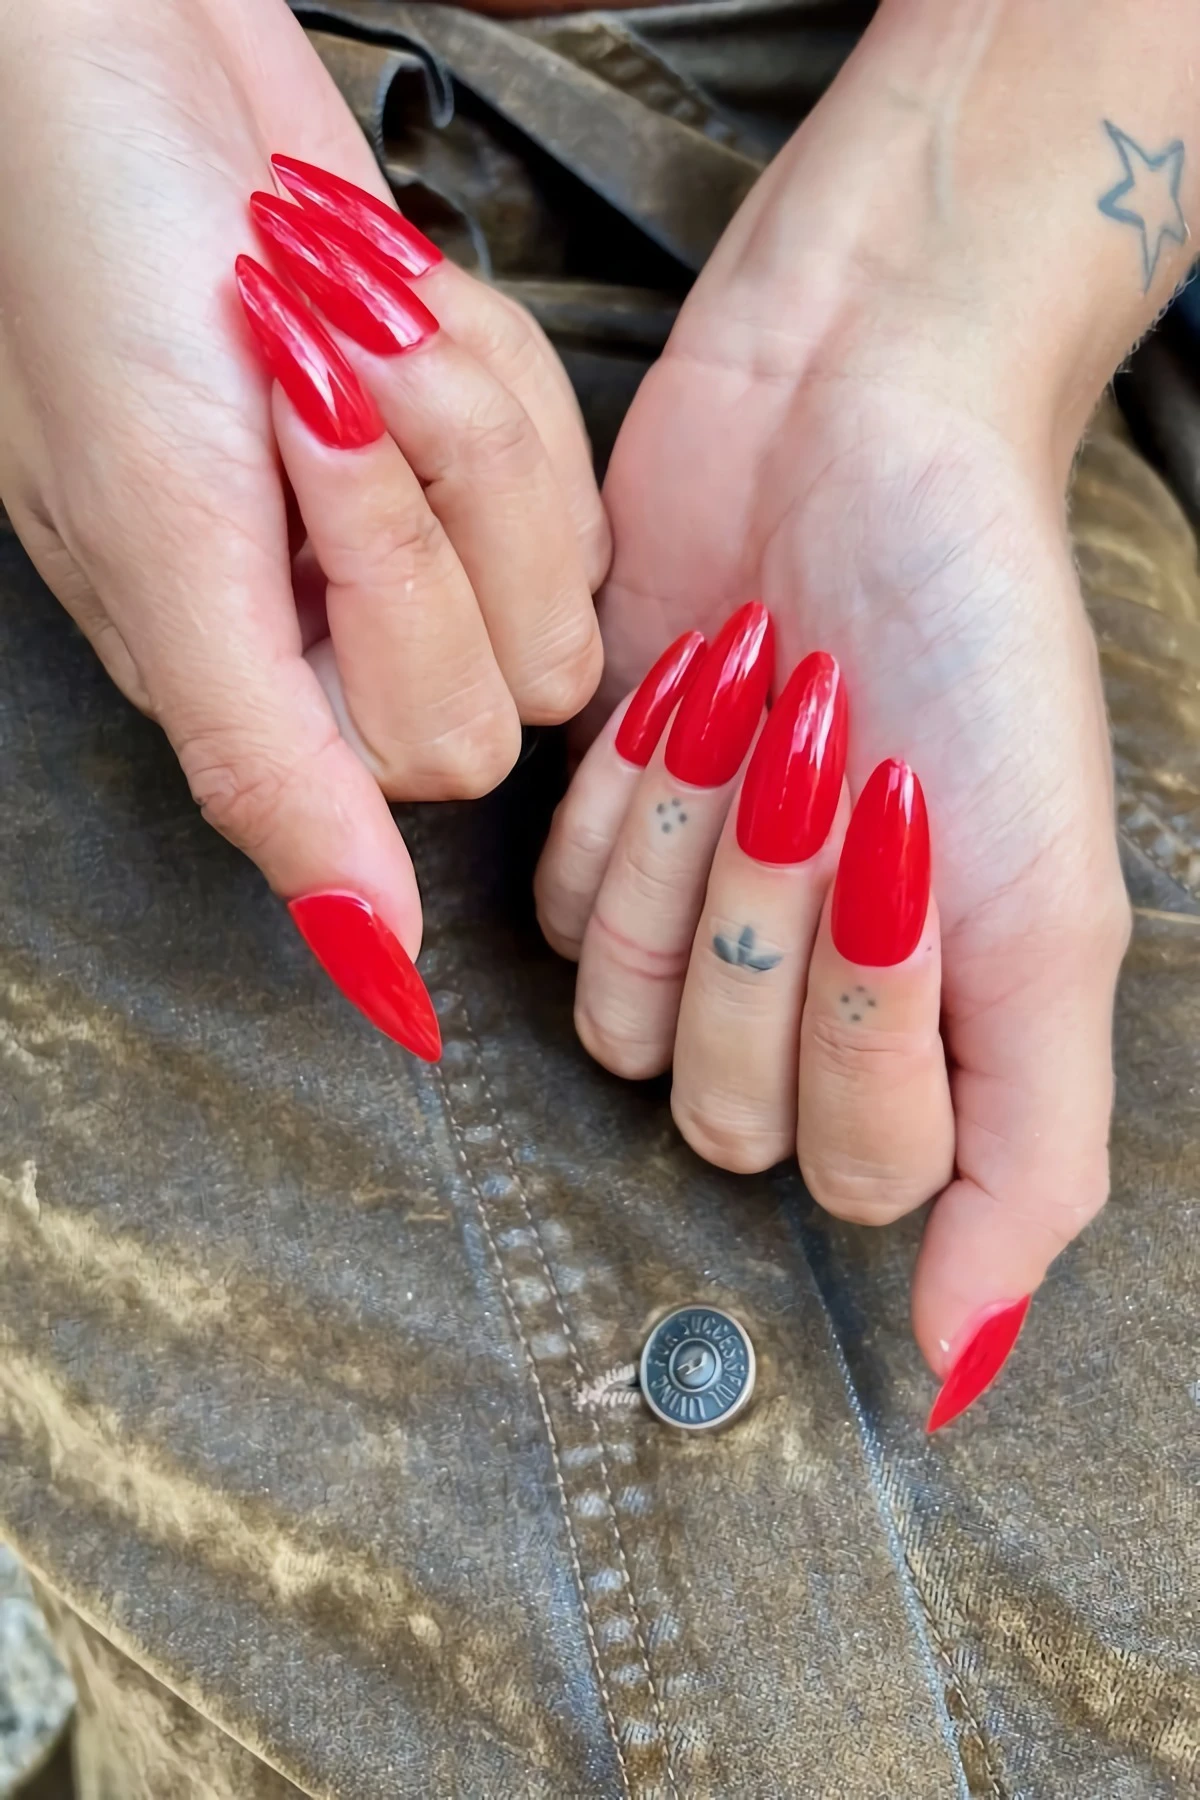
The Modern French Manicure: Thinner is Better
The French manicure never really goes away, does it? But today’s version is a world away from the thick, blocky white tips from back in the day. The modern look is a super-thin, crisp “micro-French” or a soft, blended “American French.” Getting that delicate line is a real test of a steady hand.
Two Ways to Get the Look
In the studio, there are a couple of ways we can tackle this, and the choice depends on the desired result. For most clients who want that elegant, delicate look, I use the Liner Brush Method. With a long, skinny brush and a highly pigmented gel paint, I draw the line by hand. It gives me total control to create a smile line that perfectly complements the nail shape. It’s an art form in itself.
But for the absolute sharpest, most durable French tip possible, we use the Reverse French Technique. This is a more advanced, sculpted method. First, we build the entire nail bed with a nude builder gel, then literally file a sharp smile line into it. After that, we fill in the tip with white builder gel. It’s a high-skill service, so expect it to take an extra 30-45 minutes and cost more, but the results are incredibly crisp and last forever. It’s the gold standard for competition nails.
A Quick Heads-Up on Safety
A common mistake I see with DIY attempts is using a cheap, thick white polish. Here’s the danger: if the gel is too thick or overly pigmented, the UV light from the lamp can’t penetrate it fully. This means the gel underneath doesn’t cure properly, which can lead to lifting and, more seriously, could cause you to develop a lifelong gel allergy. So, always use professional-grade art gels in thin layers. Two thin coats are always better than one thick one!
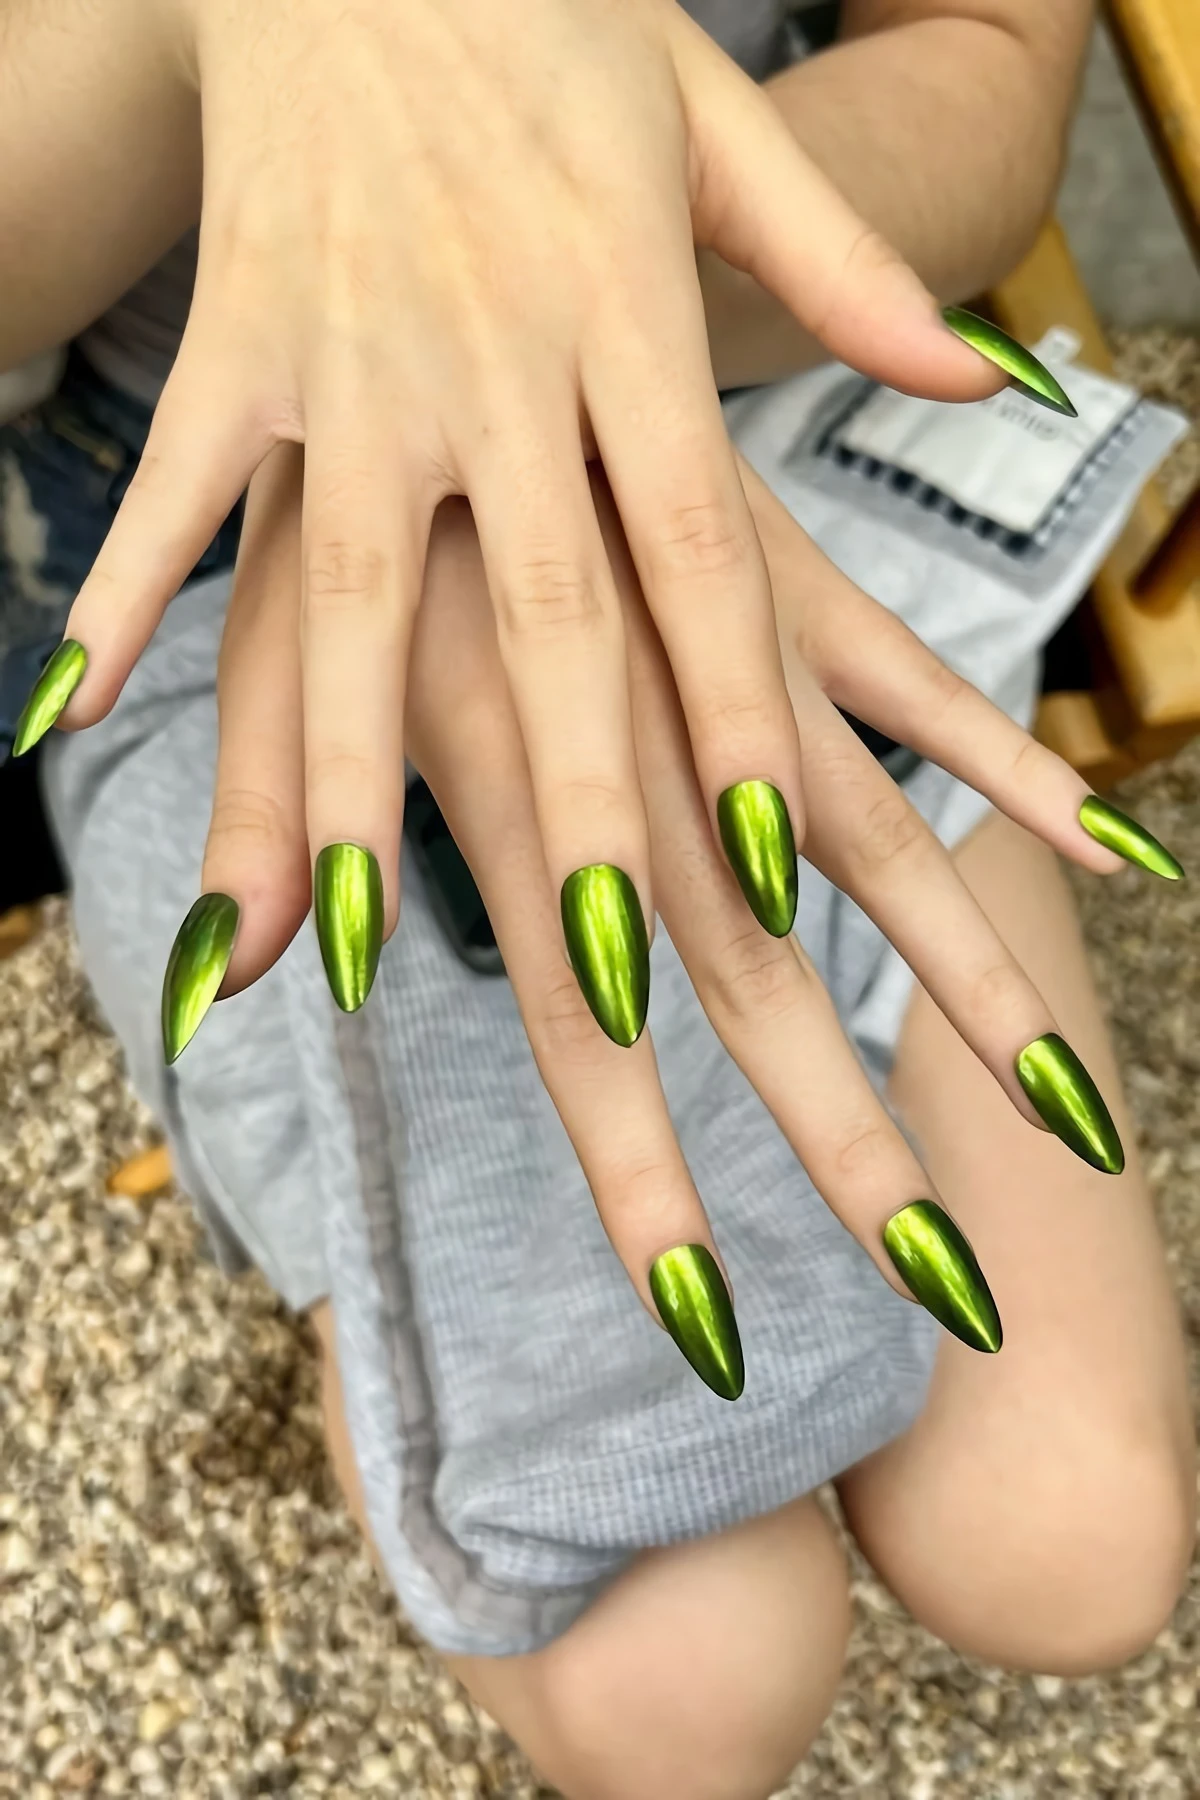
The Secret to a Perfect Mirror Chrome Finish
Chrome nails are still a huge favorite, and for good reason! That liquid-metal, mirror-like effect is mesmerizing. But getting a true chrome finish isn’t as simple as rubbing some powder on a nail. It’s a science, and there’s absolutely no room for error.
Why a No-Wipe Top Coat is Your Best Friend
Here’s the magic trick: chrome powder is an incredibly fine pigment that needs to be rubbed onto a perfectly smooth, non-porous surface to work. A standard gel top coat cures with a sticky layer, and if you rub chrome on that, you just get a clumpy, glittery mess. A “no-wipe” top coat is formulated to cure to a hard, slick finish with no stickiness.
But timing is EVERYTHING. If you under-cure the no-wipe top coat, it’ll be too soft. If you over-cure it, it’ll be too hard for the powder to stick. It’s a delicate balance. In my studio, with my professional LED lamp, that sweet spot is exactly 30 seconds. A good tech knows their equipment inside and out and has this timing down to a science.
The Unskippable Step for Long-Lasting Chrome
The biggest problem people have with chrome? It chips off the tips within a day or two. This happens because they miss the most important step: the double seal. The powder is just sitting on top of the gel, so you have to completely encase it. After burnishing the chrome and dusting off the excess, I apply a layer of base gel to seal it in, cure it, and then apply the final top coat. This double seal is non-negotiable if you want it to last.
Adding Bling: How to Apply 3D Art That Stays Put
For clients who want to add some sparkle with crystals or charms, my job becomes part nail tech, part jeweler. The goal isn’t just to make it look pretty, but to make sure it’s secure and safe. A poorly attached charm can snag and cause some serious damage.
The Right Glue for the Job
First off, a simple top coat is not glue. It’s a sealant. For flat-back crystals, I use a thick gem glue gel that holds them in place before curing. Then—and this is key—I use a tiny bit of top coat to paint a little frame around the base of the gem, sealing it to the nail without dulling the sparkle on top. Please, never let a tech paint top coat over the entire crystal! It completely ruins the facets and the shine.
For bigger, heavier 3D charms, I’ll use a small bead of clear acrylic to create an incredibly strong anchor. It’s the only thing I trust to hold up to daily wear and tear.
A Word of Warning…
I have to be honest with my clients: large 3D art isn’t for every lifestyle. If you work with your hands a lot or have small kids, those big, sharp charms can be a hazard. They can snag and rip the enhancement off, often taking a layer of your natural nail with it. Ouch.
Hygiene is also a big deal. You have to be diligent about cleaning around and under the charms with a small brush to prevent bacteria from getting trapped. I once had a new client come to me after a visit to a discount salon. They had used cheap craft glue that left a gap under a large charm. Moisture got in, and she had a nasty bacterial infection on her nail. It was a stark reminder that proper application isn’t just for looks—it’s for your health.
At the end of the day, a beautiful, long-lasting manicure is a partnership between a knowledgeable tech and an informed client. When you understand the ‘why’ behind the techniques, you can wear any style with confidence, knowing your nails are not only stunning but also healthy. And that, right there, is the whole point.
Inspirational Gallery with Photos
Did you know? The
What’s the deal with the
- Apply cuticle oil daily. We love CND SolarOil for its blend of jojoba oil and vitamin E.
- Wear gloves when doing dishes or cleaning to protect your manicure from harsh chemicals.
- Never use your nails as tools to open cans or scrape stickers.
- Schedule your next appointment for 2-4 weeks to maintain nail health and structure.
You might see salons advertising
The single most important product for longevity: Cuticle oil. It’s not just for moisturizing the skin around the nail. A high-quality oil, like the industry-favorite Dadi’ Oil, penetrates both the gel and the natural nail, keeping them flexible. A brittle, dry nail and enhancement will chip, while a hydrated one will bend under pressure and bounce back.
When you peel off a gel manicure, you’re not just removing polish—you’re typically taking 30-50% of the top layers of your natural nail plate with it.
This is why nails feel thin, weak, and sensitive after improper removal. Each time this happens, the damage compounds, making it harder for any future manicure to adhere properly. A professional soak-off is the only way to preserve the integrity of your natural nail.
Achieving that viral
- Prevents the thinning and weakening of the nail plate.
- Ensures your next manicure has a healthy, smooth foundation to adhere to.
- Avoids painful sensitivity and breakage in the following weeks.
The secret to all these benefits? Patiently and properly soaking off your gel polish with an acetone-based remover instead of picking or peeling it off.
Tacky Top Coat: This traditional standard leaves a sticky inhibition layer after curing that must be wiped with alcohol. This layer provides excellent adhesion for nail art or powders applied before the final seal.
No-Wipe Top Coat: A modern innovation that cures to a hard, glossy finish with no sticky residue. It’s a time-saver and the absolute essential for applying chrome powders, which need a perfectly smooth surface to create a mirror effect.
Beyond pretty pictures on Instagram, look for these signs of a truly professional nail studio:
- Autoclave Sterilization: Look for sealed pouches of metal implements, opened just for you. This is hospital-grade sterilization.
- One-Time Use Files: A new file and buffer should be used for every single client. Reusing porous tools is a major cross-contamination risk.
- Proper Ventilation: A good salon will have a source-capture system to minimize dust and chemical fumes.


