Your Summer Nails Keep Chipping? Here’s the Real Reason Why.
After years behind a nail desk, I’ve seen it all. But nothing gets people more excited than summer. Clients flood in, phones in hand, showing off pictures of vibrant, fun designs they want for their vacations. As a nail tech and educator, my job is to make those dream nails happen. But honestly, the more important job is making sure that art lasts through every pool day, beach trip, and barbecue.
In this article
So, this isn’t just another gallery of pretty ideas. We’re going deep into the techniques we pros use to build gorgeous summer manicures that are practically bulletproof. We’ll get into the nitty-gritty of why some manicures die a quick death in the heat and humidity, and I’ll share the exact prep methods I teach that guarantee a solid foundation. We’ll even tackle how to fight back against color-fading sun and chlorine. Whether you do your own nails or you’re a fellow tech, you’re about to learn how to create art that actually endures.
The Foundation: Why Your Mani Fails Before It Even Starts
Before you even dream of picking a color, we have to talk about prep. I’m serious. A summer manicure that starts lifting within a week is almost always a prep problem. The heat, the humidity, and the extra oils on our skin make a perfect prep non-negotiable.
First, let’s clear something up. Your nail plate is made of keratin layers. Sitting right on top of that is a thin layer of non-living tissue: the true cuticle. Our job is to get that off the nail plate without touching the living skin around it, called the eponychium. So many people call the eponychium the cuticle and—yikes—cut it. Please don’t do that! That living tissue is your finger’s bodyguard against bacteria, and cutting it is asking for trouble.
In the salon, we have our methods, but you can get amazing results at home. Here’s a quick shopping list to get you started:
- Cuticle Remover: You don’t need a fancy professional one. The classic Blue Cross Cuticle Remover you can find at Sally Beauty or online for about $5 is fantastic. It has potassium hydroxide, which does the heavy lifting of softening that dead tissue.
- Metal Pusher: A good one costs around $8-$10 and is way more effective than an orangewood stick.
- Buffer Block: A simple 180-grit buffer is all you need. They’re usually just a couple of bucks.
- 99% Isopropyl Alcohol: You can find this at any drugstore for around $4. Don’t get the 70% stuff; it has too much water in it.
Once you have your tools, gently push back the eponychium. Apply your cuticle remover and let it sit for a minute. Then, use your metal pusher to gently scrape the invisible cuticle off the nail plate. You’ll be shocked at what comes off! This step alone is a total game-changer for preventing lifting.
The Pro Prep for a Manicure That Won’t Quit
With the cuticle handled, it’s time to shape and prep the surface. I usually recommend slightly rounded shapes for summer, like an oval or almond. They’re less likely to snag and break while you’re out having fun.
Next, lightly—and I mean LIGHTLY—buff the nail plate with your 180-grit buffer. You’re just trying to remove the shine, not file away layers of your nail. Think of it like dusting the surface, not sanding it down. Over-filing makes nails weak and bendy, which causes rigid products like gel to crack right off.
Now for the most important step: cleansing the nail. Grab a lint-free wipe (a piece of an old, clean t-shirt works in a pinch) and saturate it with your 99% isopropyl alcohol. Scrub the nail plate, the sidewalls, and get right under the free edge. This removes every trace of dust and oil. After this, DO NOT touch your nails. The oils from your fingertips will undo all your hard work. Finally, a pH bonder or non-acid primer acts like double-sided tape for your polish. It’s a must for oily nail beds or if you’re prone to lifting.
Summer Art Techniques That Actually Stay Put
Okay, with that bulletproof foundation, we can finally get to the fun part. The secret to clean, professional-looking nail art is all about control and using the right stuff.
How to Nail That Perfect Ombré
Bright, blended gradients just scream summer. A sponge is the easiest way to get that smooth ombré effect with gel polish. Here’s how:
- After your base coat is cured, paint your two or three colors in stripes directly onto a cheap makeup sponge.
- Gently dab the sponge onto your nail. The first coat will look patchy. Don’t worry, that’s normal!
- Cure it for 30-60 seconds in your LED lamp. (A good, reliable 48-watt lamp like one from SUNUV on Amazon is a great investment, usually around $30-$40).
- Repeat this process two or three more times, slightly shifting the sponge placement with each layer to build up the color and blend.
- Finish with a good top coat to smooth everything out. Plan for this to take maybe 15-20 minutes for both hands once you get the hang of it.
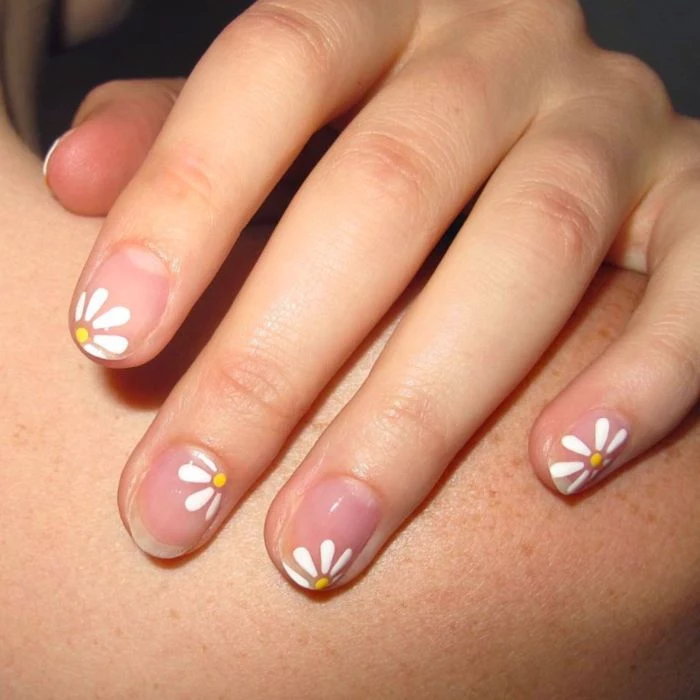
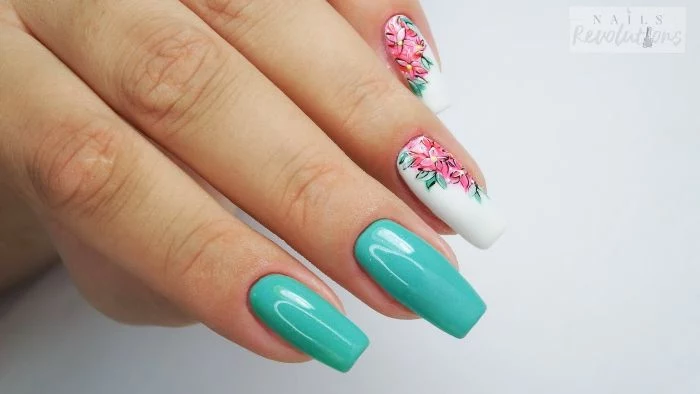
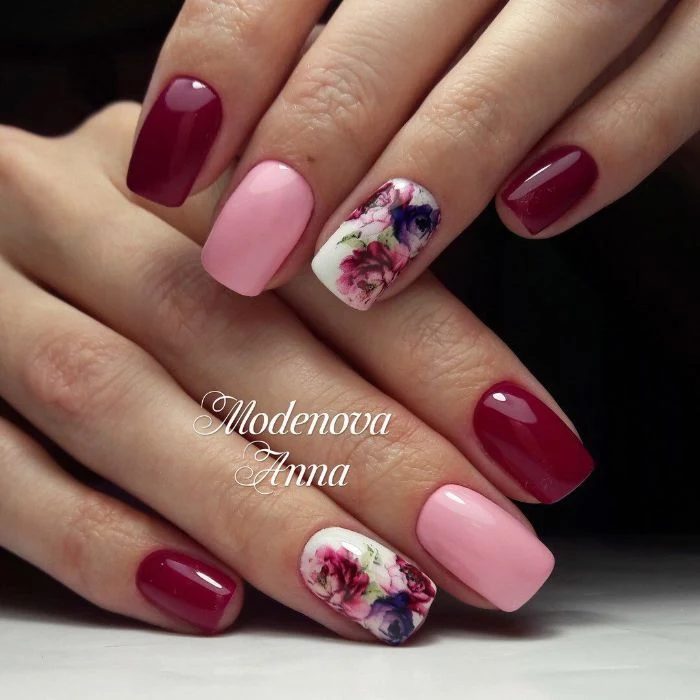
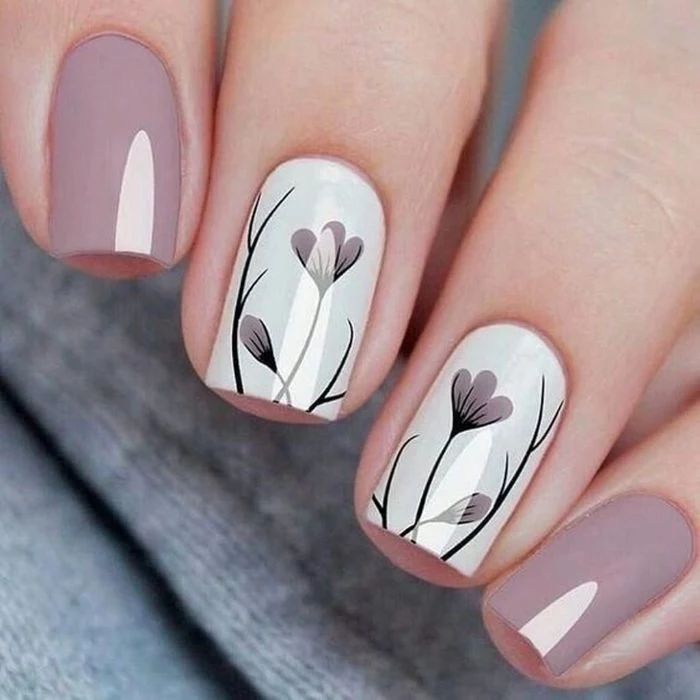
Creating Delicate Hand-Painted Florals
Don’t be scared of hand-painting! It’s just about breaking things down into simple shapes. For this, you’ll want highly pigmented art gels. They have a thicker, paste-like consistency, which means the color stays put and doesn’t run. A simple daisy is a great place to start. Use a dotting tool to place a yellow dot in the middle. Then, with a short liner brush and white art gel, just pull small, quick strokes away from the center. Done. Resist the urge to make it perfect; the imperfections are what make it look charming.
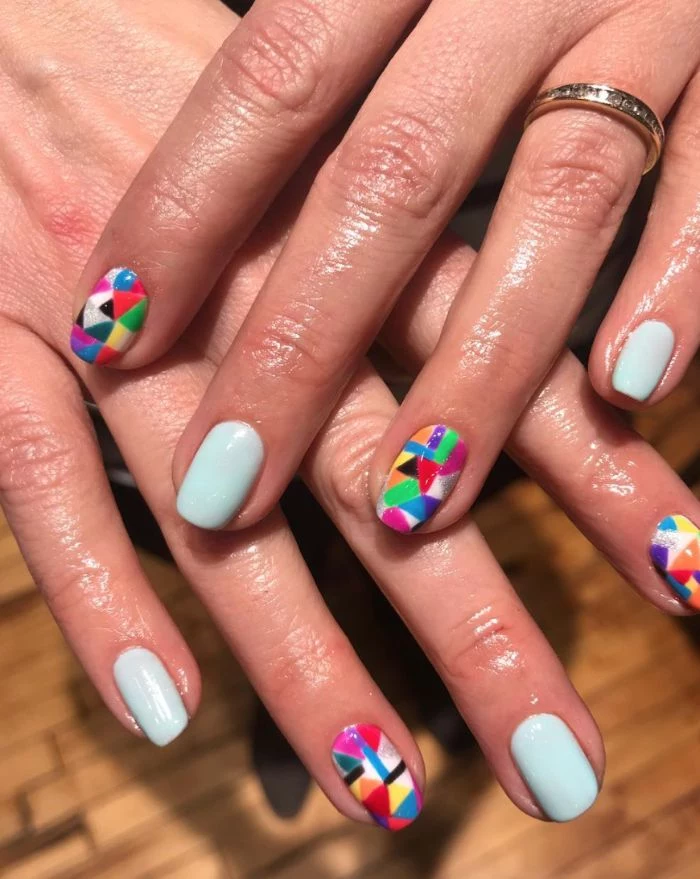
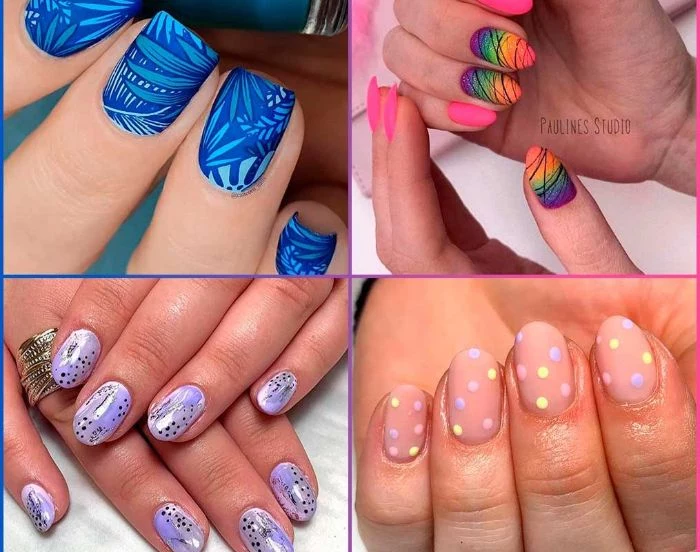
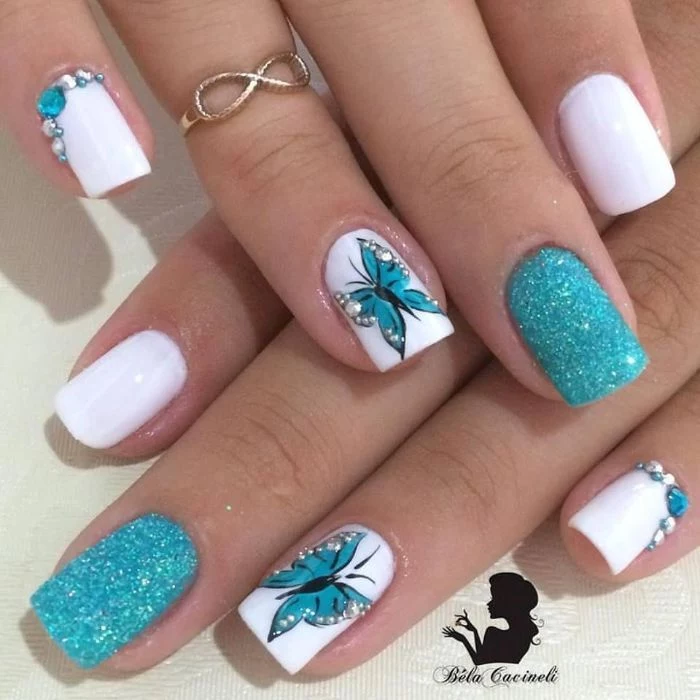
Playing with Abstracts: Inks and Foils
Abstracts are my favorite because you can’t really mess them up. For that dreamy watercolor look with alcohol inks, here’s a lesser-known trick: apply and cure a MATTE top coat first. It gives the ink something to grab onto. Add a few drops of ink, and before they dry, use a tiny brush barely damp with alcohol to gently tap the edges of the ink drops. This makes them bloom and blend beautifully. Let it dry completely, then seal with a glossy top coat.
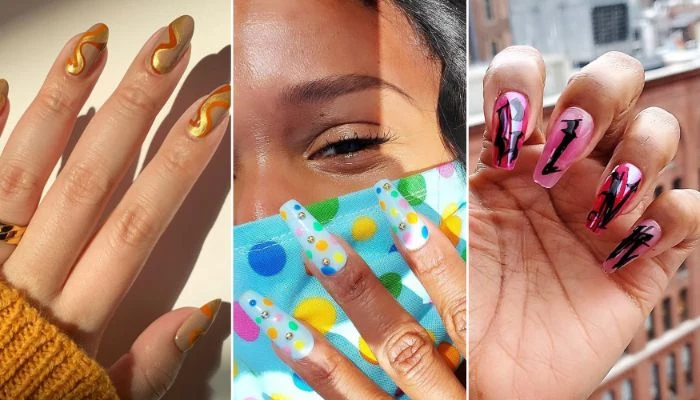
Oh, and transfer foils? They’re awesome, but the glue is everything. Apply a super thin layer of foil glue and cure it until it’s perfectly clear. From my own painful experience, if you press the foil on too soon, you get a patchy, sad-looking mess. And if that happens, don’t panic. You can often apply a little more glue to the bare spots, re-cure, and press the foil on again to fix it. Always seal foil with two layers of top coat, making sure to cap the edge.
Summer-Proofing Your Masterpiece
A fresh manicure is one thing, but keeping it fresh through sun and water is another. These are the two biggest enemies of your nail art.
The sun’s UV rays are brutal, especially to neon colors. They break down pigments and turn your vibrant coral into a dull peach. The solution? Always use a high-quality, UV-blocking top coat. It acts like sunscreen for your nails. I once had a lifeguard client whose neon pinks were fading in a week. Switching her to a UV-protective top coat made her color last a full three weeks. It really works!
Heads up on sunscreen, though: formulas with avobenzone can react with some gel top coats and turn them yellow. Try to apply sunscreen carefully and wash your hands with soap and water afterward.
Then there’s water. Your nail is like a sponge; it absorbs water and expands, then shrinks as it dries. This movement puts a ton of stress on your manicure. The absolute best defense is to cap the free edge. After every single coat—base, color, and top coat—run your brush along the very tip of your nail. This creates a seal that water can’t easily sneak under.
Quick Win: No time for a full mani? Just take 60 seconds to re-apply a good top coat to your current manicure, making sure to cap that free edge. It can give you a few more days of chip-free wear!
DIY Gels: How to Be Safe and When to Call a Pro
Doing your own gels at home is totally possible and can save you a ton of money. A decent starter setup might cost you between $75 and $150, but it pays for itself quickly. But please, be smart about it. Those super cheap, no-name kits online can be loaded with allergens like HEMA, which can cause nasty reactions if the gel is undercured.
For a beginner, I’d suggest looking at brands like Beetles on Amazon for budget-friendly, HEMA-free options. If you want to invest a bit more for salon-quality results, Gelish is a fantastic prosumer brand. If you ever feel intense itching or see redness around your nails after doing them, remove the product immediately. You might be having an allergic reaction.
And speaking of removal, while seeing a pro is always best, I know you’re going to try it at home. So let’s do it the safe way to avoid wrecking your natural nails.
Safe At-Home Gel Removal
- File the Top Coat: Gently file off the shiny top coat with a 100 or 180-grit file. You just want to break the seal so the acetone can get in.
- Protect Your Skin: Apply a thick layer of cuticle oil or Vaseline to the skin around your nails. Acetone is incredibly drying.
- Soak a Cotton Ball: Saturate a small piece of a cotton ball in 100% pure acetone. Place it directly on your nail.
- Wrap It Up: Wrap the nail tightly with a small square of aluminum foil. This traps heat and helps the acetone work faster. Repeat for all nails.
- Wait: Set a timer for 10-15 minutes. Don’t peek!
- Gently Scrape: Unwrap one finger. The gel should look lifted and flakey. Use a metal pusher or an orangewood stick to gently scrape off the softened gel. If it’s not coming off easily, re-wrap it and wait another 5 minutes. Never force it.
- Buff and Hydrate: Once all the gel is off, lightly buff your natural nail and drench your nails and cuticles in a good cuticle oil. Something with jojoba oil, like CND SolarOil, is perfect because its molecules are small enough to actually penetrate the nail plate.
A beautiful summer manicure is a team effort between great technique, the right products, and a little bit of aftercare. It all starts with respecting the health of your nail. By building a strong foundation and protecting your art from the elements, you can create nails that aren’t just pretty, but powerful. And honestly, that’s a feeling that never gets old.

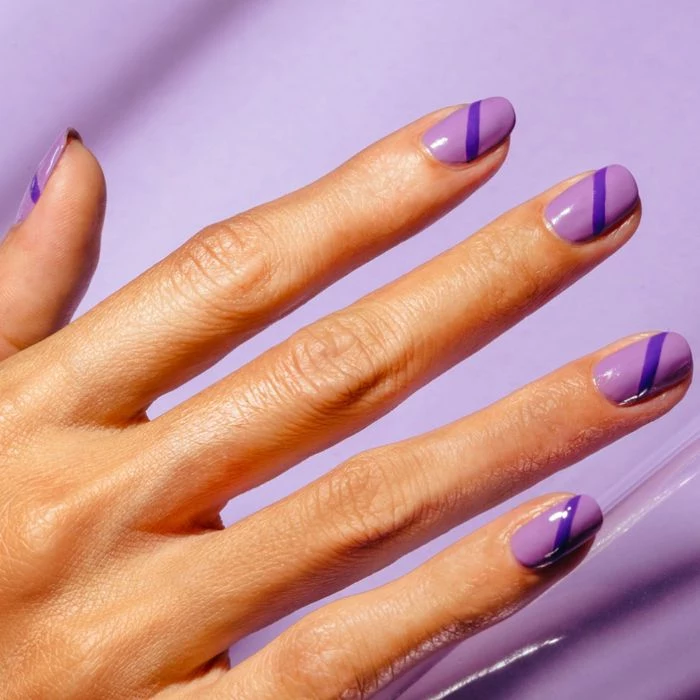
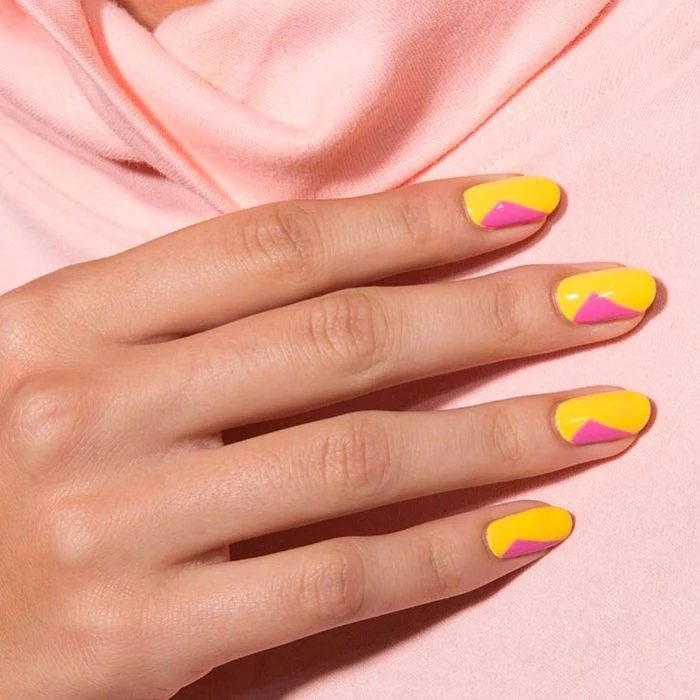
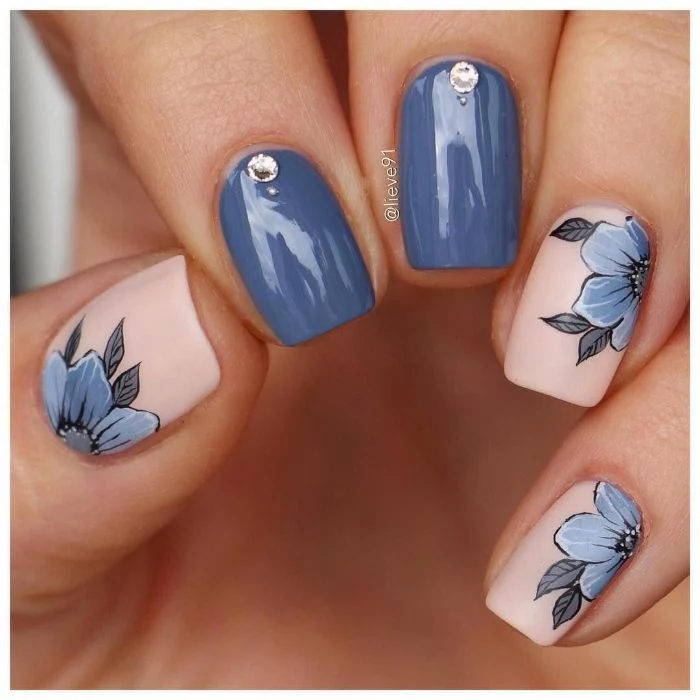
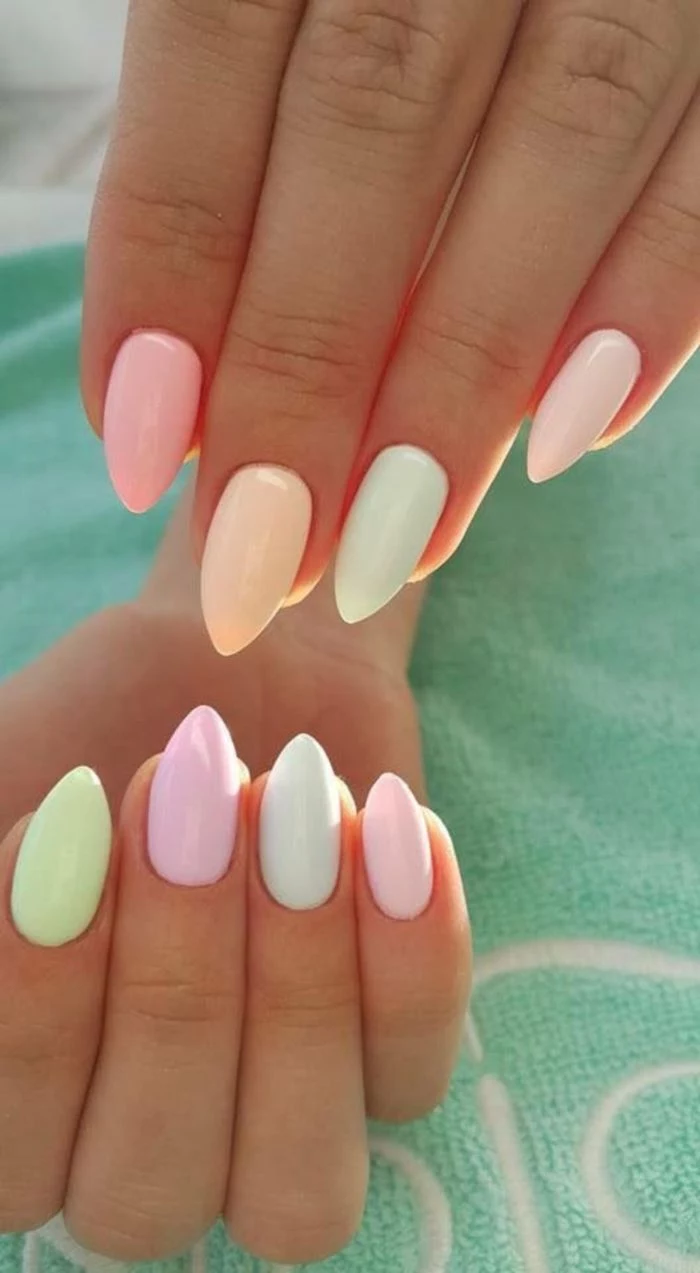
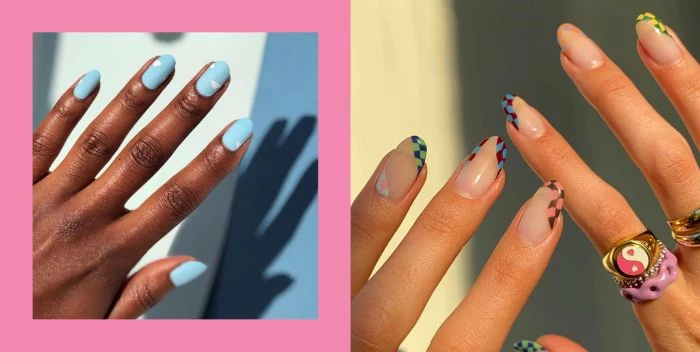
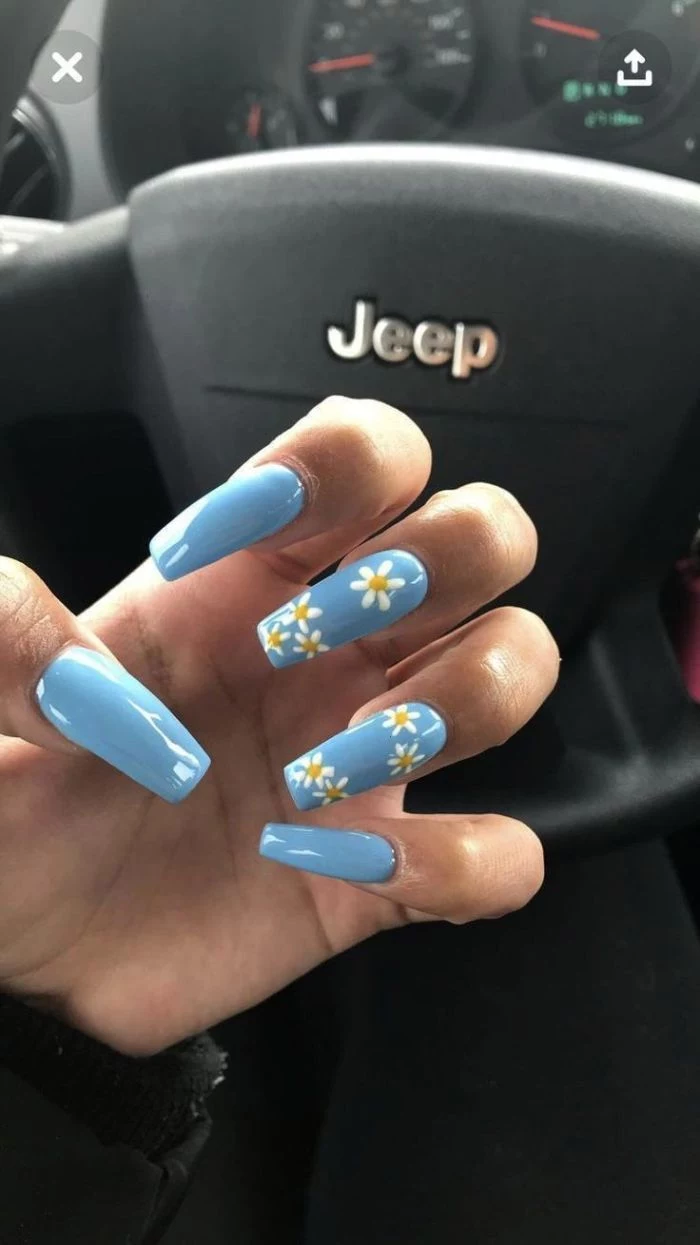
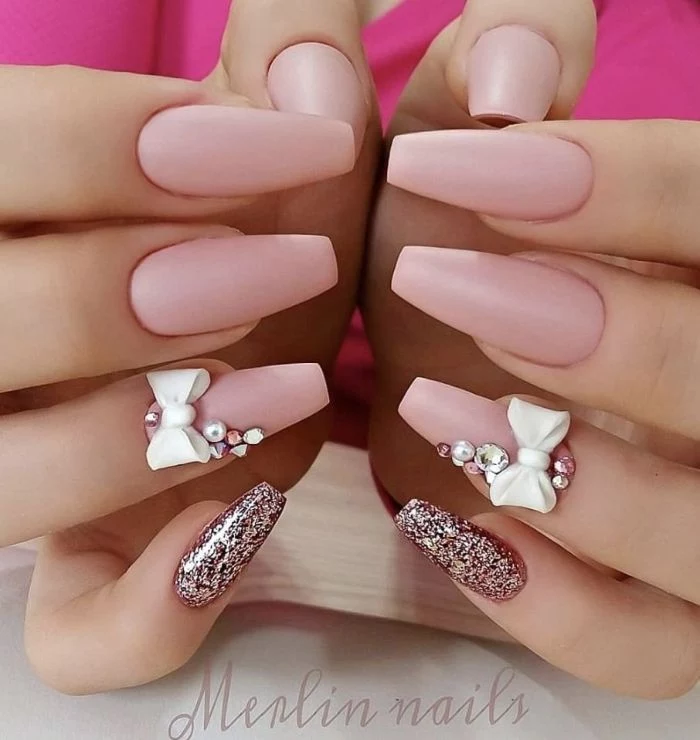
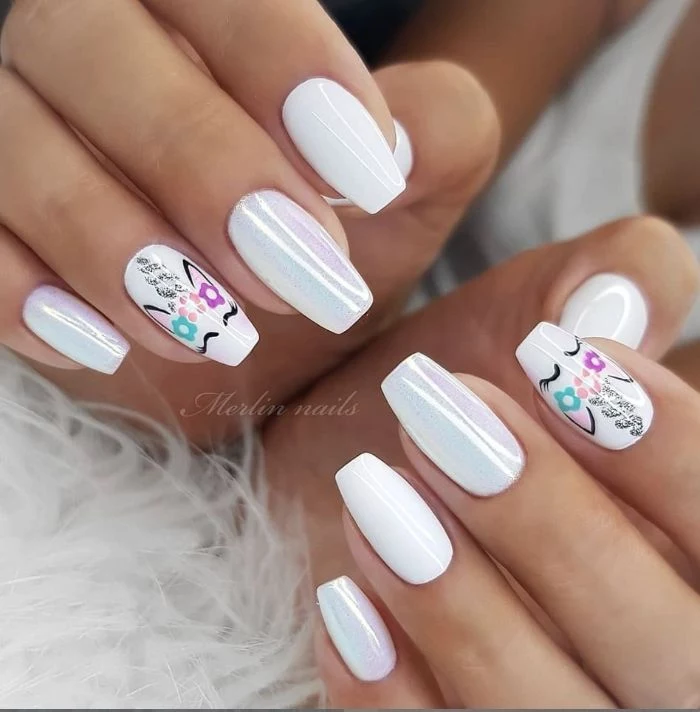
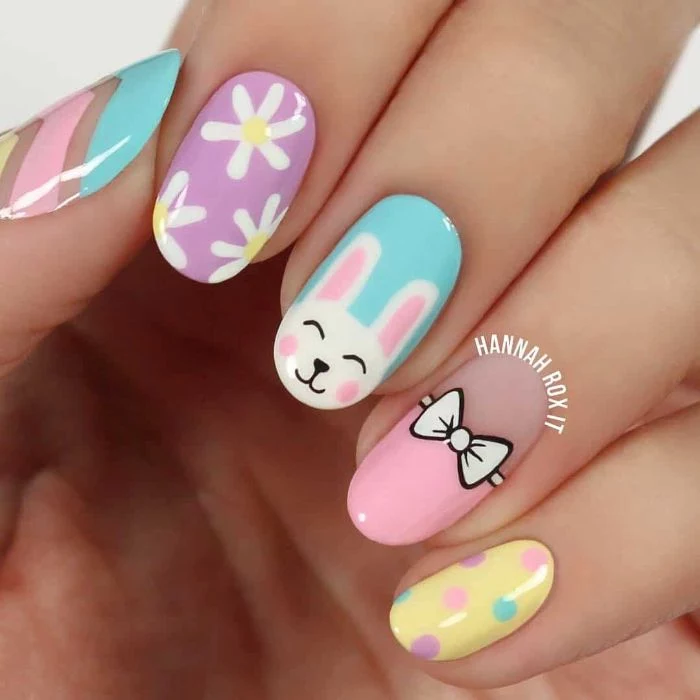
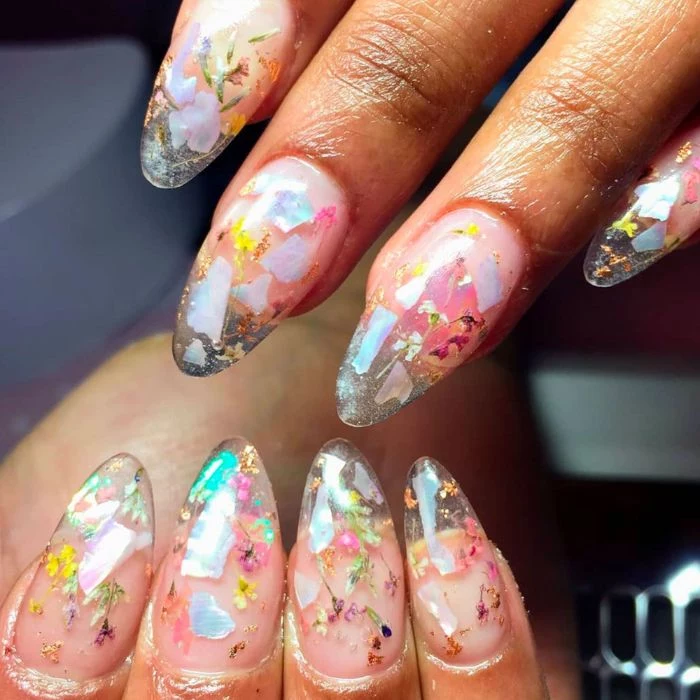
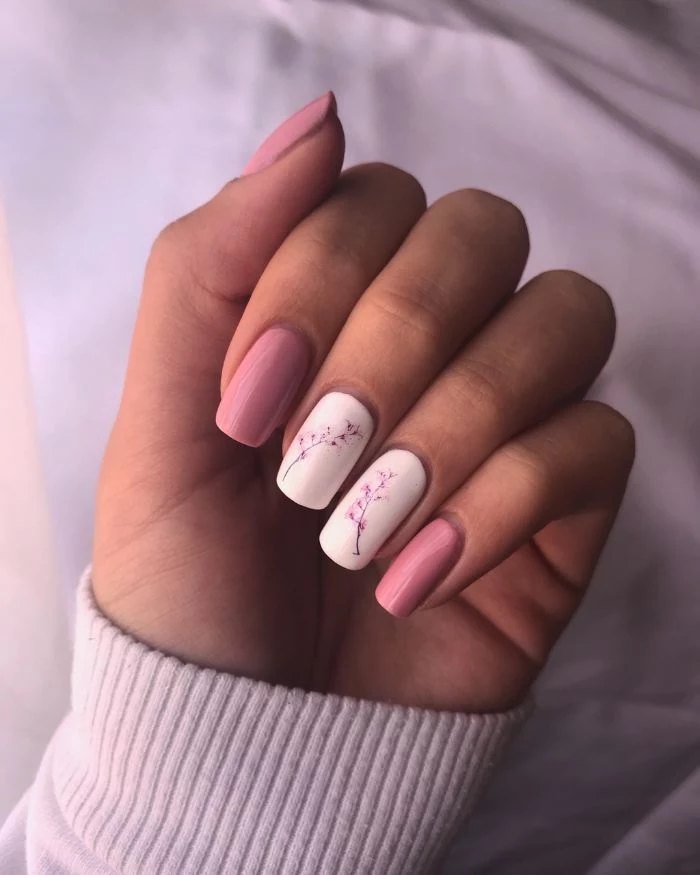
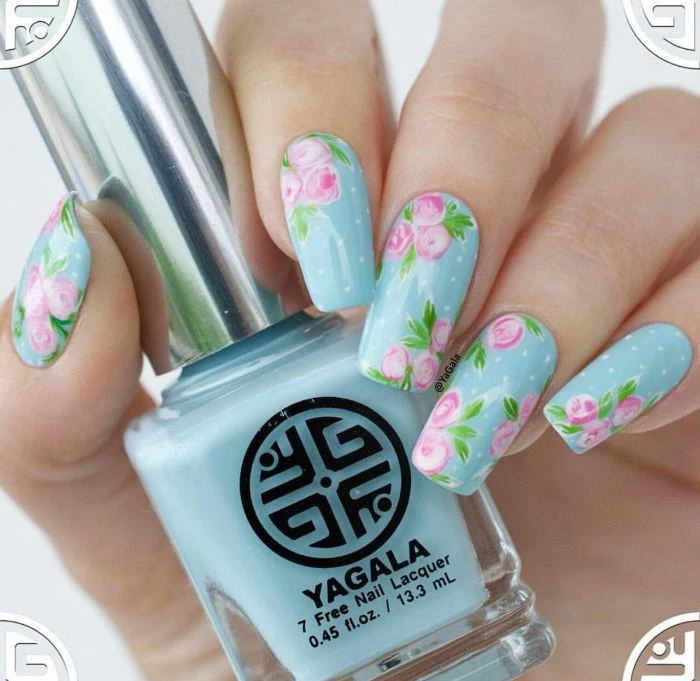
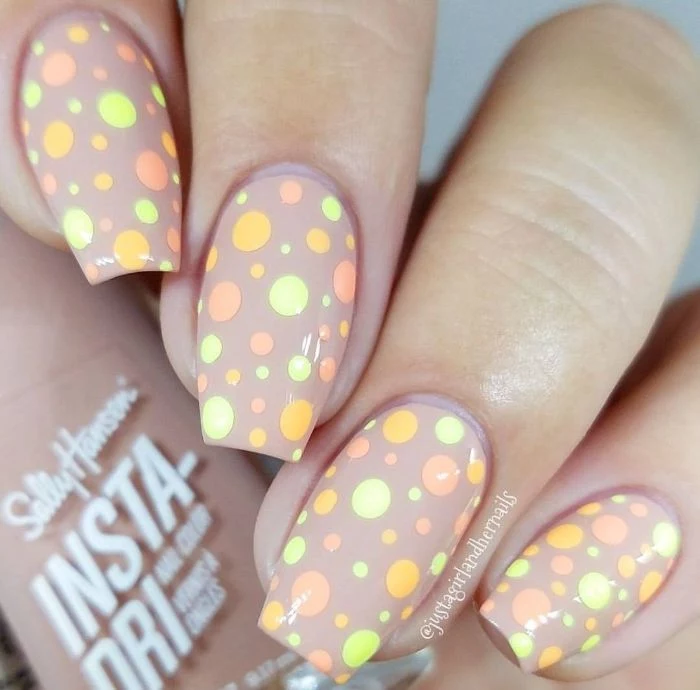
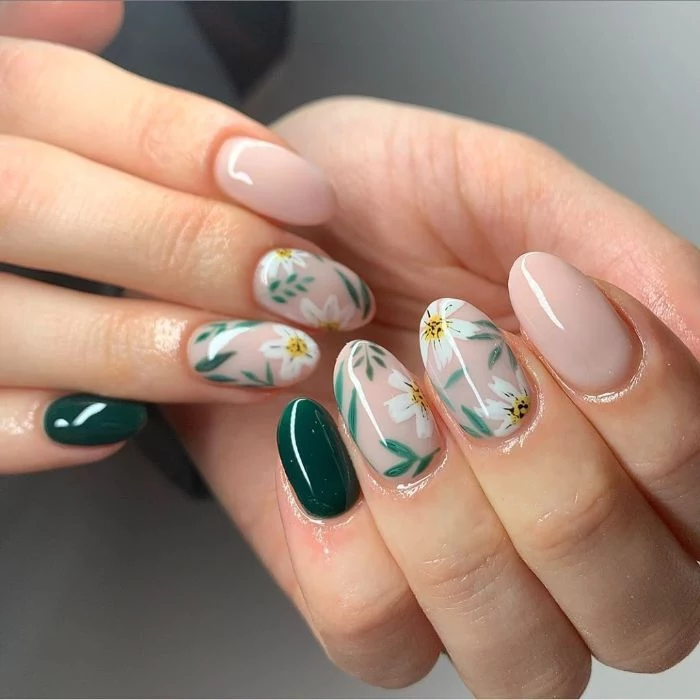
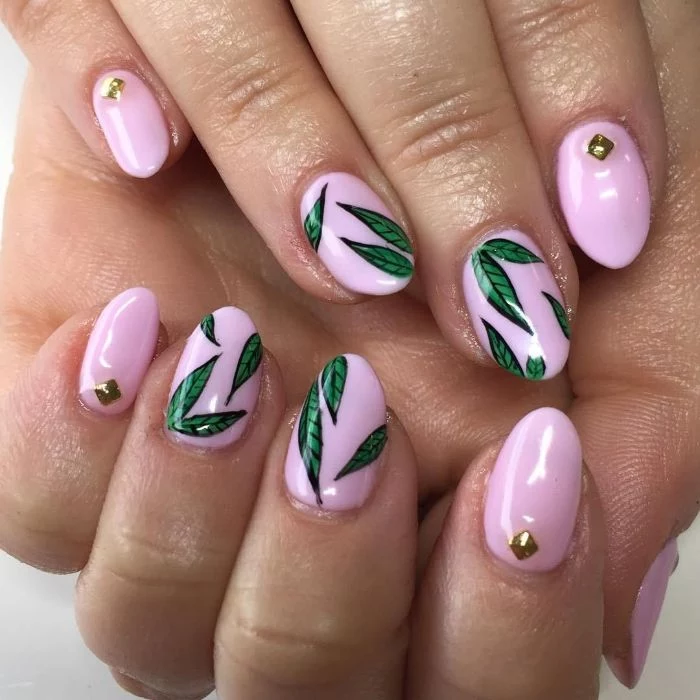
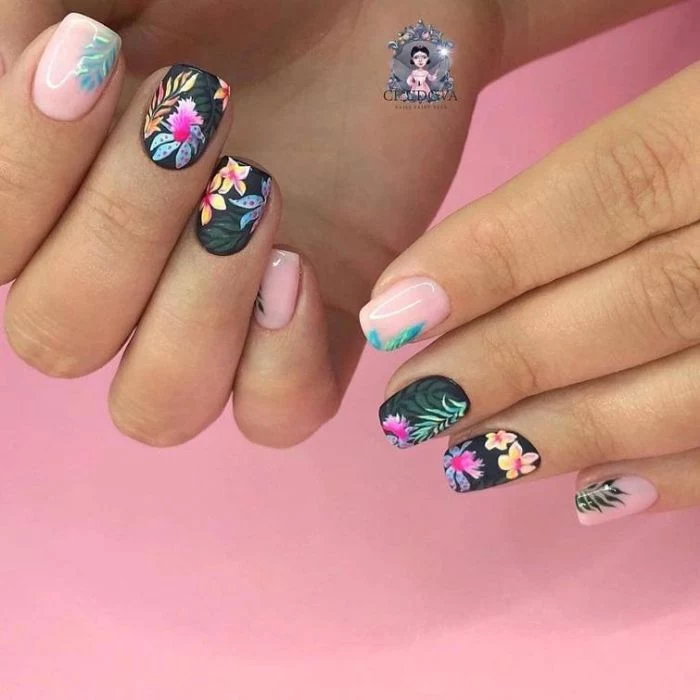
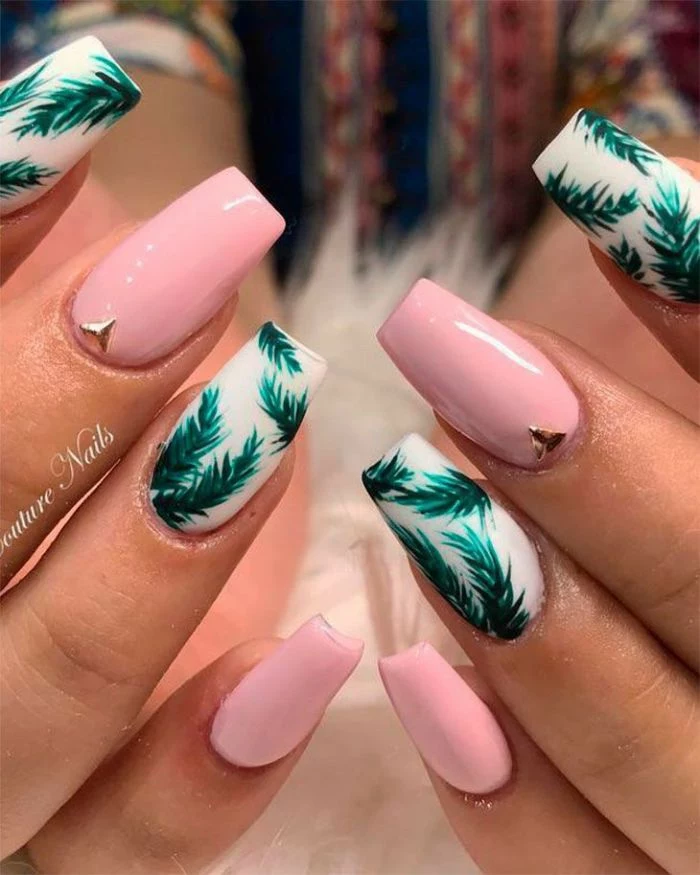
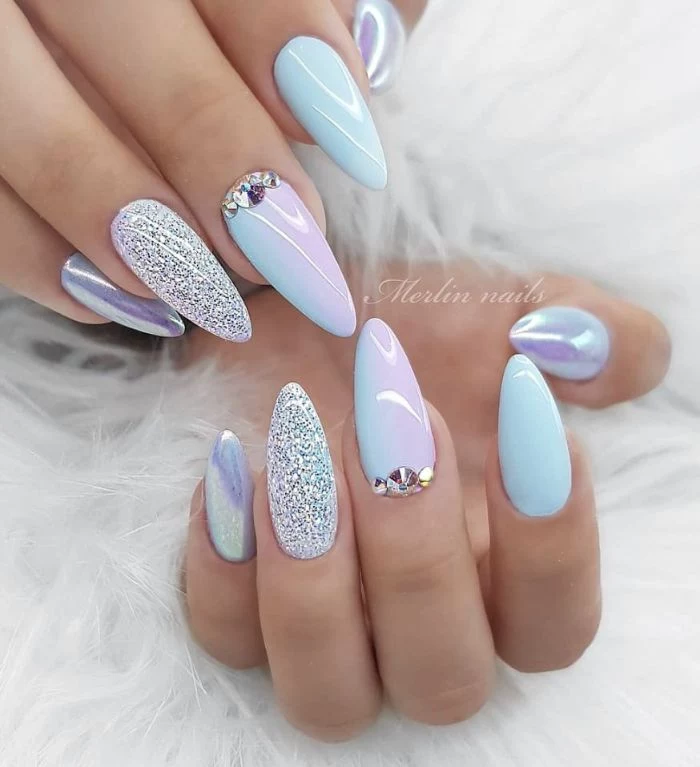
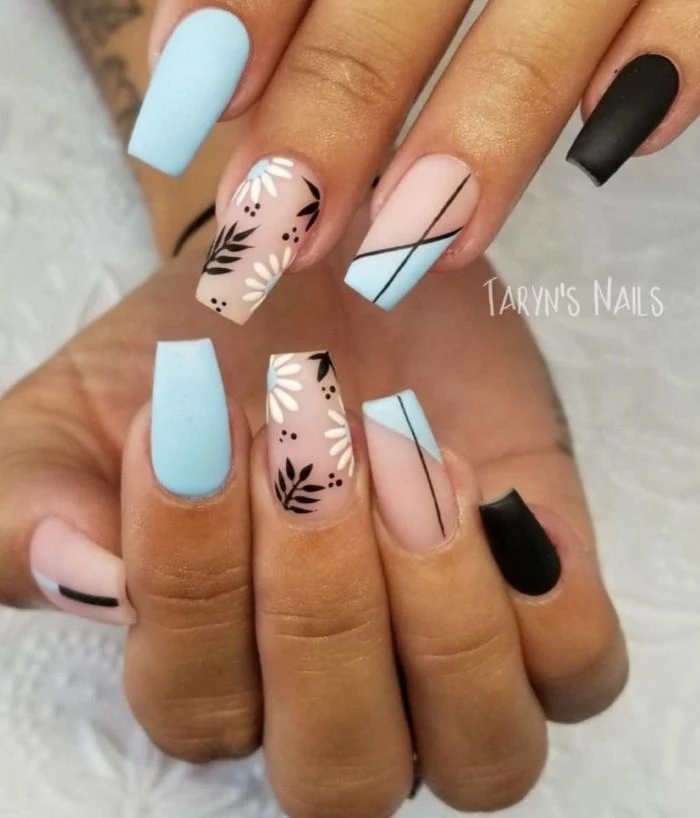
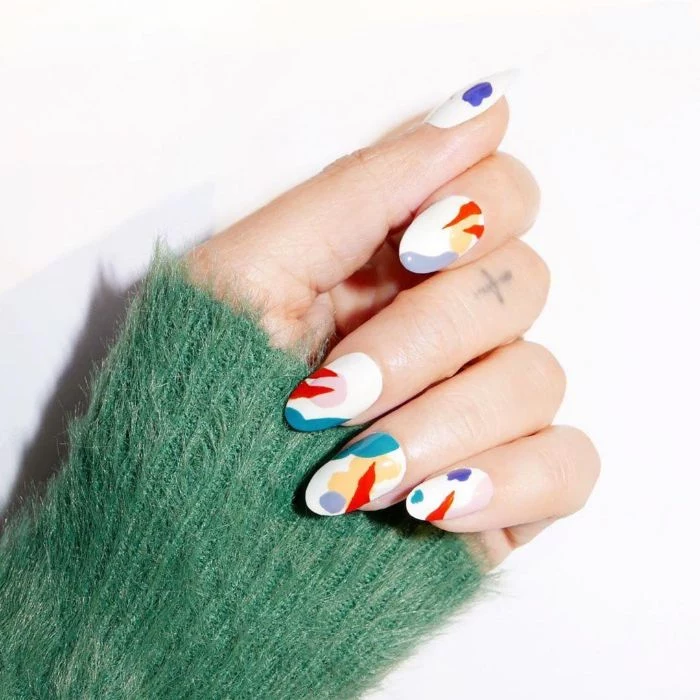
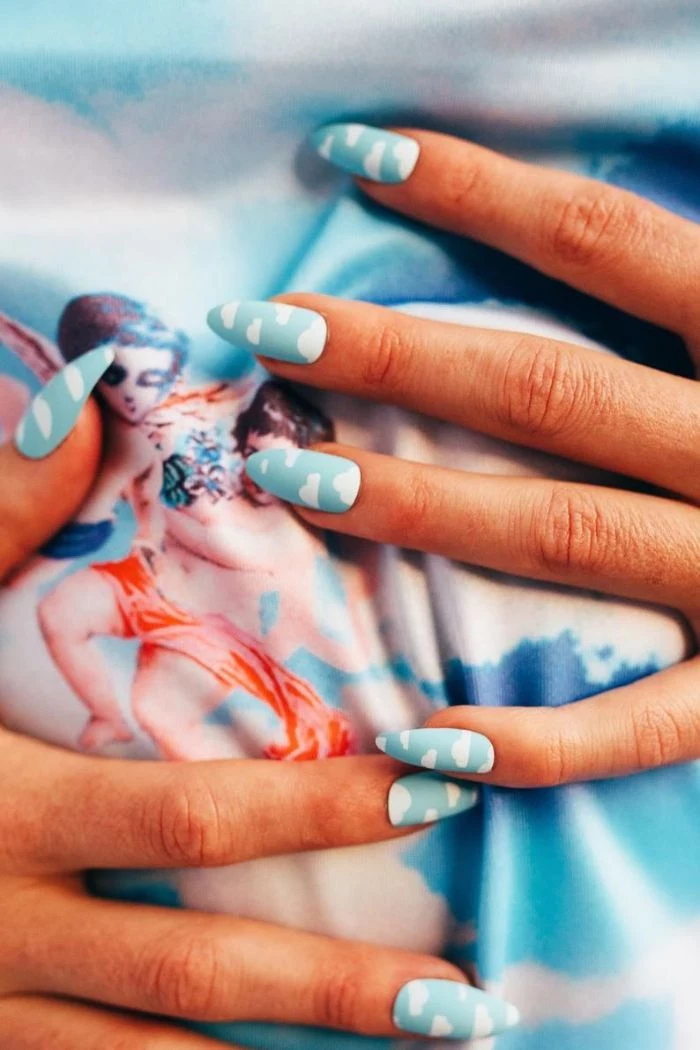
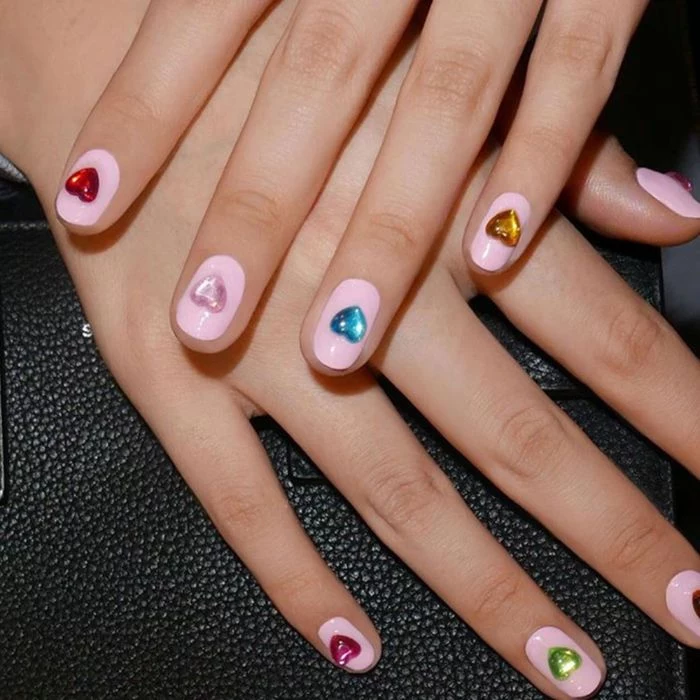
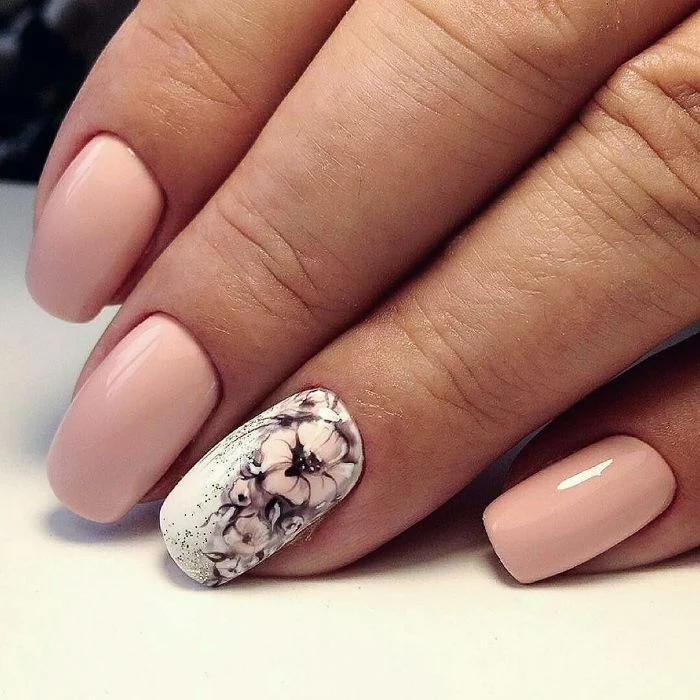
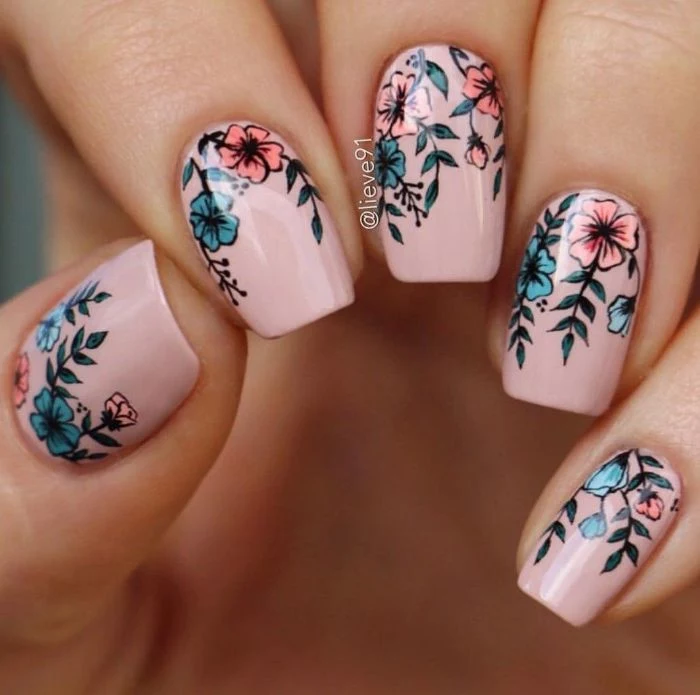
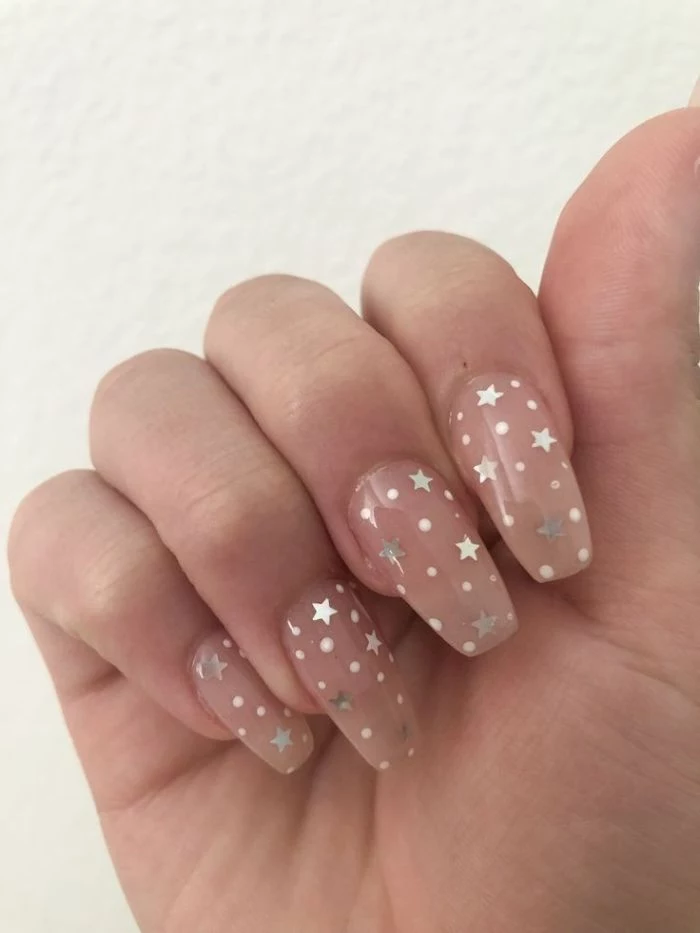
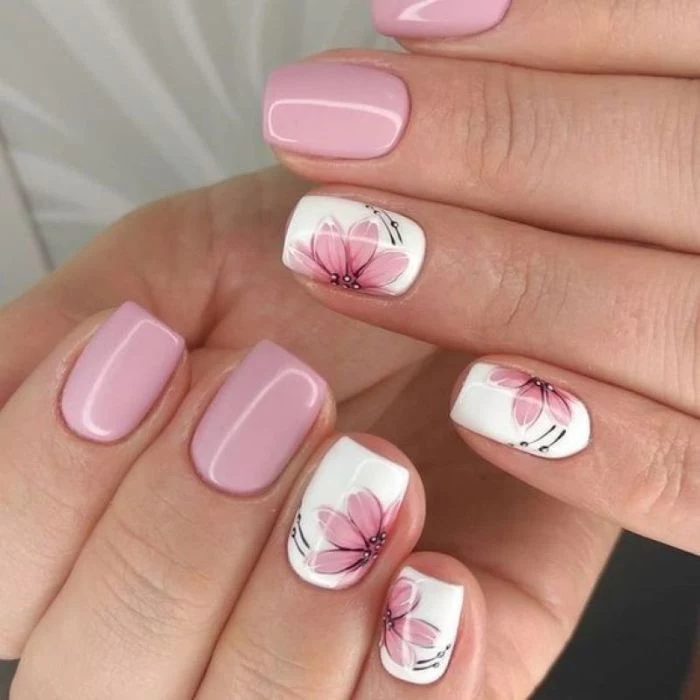
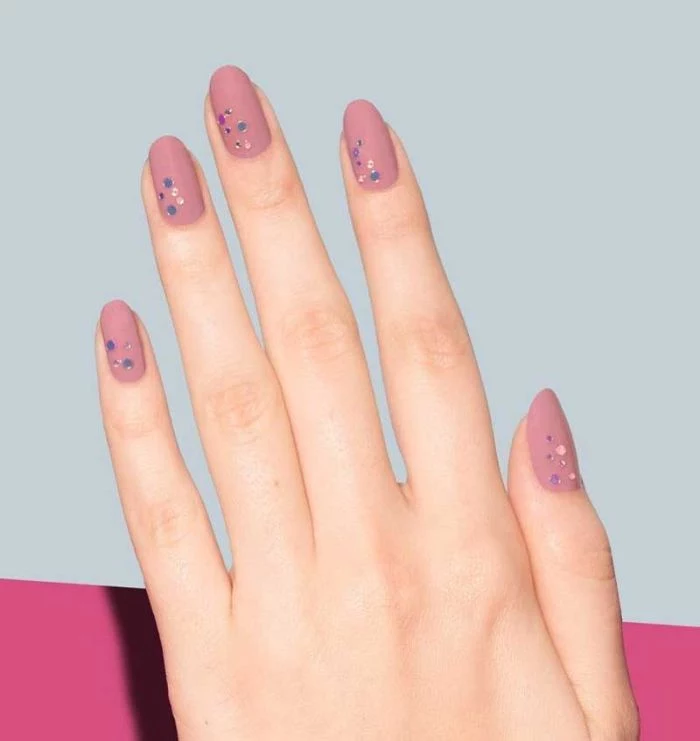
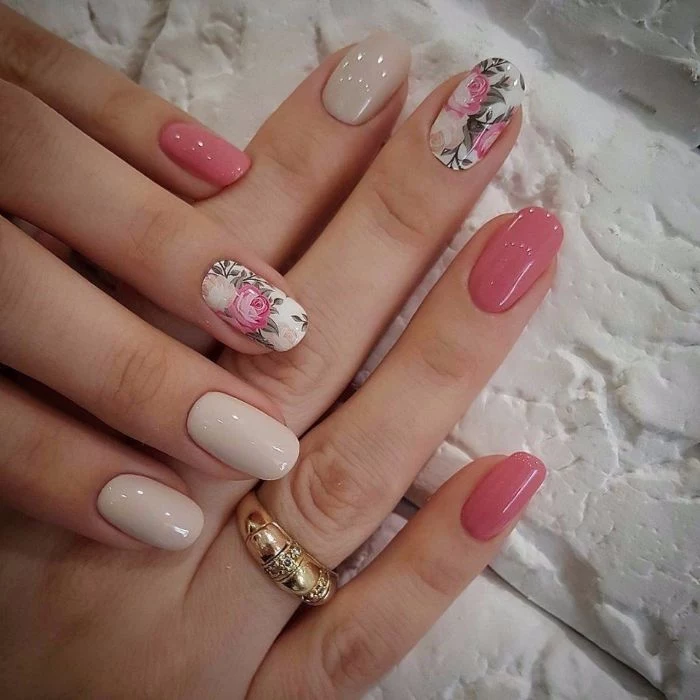
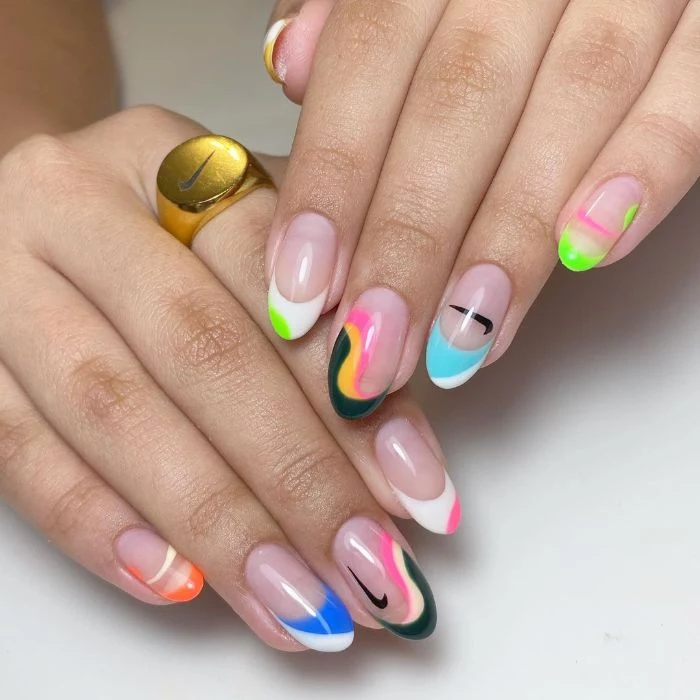
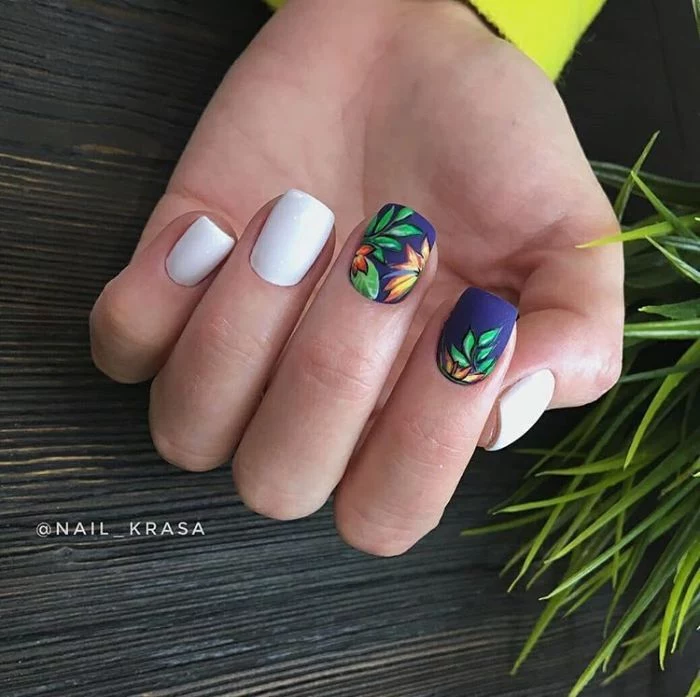
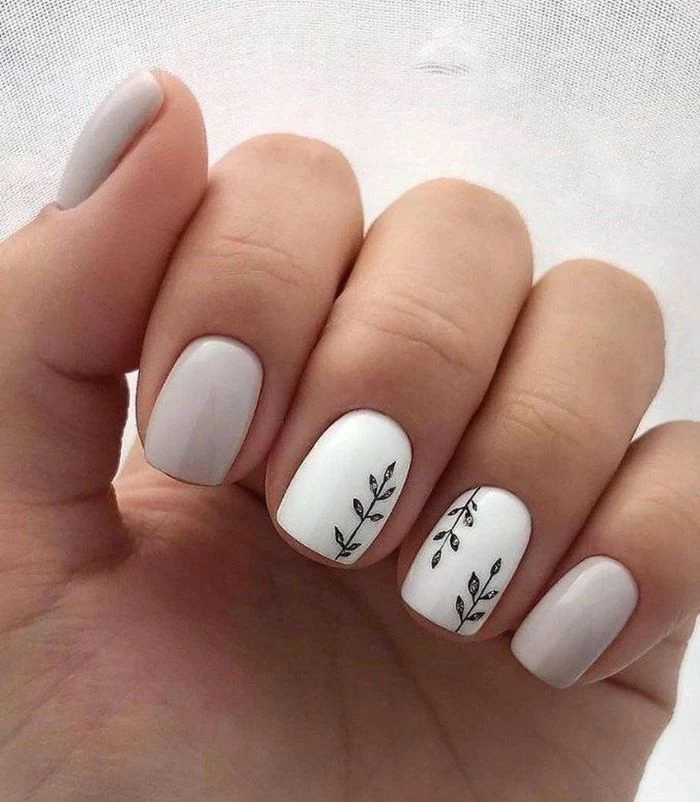
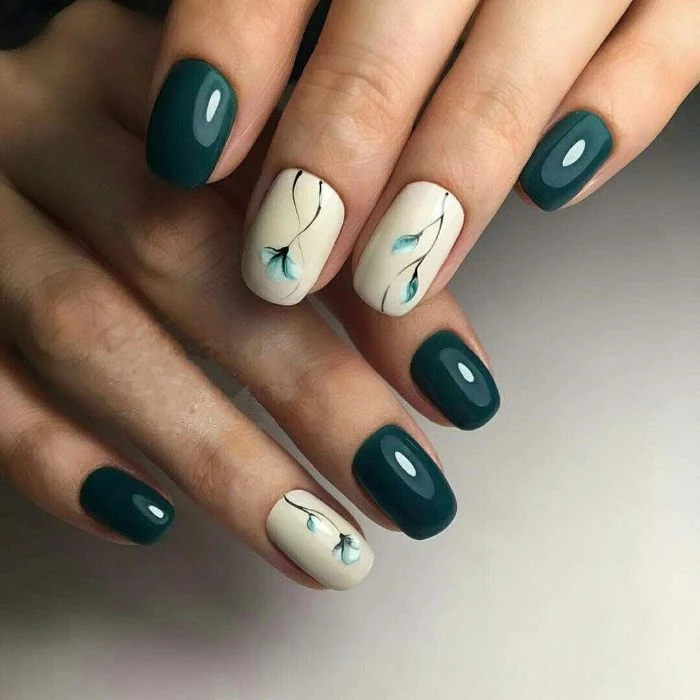
Inspirational Gallery
Sunscreen is your manicure’s frenemy. Many chemical sunscreens contain ingredients like Avobenzone that can react with top coats, causing them to yellow or break down. Apply sunscreen with the pads of your fingers, avoiding your nails, or opt for a mineral-based formula (with Zinc Oxide or Titanium Dioxide) which is less likely to cause discoloration.
- Gently file the chipped area to smooth the edge.
- Wipe with nail polish remover on a small brush to slightly melt the surrounding polish.
- Apply a very thin layer of the original color just over the patch.
- Let it dry completely, then apply one layer of a quick-dry top coat like Seche Vite over the entire nail.
Regular Lacquer: Perfect for those who love changing colors frequently. A good manicure with a quality polish like Essie’s Gel Couture line can last 5-7 days with proper care. It’s budget-friendly and easy to do at home.
Gel Polish: The holiday hero. Cured under a UV/LED lamp, brands like Gelish or CND Shellac offer a rock-hard, high-shine finish that resists chips for 2-3 weeks, making it ideal for worry-free swimming and activities.
For a long vacation, gel is the clear winner for durability.
Did you know? Nails tend to grow faster in the summer. Increased Vitamin D from sun exposure and better circulation in warmer weather can slightly accelerate growth.
The single most-skipped step: Capping the free edge. After each coat—base, color, and top—lightly swipe the brush along the very tip of your nail. This creates a seal that dramatically reduces chipping that starts at the edge, especially from typing or daily tasks.
Is chlorine really that bad for my new manicure?
Yes, it can be a real villain. Chlorine is a chemical that can dry out not only your nails and cuticles but also the polymers in your polish, making it brittle and prone to chipping. Worse, it can react with certain pigments in light or pastel polishes, causing them to fade or take on a greenish tint. A quick rinse with fresh water after leaving the pool helps mitigate the damage.
Your nail shape can influence how well your manicure wears. For maximum durability during an active summer, consider these options:
- Squoval/Soft Square: This shape follows the natural nail line but with squared-off corners, making it strong and less prone to snagging than a sharp square.
- Round/Almond: By having no sharp corners, these shapes are excellent at deflecting impact and are less likely to catch on things and break.
Ever notice your favorite OPI polish get thick and stringy in July? That’s evaporation at work.
The solvents that keep nail polish fluid evaporate more quickly in warm, humid air. Every time you open the bottle, you expose it to heat, speeding up the process. To combat this, store your polishes in a cool, dark place (not the fridge!) and work quickly when applying. A few drops of a dedicated nail polish thinner can revive a goopy bottle.
- Keeps your neon pink from turning pale orange.
- Protects that crisp white from yellowing in the sun.
- Ensures your glitter nail stays dazzlingly bright.
The secret? A UV-protective top coat. Look for products specifically formulated to block ultraviolet rays, like the Zoya Armor Top Coat. It’s like sunscreen for your polish.
Hydrated cuticles are flexible cuticles, which means less hangnails and a healthier nail matrix. Make cuticle oil a non-negotiable part of your daily routine, especially after washing hands or swimming. The CND SolarOil is a cult classic for a reason; its blend of jojoba oil and vitamin E penetrates deeply to keep the skin around your nails soft and healthy.
Your 5-minute post-beach nail revival routine:
- Rinse hands thoroughly with fresh water to remove salt and sand.
- Gently pat dry, paying attention to the nail beds.
- Apply a generous amount of a rich hand cream, like L’Occitane Shea Butter Hand Cream.
- Massage a drop of cuticle oil into the base of each nail.
Many nail polishes contain nitrocellulose, a film-forming polymer. When exposed to excessive sunlight, this compound can degrade and yellow, which is most noticeable on white or light-colored manicures.
Matte Top Coat: It creates a porous, velvety surface. While stunning, this texture can be more susceptible to staining (from makeup or dark denim) and may show oils from your skin. It can sometimes wear down at the tips faster than its glossy counterpart.
Glossy Top Coat: Provides a slick, non-porous shield that is generally more durable and stain-resistant. It’s the go-to for maximum longevity and shine.
For a rugged vacation, stick with glossy for performance.
More is not better: Applying thick coats of polish is a fast track to disaster. They take forever to dry, trapping solvents underneath and creating a squishy, dent-prone layer. Three thin coats are infinitely stronger and more durable than two thick, goopy ones. Patience is key.
Why do my nails seem more flexible and prone to bending in the summer?
Your nails are porous. When you spend a lot of time in water—swimming in the pool, ocean, or even taking longer showers—your nail plates absorb that water and swell. This makes them softer and more pliable, increasing the risk that the nail will bend, causing the rigid polish on top to crack or lift. This is why proper dehydration before your manicure is so crucial!
Want intricate nail art that lasts? Some designs are inherently more durable for an active summer. Think about:
- Glitter Gradients: A sprinkle of glitter near the cuticle or tip is great at disguising minor tip wear and small chips as it grows out.
- Negative Space Designs: By leaving parts of the natural nail exposed, chips are less noticeable and the design looks intentional for longer.
- Abstract Swirls: Imperfections blend right into the design, unlike precise geometric lines which show chips immediately.
- A perfectly smooth, glass-like finish.
- No tiny, frustrating air pockets ruining your color.
- A stronger bond between polish layers.
The secret? Never shake your polish bottle. Shaking introduces air bubbles. Instead, gently roll the bottle between your palms to mix the pigment without creating bubbles.
A good base coat, like Orly Bonder, acts like double-sided tape for your nail.
It’s not just about preventing stains. A quality base coat is formulated to chemically bond to the keratin of your nail plate on one side, and to the polymers in your nail polish on the other. This creates a flexible, adhesive foundation that moves with your natural nail, significantly improving polish adhesion and preventing premature lifting.
Your vacation nail S.O.S. kit:
- A small nail file or buffer block.
- A mini bottle of your top coat.
- Cuticle oil (a pen is great for travel).
- A few alcohol wipes for cleaning the nail surface before a touch-up.
- Nail polish remover pads (less messy than a bottle).
Professional Manicure: A nail tech has access to professional-grade dehydrators, primers, and has the skill to perfectly prep the cuticle area, leading to a superior foundation for polish.
DIY Prep: You can achieve excellent results at home by being meticulous. Using a dehydrating solution (or simply wiping the nail with isopropyl alcohol) after filing and buffing is a crucial step many home users skip.
The pro has the edge, but a careful DIYer can come very close.
The nail plate can absorb more than 25% of its own weight in water. This swelling and subsequent shrinking upon drying puts immense stress on any polish applied on top.
The 2-Minute Rule: Rushing your manicure is the number one cause of smudges and dents. Wait at least two full minutes between each coat of polish. This allows the solvents in the lower layer to evaporate, creating a stable surface for the next coat. Your total drying time will actually be shorter, and the finish will be harder.
The final frame for your nail art is your hands. All the effort you put into a perfect manicure can be let down by dry skin. After your top coat is fully dry to the touch, finish your at-home manicure session with a deeply hydrating, non-greasy hand cream. It makes your skin look healthier and your nail color pop even more.


