You can always tell when spring is just around the corner by looking at people’s hands. As a nail tech who’s spent more seasons than I can count behind the desk, I see it every single year. The requests for deep, moody burgundies and glittery blacks just… stop. Suddenly, everyone’s craving something lighter, brighter, and full of life.
It’s my favorite time of year, honestly. It feels like a creative reset for all of us.
But this isn’t just another post with pretty pictures. I want to give you the inside scoop on how a pro really approaches spring nail art. We’ll get into choosing a design that fits your actual life, the techniques we use to create those delicate looks, and—most importantly—how to make them last. This is all the stuff I’ve picked up over the years, the kind of advice I share with my own apprentices. Let’s get into it.
The Real Foundation: Prepping Nails for a Flawless Finish
Before we even dream of colors or designs, we have to talk about nail health. Winter can be brutal, leaving nails dry, brittle, and peeling. Putting a gorgeous design on an unhealthy nail is like building a house on a shaky foundation—it just won’t last. The prep work is everything.
Step 1: A Gentle, Purposeful Manicure
This is a non-negotiable step in any good salon. It’s the difference between a manicure that lifts in a week and one that looks perfect for three or more.
First, we shape. For spring, a lot of my clients lean towards softer shapes like oval or almond because they look so elegant with floral designs. I always use a quality file and move it in just one direction. A common mistake is sawing back and forth, which creates tiny tears in the nail that lead to splits. Filing one way seals the edge.
Quick tip: When you’re looking at files, think of it like sandpaper. A lower number, like a 180-grit, is coarser and great for quickly shaping the nail. A higher number, like a 240-grit, is much finer and perfect for gently smoothing the edge on natural nails without causing damage.
Next up is cuticle care, and oh boy, this is where I see a lot of problems. Aggressive cutting is a huge no-no; it can cause injury and infections. A pro will apply a cuticle softener, let it sit, and then gently push back the cuticle with a sterilized metal pusher. We only ever nip the true, non-living tissue that’s lifted off the nail plate. If you’re doing your nails at home, please don’t cut your cuticles! Just gently push them back after a shower when your skin is soft.
Step 2: Getting the Nail Plate Squeaky Clean
The science here is pretty simple. For any polish (especially gel) to stick, the nail has to be completely free of oils, lotions, and dust. After shaping and cuticle work, I have clients wash their hands, and I’ll use a little scrub brush on their nails to be extra sure.
Then comes the magic step: a nail dehydrator. Using a lint-free wipe, I swipe each nail with a solution of isopropyl alcohol and acetone. You can actually see it work—the nail goes from a little shiny to a dull, matte finish. This temporarily removes all the oil and moisture, creating the perfect canvas for the base coat. Skipping this is probably the
1 reason for premature gel lifting.
A Quick Word on Finding a Good Nail Tech
I can’t stress this enough: your health is paramount. Always go to a licensed tech who takes sanitation seriously. I’ve seen some horror stories from people who went to questionable places.
So, how do you spot a good salon? Look for these green flags:
Green Flag: Metal tools are pulled from sealed, sterile pouches for each client.
Green Flag: The tech uses a new file and buffer for you (or has a personal, labeled box just for you).
Green Flag: The workstations are clean, dust-free, and the air doesn’t smell overwhelmingly of chemicals (which signals good ventilation).
And if you see these, it might be time to walk away:
Red Flag: Dirty-looking pedicure bowls or workstations.
Red Flag: The tech pulls tools from a dirty drawer or a jar of mystery blue liquid (that’s not proper sterilization!).
Red Flag: They try to use the same file or buffer on you that they just used on someone else. Just don’t.
A true professional will be proud to tell you about their sterilization process. Don’t be afraid to ask!
The Spring Palette: It’s More Than Just Pastels
Okay, let’s talk color! While pastels are a spring classic, the specific tones and finishes are always evolving. We look at broader trends in fashion and design to guess what clients will be asking for.
Trending Colors Right Now
This season, it’s all about soft, sophisticated, and slightly muted tones. Think less candy-colored and more earthy and chic.
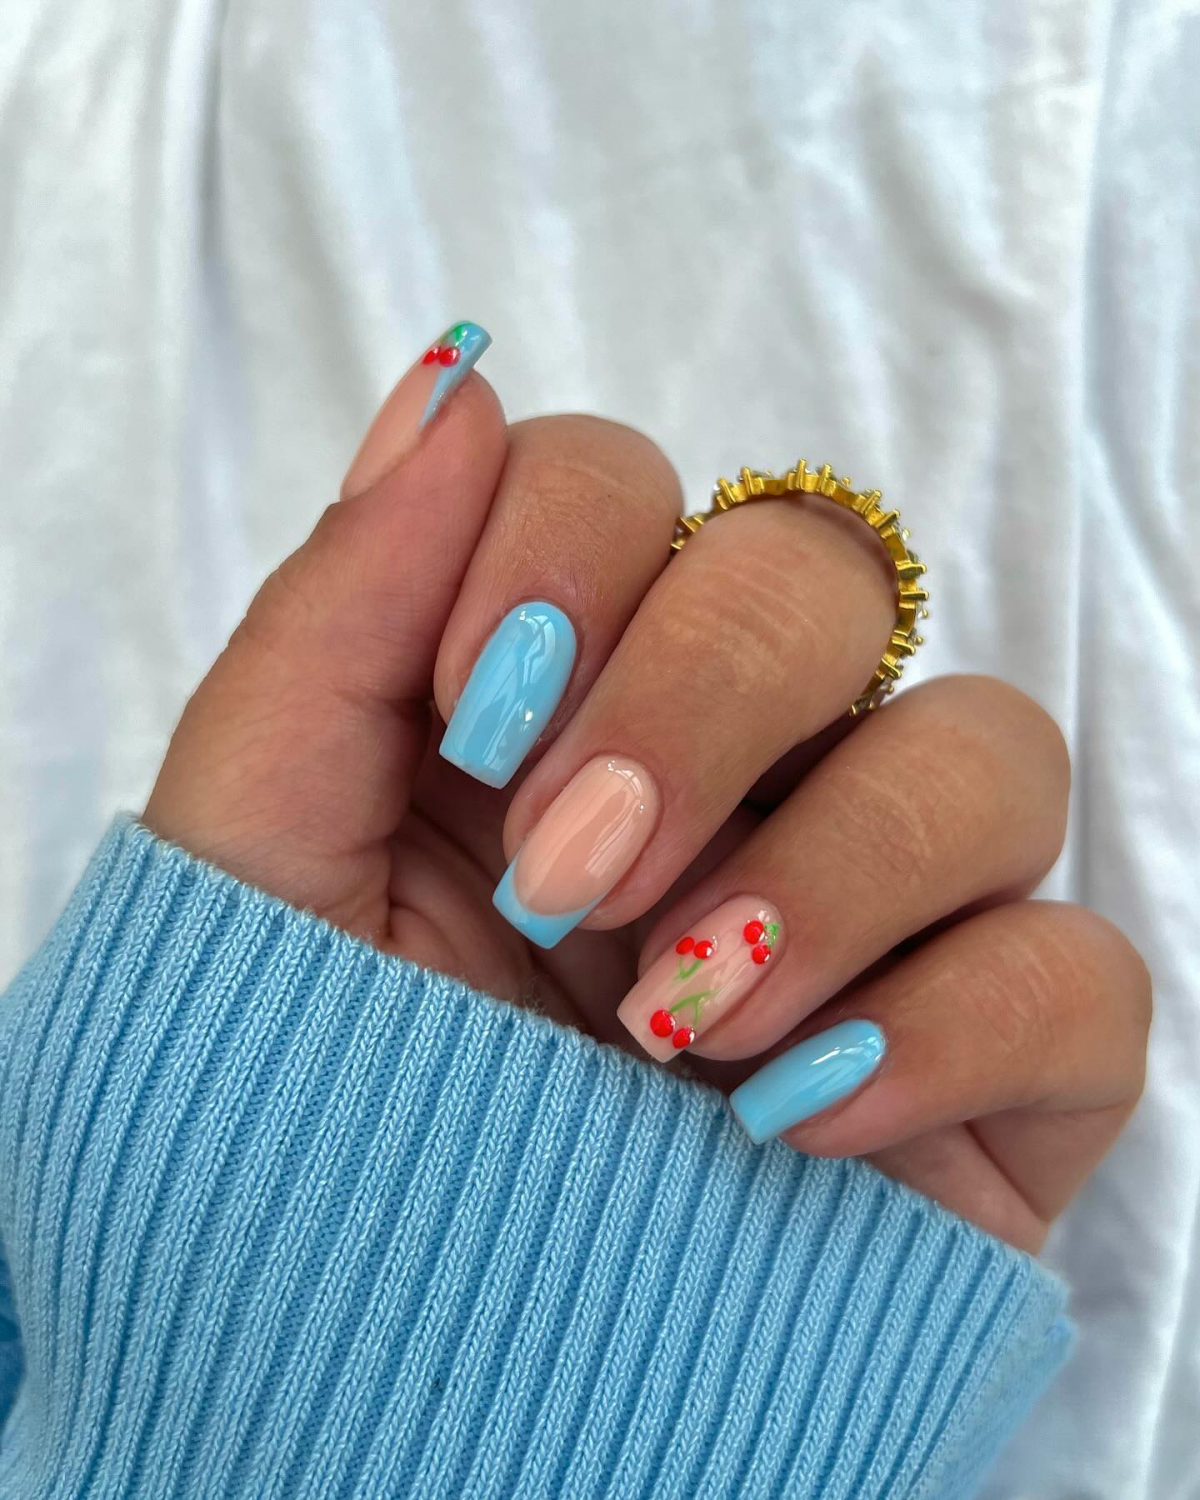
Periwinkle & Cornflower Blue: These blues are just so versatile and calming. They look incredible on almost every skin tone.
Peach & Apricot: We’re seeing a lot of these warm, peachy tones. They’re a fantastic, modern alternative to classic pinks. A sheer peach makes for a gorgeous, clean base.
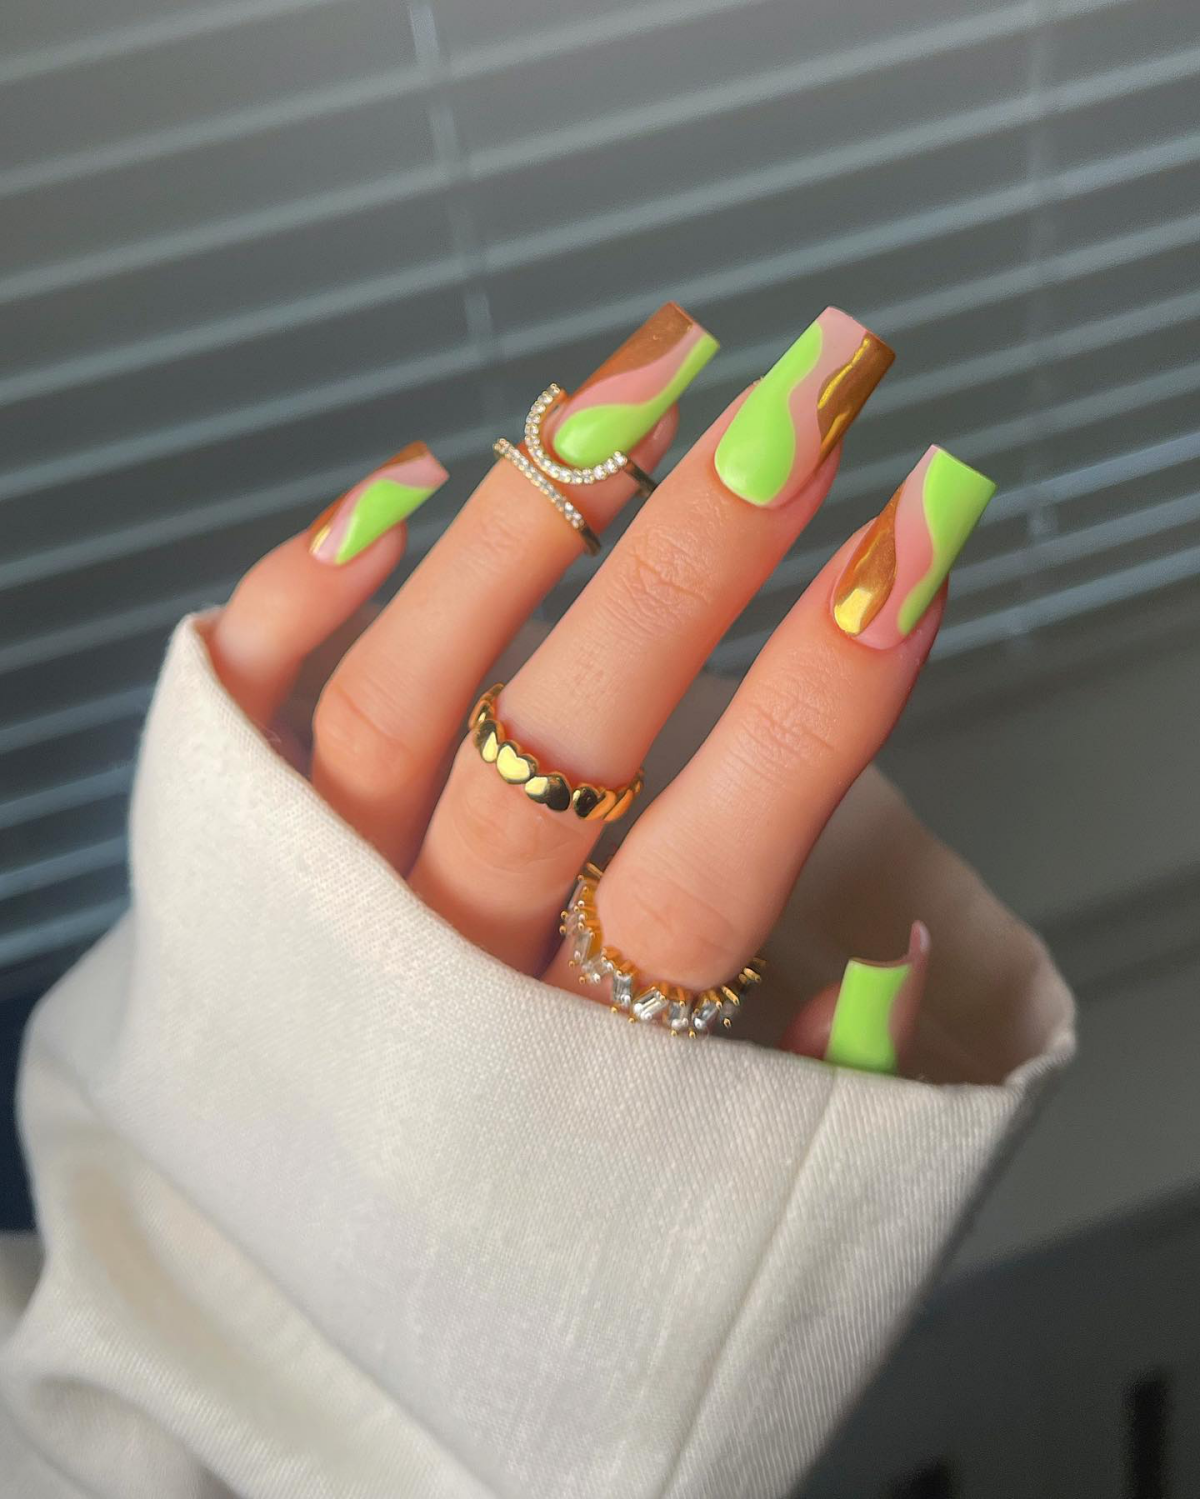
Sage & Matcha Green: Soft, organic greens are huge. They tie into that feeling of new growth and look amazing paired with gold accents for a vibe that’s both earthy and luxe.
Sheer “Lip Gloss” Nails: The jelly or glass nail look is still going strong. A sheer milky white or a barely-there pink gives a super clean, polished look that enhances your natural nail. It’s perfect for a low-maintenance but incredibly elegant style.
Don’t Forget About Texture!
The finish you choose can totally change a color’s personality.
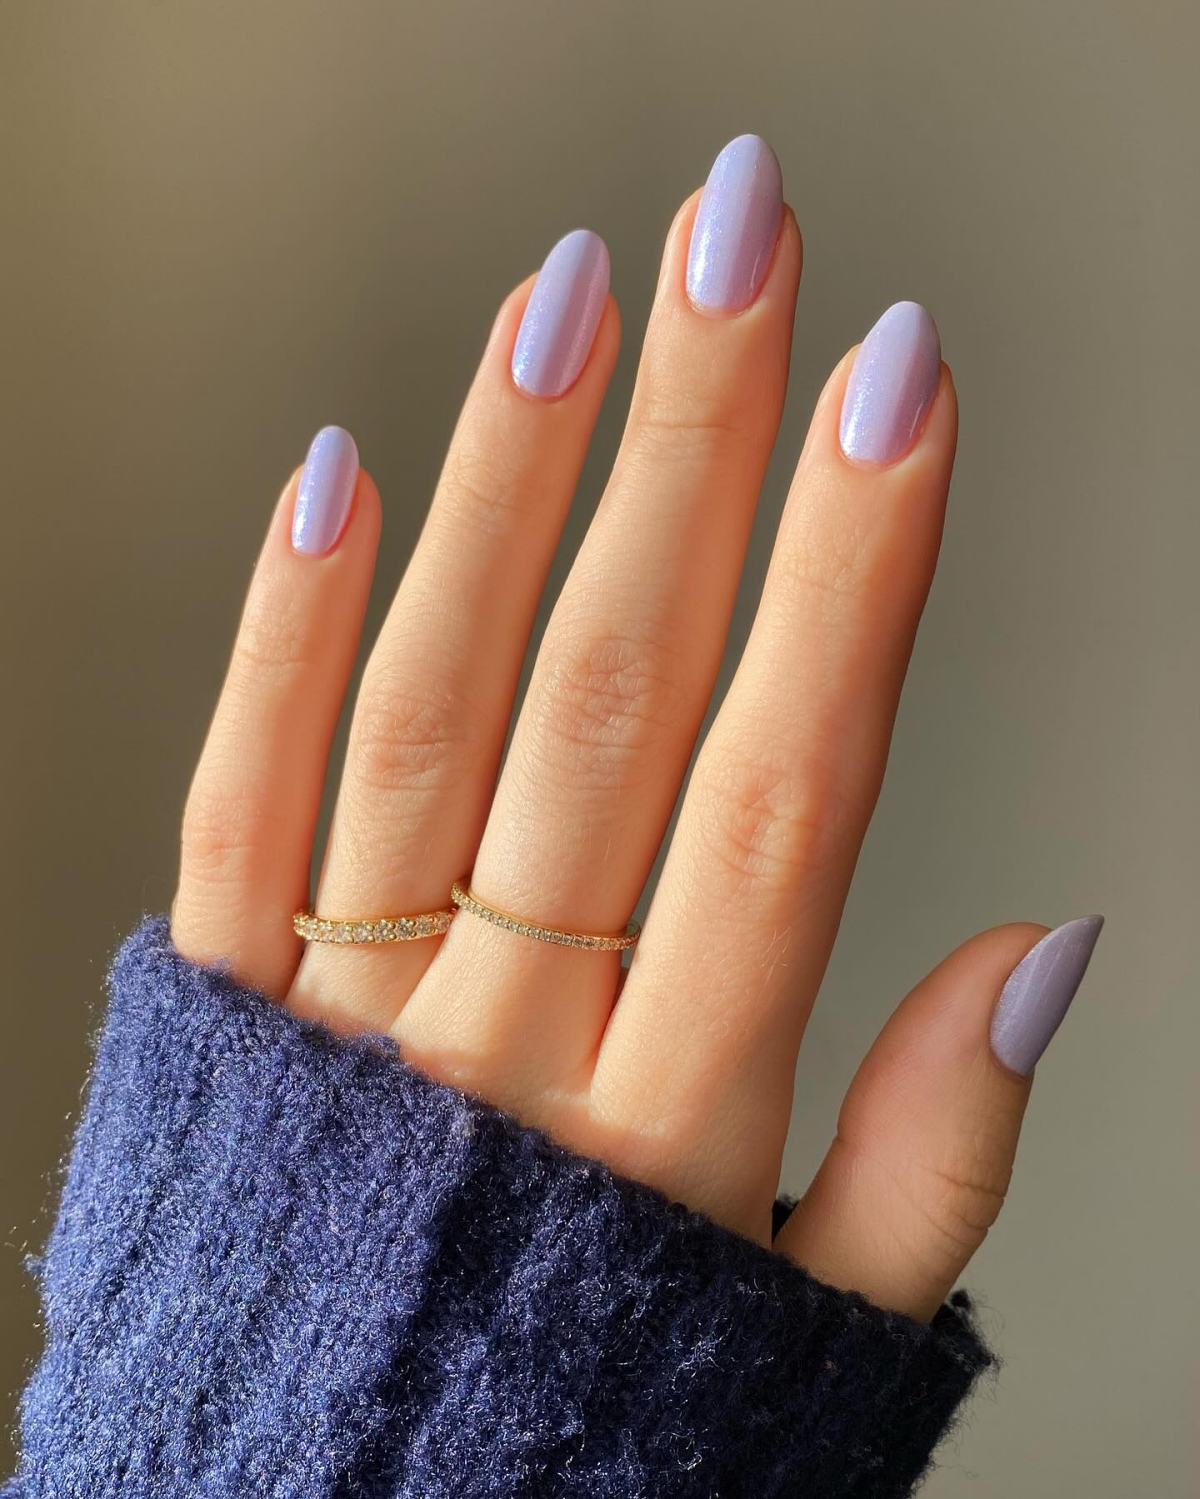
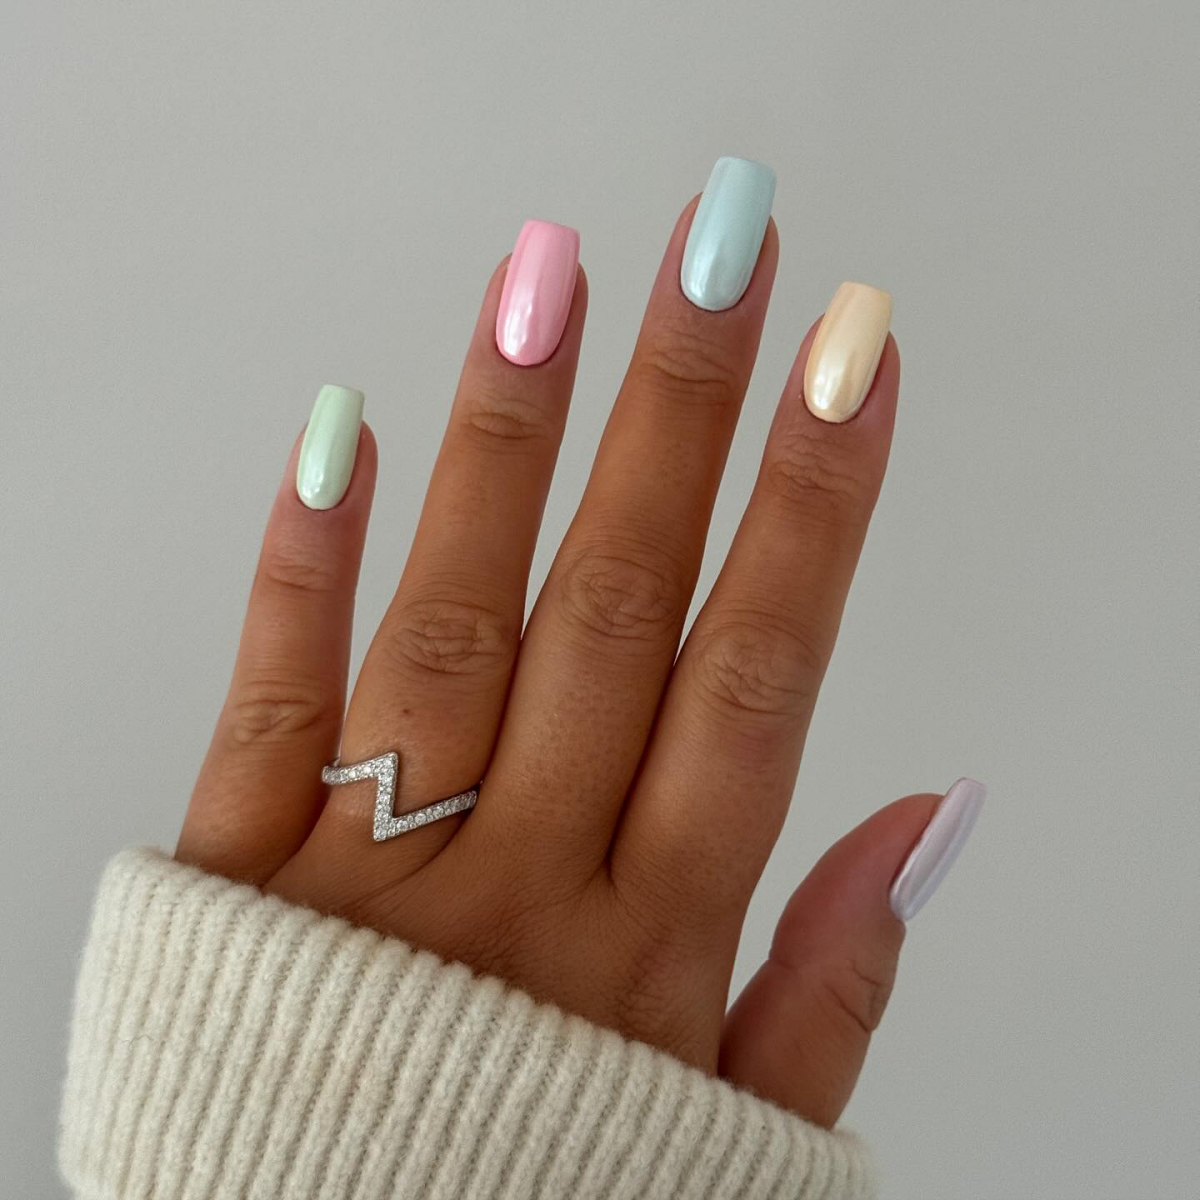
Pastel Chromes: This isn’t just a polish; it’s a whole process. We apply a base color, then a special tack-free gel top coat. The trick is curing it for just the right amount of time—usually around 30 seconds. If you cure it too long, the powder won’t stick. Then we burnish a fine chrome powder on top until it’s a mirror-like finish. Heads up! That cure time can change depending on your lamp’s power. If your powder isn’t sticking, try curing for just 20-25 seconds and see if that works better.
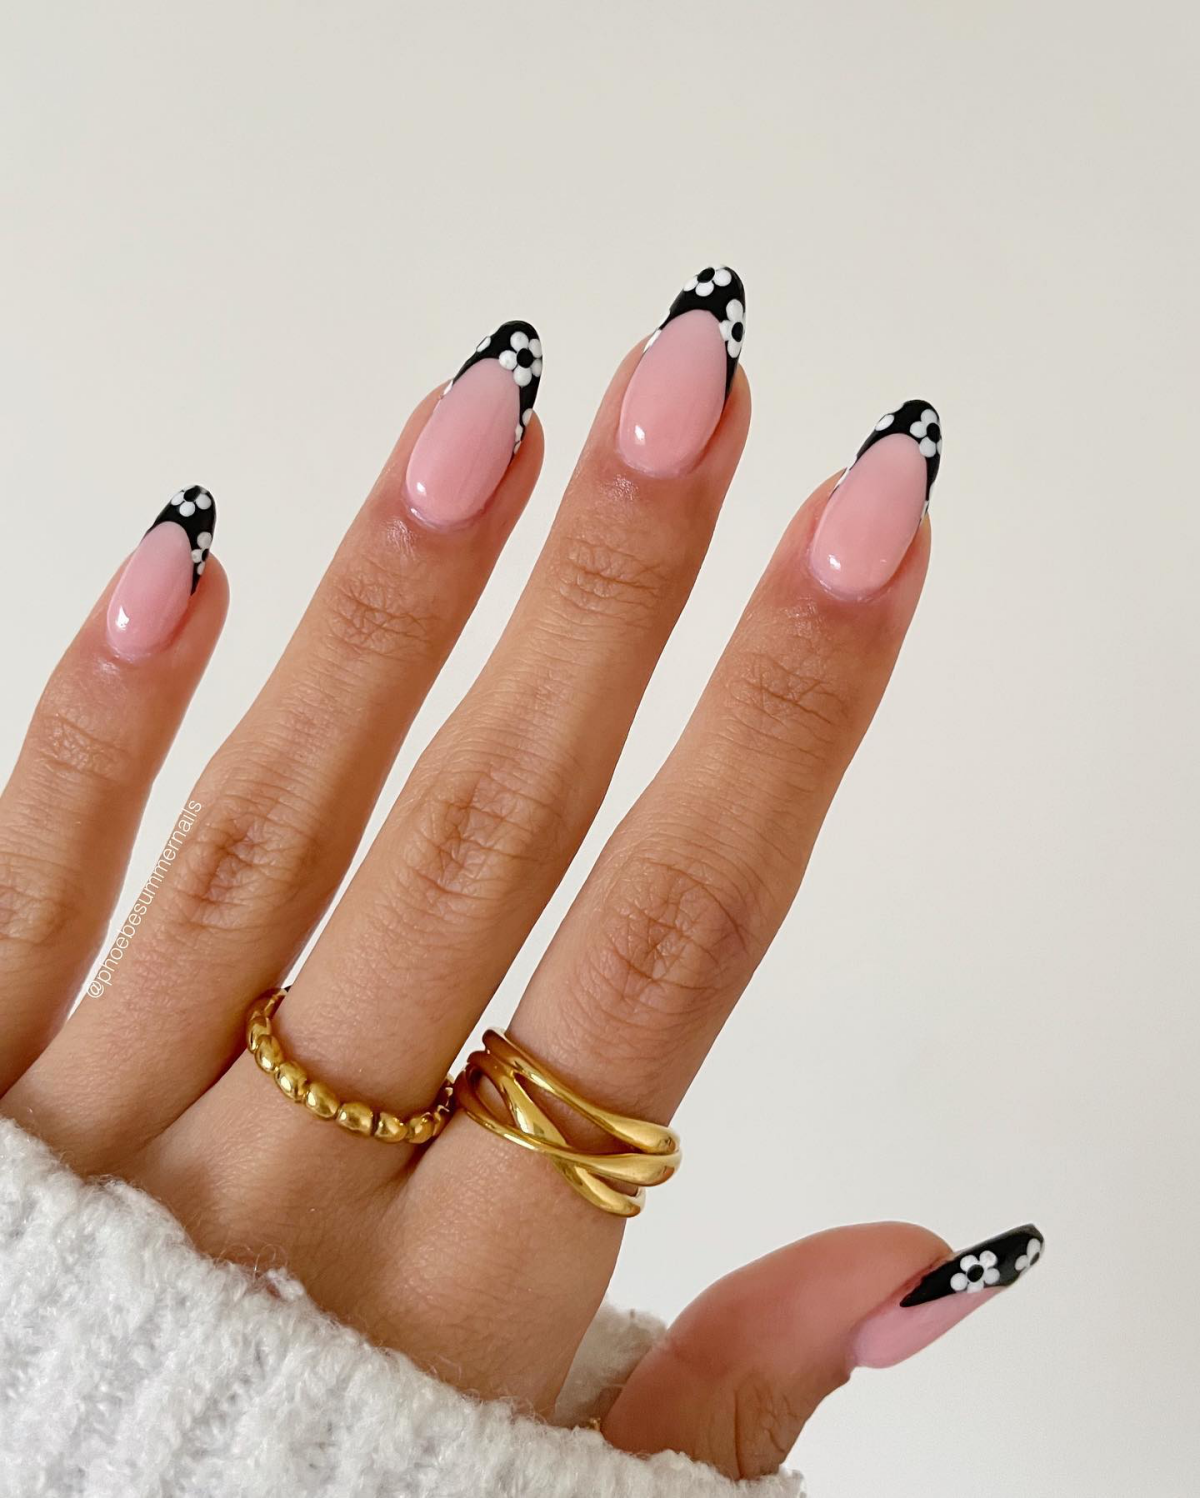
Matte Top Coats: A matte finish instantly makes any color look more modern and chic. A matte nail with a glossy French tip is a really popular look.
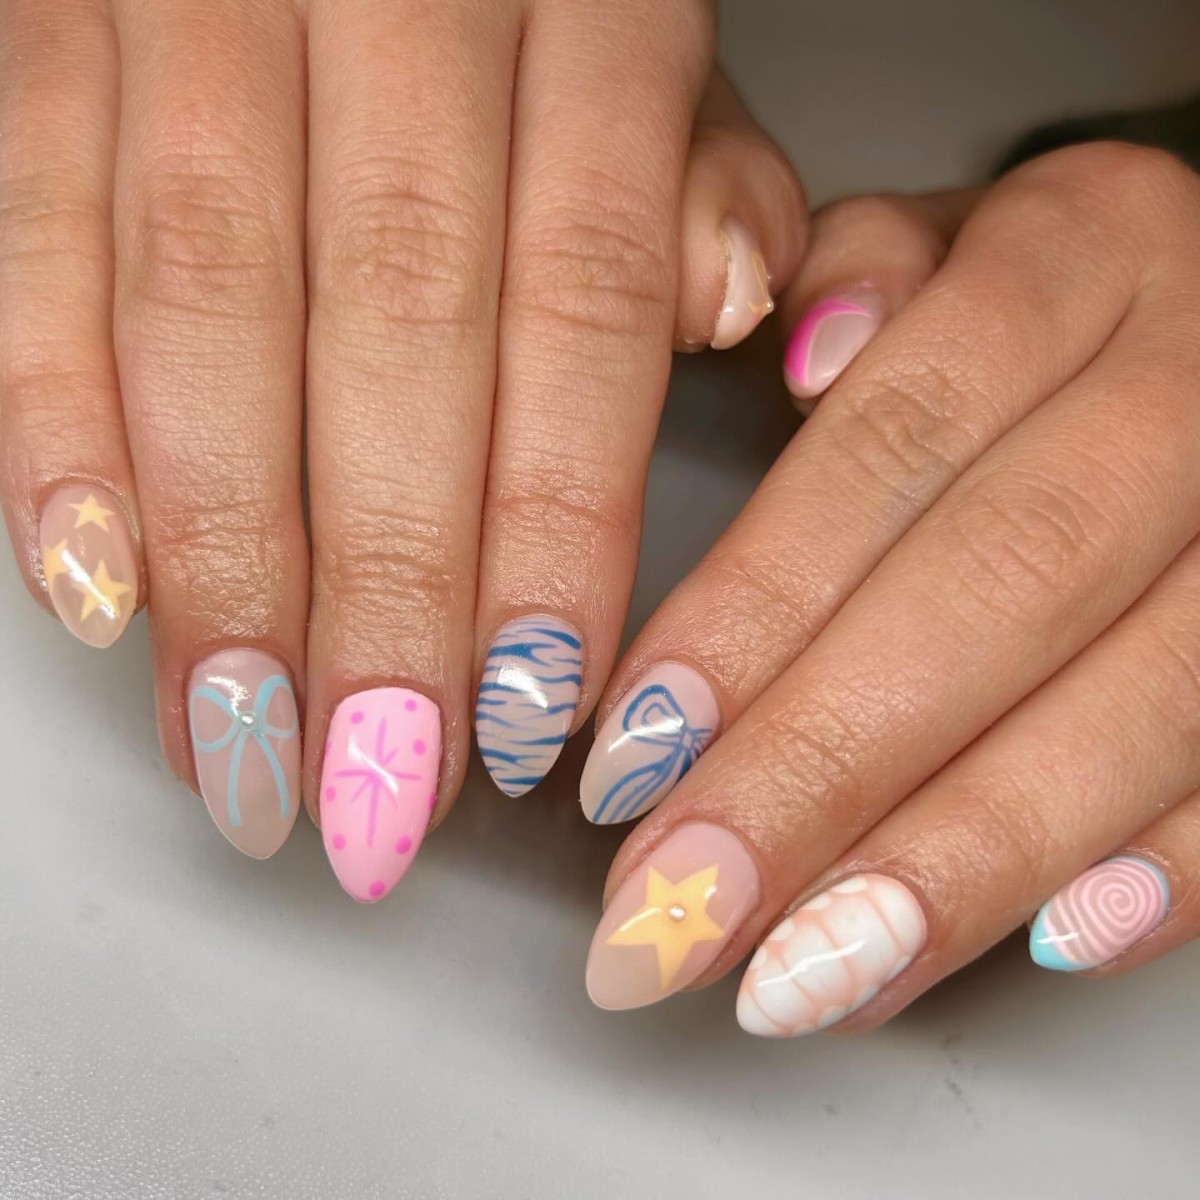
Subtle 3D Accents: We’re seeing more 3D art, but it’s refined. Think tiny, clear gel “water droplets,” a single small gold charm, or a delicate sculpted flower on an accent nail.
A Pro’s Look at Spring Nail Art Techniques
Now for the really fun part—the art itself. Here are a few popular spring designs, how we do them, and what you should know before asking for them.
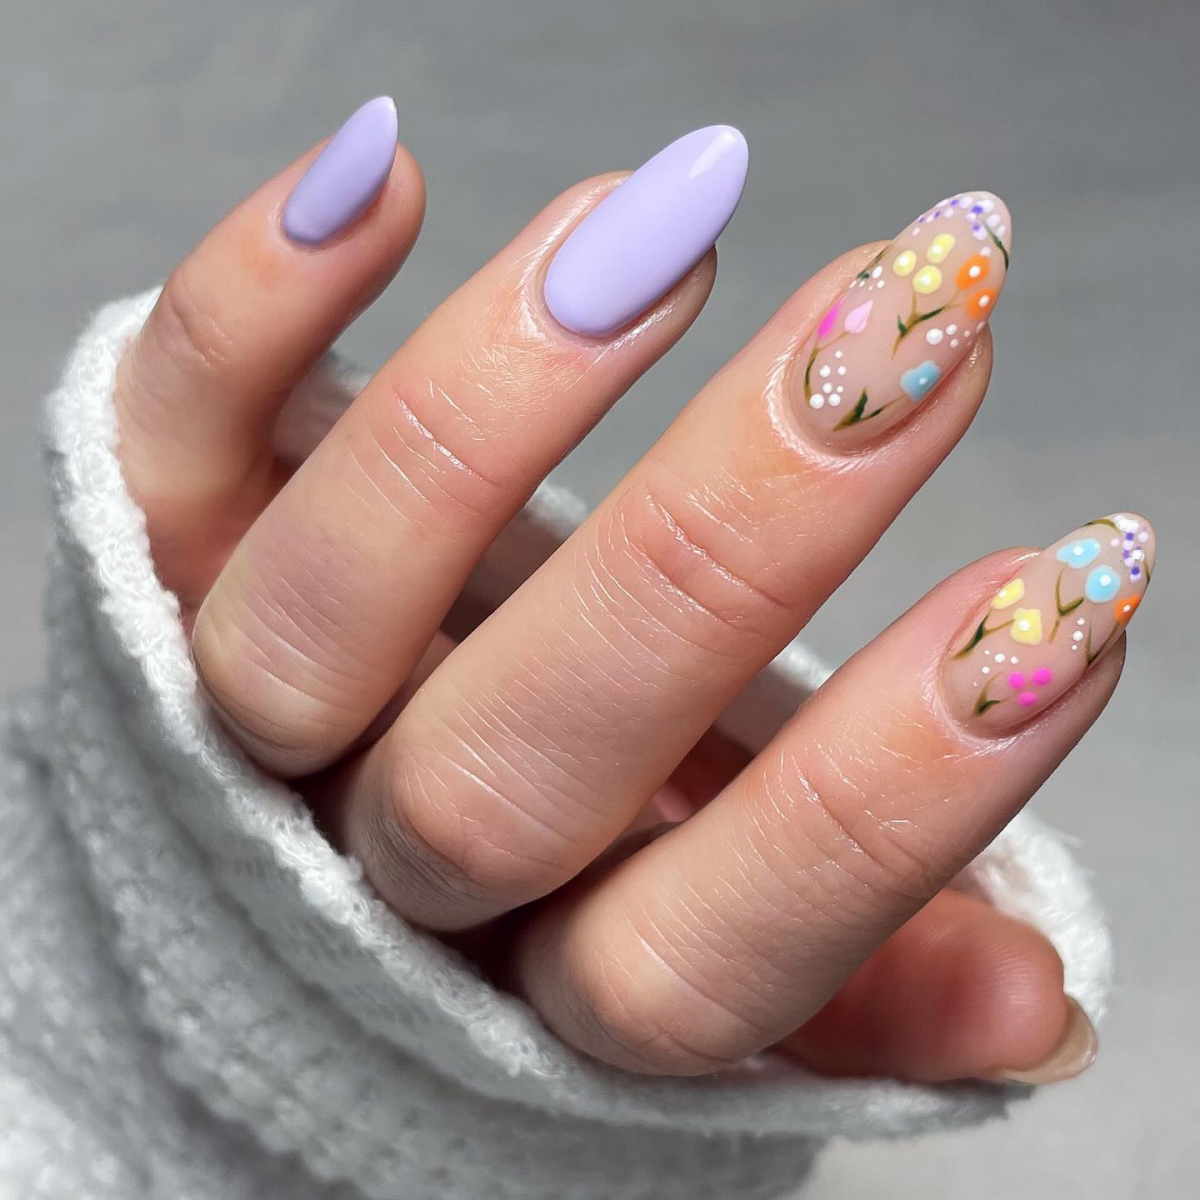
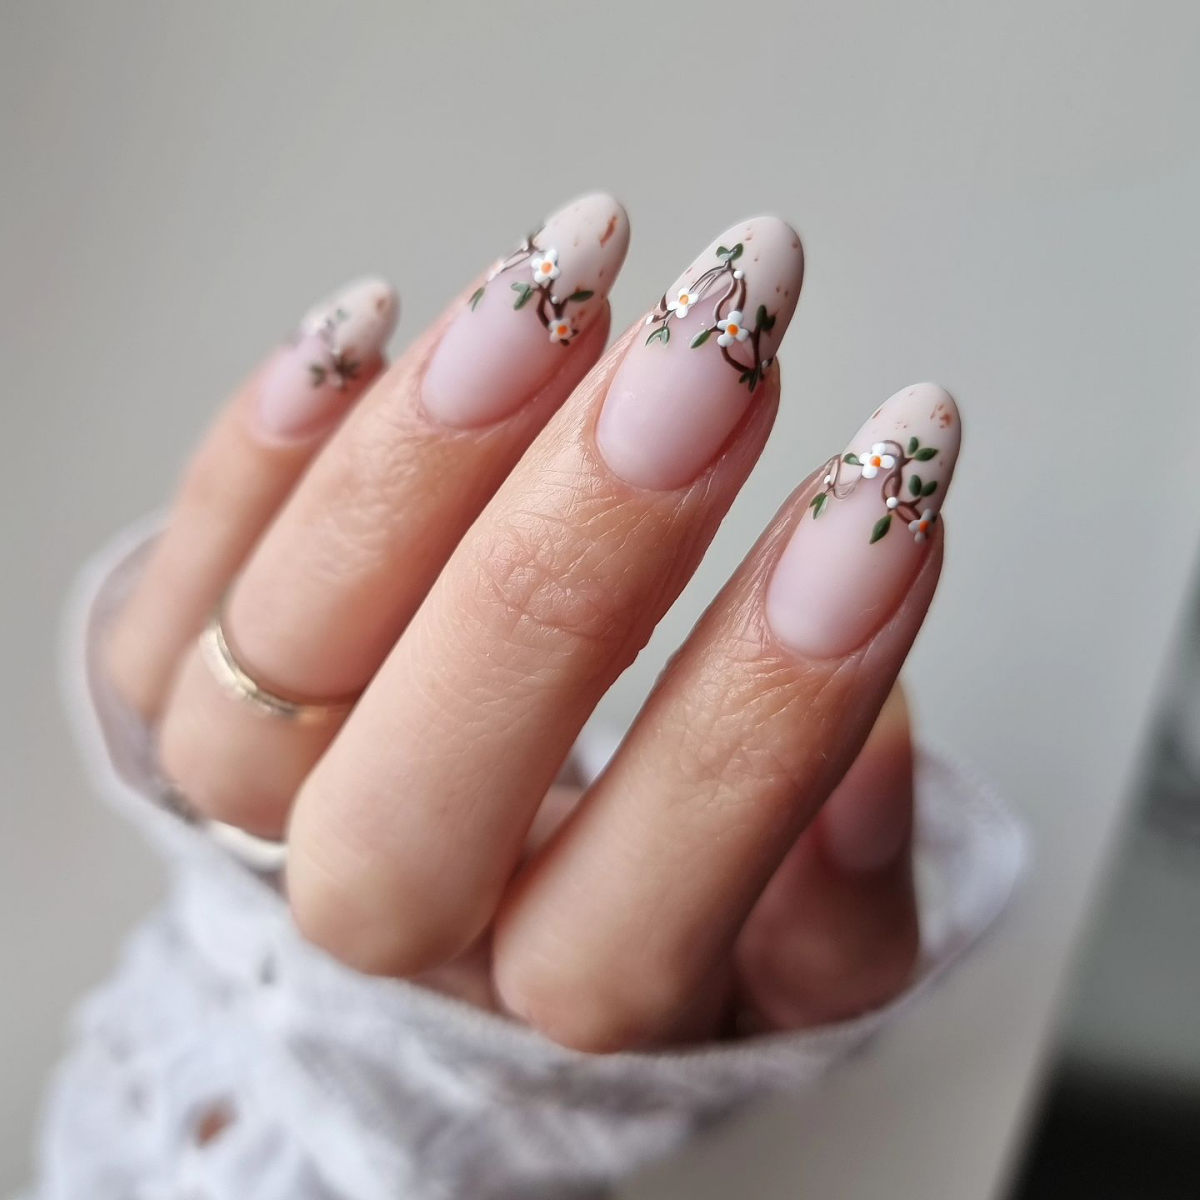
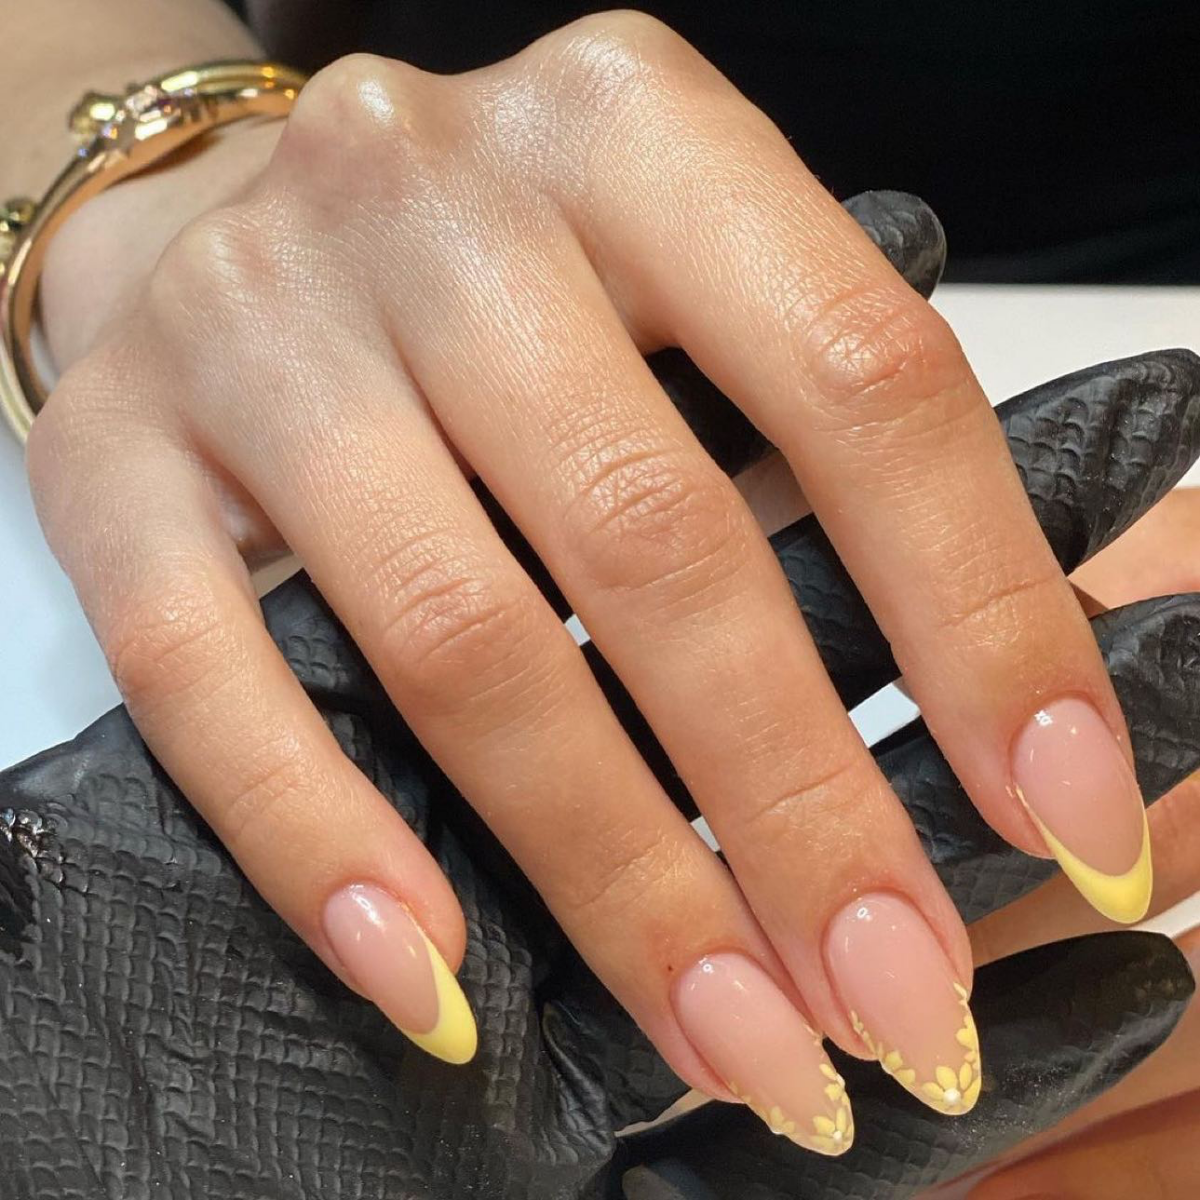
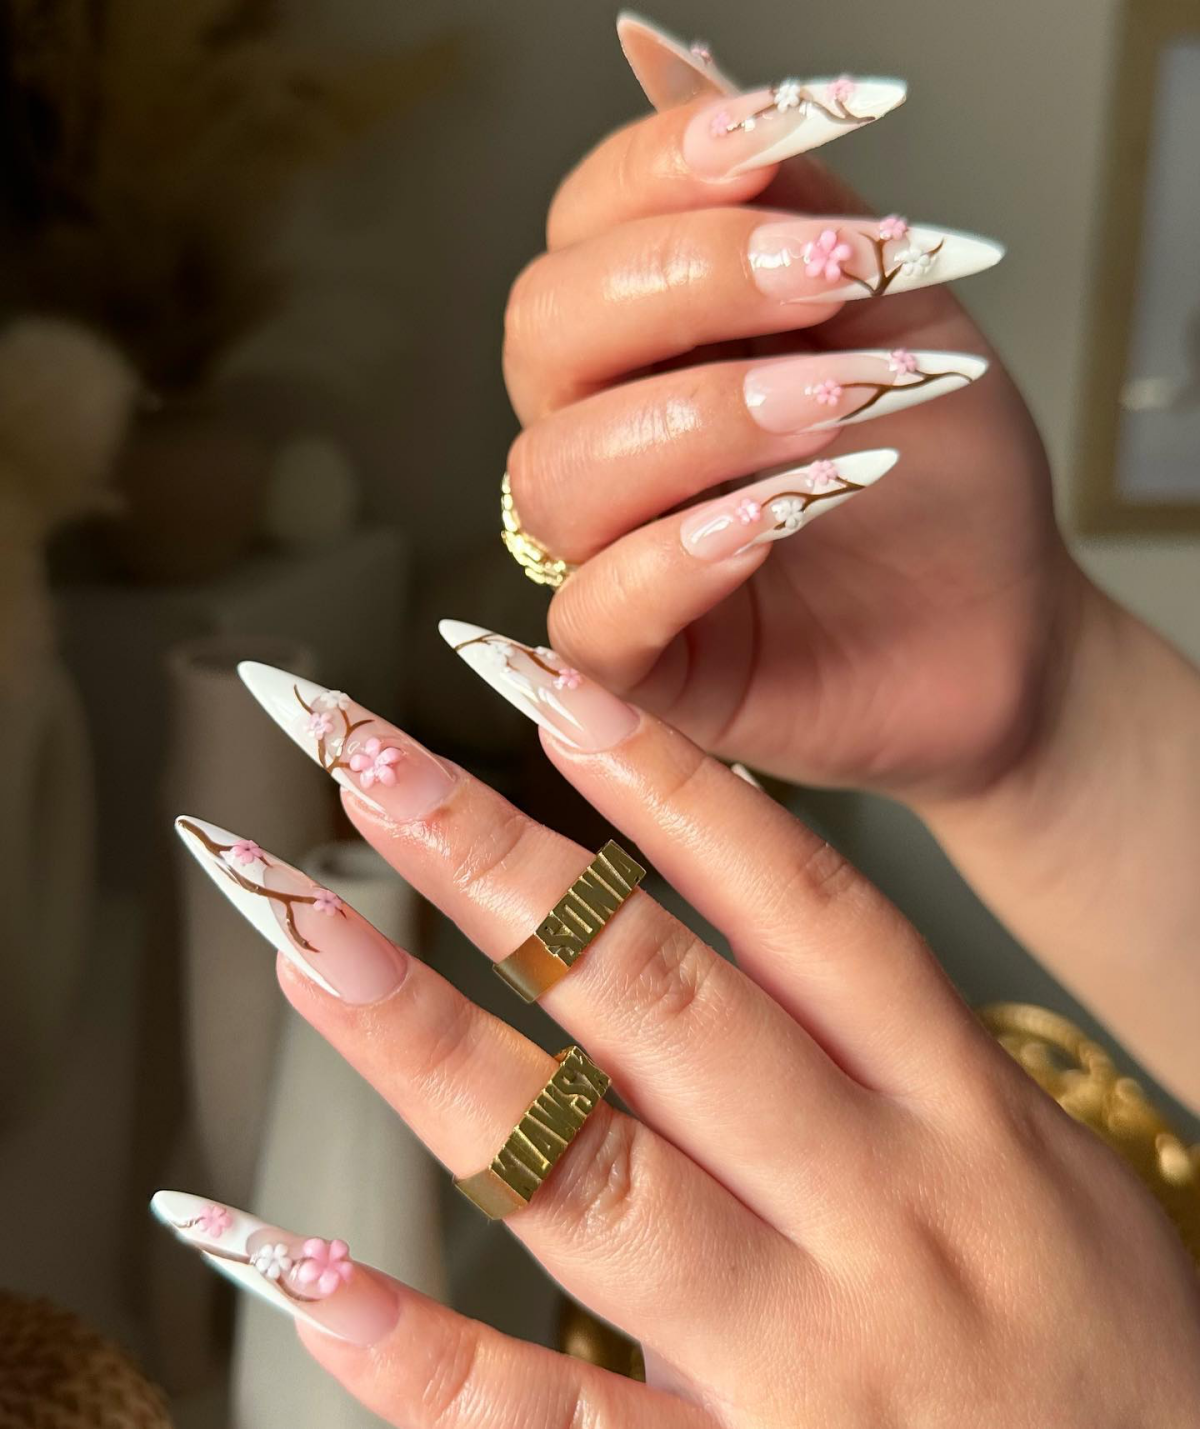
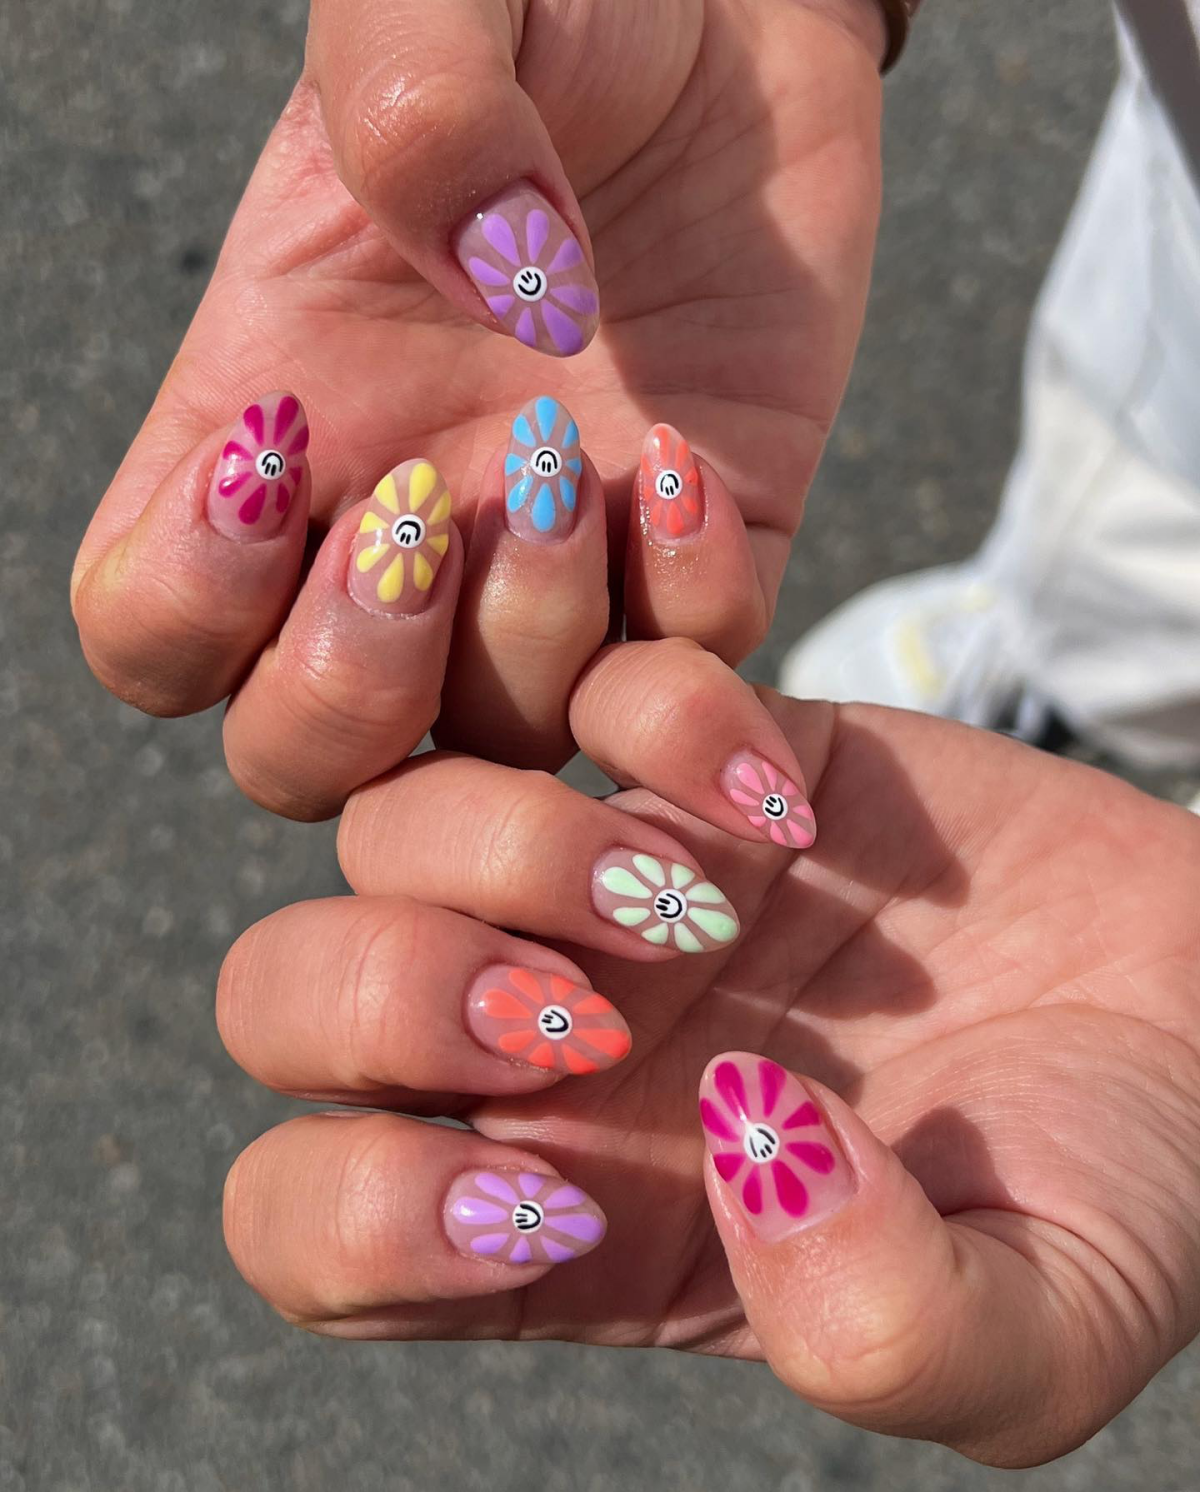
Delicate Hand-Painted Florals
Florals for spring? Groundbreaking, I know. But today’s style is all about minimalist, hand-painted botanicals, not big, chunky stamps.
We typically use a super-thin liner brush and pigmented gel paints (they don’t run like regular polish) to create wispy branches and tiny buds. It’s a gorgeous accent on a nude nail.
Cost: This is considered detailed art. Expect to pay an add-on of around $8-$15 per nail, depending on the complexity.
Practicality: Very high. Since it’s painted on and sealed flat with a top coat, it won’t snag or get in the way.
DIY-Friendly?: Yes, if you have a steady hand! This is a great one to practice at home.
Encapsulated Dried Flowers
This is that stunning look where it seems like there’s a real flower pressed inside the nail. It’s done by placing a tiny, pressed dried flower onto a layer of wet builder gel, curing it, and then building the rest of the nail structure over it.
Cost: This is an advanced technique. You’re looking at $15-$25 per nail, easily.
Practicality: Medium. The nail is thick but smooth. However, removal requires filing off the gel, which should only be done by a pro.
DIY-Friendly?: Definitely not. This is a pro-only technique that requires training in gel enhancements.
The Chrome Finish
As we talked about, this gives that beautiful, liquid-metal look. It can be done over the whole nail or as a French tip.
Cost: This usually runs about $5-$7 per nail as an add-on service.
Practicality: High. It’s completely smooth once it’s sealed correctly with a top coat.
DIY-Friendly?: Intermediate. You can buy the powders online, but it takes some practice to get the timing and application just right.
3D Sculpted Art
This is where the nail becomes jewelry. Using a thick, putty-like gel or acrylic, a tech sculpts a flower or design petal by petal. It’s truly a display of skill.
Cost: This is high-end art, often priced at $20+ per nail.
Practicality: Low. Let’s be honest, this is for a special occasion. It can snag on hair and clothes and makes typing a little tricky.
DIY-Friendly?: Pro only. This requires a very high level of skill and specific products.
The Consultation: What to Ask For
Part of my job is being a consultant. You might see a wild design online, but it’s my job to help you figure out if it will work for you.
To give you a realistic idea of pricing, a simple design like a few dots or lines might add $5-$8 to your manicure. More complex, hand-painted art could be $15 per nail, while something advanced like a 3D sculpted flower could be $25 or more for that one nail. Being upfront about your budget is super helpful!
Also, think about your lifestyle. A nurse can’t have 3D art, and someone who types all day might find it annoying. And if you stretch your appointments to four or five weeks, ask for a design that grows out gracefully, like a soft gradient from the cuticle, so the regrowth isn’t so obvious.
Protecting Your Investment: Aftercare is Key
Your manicure isn’t finished when you walk out the door. How you treat your nails for the next few weeks makes all the difference.
Use Cuticle Oil Daily. If you do nothing else, do this! My go-to professional choice is CND SolarOil for its blend of oils that really penetrate. But honestly, if you’re on a budget, a simple bottle of pure Jojoba oil (you can find it on Amazon or at health food stores for around $10) works wonders. It keeps the gel flexible and your skin hydrated.
Wear Gloves. For dishes, for cleaning—always. Harsh chemicals and prolonged water exposure are the enemies of a long-lasting manicure.
Be Gentle. Your nails are jewels, not tools. Don’t use them to open soda cans or scrape labels. This is the
1 cause of chips and breaks.
Schedule a Proper Removal. Please, please, do not pick or peel off your gel polish! It rips off layers of your natural nail and causes damage that takes months to fix.
Just a heads-up for the DIYers: some of the techniques described here, especially those involving builder gels, 3D sculpting, and chrome powders, are really intended for trained pros. Using them incorrectly can lead to skin irritation or nail damage, so always be careful and do your research.
Galerie d’inspiration
Prevents chipping and premature wear.
Adds a professional-looking, high-gloss shine.
Revives your manicure’s vibrancy after a few days.
The secret? A high-quality top coat, reapplied every two to three days. It’s the single best habit for making your intricate spring designs last until you’re ready for a new look.
Gel-Look Polish: Brands like Essie’s Gel Couture or CND Vinylux offer a plump, ultra-glossy finish that mimics a gel manicure, complete with impressive longevity, but removes with regular acetone.
Breathable Polish: Formulations from brands like Orly or Inglot allow oxygen and water to pass through to the nail. This is a great choice if you’re focusing on nail health post-winter but still want to play with spring colors.
Choose based on your priority: durability for the gel-look, or nail care for the breathable option.
The Pantone Color of the Year 2024 is Peach Fuzz (13-1023), a gentle, velvety peach tone.
This shade is a perfect starting point for spring. It works beautifully on its own for an understated, chic look, or as a warm, neutral base for delicate white floral art or tiny gold-leaf accents. It captures the season’s feeling of soft renewal.
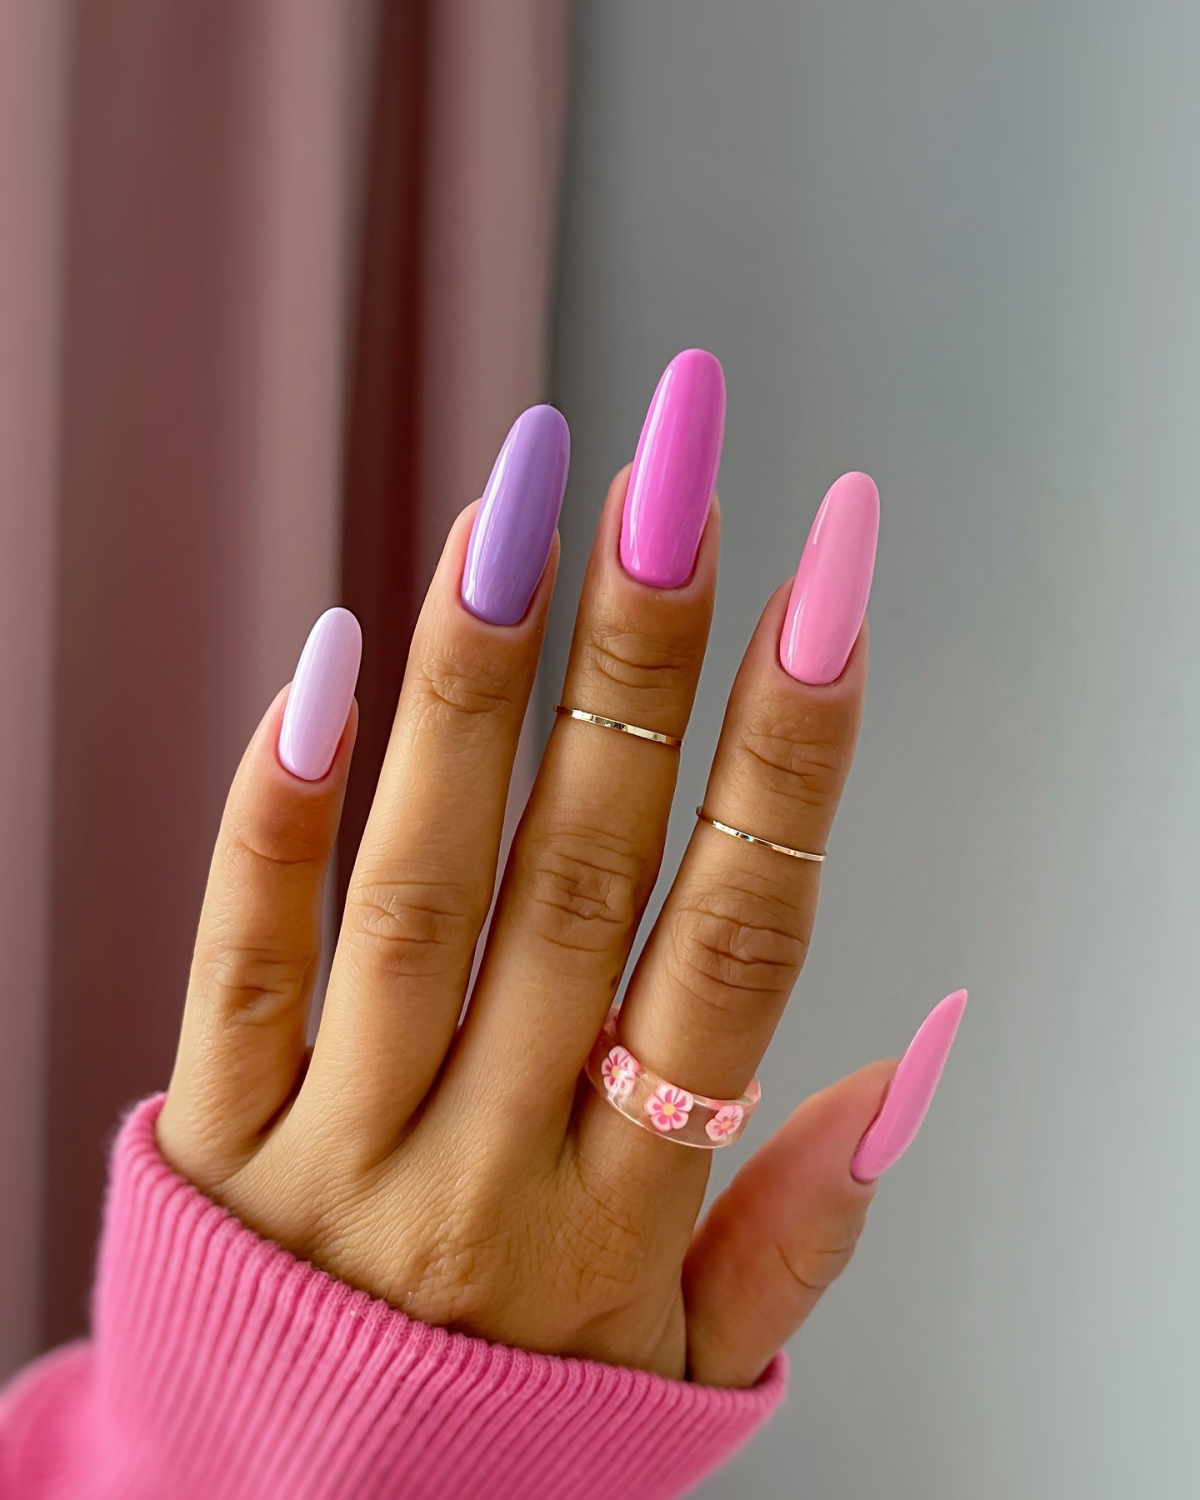
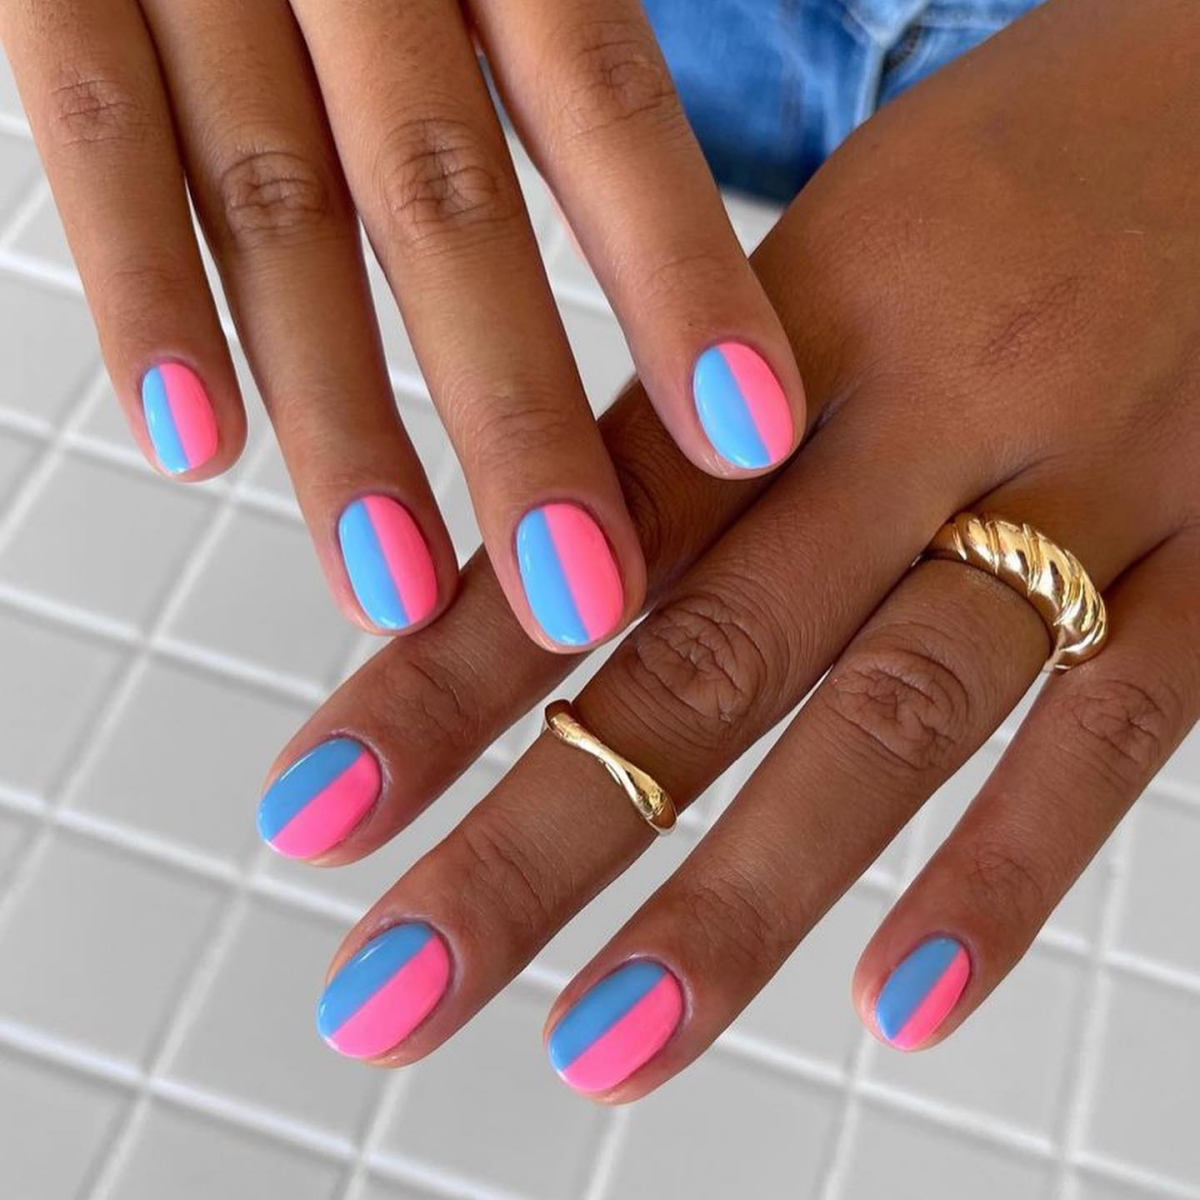
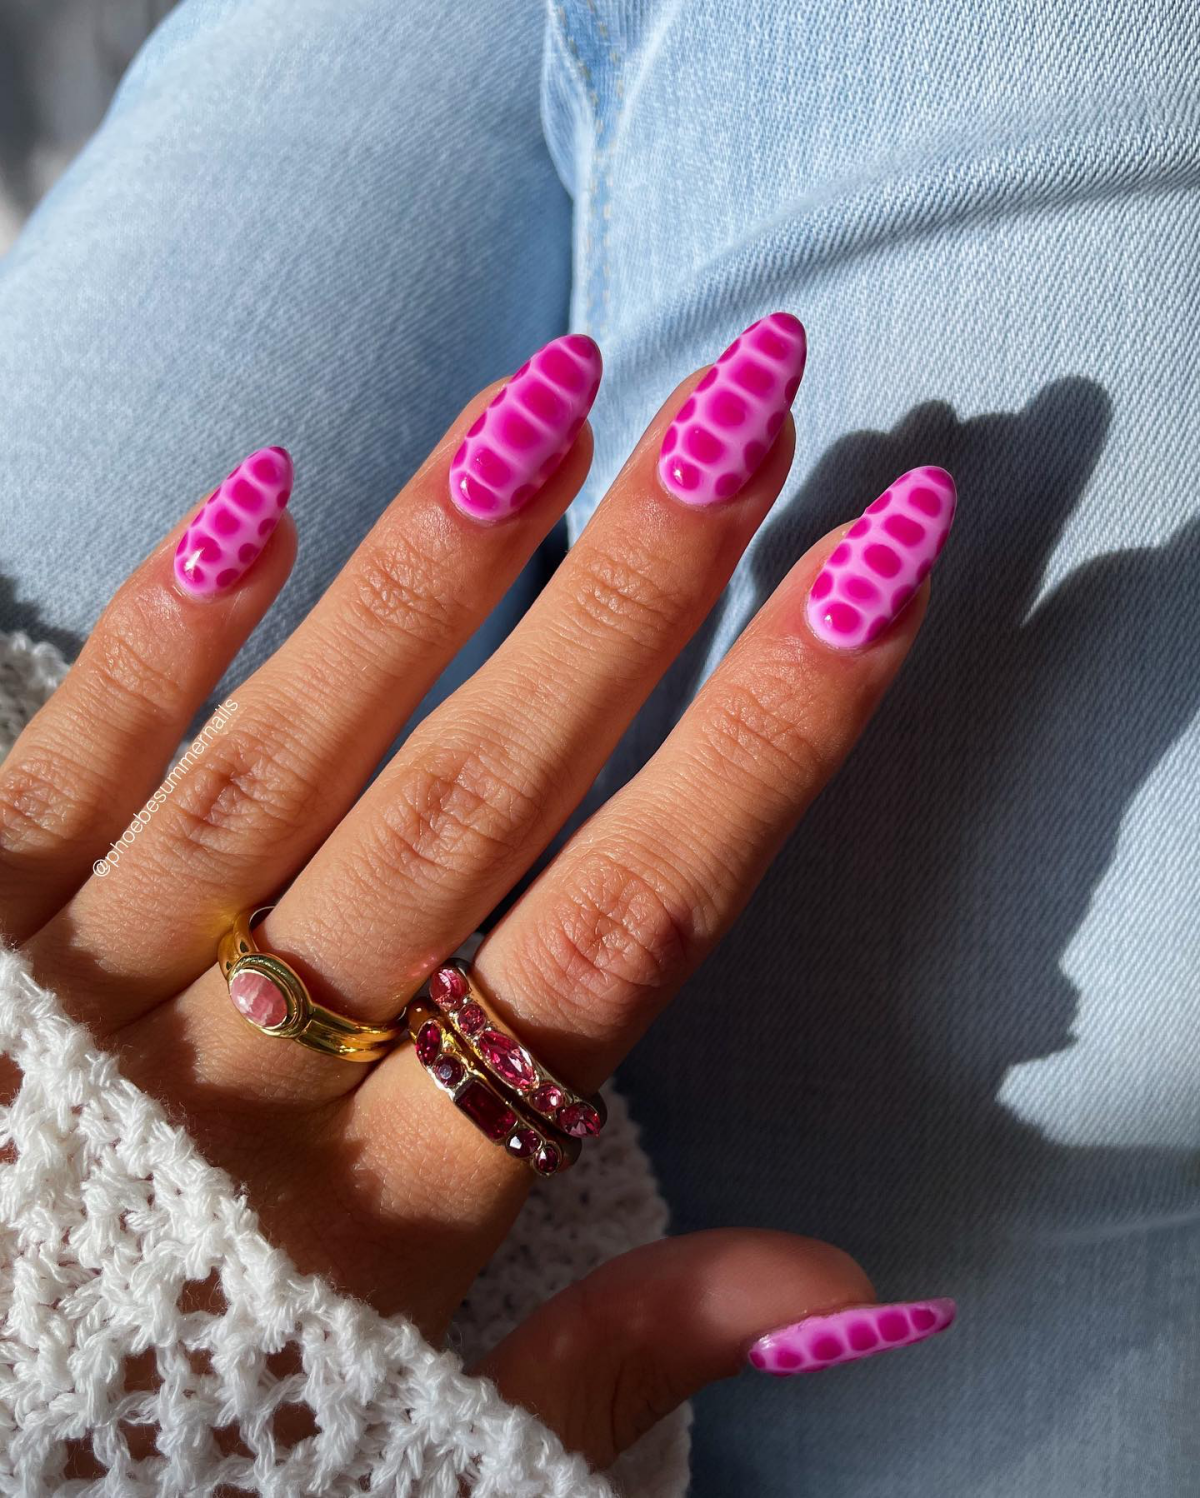
Want to try the trendy “aura” or “blush” nail effect but don’t have an airbrush?
The solution is surprisingly simple: a makeup sponge. Apply a drop of your base color (like a pale pink) and a smaller drop of your vibrant accent color (like a hot pink or coral) next to it on a disposable cosmetic wedge. Gently dab the sponge on the nail, concentrating the darker color in the center. A glossy top coat will blend the edges for a seamless, professional-looking gradient.
That slightly translucent, “jelly” or “syrup” look seen all over social media is perfect for a subtle take on spring color. It gives nails a healthy, juicy appearance. To get this effect, look for polishes specifically labeled as “jelly,” or simply mix a few drops of your favorite pastel color into a clear top coat until you reach the desired sheerness. Apply two to three coats for a beautiful, watercolor-like depth.
The one trick pros use to prevent tip wear: Cap the free edge. After applying each layer—base coat, color, and top coat—make sure to swipe the brush horizontally along the very tip of your nail. This creates a seal that protects the most vulnerable part of the manicure from daily wear and tear, drastically reducing the chance of chipping.
For an elevated spring manicure, consider the texture. Beyond glitter, new top coats can create unique finishes. A matte top coat, for example, can give pastel shades a soft, eggshell-like appearance that’s incredibly chic. Try it over just one accent nail with a floral design to create a striking contrast with the other glossy nails.
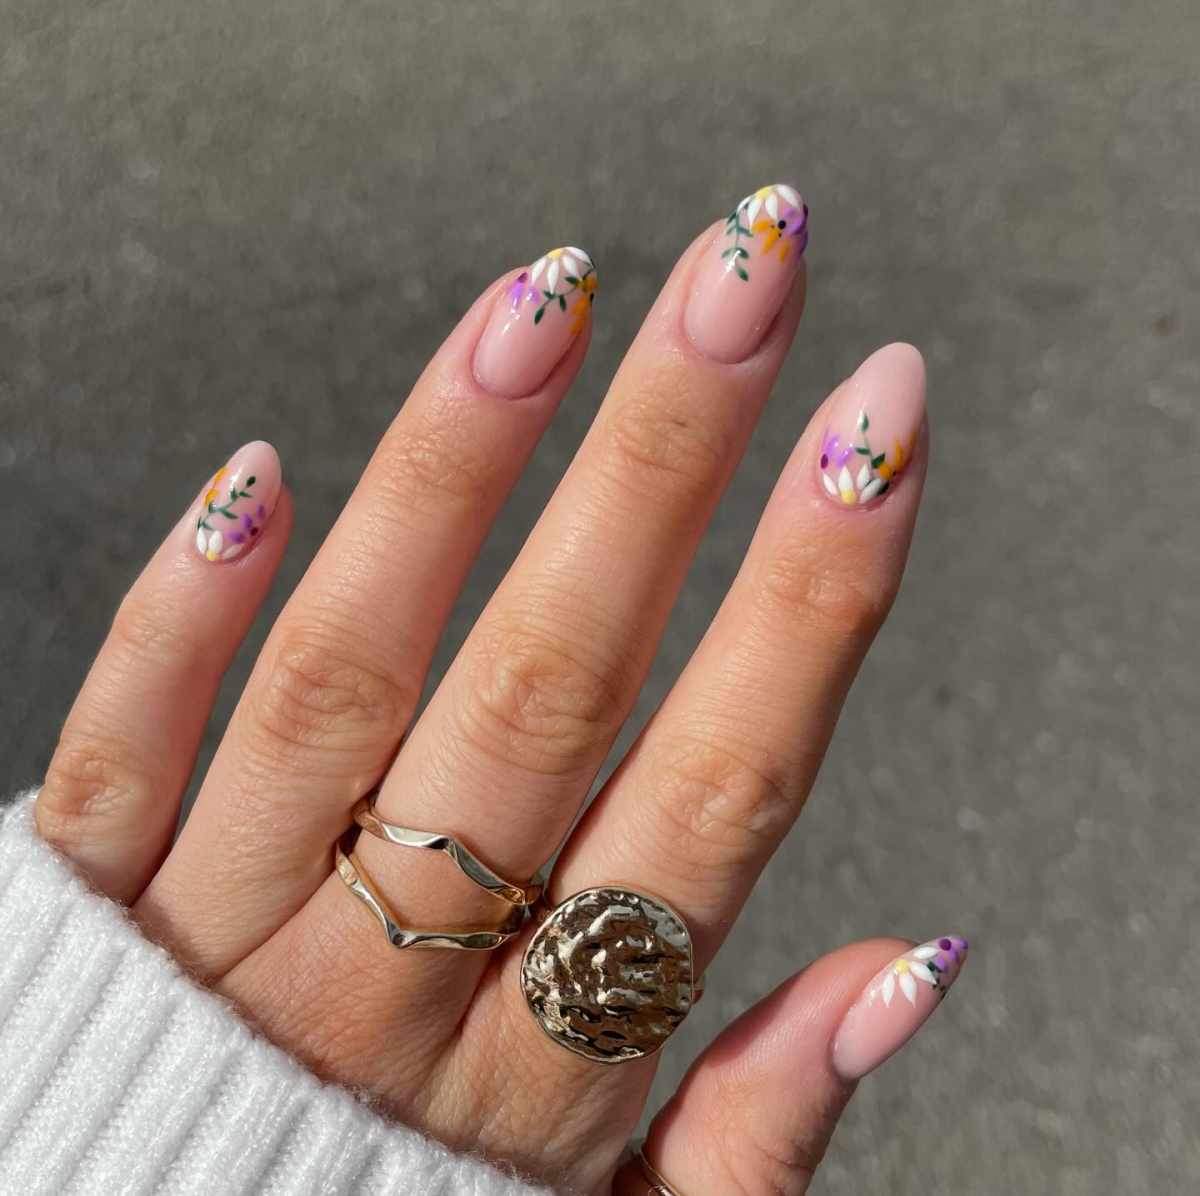
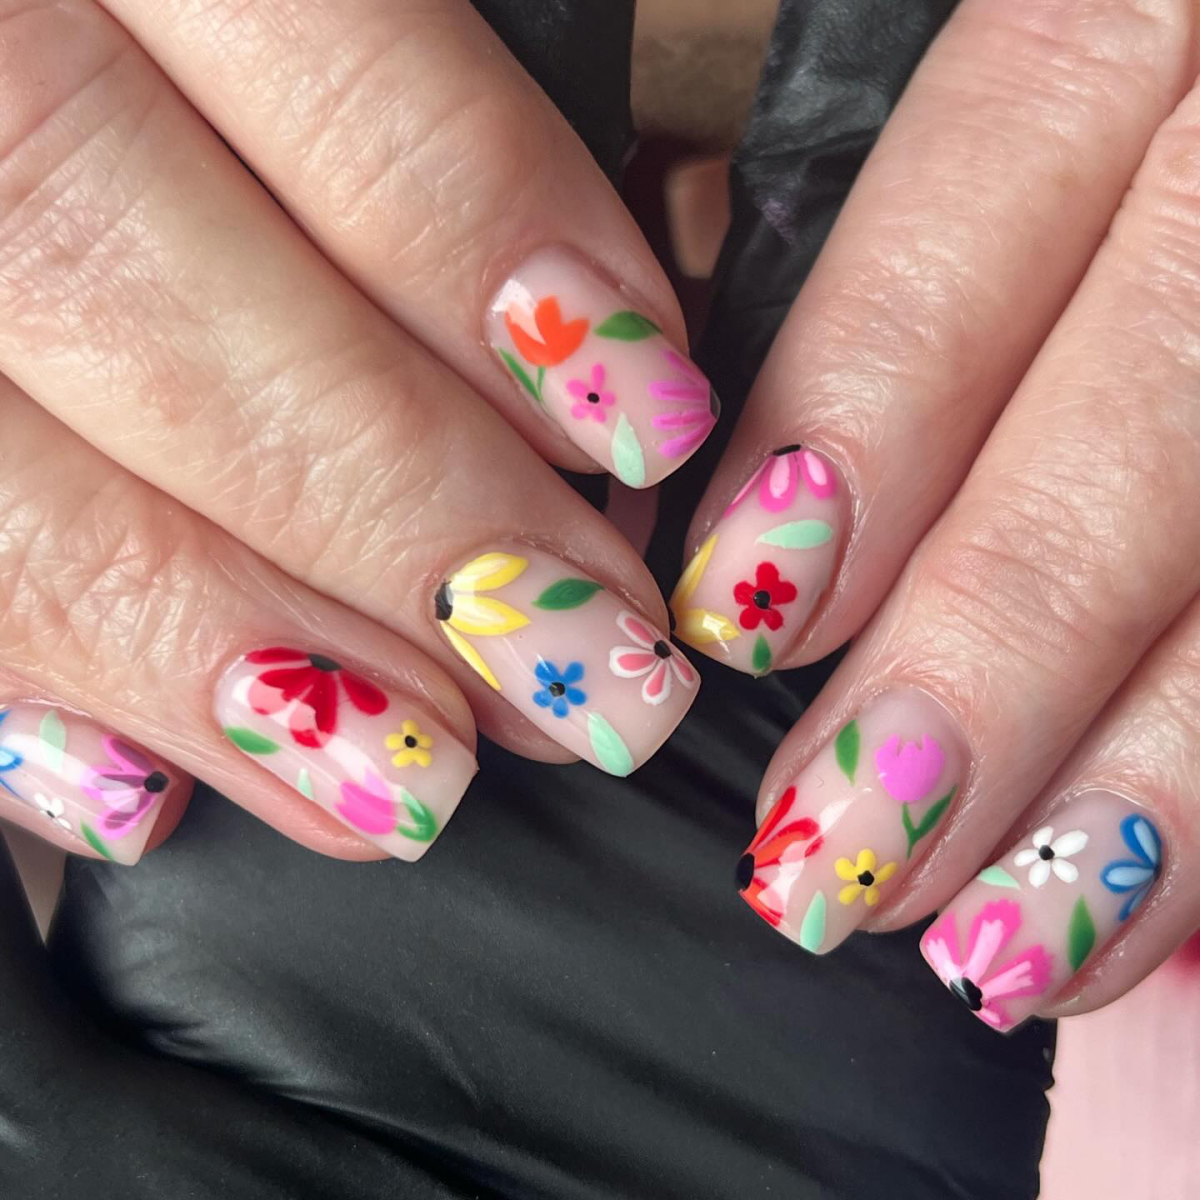
A 2021 study found that looking at floral patterns can evoke positive emotions and reduce stress.
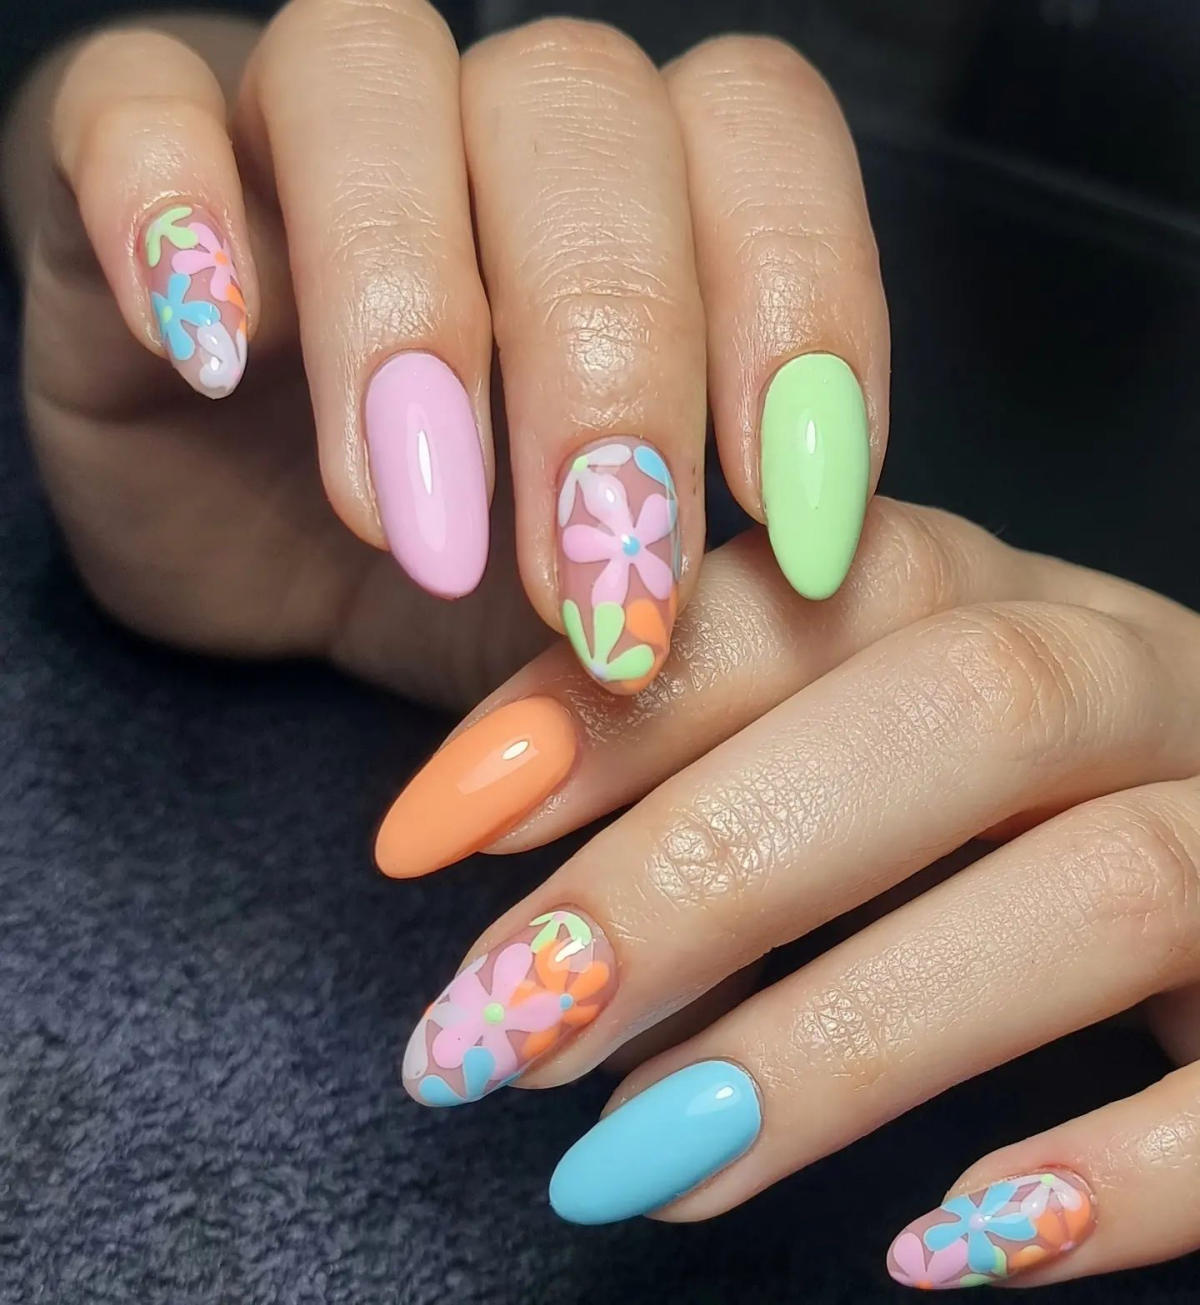
Lean into this by choosing a floral design that reflects your mood. For a calm, serene vibe, opt for delicate lavender sprigs or baby’s breath on a nude base. If you’re feeling energetic and joyful, go for bold, bright daisies or poppies inspired by a spring meadow.
If you love intricate designs like the bee and honeycomb or detailed cherry blossoms but lack the artistic confidence, nail art decals are your best friend. These are not the chunky stickers of your childhood. Modern water-slide decals are ultra-thin and look painted-on once sealed with a top coat. You can find stunning, hyper-realistic floral and animal designs from indie brands on Etsy that make complex art accessible to everyone.
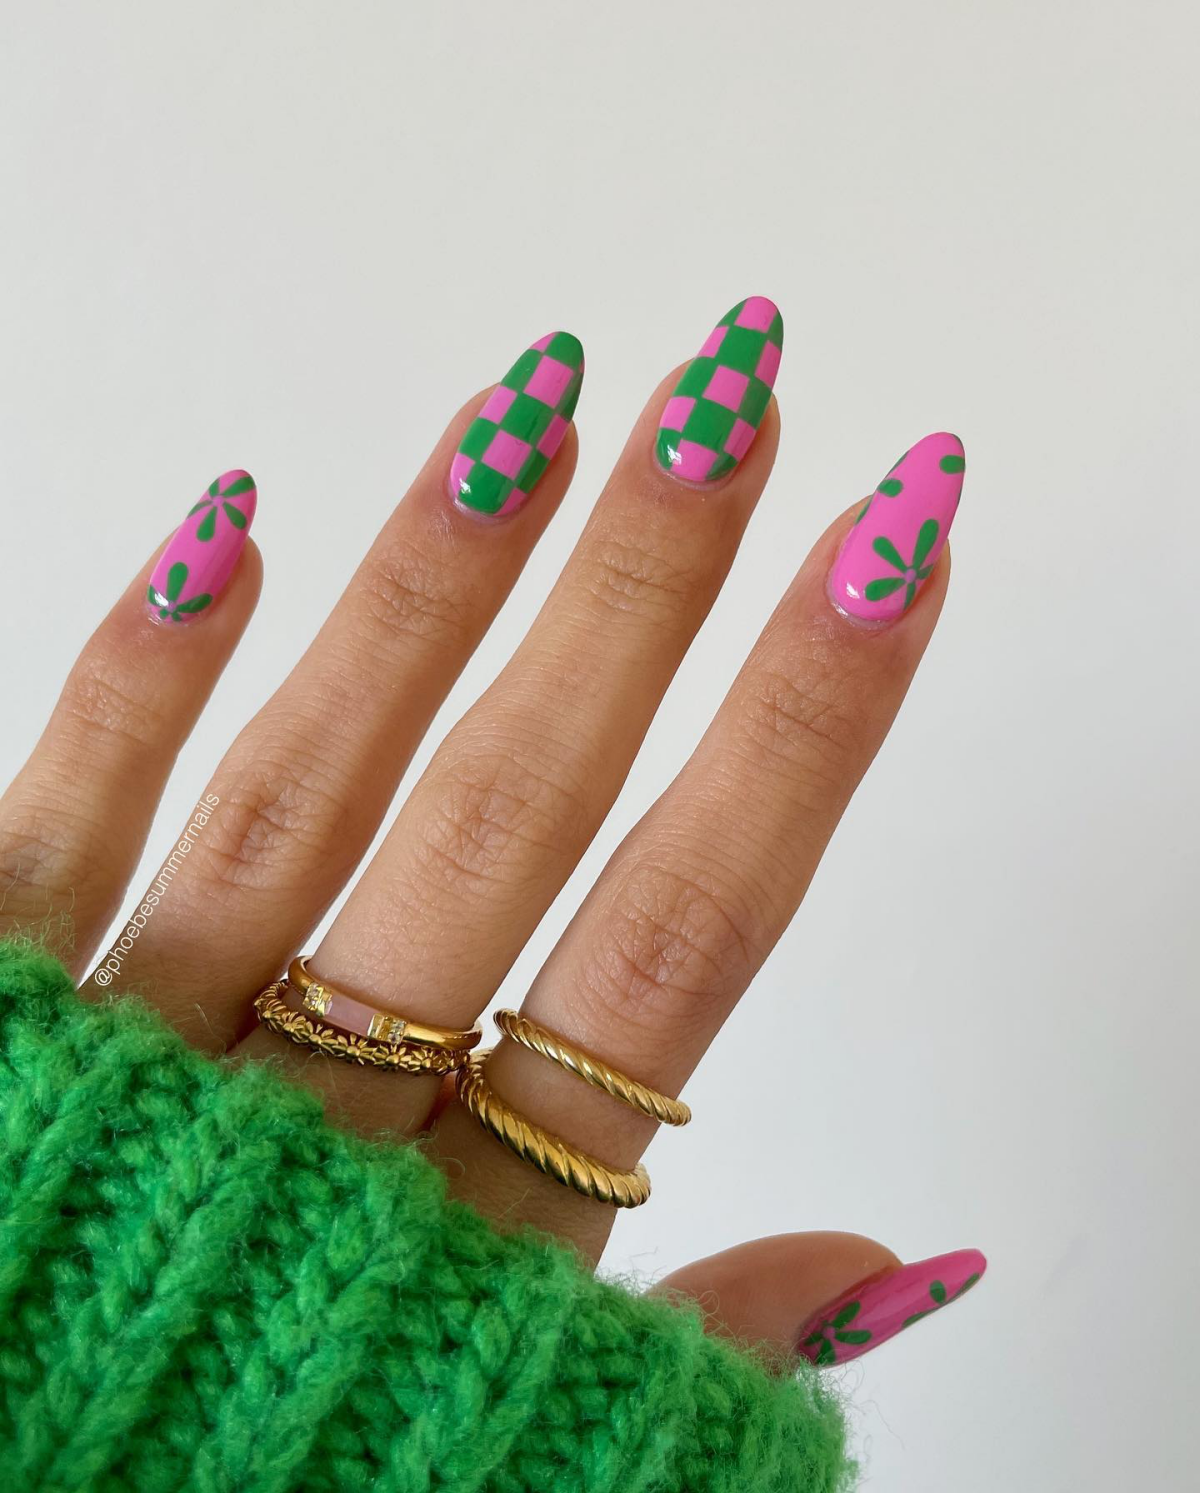
Don’t be afraid of green! From sage to mint to vibrant lime, green is spring’s essential color.
Pair it with unexpected partners. A mint green looks stunning with a pop of coral.
For a sophisticated look, try an olive green with delicate gold foil accents along the cuticle.
Use a dotting tool to create simple leaves alongside a single floral accent nail.
Jessica has spent 14 years in the fashion industry, starting as a stylist assistant and working her way up to Fashion Editor. A graduate of Fashion Institute of Technology, she has styled celebrities, worked backstage at Fashion Week, and contributed to major fashion publications. Jessica believes fashion should be fun, accessible, and expressive.
To provide the best experiences, we use technologies like cookies to store and/or access device information. Consenting to these technologies will allow us to process data such as browsing behavior or unique IDs on this site. Not consenting or withdrawing consent, may adversely affect certain features and functions.
Functional
Always active
The technical storage or access is strictly necessary for the legitimate purpose of enabling the use of a specific service explicitly requested by the subscriber or user, or for the sole purpose of carrying out the transmission of a communication over an electronic communications network.
Preferences
The technical storage or access is necessary for the legitimate purpose of storing preferences that are not requested by the subscriber or user.
Statistics
The technical storage or access that is used exclusively for statistical purposes.The technical storage or access that is used exclusively for anonymous statistical purposes. Without a subpoena, voluntary compliance on the part of your Internet Service Provider, or additional records from a third party, information stored or retrieved for this purpose alone cannot usually be used to identify you.
Marketing
The technical storage or access is required to create user profiles to send advertising, or to track the user on a website or across several websites for similar marketing purposes.