Your Guide to Flawless Ombre Nails (Without the Salon Price Tag)
I’ve been a nail tech for a long time, and I’ve seen trends explode and then fizzle out. But the ombre gradient? That one has some serious staying power. It’s not just a fad; it’s a real technique that, when done right, looks absolutely stunning. A good ombre is a smooth, seamless melt of color. A bad one… well, we’ve all seen those patchy, lumpy attempts. And trust me, I’ve fixed a lot of them.
In this article
- The Big Choice: Regular Polish or Gel?
- Gearing Up: Your Ombre Toolkit & What It’ll Cost
- Method 1: The Classic Sponge Technique
- Common Sponge Fails & How to Fix Them
- Method 2: Leveling Up with a Brush (For Gel)
- So, Sponge or Brush? Which Is For You?
- A Quick Win: The Accent Nail
- Choosing Your Colors: Pro Tips for Popular Looks
- Let’s Talk Safety (Seriously)
- Inspiration Gallery
So many people bring in photos of these perfect, airbrushed-looking nails and ask, “Can I actually do this myself?” And the answer is a resounding YES. But it takes a bit more than just dabbing at your nails with a Q-tip. It takes a little patience and the right know-how. This guide is all about giving you those pro secrets. We’re going to cover the tools, the techniques, and the little tricks that make all the difference.
The Big Choice: Regular Polish or Gel?
Before you even think about colors, you have to decide on your medium. This is probably the biggest factor that will shape your whole process, so let’s break it down.
Regular Nail Lacquer is what most of us have lying around. It works by air-drying as its solvents evaporate, which means you’re literally racing against the clock. You have a very short window to blend the colors before they get tacky and unworkable. Honestly, trying to blend sticky polish is a recipe for clumps and streaks. It’s totally doable, but you have to be speedy.
Gel Polish, on the other hand, is a game-changer for nail art. To be frank, it’s my go-to for any kind of complex blend. Gel doesn’t air dry at all. It stays wet and workable until you stick it under an LED or UV lamp to cure it. This gives you all the time in the world to blend, tweak, and perfect your gradient. When you’re happy, you cure it, and it’s locked in place. For beginners, gel is way more forgiving.
Gearing Up: Your Ombre Toolkit & What It’ll Cost
Having the right tools is half the battle. A gorgeous ombre depends on a few key items, and investing a little bit here will save you a ton of frustration. You don’t have to break the bank, but you do need to be strategic.
For Prepping Your Nails (The Non-Negotiables):
- Nail File & Buffer: You’ll want a 180-grit file for shaping and a finer 240-grit buffer to gently take the shine off your nail plate. This creates a better surface for the polish to grip onto. A decent file/buffer combo pack is usually under $5 at places like Target or Sally Beauty.
- Isopropyl Alcohol: The secret to a long-lasting manicure! A quick wipe with alcohol cleans off any dust and oils that prevent good adhesion. A big bottle costs just a few bucks at any drugstore.
For Creating the Blend (Choose Your Weapon):
- Makeup Sponges: This is the go-to for most DIYers. The trick is to get a high-density cosmetic wedge, not a porous, cheap one that will just drink your polish and leave bubbles. You can find a pack of these on Amazon or at any beauty supply store for about $5-$10. Quick tip: Dampen the sponge slightly with water and squeeze it out completely. This keeps it from soaking up that first layer of polish.
- An Ombre Brush: If you’re using gel, this is a fantastic tool. It’s a specialty brush with long, wispy bristles made for feathering colors together. It offers way more control than a sponge but does have a learning curve. Expect to pay between $8 and $20 online or at Sally Beauty for a good one.
For the Finishing Touches (What Makes It Look Pro):
- Cleanup Brush: Ditch the cotton swabs—they leave fuzzies everywhere. A small, flat artist’s brush or an angled eyeliner brush from a brand like e.l.f. (usually just $2-$4) dipped in acetone will give you that razor-sharp cuticle line.
- A Killer Top Coat: This is crucial! For regular polish, a good quick-dry top coat like Seche Vite not only adds shine but helps smooth out any slight texture from the sponge. For gel, a “no-wipe” top coat gives you that glass-like finish right out of the lamp.
So what’s the total investment? If you’re starting from scratch with gel, a beginner’s kit with a decent lamp, base/top coats, and a few colors will probably run you between $40 and $70 on Amazon. If you’re sticking with regular polish you already own, you might just need to spend $15 on sponges, a cleanup brush, and a quality top coat.
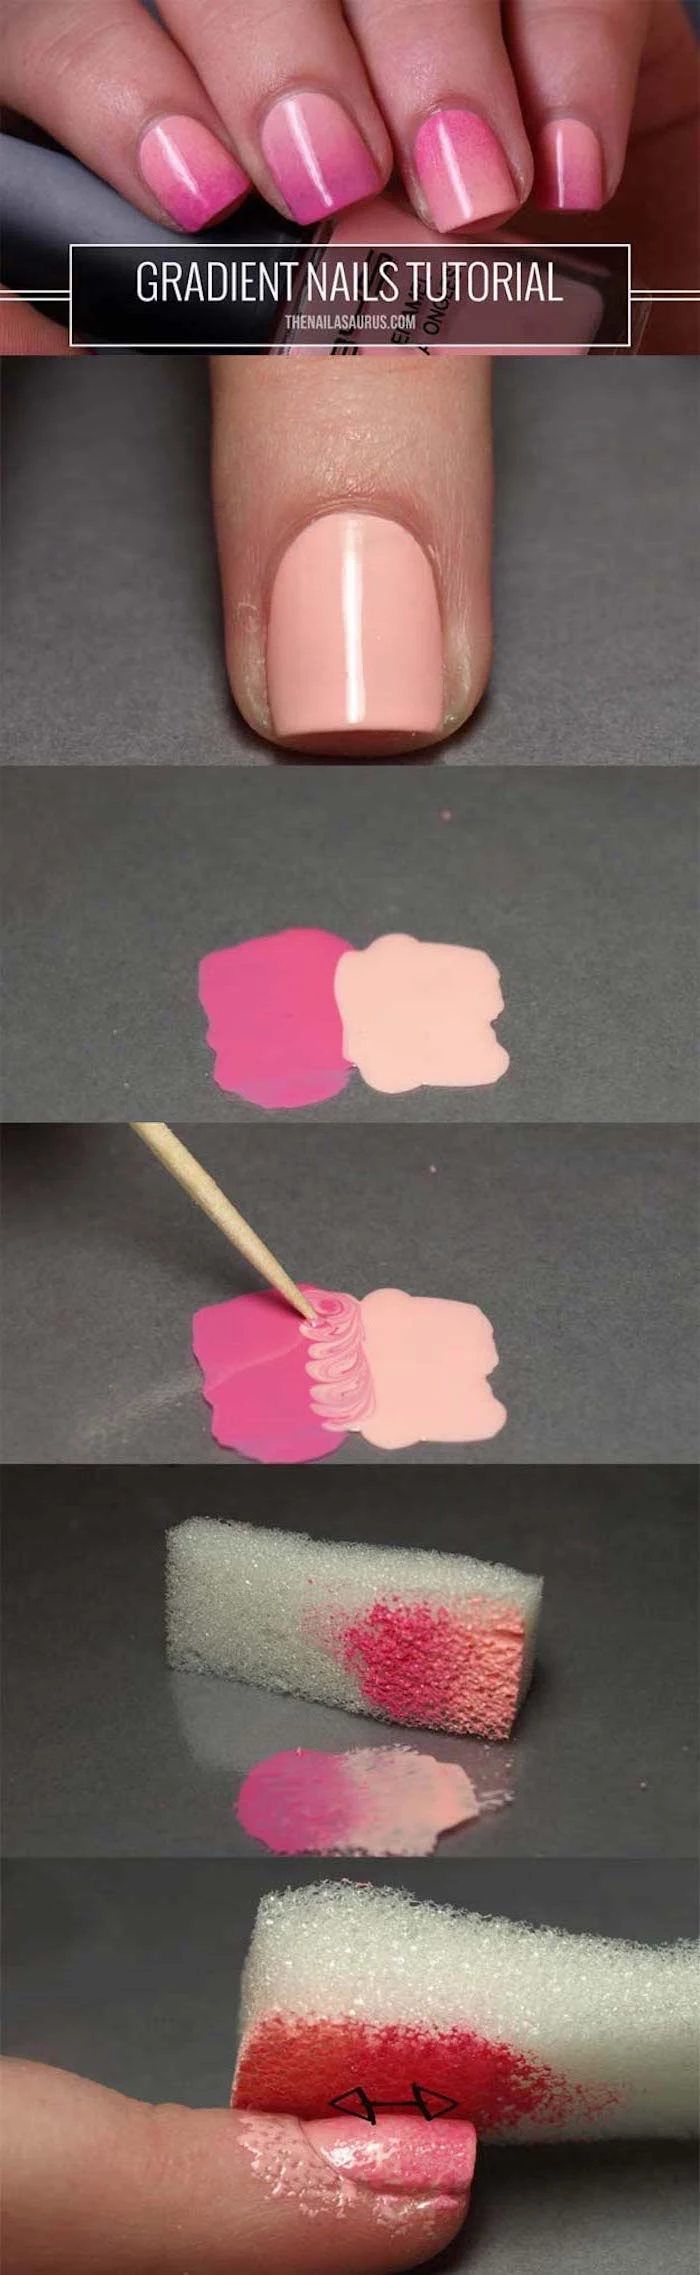
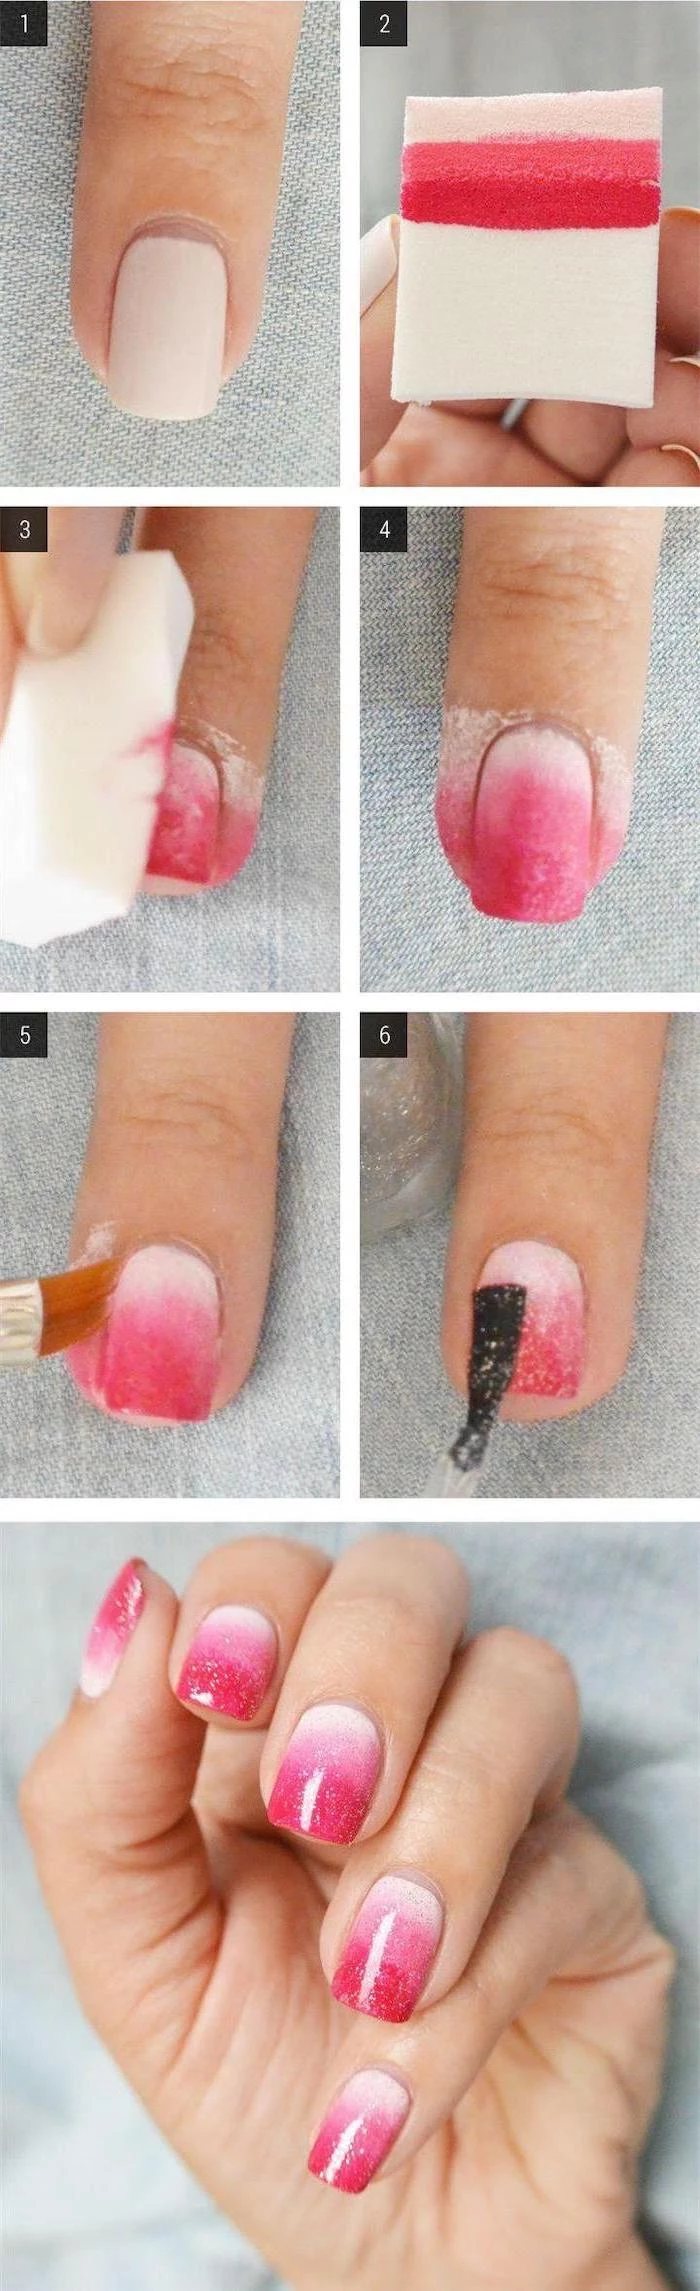
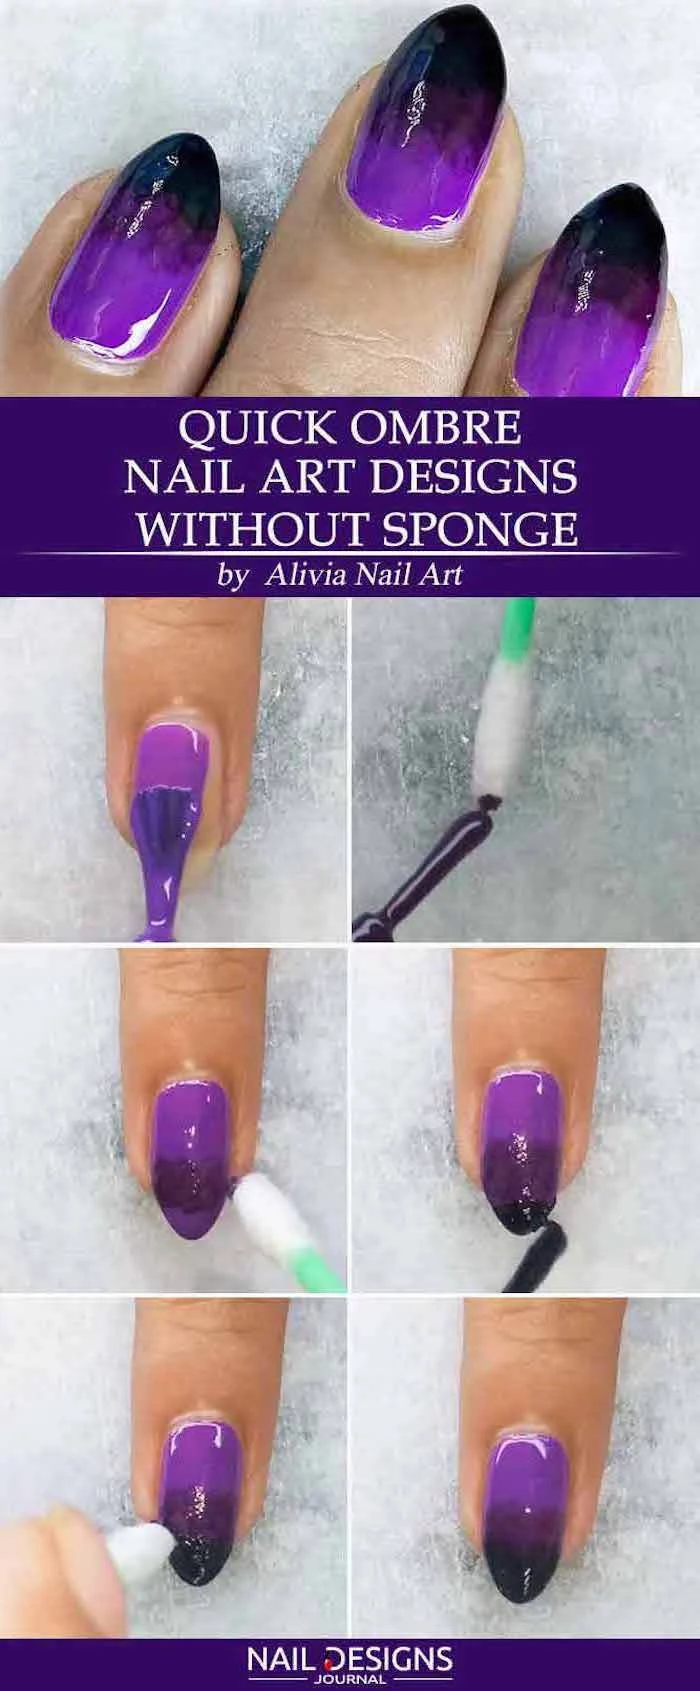
Method 1: The Classic Sponge Technique
This is the most popular way to do an ombre at home. Plan for at least an hour, don’t rush, and you’ll be golden. A common mistake is getting frustrated with the mess—just trust the process!
- Prep Like a Pro: Start with clean, shaped, and lightly buffed nails. Wipe them down with alcohol. Apply a good base coat to protect your nails from staining.
- Apply Your Base Color: Apply one or two coats of the lightest color in your ombre. For that classic pink-and-white French ombre, this would be a sheer pink like OPI’s Bubble Bath. This creates the foundation for your gradient. Let it dry completely (for regular polish) or cure it (for gel).
- Load the Sponge: On your damp sponge, paint stripes of your chosen colors, overlapping them just a tiny bit. Be generous with the polish!
- Lesser-Known Trick: Instead of painting directly on the sponge, try this. Paint your polish stripes onto a non-porous surface like a piece of foil or a silicone nail art mat. Use a toothpick to gently swirl the line where the colors meet. Then, dab your sponge into this pre-blended puddle. It gives you a head start on a smoother blend!
- Stamp and Dab: Gently press and roll the sponge onto your nail using a light bouncing motion. Don’t press hard, or you’ll get a weird texture. You’ll probably need to re-apply polish to the sponge and dab 2-3 times to build up the color. And yes, your fingers will be a mess. This is normal!
- The Satisfying Cleanup: Dip your cleanup brush in pure acetone, wipe off the excess, and carefully trace around your cuticle. A sharp, clean line is what elevates the whole look from homemade to salon-quality.
- Seal the Deal: Apply a generous top coat. This is the magic step that melds the colors and smooths everything out. Sometimes a second coat is needed to get it perfectly glassy.

Common Sponge Fails & How to Fix Them
- It looks patchy… You probably didn’t use enough polish on the sponge. Don’t be shy, load it up!
- I have tiny bubbles! You’re either pressing too hard or your polish is getting thick and old. Use a lighter touch. You can add a few drops of nail polish thinner (not acetone!) to revive gloopy polish.
- My colors turned to mud. You over-blended. The goal is a gentle dabbing motion, not scrubbing. Keep the stripes on your sponge a little more distinct next time.
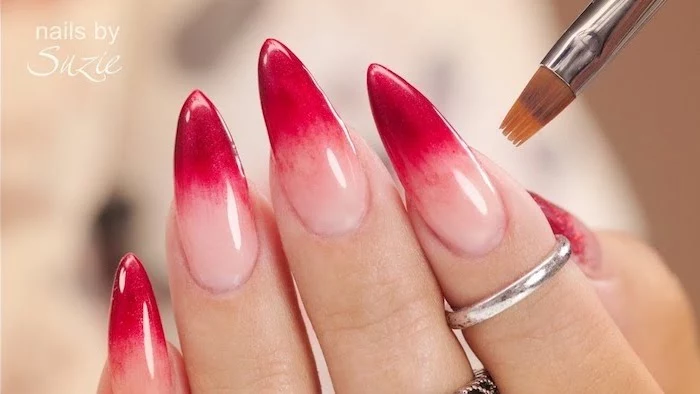
Method 2: Leveling Up with a Brush (For Gel)
Once you’re comfortable with the concept, you might want more control. The brush method is almost exclusively for gel polish because you need that unlimited blend time.
- Prep and Base: Do all the same prep, including applying and curing your lightest base color.
- Apply Both Colors: Apply your light color to the top half of the nail and the darker color to the bottom half. The two colors should meet in a line. Don’t cure it!
- Blend the Seam: Take a clean, dry ombre brush. Lightly tap and drag the brush horizontally across the line where the two colors meet. The bristles will gently pull the colors into each other.
- Clean, Repeat, Clean: This is the most important part. After every one or two passes, wipe your brush clean on a lint-free pad dipped in alcohol. If you use a dirty brush, you’ll just drag a muddy mess around. Continue tapping gently until the line is soft.
- Cure and Top Coat: When you’re happy with your blend, cure it. Then apply your top coat and do a final cure.
Heads up! My first few attempts with a brush were streaky. The secret is a feather-light touch and a constantly clean brush. To clean your brush afterward, just wipe it thoroughly with isopropyl alcohol until no color comes off, then pop the cap back on to protect the bristles.
So, Sponge or Brush? Which Is For You?
Not sure which path to take? Here’s the breakdown. The sponge method is fantastic for beginners, works with any kind of polish, and is great for creating a soft, almost-airbrushed look. The downside is that it’s messy and can sometimes leave a slight texture that needs a thick top coat. It’s best for simple two-color gradients.
The brush method, on the other hand, gives you ultimate control, creates a more hand-painted look, and is surprisingly clean. But, it really only works with gel polish and definitely requires some practice to master that light touch. It’s the go-to for more complex, multi-color blends or sharp diagonal ombres.
A Quick Win: The Accent Nail
By the way, feeling a little intimidated? Don’t! You don’t have to commit to a full set of ten ombre nails on your first try. Just do an accent nail on your ring finger. It’s a great way to practice the technique without the pressure, and it still looks super stylish.
Choosing Your Colors: Pro Tips for Popular Looks
Certain color combos are classics for a reason. They just work.
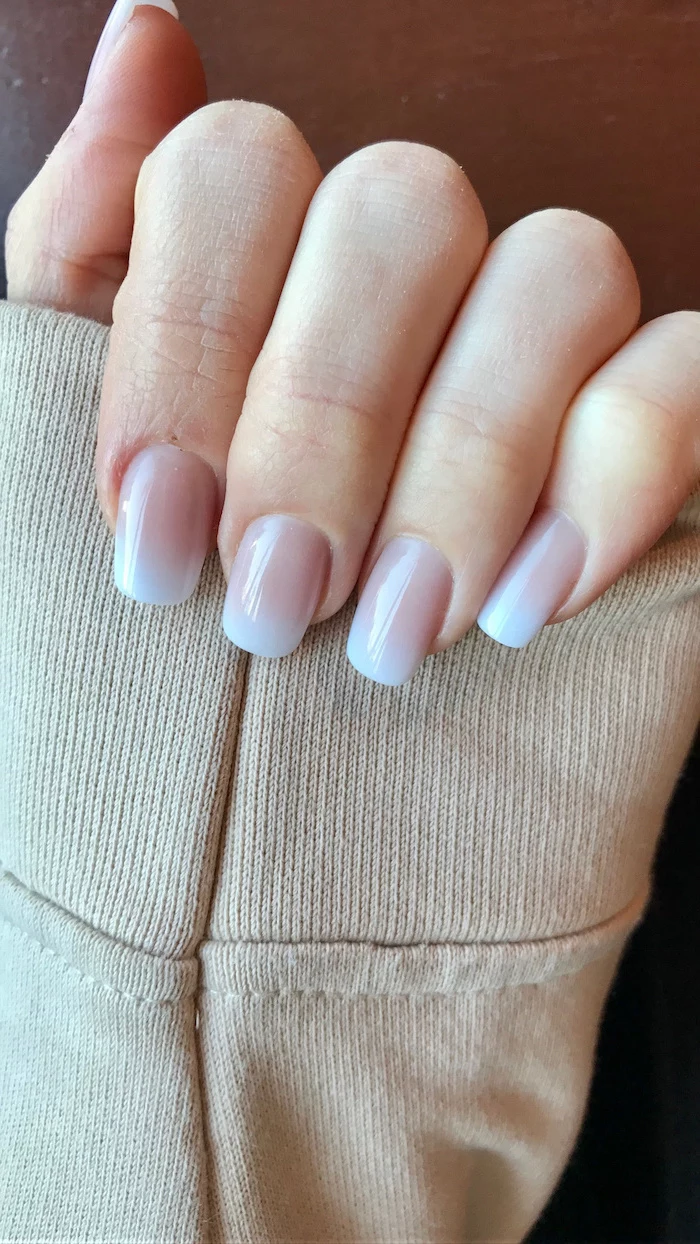
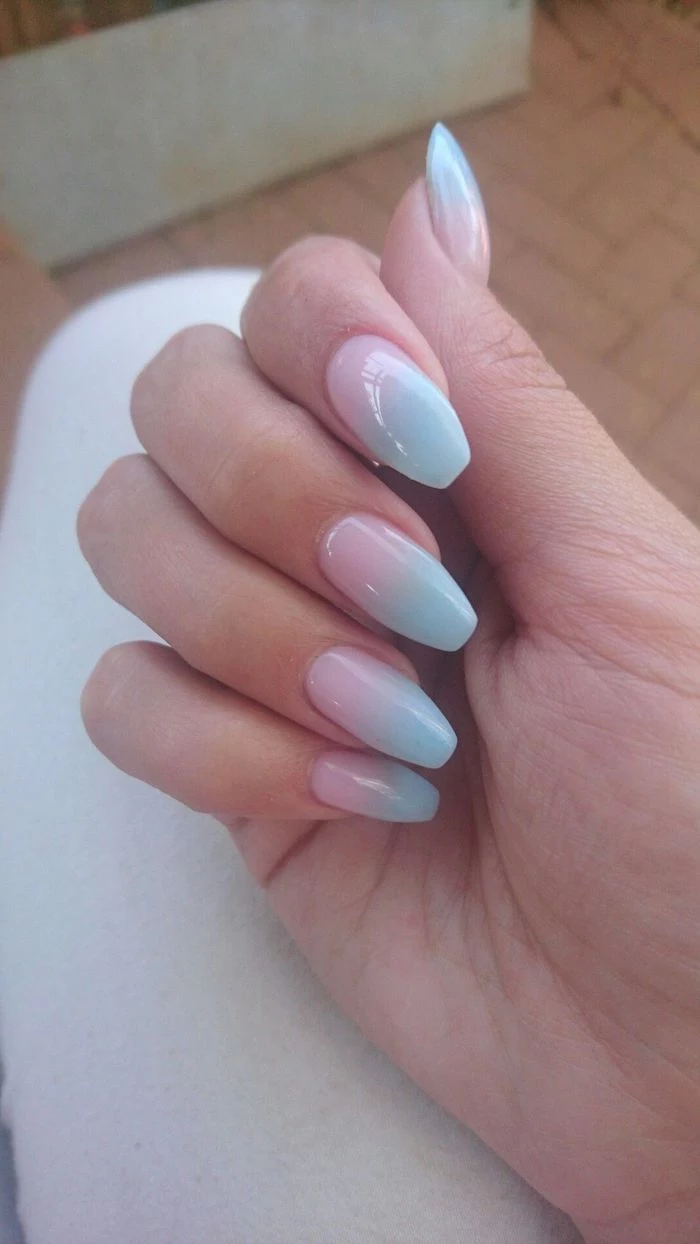
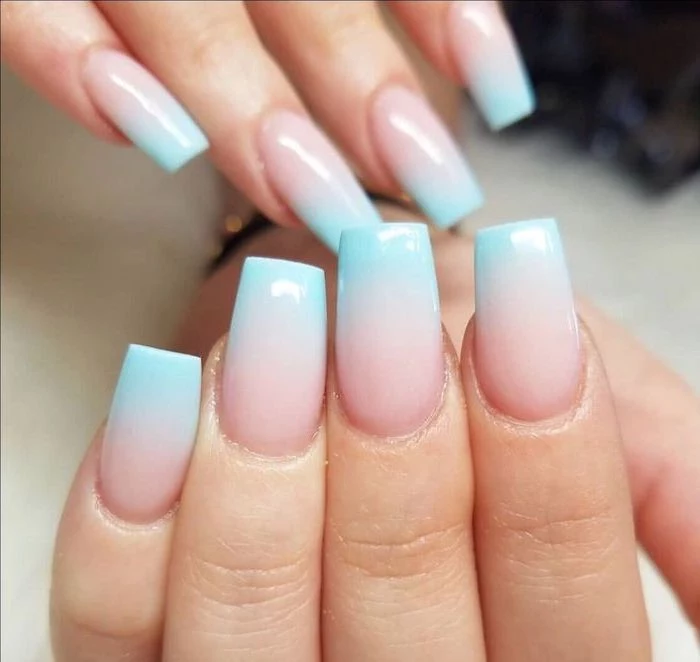
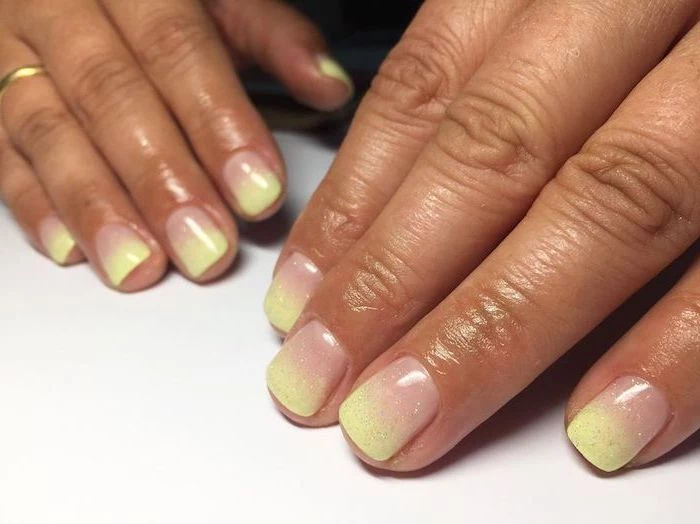
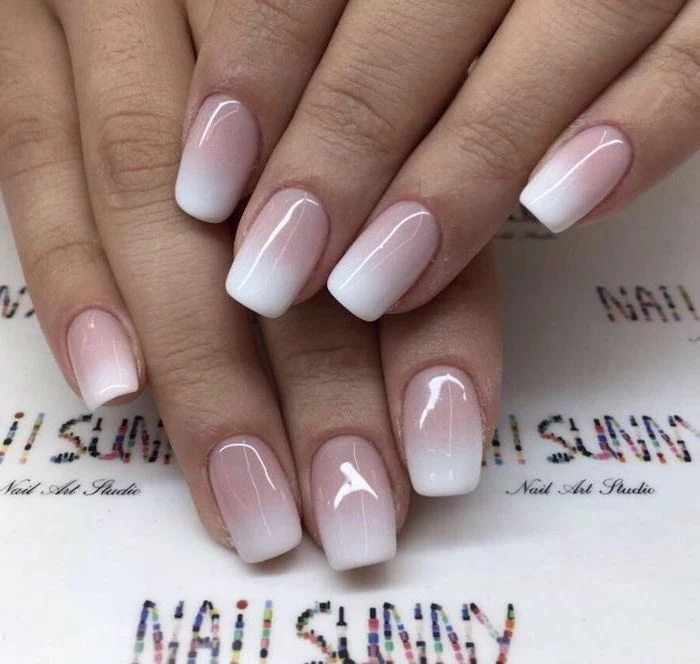
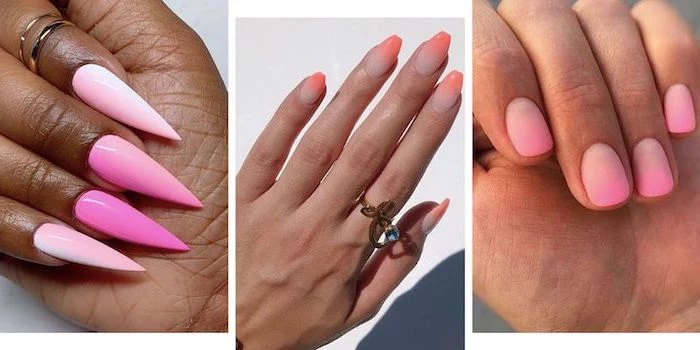
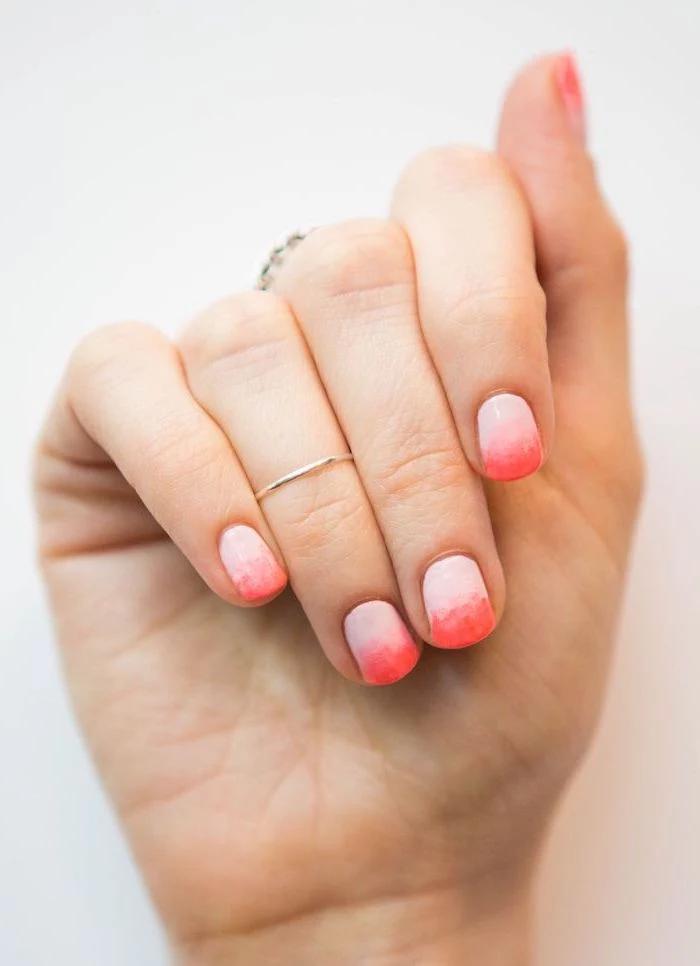
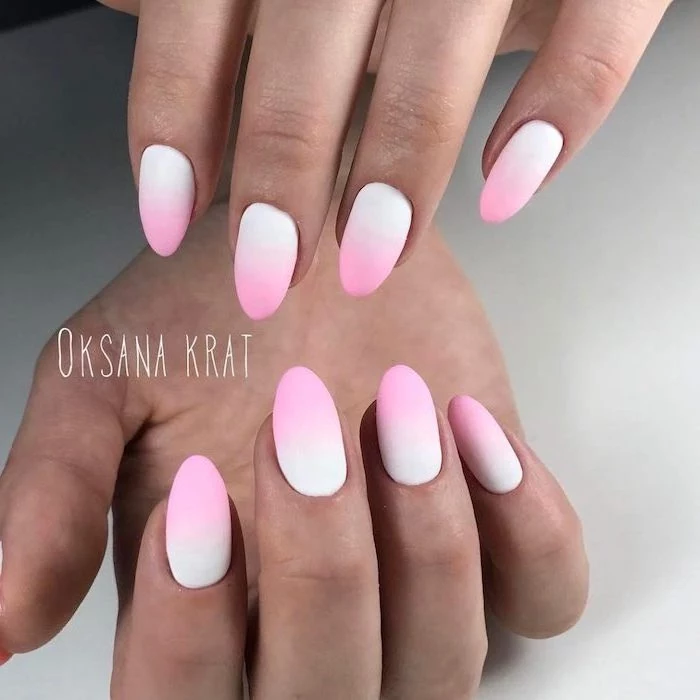
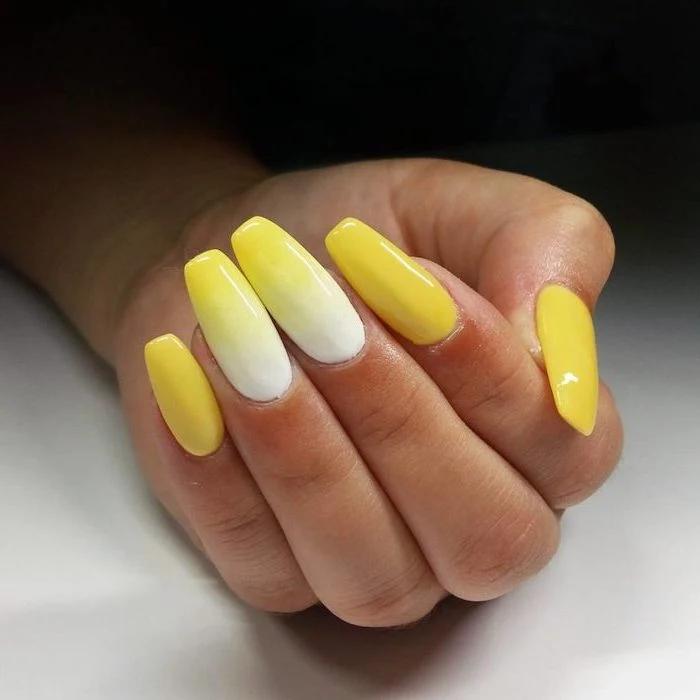
- The Classic French Ombre: This is that soft, timeless gradient from a milky white tip to a sheer nude base. My most requested look! The secret is to avoid a harsh, opaque white. A sheer, milky white blends much more softly. The nude should be chosen to complement your skin tone.
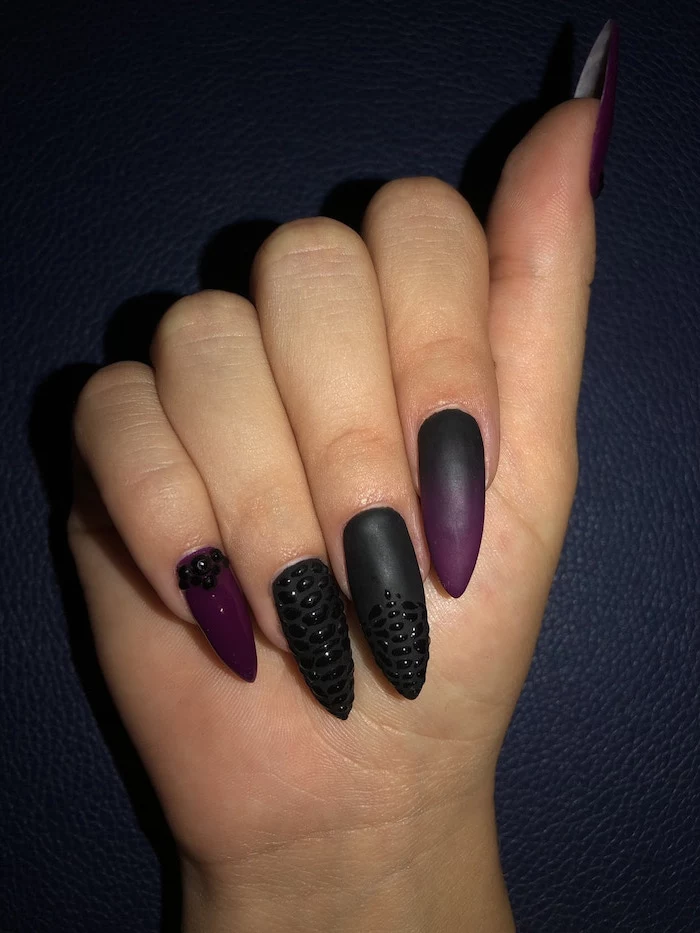
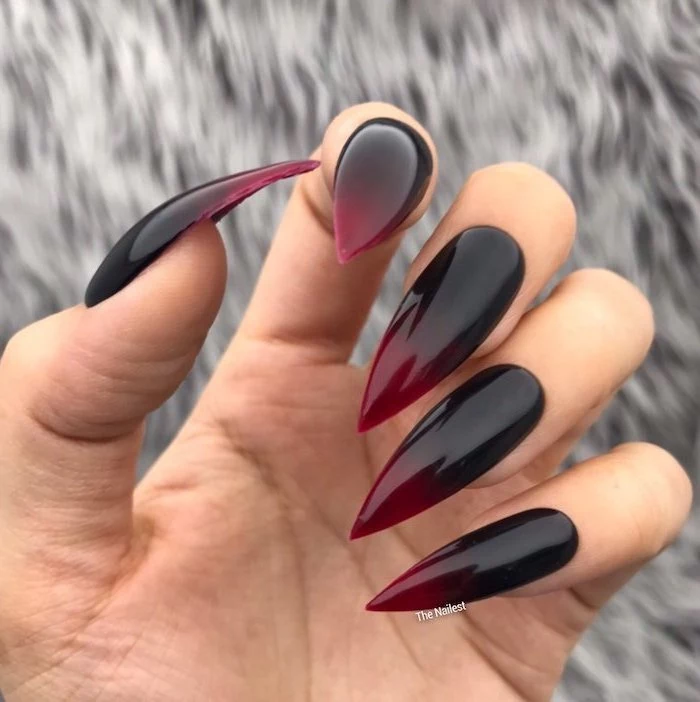
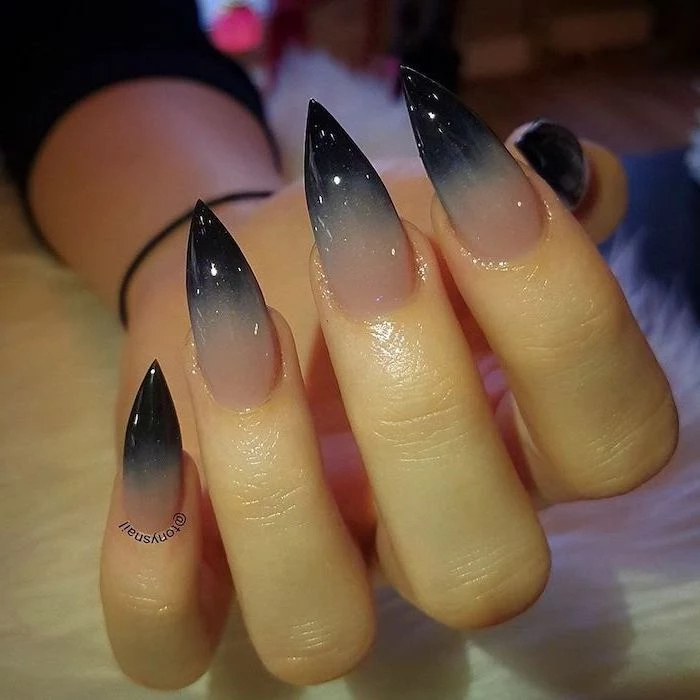
- High-Contrast Blends (like black and red): These look amazing but can be tricky. The dark color can easily overpower the light one. Pro tip: Apply the light color (red) over about two-thirds of the nail, and the dark color (black) on just the top third. When you blend, the black will naturally travel down and create a balanced look.
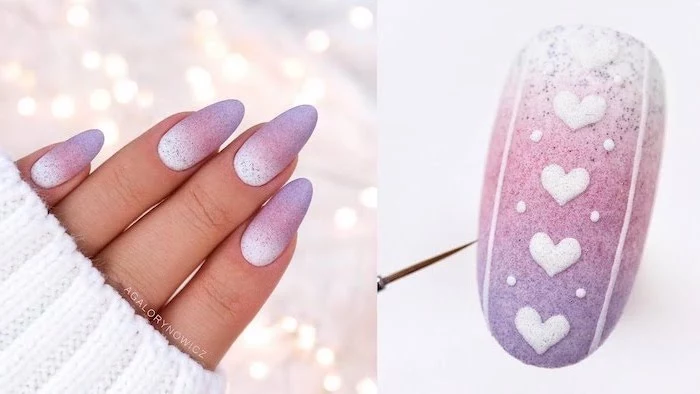
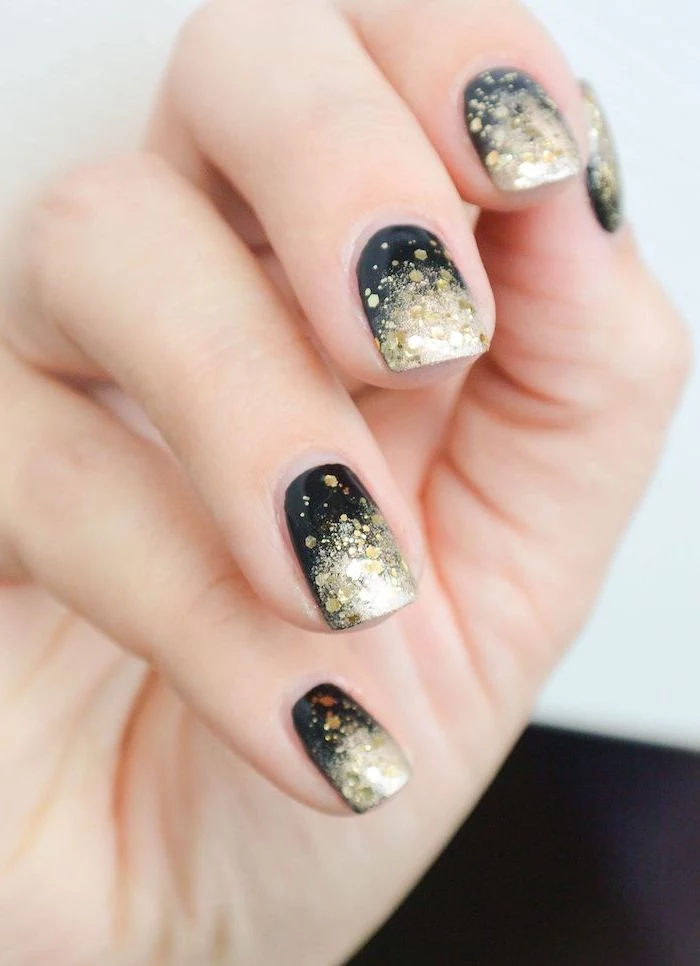
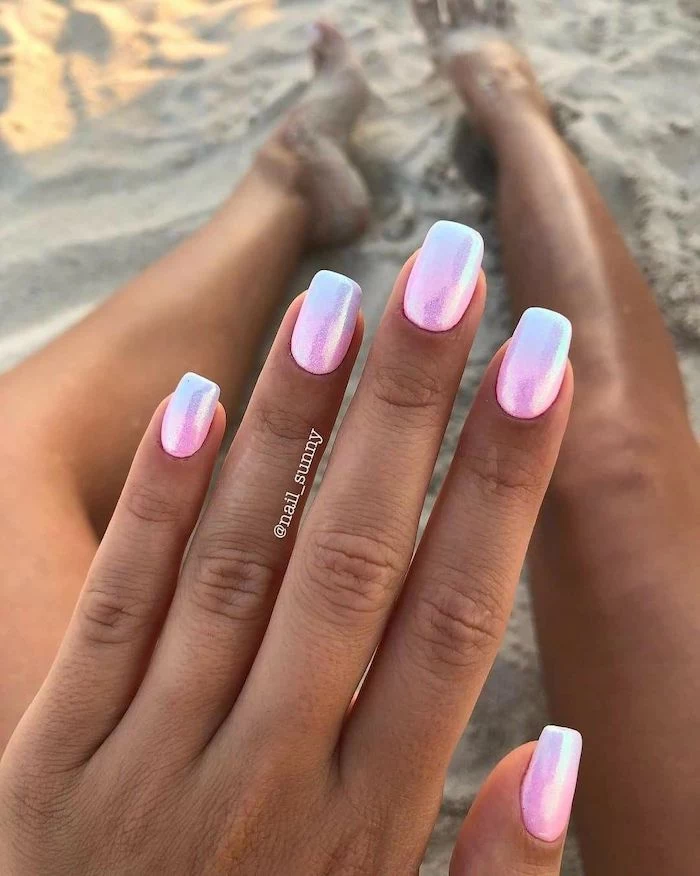
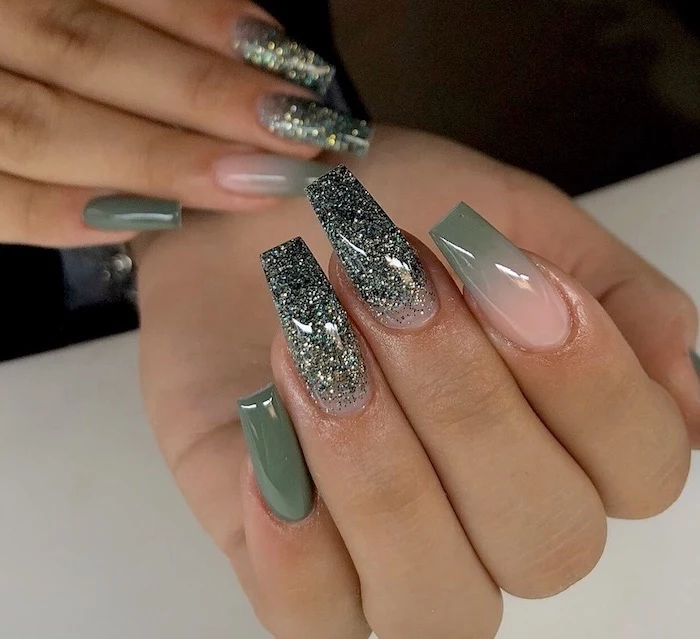
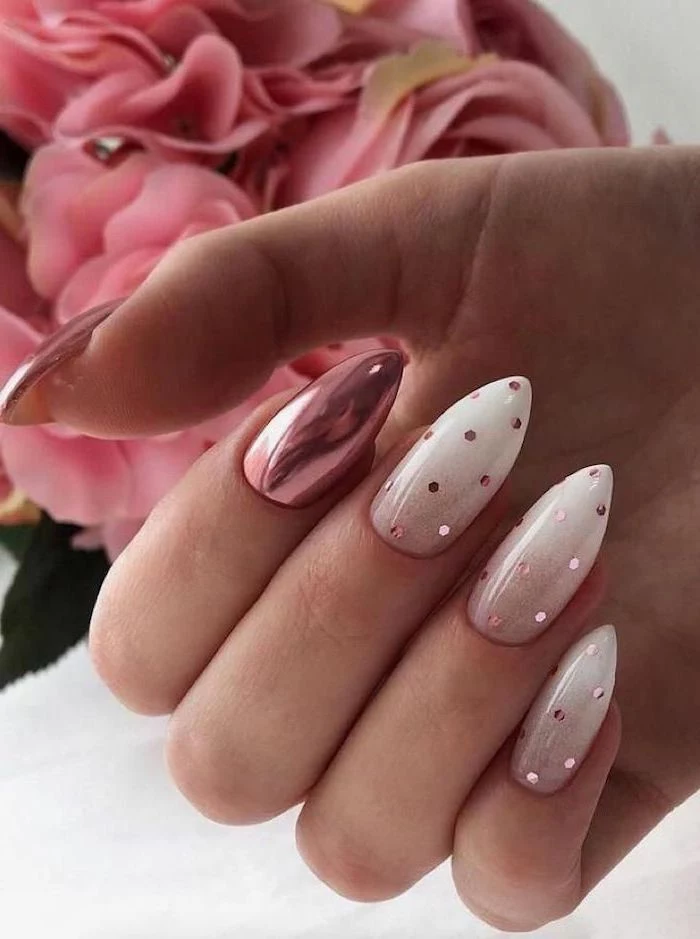
- Glitter Fades: Want some sparkle? This is often easier than blending two solid colors. Apply your base color, then use a small brush to apply a dense glitter polish near your cuticle, fading it out as you drag it toward the tip. So pretty!
Let’s Talk Safety (Seriously)
Doing your nails at home is fun, but we’re still working with chemicals. A little caution goes a long way.
- Ventilation is a MUST. Polish and acetone have strong fumes. Open a window or use a small fan to keep the air moving away from your face. Trust me, you’ll avoid a headache.
- Heads Up on Gel Allergies. Gel polish is amazing, but it contains ingredients that can cause a lifelong skin allergy if used improperly. The number one rule: DO NOT get it on your skin. If you do, wipe it off with alcohol before you cure. Curing gel on your skin is the fast track to developing a sensitivity.
- About Those UV Lamps… To be extra safe with UV exposure, you can either apply sunscreen to your hands 20 minutes before you start or buy a pair of fingerless UV-protective gloves. Just search for “UV gloves for gel manicure” on Amazon—they’re usually around $10 and offer great peace of mind.
- Don’t Peel Your Polish! Never, ever pick or peel off gel polish. You’re tearing off layers of your natural nail along with it, which leads to damage. Always follow the proper soak-off removal process.
Ultimately, creating a beautiful ombre is a skill that blends art and science. Be patient with yourself. Your first try might not be Instagram-perfect, and that is completely okay. With a bit of practice and the right tools, you’ll be creating seamless, professional-looking gradients you’ll be proud to show off.
Inspiration Gallery
Not all sponges are created equal. For the smoothest blend, skip the porous kitchen sponge and grab a high-density cosmetic wedge. The kind you use for foundation application is perfect. Its fine texture prevents unsightly bubbles and soaks up less polish, giving you a more pigmented transfer onto the nail.
- To prevent premature chipping, always “cap the free edge.” This means running the sponge or top coat brush lightly along the very tip of your nail.
- Reapply your top coat every 2-3 days. This small step acts like a shield, massively extending the life of your gradient.
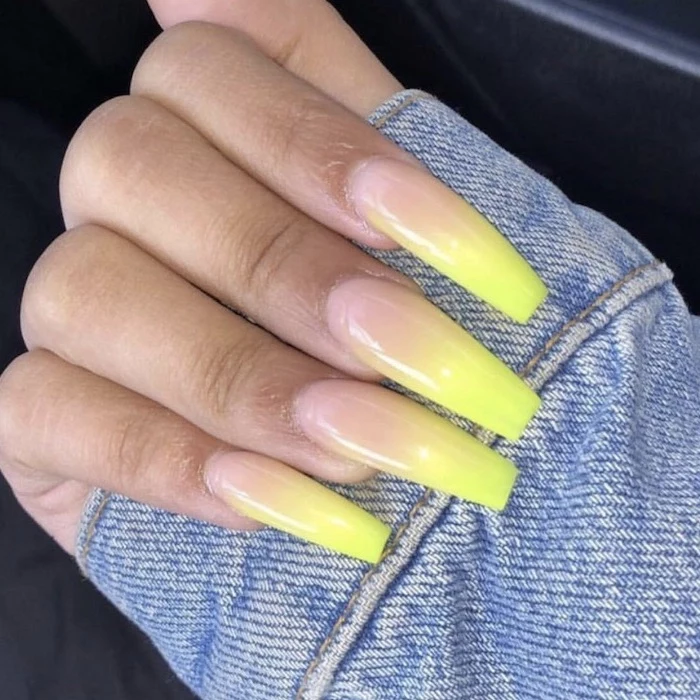
The secret to a vibrant gradient: Always start with an opaque white or nude base coat. Applying your colors over a neutral canvas makes them pop, preventing your natural nail color from dulling the effect. For pastel or neon ombres, a pure white base is non-negotiable.
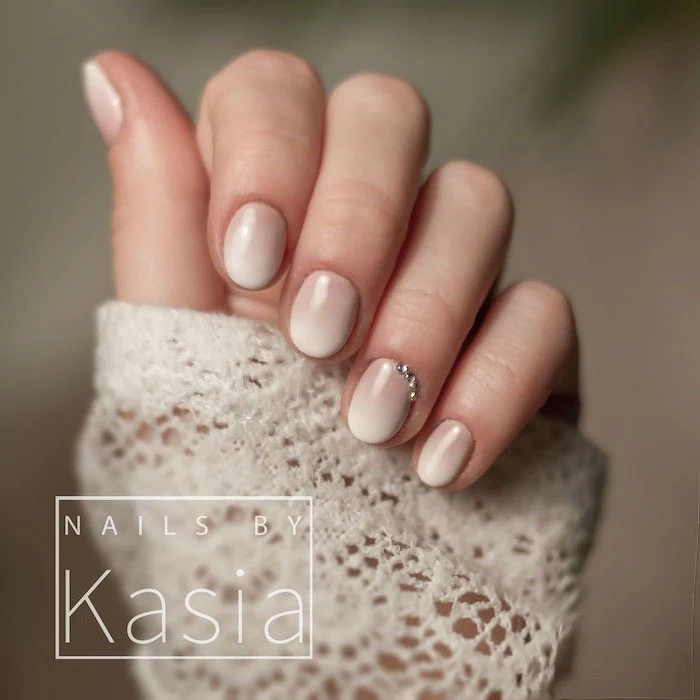
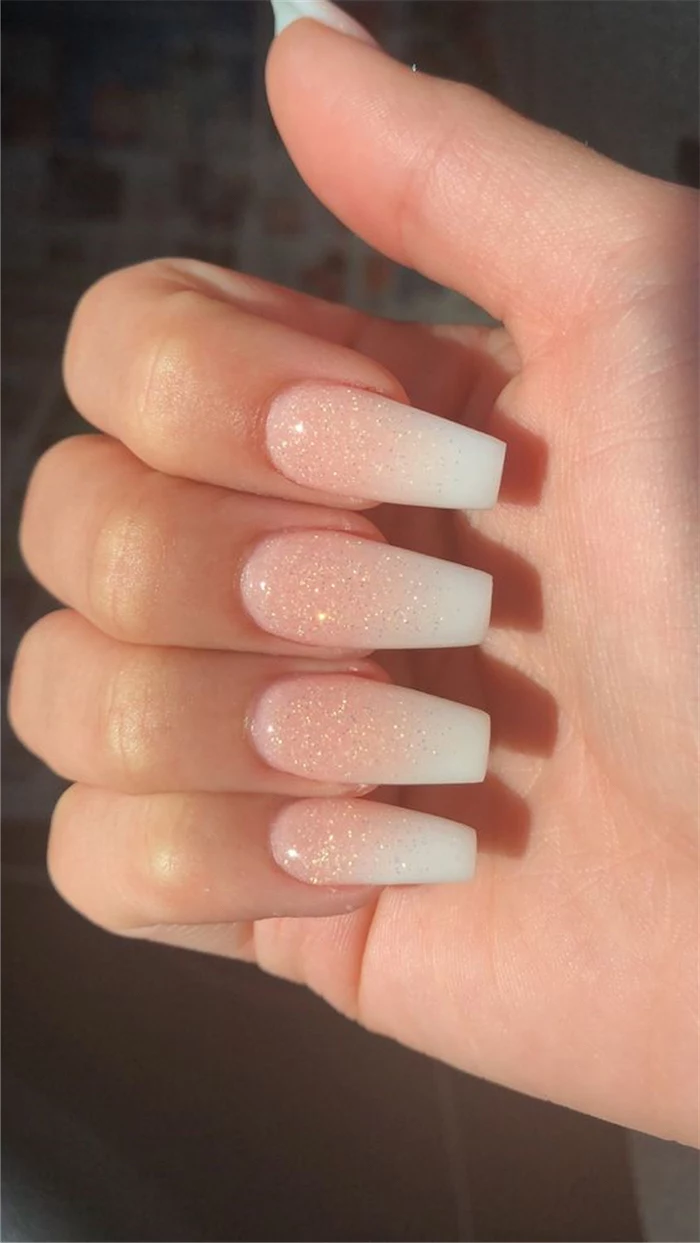
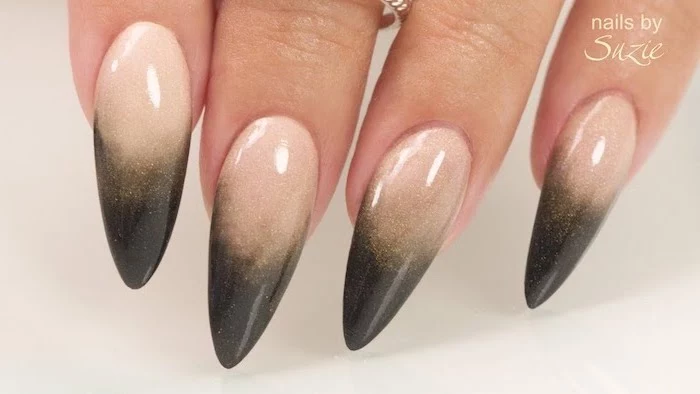
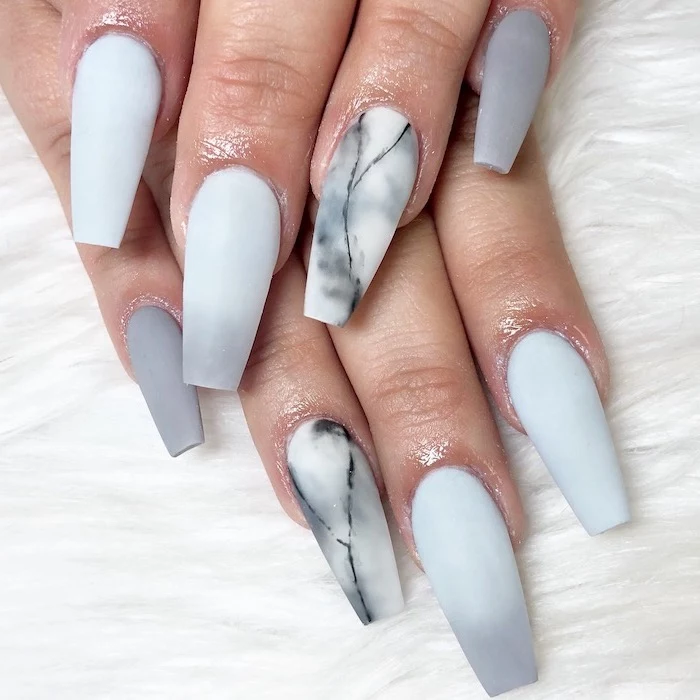
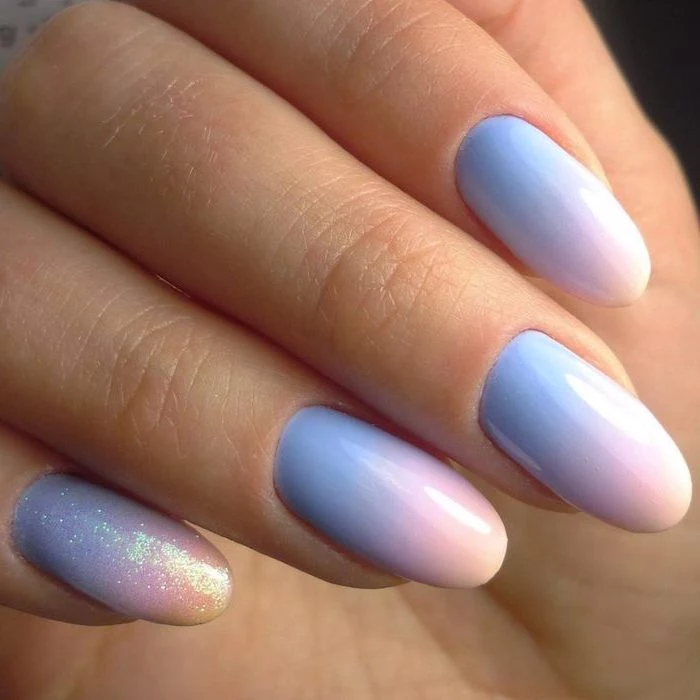
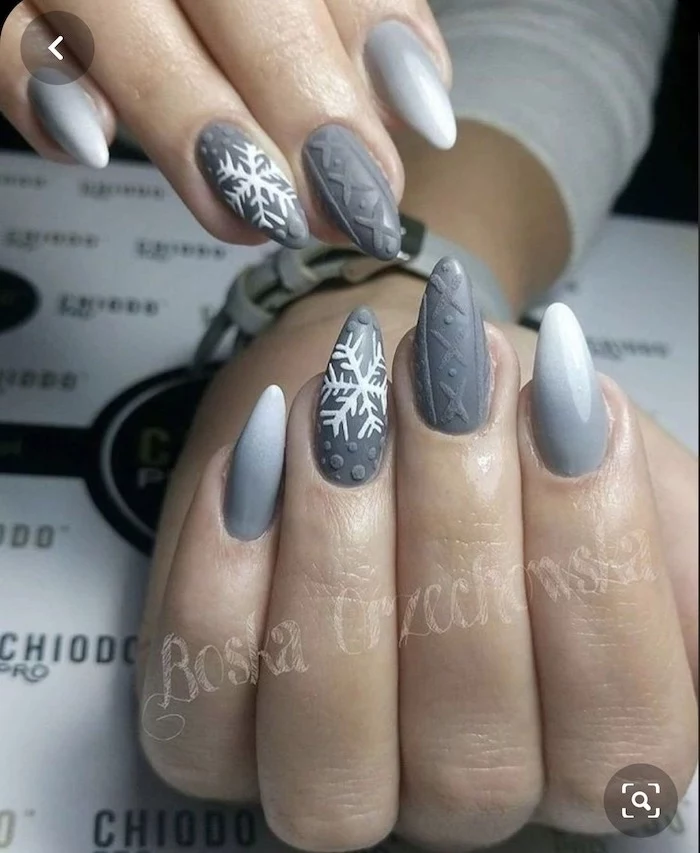
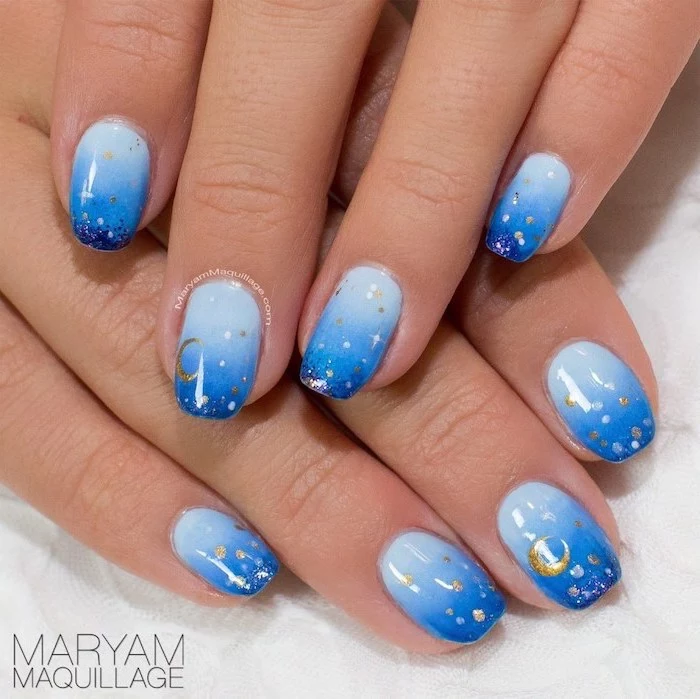
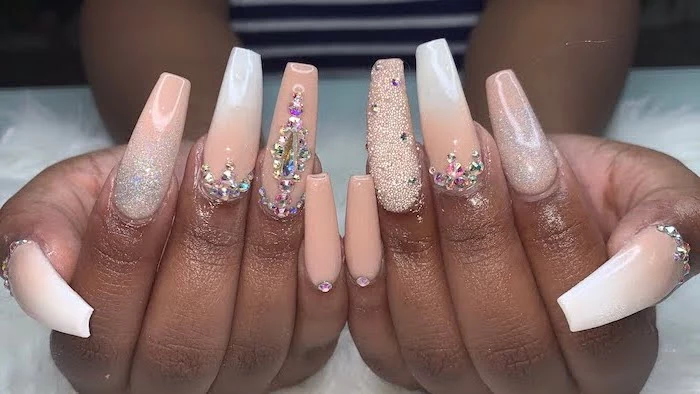
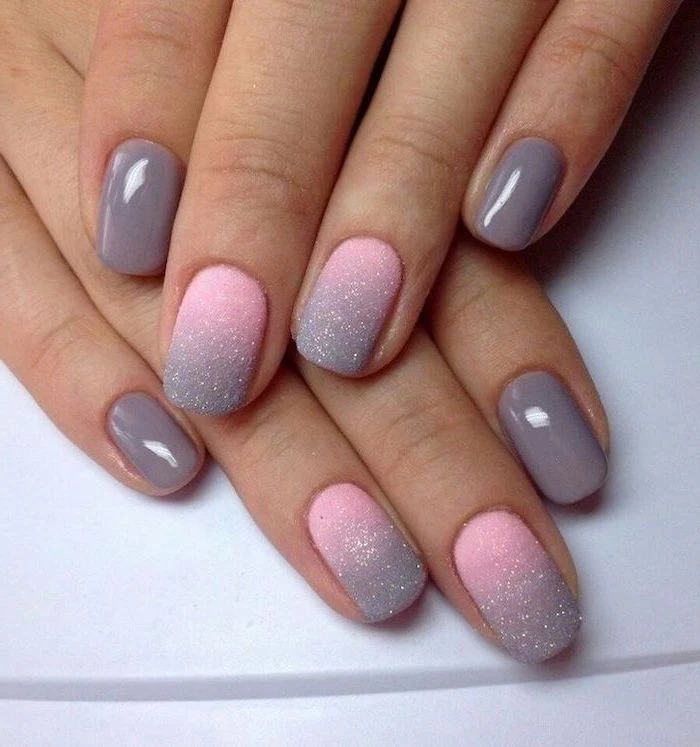
The ‘Baby Boomer’ nail, a delicate nude-to-white gradient, is a modern take on the classic French manicure and currently one of the most requested salon designs.
Messy cuticles are the tell-tale sign of a DIY job. For a pro finish, cleanup is key. Before you even start, prep your battlefield:
- Apply a liquid latex barrier, like Pueen’s popular pink Latex Tape, around your nail. It peels off in one piece, taking all the mess with it.
- Keep a small, flat brush and a dappen dish of acetone handy for precision cleanup of any stray smudges.
Does ombre work on short nails?
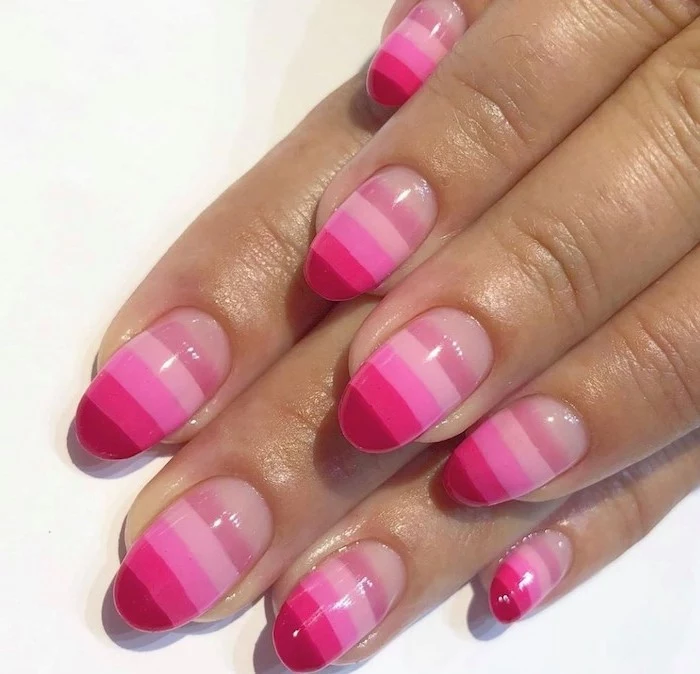
Absolutely! While long nails provide a larger canvas, short nails can look incredibly chic with a gradient. The trick is to use lighter, less-contrasting colors to create an illusion of length. A vertical ombre, with colors blending from left to right instead of top to bottom, is also a fantastic and flattering option for shorter nail beds.
Standard Top Coat: Provides shine and basic protection.
Plumping Top Coat: Thicker formulas, like the Essie Gel Setter or Seche Vite, create a gel-like, high-gloss finish. This is ideal for ombre as it smooths over any slight texture from the sponge application, resulting in a flawless, glassy surface.

Over 90% of nail technicians on Instagram report that gradient and ombre effects are among their top 5 most-liked content types.
This huge social media buzz is what drives the trend’s staying power. It inspires millions of users to try it themselves, sharing their creations and fueling a cycle of endless color inspiration. Your next favorite combo is just a hashtag away.

- Your colors blend seamlessly with no harsh lines.
- You avoid a thick, textured, or bubbly finish.
The secret? After applying polish to your sponge, dab it once or twice on a piece of paper or a palette. This removes the excess product and pre-blends the colors slightly before they even touch your nail.
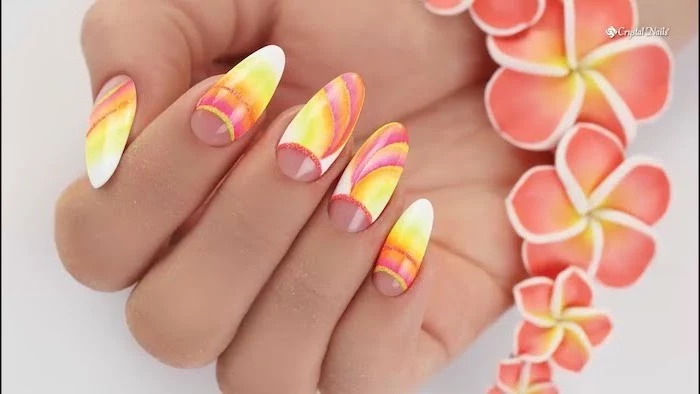
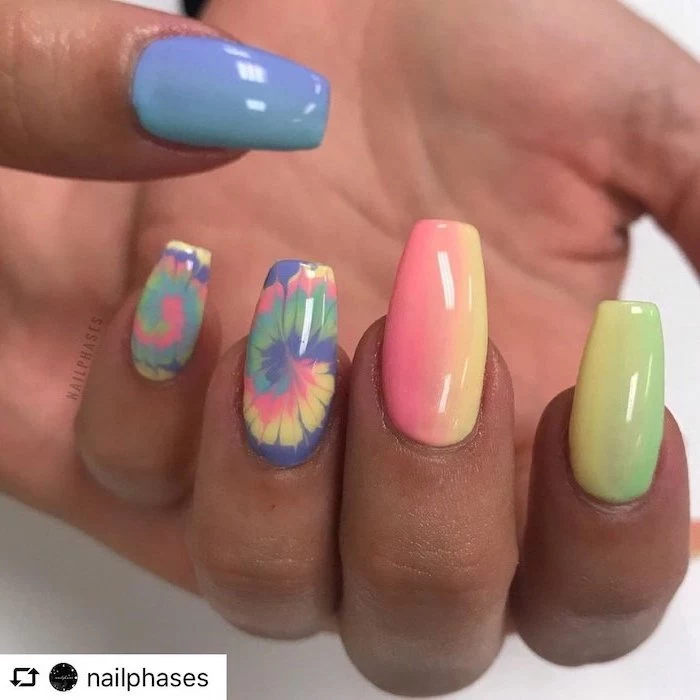
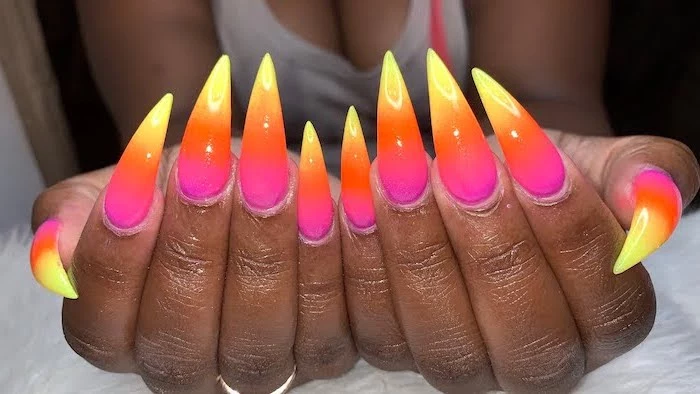
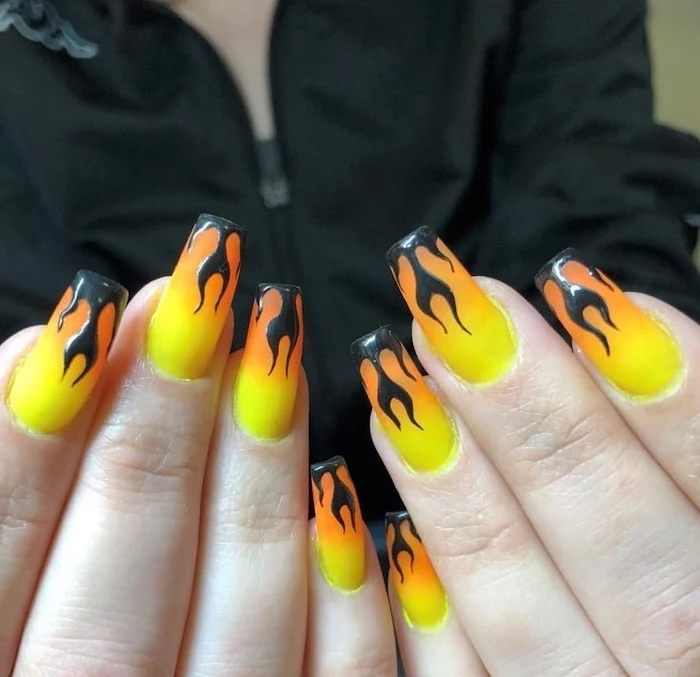
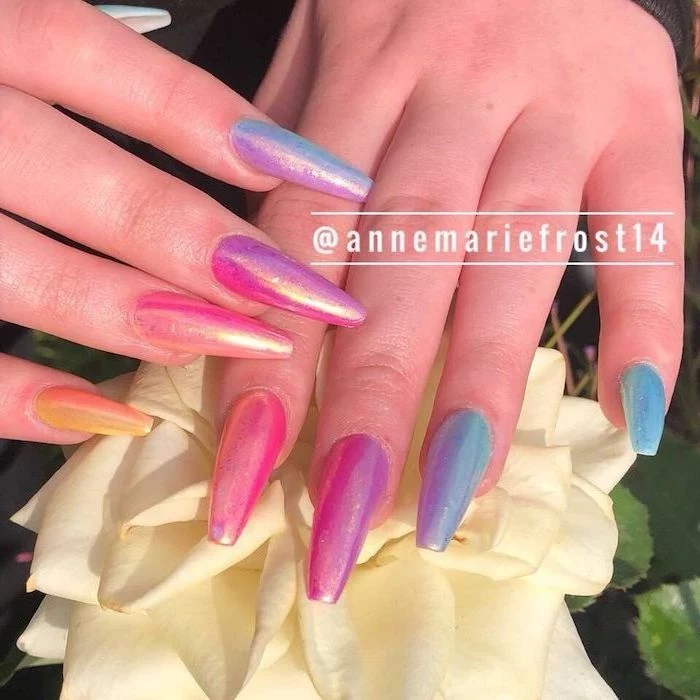
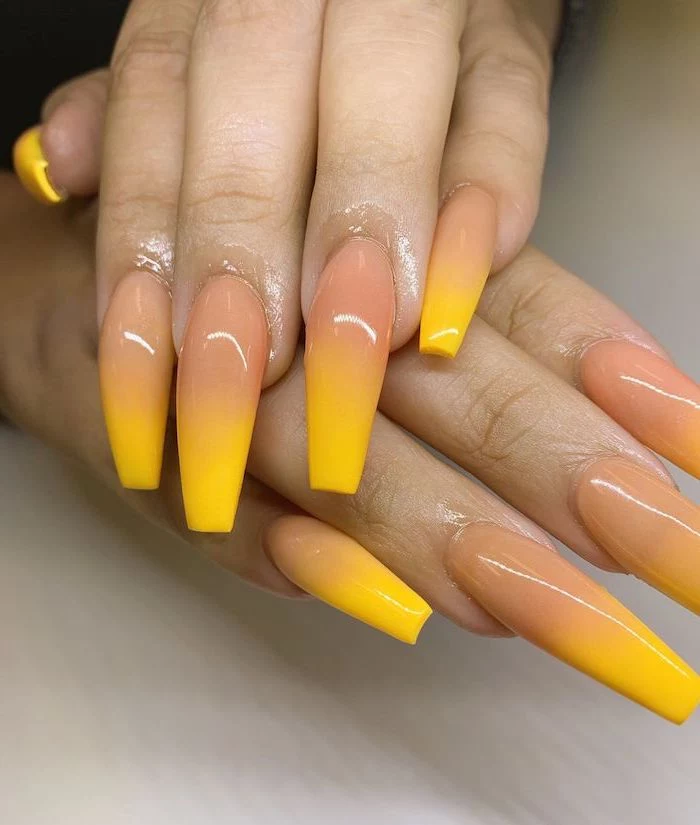
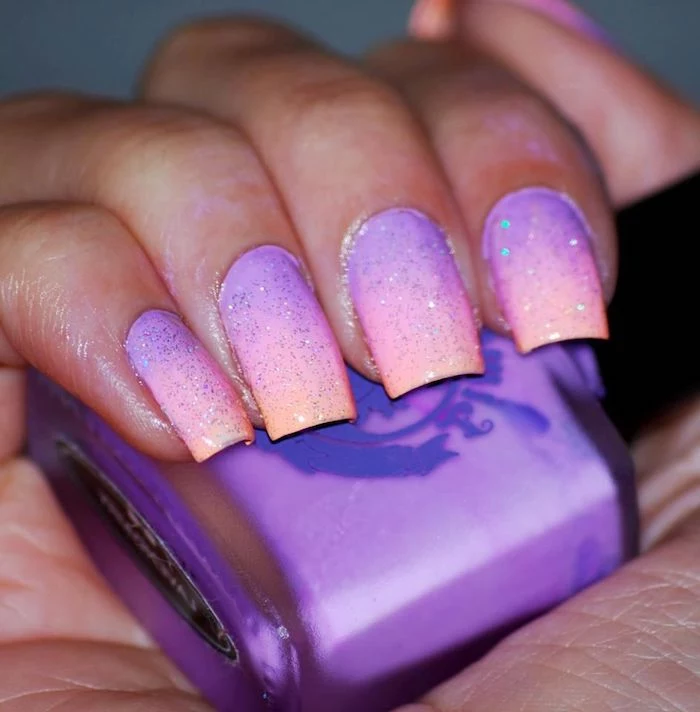
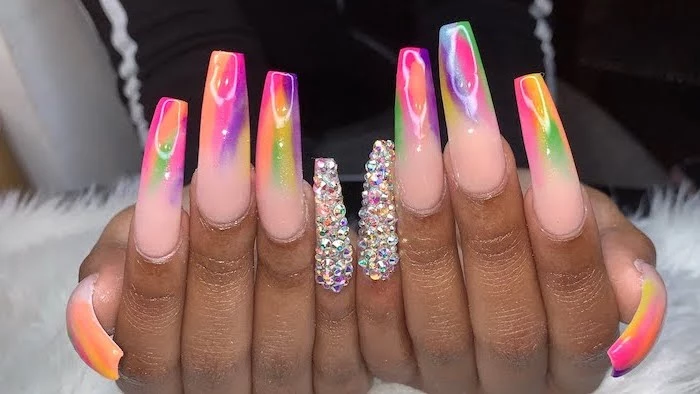
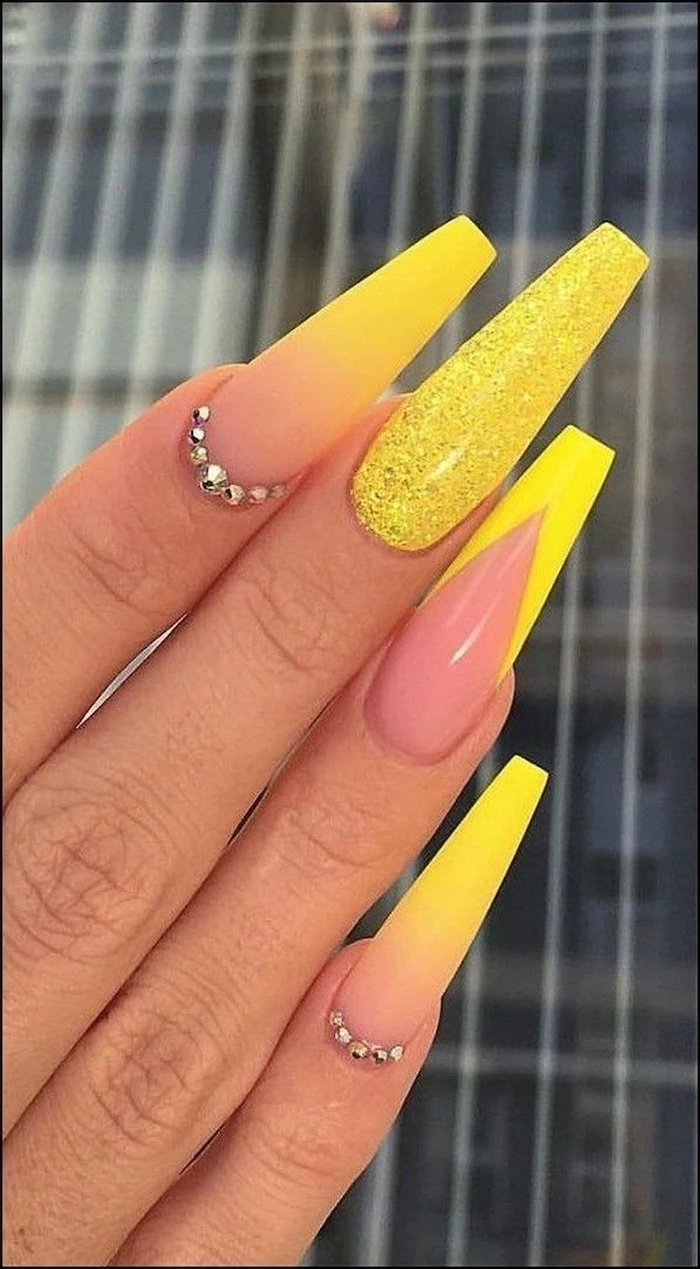
Create a stunning ‘Sunset Ombre’ by blending a hot pink near the cuticle, a fiery orange in the middle, and a vibrant yellow at the tip. It’s a bold, warm look that evokes the feeling of a perfect summer evening. It works especially well with a glossy top coat to maximize the vibrancy.
Pro-Tip for Glitter Gradients: Instead of sponging, try a ‘painting’ technique. Apply your base color. Then, using a small, stiff brush, dab the glitter polish starting from the tip and lightly feathering it down towards the cuticle. This gives you more control over the glitter placement for a perfect fade.
Hate removing glitter polish?
The foil method is your best friend. Soak a piece of a cotton ball in pure acetone, place it on your nail, and wrap your fingertip tightly in a small square of aluminum foil. Wait 10-15 minutes. The glitter polish will slide right off with the cotton, saving you from damaging your nails with scrubbing.
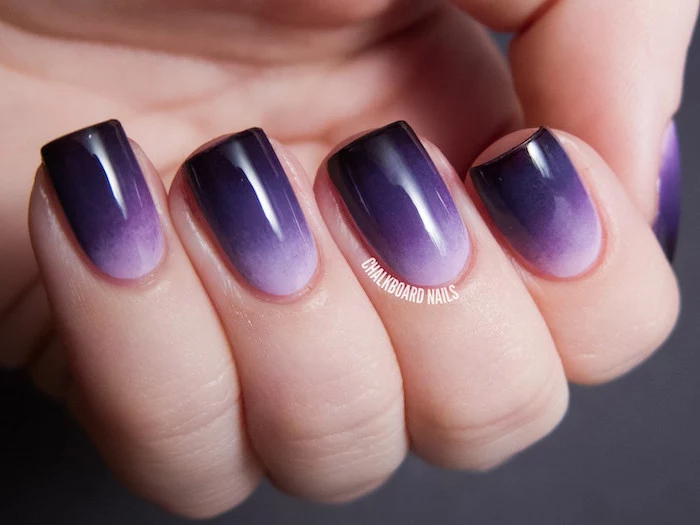
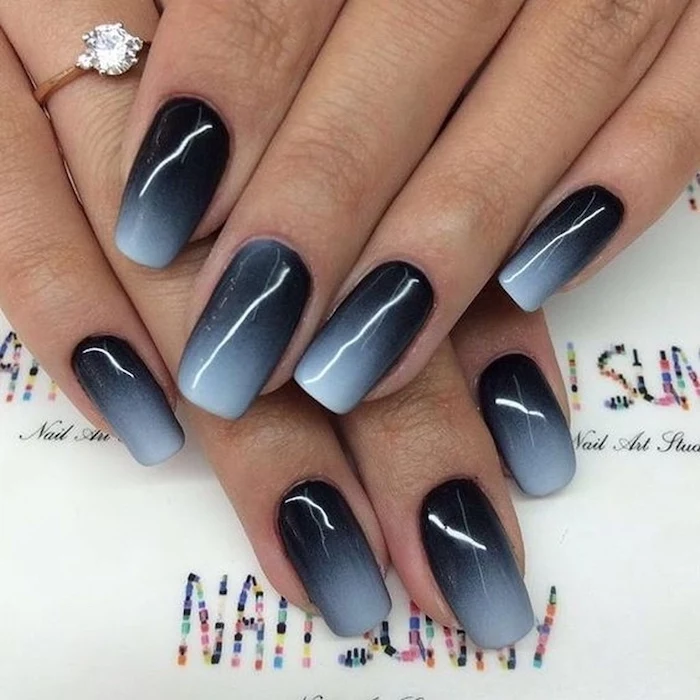
Matte Finish: This gives your ombre a modern, velvety, and almost soft-touch appearance. It’s fantastic for diffusing dark or moody color combinations, like a black-to-burgundy blend. Try the OPI Matte Top Coat for a streak-free finish.
Glossy Finish: The classic choice. A high-gloss top coat makes colors pop and gives your nails a liquid-smooth, professional look, hiding minor imperfections from sponging.
A modern LED nail lamp can cure a layer of gel polish in as little as 30-60 seconds, whereas older UV models can take 2-3 minutes. This speed is a huge advantage when doing multi-layer nail art like ombre.
- It can make short or wide nails appear longer and more slender.
- It offers a unique twist on the classic horizontal fade.
The technique? A vertical ombre. Simply paint your color stripes vertically on your sponge and dab side-to-side instead of up-and-down. It’s an easy way to switch things up!
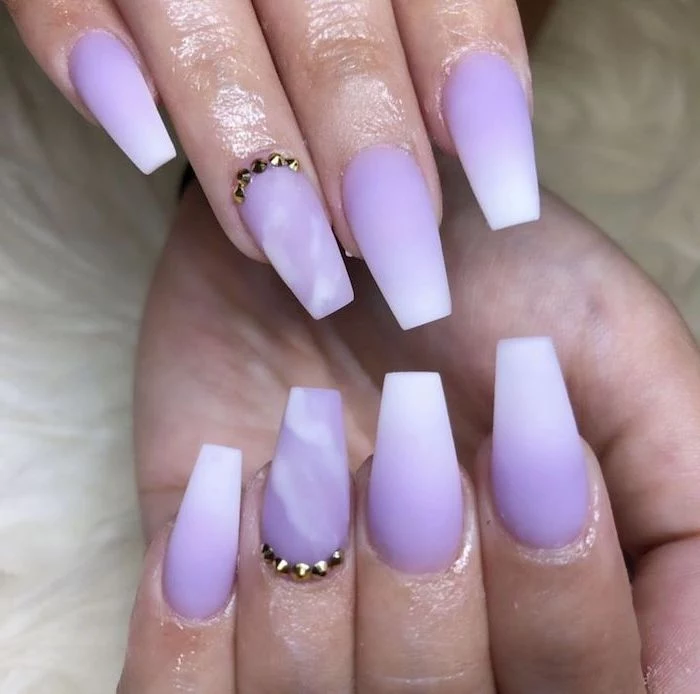
For an effortlessly chic look that’s perfect for weddings or everyday wear, you can’t go wrong with a classic ‘Baby Boomer’ ombre. The key is a subtle, milky transition.
- Classic: A sheer pink base like Essie’s ‘Ballet Slippers’ blended into a soft, milky white tip.
- Modern Twist: A warm beige or nude base like OPI’s ‘Bubble Bath’ for a slightly warmer, more natural effect.
Looking for drugstore polishes that are perfect for ombre? Look no further than the Sally Hansen Insta-Dri line. Their formula is highly pigmented and their famously wide color range means you can always find two or three shades that will blend beautifully together. Plus, they dry fast, which is a bonus for layering top coats.
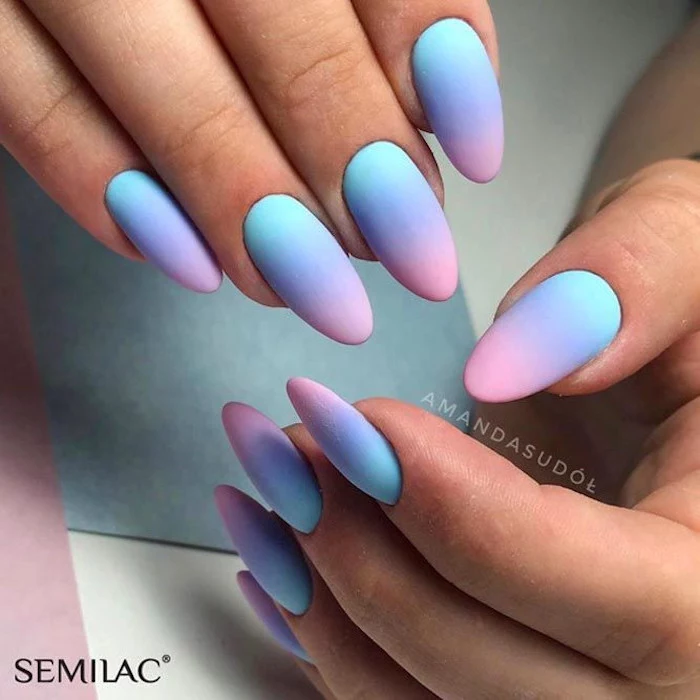
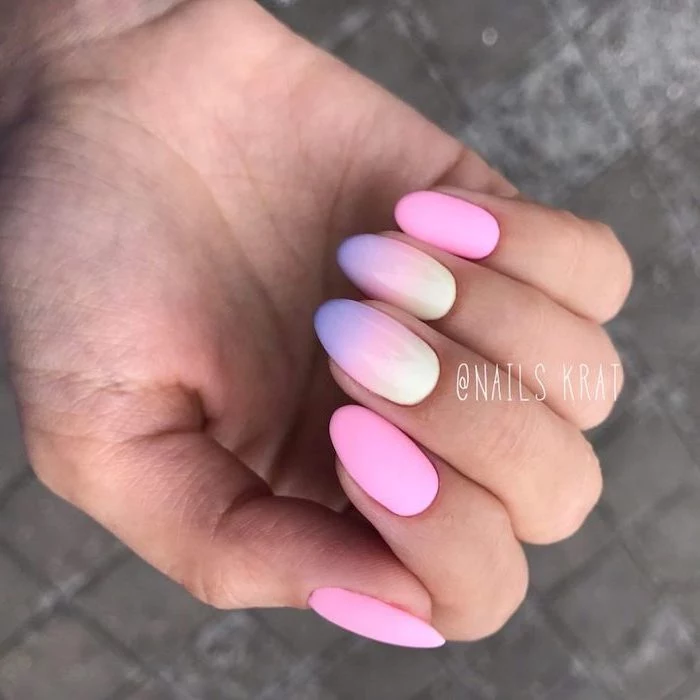
Analogous Colors: These are neighbors on the color wheel (e.g., blue and green, or pink and purple). They blend together naturally for a smooth, harmonious gradient that is very forgiving for beginners.
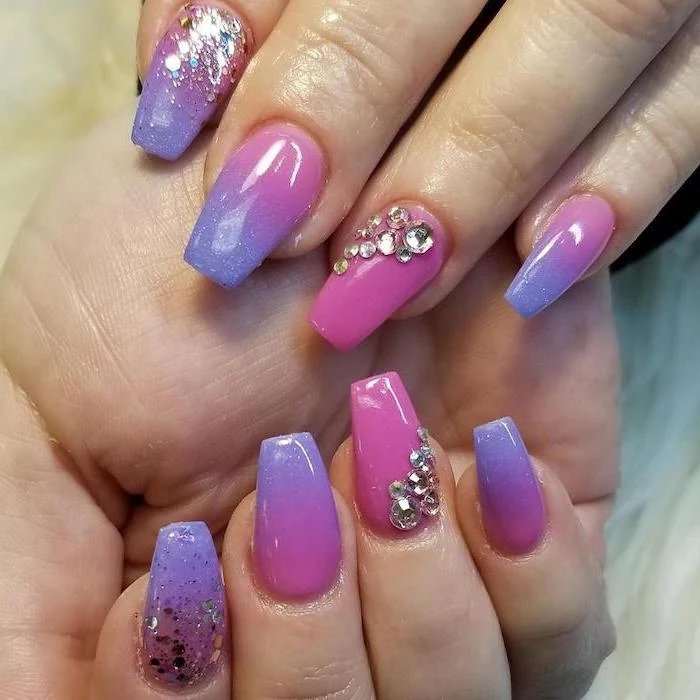
Complementary Colors: These are opposites on the color wheel (e.g., blue and orange, or yellow and purple). They create a dramatic, high-contrast look that really makes a statement, but requires more careful blending to avoid a muddy transition.
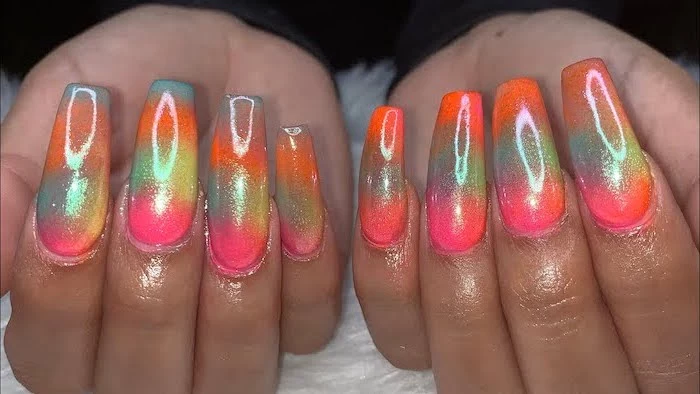
The next evolution of the gradient is ‘Aura Nails’. Instead of a linear fade, colors radiate from the center of the nail outwards, creating a soft, orb-like effect. It’s typically done with an airbrush machine in salons, but you can mimic the look by dabbing a single color onto the center of your nail with a small piece of sponge over a nude base.
- Flawlessly clean lines around your cuticle.
- Zero time spent scrubbing polish off your skin.
The secret is a peel-off cuticle guard. While liquid latex is great, products like Magique’s ‘Cuticle Defender’ come with a user-friendly brush for precise application. Just paint it on, do your ombre, and peel it off for an instant, perfect manicure.

Why does my sponge create a bubbly texture?
This usually happens for two reasons. First, the sponge might be too porous, trapping air that transfers to the nail. Use a dense makeup sponge. Second, you might be dabbing too aggressively. Use a light, quick, bouncing motion. If bubbles appear, wait for the layer to dry and apply another, gentler layer on top to smooth it out.
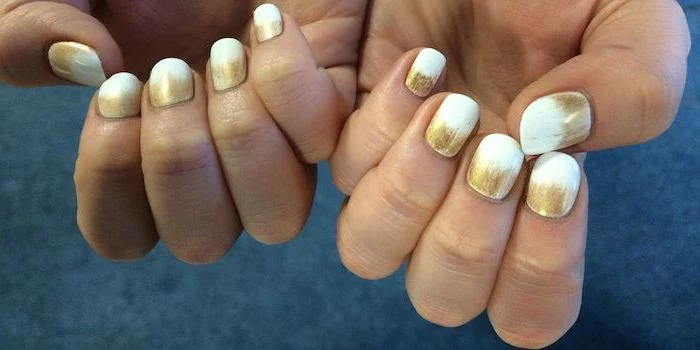
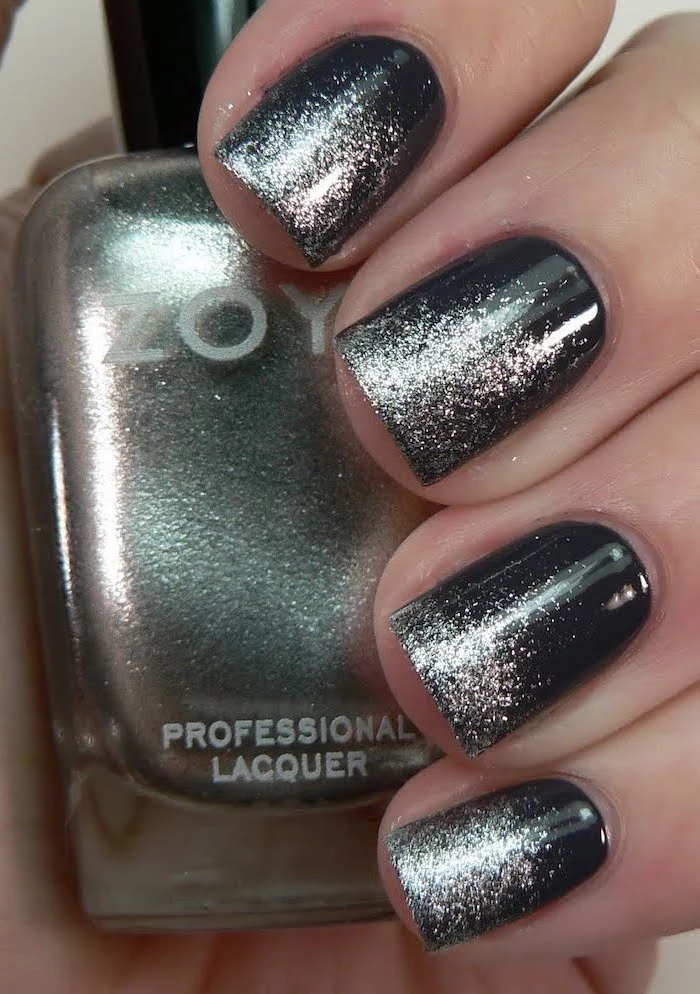
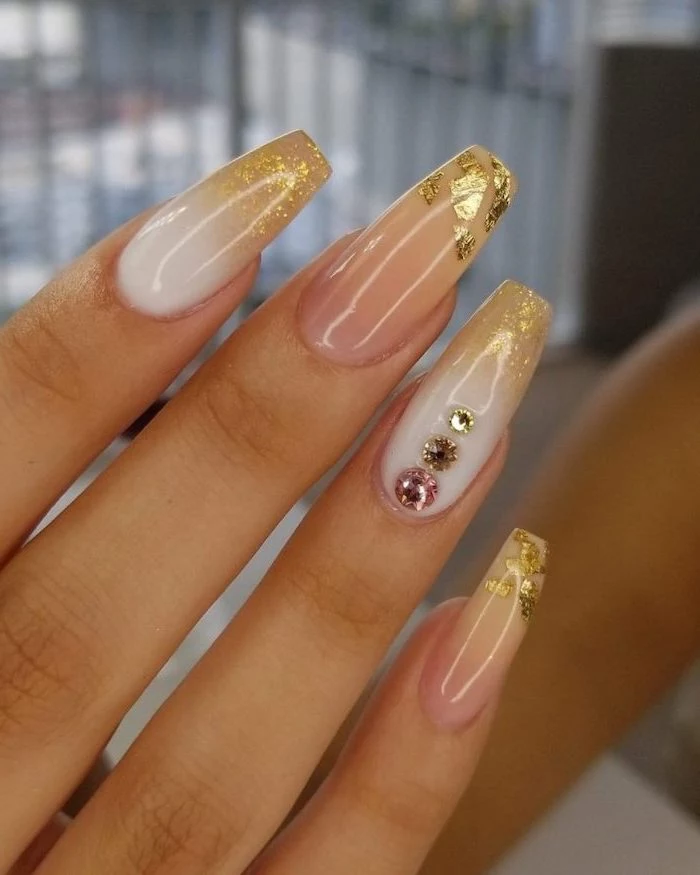
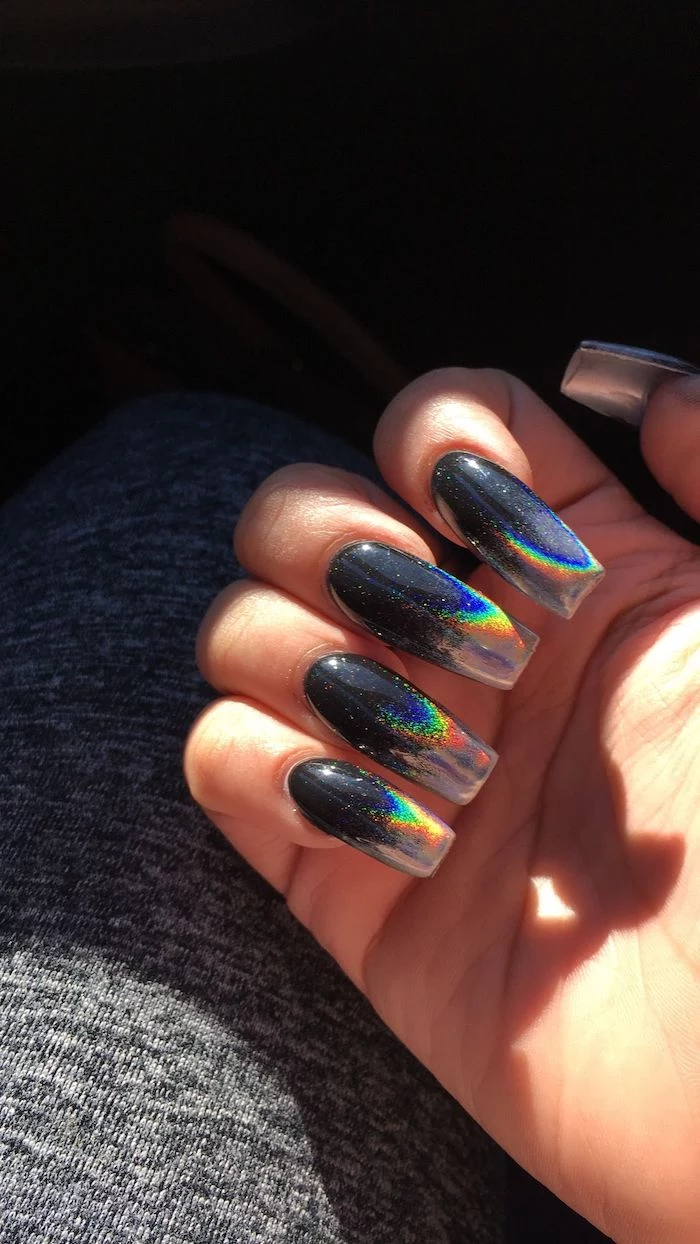
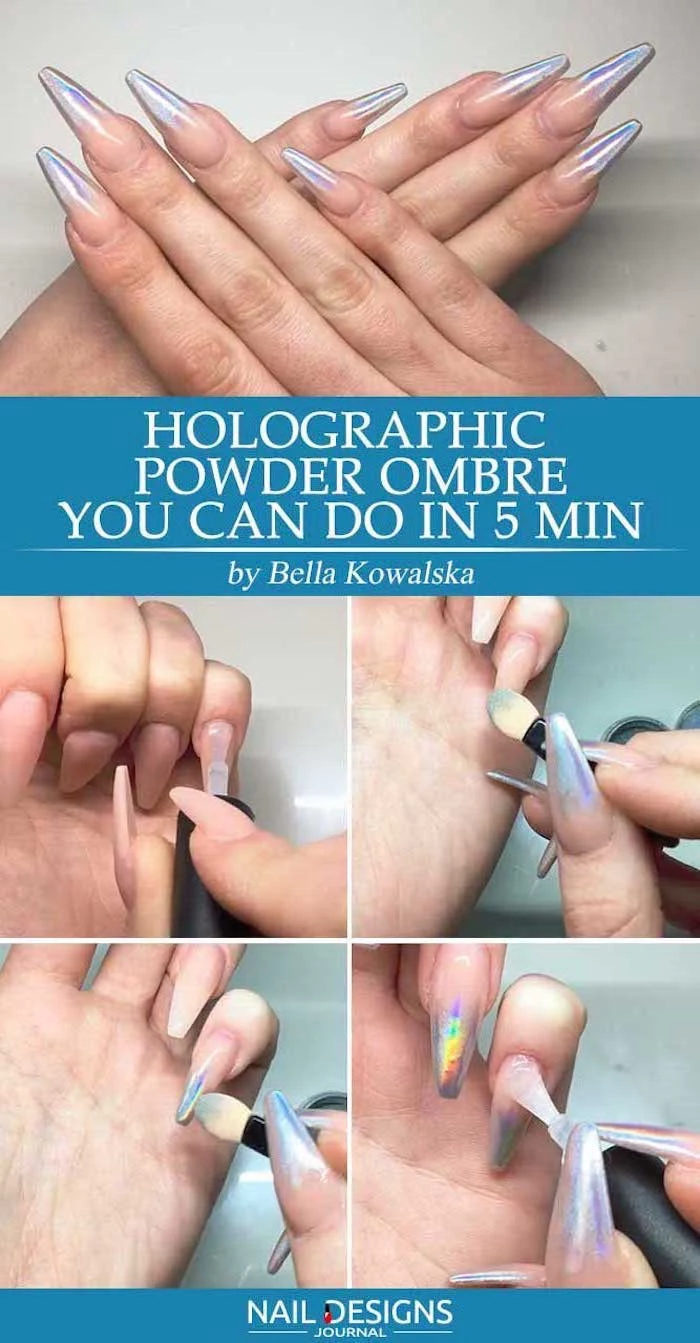
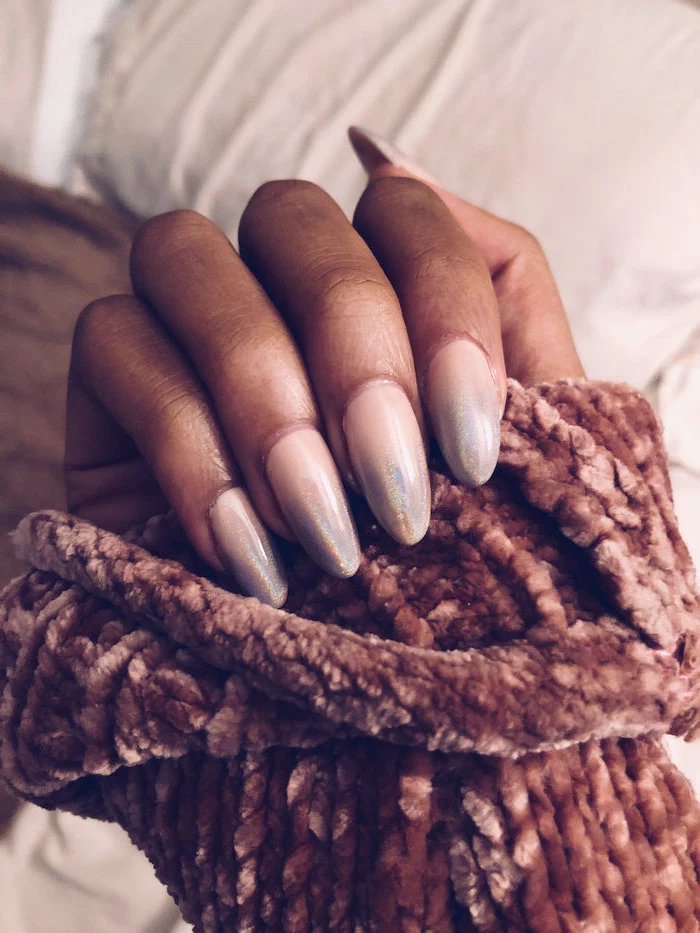
To add a touch of luxury, consider a chrome powder fade. After applying and curing a no-wipe gel top coat, use a small eyeshadow applicator to gently rub a metallic or holographic chrome powder onto just the tip of the nail. The powder will only stick to the glossy surface, allowing you to create a stunning metallic ombre with minimal effort.
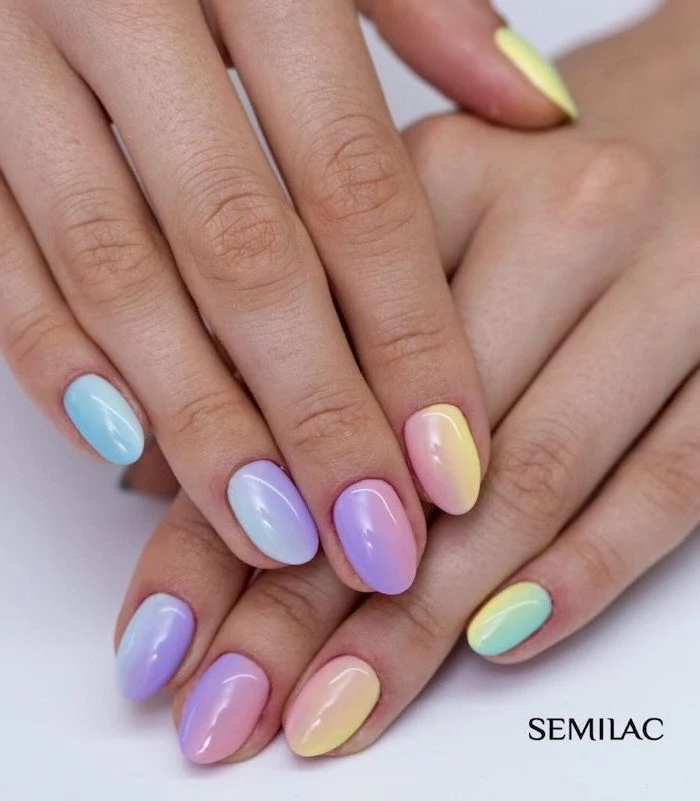
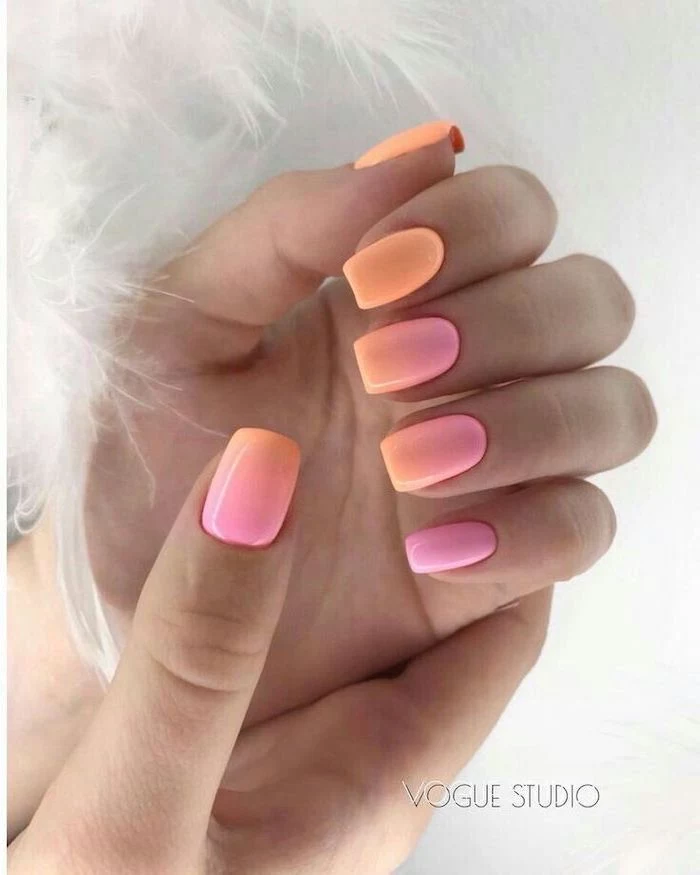
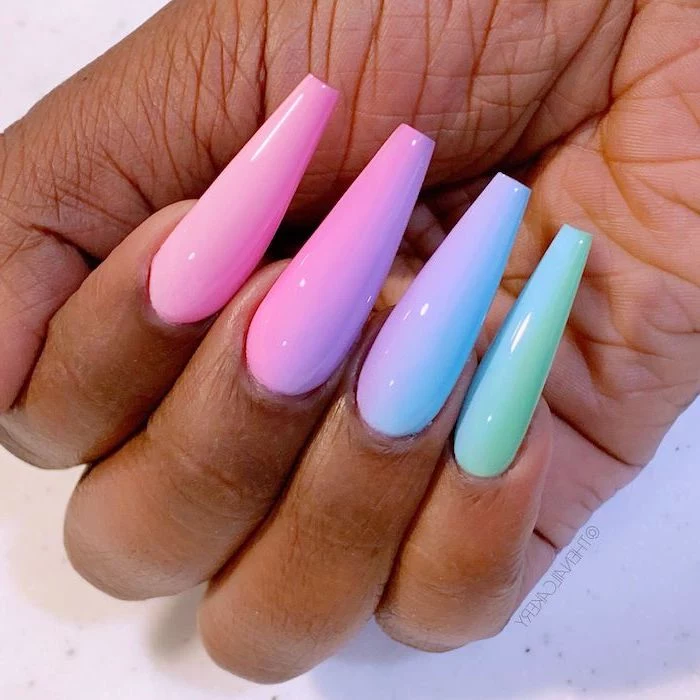
- Spring Fling: Blend pastel lavender, mint green, and baby pink.
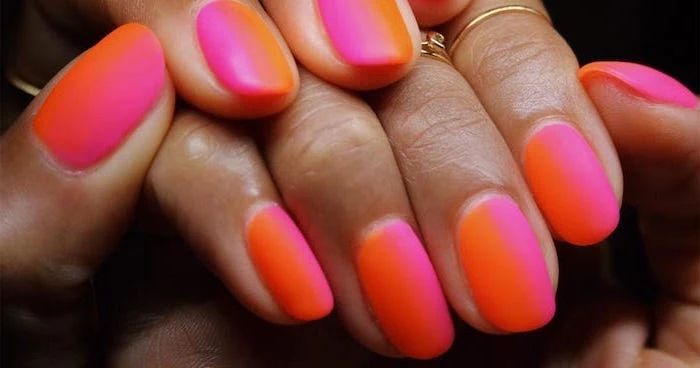
- Summer Heat: A vibrant fade from neon orange to hot pink.
- Autumnal Vibes: A rich gradient of cranberry red, burnt orange, and deep brown.
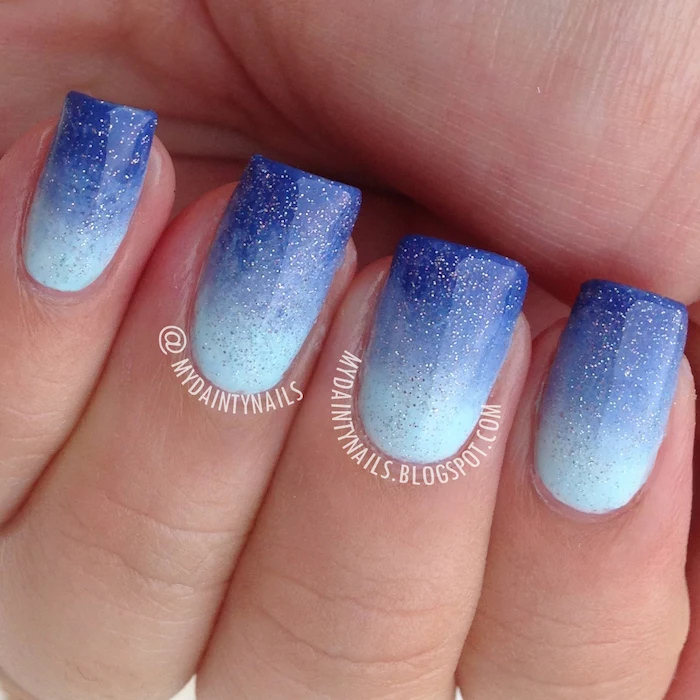
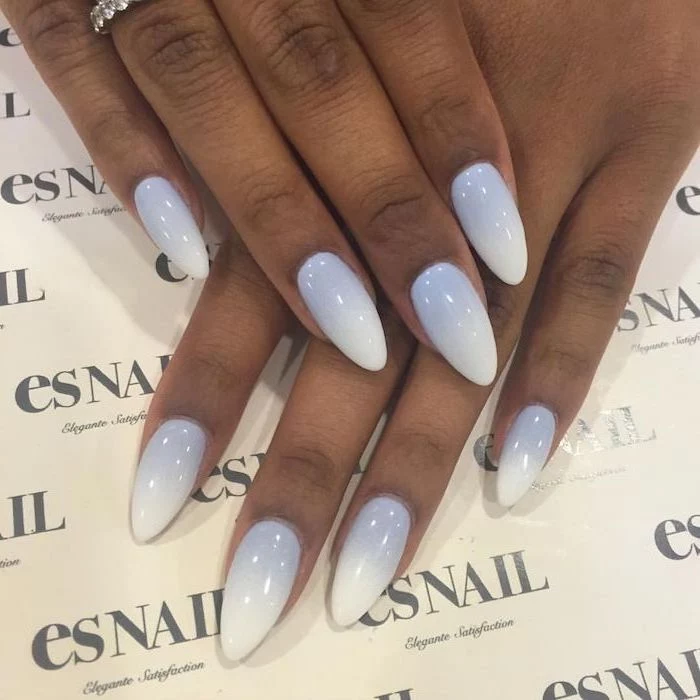
- Winter Chill: Icy blue fading into a shimmering silver glitter at the tips.
Important step for gel users: After curing your base color layer, wipe off the tacky ‘inhibition layer’ with an alcohol wipe before you start sponging on your gradient. This sticky residue can cause the sponge to drag or lift the base color, ruining your smooth canvas. A clean, non-sticky surface is key for perfect blending.


