Your Ultimate Guide to Cozy, Chip-Proof Nails This Fall & Winter
You can always tell when the seasons are about to turn, not just by the weather, but by the vibe at the manicure table. As soon as that first crisp breeze hits, the requests for neons and bright corals just… stop. Suddenly, everyone’s talking about cozy sweaters, pumpkin-spice everything, and nails that perfectly match that warm, fuzzy feeling. Honestly, it’s a shift I look forward to every year. It’s a chance to play with rich colors, elegant art, and most importantly, to focus on getting your nails strong enough to handle the cold, dry months ahead.
In this article
- Why Your Nails Get So Fragile in Winter (And How to Fix It)
- Choosing Your Armor: Gel, Acrylic, Dip, or Polish?
- What If I Have a Gel Allergy?
- The Art of At-Home Manicure Care
- Fall & Winter Colors: It’s All About Depth
- Nail Shapes: Finding Strength in Style
- Cozy Nail Art You’ll Actually Want to Wear
- Inspirational Gallery
But this isn’t going to be another list of fleeting social media trends. Those come and go so fast, who can keep up? Good technique and healthy nails, on the other hand, are always in style. I want to share the real, practical knowledge I’ve picked up over the years from thousands of manicures. We’ll get into why your nails get so brittle in the winter, which products actually offer the best protection, and how to pick shapes and designs that are both gorgeous and durable. This is the advice I give my own clients to make sure their nails look amazing all season long.
Why Your Nails Get So Fragile in Winter (And How to Fix It)
Okay, before we even dream about colors, we have to talk about the foundation: your natural nails. Healthy nails are everything. And the switch from fall to winter is often the toughest time of year for them. Understanding why is the key to preventing the peeling and splitting before it even starts.
Think of your nails like your skin and hair—they hate dry air. Cold winter air holds almost no moisture. Combine that with the blasting indoor heat at home or in the office, and you’ve got a recipe for dehydration. Your nail plate is made of layers of a protein called keratin, and when moisture gets sucked out, those layers become brittle. That’s when you start seeing peeling, splitting, and annoying breaks that just didn’t happen in the summer.
On top of that, your circulation slows down a bit in the cold. This can mean fewer nutrients are getting to the nail matrix, which is the little factory where your nail cells are made. Growth might slow down, and the nails that do grow can be weaker. It’s a double whammy.
So, what can you actually do about it? Here’s your winter nail survival kit.
Your Winter Nail Survival Shopping List:
- A Jojoba-Based Cuticle Oil ($8 – $15): This is non-negotiable. Most hand lotions are water-based and don’t do much for the nail plate itself. Cuticle oil is designed to penetrate. Look for one where jojoba oil is a primary ingredient—its molecular structure is super similar to our skin’s natural oils. A classic pro choice is CND SolarOil, but even pure jojoba oil from a health food store works wonders. Get it at any beauty supply store or online. My advice? Keep it on your nightstand and massage it into your cuticles and all over the nail (even over polish!) every single night.
- A Gentle Glass or Crystal Nail File ($5 – $12): Those coarse, gritty emery boards can tear the delicate edges of your nails, leading to more peeling. A glass file seals the nail edge as it files. It’s a small investment that makes a huge difference.
- Basic Cotton Gloves ($5): No, really. After you apply your cuticle oil at night, slip on a pair of cotton gloves before bed. It locks in the moisture and supercharges the hydrating effect. You’ll wake up with noticeably softer hands and happier nails.
And here’s a huge pro tip: Stop letting people cut your cuticles. The cuticle is the tiny rim of dead tissue on your nail plate. The living skin behind it, called the eponychium, is a protective seal for your nail matrix. When you cut that living tissue, you break the seal, opening yourself up to infection and painful, cracked skin—especially in the dry winter. A good technician will only ever gently push back the living tissue and nip away any truly dead skin or a hangnail, never the live fold.
Oh, and one more thing. The simplest, most ignored advice ever? Wear gloves! Put on warm gloves when you go out in the cold. And for the love of all things holy, wear rubber gloves when you do dishes or clean. Hot water and harsh soaps are the fastest way to strip every last bit of moisture from your hands and nails. Seriously, this one change can be a total game-changer.
Choosing Your Armor: Gel, Acrylic, Dip, or Polish?
The product you choose for your manicure can act like a shield against winter damage. Each one has its pros and cons, especially when it comes to durability and cost. Let’s break it down.
Gel Polish: The Flexible Shield
For most people, gel polish is the best bet for winter. Its biggest advantage is its flexibility. Gel polish moves with your natural nail, so it’s way less likely to chip or crack when your nails get rigid from the cold. It’s perfect for adding a layer of protection to your natural nails without a lot of bulk.
- Best For: Natural nails needing extra strength and a long-lasting, glossy finish.
- Durability: Typically 2-3 weeks with no chipping.
- Average Cost: Around $40 – $60 for a salon manicure.
- Heads Up: Safe removal is key. Never, ever peel it off! That takes layers of your natural nail with it. Also, a rare but real risk is developing a gel allergy from repeated skin contact with uncured gel. A careful technician is a must.
Acrylic: The Heavy-Duty Armor
If you’re tough on your hands or want to add serious length and strength, acrylic is the powerhouse. It creates a hard, durable shell over the nail that can withstand a lot. It’s a fantastic option for the busy holiday season when you don’t have time to worry about breaks.
- Best For: Adding length, creating dramatic shapes, or for people with very active hands.
- Durability: Very strong. Fills are needed every 2-3 weeks as your nail grows.
- Average Cost: A full set can range from $60 – $100+, with fills costing around $40 – $70.
- Heads Up: This is a job for a trusted professional. Bad application can look bulky, and some discount salons may use a dangerous, banned monomer called MMA that severely damages the nail. Make sure your salon uses EMA monomer.
Dip Powder: The Durable Hybrid
Dip powder gives you the durability of acrylic but with a slightly different application. It’s a great middle-ground, offering a strong, resilient finish that feels a bit lighter than a full acrylic set.
- Best For: Those who want something stronger than gel but less intense than acrylics.
- Durability: Often lasts 3 weeks or even longer.
- Average Cost: Typically falls between gel and acrylic, around $50 – $70.
- Heads Up: A critical safety note here! Never let a technician dip your finger into a communal pot of powder. That’s a huge cross-contamination risk. A reputable tech will always pour the powder over your nail and discard the excess. If you see them dipping everyone’s fingers into the same jar, please walk out.
Traditional Lacquer: The Classic Quick-Change
Love changing your color every week? Traditional nail polish is still a wonderful choice. You just need to be a bit more strategic in the winter to make it last.
- Best For: DIY manicures and frequent color changes.
- Durability: 3-7 days, depending heavily on your prep and daily activities.
- Average Cost: From $25 – $40 in a salon, or the cost of a bottle ($8-$15) for at-home use.
- Heads Up: Prep is everything. And you absolutely must “cap the free edge”—that’s the very tip of your nail that extends past your finger. After each coat of polish (base, color, and top), run the brush lightly along that edge. It seals everything in and drastically reduces chipping.
What If I Have a Gel Allergy?
Okay, this is important. If you’ve developed a sensitivity to gel (often showing up as itchy, red, or blistering skin around the nails), it doesn’t mean you’re out of options. First, you need to give your nails a complete break from all artificial products to heal. Once you’re ready to try again, your safest bet is high-quality traditional lacquer. If you still crave durability, look for a technician who specializes in “structured manicures” using builder gel in a bottle. This is a thicker gel that can be applied very precisely without touching the skin, which is often the cause of the reaction. It’s a specialized service, but a great alternative for sensitive clients.
The Art of At-Home Manicure Care
Can’t make it to the salon? You can still keep your nails looking great. But please, be gentle!
How to Safely Remove Gel Polish at Home: Peeling off your gel is the number one nail sin. Here’s how to do it right. You’ll need 100% acetone, cotton balls, aluminum foil, and a nail file. Plan for about 30 minutes of downtime.
- Gently file the shiny top coat off your nails. You don’t need to go crazy, just rough up the surface so the acetone can penetrate.
- Soak a piece of a cotton ball in acetone, place it on your nail, and wrap your fingertip tightly in a small square of aluminum foil.
- Repeat for all ten fingers. Now, just relax! Let them soak for 10-15 minutes.
- After 15 minutes, press down on the foil and pull it off one finger. The gel should be lifting and flaking off. You can gently nudge the rest off with an orange wood stick. If it’s not coming off easily, re-wrap it and wait another 5 minutes. Patience is key!
- Once it’s all off, wash your hands and immediately apply a generous amount of that cuticle oil.
A full at-home lacquer manicure should take about 45 minutes to an hour, including drying time. And by drying time, I mean really dry. Give your nails at least 30 minutes before you start trying to do things. A quick-dry top coat can help, but nothing beats good old-fashioned air drying.
Fall & Winter Colors: It’s All About Depth
This is the fun part! The color palettes for the cooler seasons are all about richness and sophistication.
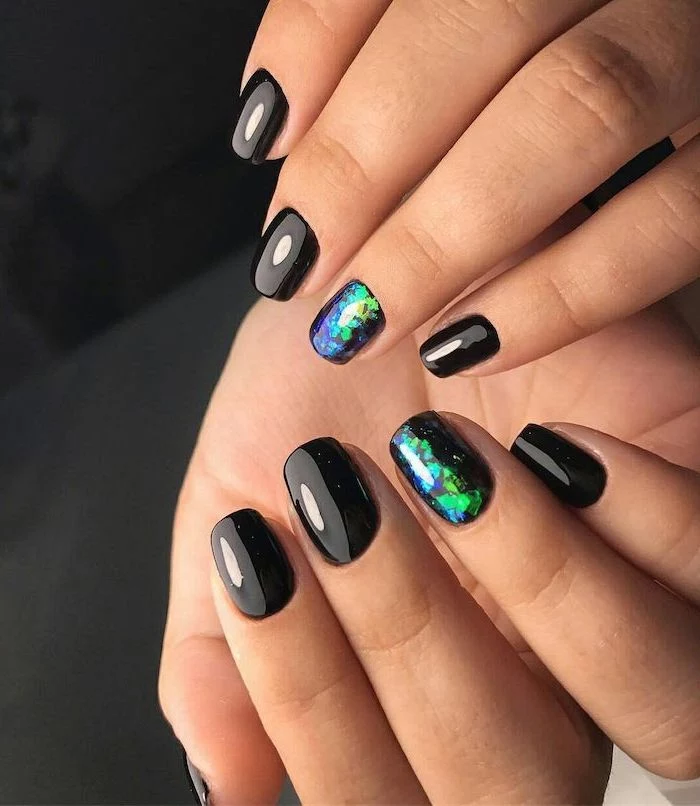
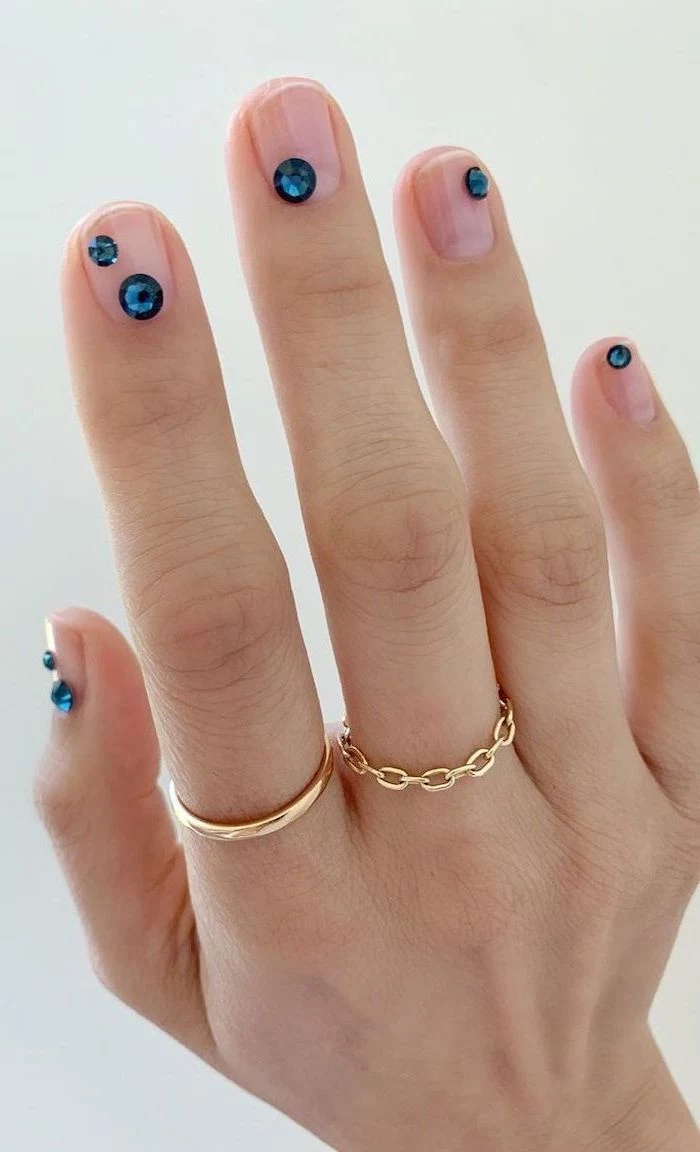
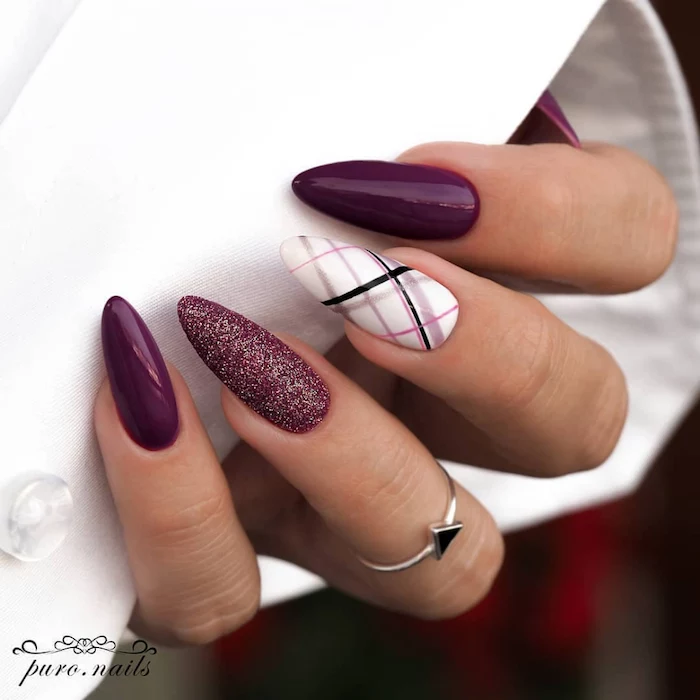
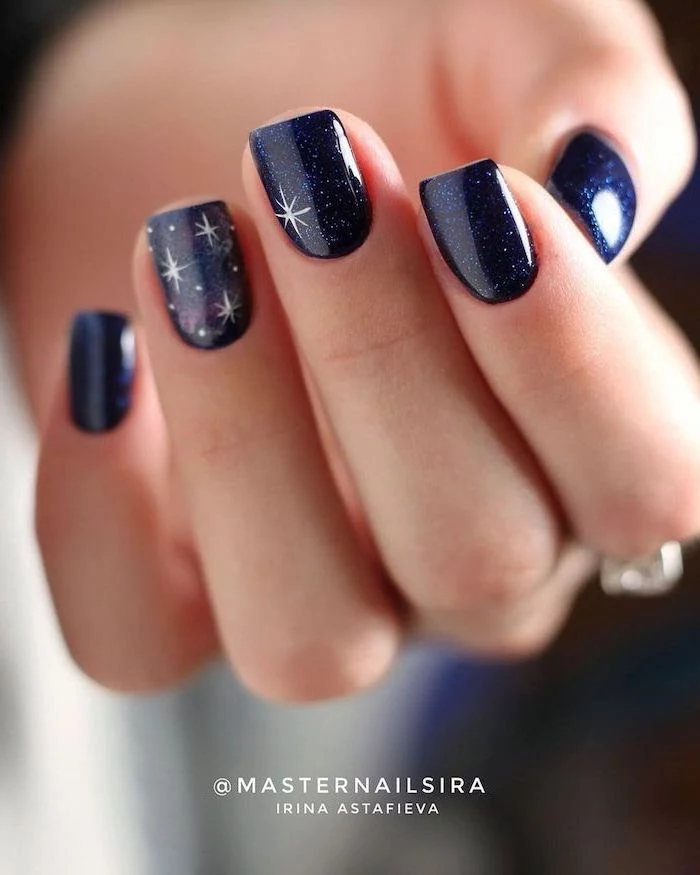
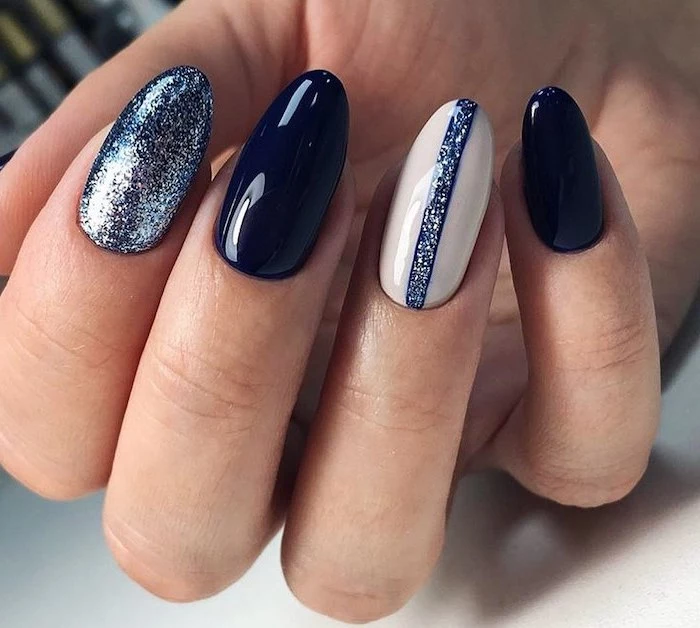
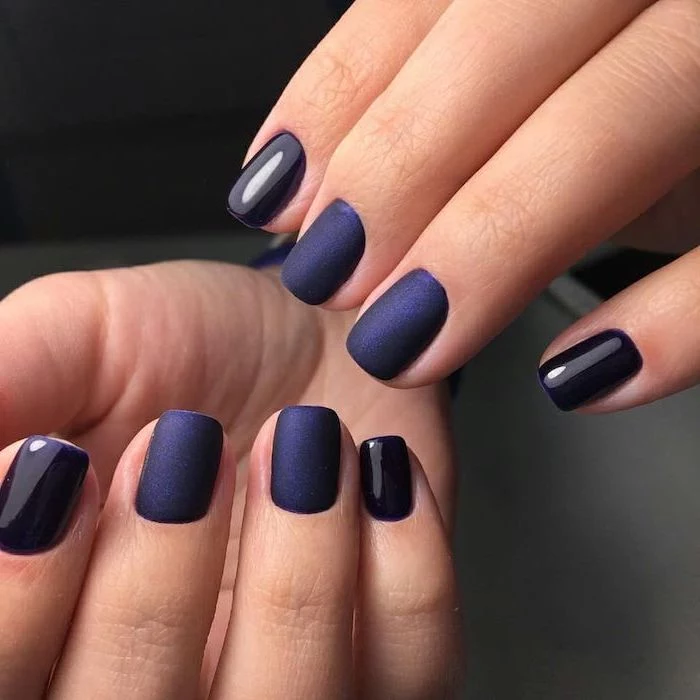
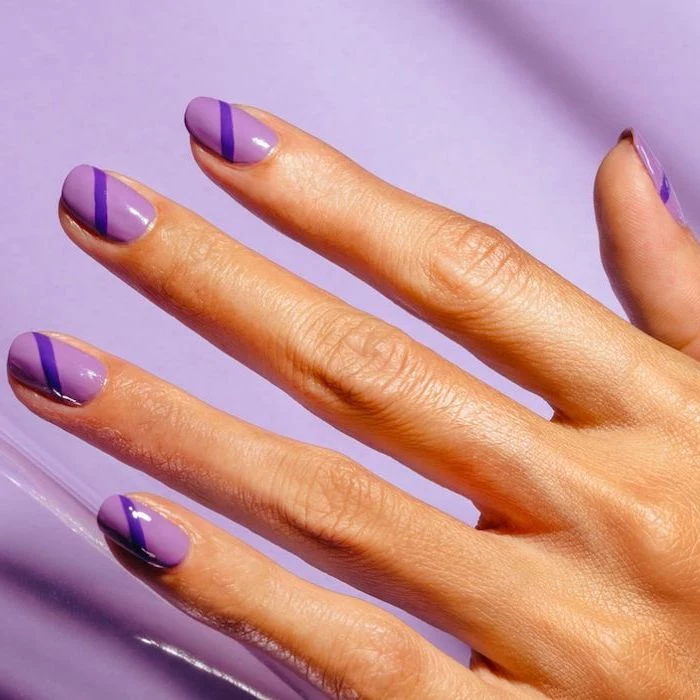
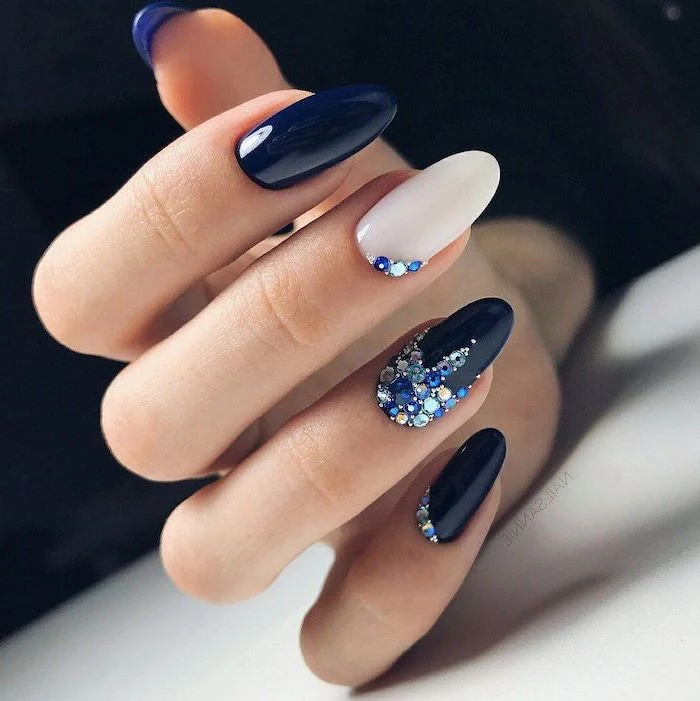
Deep Jewel Tones: Think emerald green, sapphire blue, deep amethyst purple, and rich ruby red. These colors scream luxury. A quick tip: with these dark, highly pigmented shades, a good base coat is a must to prevent them from staining your natural nail.
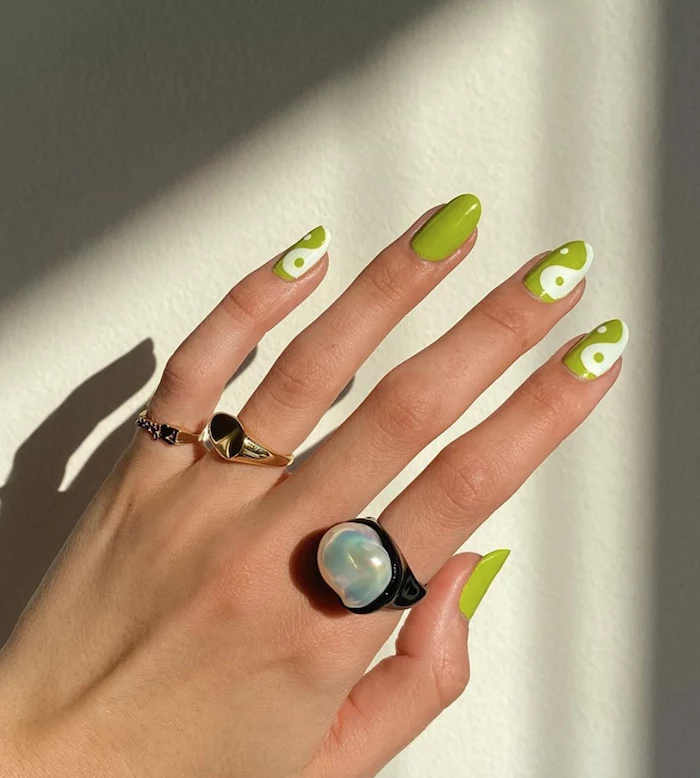
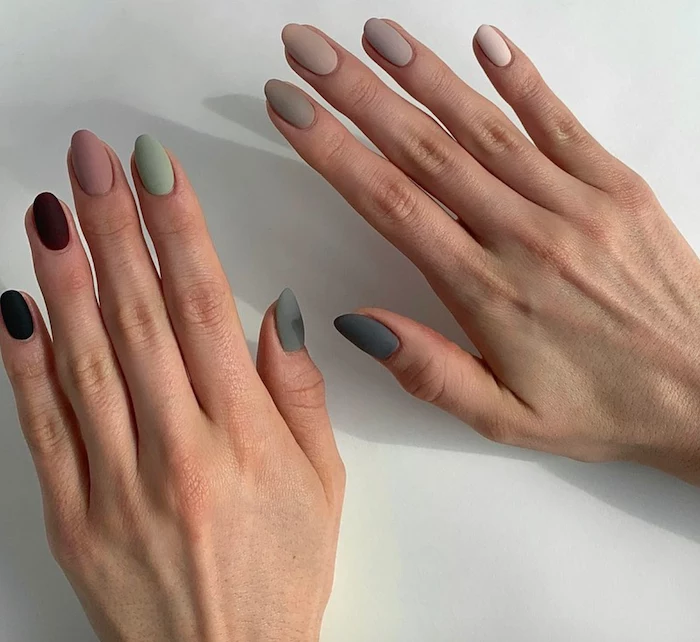
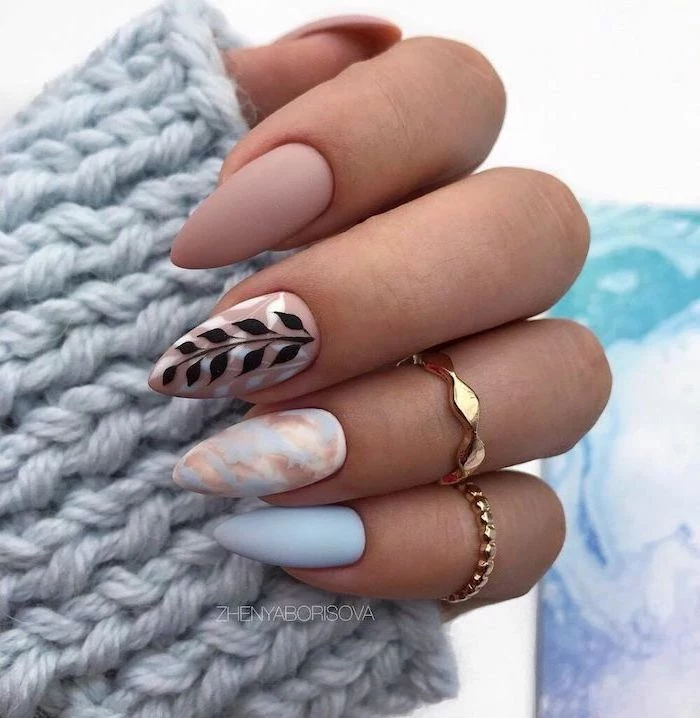
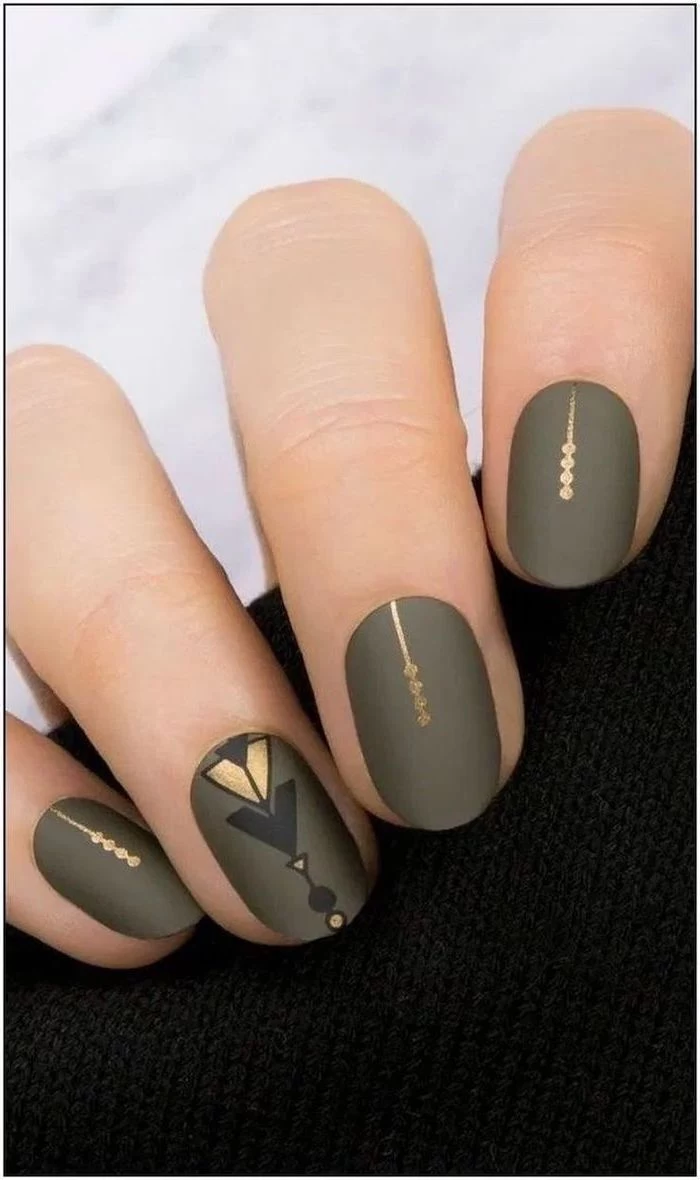
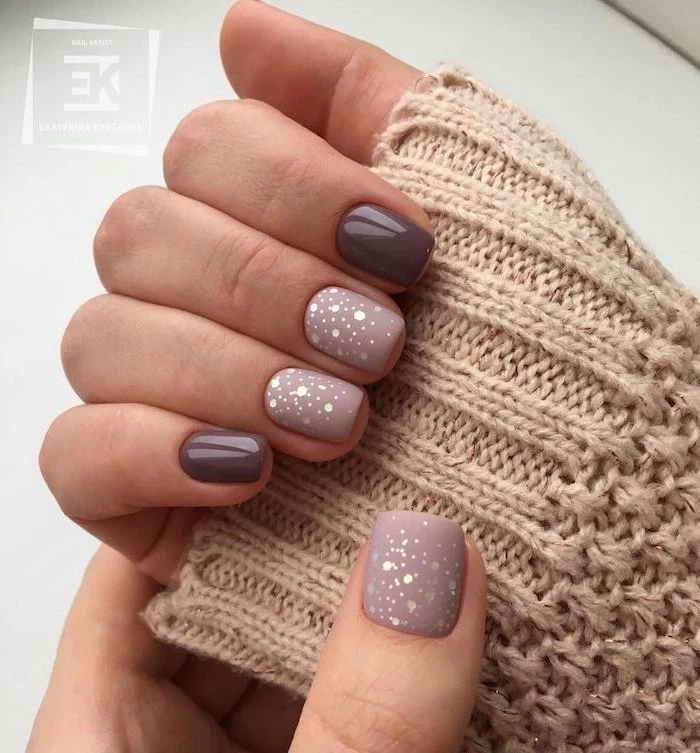
Earthy, Muted Neutrals: Forget basic beige. We’re talking about the colors of a walk in the woods on a cloudy day: mushroom taupe, slate gray, olive green, and warm clay. They are effortlessly chic and go with every cozy sweater you own.
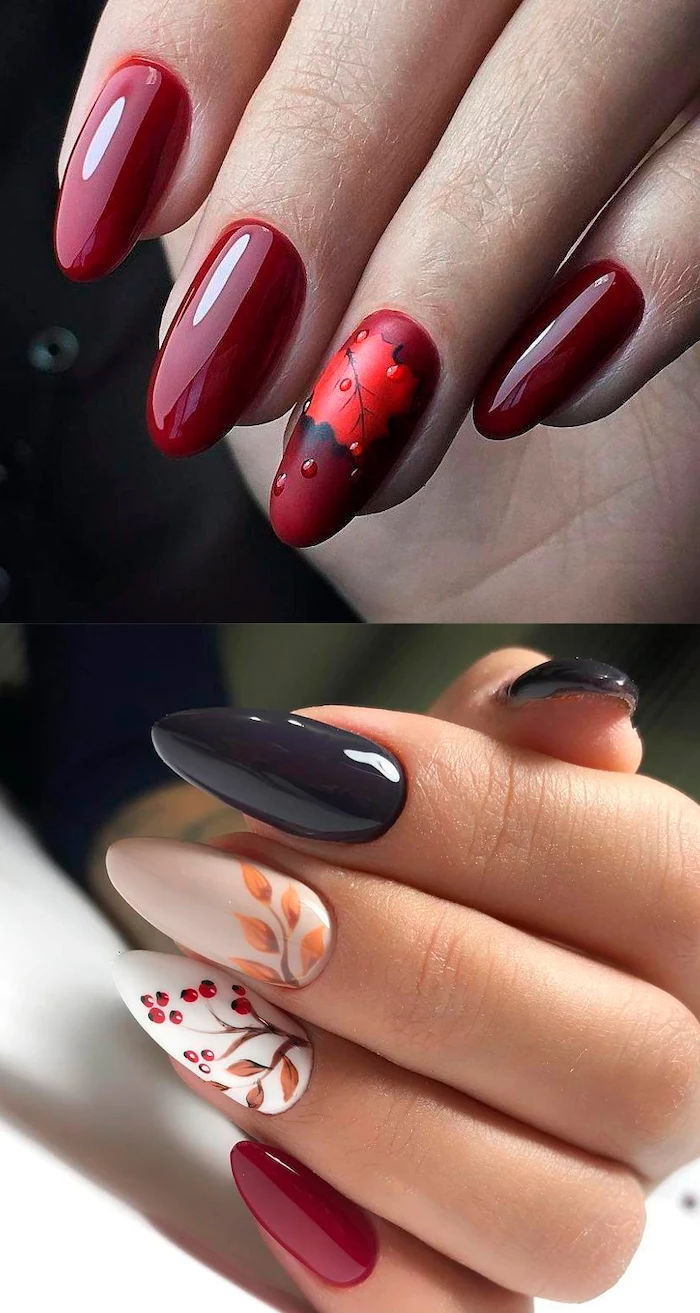
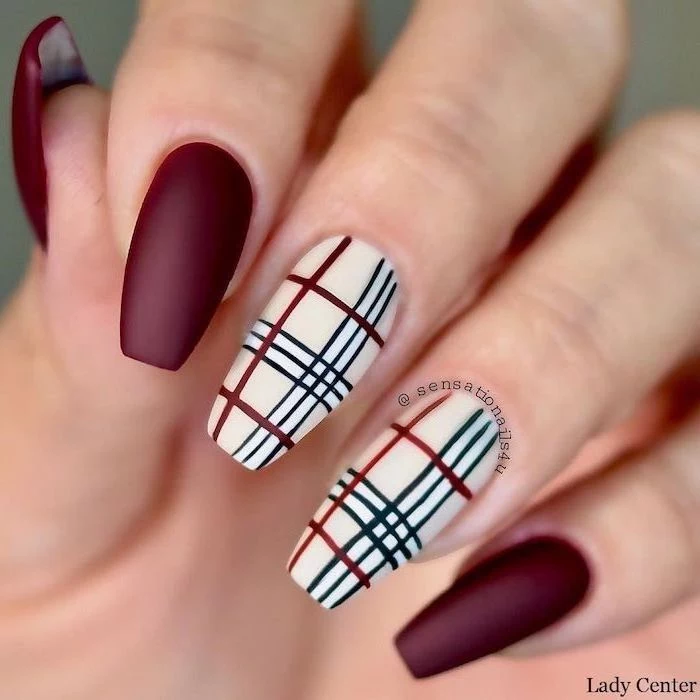
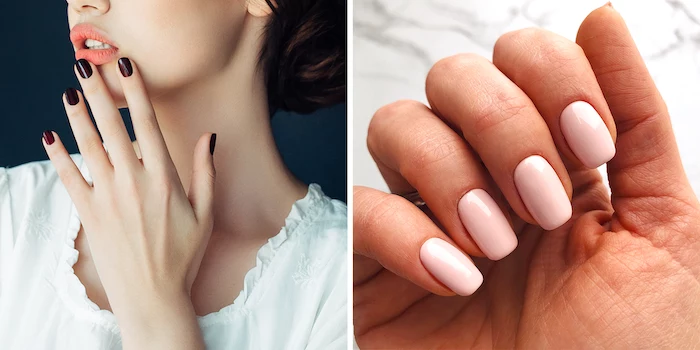
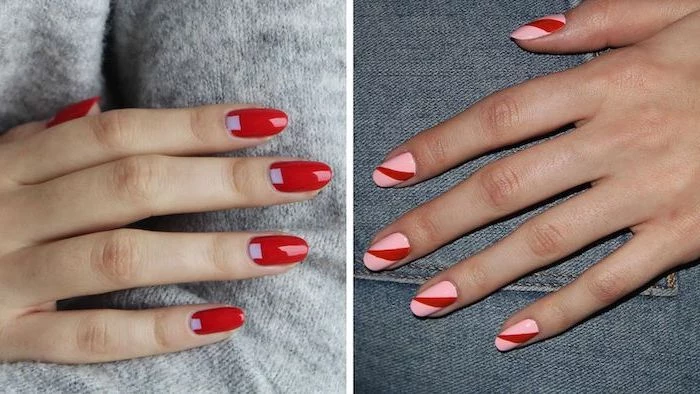
Rich Reds and Browns: A classic red never fails, but fall calls for something with more depth, like oxblood, burgundy, or merlot. For a warmer vibe, chocolate brown and burnt sienna are gorgeous. A good rule of thumb is that blue-based reds tend to flatter cooler skin tones, while orange or brick-based reds pop against warmer skin tones. But honestly? Wear whatever color makes you happy.
And by the way, try asking for a matte top coat. It can completely transform any color, giving it a soft, velvety look that’s perfect for the season. It’s stunning over dark colors. Just a heads up, matte finishes can absorb oils from lotions and your skin, which can cause shiny spots. A lesser-known trick is to just wipe them with a bit of rubbing alcohol on a lint-free pad—it instantly restores that flat, matte look.
Nail Shapes: Finding Strength in Style
The right nail shape isn’t just about what looks good; it’s about tiny-scale structural engineering. The best shape for you is one that fits your lifestyle.
- Squoval/Soft Square: This is the workhorse. It’s strong, practical, and looks great on everyone. The softly rounded corners prevent the snagging and chipping you get with sharp squares.
- Round/Oval: These are the best shapes for preventing breaks, period. With no sharp corners to catch on things, they are perfect for encouraging natural nail growth.
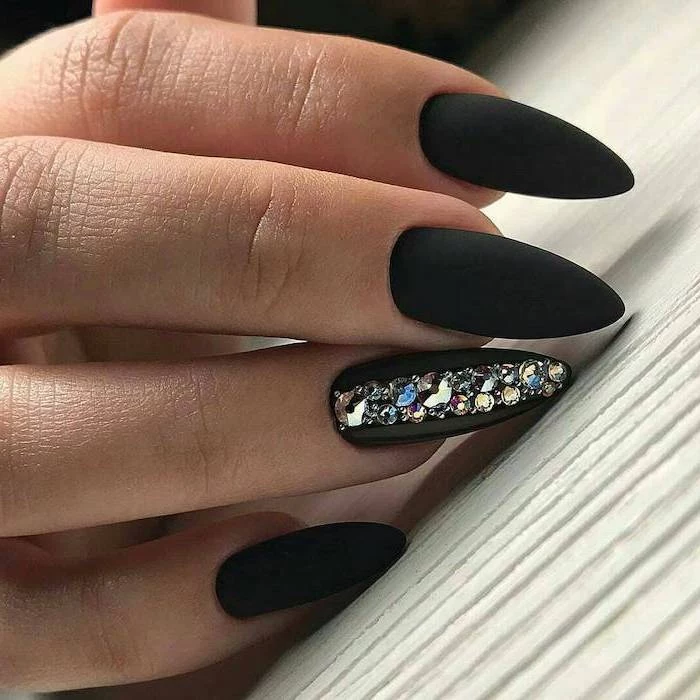
- Almond: Super elegant, but this shape needs some help. The tapered sides mean that stress is concentrated at the tip, making it prone to breaking on natural nails. I almost always recommend a structured gel or acrylic overlay to build a proper apex (a slight curve in the center) for strength.
- Coffin/Ballerina: This bold shape is best left to acrylic or hard gel. It’s almost impossible to maintain on natural nails without constant heartbreak. A well-built enhancement isn’t just an option here; it’s a necessity.
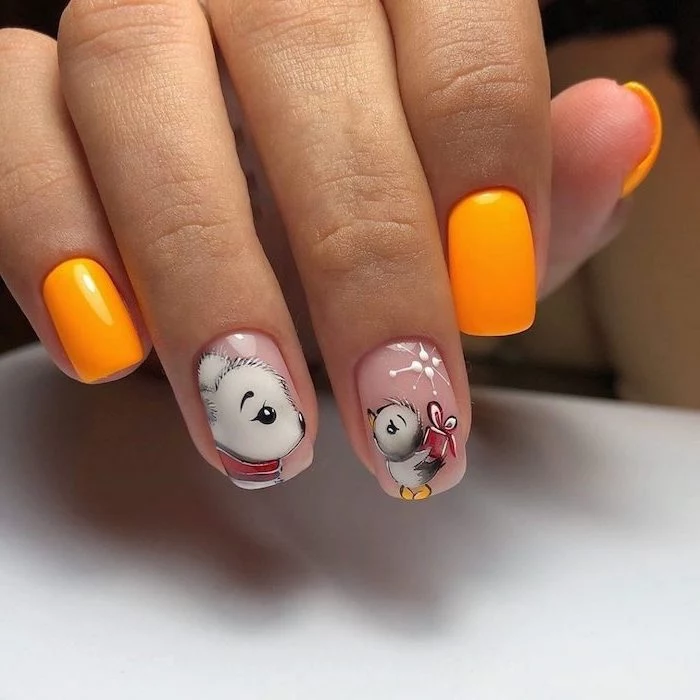
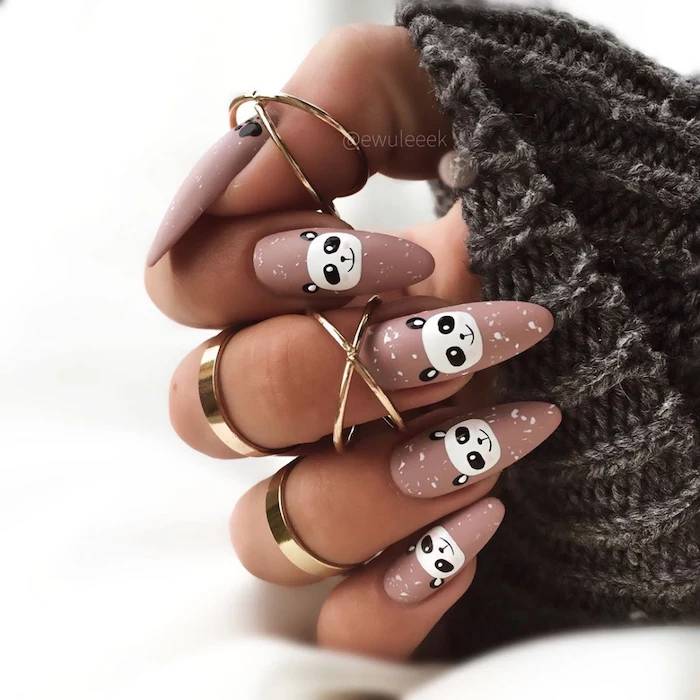
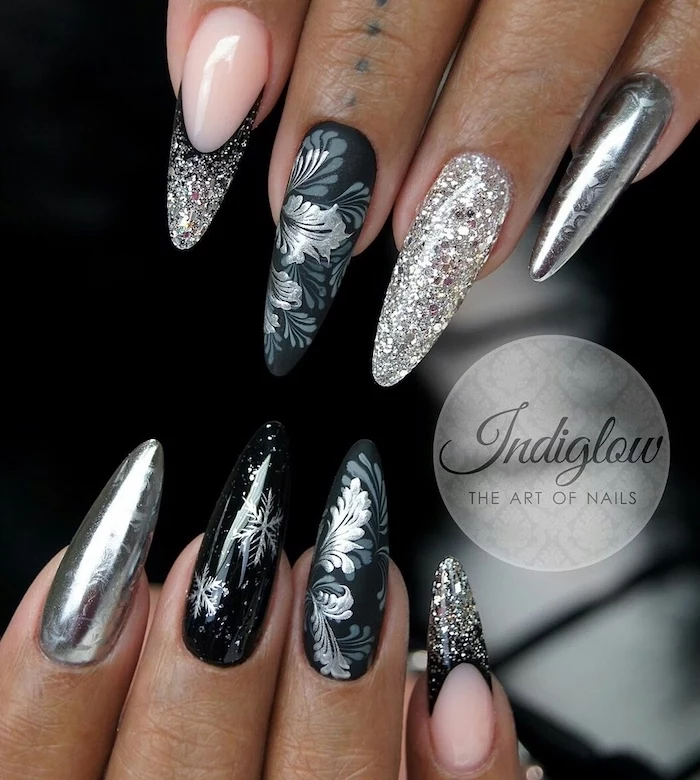
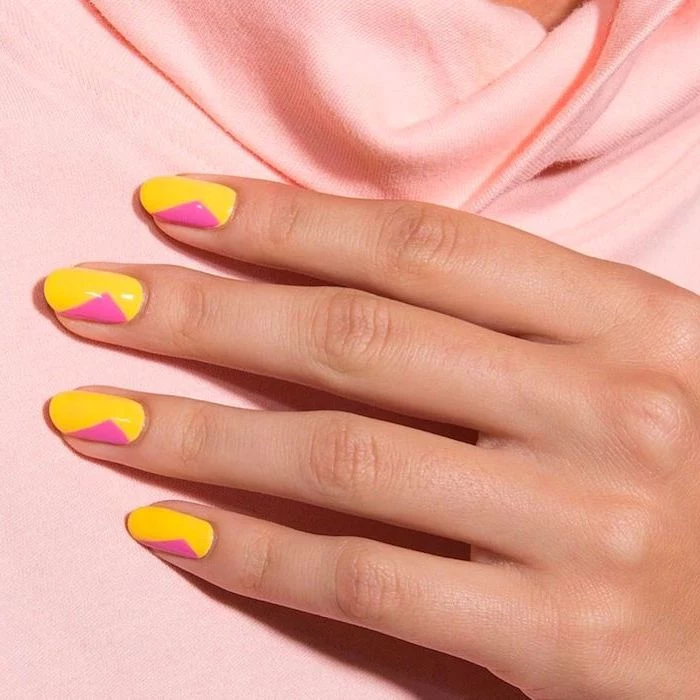
Cozy Nail Art You’ll Actually Want to Wear
Fall and winter are the best times for more detailed nail art. The cozy vibes are perfect for adding texture and depth.
The Sweater Nail
This creates a raised, 3D cable-knit pattern that people can’t stop touching. It’s a client favorite every single year. After the base color and a matte top coat are cured, I’ll use a fine detail brush and a thicker mixture of gel (usually the color mixed with a little clear builder gel) to paint the sweater pattern on top. One final cure, and you have a textured design you can actually feel. This kind of art usually adds about 15-20 minutes and $15-$25 to a manicure, depending on the complexity.
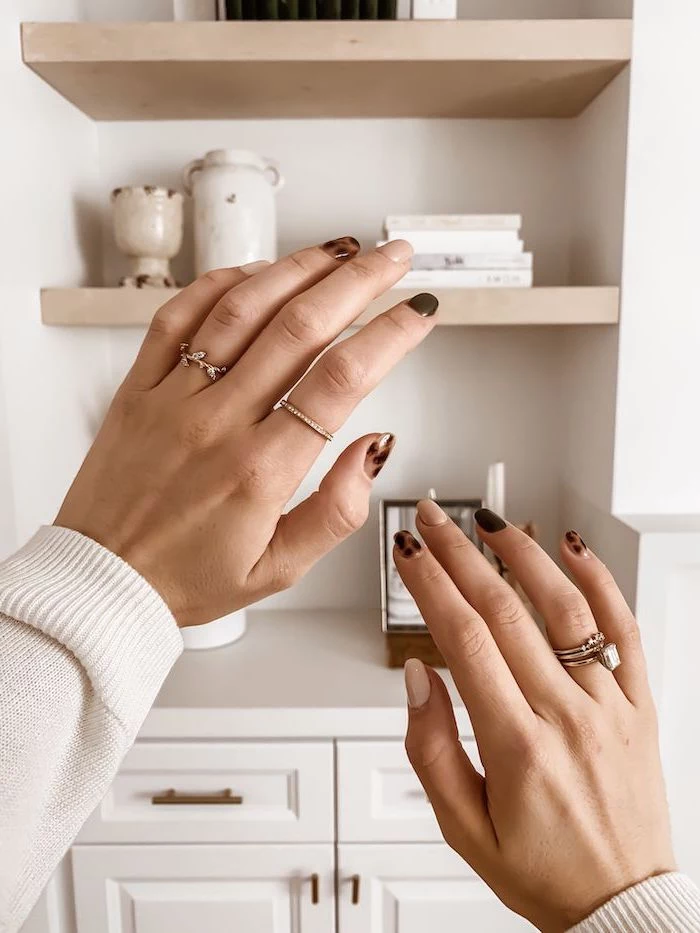
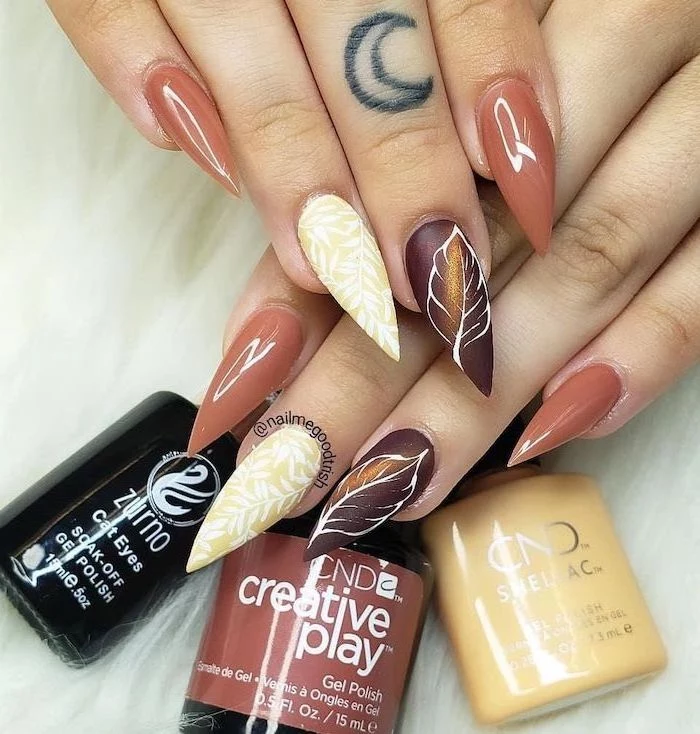
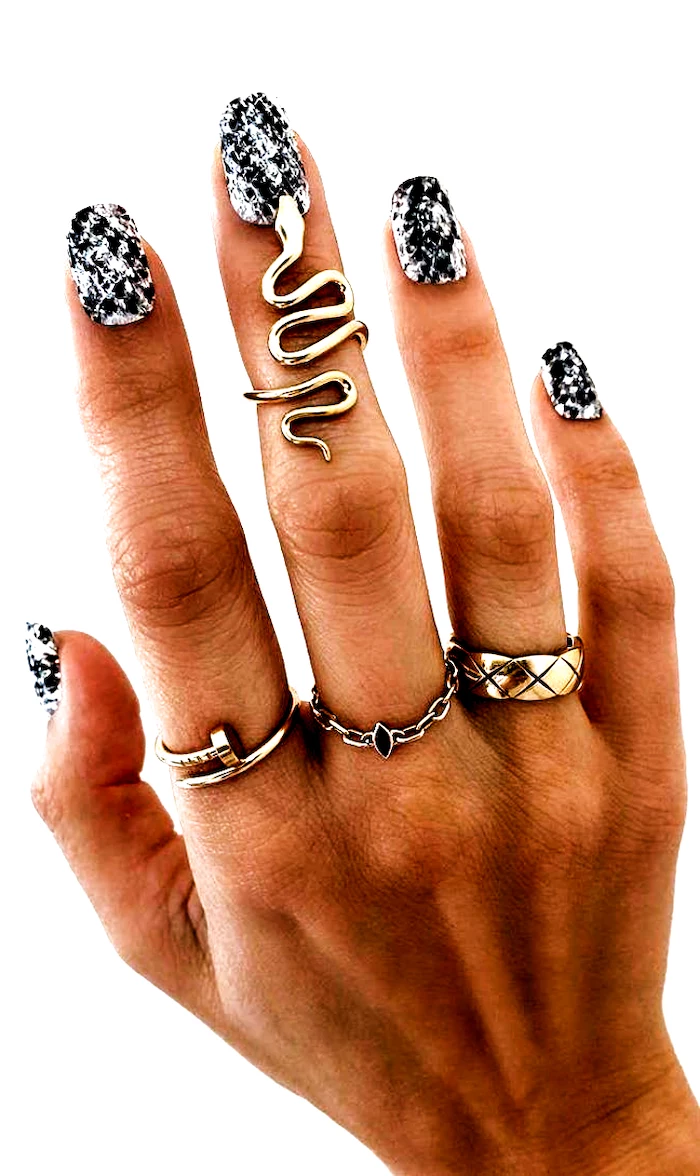
Tortoiseshell Nails
This is so much more sophisticated than a simple animal print. It’s all about layering. You start with a sheer, warm amber or honey-colored gel base. Then, while that layer is still wet, you use a fine brush to randomly dot on a darker brown or black gel. The wet base allows the dark spots to bloom and soften, creating that signature see-through, layered effect. You can add a few more dots on a second layer of the sheer amber for even more depth. It’s a beautiful, timeless look that’s surprisingly easy to achieve for a pro.
Inspirational Gallery

- Fewer, richer colors.
- More protective top coats.
- A renewed focus on hydration.
The secret to a perfect winter manicure? It’s treating it as a seasonal ritual, not just a color change. Your nail care routine needs to adapt to the cold, just like your skincare.
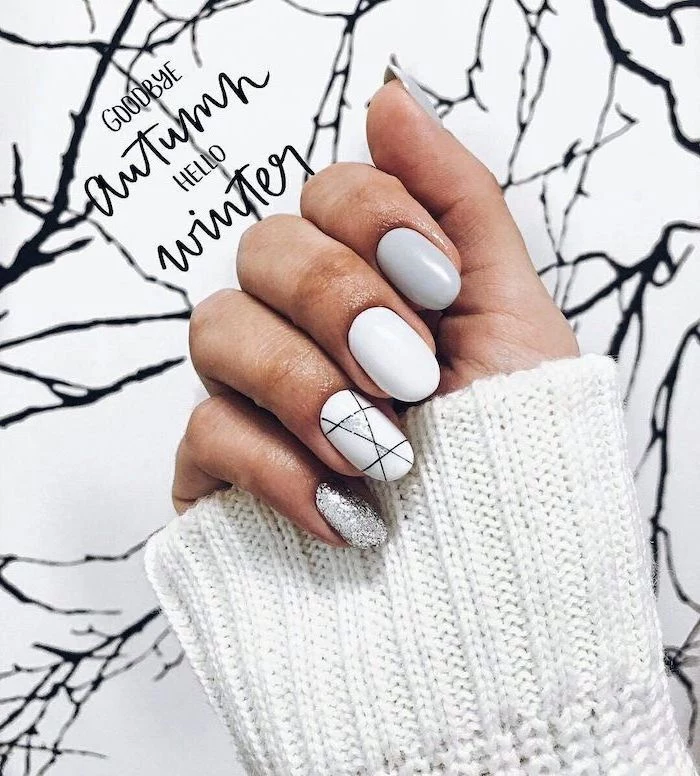
The right shape is your first defense. While dramatic stilettos are stunning, winter is the perfect time to embrace softer, more resilient shapes. Oval, squoval, or almond shapes have fewer sharp corners, making them less likely to snag on cozy knits or chip during daily tasks. This simple switch can dramatically increase the life of your manicure.
The global nail care market is projected to reach $22.6 billion by 2030, with a significant portion driven by seasonal trends and at-home care products.
This surge shows a clear trend: we’re investing more in the health and beauty of our nails. It’s not just about a splash of color anymore, but about high-quality base coats, nourishing oils, and polishes with long-term benefits.
Is cuticle oil really that important?
Absolutely, especially now. Think of it as conditioner for your nails. The cold, dry air sucks moisture from your nail beds, leading to hangnails and brittle nail plates. A daily drop of a quality oil, like the iconic CND SolarOil with its blend of jojoba and vitamin E, massaged into the cuticle area keeps them flexible, hydrated, and promotes healthier growth from the matrix.
Regular Polish: Perfect for those who love to switch colors frequently. Modern formulas, especially from brands like Zoya or OPI, offer impressive durability when paired with a good top coat.
Gel Polish: The ultimate choice for a chip-proof, high-gloss finish that lasts two weeks or more. Ideal for holiday travel or if you’re tough on your hands. A salon gel manicure is an investment in durability.
For winter, gel offers superior protection against brittleness, but proper, gentle removal is key to prevent damage.
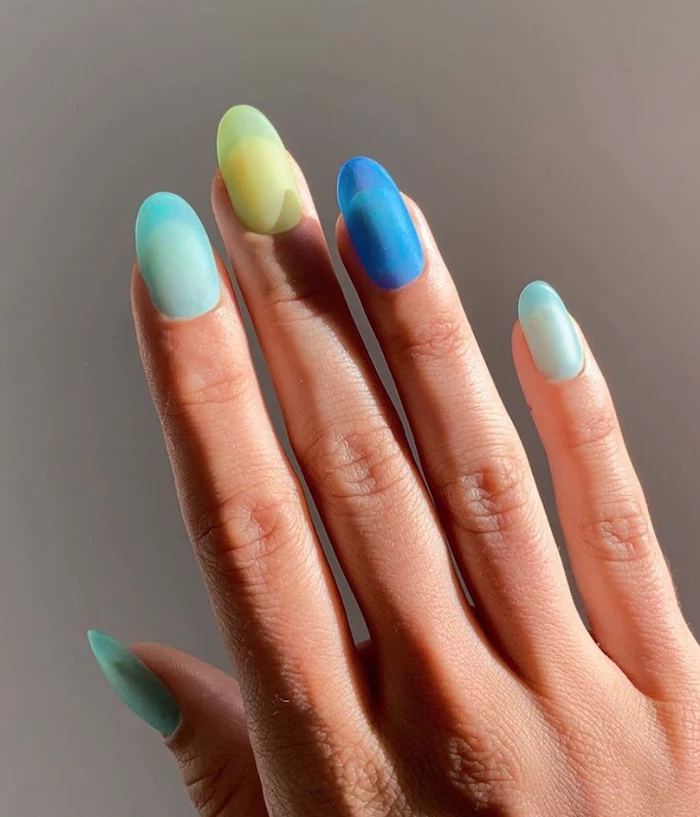
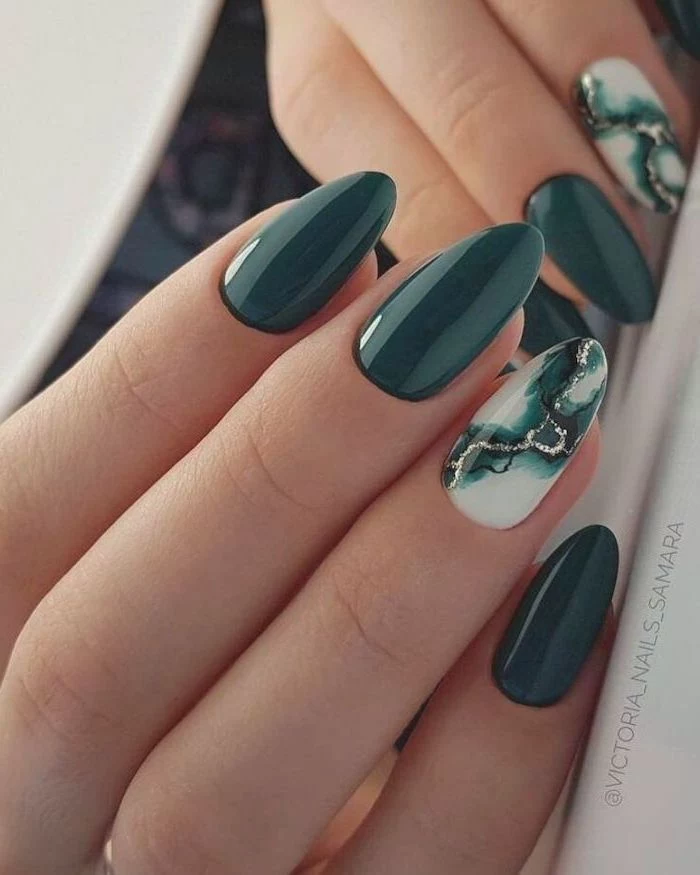
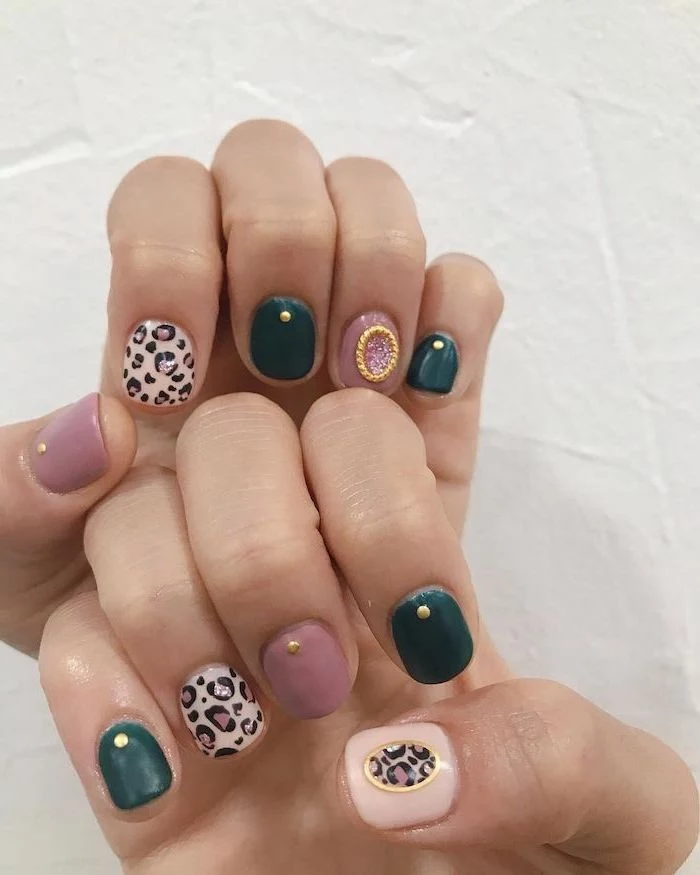
Don’t underestimate the power of a deep, moody green. It’s the sophisticated alternative to black or navy. Think of the rich tones of a pine forest or dark olive. Shades like Essie’s ‘Off Tropic’ or OPI’s ‘Stay Off The Lawn!!’ offer a chic, earthy vibe that pairs beautifully with fall and winter neutrals like camel, cream, and grey.

Top Coat Tip: For an ultra-durable, glass-like shine that truly armors your polish against chips, many professionals swear by Seche Vite Dry Fast Top Coat. Its unique formula penetrates through the polish to the base coat, forming a single solid coating. Apply it while the final color coat is still slightly tacky for the best results.
- Always file in one direction, from the side of the nail to the center.
- Never use a coarse, gritty file on natural nails; opt for a 180-240 grit glass or crystal file.
- Avoid filing right after a shower when nails are soft and prone to tearing.
A single nail is made up of approximately 100 layers of keratin cells. In winter, dehydration can cause these layers to separate, resulting in peeling and splitting.
This season, the texture is just as important as the color. The ‘velvet nail’ trend, achieved with magnetic polish, creates a deep, multi-dimensional shimmer that moves in the light. It mimics the plush feel of velvet fabric, making it a perfect sensory match for cozy winter fashion. Ask your technician for it, or try a kit from a brand like Starrily at home.
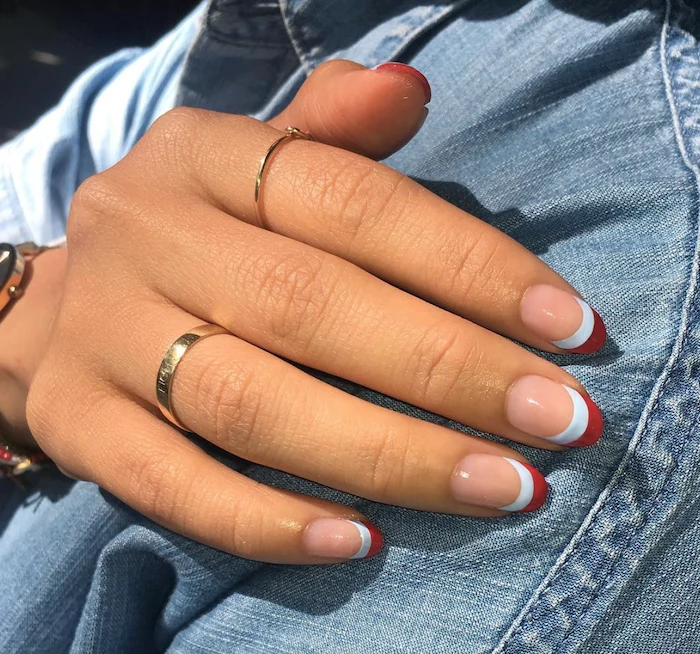
Can you wear bold colors on short nails?
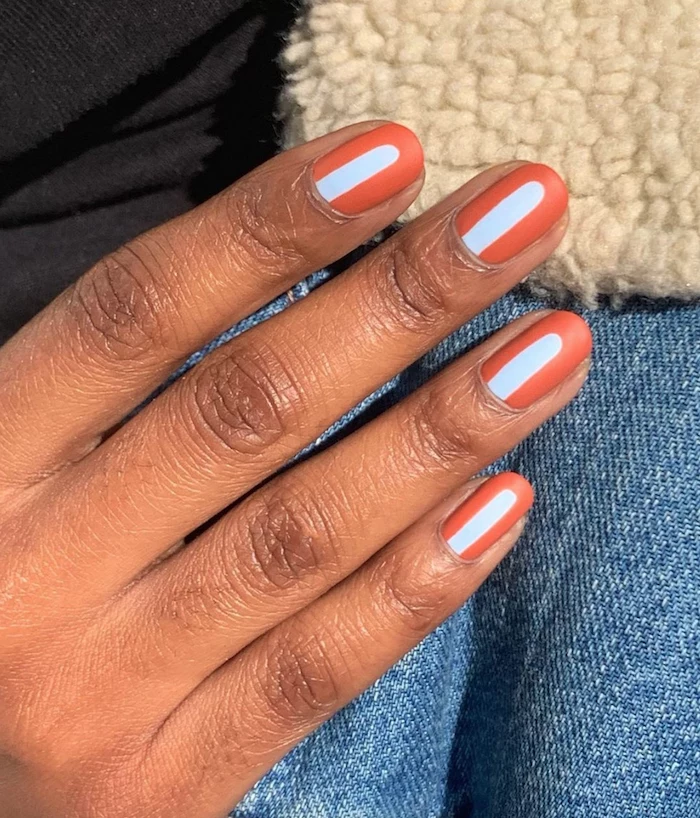
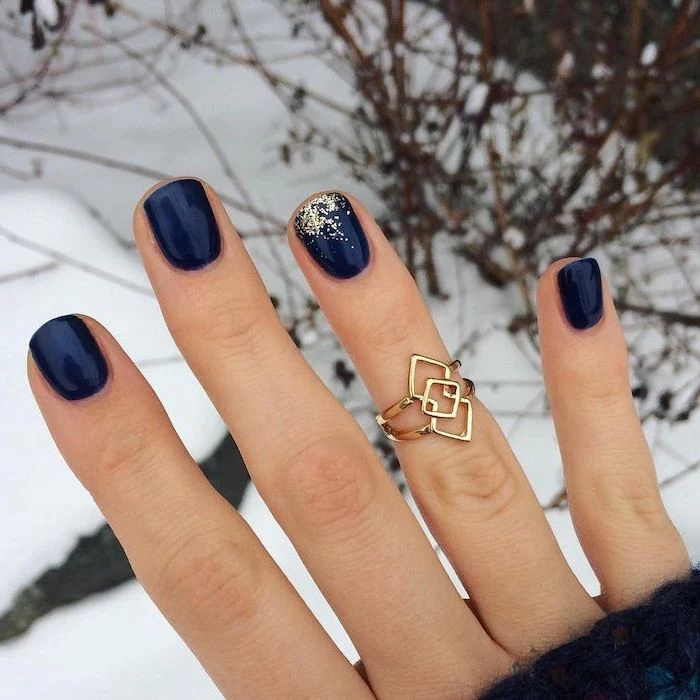
Of course! A dark, vampy color like a deep burgundy or navy looks incredibly chic and intentional on neatly filed short nails. It’s a powerful, modern statement. The key is a flawless application: use a good base coat to prevent staining and ensure the color goes right to the edges for a clean, crisp look. Try a classic like Chanel’s ‘Rouge Noir’.

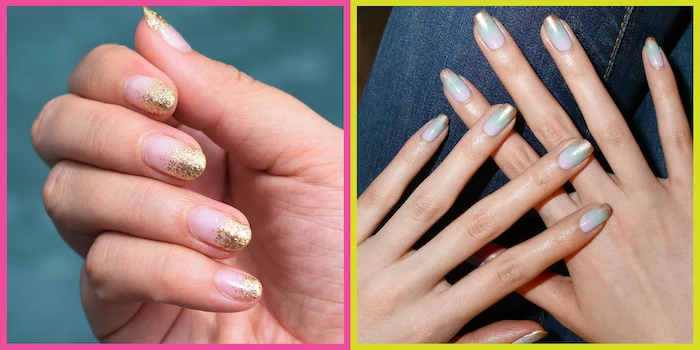
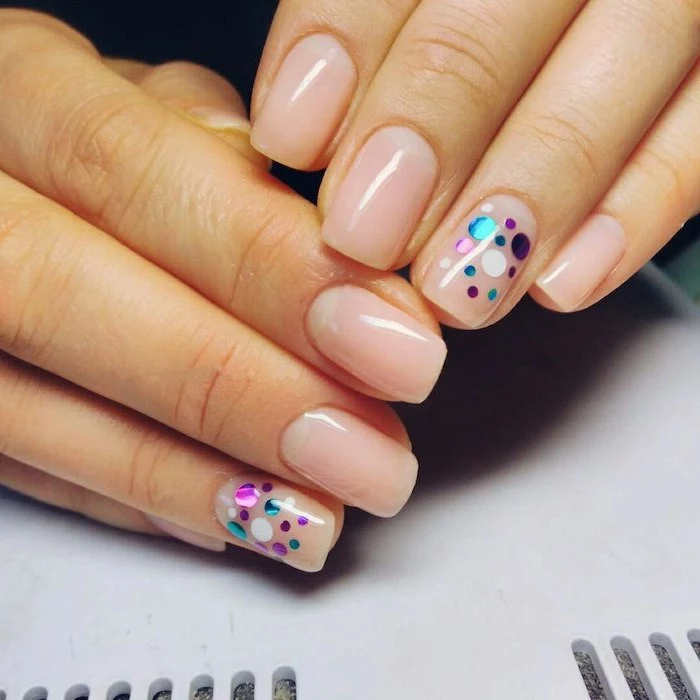
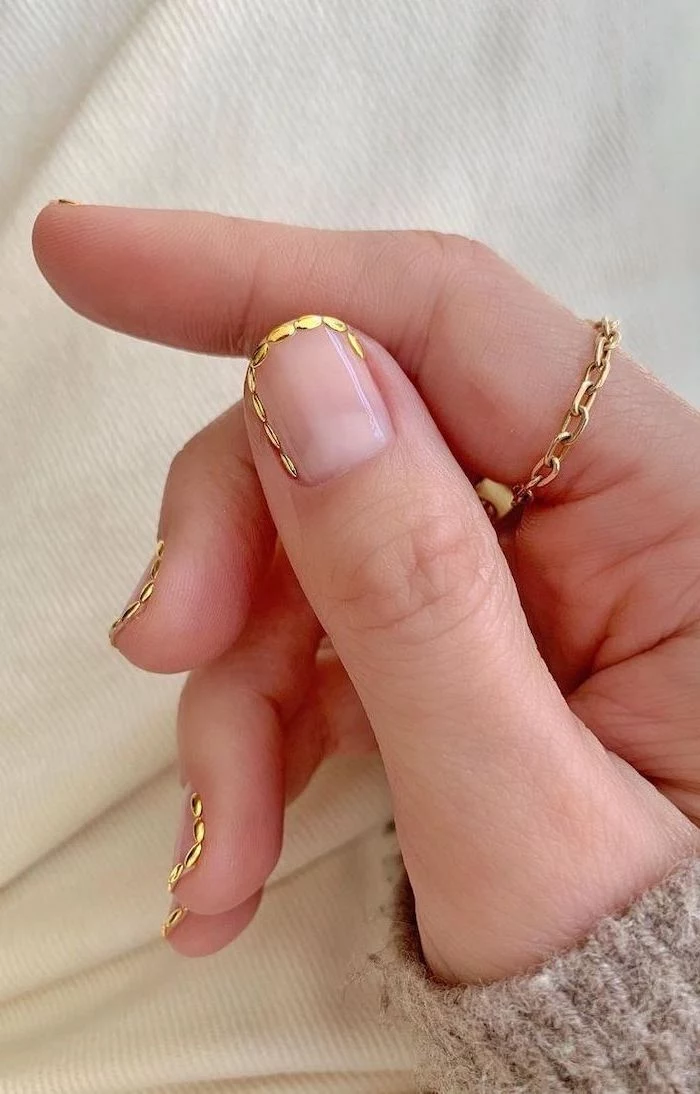
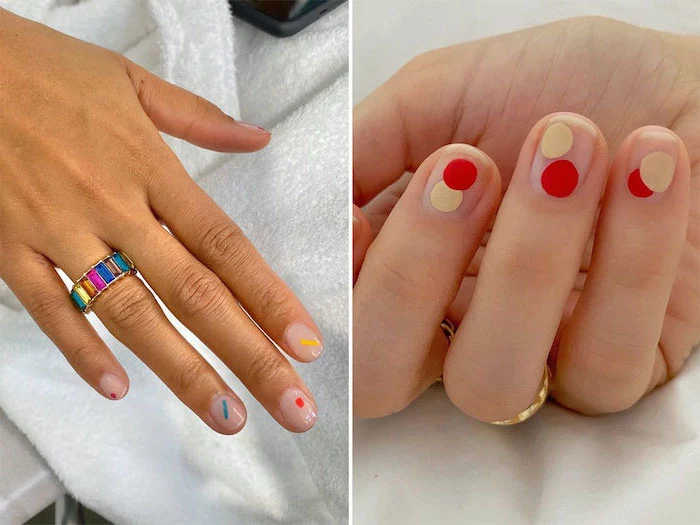
The secret to an elevated, minimalist look lies in the ‘lip gloss’ nail. It’s about more than just clear polish. Start with a ridge-filling base coat, apply one sheer coat of a milky pink or beige like OPI’s ‘Bubble Bath’, and finish with an ultra-glossy top coat. It’s your natural nail, but perfected—healthy, shiny, and effortlessly elegant.
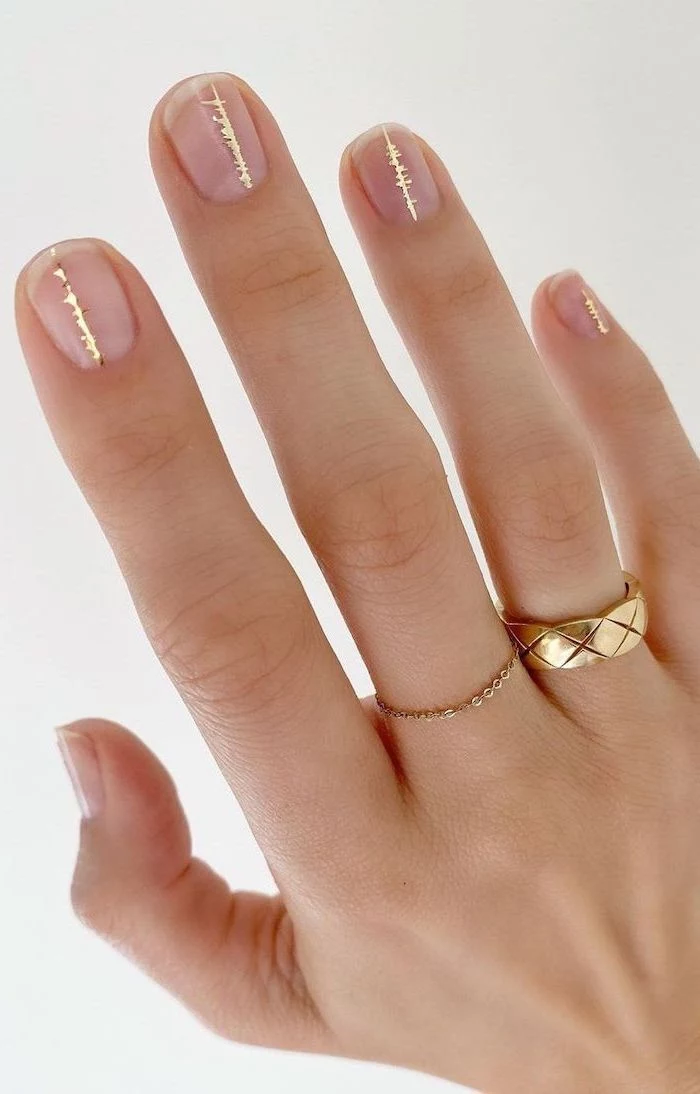
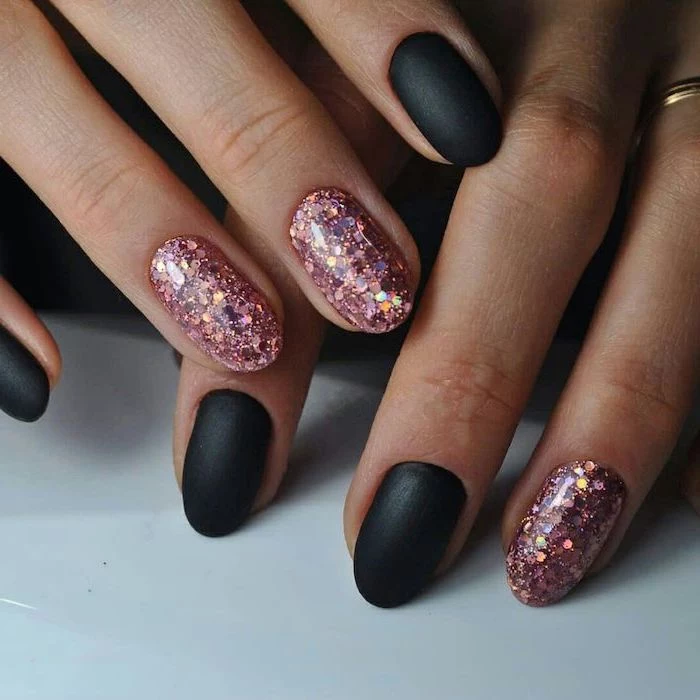
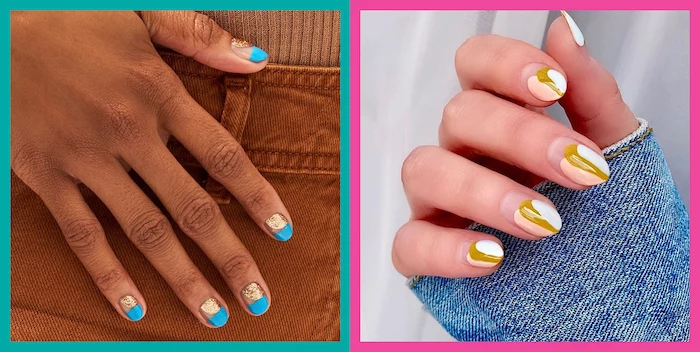
For an easy touch of holiday glam, try a single accent nail with gold leaf. After applying your base color (a deep red or black works beautifully), apply a thin layer of top coat to one nail. While it’s still wet, use tweezers to place tiny flecks of nail art foil or leaf. Let it set, then seal with another two layers of top coat to smooth it all out.
Don’t forget your hands! Your nails can’t be healthy if the skin around them is dry and cracked. Keep a tube of heavy-duty hand cream, like L’Occitane’s Shea Butter Hand Cream or Kiehl’s Ultimate Strength Hand Salve, in your bag, at your desk, and by your bed. Apply it after every hand wash to create a protective barrier against the cold.
- A mirror-like shine that lasts.
- Prevents premature chipping and tip wear.
- Makes your color look richer and deeper.
The hero? A non-negotiable base coat. Specifically, a strengthening one like OPI’s Nail Envy. It not only grips the polish but also infuses your nails with hydrolyzed wheat protein and calcium to counteract winter brittleness.
“The most important thing for winter nail health is hydration, from the inside out and the outside in. Drink your water, and never, ever skip cuticle oil.” – Jin Soon Choi, Celebrity Manicurist
The humble brown nail polish is having a major moment. Forget boring beige; we’re talking about rich, decadent shades that feel incredibly luxurious. From a creamy espresso to a warm reddish-brown reminiscent of terracotta, these colors are the new neutral. Zoya’s ‘Kateri’ is a perfect deep brown that offers full coverage and a sophisticated finish.
When washing dishes or doing any household cleaning, wearing rubber gloves is the single best thing you can do for your manicure. Hot water and harsh detergents are the primary culprits for stripping oils from your nails and skin, causing polish to lift and nails to become brittle. It’s a simple habit with a huge payoff.
On average, fingernails grow about 3.47 millimeters per month. This growth can slow slightly in colder months due to reduced circulation to the extremities.
This means that any damage, like a split or break, will take longer to grow out in winter. That’s why preventative care—using strengthening treatments and wearing protective gloves—is more critical than ever during this season.
Looking for a high-performance option without the salon price tag? The Sally Hansen Miracle Gel line is a game-changer. It’s a two-step system (color + top coat) that provides a gel-like cushion and shine without needing a UV lamp. It’s more durable than regular polish and is easily removed with standard nail polish remover.
Over-cutting cuticles: A common mistake that can lead to infection and damage. Your cuticles are a natural barrier. Instead of cutting, gently push them back after a shower with an orange stick wrapped in cotton, and keep them hydrated with oil.
Ever heard of ‘5-Free’ or ’10-Free’ polish? This refers to formulas created without common controversial ingredients like formaldehyde, toluene, and DBP. Brands like Butter London and Tenoverten champion these cleaner formulas, which are a great choice if you have sensitive skin or are conscious about ingredients without sacrificing color performance.

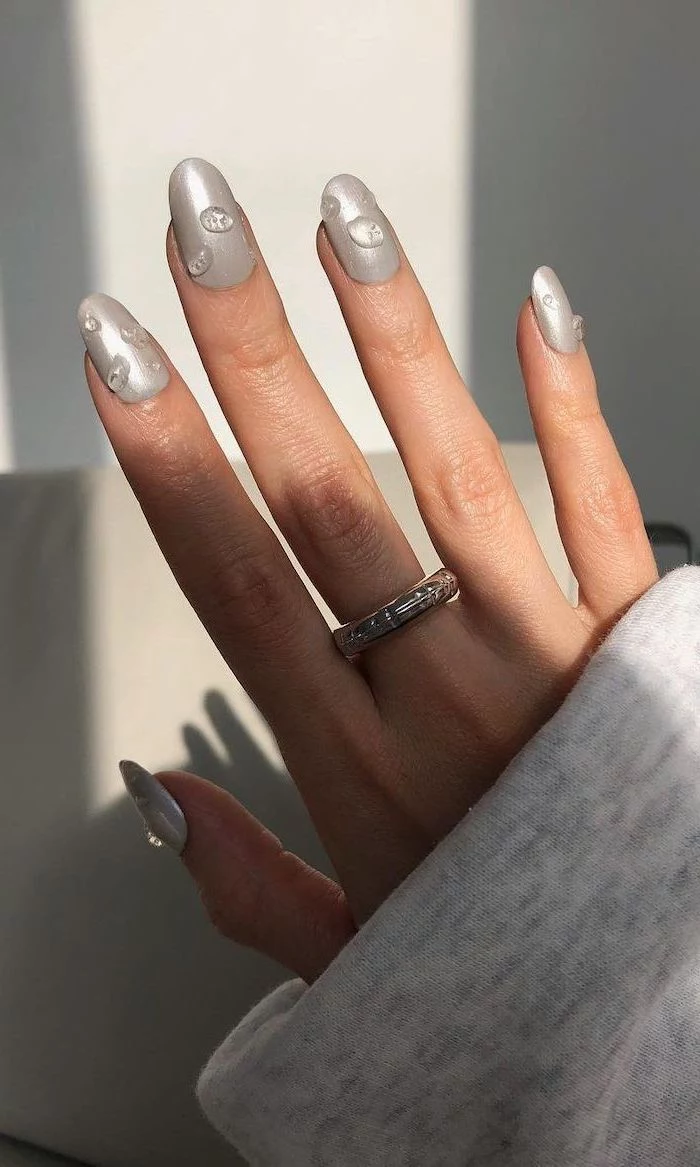
For an unexpected pop of winter shimmer, explore the world of chrome powders. Applied over a no-wipe gel top coat, these ultra-fine pigments create a stunning, liquid-metal effect. A silvery chrome over a black base is classic, but try a pearlescent white chrome over a nude base for a ‘glazed donut’ look perfectly suited for the frosty season.
- Stunning with holiday metallics.
- A perfect match for a little black dress.
- Feels powerful and confident.
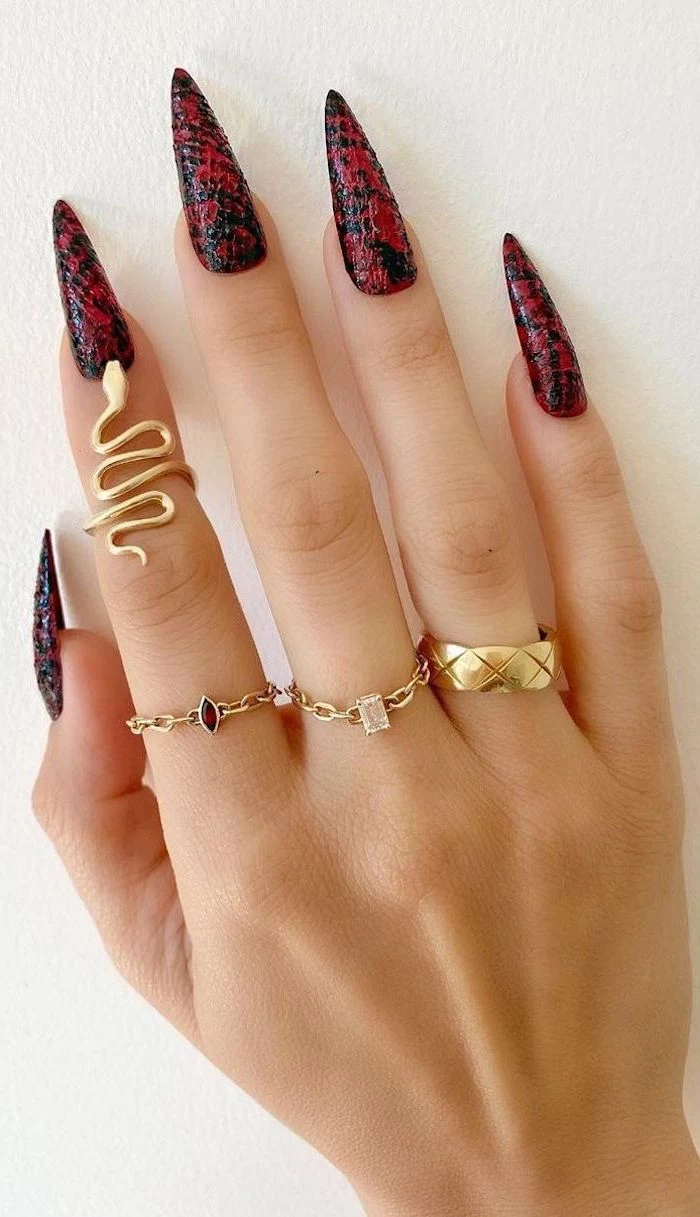
The mood? Dark and vampy. A nearly-black red or a deep, inky purple creates an aura of mystery and sophistication. It’s a timeless choice that signals you’re ready for cozy evenings and glamorous holiday parties.
The Pro’s Finishing Touch: After your top coat has had a minute to set, quickly dip your fingertips into a bowl of ice water for about 30 seconds. This helps to rapidly harden all the layers of polish from the outside in, reducing the risk of smudges as your manicure fully cures over the next few hours.


