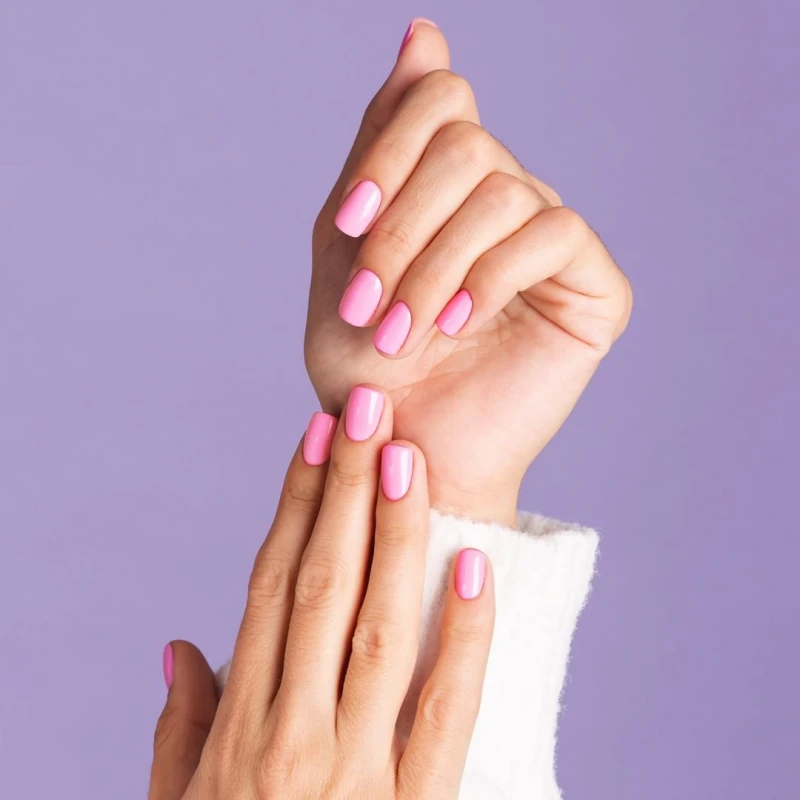
Your Guide to Flawless Dip Nails at Home (From a Pro Who’s Seen It All)
Alright, let’s talk dip nails. For years, I worked in a salon, and this stuff was our secret weapon. Clients were hooked on that rock-hard, three-week manicure. Then, at-home kits hit the scene, promising that same salon magic in a box. And while they’re not wrong, those little instruction pamphlets often leave out the real secrets—the tiny adjustments that make the difference between a lumpy, peeling mess and a manicure you can’t stop staring at.
In this article
- First, Let’s Geek Out: What’s Actually Happening?
- The Most Important Step: Professional-Level Prep
- Building the Perfect Nail: It’s All About Structure
- Oops! Quick Fixes for Common Dip Nail Problems
- Activation & Filing: The Refinement Stage
- The Glassy Finish: Top Coat Secrets
- Nail Health & Taking Breaks
- The Only Safe Way to Remove Dip Powder
- Final Thoughts on Your Dip Journey
- Inspiration:
So, this is not a sales pitch. This is the stuff I taught my apprentices, the hard-won knowledge from thousands of manicures. We’re going to get into the nitty-gritty of why things work, how to prep like a pro, and how to shape your nails so they look elegant, not bulky.
Heads up: Your first attempt might take you a solid two hours. Don’t panic! That’s totally normal. Once you get the rhythm down, you’ll likely cruise through a set in about 75 minutes. So put on a good podcast, grab a drink, and let’s get started.
First, Let’s Geek Out: What’s Actually Happening?
Before you even think about opening a jar of powder, it helps to know what you’re playing with. Dip powder is basically a chemistry experiment on your fingertips. The system has two stars: a resin-based liquid (your Base coat) and a super-fine polymer powder.
Here’s the simple version: The Base coat is like a glue. When you dip your nail in, the powder sticks to it. Then, the Activator liquid swoops in. It’s a catalyst that kicks off a chemical reaction called polymerization, which basically locks the powder and liquid together into a strong, plastic-like mesh. It’s an exothermic reaction, meaning it creates a little heat. Feeling a slight warmth on your nail is a good sign—it means it’s working!
Why does this matter? Because knowing this helps you troubleshoot. If your nails feel gummy, the reaction didn’t fully complete. If they’re brittle, your layers might be too thin. Unlike gel that needs a UV light to cure, dip powder cures with a chemical reaction, which is great for at-home use but demands a bit of precision with your liquids.
The Most Important Step: Professional-Level Prep
Honestly, more than 90% of dip powder problems like lifting and chipping come from lazy prep. This is the one step everyone rushes at home, but in the salon, we take our time here. A perfectly clean nail is the only way to guarantee your manicure will stick around for the full three or four weeks.
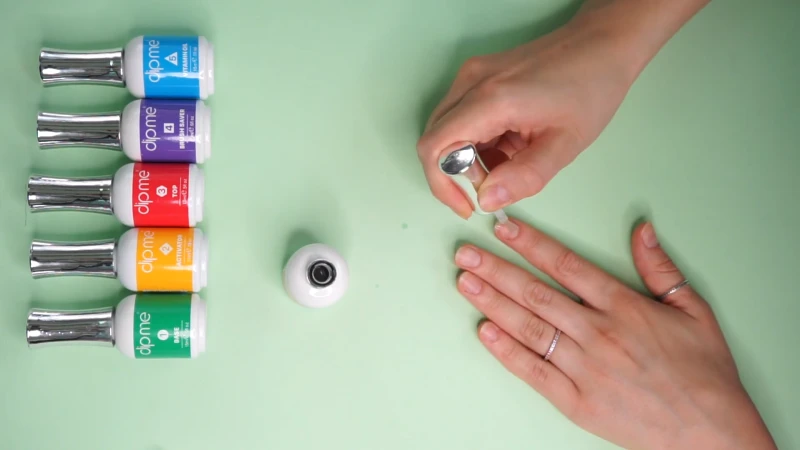
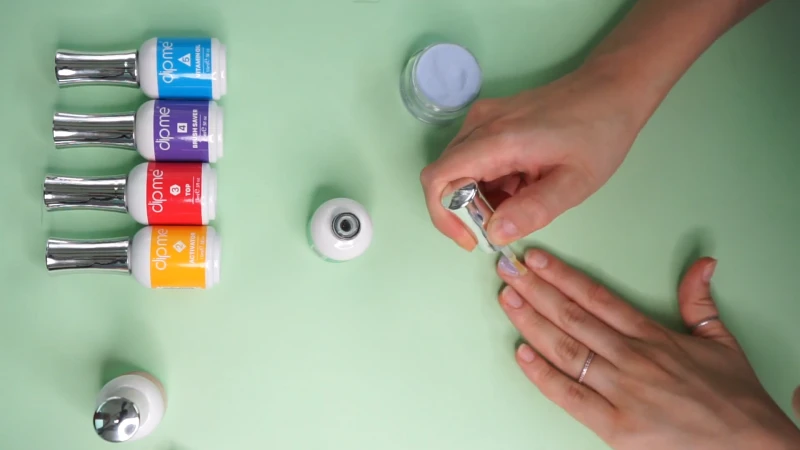
Your Beginner’s Shopping List
You can grab a starter kit from brands like Revel Nail or Kiara Sky for about $40-$60, and even some budget-friendly options on Amazon work pretty well for learning. Or, you can build your own kit. Here’s what you absolutely need:
- A Cuticle Pusher: For beginners, I always recommend simple orangewood sticks or one with a rubber tip. Metal pushers can do some real damage to your nail plate if you don’t have a trained hand.
- A Gentle Buffer Block: Look for a 220/280-grit buffer. You’re just trying to remove shine and oil, not file your nail into oblivion. Coarse files will just cause damage.
- A Nail File: A standard 180/240-grit file is perfect for shaping the edge of your nail.
- Lint-Free Wipes: Please, skip the cotton balls. They leave behind tiny fuzzies that will get trapped in your dip layers and drive you crazy. You can find these at any beauty supply store or online.
- Nail Dehydrator & Cleanser: Your kit will call this “Prep” or “Step 1.” It’s mostly isopropyl alcohol and a bit of acetone. In a pinch, 91% isopropyl alcohol from the drugstore works just fine. Oh, and don’t forget a bottle of 100% pure acetone for removal—it’s about $5 and essential.
The No-Fail Prep Method
1. Shape First: Shape your nails before anything wet touches them. It’s way easier. File gently in one direction to avoid fraying the tips.
2. Deal with Your Cuticles (The Right Way): This is a game-changer. You need to distinguish between the cuticle and the eponychium. The eponychium is the living skin at the base of your nail—never, ever cut it. The cuticle is the invisible, non-living tissue stuck to your nail plate. Gently push back the skin, and you’ll see a flaky layer. THAT is what you need to remove. Very gently buff it off. Any product you put on top of that tissue is guaranteed to lift.
3. Lightly Buff: Grab that soft buffer block and gently go over the entire nail surface until the shine is gone. The nail should look matte, not scratched. Get close to the cuticle area and sidewalls, where oils like to hide.
4. Scrub Clean: Use a lint-free wipe soaked in your prep solution or alcohol and scrub the nail clean. Get the sides, the front edge, and even underneath the tip. From this moment on, do not touch your nails with your fingers! The oils from your skin will ruin all your hard work.
Building the Perfect Nail: It’s All About Structure
In the salon, we don’t just paint on color; we build an elegant structure. The key is creating an “apex”—a slightly thicker, curved area in the center of the nail that provides strength right where it’s needed most. This allows the nail to be thin and natural-looking at the cuticle and tip, which prevents that bulky, “chicklet” look.
Work on one nail at a time through the dipping process, as the base coat dries surprisingly fast.
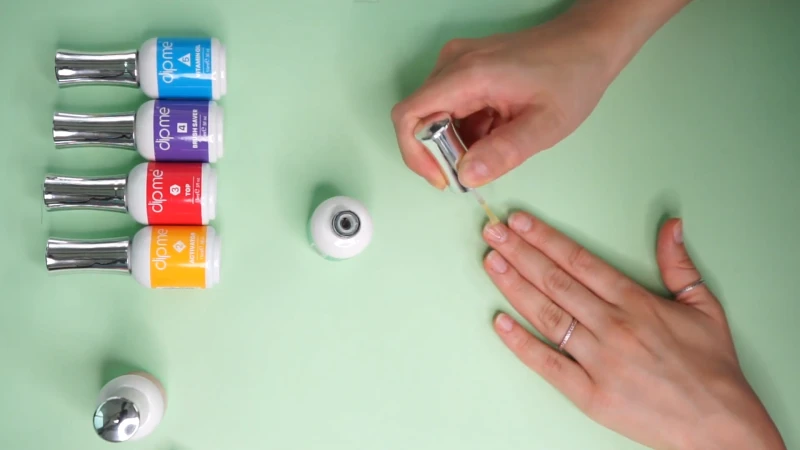
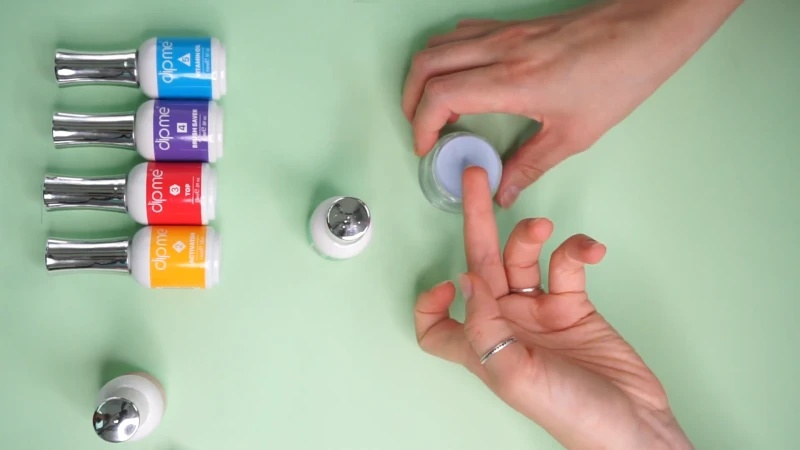
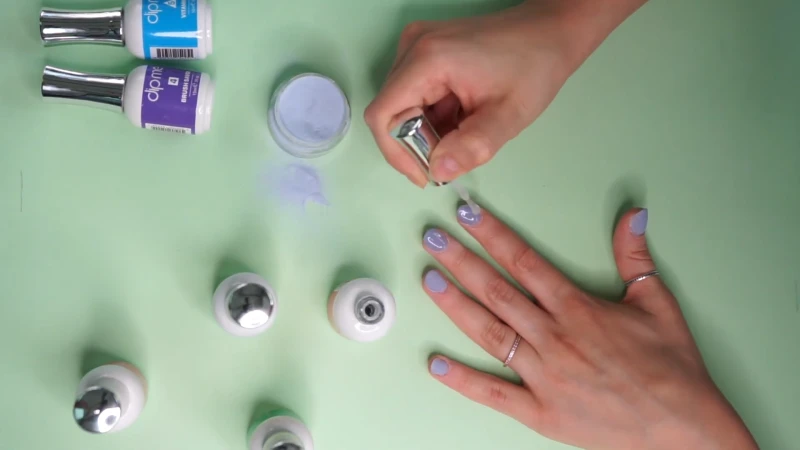
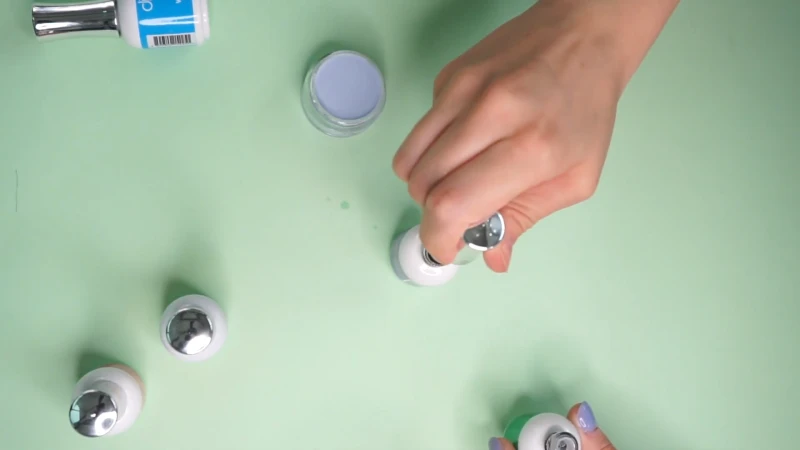
1. The First Dip (The 75% Rule): Apply a thin layer of Base coat, but stop about two millimeters from your cuticle line. Think of painting just the middle 75% of your nail. Immediately dip the nail into your powder at a 45-degree angle. This gives you an even coat. Hold it for a moment, pull out, and gently tap your finger to knock off the extra powder. Don’t brush it yet.
2. The Second Dip (The 90% Rule): Apply your second layer of Base coat, this time getting a little closer to the cuticle—about one millimeter away. Dip, tap, and move on. This layer builds the body and the apex.
3. The Final Dip (Full Coverage): For most nails, two dips are plenty. If you have long nails or are tough on your hands, a third dip adds great strength. Apply the Base coat over the entire nail, getting as close as you can to the cuticle without touching your skin. Do your final dip and tap.
4. Brush Away Excess: Once you’ve finished all the nails on one hand, take a stiff, fluffy brush (an old makeup brush is perfect) and firmly brush away all the loose powder. Brush from the cuticle down towards the tip.
Pro Tip for Glitters: If you’re using a chunky glitter, it can get lumpy. To avoid this, do one layer of your glitter, then do a final layer of clear dip powder over the top. We call this “encapsulating,” and it gives you a perfectly smooth surface for your top coat.
Oops! Quick Fixes for Common Dip Nail Problems
Before we move on, let’s talk about screw-ups, because they happen. I’ll never forget the first time I tried a French manicure on someone… let’s just say it looked more like a wavy blob. We all start somewhere!
- Mistake: My nails are lifting after just a few days!
The Fix: I’d bet money this is a prep issue. You most likely left some invisible cuticle on the nail plate or touched the nail with your fingers after cleansing. Next time, spend an extra five minutes just on prep. It really is the foundation for everything. - Mistake: My top coat brush got hard as a rock!
The Fix: Ah, the classic. This happens when the Activator on the nail reacts with the Top Coat in the bottle. Your kit’s “Brush Saver” bottle is your best friend—just swap the brushes and let the hard one soak. To prevent it, make sure you really scrub the nail with a dry, lint-free wipe after that final activator layer. Excess activator is the #1 brush killer. - Mistake: I flooded my cuticle with base coat!
The Fix: Don’t panic! Before you dip the nail in powder, take a clean orangewood stick and trace around your cuticle line to clean up the wet base coat. It’s a million times easier to fix it now than to file it off later.
Activation & Filing: The Refinement Stage
Right now, your nails are structured but probably look a bit chalky and rough. This is where we make them pretty.
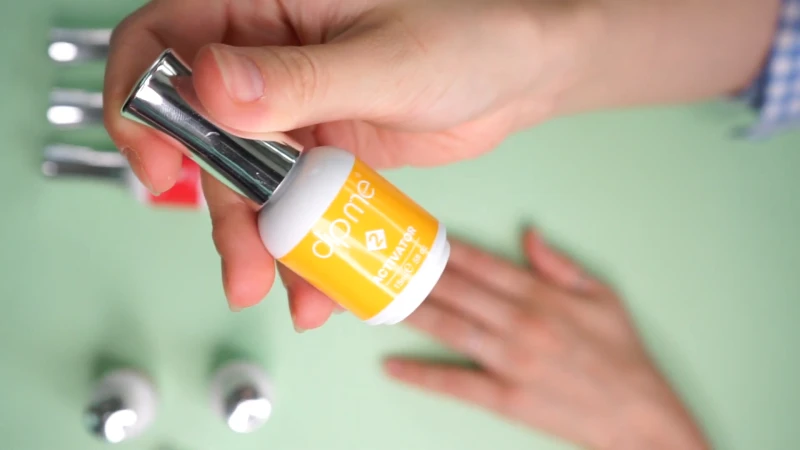
1. Apply the Activator: Be generous here. Apply the Activator to every nail, making sure to cover the entire surface and cap the free edges. It needs to soak through all the layers to cure them completely. Let it sit for at least two minutes. The nails are ready when you can tap on them with your brush handle and hear a sharp ‘click’ sound.
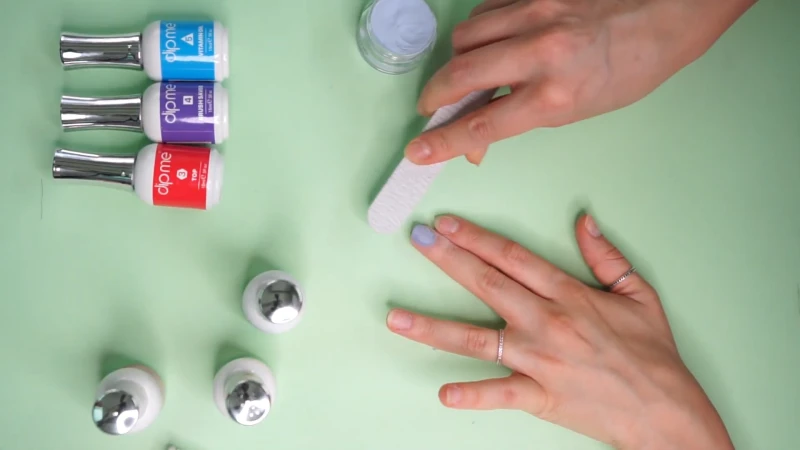
2. Shape and Refine: Once they are rock-hard, you can perfect the shape. Use a 180-grit file on the side walls and tip. Then, use that same file or a buffer to smooth the surface. Look at your nail from the side—see any lumps? File them smooth now for that graceful, professional curve.
3. Final Buff: Use your fine-grit buffer (220/280) to get the surface perfectly smooth. Any scratches you leave now will show right through the top coat.
The Glassy Finish: Top Coat Secrets
That signature dip powder shine comes from the top coat, but it can be tricky. A lot of people end up with a matte finish or a contaminated brush. The key is neutralizing the activator first.
1. Wipe Them Down: After your final buffing, you can either quickly wash your hands with soap and water (no lotion!) or just thoroughly wipe each nail with an alcohol-soaked wipe. Make sure they are BONE DRY before the next step.
2. The Sacrificial Layer: Apply one more quick, thin layer of Activator over all the nails. Wait about 30 seconds, then take a clean, dry, lint-free wipe and rub the nails firmly. This removes any excess activator that’s sitting on the surface, ready to murder your top coat brush.
3. Quick First Coat: Work fast. Apply the first layer of Top Coat in two or three quick strokes. Don’t play with it. Cover the nail, cap the tip, and move on. Do this for all ten nails.

4. The Second, Perfect Coat: Immediately go back to the first nail you started with and apply a second, more deliberate layer of Top Coat. This coat will magically self-level over the first one, creating that flawless, glassy finish. Let it air dry for about two to three minutes. No light needed!
Nail Health & Taking Breaks
Let’s clear something up: your nails do not “breathe.” They get their nutrients from your blood flow, not the air. So, do you need to take a break between sets? Not really, but it can be a good idea. Constantly wearing enhancements and using acetone for removal can be drying.
A great practice is to go bare for a week every few sets. During that week, go to town with a high-quality cuticle oil. I’m a big fan of anything with jojoba oil because its molecules are small enough to actually penetrate the nail plate and skin. You can find great ones at places like Sally Beauty or even Target. It makes a huge difference in flexibility and health.
The Only Safe Way to Remove Dip Powder
I’m begging you: never, ever pry, pick, or peel off your dip nails. You will rip off layers of your natural nail and cause serious damage that takes months to grow out. The only safe way is to dissolve the product.
1. File Off the Top Coat: Use a coarse file to break the seal of the shiny top coat. You need to file until the shine is completely gone and you start to see color coming off as dust. This allows the acetone to get in.
2. Soak in Pure Acetone: Regular nail polish remover won’t cut it. You need 100% pure acetone. Soak a piece of cotton in it, place it on your nail, and wrap your fingertip tightly in a small square of foil. Set a timer for 15-20 minutes.
3. Gently Scrape: After soaking, the product should be gummy and almost melted. Use an orangewood stick to gently push it off. If it’s still hard, do not force it. Just re-wrap it and soak for another five minutes.
4. Nourish: Acetone is very drying. Once the product is off, gently buff your natural nail and then drench your nails and cuticles in that good oil we talked about.
Final Thoughts on Your Dip Journey
Learning to do your own dip nails is a real skill. Your first set probably won’t be perfect, and that is completely fine. Every single set is a chance to learn something new. Focus on your prep, be patient with your filing, and don’t be afraid to make mistakes. You have the right knowledge now—the craft just takes a little practice.
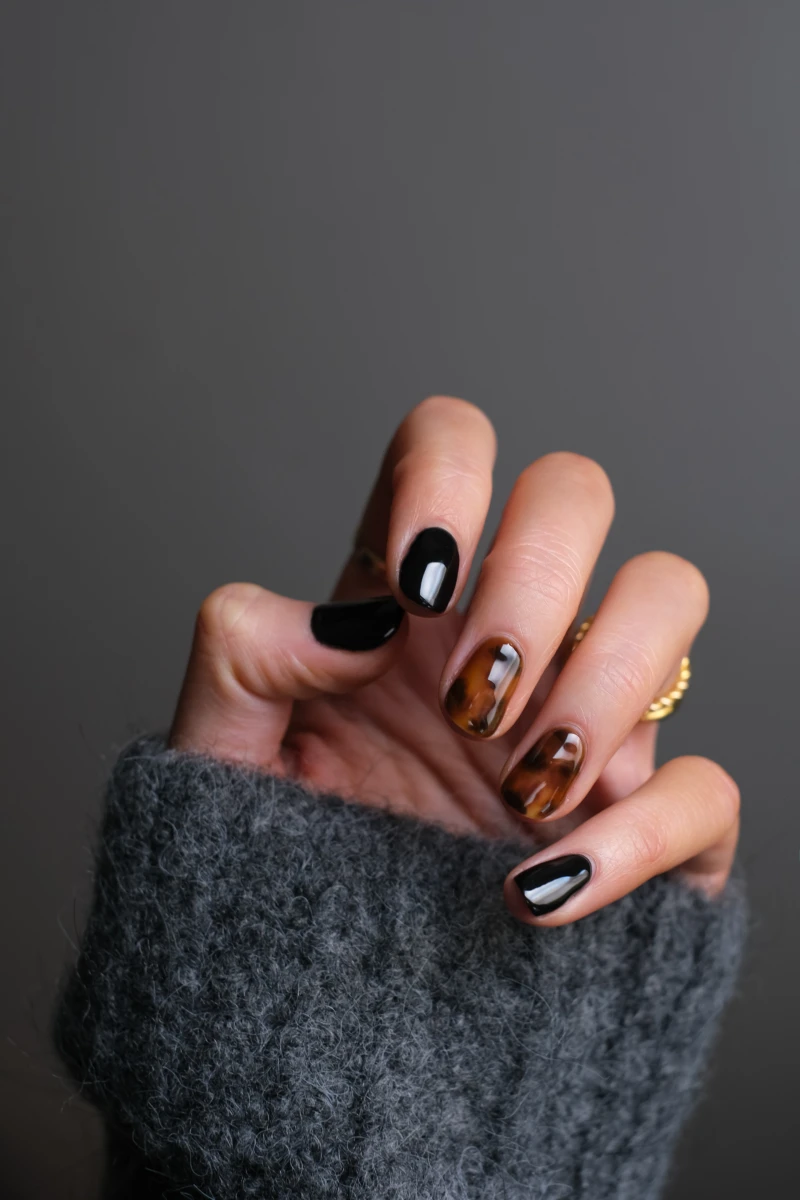
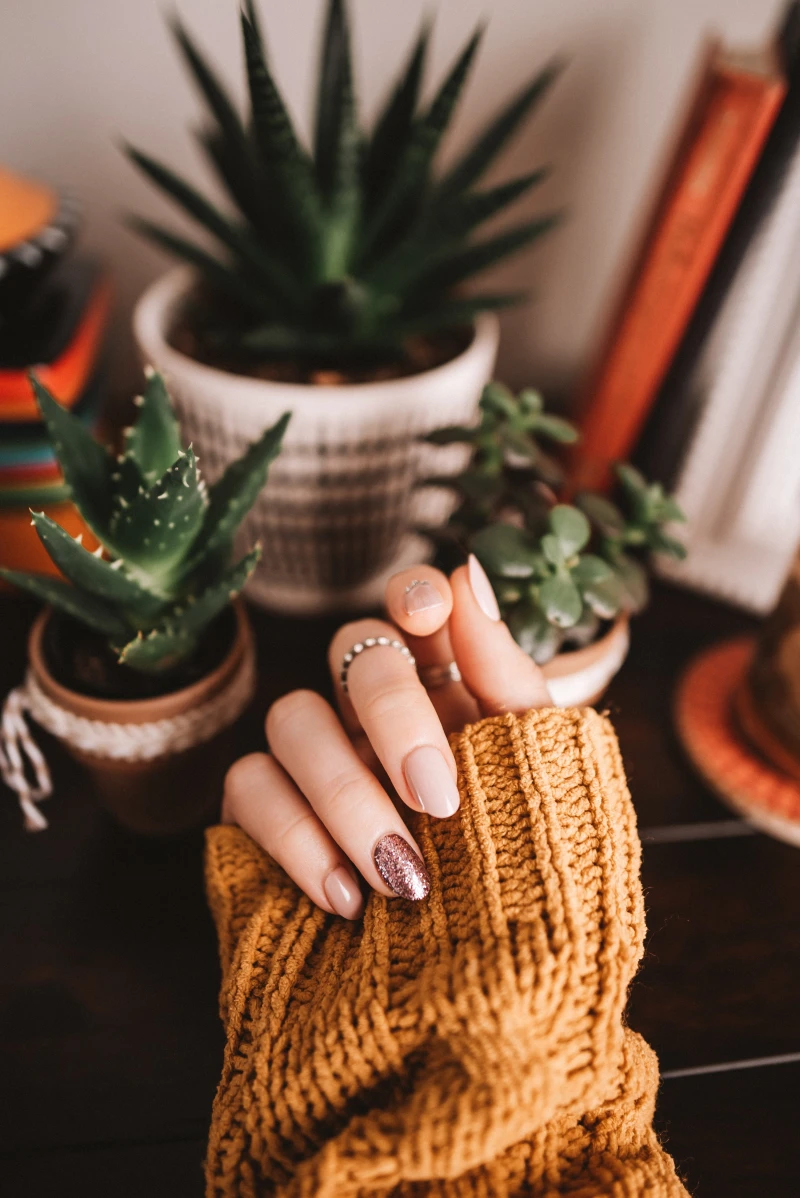
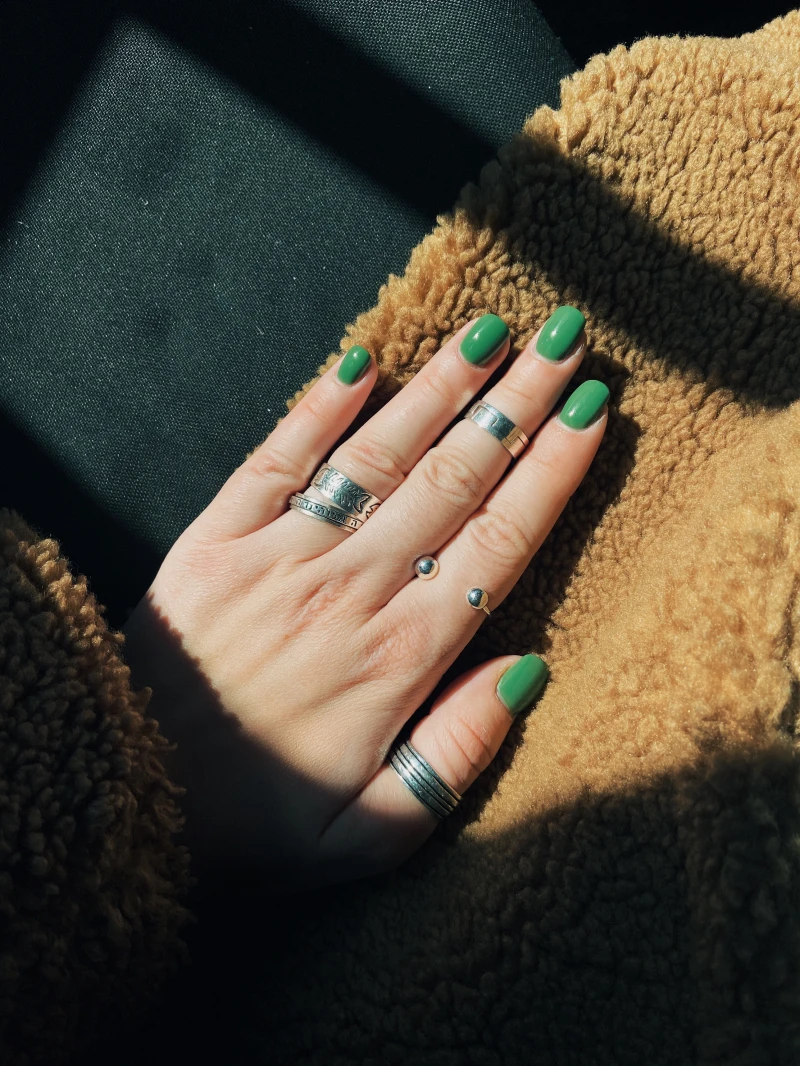
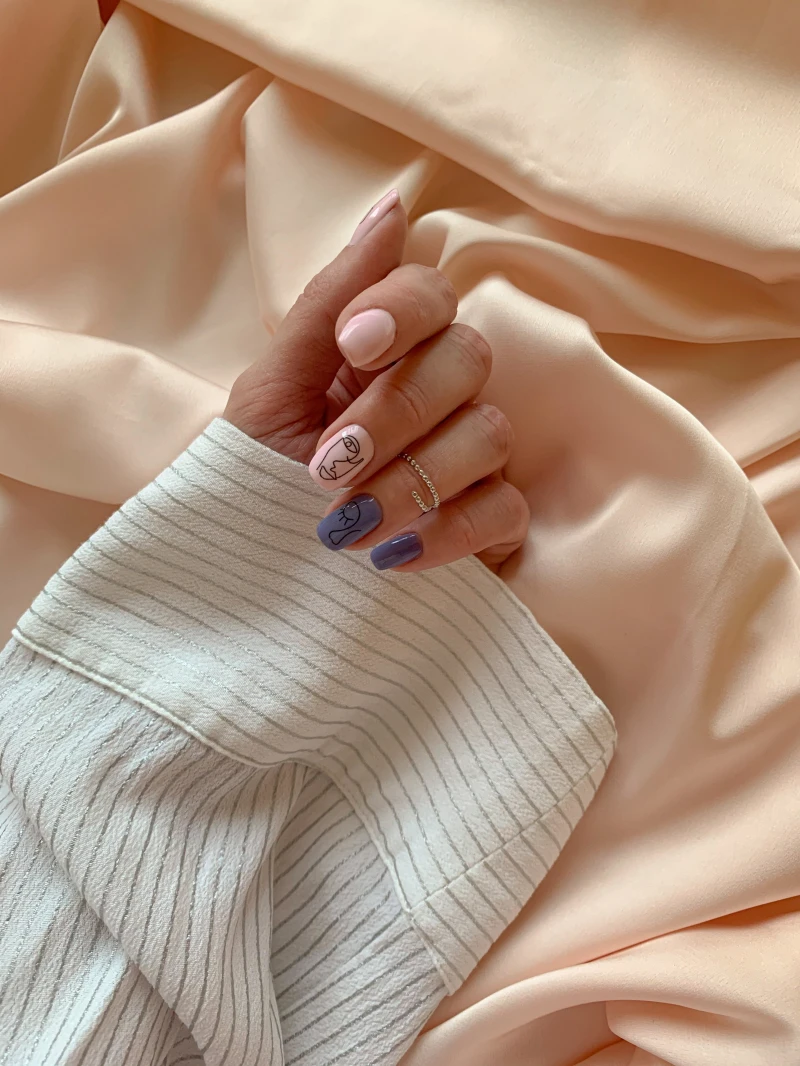
Inspiration:

The big question: How do I get this stuff off without wrecking my nails?
Patience is everything. First, use a coarse file (around 100 grit) to gently remove the shiny top coat. This breaks the seal and allows the acetone to penetrate. Next, soak cotton ball pieces in 100% pure acetone, place them on your nails, and wrap each finger tightly in a small square of aluminum foil. For faster results, place your hands in a warm towel. After 15-20 minutes, the dip should be soft and flake off easily with a cuticle pusher. Never force or pry it off—if it’s not ready, re-wrap and wait another 5 minutes.
Did you know? Your natural nail plate is made of dead keratin cells and doesn’t need to ‘breathe.’
Nails receive their oxygen and nutrients from the bloodstream, not the air. The real key to nail health lies in what you do between manicures. It’s about gentle removal, keeping your cuticles hydrated with a quality oil like CND SolarOil, and protecting your hands. A ‘breathing break’ is really just a break from potential damage caused by improper application or removal.
The secret to a salon-perfect shape: It’s all about building an ‘Apex’. An apex is the subtle, curved high point on the nail bed that provides structural strength and creates a slender, elegant look. Flat nails look bulky and are more prone to breaking. You can build one by applying an extra layer of base and powder just in the center of your nail (avoiding the cuticle and tip) before your full-coverage coats. It’s a game-changer.
Achieving a classic French manicure with dip powder can feel intimidating, but a popular hack makes it simple. Many DIYers swear by specialized French dip trays, like the one from Revel Nail, that guide your finger into a perfect smile line.
- Angle your finger downwards as you push it into the white powder to create a deeper, more dramatic curve.
- For a softer, more natural line, push in at a shallower angle.
- Clean up any stray white powder with a stiff brush before dipping into your pink or nude base color.
- Daily cuticle oil application.
- Wearing gloves for dishes and cleaning.
- Filing, not clipping, to reshape any minor chips.
The secret? These three simple habits can easily add another week of flawless wear to your dip manicure by preventing lifting and keeping the product flexible.
Thin Liquids: Like those from brands such as Kiara Sky, these are runny and allow for very thin, even layers. They are great for experienced users but can be tricky for beginners as they can flood cuticles easily.
Thicker Liquids: Often found in starter kits from brands like Modelones or AzureBeauty, these are more forgiving and give you more time to work before they set. The trade-off is a higher risk of a bulky application if you’re not careful.
Start with thicker liquids to learn, then consider graduating to a thinner formula once you’ve mastered your technique.
For a touch of texture that catches the light, try the ‘sugar effect’. After your final activator step and buffing, apply a thin layer of your Top Coat. Before it dries, sprinkle a fine, iridescent glitter over the entire nail. Tap off the excess and let it dry completely *without* an additional top coat. The result is a gritty, sparkling finish that feels just like sugar.


