Your Ultimate Guide to Flawless Green Chrome Nails
I’ve been obsessed with nail art for years, and I’ve seen countless trends come and go. But let me tell you, chrome finishes are in a league of their own. They have some serious staying power. I’ll never forget the first time a client showed me a picture of green chrome nails. It wasn’t just sparkly—it was a true liquid-metal effect that looked incredibly sleek and futuristic.
In this article
My first thought wasn’t just, “Wow, that’s gorgeous.” It was, “How in the world do you get it that smooth?” There was no grit, no texture, just a perfect, mirror-like surface. Achieving that look isn’t about slapping on some green polish. It’s a very specific technique that hinges on the right products, timing, and a bit of know-how. This guide is basically everything I’ve learned from trial, error, and countless successful applications. We’re going to get into the nitty-gritty of how it actually works, so you can get that perfect finish, whether you’re a pro or a determined DIY-er.
The Science Behind That Mirror-Like Shine
So, what’s the secret? To get great results, you have to understand what you’re working with. Chrome powder isn’t like the pigment in your eyeshadow. It’s made of microscopic flakes of metal or glass that are engineered to be incredibly thin and flat—like millions of tiny, individual mirrors.
The magic happens when all those tiny flakes lie perfectly flat and uniform against each other. When they do, they create a seamless sheet that reflects light perfectly. But if the surface underneath is bumpy or they get jumbled, they scatter light instead. That’s when you get that dreaded gritty, glittery look, which is probably the most common chrome fail.
This brings us to the hero product of this whole process: the no-wipe gel top coat. Your standard gel top coat cures with a sticky film on top, often called the inhibition layer. If you try rubbing chrome powder on that, you’ll just get a clumpy mess. A no-wipe top coat, on the other hand, is designed to cure completely dry and rock-hard. It creates a smooth, non-porous canvas that’s perfect for burnishing (a fancy word for rubbing) the chrome flakes onto the surface until they form that flawless mirror.
Oh yeah, and your base color matters. A LOT. Black gel polish is the go-to for a reason. That dark background absorbs any stray light, making the chrome on top look deeper and more reflective. But you can totally play with this! For a super-vibrant mint green, for instance, using a mint green base color will give you a much truer, brighter result than black would.
Your Toolkit: What You’ll Need and What It’ll Cost
Using the right tools isn’t just a suggestion; it’s the difference between a pro-level result and a day of frustration. Here’s a rundown of what you’ll need to get set up at home, with some realistic price estimates.
Gels and Liquids:
- Nail Dehydrator & Primer: Don’t skip this. Prep is everything for making a manicure last. A set will run you about $10-$15.
- Gel Base & Color Coat: You’ll need a quality base coat and your chosen color (black is a safe bet!). Expect to pay around $10-$15 per bottle.
- No-Wipe Gel Top Coat: This is the most important player. Don’t cheap out here. A good one, like those from brands such as Daily Charme or Kupa, costs about $12-$20 but is worth every penny for its consistency.
Powders and Tools:
- Green Chrome Powder: Quality is key. Cheap powders from Amazon or eBay often have larger particles and give you a glittery finish. A small pot of professional powder costs between $8 and $15 but will last you forever.
- Silicone Applicator: Most powders come with a disposable eyeshadow sponge, which works in a pinch. But a dedicated silicone tool (around $5) is way better. It doesn’t absorb the powder and gives you a much smoother application.
- Soft, Fluffy Brush: You’ll need this to dust off excess powder. A big, soft makeup brush you’re willing to dedicate to nails works great.
Hardware & Safety:
- LED Lamp: A non-negotiable for curing gel. A decent 48-watt lamp will cost between $25 and $60 online or at a beauty supply store. An underpowered lamp is a recipe for disaster.
- Dust Mask: These powders are super fine and go everywhere. Please wear a mask. Your lungs will thank you. A box is only a few bucks.
All in, a solid DIY chrome setup will probably cost you between $70 and $130, but most of these items will last for dozens of applications.
The Step-by-Step Pro Method
Alright, let’s get to it. Follow these steps precisely, and don’t rush. Patience is your best friend here. I usually recommend working on one or two nails at a time from the top coat step onward.
Step 1: Prep is Everything
Bad prep is the number one cause of lifting and chipping. Gently push back cuticles, shape the nail, and then lightly buff the nail surface just enough to remove the shine. Cleanse the nail with 99% isopropyl alcohol, then apply one coat of dehydrator, followed by one coat of non-acidic primer.
Step 2: Build Your Base
Apply a thin layer of gel base coat and cure for 60 seconds in your LED lamp. Then, apply two thin coats of your black (or colored) gel polish, curing for 30-60 seconds after each coat. Thin coats are crucial to avoid wrinkling!
Step 3: The No-Wipe Top Coat (The Make-or-Break Step!)
This is where the magic—and the mistakes—happen. Apply one thin, even layer of your no-wipe top coat. Now, the cure time is critical. For most 48-watt lamps, the sweet spot is often shorter than the full time. I usually cure for just 20-30 seconds. If you cure for the full 60 seconds, the surface can become too slick for the powder to grab onto.
Quick Tip: Not sure about your lamp and top coat combo? Test it first! Grab a swatch stick, apply the base color and no-wipe top coat, and cure it for 15 seconds. Try rubbing the chrome on. Does it look gritty? Try another stick at 20 seconds. Then 25. You’re looking for that perfect moment where the powder instantly melts into a mirror finish with just a few rubs.
Step 4: Burnish the Chrome Powder
As soon as the nail comes out of the lamp, dip your applicator in the powder—you need very little! Start at the cuticle and rub the powder onto the nail with firm, steady pressure. Use circular motions until it transforms from a powder into a solid sheet of metal. You’ll literally see it happen.

Step 5: Seal It for Good
The chrome layer is delicate, so you have to seal it properly. First, use your fluffy brush to dust away ALL excess powder. Be thorough. Any speck left behind will be trapped in your top coat.
Lesser-known trick: To prevent chipping at the tips, take your primer and carefully run the brush just along the free edge of the nail. This gently etches the chrome and helps the top coat get a better grip. Then, apply two layers of top coat (you can use your no-wipe or a standard one), making sure to cap the free edge each time. Cure for a full 60 seconds for each layer.
Troubleshooting: When It All Goes Wrong
Even the pros run into issues. Here are the most common problems and how to fix them.
Problem: My finish is dull and sparkly, not a mirror.
This is almost always about the cure time for your no-wipe top coat. It’s either under-cured (still a bit sticky) or over-cured (too slick). Go back to that swatch stick test to find your perfect timing.
Problem: The chrome is chipping off at the tips after a day.
You didn’t seal the free edge properly. The chrome is just sitting on top, and if it’s not fully encased, it’ll flake right off. Make sure you’re capping that edge with both layers of your final top coat.
Problem: It looked great, but my top coat made it streaky.
Ah, the classic contamination. Your top coat brush picked up loose chrome dust and dragged it across the nail. I learned this the hard way… I’ll never forget contaminating a brand new bottle of top coat. For a week, every client got a subtle, unwanted shimmer in their manicure. Now, I have a dedicated bottle of top coat just for glitters and chromes. It’s a lifesaver.
Beyond the Basics: Playing with Color and Design
Once you nail the basic application, you can have some fun. Don’t just stick with a black base! Try applying your green chrome over different colors to see what happens. For example:
- Over black, you get that classic, deep emerald green.
- Over a dark navy blue, it can create a stunning, rich teal effect.
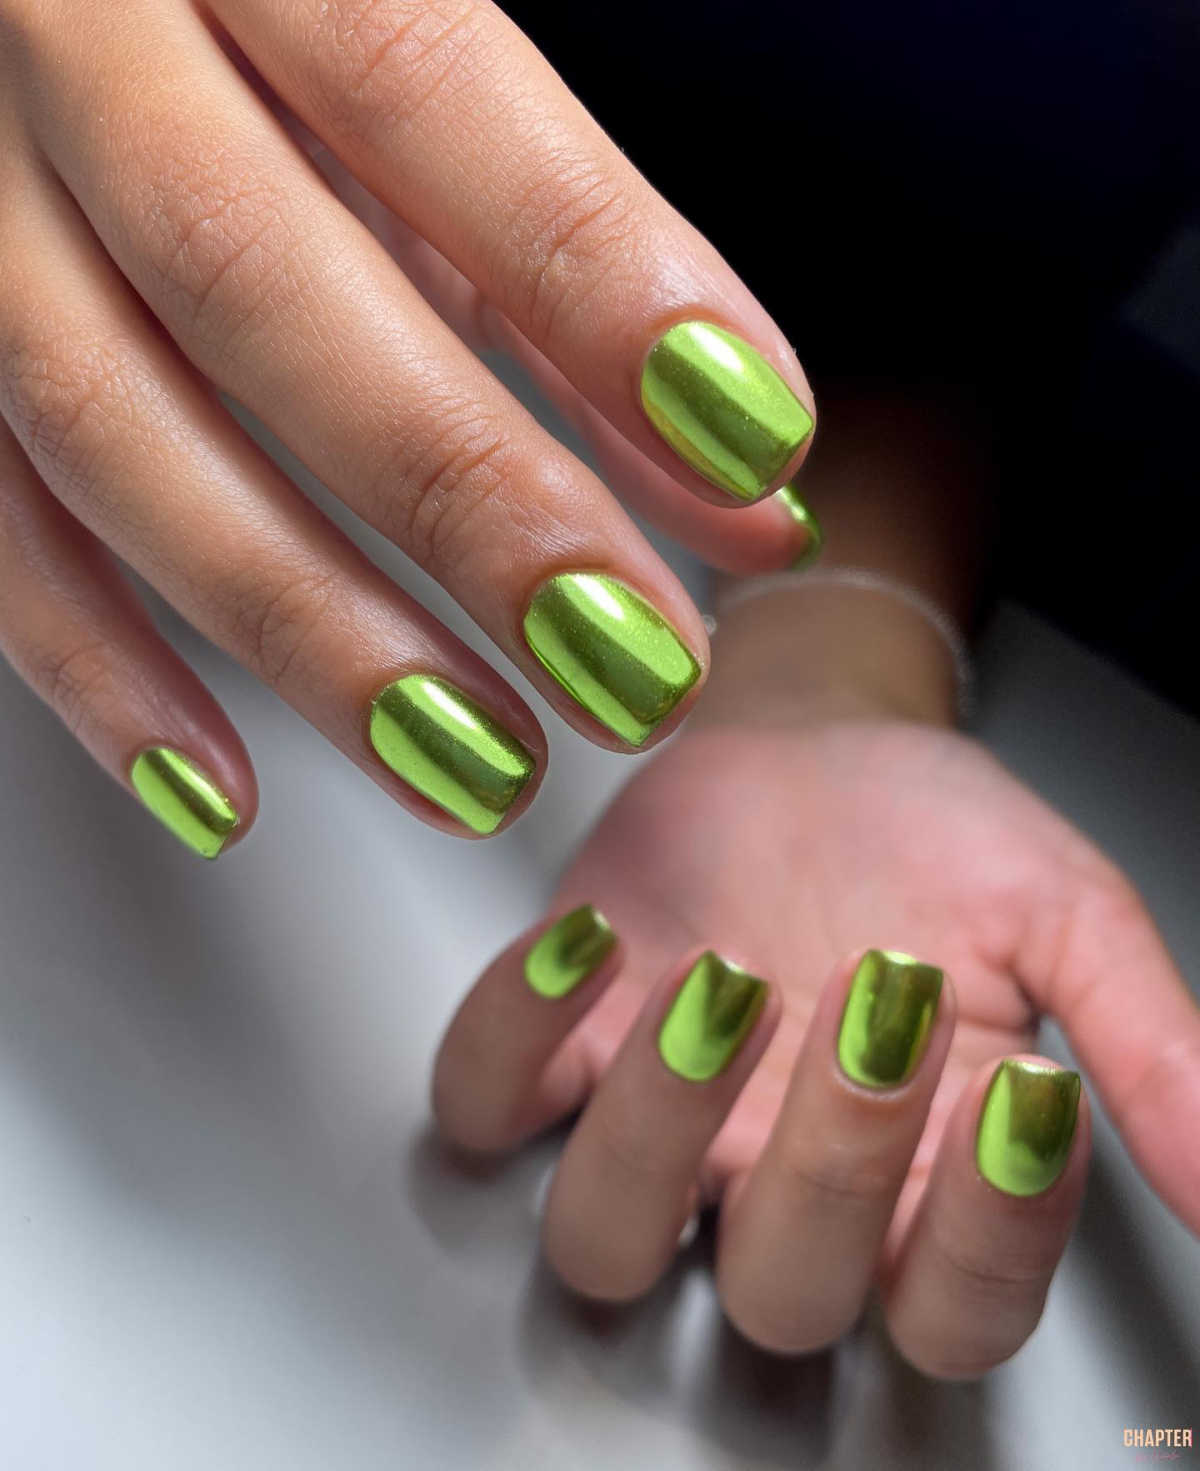
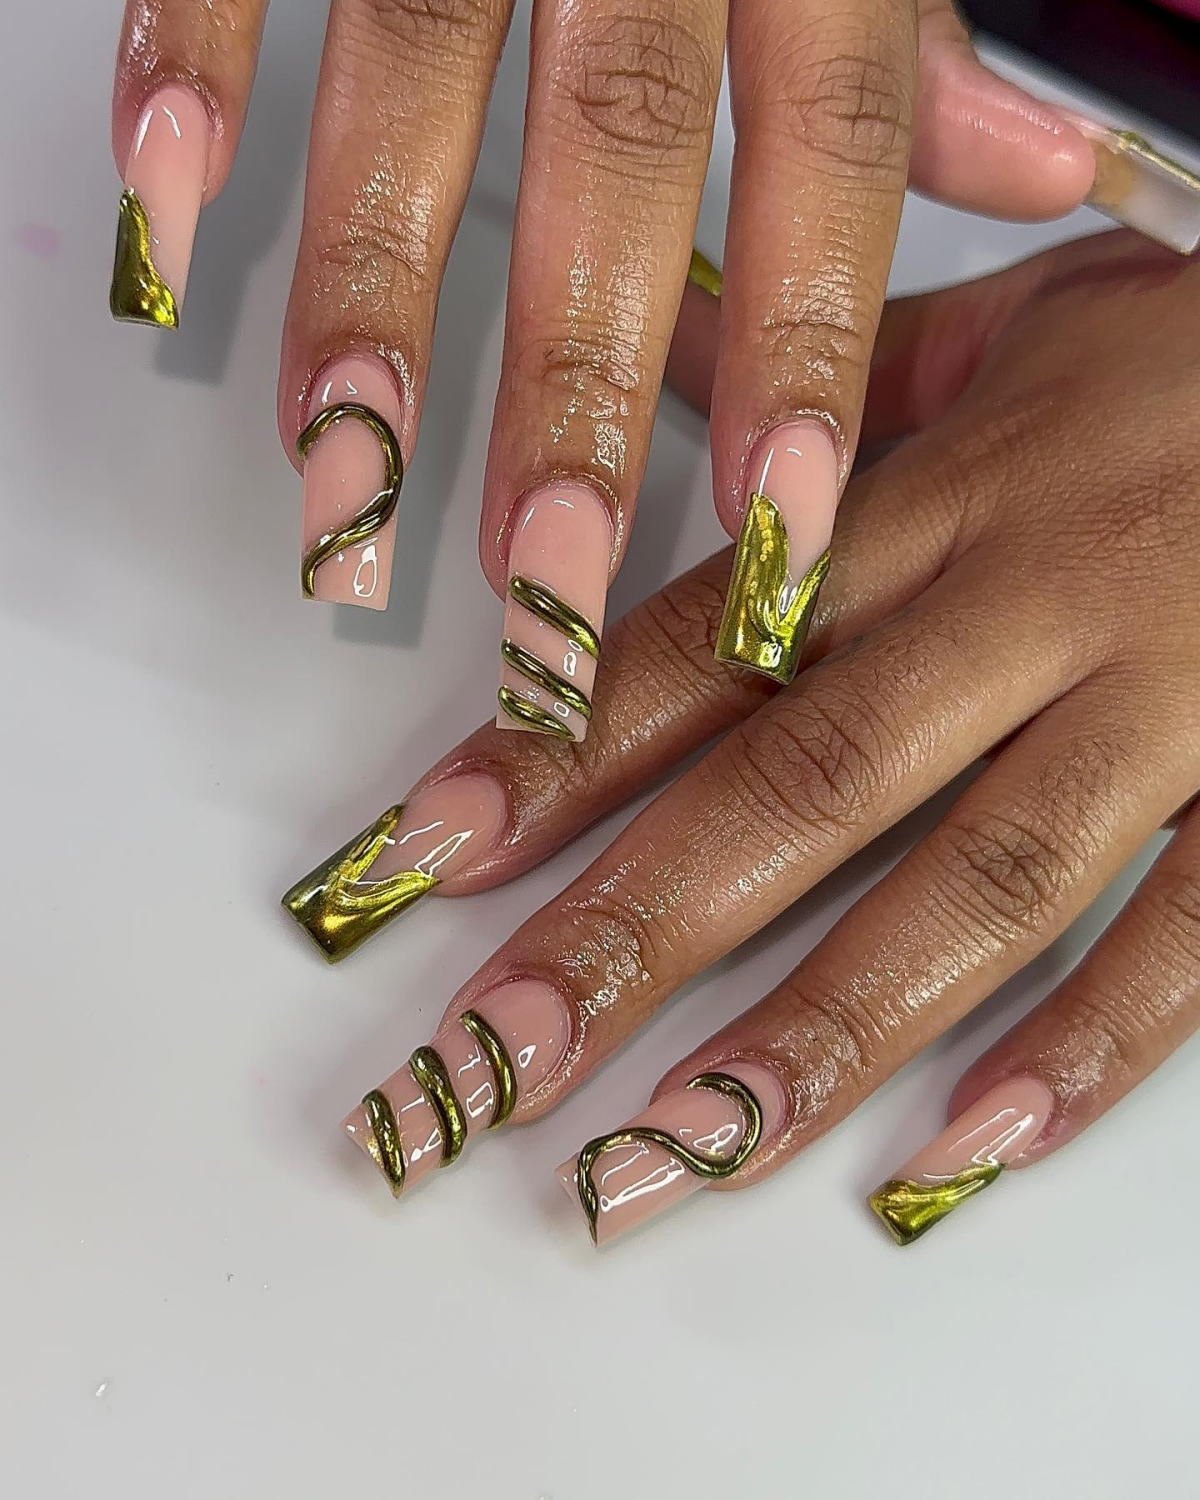
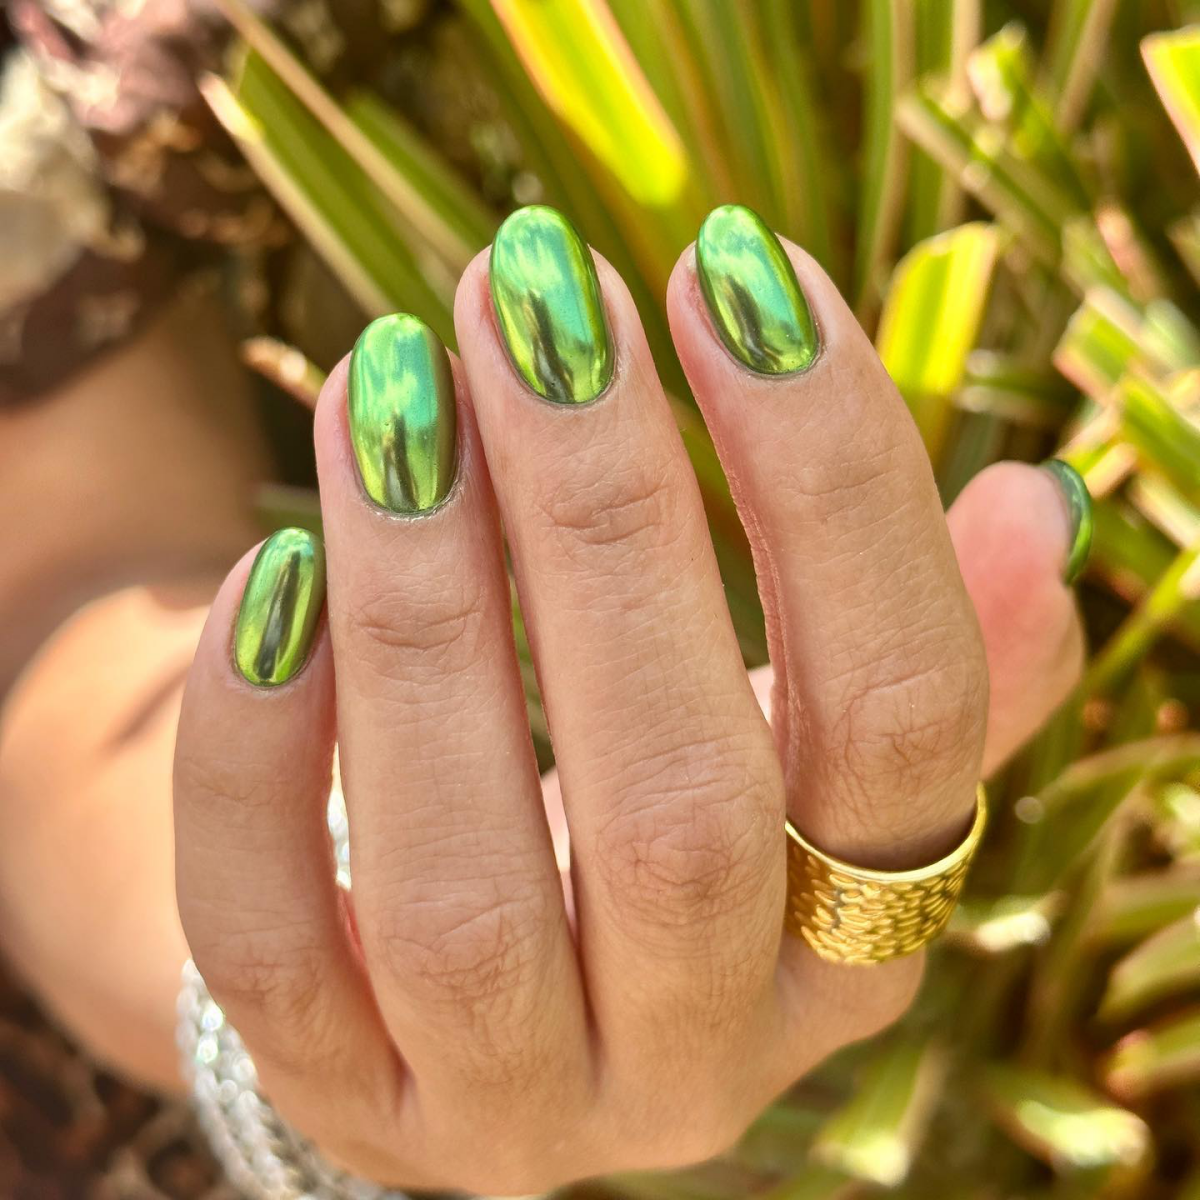
- Over a bright yellow, an olive green chrome can turn into a dazzling chartreuse.
- Over a matching green, the color becomes incredibly vibrant and true to shade.
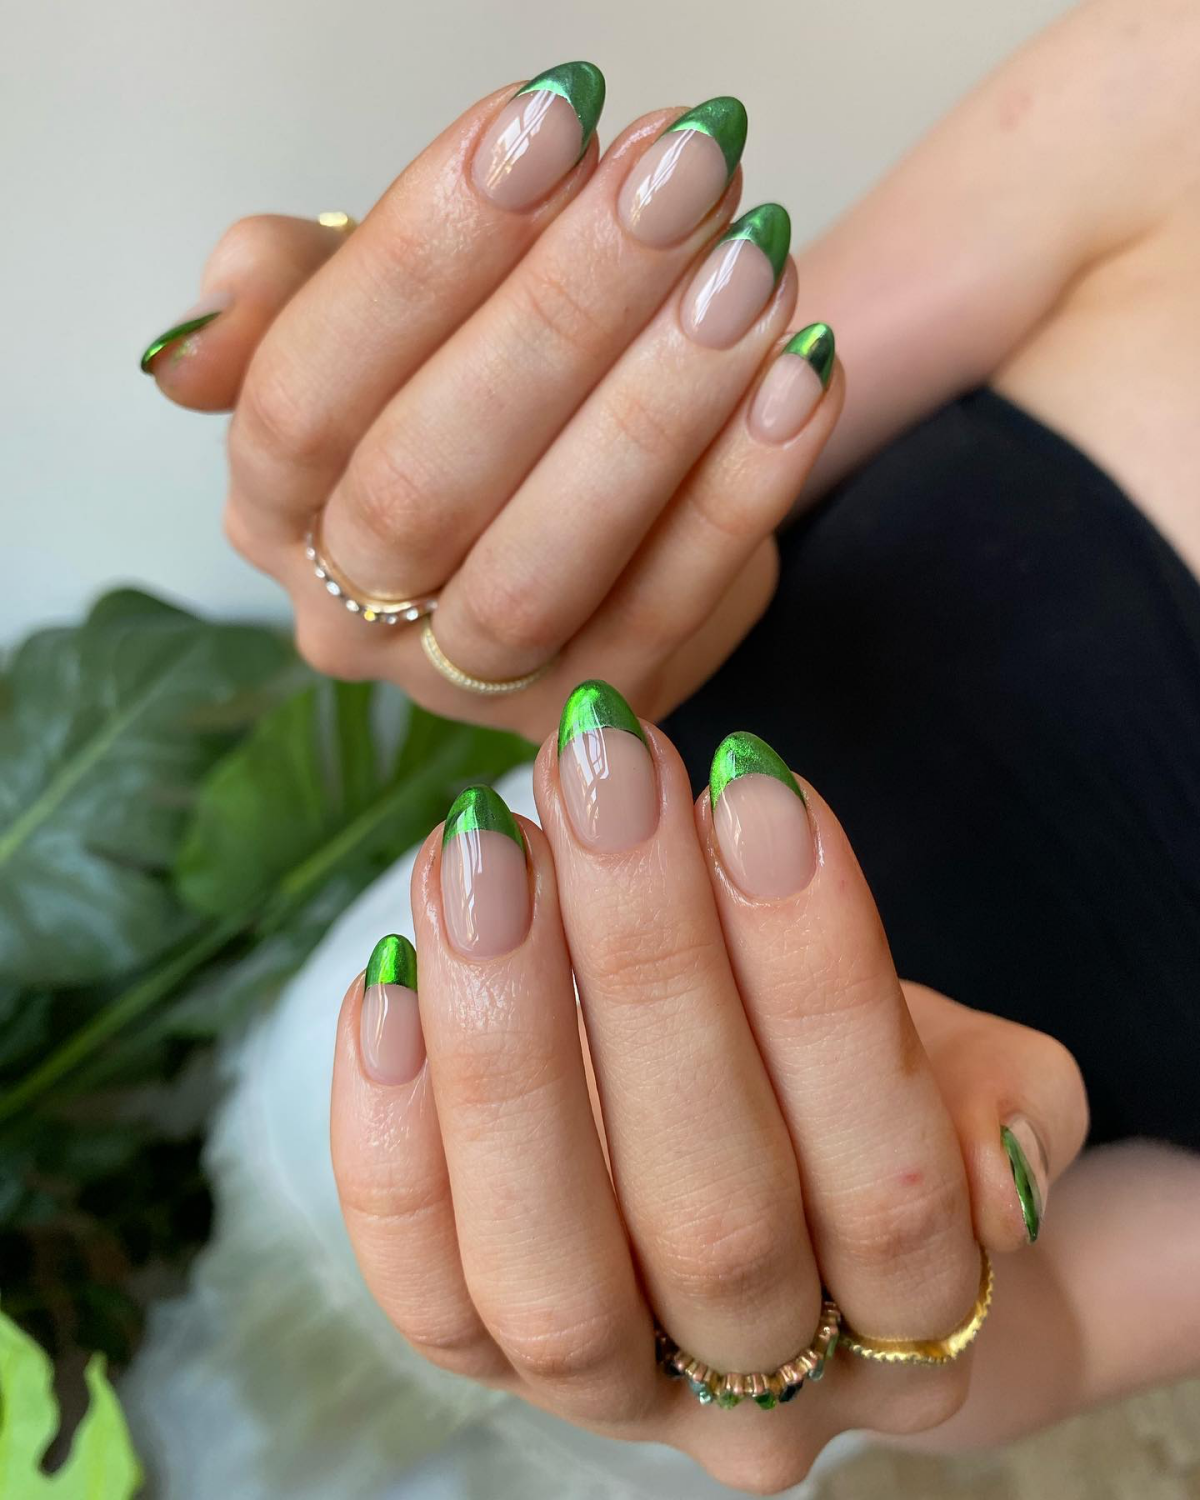
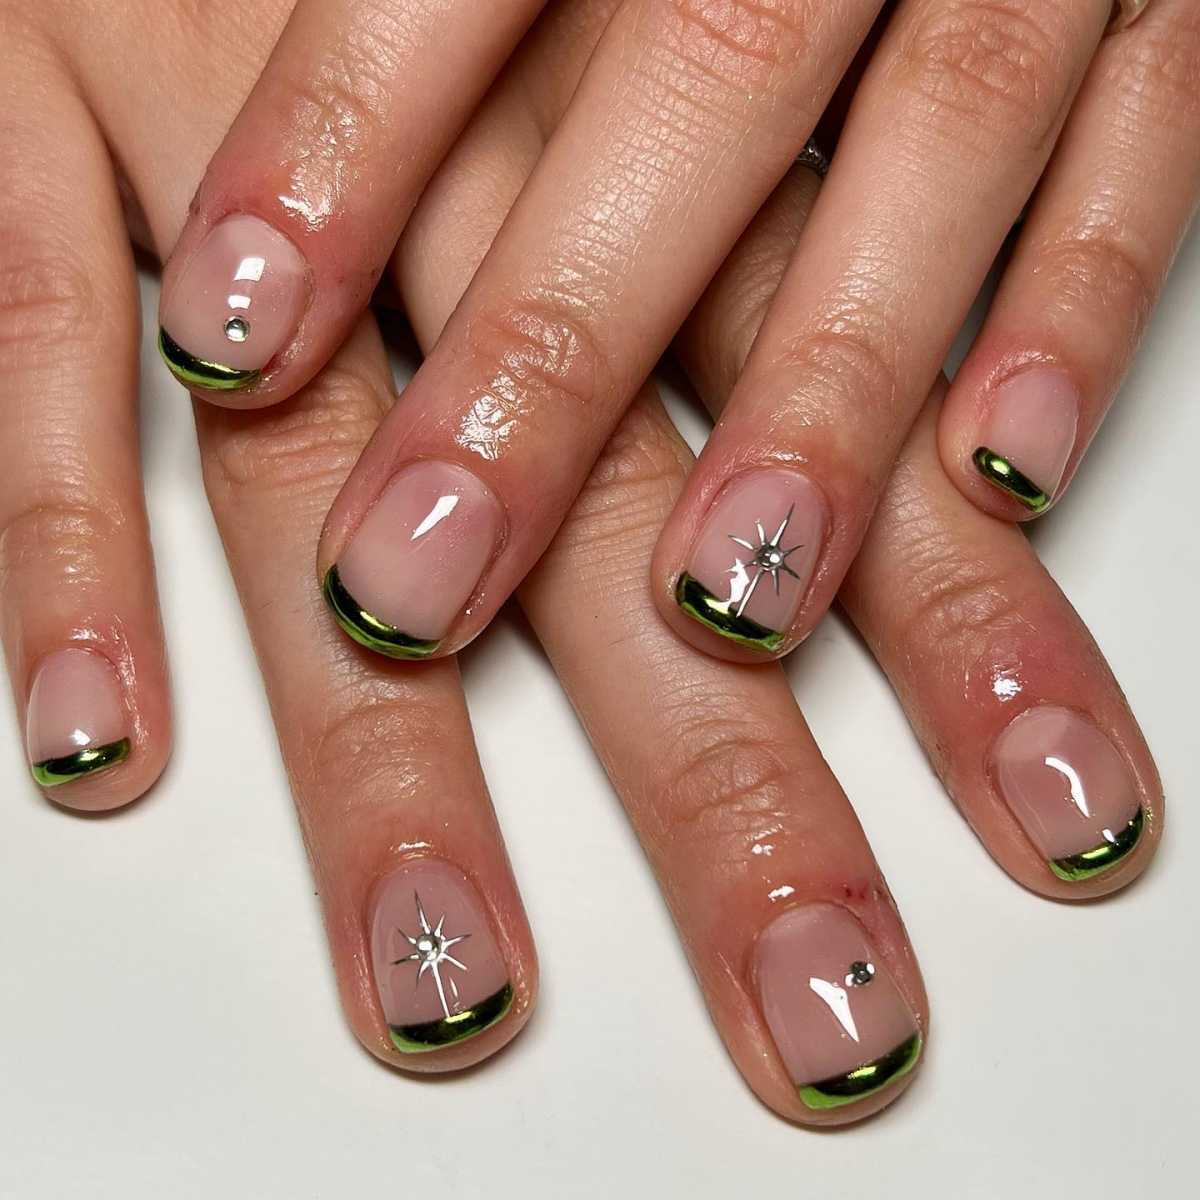
You can also try a chic chrome French tip by just painting the tip with your no-wipe top coat, curing it, and then burnishing the powder only onto that line. The possibilities are endless.
The Big Questions: Cost, Longevity, and Safety
Okay, let’s talk practicals. A professionally done green chrome manicure should last you a solid 2 to 3 weeks, just like any other gel manicure. As for cost, expect to pay a bit of a premium. In a salon, a full set of chrome nails typically runs anywhere from $55 to $85+, depending on your location and the complexity of the design.
And a final word on safety: gel products contain acrylates that can cause skin allergies, so always avoid getting them on your skin. And please, never pick or peel off a gel manicure! You’ll tear off layers of your natural nail. Have it removed professionally or learn to soak it off properly with acetone.
Mastering this technique is so satisfying. When that final top coat is on and you see that perfect, liquid-metal shine, it feels like pure magic. It’s a true display of craft, and with a little practice, you can get a stunning result every single time.
Galerie d’inspiration
The global nail care market is projected to reach $11.6 billion by 2027, largely driven by the popularity of complex, high-impact finishes like chrome.
What does this mean for you? A huge influx of innovation. Brands are constantly refining their formulas, leading to finer chrome powders, longer-lasting no-wipe top coats, and an ever-expanding palette of greens, from deep emerald to holographic lime.

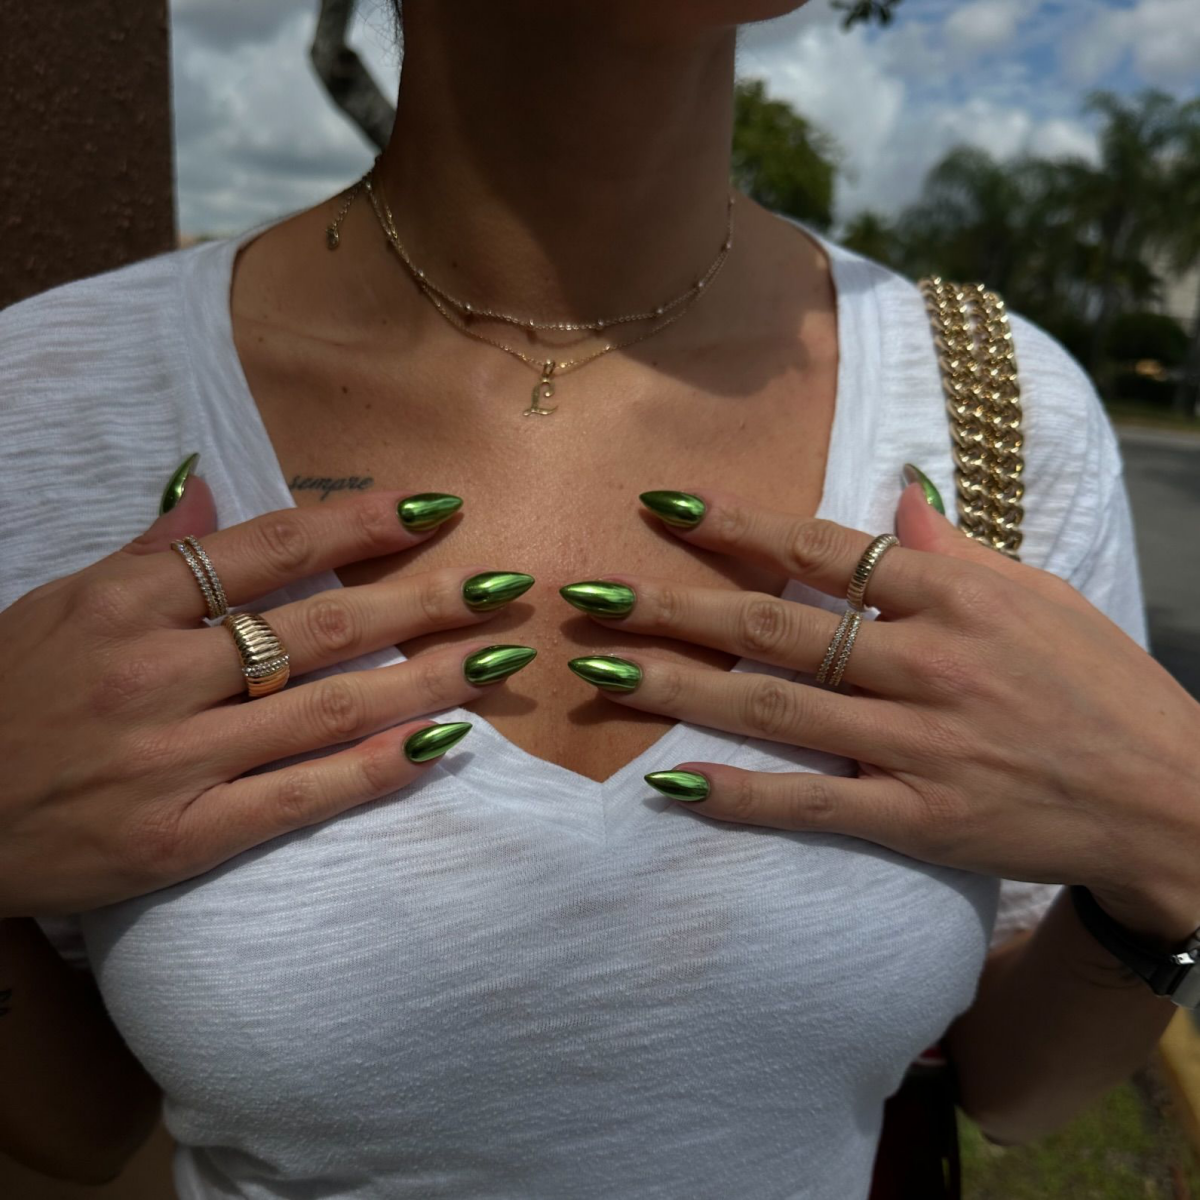
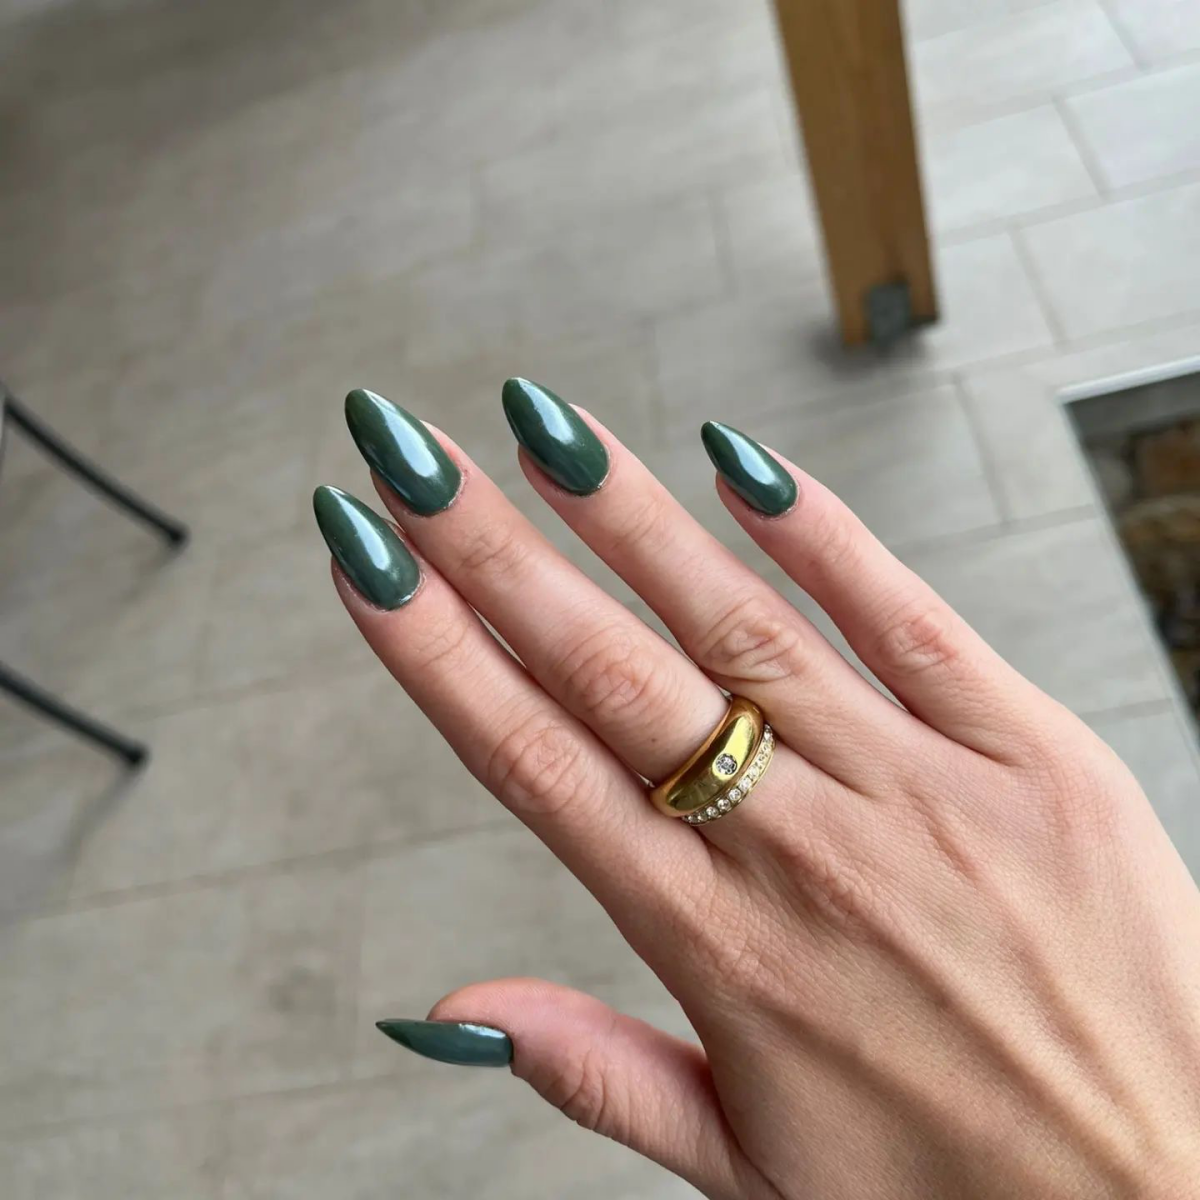
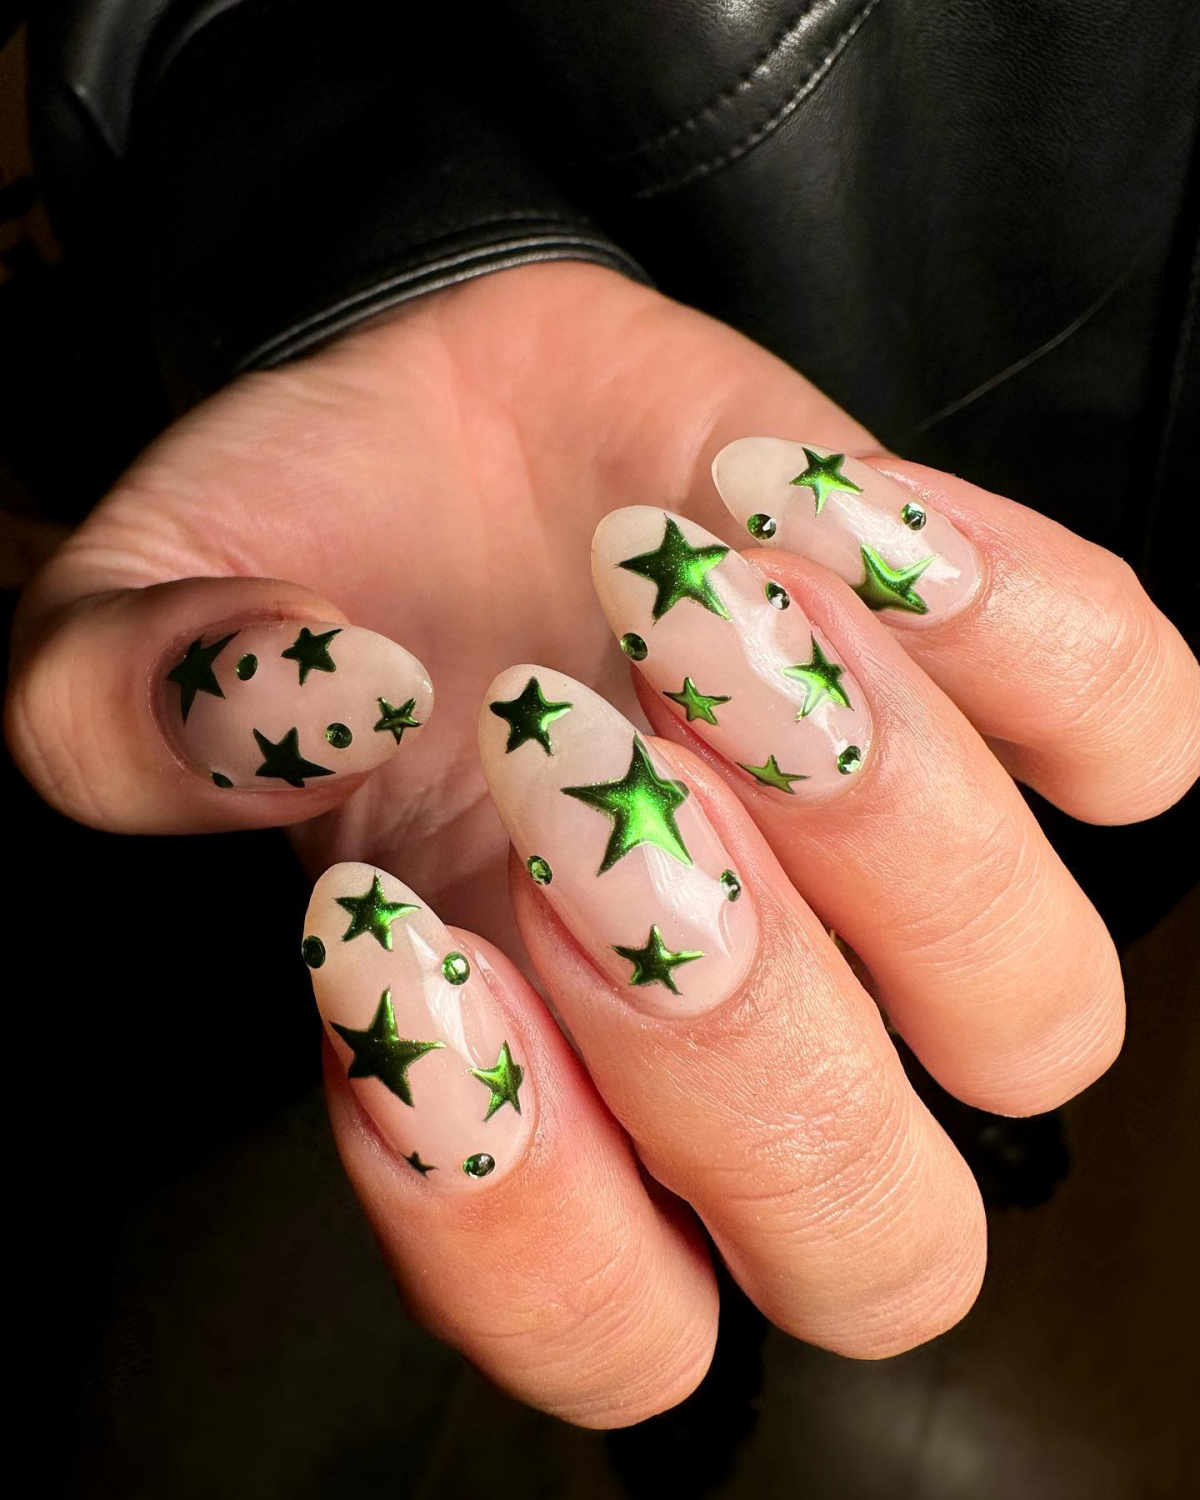
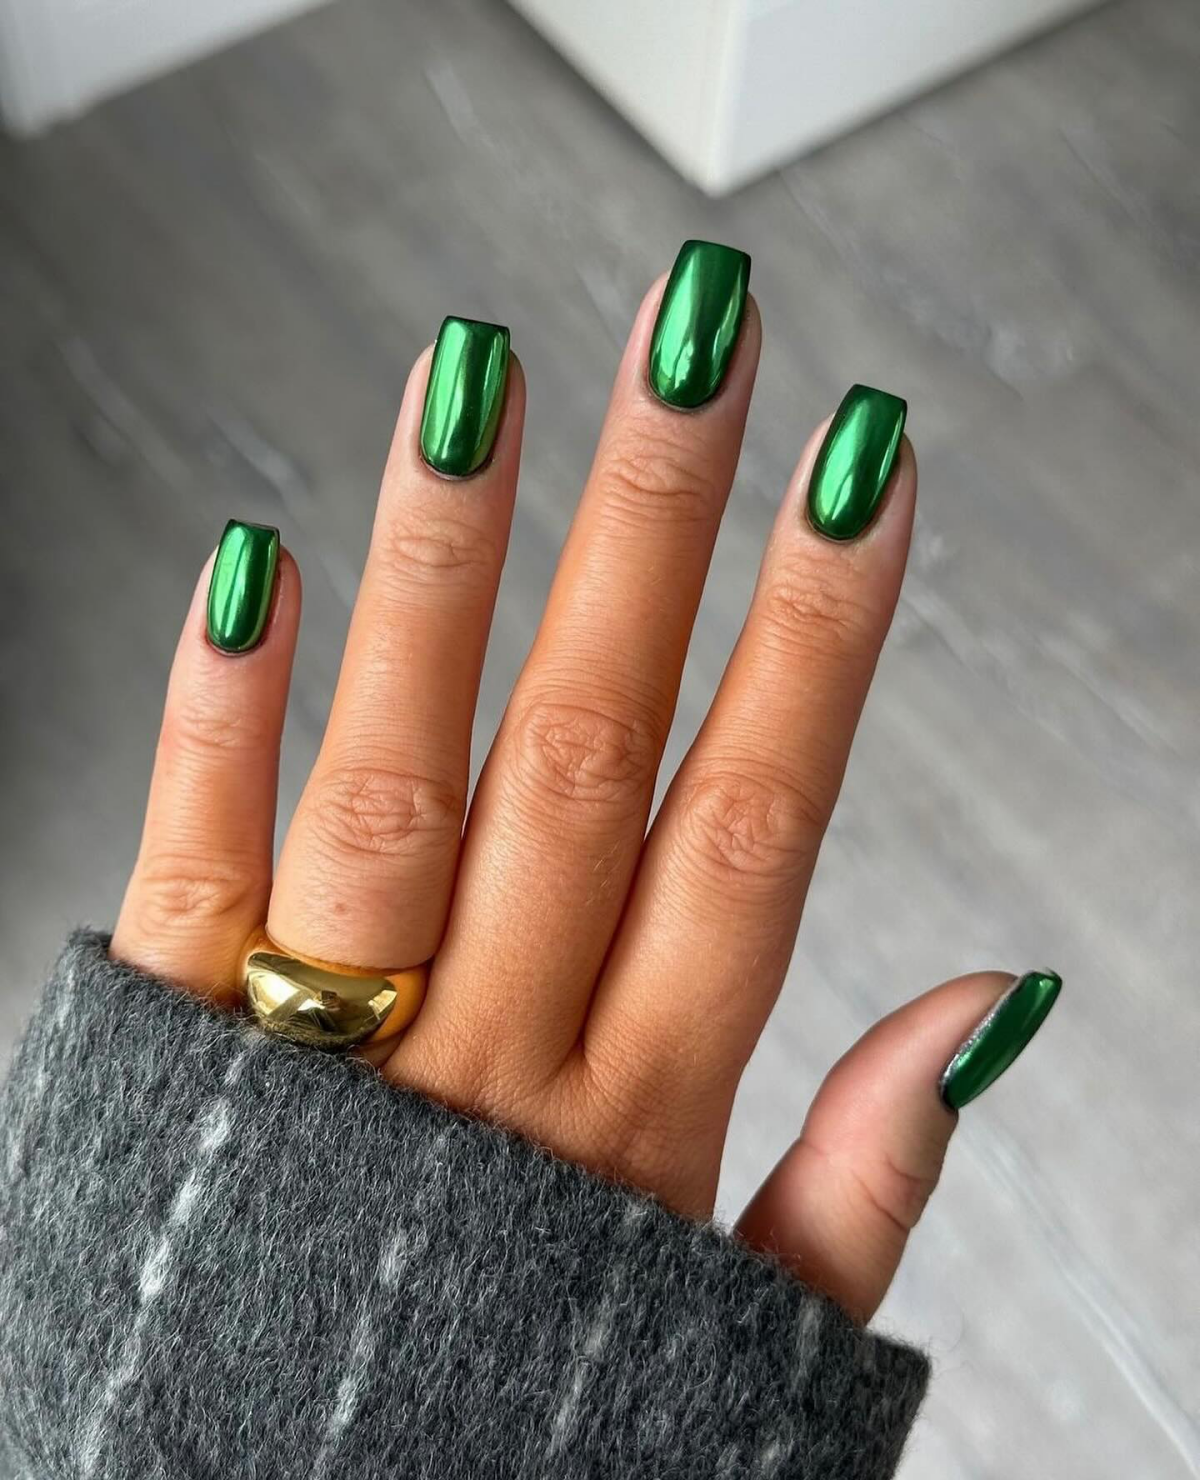
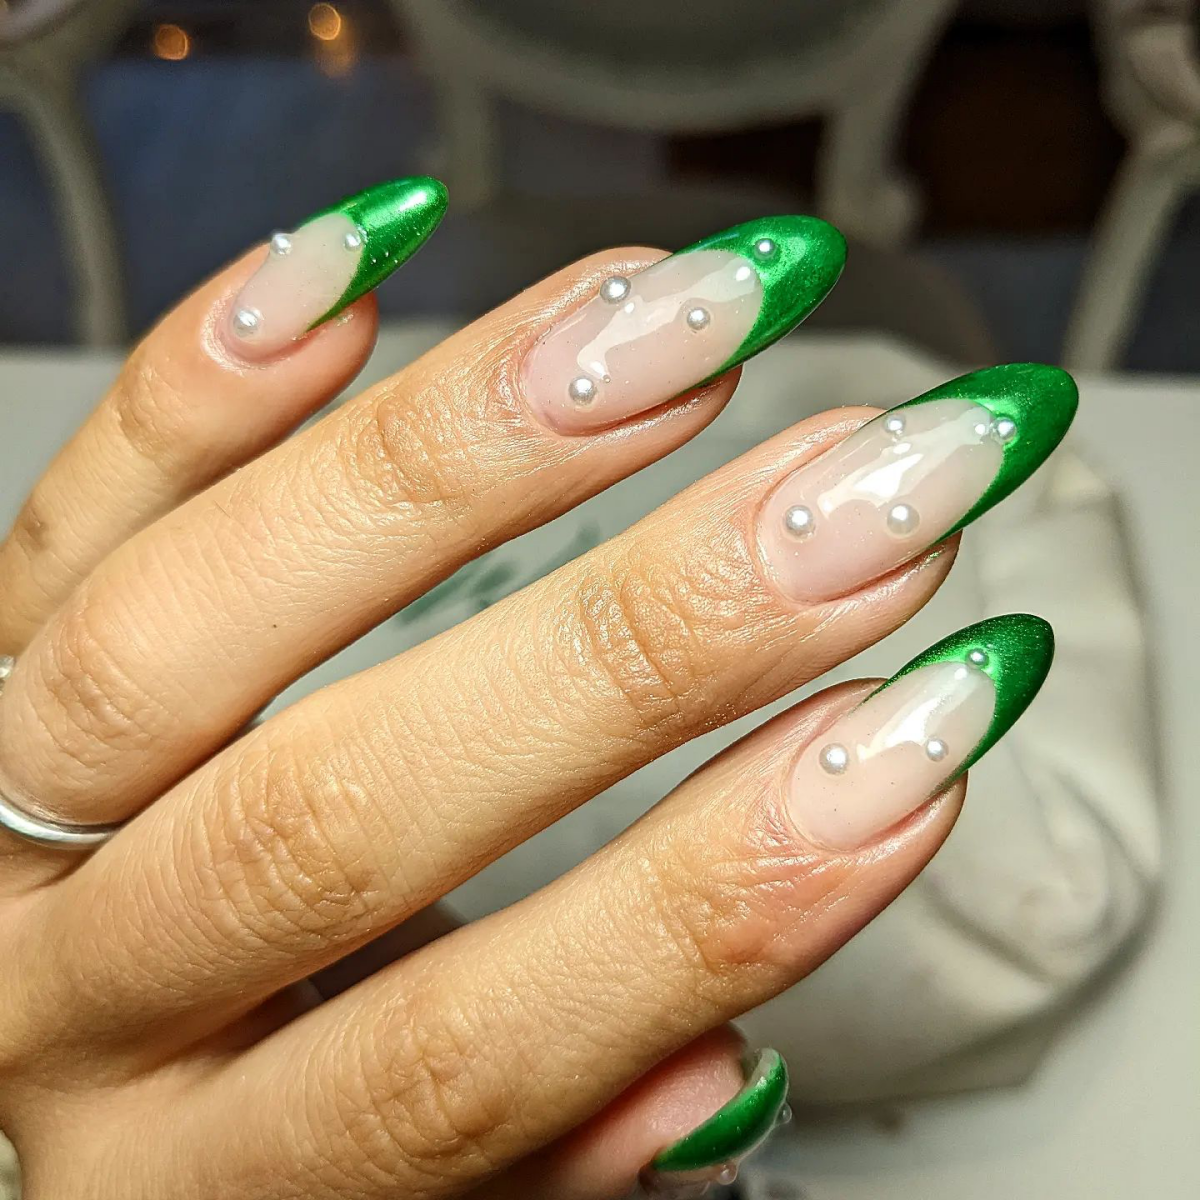
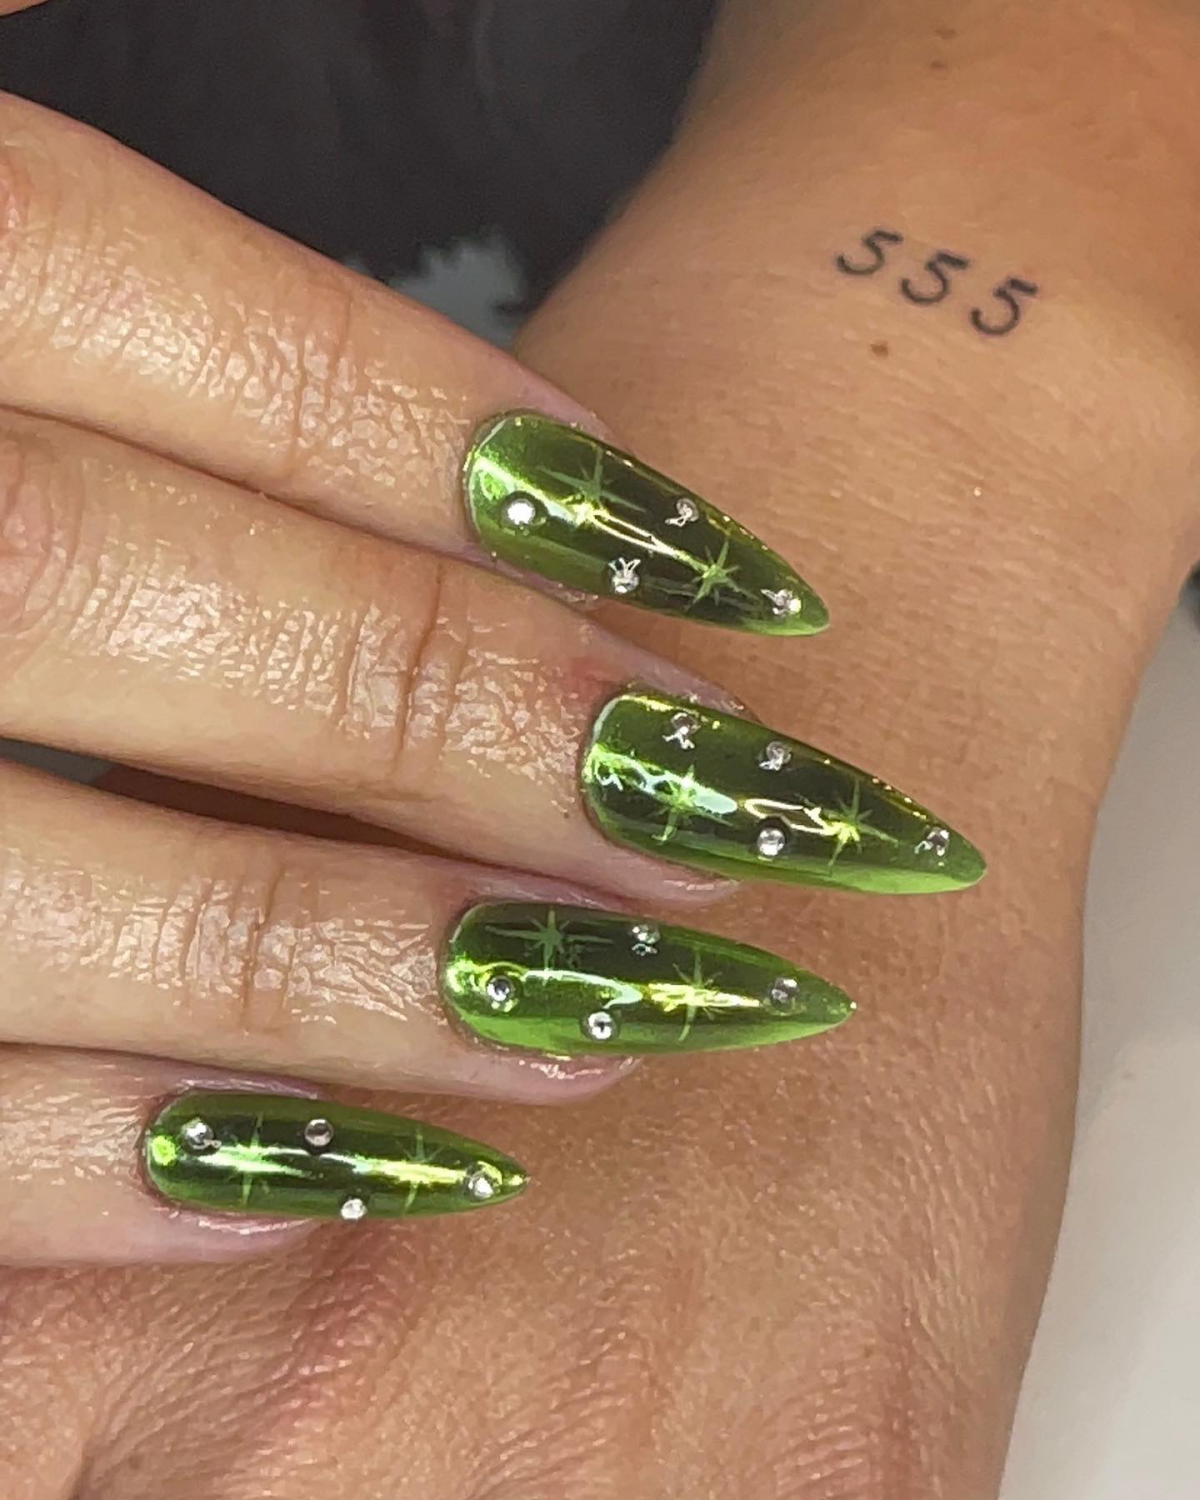
Emerald Green Chrome: Bold, luxurious, and dramatic. This shade evokes jewels and high fashion. It’s a statement look that works exceptionally well on almond or stiletto nail shapes, especially against a true black base.
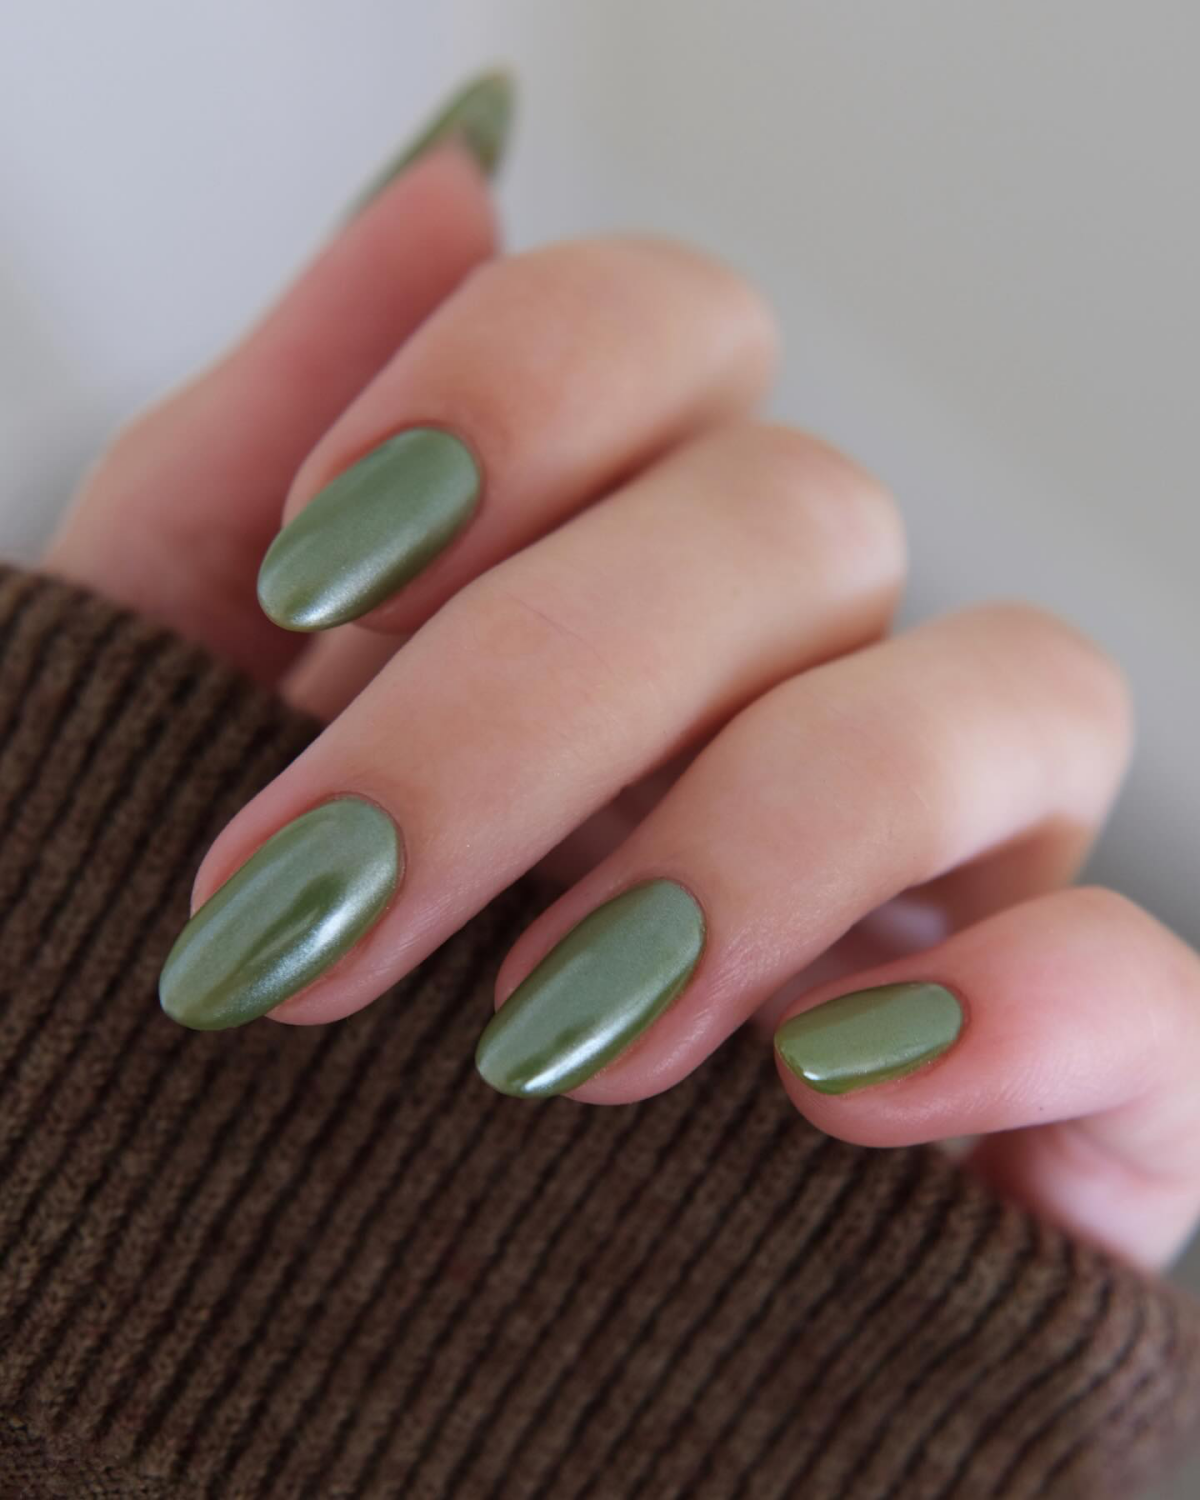
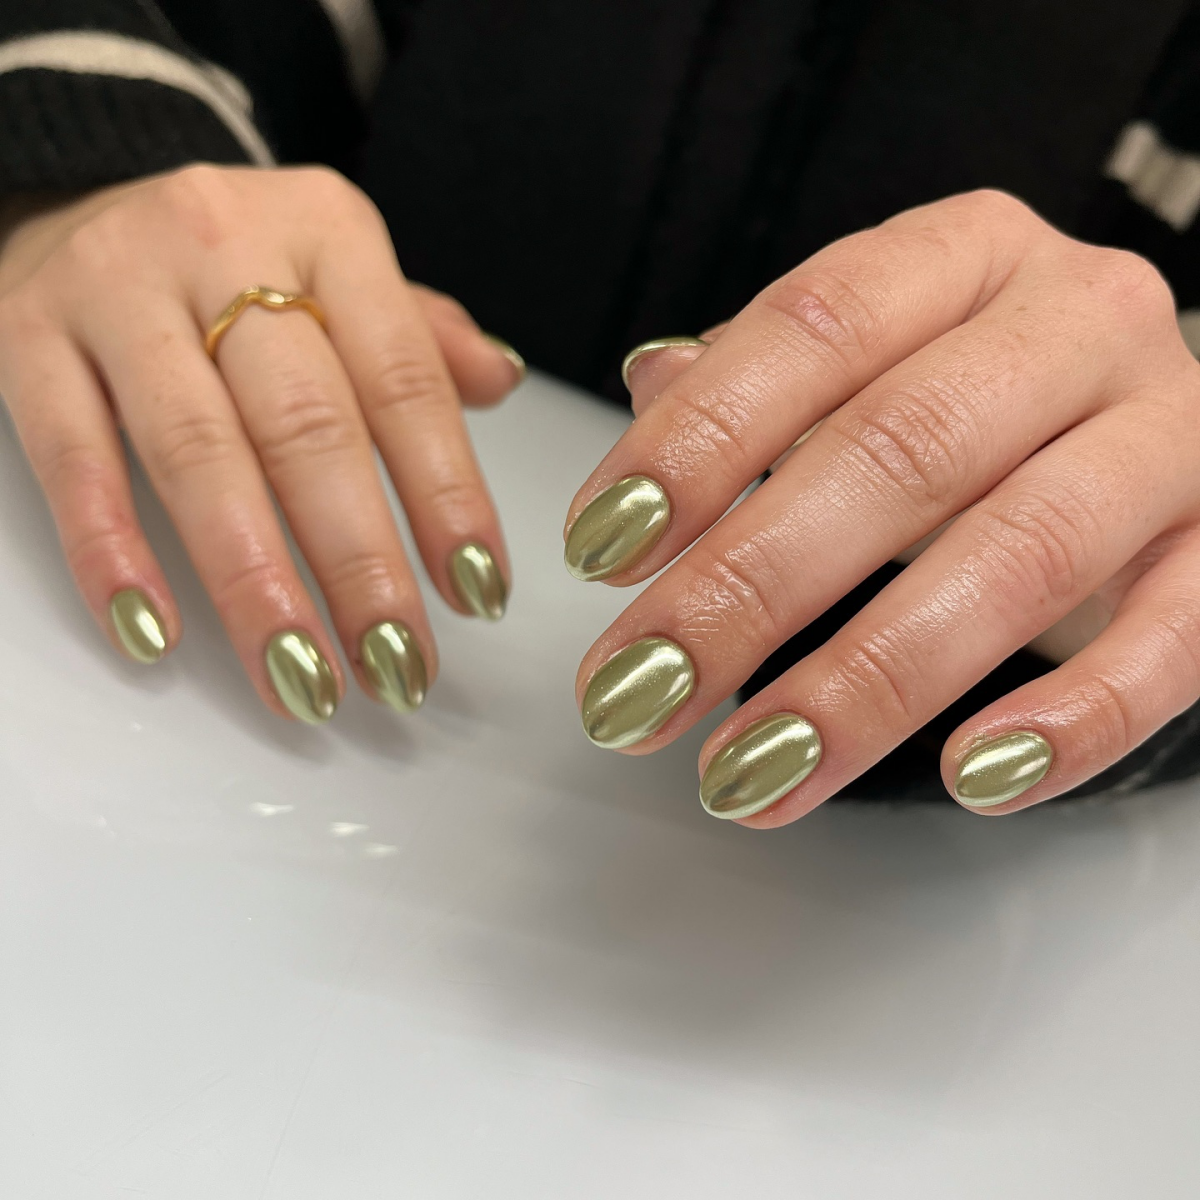
Sage Green Chrome: Soft, ethereal, and modern. This muted, earthy green has a calming effect. It’s perfect for a more subtle take on the trend and pairs beautifully with minimalist aesthetics or pearl embellishments.
Ultimately, your choice sets the mood, from powerful to poetic.
The secret to a flawless application isn’t just the powder; it’s the tools. Forget the tiny sponge applicators that often come in the kit. For ultimate control and a smoother-than-glass finish, use a dedicated silicone nail art tool or even a disposable eyeshadow applicator. The soft, non-porous surface burnishes the powder into the gel without scratching or absorbing the product, giving you that perfect mirror effect with less waste.
Help! My chrome is chipping at the tips within days! What did I do wrong?
This is almost always an issue of not properly “capping the free edge.” After applying your final layer of no-wipe top coat over the chrome, take your brush and run it lightly along the very edge of your nail tip. This creates a seal that protects the most vulnerable part of your manicure from bumps and daily wear. It’s a tiny step that makes a world of difference.
- Prevents premature chipping.
- Creates a perfectly smooth, liquid-metal surface.
- Ensures the chrome powder adheres flawlessly.
The key? A specific curing time. Don’t fully cure your no-wipe top coat before applying the powder. Most nail techs recommend a “flash cure” of just 15-30 seconds under an LED lamp. This leaves the surface hard but with just enough microscopic tackiness for the chrome to grip onto perfectly.

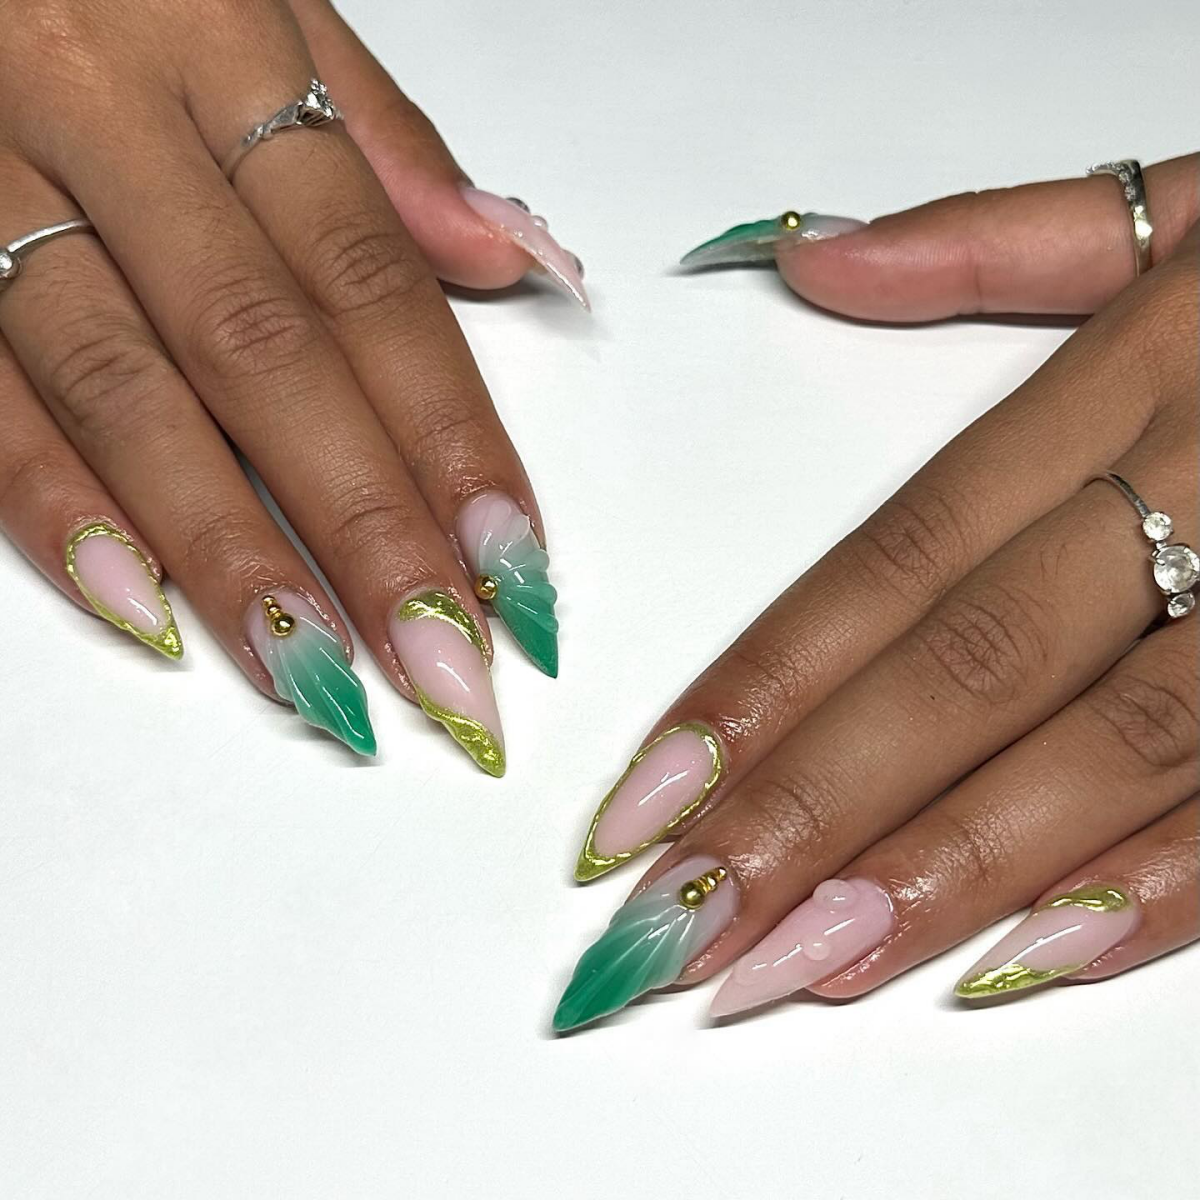
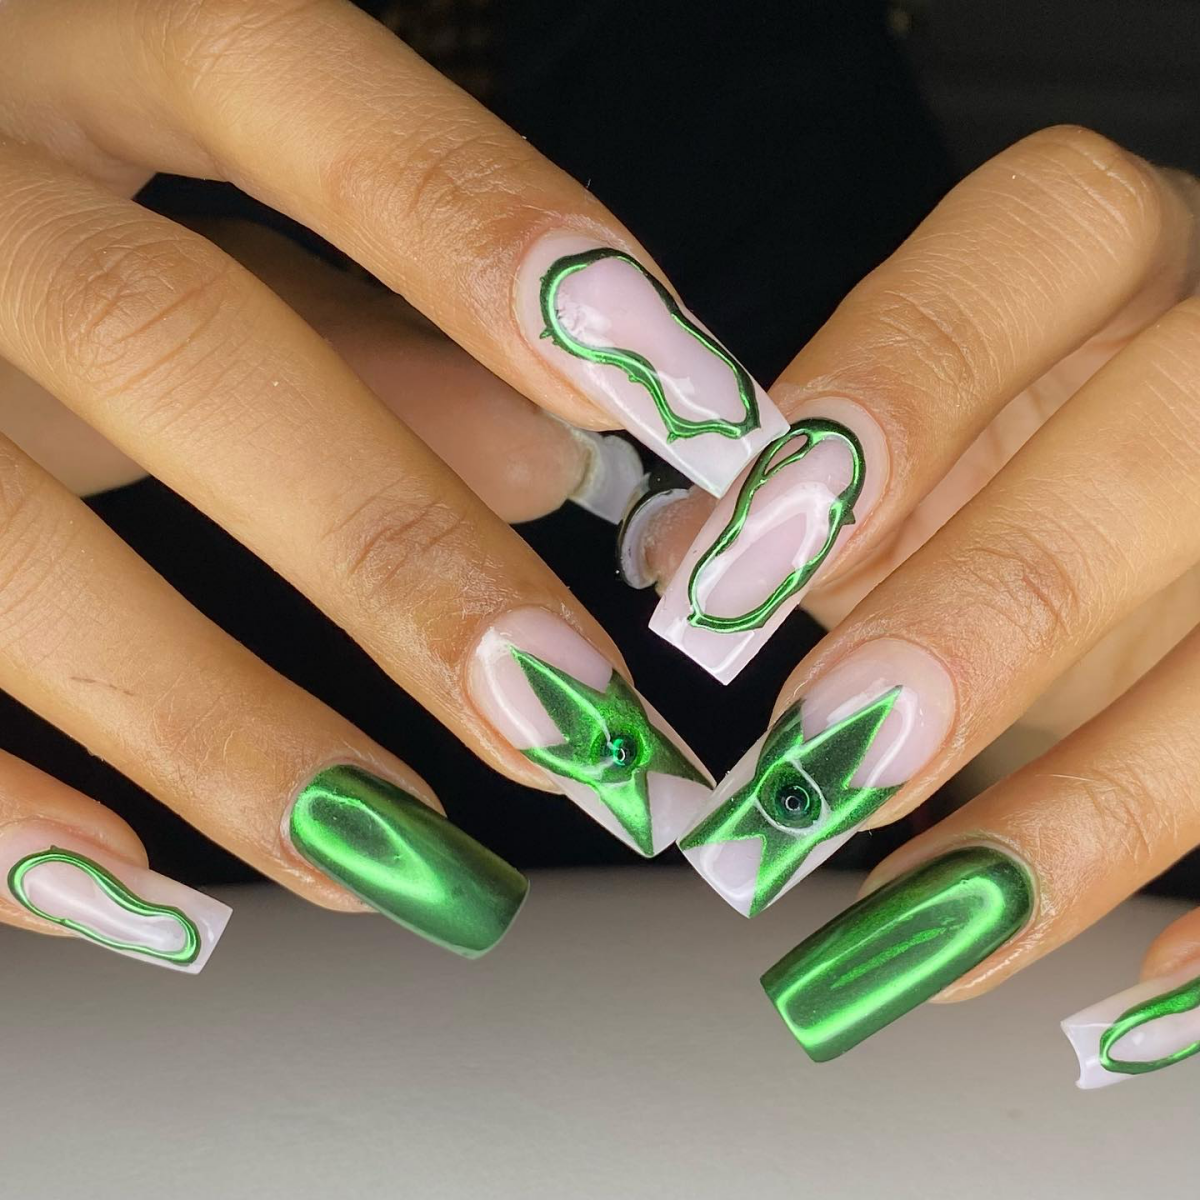
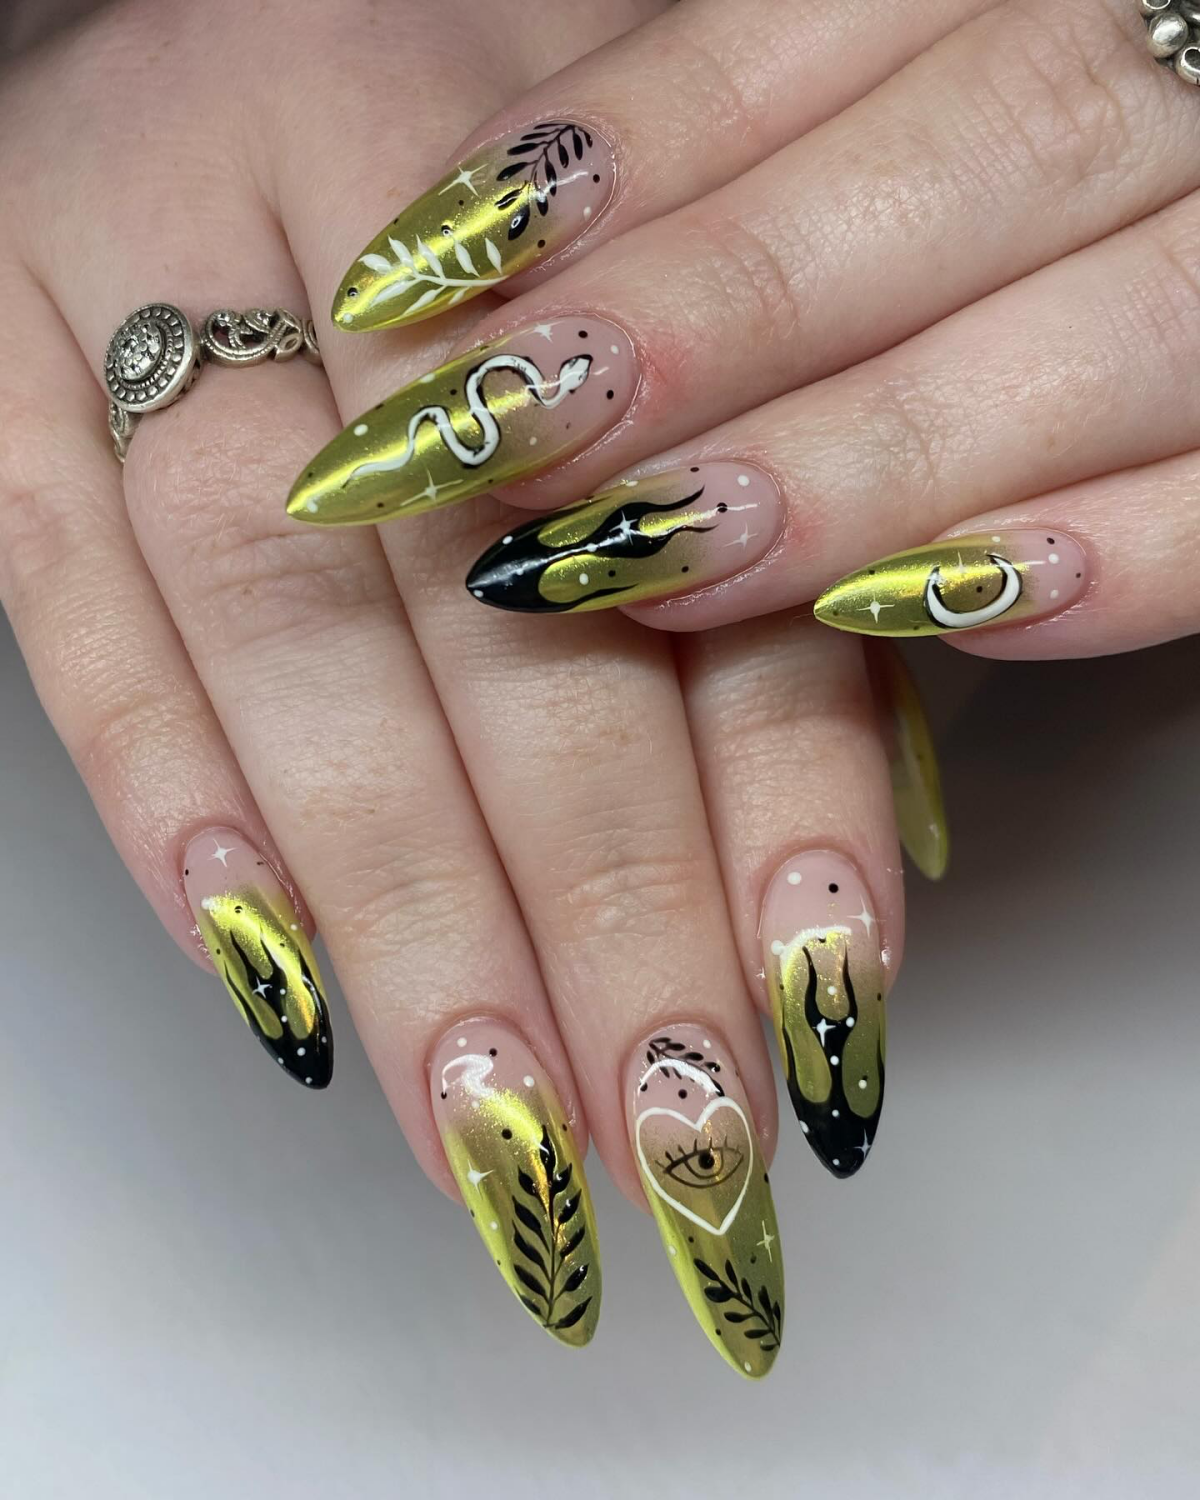
Want to elevate your green chrome? Think texture and contrast. A single accent nail with a matte top coat can make your other chrome nails appear even shinier. For a truly luxe look, consider adding fine, hand-painted gold or black lines over the chrome, or place a few tiny Swarovski crystals near the cuticle after the final top coat for a touch of sparkle that complements the metallic sheen.
For that liquid-metal effect seen on runways, look to pro-quality powders. Brands like Daily Charme, Wildflowers, and iGel Beauty offer ultra-fine chrome powders that are renowned for their true mirror finish and minimal particle fallout.

The Removal Hurdle: Soaking off chrome nails can be tougher than standard gel. The final top coat creates a strong seal. Before soaking in acetone, you must gently but thoroughly file off that top layer with a 100/180 grit file. Once you break that seal, the acetone can penetrate the layers of chrome and gel polish beneath, making the removal process much faster and less damaging to your natural nails.
Can I get the chrome look without a UV lamp and gel polish?
Yes, though the effect is slightly different. Look for products labeled as ‘silver chrome nail polish’ that are used with a special water-based top coat, like the ones from Born Pretty. You apply the base, the chrome polish, and then seal it. Alternatively, some brands offer highly metallic, foil-finish green polishes like ILNP’s ‘Open Fields’ that give a chrome-like look in a single bottle, no powder required.
Embrace the ‘Witchy’ aesthetic seen in the gallery by choosing a deep, forest green chrome with a hint of a black undertone. This particular shade is mesmerizing; in low light, it appears almost black, but as you move your hands, it flashes with an otherworldly, metallic green glow. It’s a sophisticated and slightly mysterious look that’s perfect for autumn or any time you want to add a touch of magic to your style.
- Keep cuticles hydrated with a quality nail oil daily. Healthy skin around the nail makes any manicure look more polished and professional.
- Wear gloves when doing dishes or cleaning. Harsh chemicals are the number one enemy of a long-lasting gel manicure.
- If a small chip does occur, seal it immediately with a layer of regular air-dry top coat to prevent it from getting worse until you can get a proper fix.
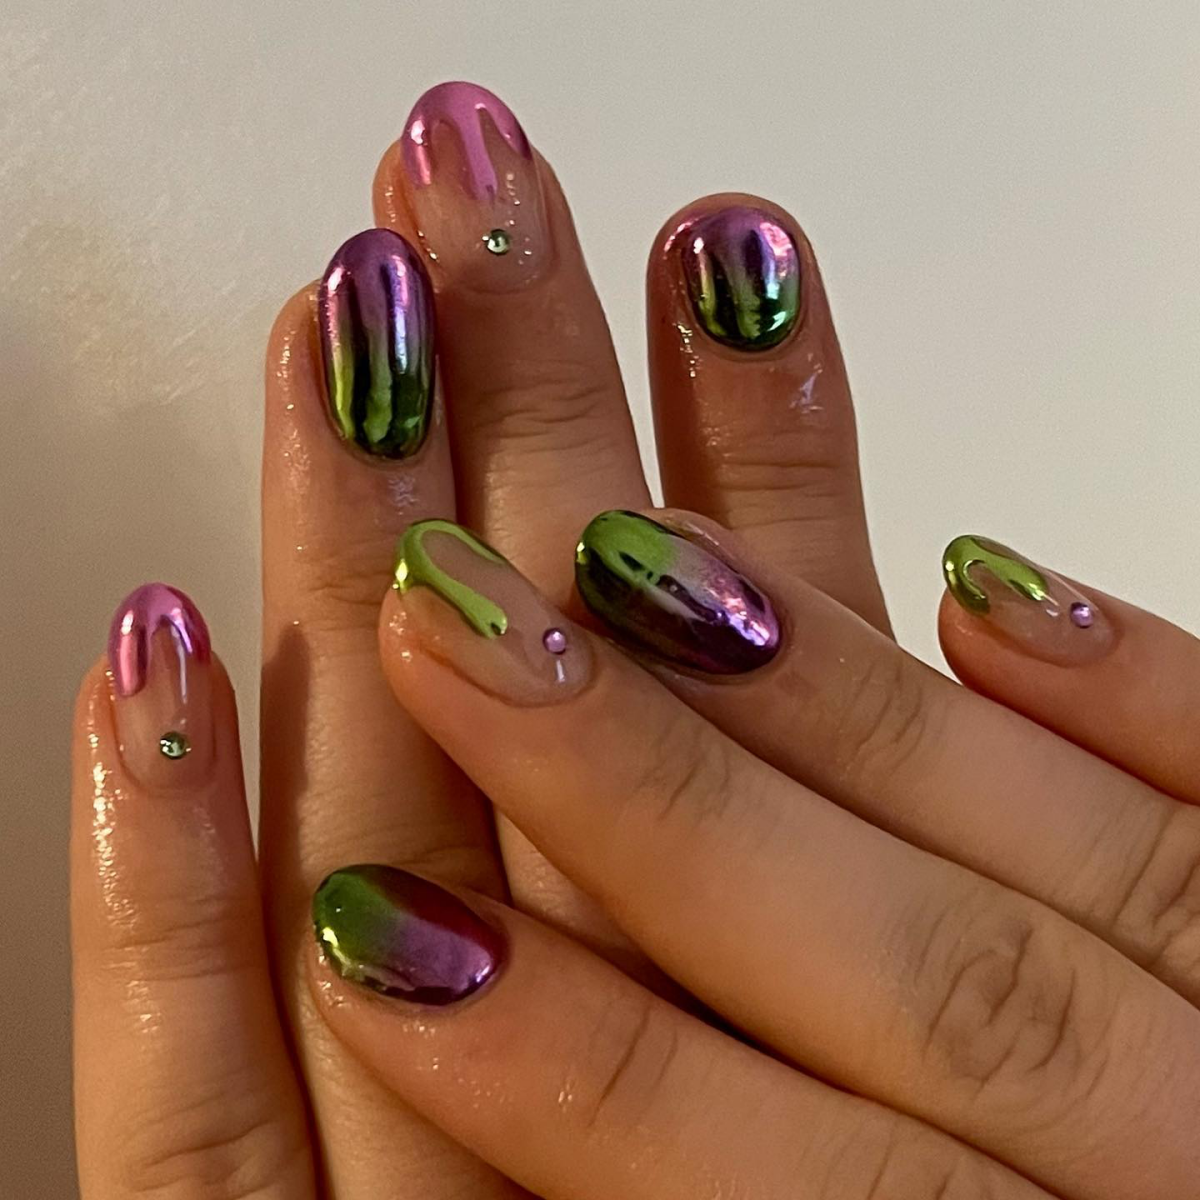
Don’t be afraid to mix your metals. A classic green-and-purple chrome combination creates an iridescent, beetle-wing effect that is truly stunning. Apply green chrome to the main part of the nail and use a fine brush to blend a purple chrome powder near the cuticle or tip for a mesmerizing color-shifting look. The key is to work quickly while the no-wipe top coat is still receptive.


