Spring Nails Done Right: A Pro’s Guide to Manicures That Actually Last
After spending more years than I can count behind a nail desk, I can tell you one thing for sure: when the seasons change, so do the nails. And spring? Spring is a whole different ballgame. Clients come in with hands that have just survived a long, tough winter. We’re talking dry, often brittle nails that are absolutely crying out for a fresh start.
In this article
This is about so much more than just slapping on a pretty floral design. It’s about rebuilding the canvas itself, creating a healthy foundation that can not only show off beautiful art but also hold up through all the gardening, spring cleaning, and outdoor fun. A lot of articles just throw a gallery of nail pics at you, but this is different. I’m going to walk you through the actual craft. We’ll get into the nitty-gritty of prep work, the science behind the products, and the techniques I use every day to create stunning spring manicures that are built to last.
First Things First: Healing Your Post-Winter Nails
Before we even dream of pastels and petals, we have to talk about nail health. Winter is just plain brutal. The constant shift from cold, dry air outside to warm, dry heat inside sucks the moisture out of everything, and your nails are no exception. It’s so common to see peeling cuticles and nails that snap at the slightest provocation.
Trying to put gel or even regular polish on a weak, peeling base is like building a gorgeous house on a shaky foundation. It’s just not going to work, and honestly, it can make things worse. The nail plate is made of layers of keratin (think of it like the pages of a book). When it’s dehydrated, those layers separate. Our first job is to gently get that surface back in shape. Seriously, I’ve had to gently tell clients that we can’t do long extensions on their paper-thin nails. My number one job is to protect their nail health, and building that trust is everything.
The Pro-Level Prep Routine
A fantastic manicure starts way before the polish bottle is even opened. Here’s the exact process we follow in the studio—it’s the key to a safe, long-lasting result.
- Sanitization is Everything. We start by washing and sanitizing both my hands and my client’s. All my metal tools, like pushers and nippers, are fresh from a sealed autoclave pouch. That’s a hospital-grade sterilization method using heat and pressure, and it’s the only way to be 100% sure everything is sterile. Files and buffers? Always one-time use. No exceptions.
- Gentle, Purposeful Shaping. We’ll decide on a shape—square, oval, almond—and I’ll use a fine-grit file (180 or 240 grit is great) to shape the nail. Here’s a pro tip: always file in one direction. That back-and-forth sawing motion you see people do? It creates tiny tears in the nail tip that lead directly to peeling and snags.
- Smart Cuticle Care. Oh boy, let’s clear up a huge myth. We don’t actually “cut” the cuticles. That ridge of living skin at the base of your nail is called the eponychium, and it’s there to protect you from infection. We never cut that. The true cuticle is the non-living, sticky tissue on the nail plate itself. I apply a professional cuticle softener, wait a minute, and then gently push back the living skin. Then I carefully remove only that non-living tissue from the nail. Any dry, loose hangnails can be nipped away carefully, but aggressive cutting is a big no-no.
- A Super-Light Buff. I use a very fine buffer (240 grit or higher) to just remove the shine from the nail. We’re not thinning the nail at all! The goal is just to create a slightly textured surface for the gel or polish to grip onto. I’ve seen new techs go way too hard and create “rings of fire”—those red, sensitive spots from over-filing. You just need to take the shine off, that’s it.
- Final Cleanse & Dehydrate. The last step is to scrub the nail plate with a lint-free wipe soaked in a dehydrator. Honestly, 99% isopropyl alcohol works perfectly for this and you can get a huge bottle for like $4 at any drugstore. This removes every trace of oil and dust, which are the number one cause of polish lifting. From this moment on, no touching your nails, face, or hair!
Choosing Your Polish: Gel vs. Lacquer vs. Builders
With our canvas perfectly prepped, it’s time to choose the right medium. This choice affects the look, durability, and the time you’ll spend in the chair.
Gel Polish: The Modern Standard
For most of the intricate art you see today, gel polish is the undisputed champion. It’s cured under an LED lamp, giving it an incredible shine that lasts two to three weeks without a single chip. Its real magic for art is that you can cure each layer. I can paint a delicate vine, cure it for 30 seconds so it’s locked in place, and then paint tiny leaves over it without smudging a thing. You just can’t do that with regular polish.
A quick heads-up: I pretty much exclusively use HEMA-free gels. HEMA is a common ingredient in gels but it’s also a leading cause of skin allergies. Using HEMA-free products is a professional choice that just makes sense for long-term nail health.
So, what’s the time and money commitment? A standard gel manicure with this level of prep will take about 60 to 75 minutes at the salon. If you’re adding detailed art, plan for another 30 to 60 minutes on top of that. Price-wise, you can expect to pay anywhere from $75 to $120, or even more, for a custom art manicure, depending on the complexity and your artist’s skill level.
Good Ol’ Nail Lacquer
Don’t write off traditional nail polish! It’s fantastic for anyone who loves changing their color weekly or prefers doing their nails at home. The secret to a great lacquer manicure is using multiple thin coats instead of one thick, goopy one. A good base coat is essential to prevent staining, and a quality top coat gives you that shine and protection.
To be frank, it’s tough to do detailed spring art with lacquer because it starts drying immediately, making fine lines and blending a real challenge. It’s much better suited for simpler looks, like solid pastels or a classic polka dot.
So, to sum it up: Gel polish is your long-term relationship. It gives you 2-3 weeks of flawless wear and is the go-to for intricate art, though it’s a bit more complex for DIY. Traditional lacquer is your fun, weekly fling—it lasts about 3-7 days, is super easy to use at home, and is perfect for quick color changes.
Builder Gels for Extra Strength
For nails that need a little extra help, we bring in the heavy hitters like builder gel. This is a thick gel that can be used to add a strong, protective layer over the natural nail or even build short extensions. It adds a ton of strength but stays more flexible than acrylic. This is definitely more advanced stuff and requires proper training to apply without causing damage.
Techniques for Gorgeous Spring Designs
Instead of just listing trends, let’s break down the core techniques. Master these, and you can create endless spring looks.
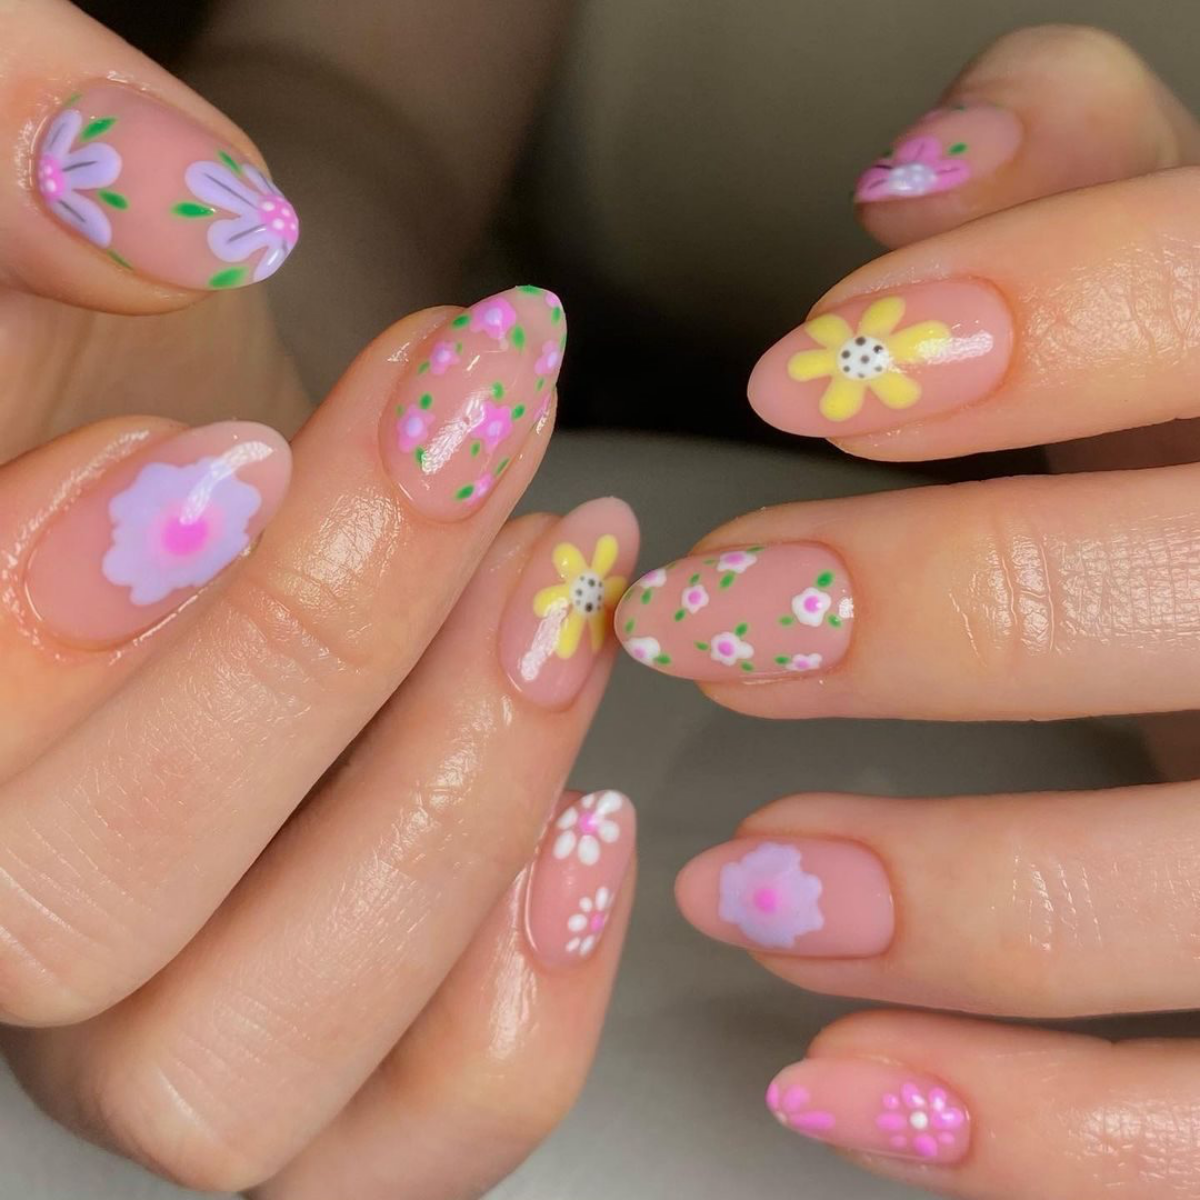
The Secret to Perfect Florals
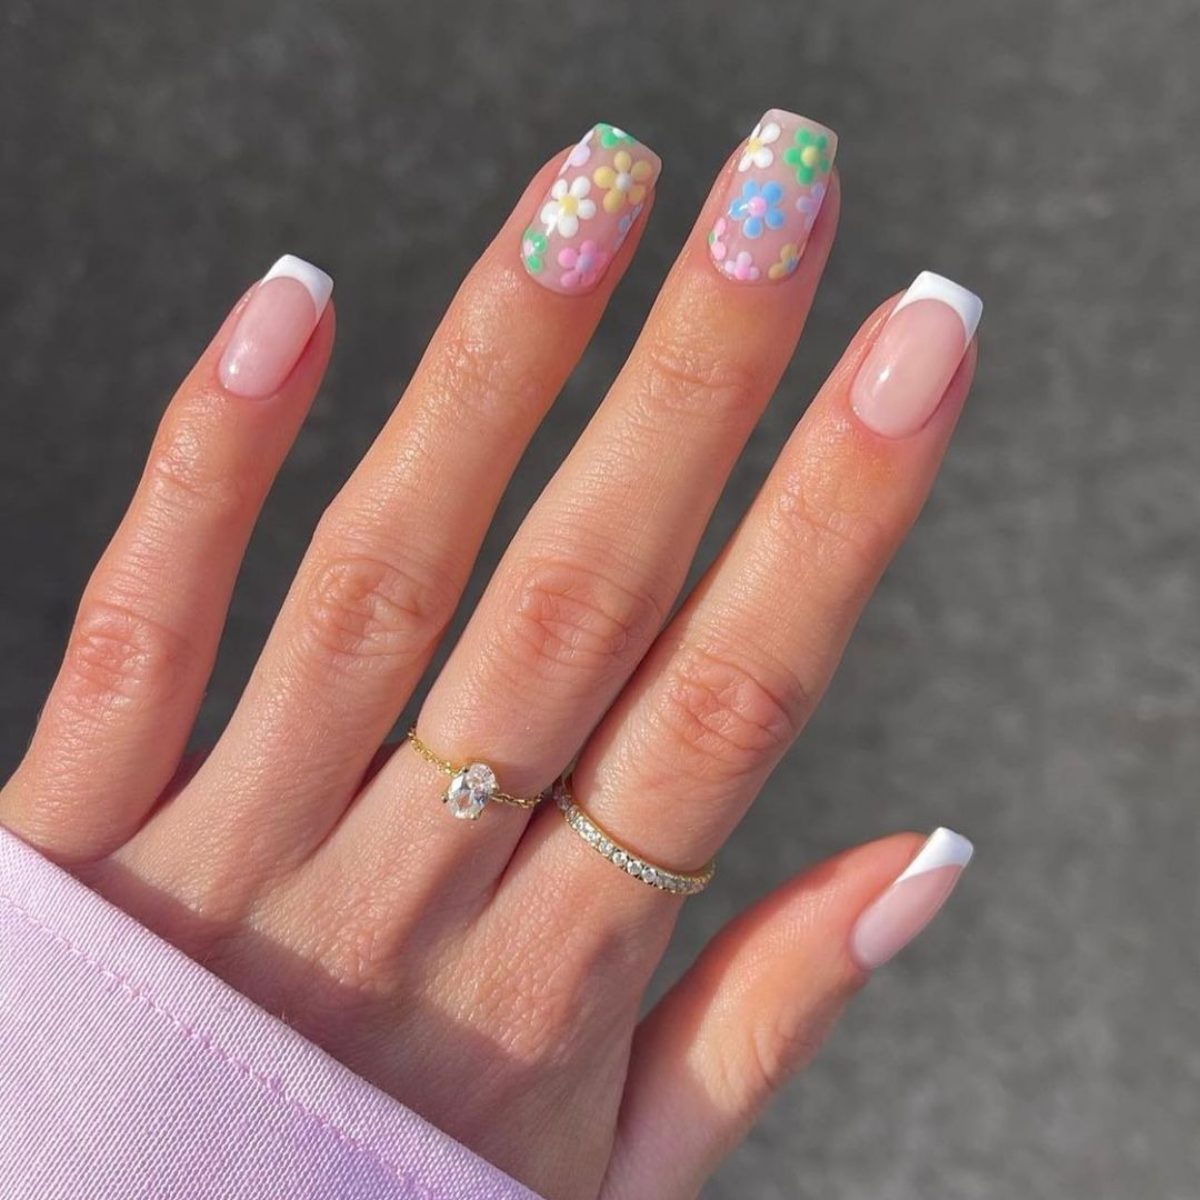
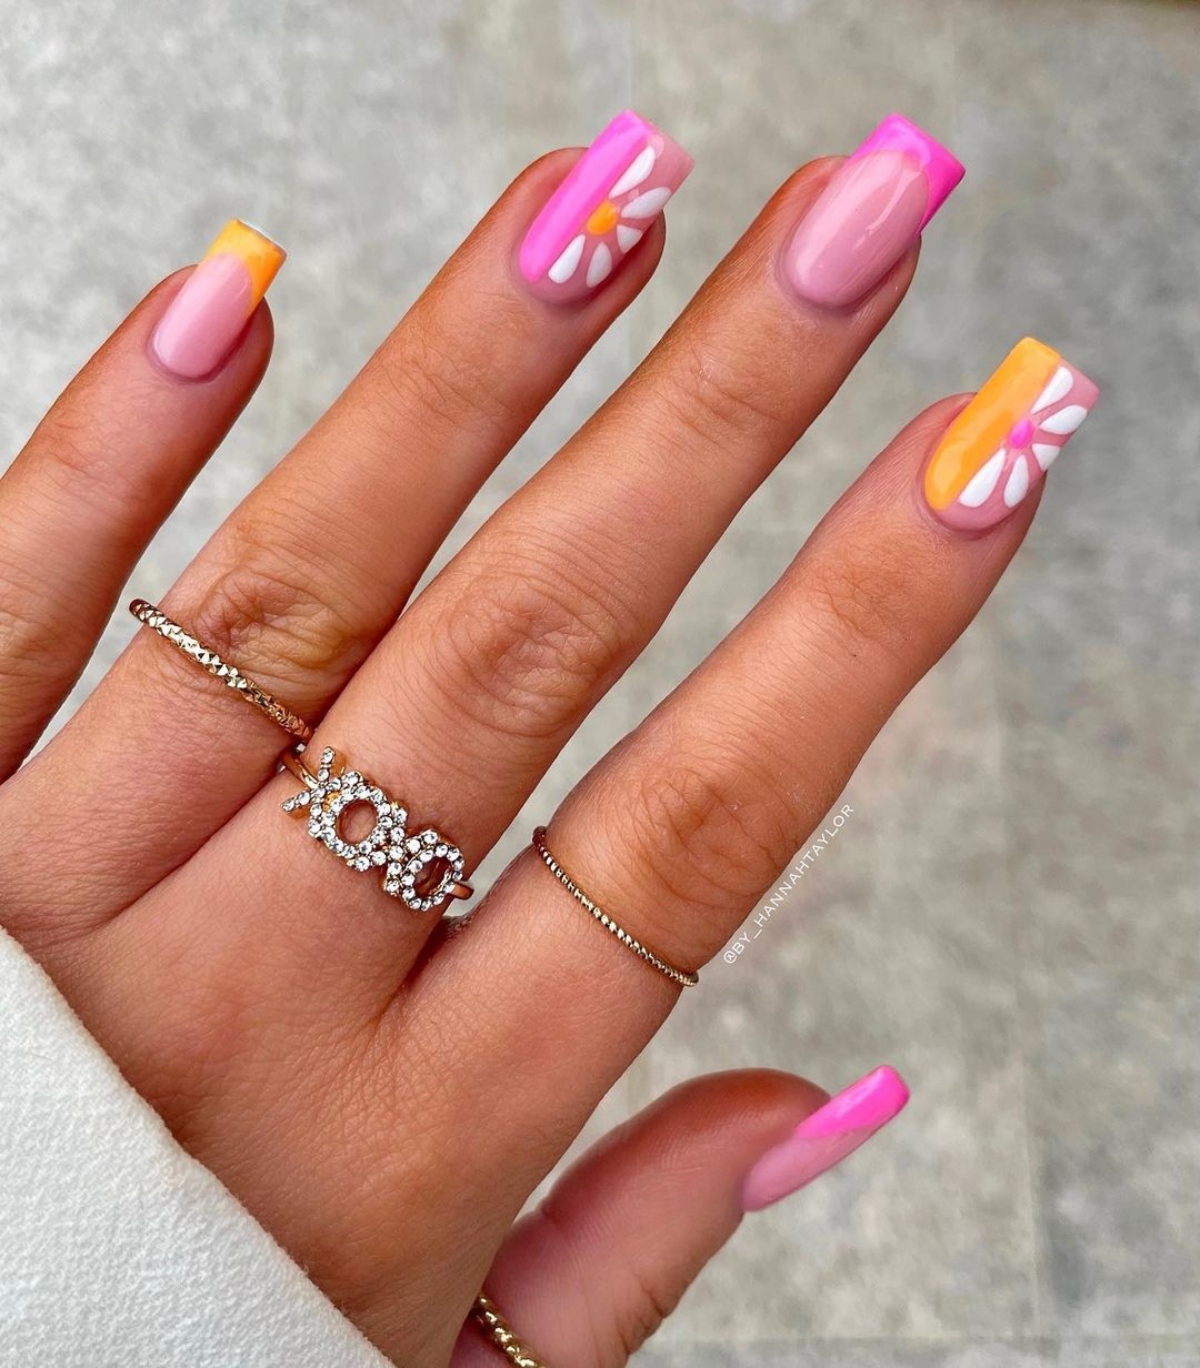
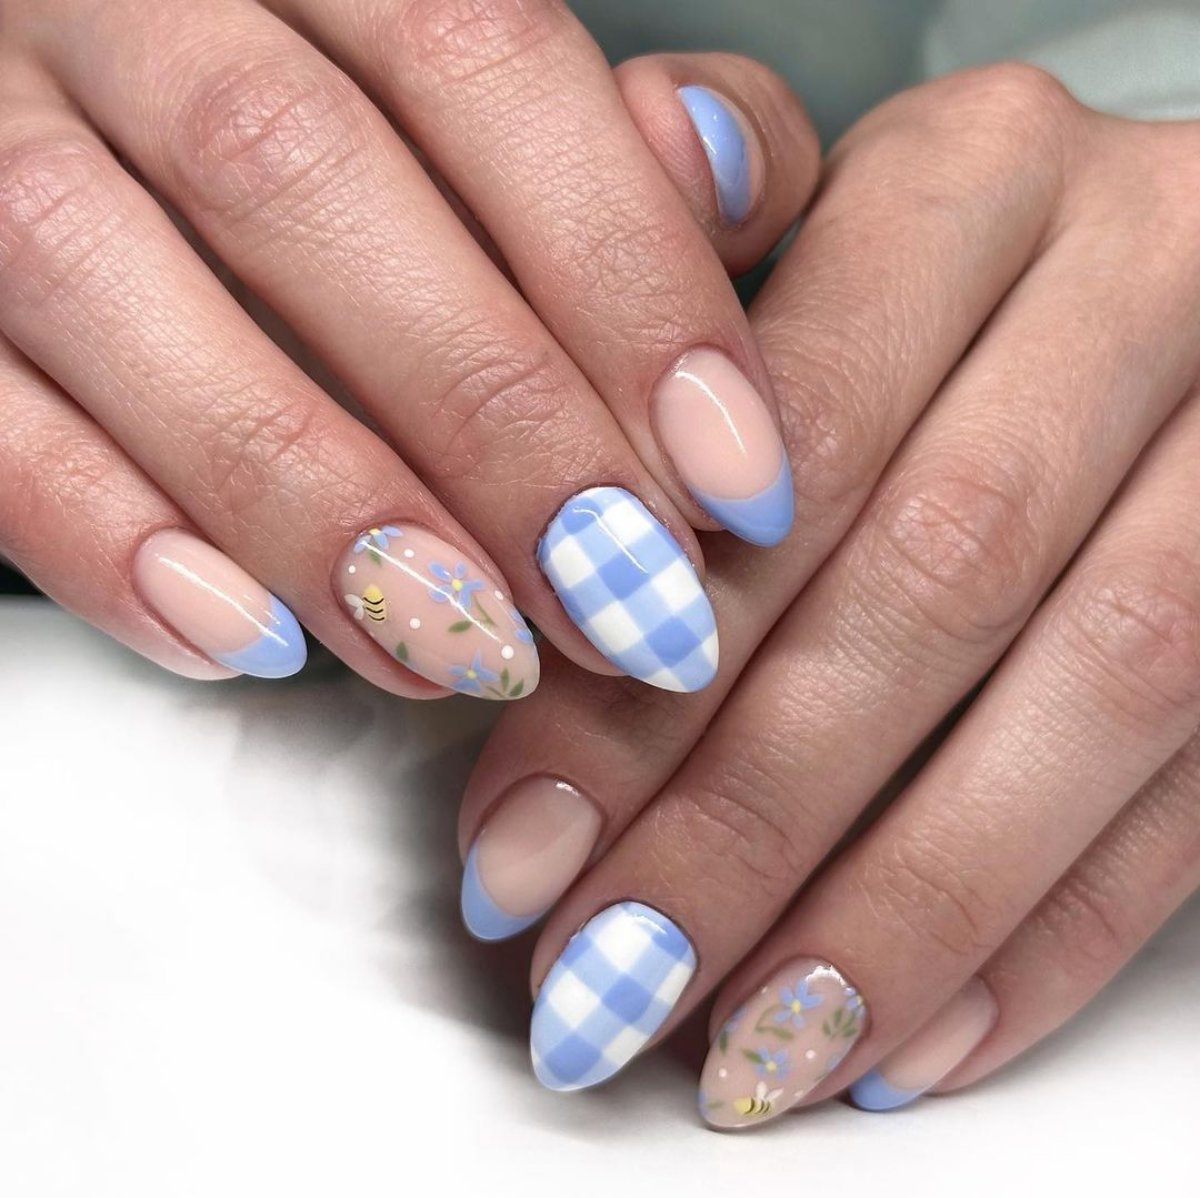
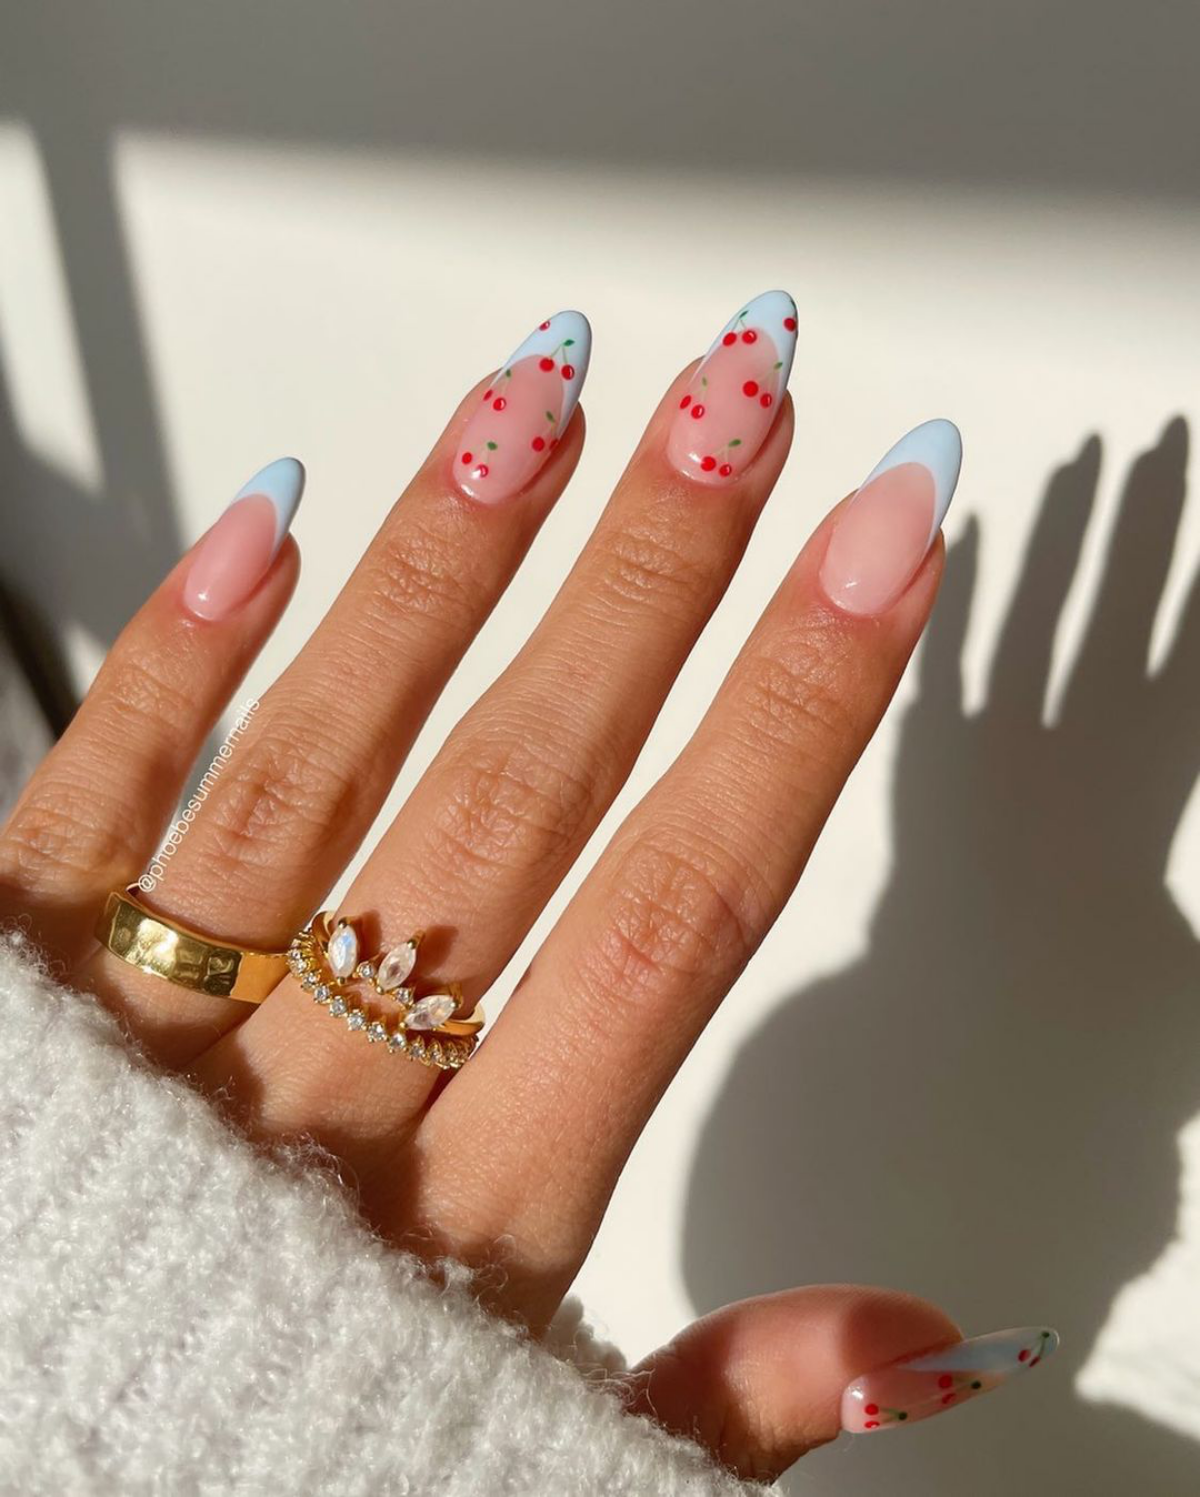
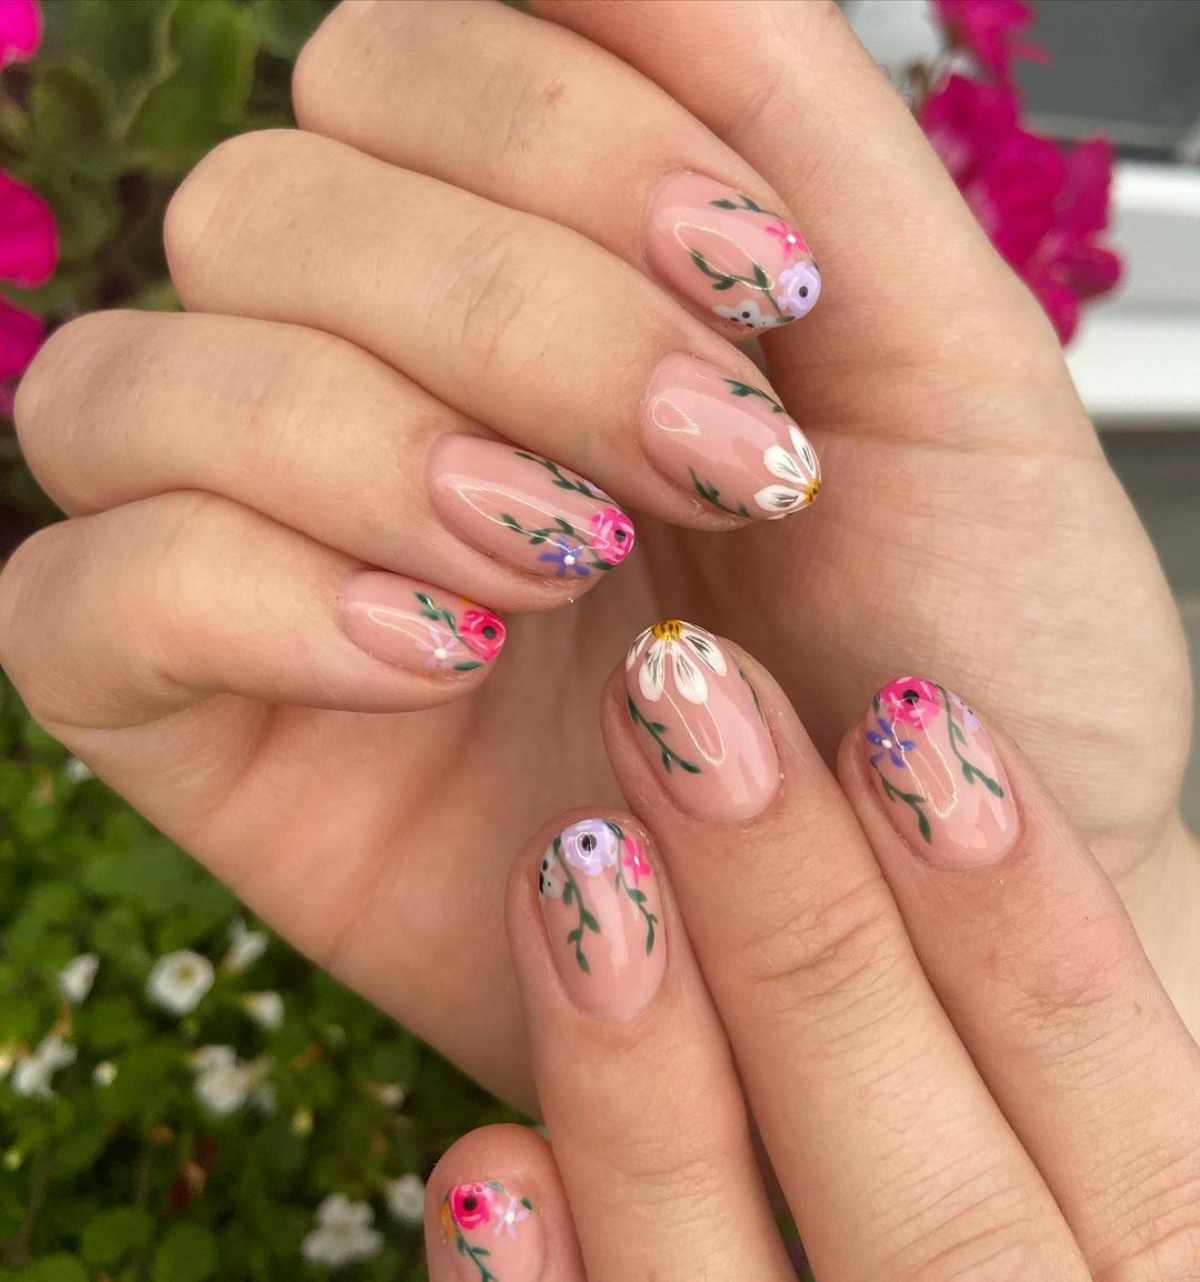
- Simple Daisies: This is the perfect starting point. Use a dotting tool to place a yellow dot for the center. Then, with a smaller dotting tool or a tiny brush, pull white polish out from the center to create petals. The trick is to wipe your tool clean after every one or two petals to keep the shapes crisp.
- Painterly Layered Florals (with gel): For a more sophisticated look, start with a sheer wash of your petal color and cure it. Next, use a slightly darker shade to paint in some shadows—don’t cure it yet! Use a fine brush with a tiny bit of clear top coat to gently blur the edges for a soft, watercolor effect. Cure that. Finally, add a few highlights with an almost-white pastel. This layering creates incredible depth.
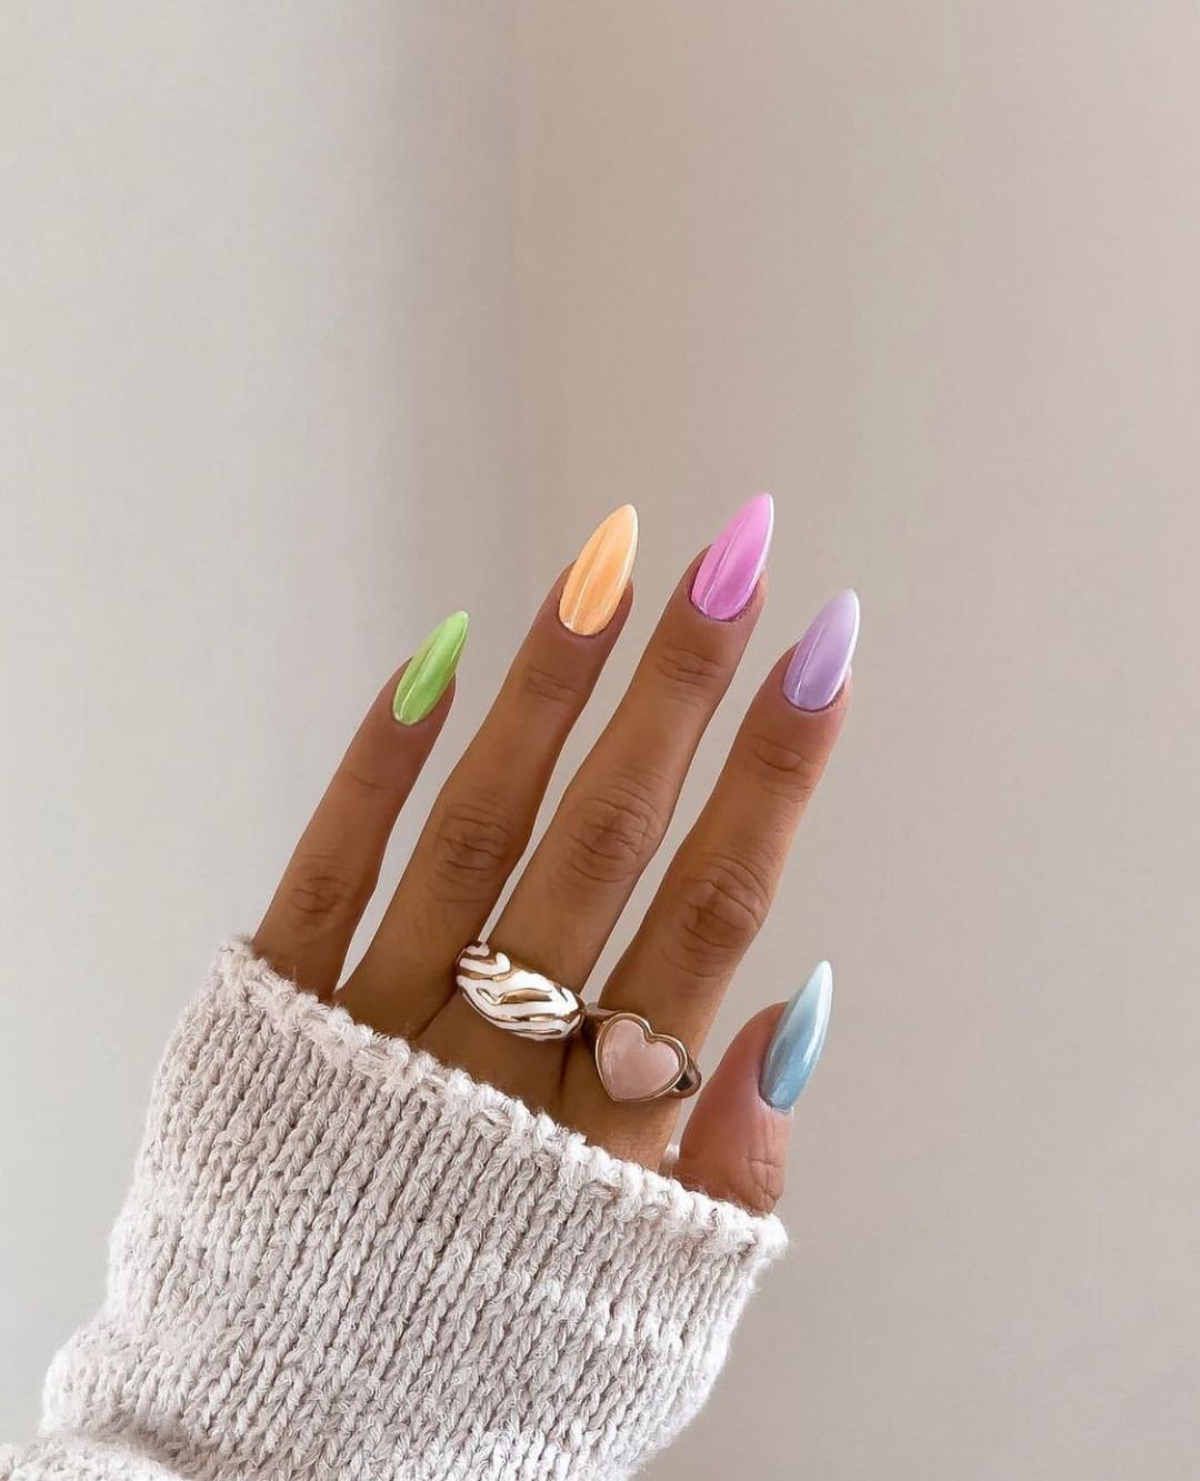
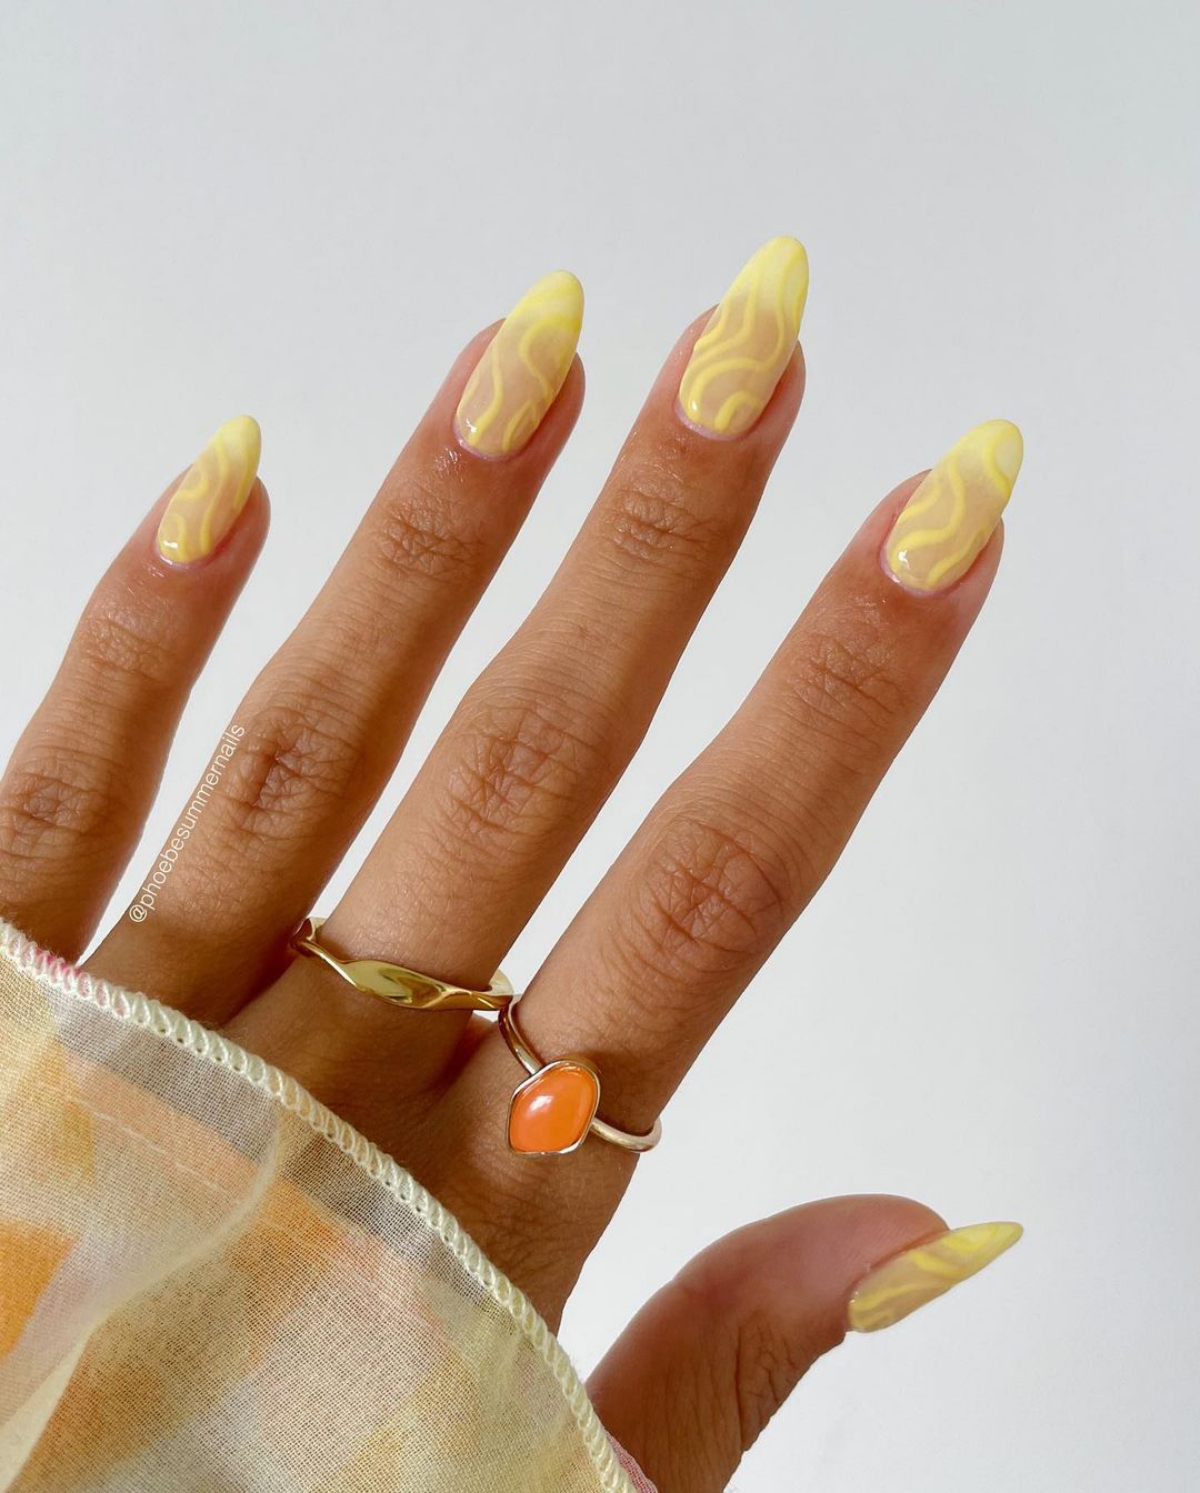
Making Pastels Pop
Wanna know the single most important pro tip for vibrant pastel nails? Apply them over a perfectly cured, opaque white base. That white background makes any pastel—especially tricky pale yellows and mints—look true-to-bottle and totally even. Without it, they can look streaky and sad.
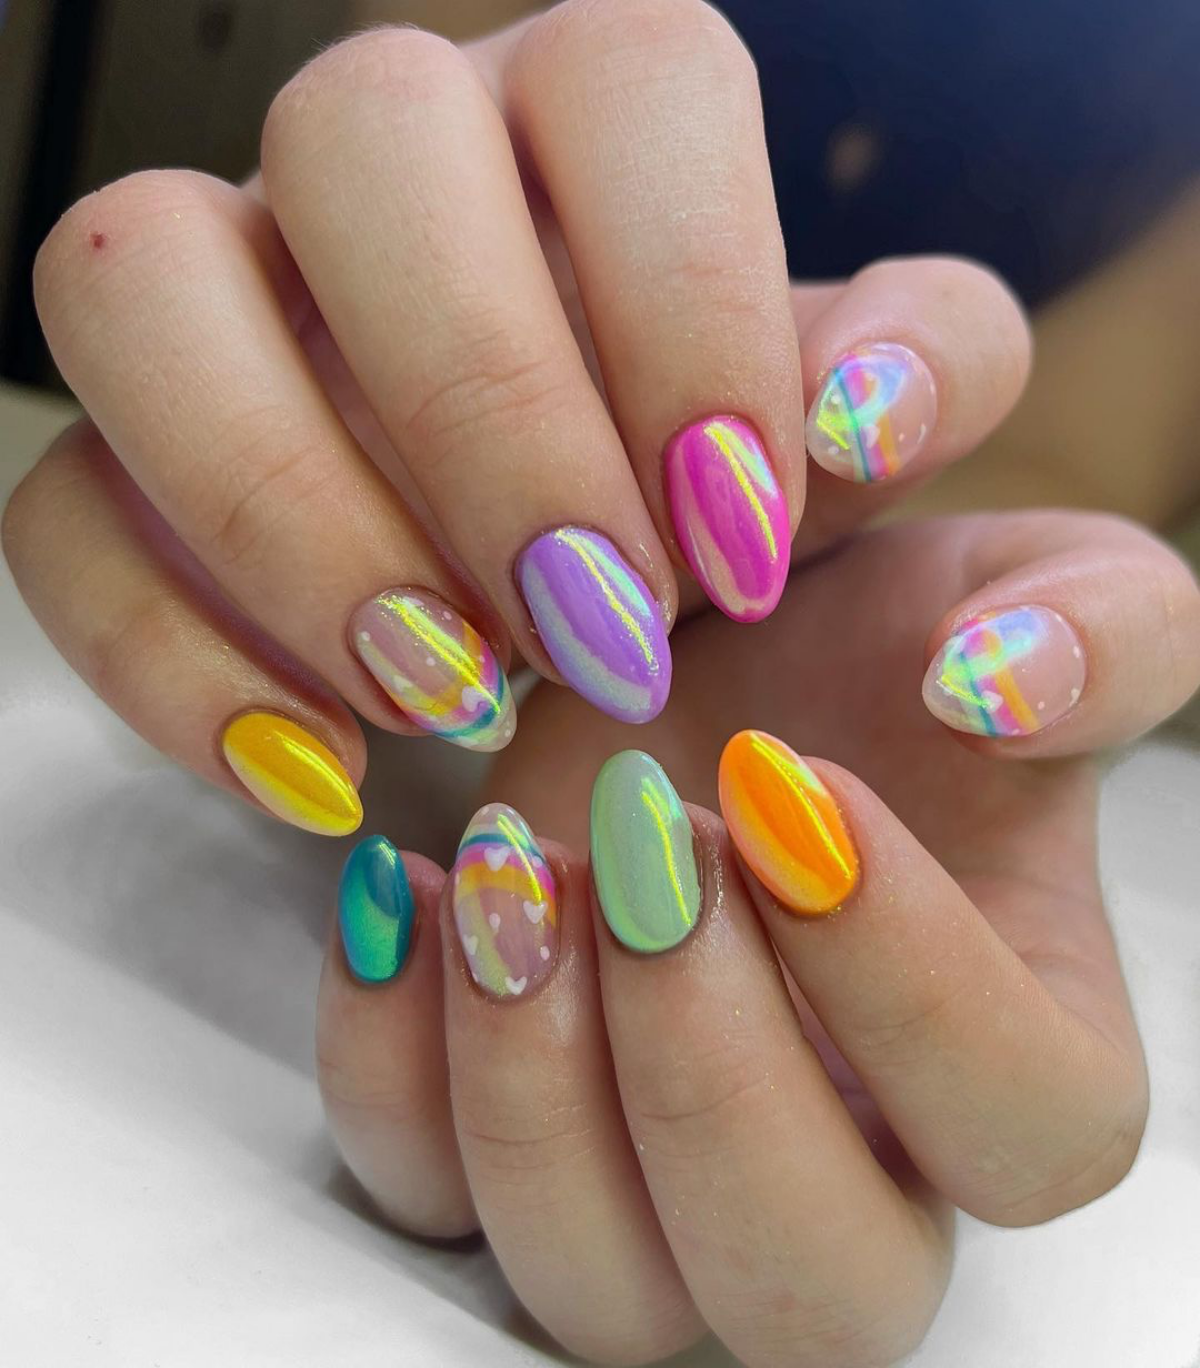
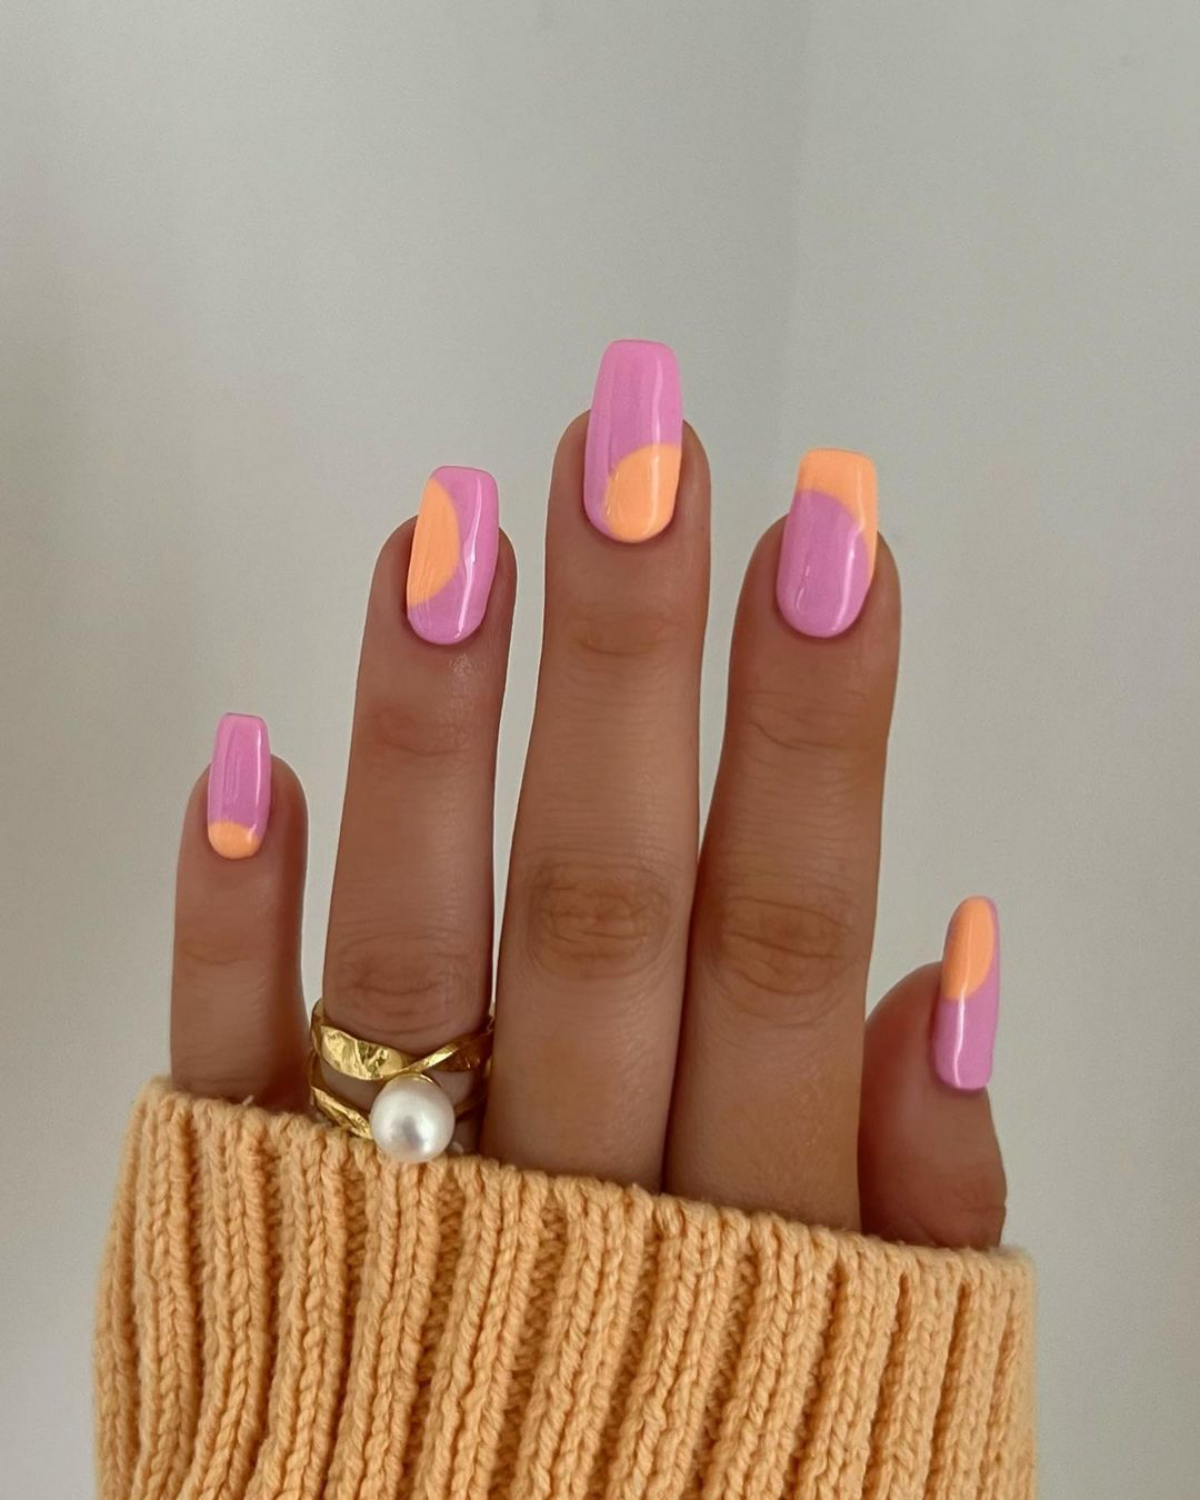
When picking colors, I often suggest a five-color palette. Think of a garden: you’ve got green, a few flower colors, and a neutral. A go-to spring combo could be sage green, a dusty rose, creamy yellow, crisp white, and a sheer nude. Using a consistent palette makes even a mismatched design look intentional and chic.
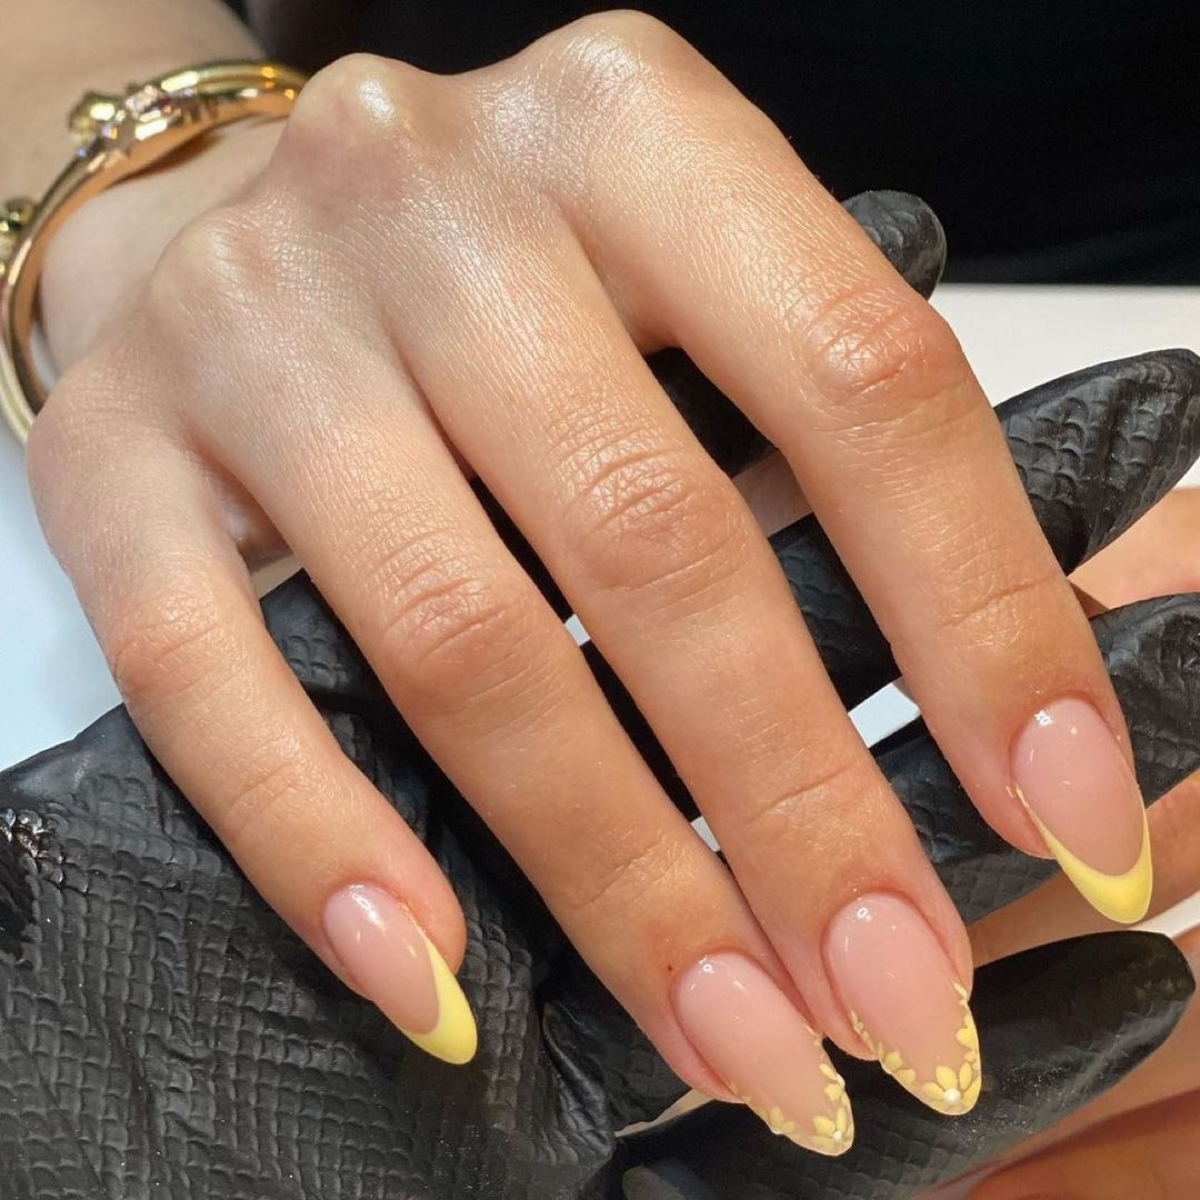
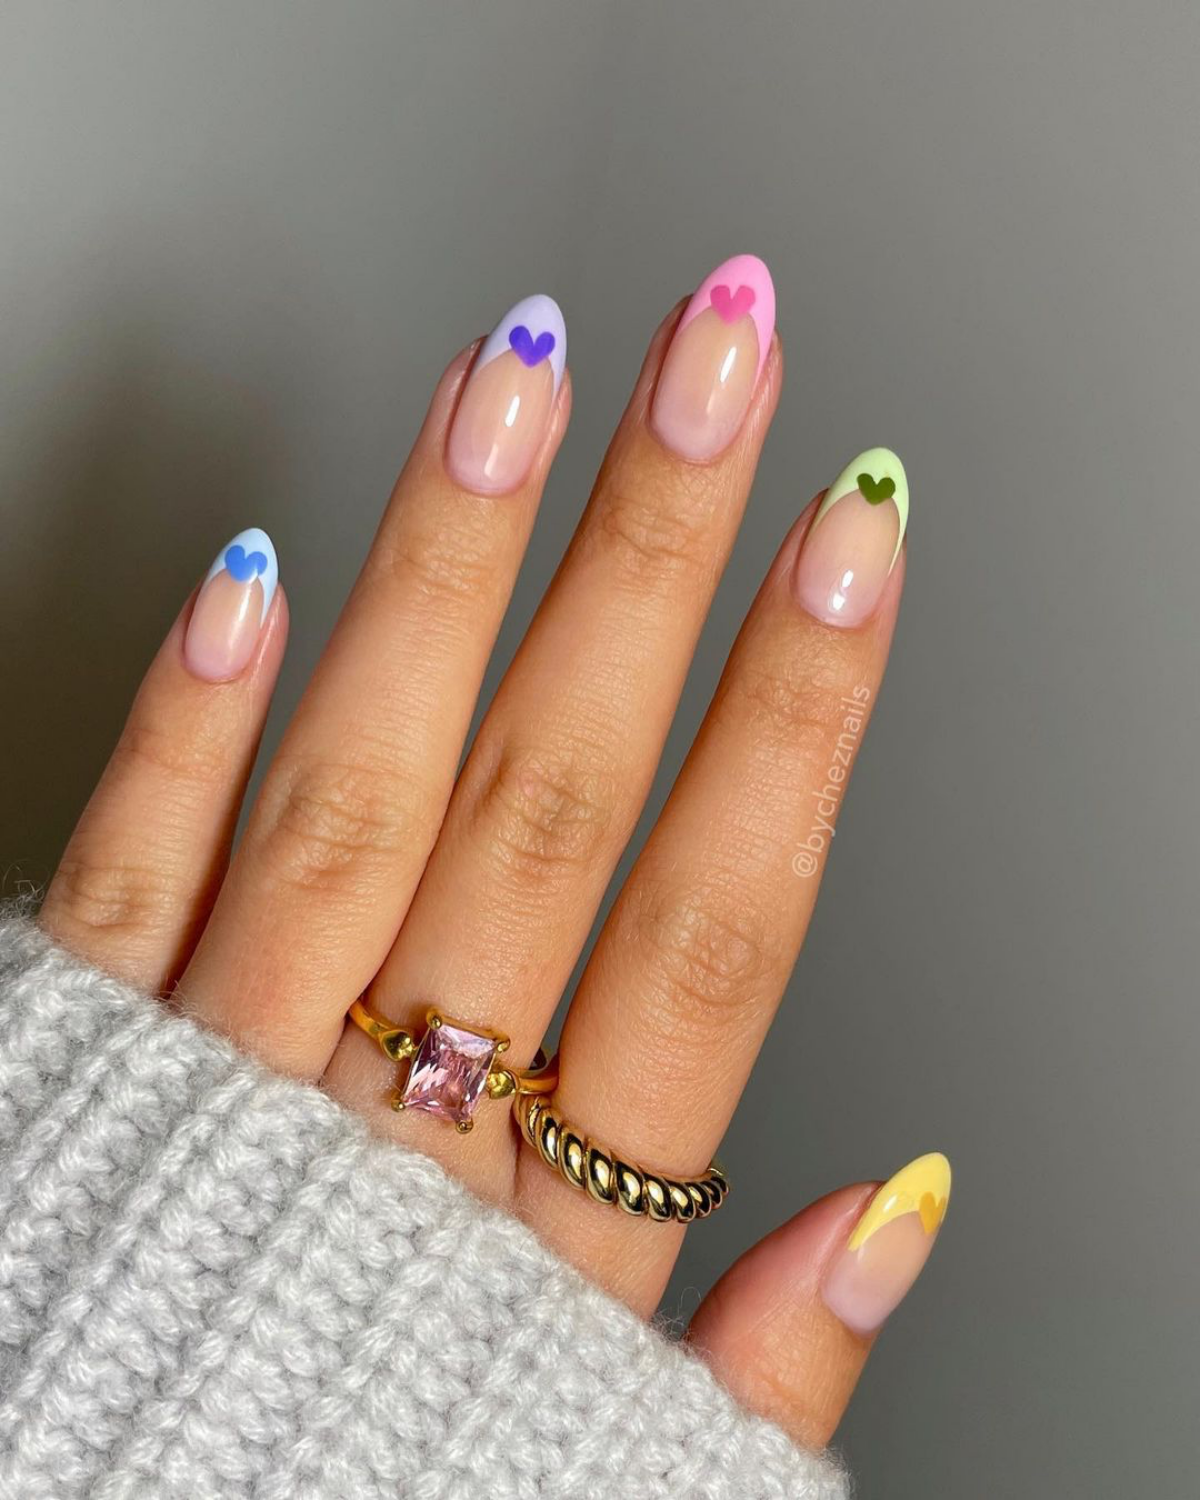
The Modern French Manicure
The French is timeless, but spring is when we play with colorful tips. The key is always that perfect, crisp smile line.
- The Pro Method: I still think the sharpest lines come from hand-painting with a fine liner brush. I anchor my hand and pull the line slowly, then perfect it with a small, flat brush dipped in pure acetone.
- The Stamper Hack (Great for DIY!): A popular shortcut involves a silicone nail art stamper. It’s so clever. First, you paint a stripe of polish directly onto the stamper. Then, you gently but firmly press your nail tip into the polish at about a 45-degree angle. Finally, use a clean-up brush and acetone to wipe away any excess from your skin. It takes a little practice to get the angle right, but it creates a perfect curve in seconds.
Ready to DIY? Your Spring Nail Starter Kit
Thinking of trying this at home? It’s totally doable, and building a kit is half the fun. For a one-time investment of around $80 to $150, you can get everything you need.
Here’s a basic shopping list:
- A good quality nail file (180/240 grit) – about $3
- A decent LED Lamp (this is your biggest purchase, ranging from $25 to $80)
- 99% Isopropyl Alcohol – around $4
- A HEMA-free gel trio (base coat, color, and top coat) – usually about $30 for a set
- A set of dotting tools and fine liner brushes – you can find these for $5-$10 online
Aftercare: How to Make Your Manicure Last
A great manicure is a partnership. My work is only half the story; the other half is how you treat your nails at home.
If you take away nothing else, please hear this: Cuticle oil is non-negotiable. I tell my clients to apply it every single day, twice a day if they can. Look for one with jojoba oil—I love CND SolarOil and OPI ProSpa, which you can find at Ulta, Sally Beauty, or online for about $10-$15. The oil keeps the gel polish flexible (preventing chips) and nourishes your skin and new nail growth.
Also, remember my favorite mantra: your nails are jewels, not tools. Don’t use them to open soda cans or scrape off labels. And please, never pick or peel off your gel polish! It rips off layers of your natural nail and causes serious damage that takes months to grow out. Get it removed professionally or learn to do a safe soak-off at home.
Ultimately, creating beautiful spring nails is about celebrating a new season. But the real artistry is in the details—the meticulous prep, understanding your materials, and committing to nail health. When you respect the process, you get results that aren’t just pretty, but strong, safe, and truly professional.
Galerie d’inspiration


The Secret to Lasting Color: Don’t skip the top coat, and don’t be afraid to reapply it! A thin layer of a high-quality top coat, like the Essie Gel Setter or Seche Vive, applied every two to three days can dramatically extend the life of your manicure. It revives the shine and adds a fresh shield against the chips and dings of daily life, keeping your spring pastels vibrant for longer.
Nearly 80% of what we perceive as flavor comes from our sense of smell.
This is why the subtle, almond-like scent of a premium cuticle oil, such as CND SolarOil, feels so luxurious. It’s more than just hydration; it’s a multi-sensory experience that signals care and pampering. Massaging it into your cuticles nightly not only nourishes the nail matrix for healthier growth but also turns a simple maintenance step into a calming ritual.
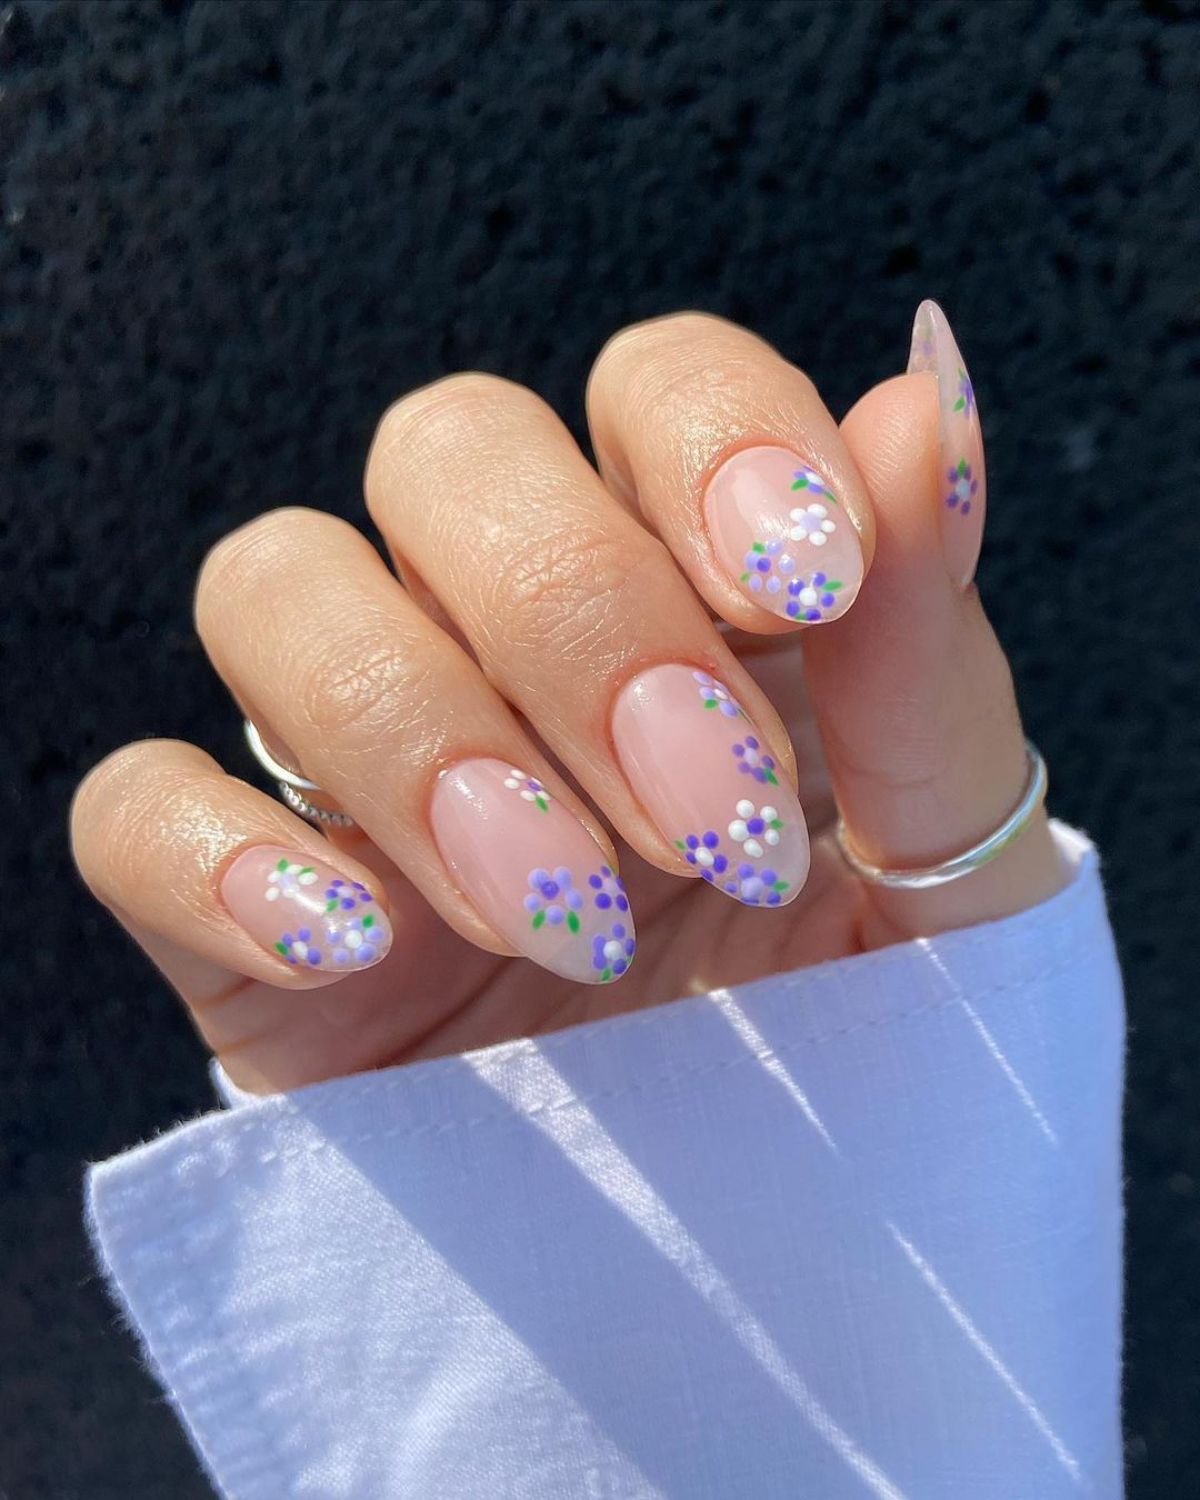
Wondering how to wear the ‘micro-floral’ trend without it looking childish?
The key is restraint and a sophisticated color palette. Instead of a busy all-over pattern, opt for a single, delicate floral accent on the ring finger or near the cuticle. Pair a neutral base, like a sheer blush from OPI’s ‘Bubble Bath’ family, with fine-lined petals in a contrasting classic color like navy or deep emerald green. It’s an elegant nod to the season, not a full-blown garden party.
- Your nails will appear longer and more elegant.
- It helps prevent polish from lifting at the edges.
- The manicure looks clean and impeccably professional.
The trick is ‘leaving a margin’. Pros don’t paint all the way to the skin. By leaving a hairline gap around the cuticle and sidewalls, you ensure the polish adheres perfectly to the nail plate, creating a flawless, more durable finish.
Builder Gel Overlay: A thin, self-leveling layer of builder gel (like IBD Builder Gel or Orly’s Builder in a Bottle) applied over the natural nail before any color. It provides a strong, flexible foundation that absorbs shocks and prevents the nail from bending, which is the number one cause of chips and breaks.
Classic Gel Polish: A softer gel formula designed for color. While it adds some strength, its primary purpose is long-wearing color and shine. It’s more flexible than a builder overlay.
For brittle, post-winter nails, an overlay is the ultimate reinforcement for a lasting spring manicure.
Embrace the ‘Skittle’ manicure, but give it a spring-inspired, cohesive twist. Instead of random colors, choose five shades from a single color family to create a subtle ombré effect across your hand. Think from a pale blush to a dusty rose, or a light sky blue to a periwinkle. Brands like Zoya and Cirque Colors excel at offering nuanced shades that make this trend look chic and intentional.
- Cuticle Care: Never cut your own cuticles. This can lead to infection and damage. Instead, apply a cuticle remover, like the one from Sally Hansen, wait a minute, and then gently push them back with an orange wood stick wrapped in cotton.
- Hydration is Key: Follow up immediately with a nourishing cuticle oil. This keeps them soft, prevents hangnails, and supports healthy nail growth from the source.


