The Modern Mullet: A Barber’s No-BS Guide to Getting It Right
I’ve been standing behind a barber chair for a long, long time. Long enough to see styles get born, die, and then come back from the dead. I vividly remember when the only guy asking for a mullet was doing it for a laugh. But a few years back, the vibe shifted. Younger guys started walking in, dead serious, with phones full of pictures of musicians and skaters. They wanted that iconic shape, but updated. That’s when I knew the mullet was really back—not as a joke, but as a genuine style statement.
In this article
And let’s be clear: this isn’t just a haircut. It’s an exercise in controlled chaos and pure confidence. It goes against the first thing they drill into you at barber school: blend everything. The mullet is all about a bold disconnection, which, honestly, makes it a fun technical challenge I’ve really grown to love. I’ve taught apprentices how to build one from scratch, fixed more than a few DIY disasters, and adapted the cut for every hair type under the sun. This is the real-deal guide to doing it right.

First, Let’s Talk Physics (Seriously)
Before a single strand of hair gets cut, you have to get the concept. A mullet is basically two haircuts in one: short on the front and sides, long in the back. The real art—and the difficulty—is in managing where those two zones meet. If you don’t have a solid plan, you end up with a harsh, blocky line right at the crown. We call that a “shelf,” and it looks absolutely terrible, kind of like one haircut just stacked on top of another.
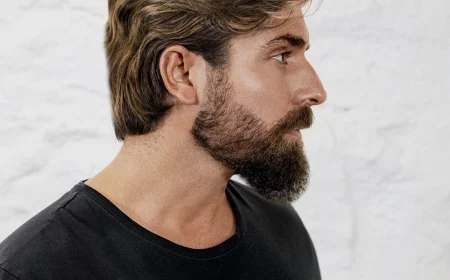
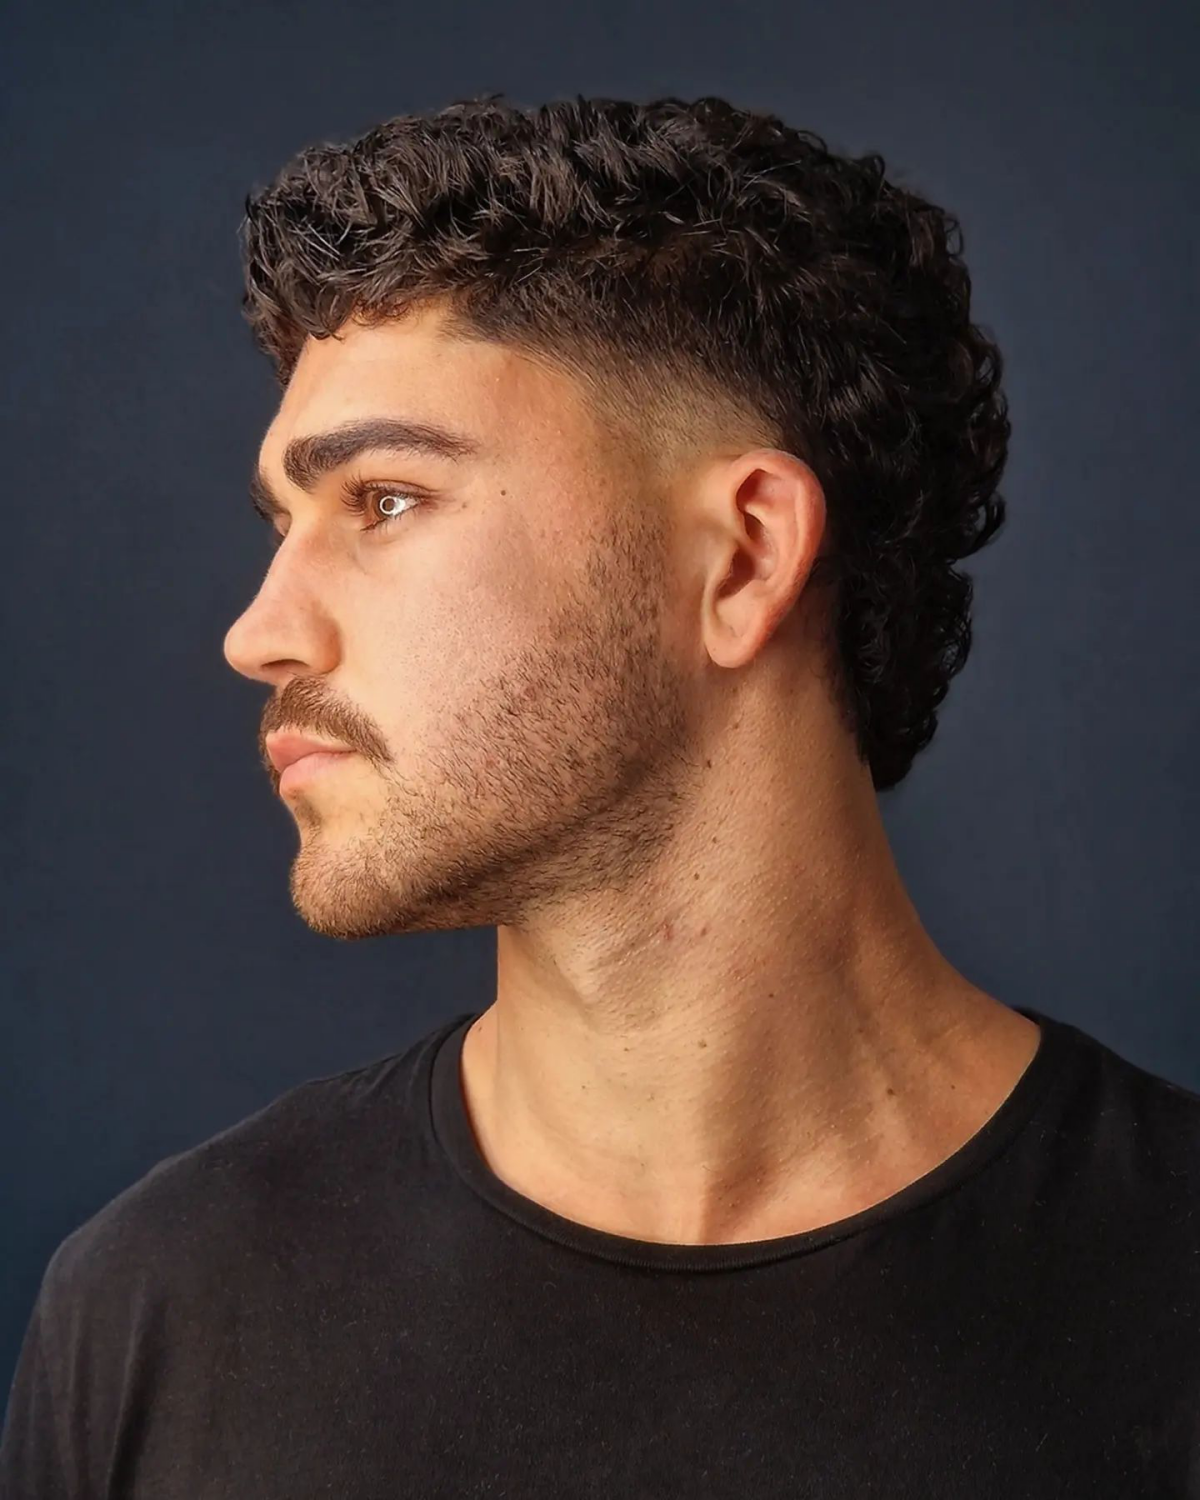
Your hair’s natural texture is the biggest factor here. Wavy or curly hair is a dream for a mullet. That natural bend and body helps to soften the transition between the short and long bits all by itself, creating shape and movement without much effort. Straight, fine hair? That’s the hard mode. It has no natural body, so it can hang limp and make the disconnection look way too severe. For those guys, we have to build all the texture in with scissors.

Density plays a big part, too. Thick hair is great because it gives us more material to work with—we can carve into it, remove weight, and create cool layers. With thin hair, you have to be way more strategic. The goal is to create an illusion of fullness, and a well-executed mullet can actually make thin hair look thicker by keeping the length concentrated in the back.
How the Pros Build a Mullet
In a real barbershop, a mullet isn’t a quick buzz-cut-and-go. It’s a project. Think of it less like a haircut and more like sculpting. Here’s what you should expect if you’re paying for a quality cut, which can run you anywhere from $50 to over $100 depending on the shop and the stylist’s experience. Plan to be in the chair for a good 45 minutes to an hour for the first one.
1. How to Talk to Your Barber (So You Don’t Get a Bad Mullet)
The first thing we do is talk. This is, without a doubt, the most important step. Don’t be shy! A good barber wants you to be specific. Here’s a little script you can use:
“Hey, I’m looking to get a mullet. I want a pretty clean taper on the sides, maybe starting with a #2 guard, but not a full skin fade. For the top, I’d like to keep enough length to style it back a bit. The main thing is I want the back to look intentional, so could you add some texture so it doesn’t just hang there?”
This tells your barber everything they need to know: the side length, the top style, and your goal for the back. After we chat, I section the hair. This is the blueprint. I create a clean horseshoe part from the temples back to just below the occipital bone (that’s the bump on the back of your head). Everything above that line is the ‘business,’ and everything below is the ‘party.’ Clean sections prevent major mistakes.
2. Tackling the Sides and Top
For the sides, it’s usually clippers or scissors. A faded mullet is super popular and uses clippers for a clean, modern taper. For a softer, more classic vibe, I’ll use a scissor-over-comb technique, which leaves the hair a bit longer and follows the head’s shape more naturally. It’s a traditional skill that gives a less severe look. Up top, it’s almost always scissors to create the right shape and add some light layers for movement.
3. Shaping the Back
The back is what makes the mullet. You can’t just let it grow wild, or it’ll get thin and stringy at the ends. My go-to technique here is point cutting—I snip vertically into the ends of the hair. This breaks up any blunt lines and creates a soft, textured edge that looks deliberate. For really thick hair, I might use thinning shears in the mid-lengths, but NEVER on the ends. That’s a one-way ticket to frayed, damaged-looking hair.
4. Managing the Dreaded “Shelf”
Okay, this is where so many DIY jobs and lazy barbers fail. That transition zone where the short top meets the long back is critical. To avoid that hard shelf line, I blend the area by taking small sections of both the short and long hair and using deep point cuts to chip away at the corner. This encourages the hair to mix together, softening the line without fully blending it away. It keeps the mullet’s disconnected spirit but makes it look sharp and professional.
Finding Your Mullet Match
Not all mullets are created equal. Different versions have different vibes, so knowing the lingo can help you find your perfect match. Here’s a quick rundown:
-
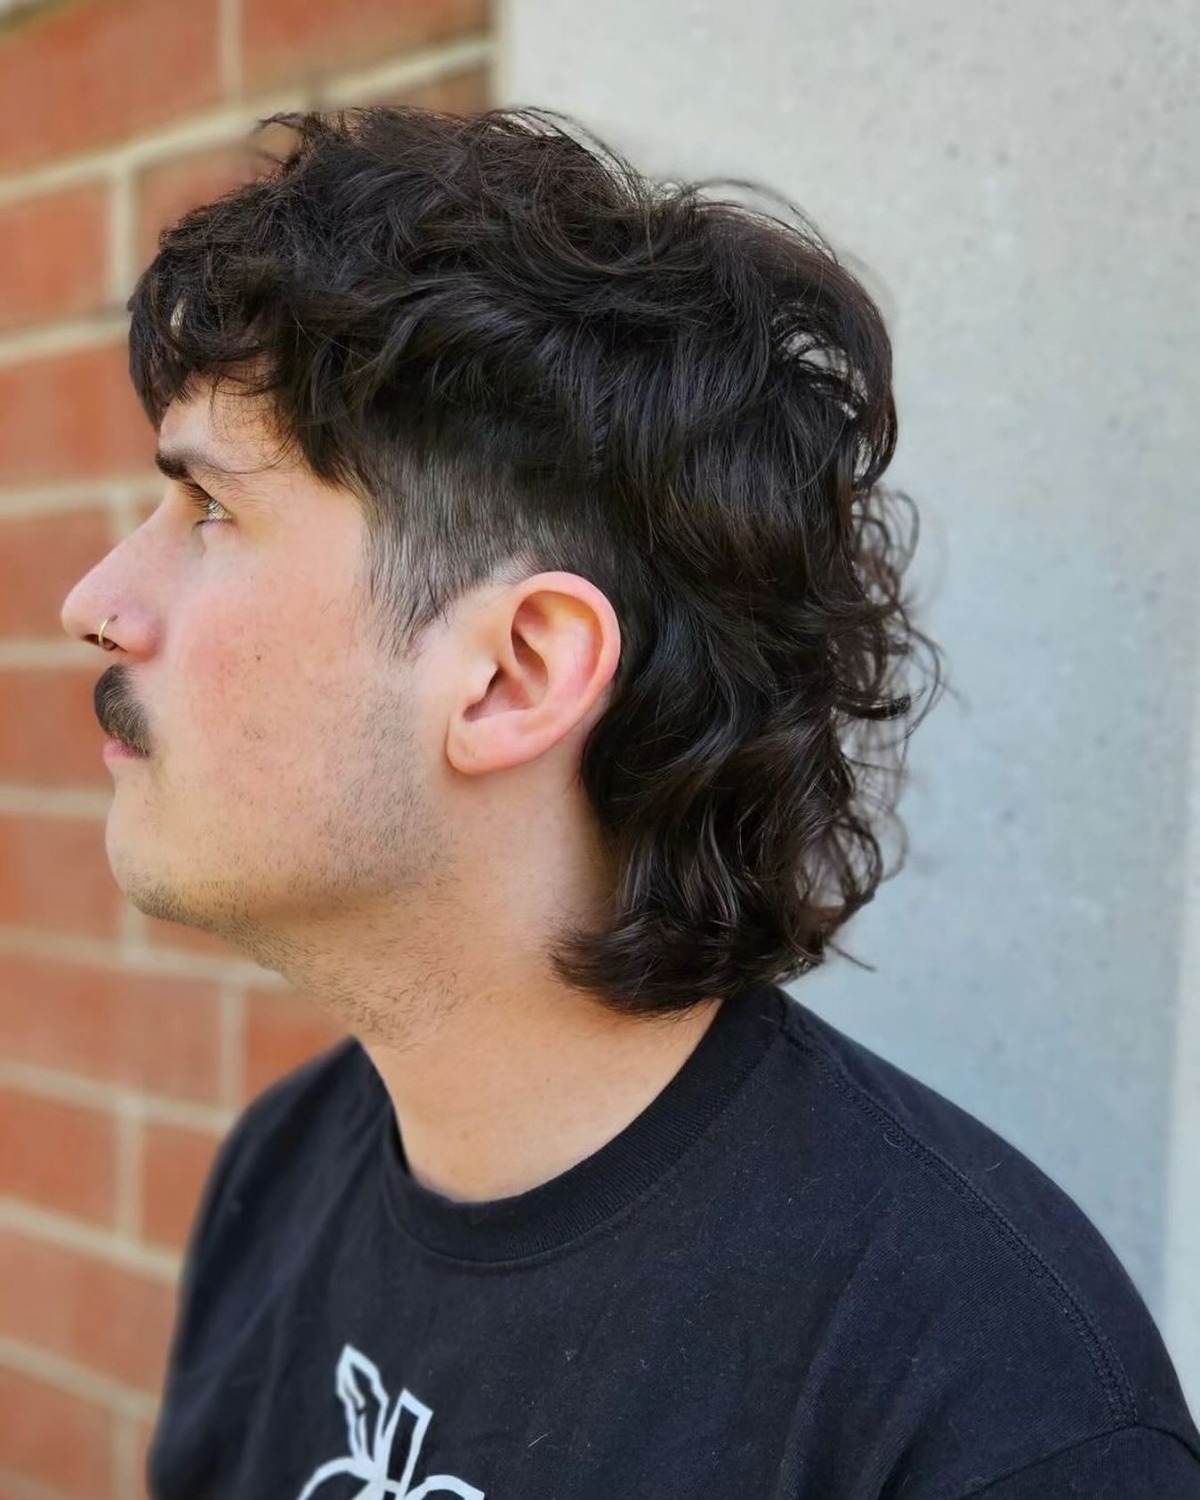
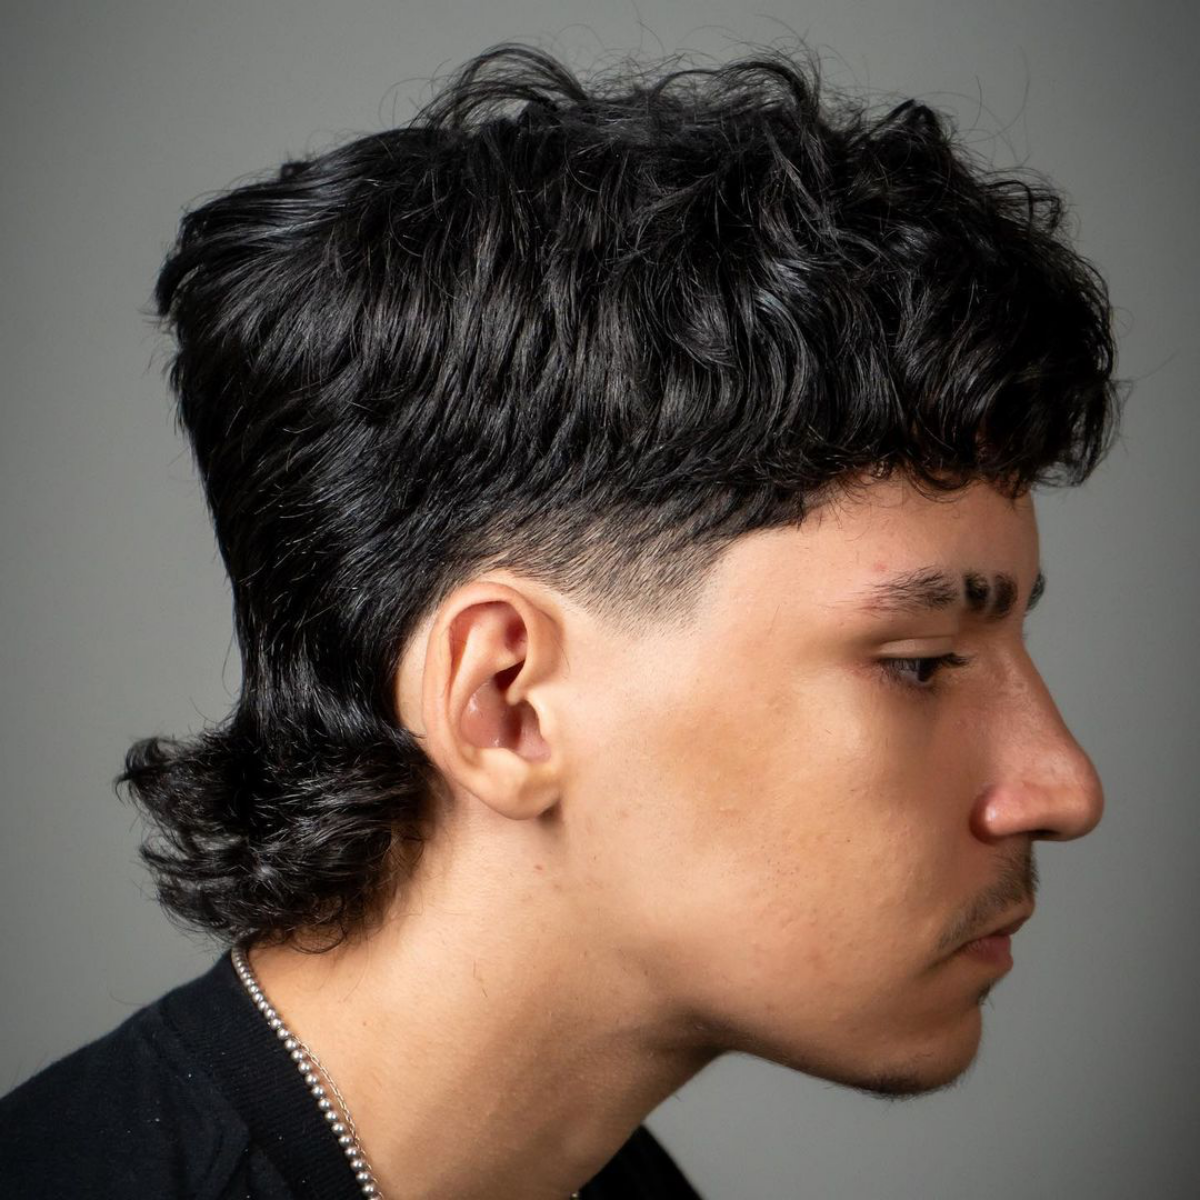
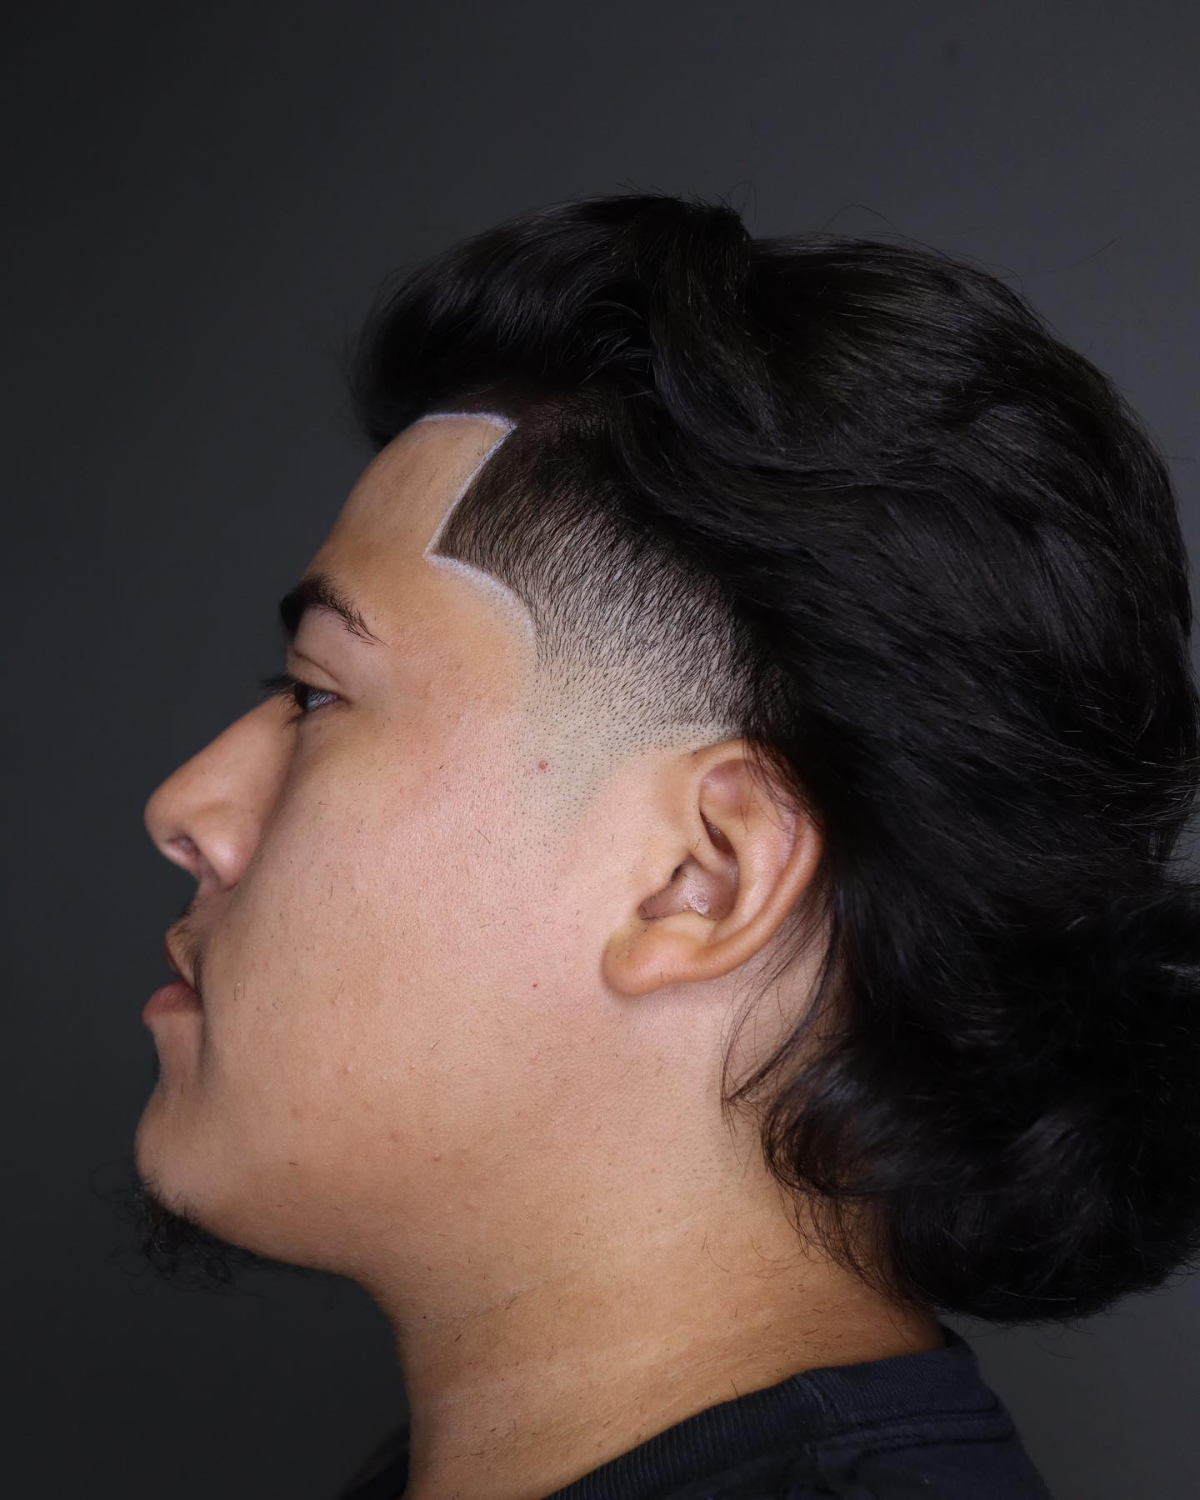
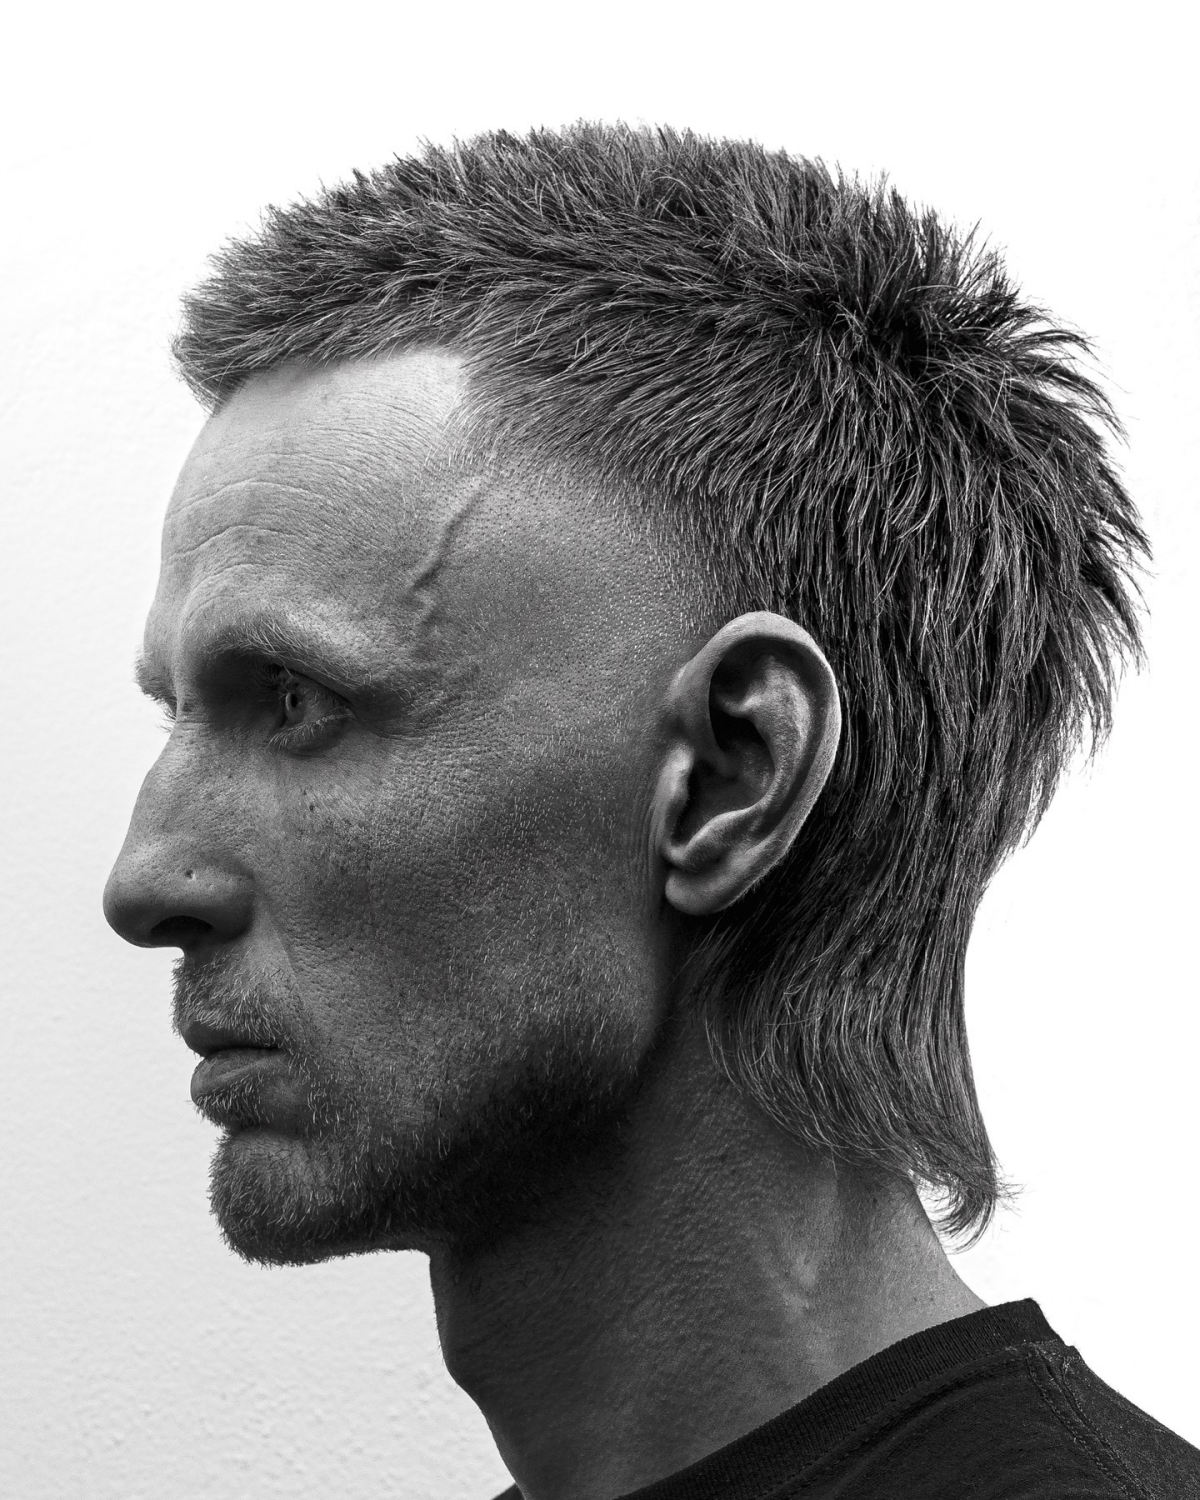
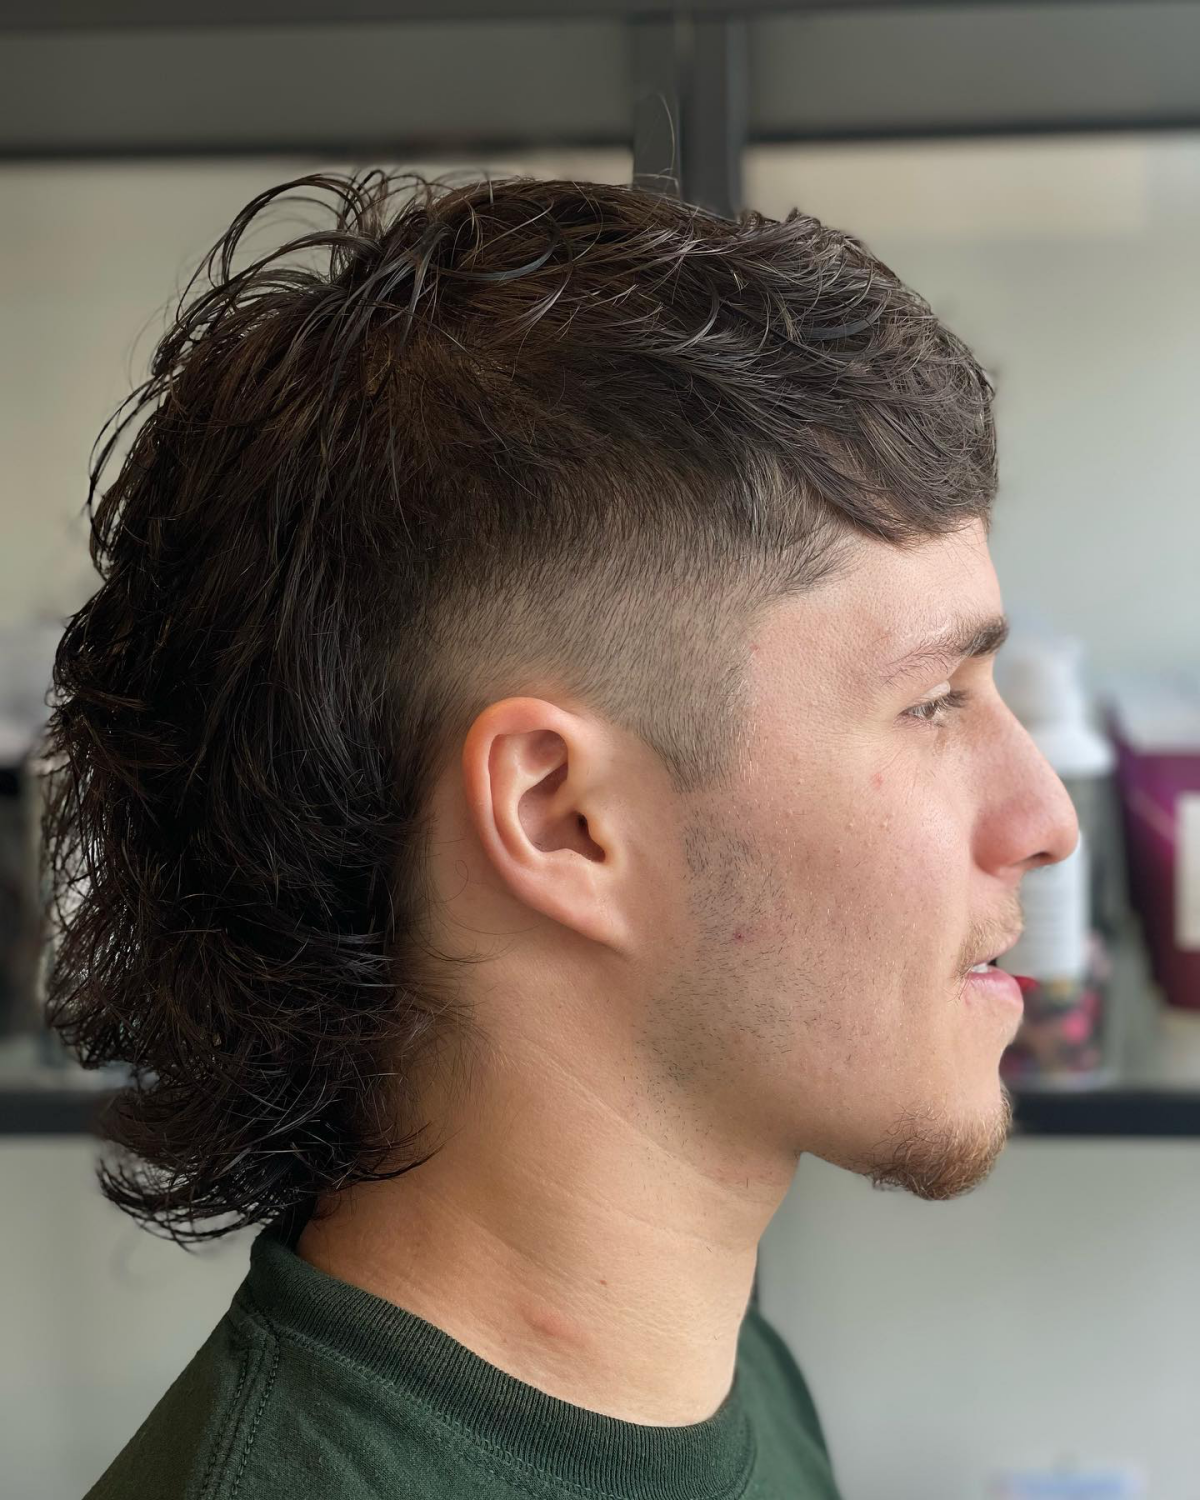
The Takuache or “Edgar” Mullet: This one is super high-contrast and bold, popular in a lot of modern truck and music scenes. It features a very sharp, often skin-high fade on the sides, with a blunt, straight fringe on top. The back is usually left pretty long and straight. Vibe: Sharp, edgy, and unapologetic. Best for: Straighter hair types that can hold a sharp line. Maintenance: High. That fade needs a touch-up every 2-3 weeks.
-
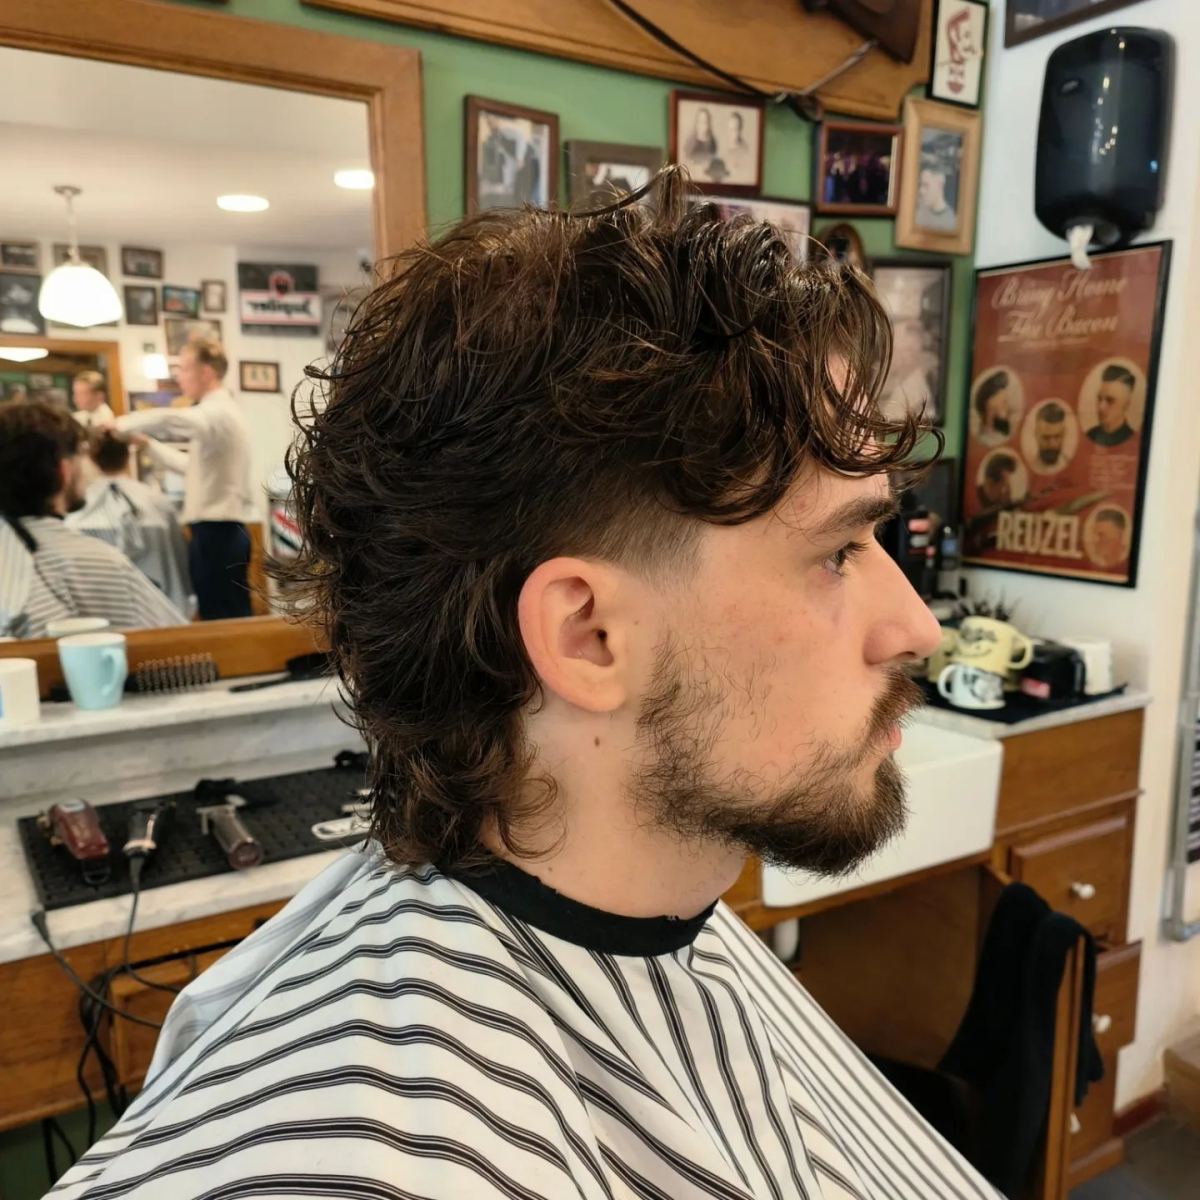
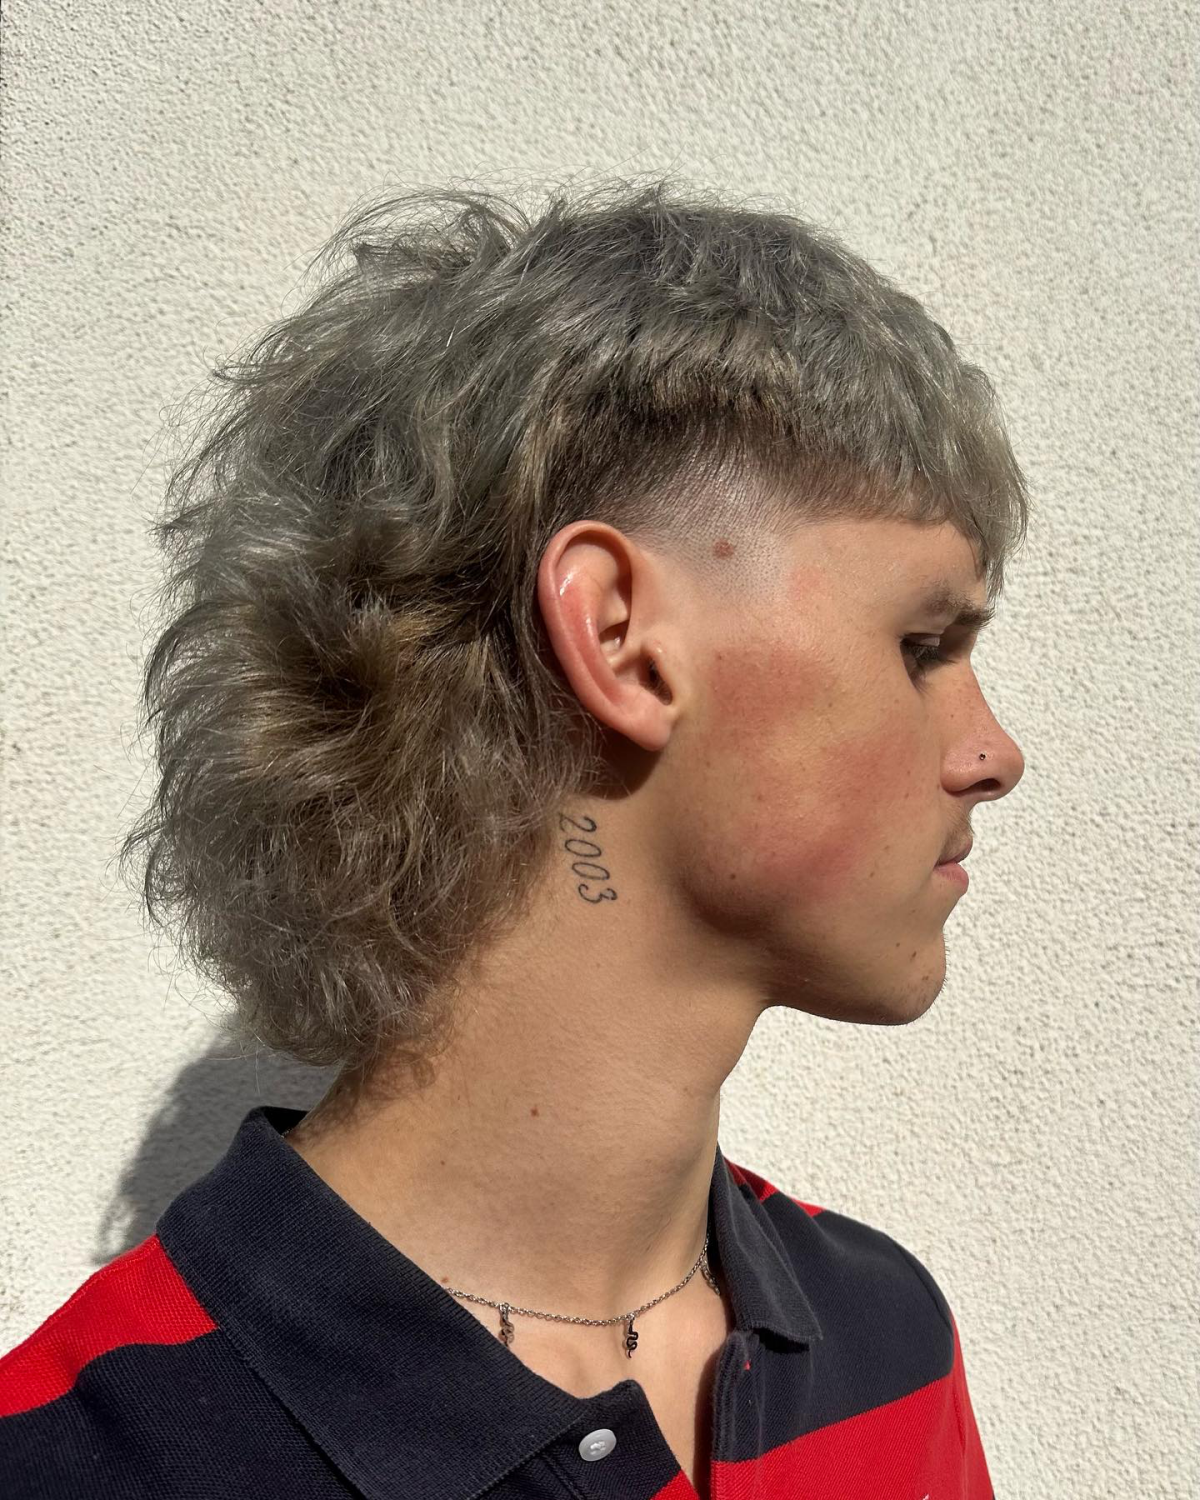
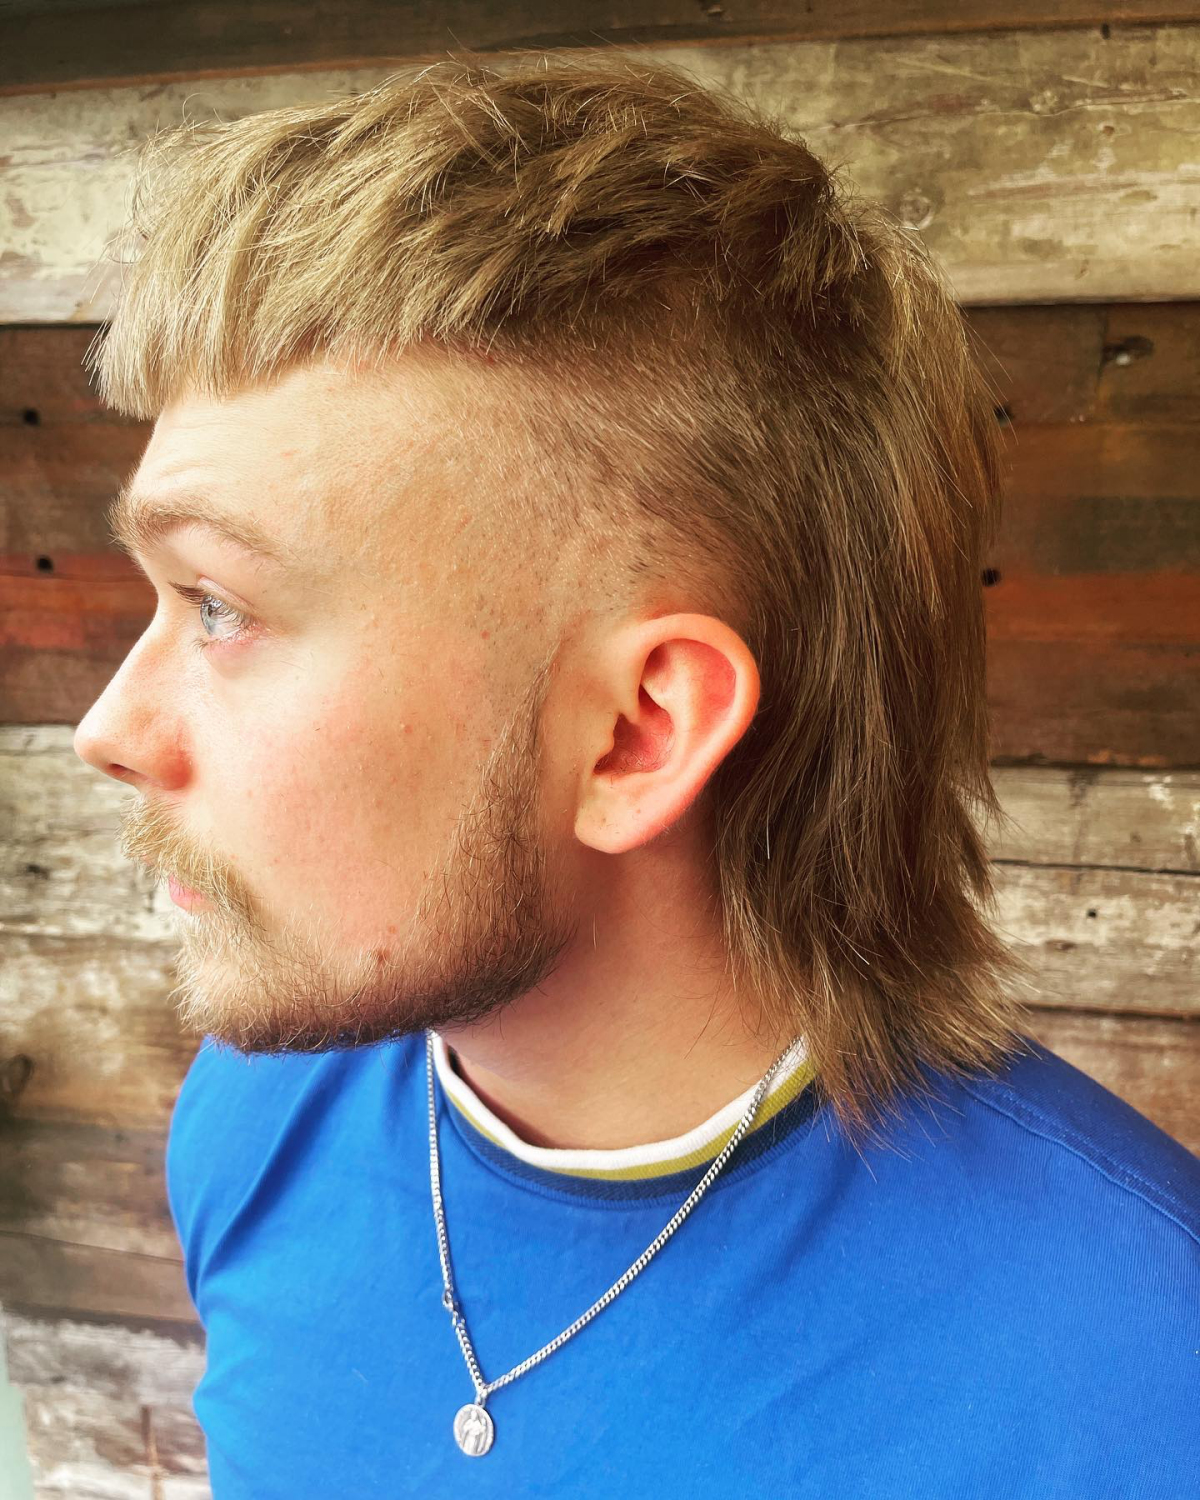
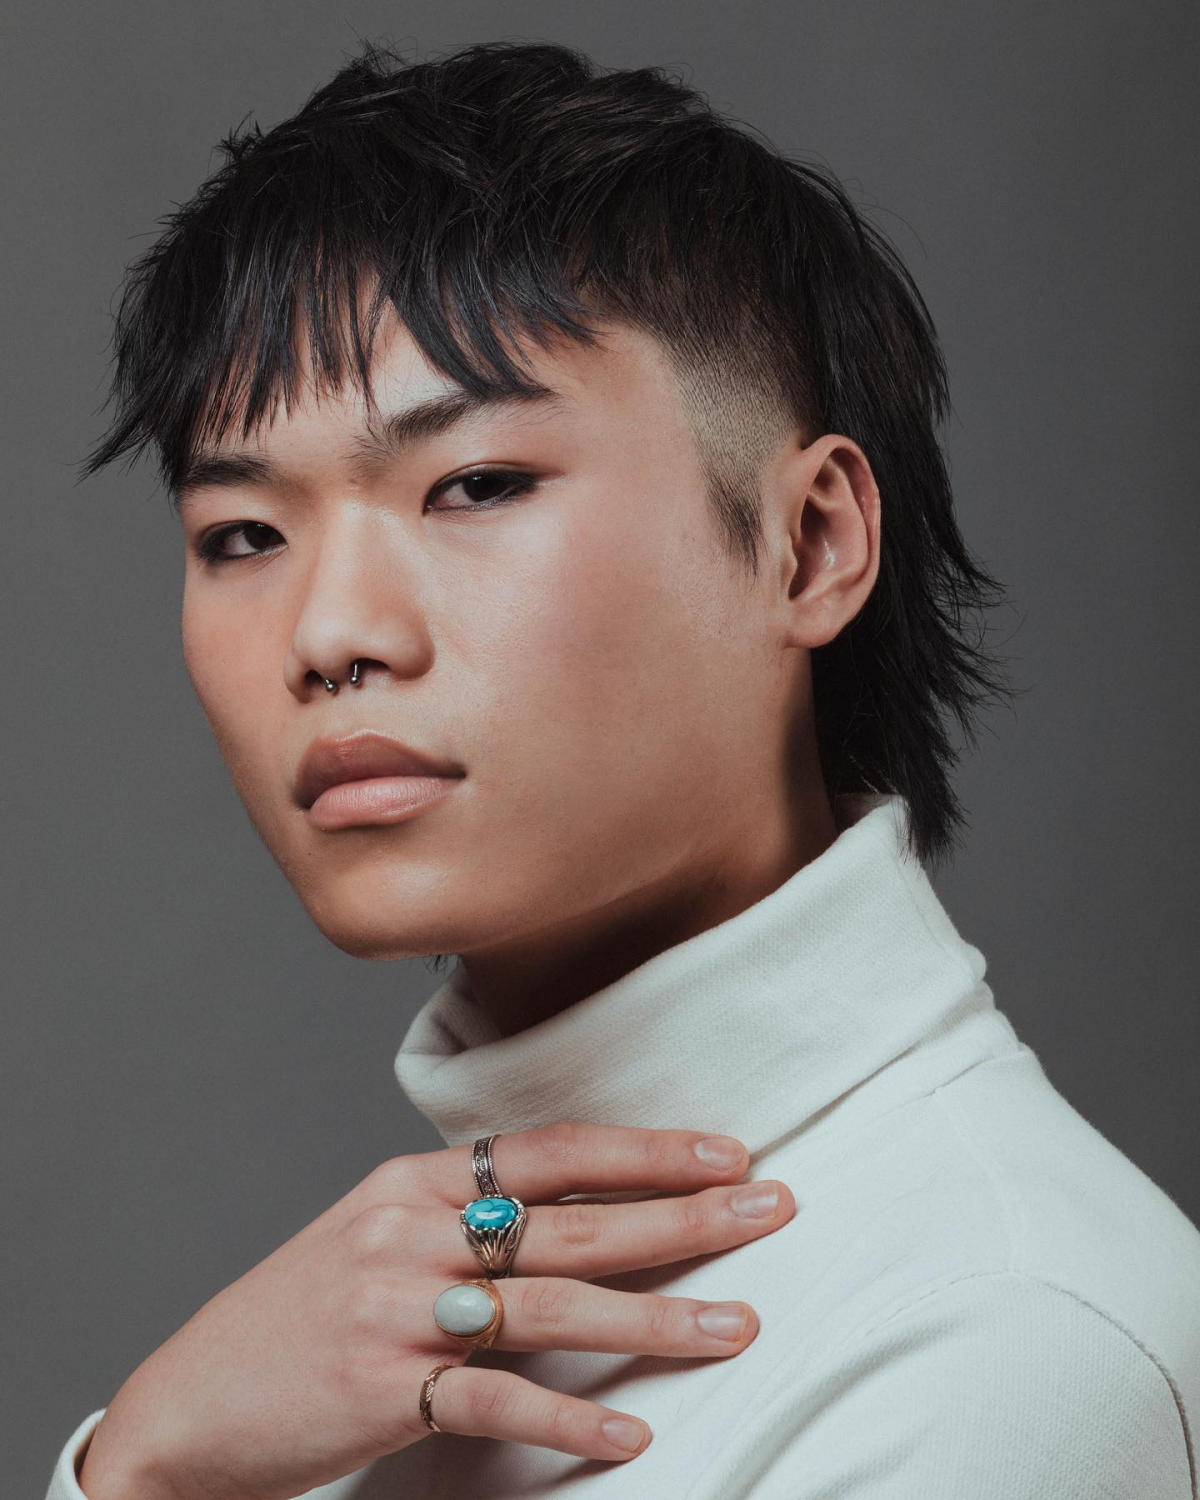
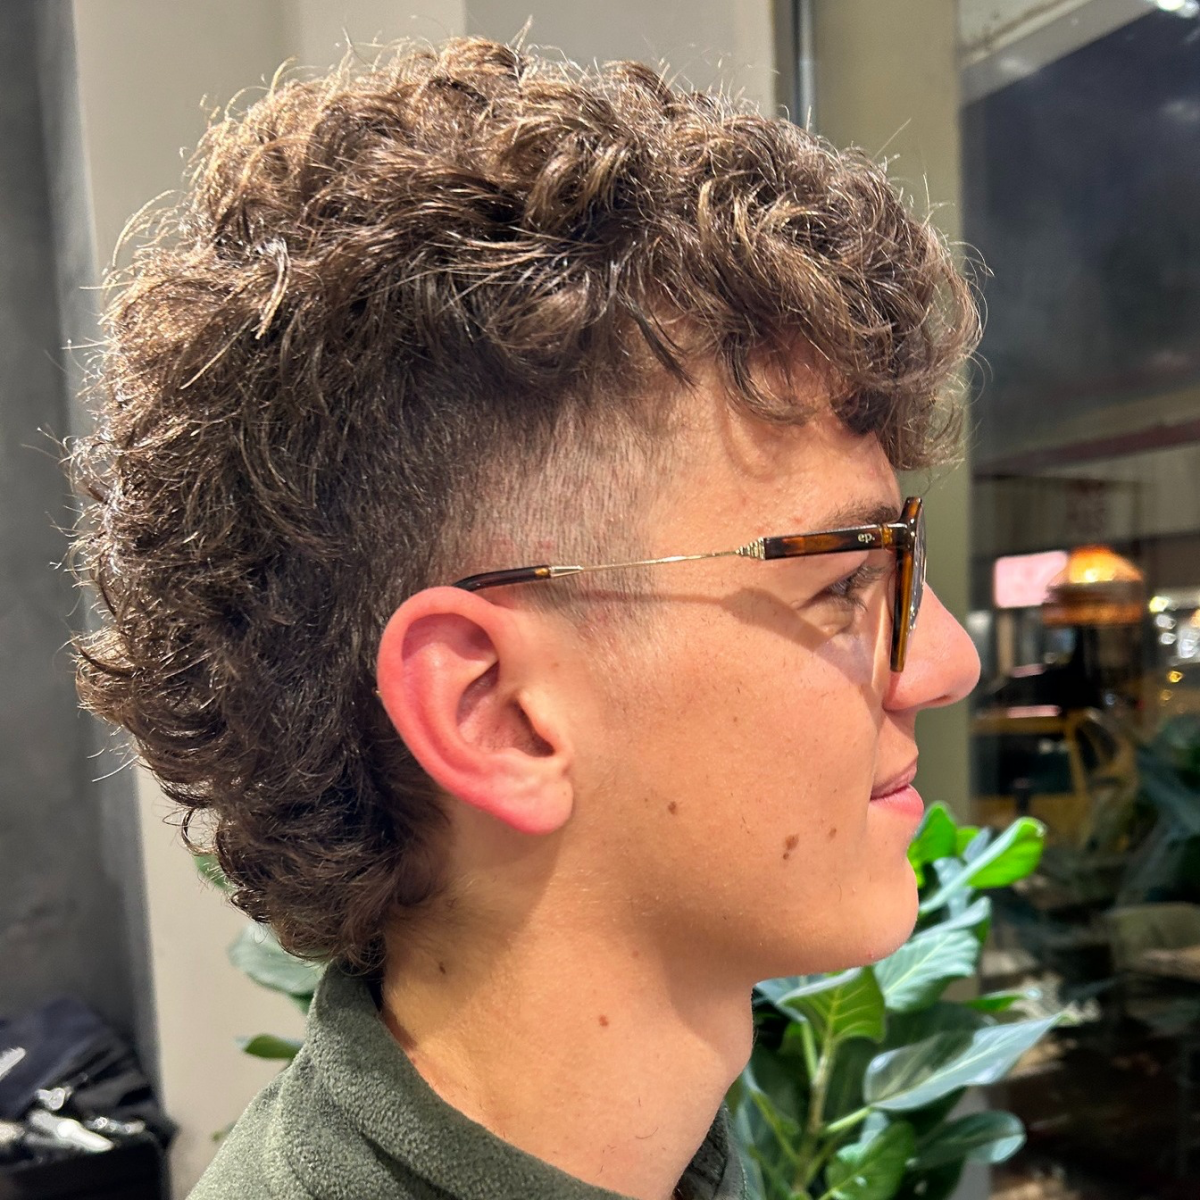
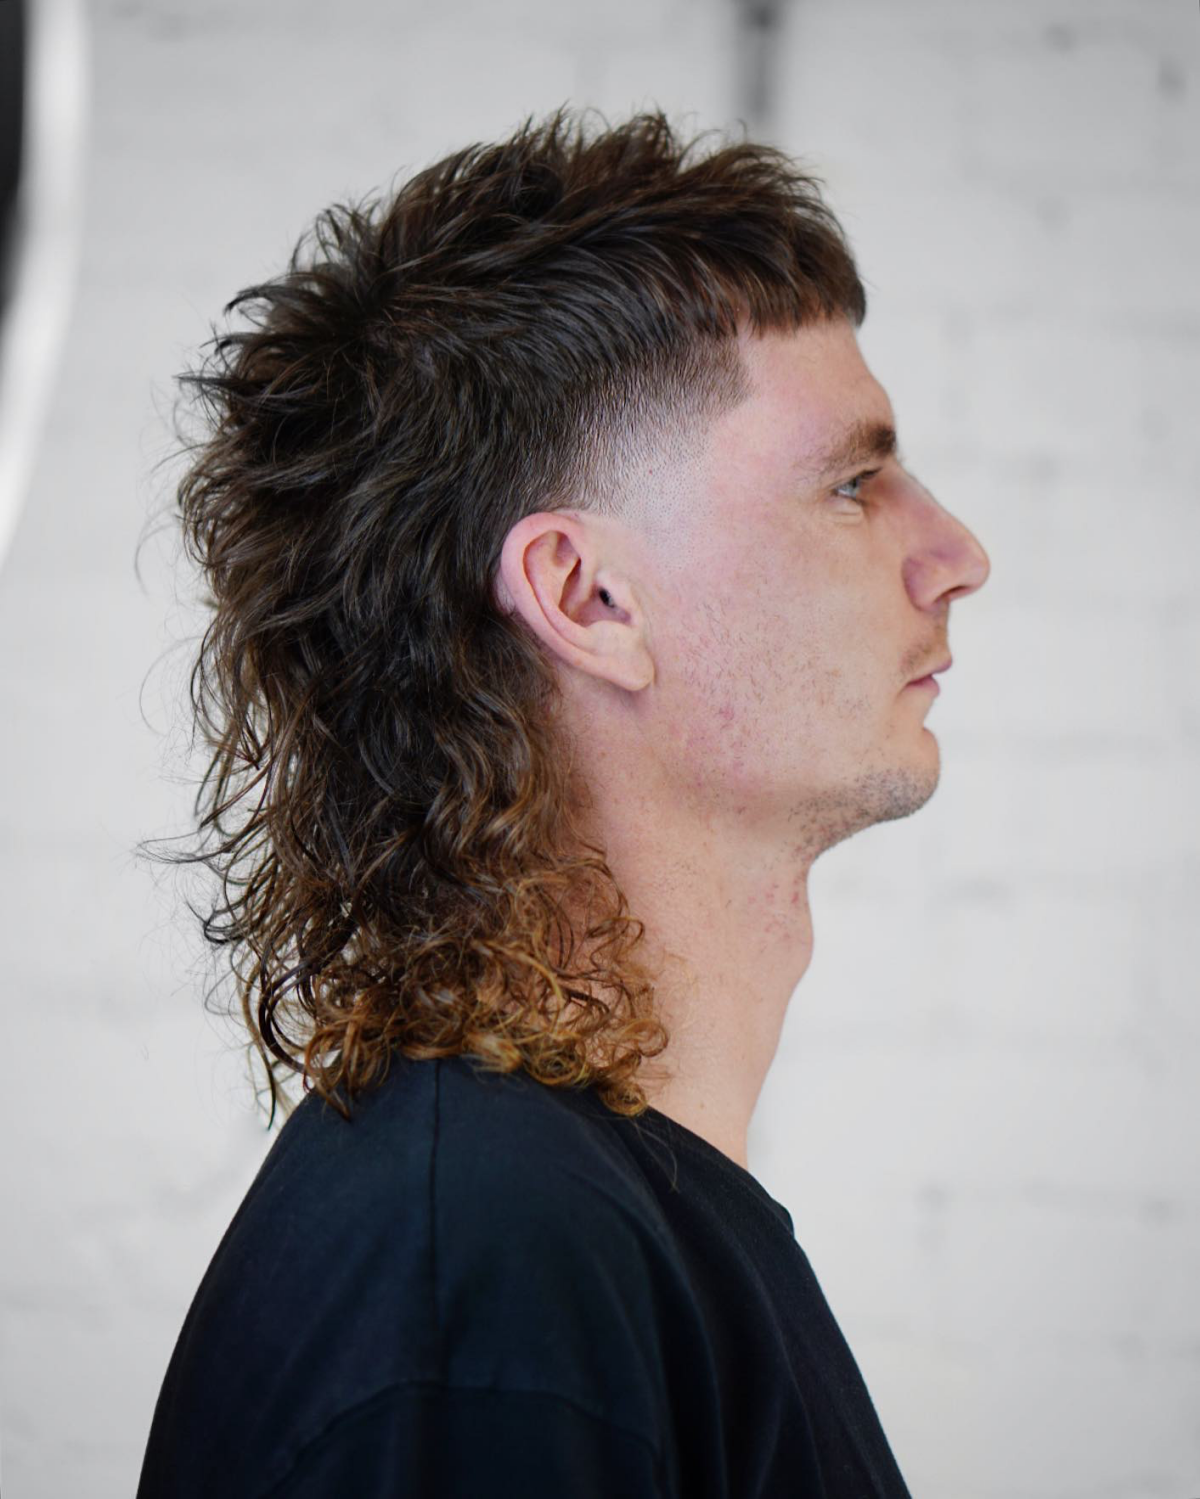
The Shaggy or Wolf Cut Mullet: This is a much softer, more androgynous take on the style. It’s basically a hybrid of a mullet and a classic shag. The top and sides are heavily layered (often with a razor) to create tons of wispy texture and movement. The back, which might be around 4-6 inches long, is also layered to flow with the rest of the cut. Vibe: Effortless, artistic, and a little bit wild. Best for: Wavy or slightly curly hair. Maintenance: Medium. It grows out pretty well.
-
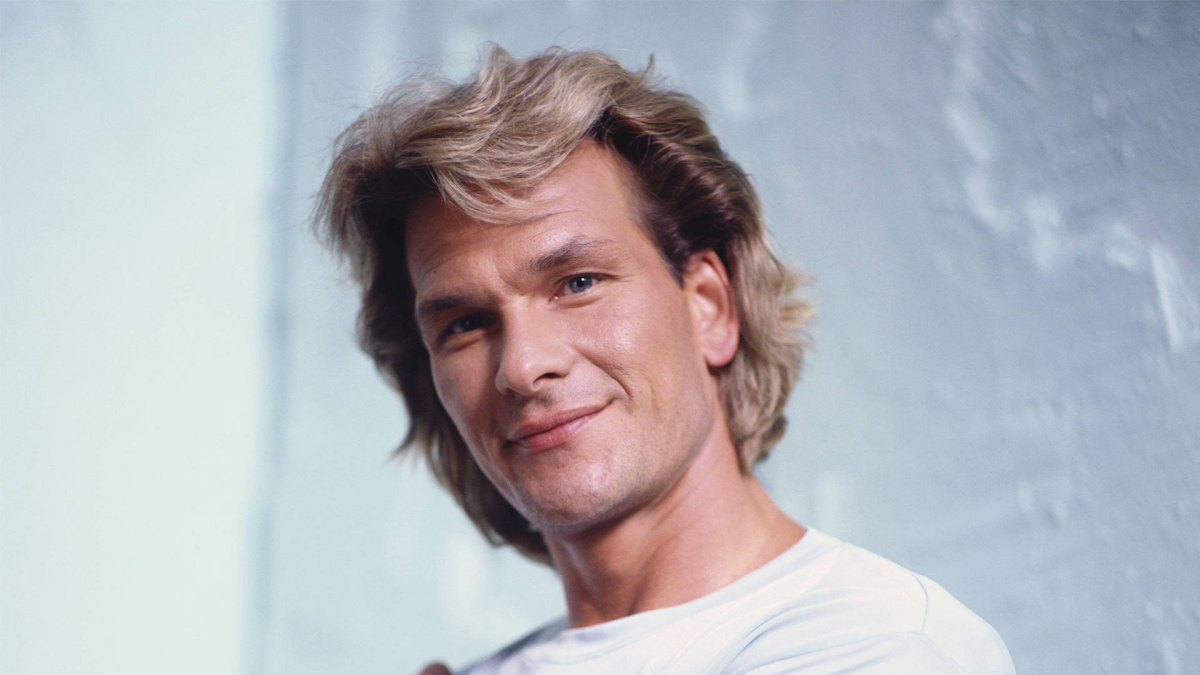
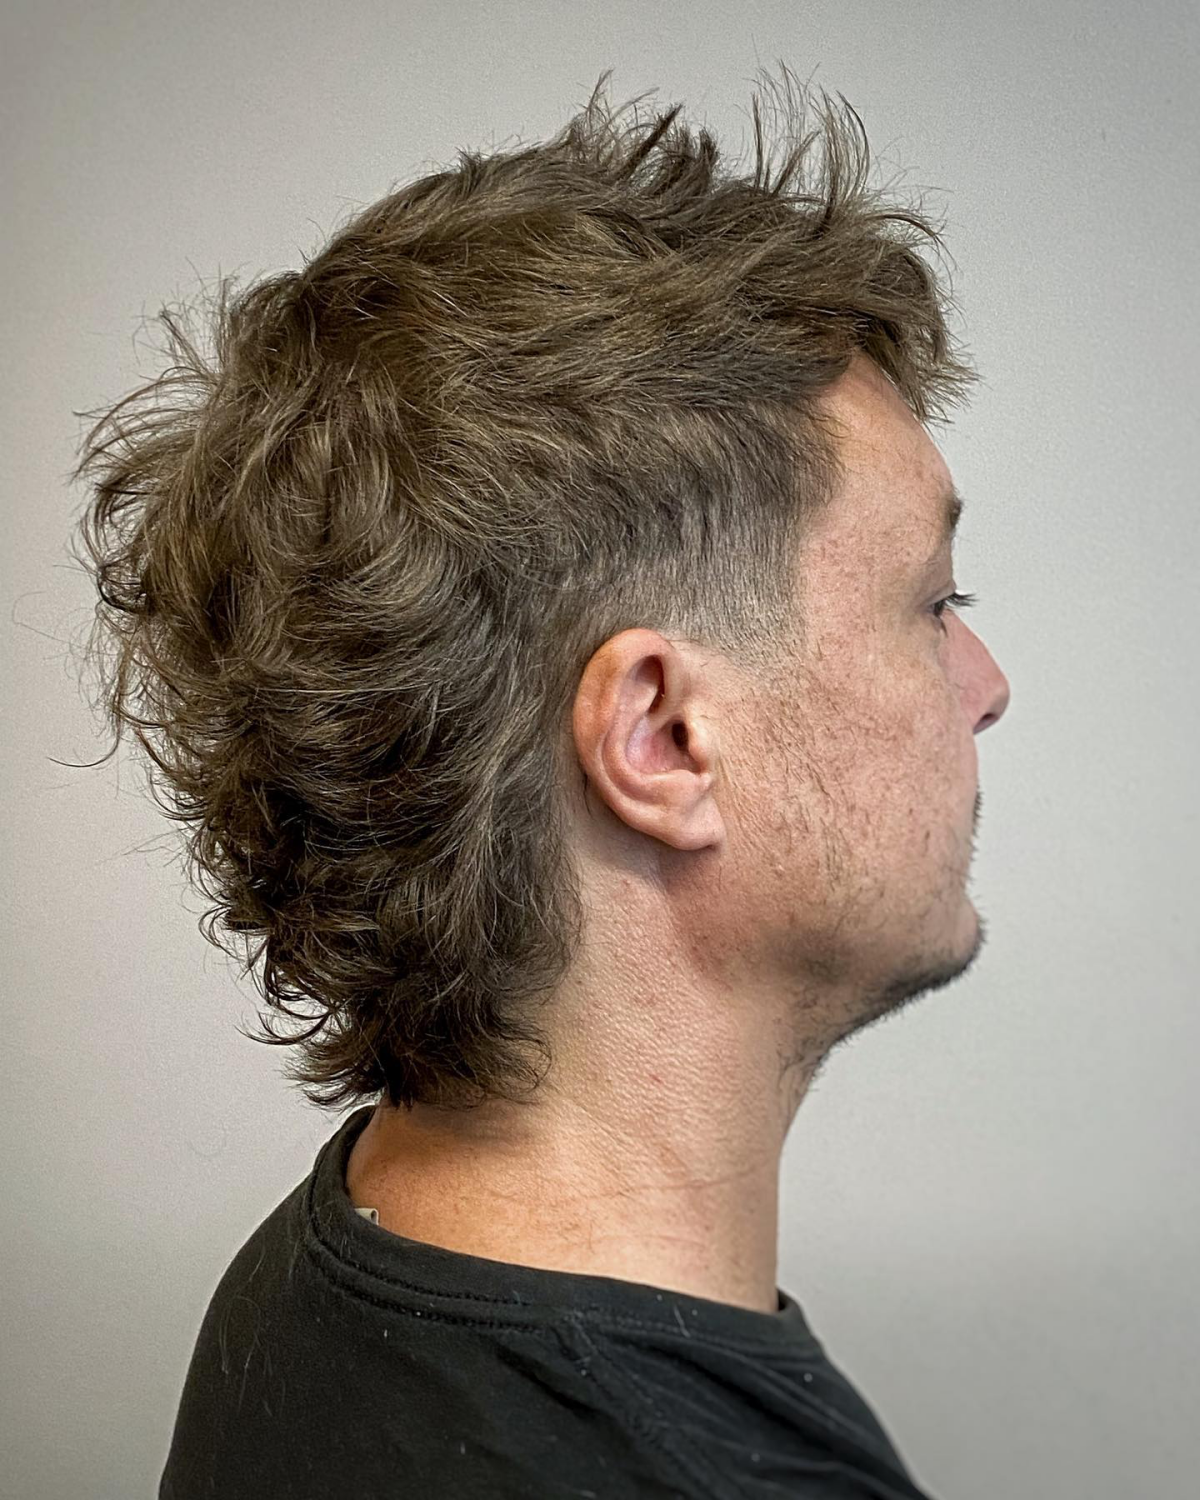
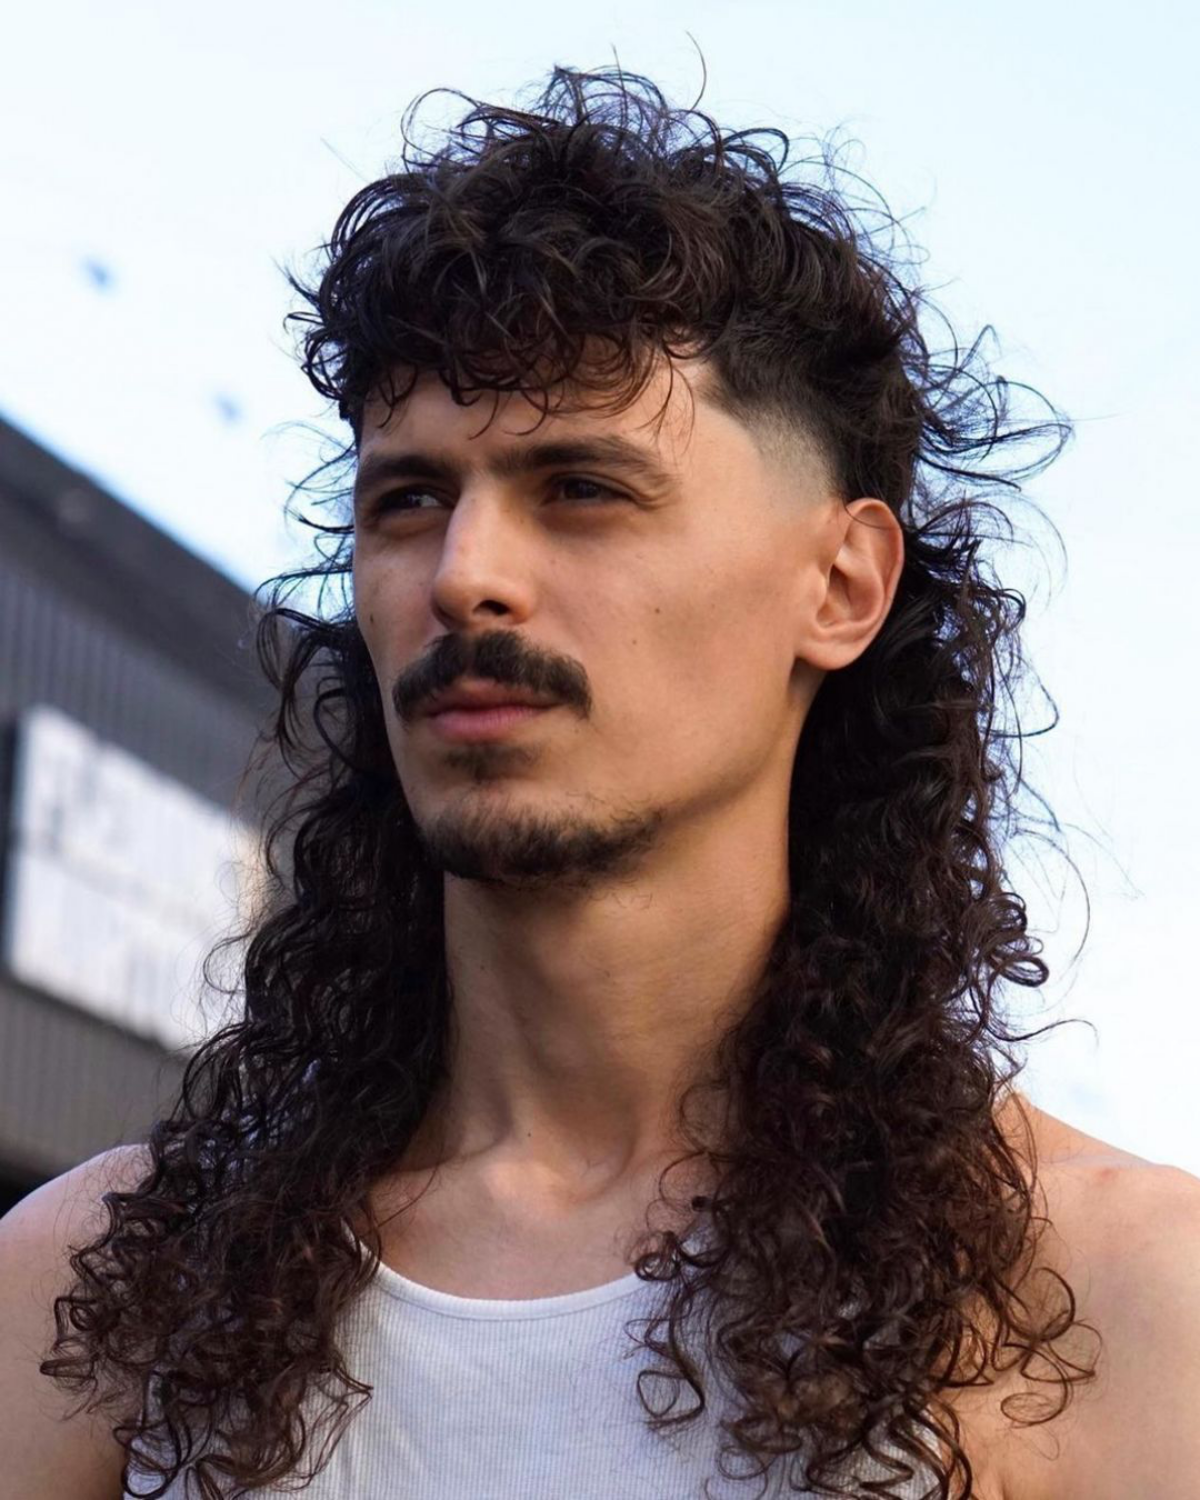
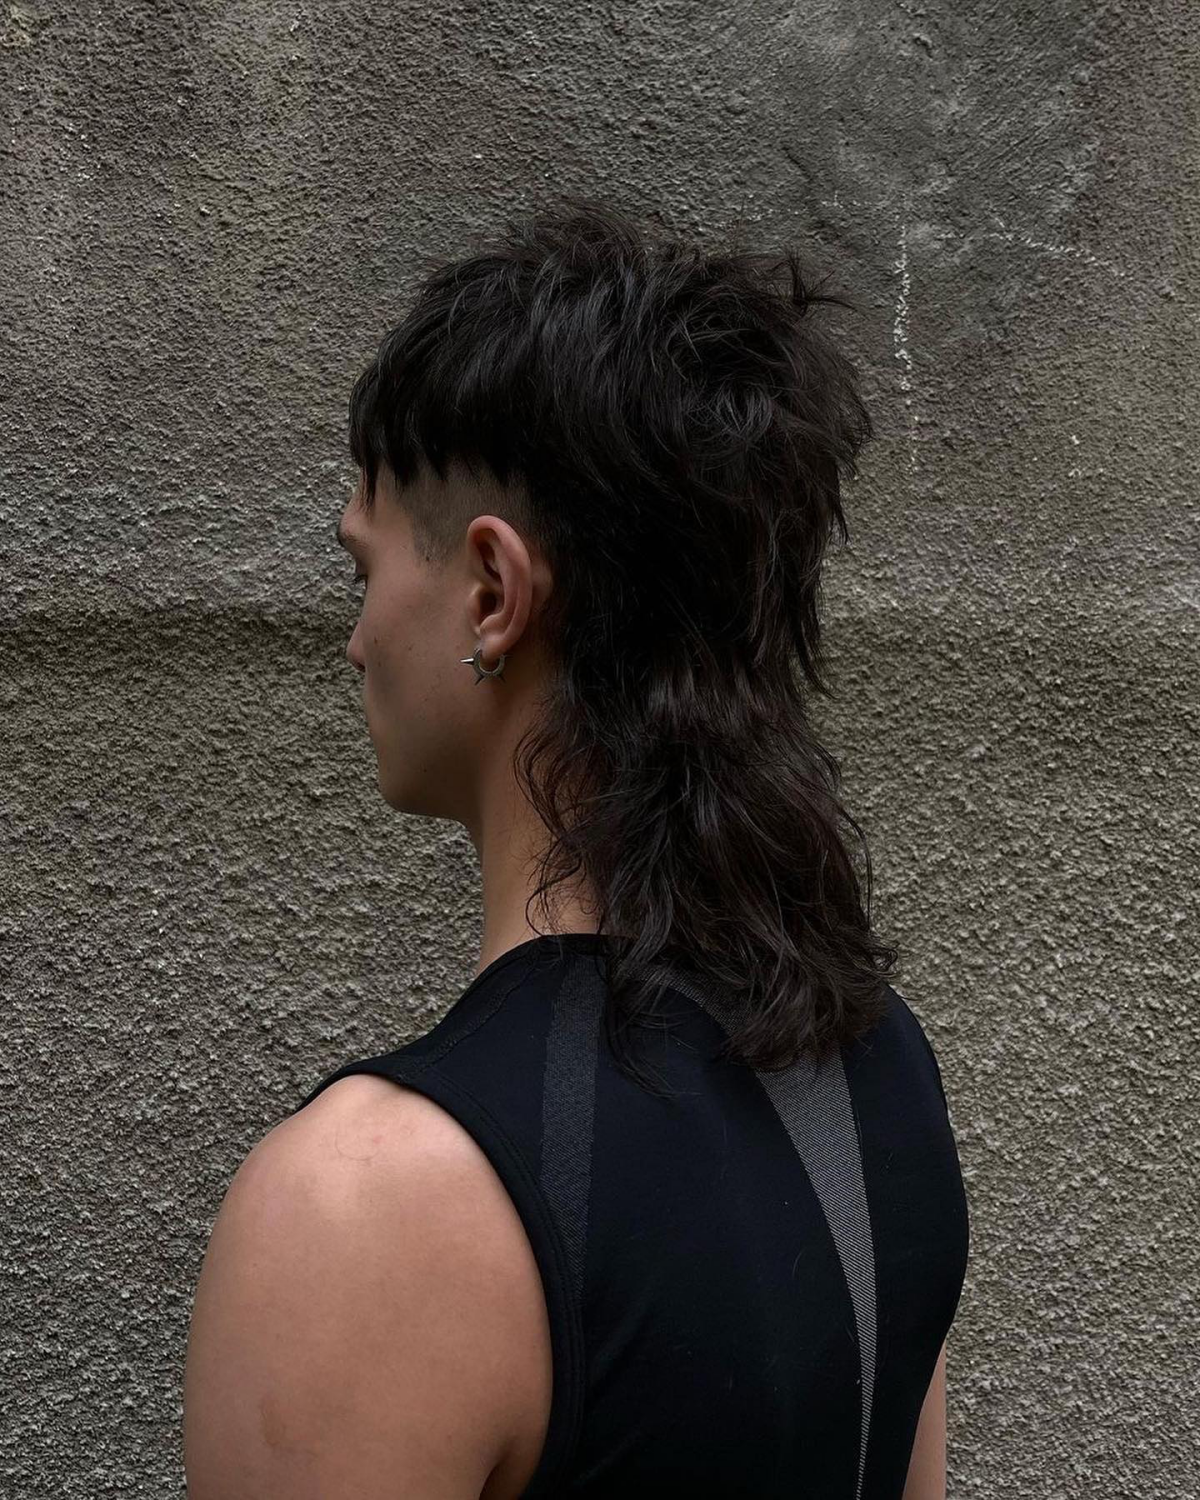
The Classic Rocker Mullet: This is the one you probably picture first. Think big hair bands. The top is styled for volume, the sides are shorter but not faded (usually scissor-cut), and the back is long and full—we’re talking 5+ inches. Vibe: Loud, proud, and retro. Best for: Thick hair that can support all that volume. Maintenance: Medium to high, depending on how much you style it.
-
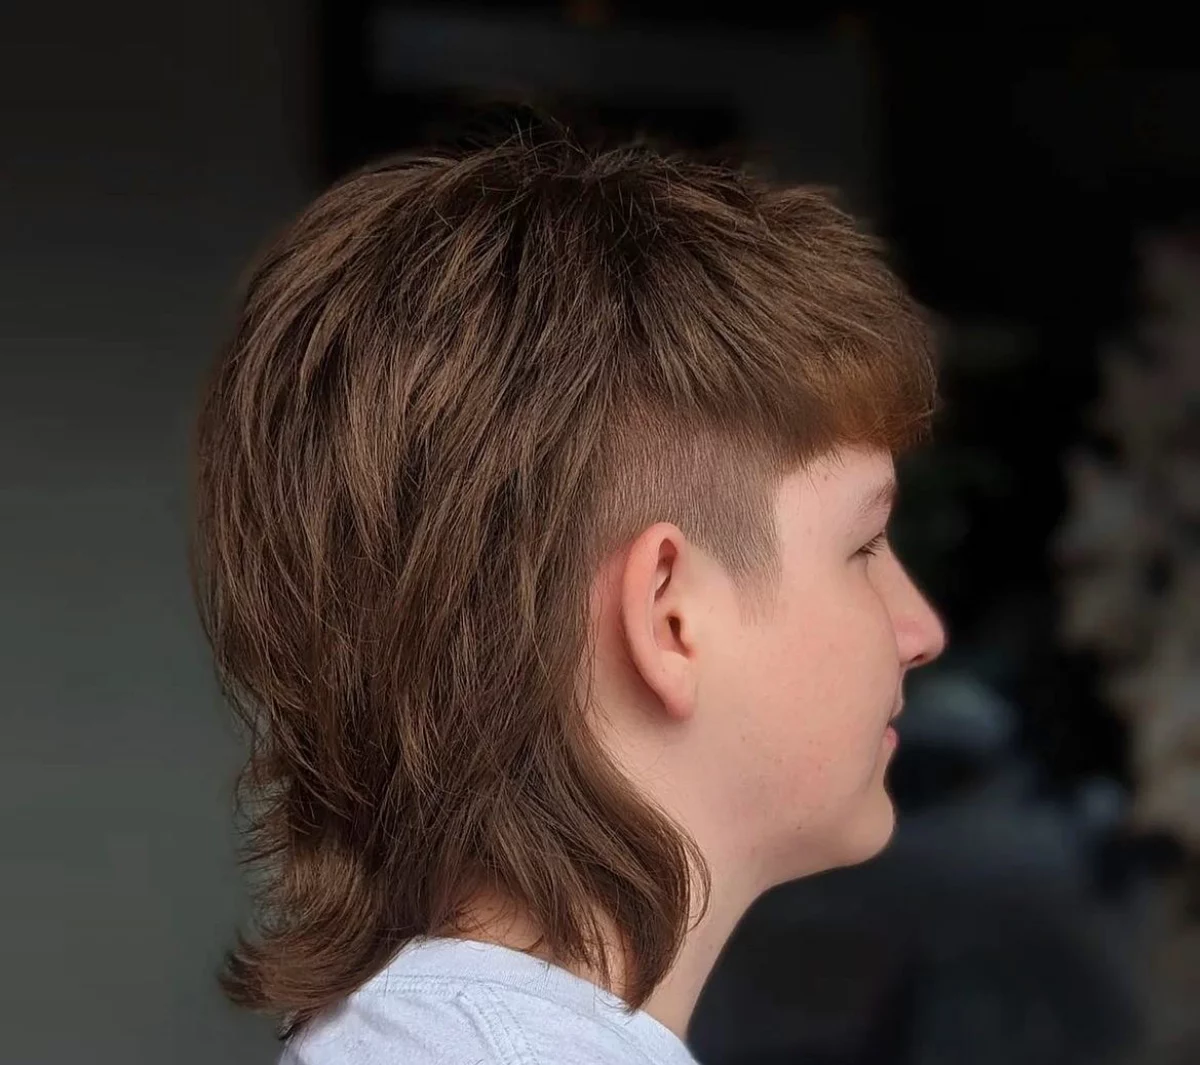
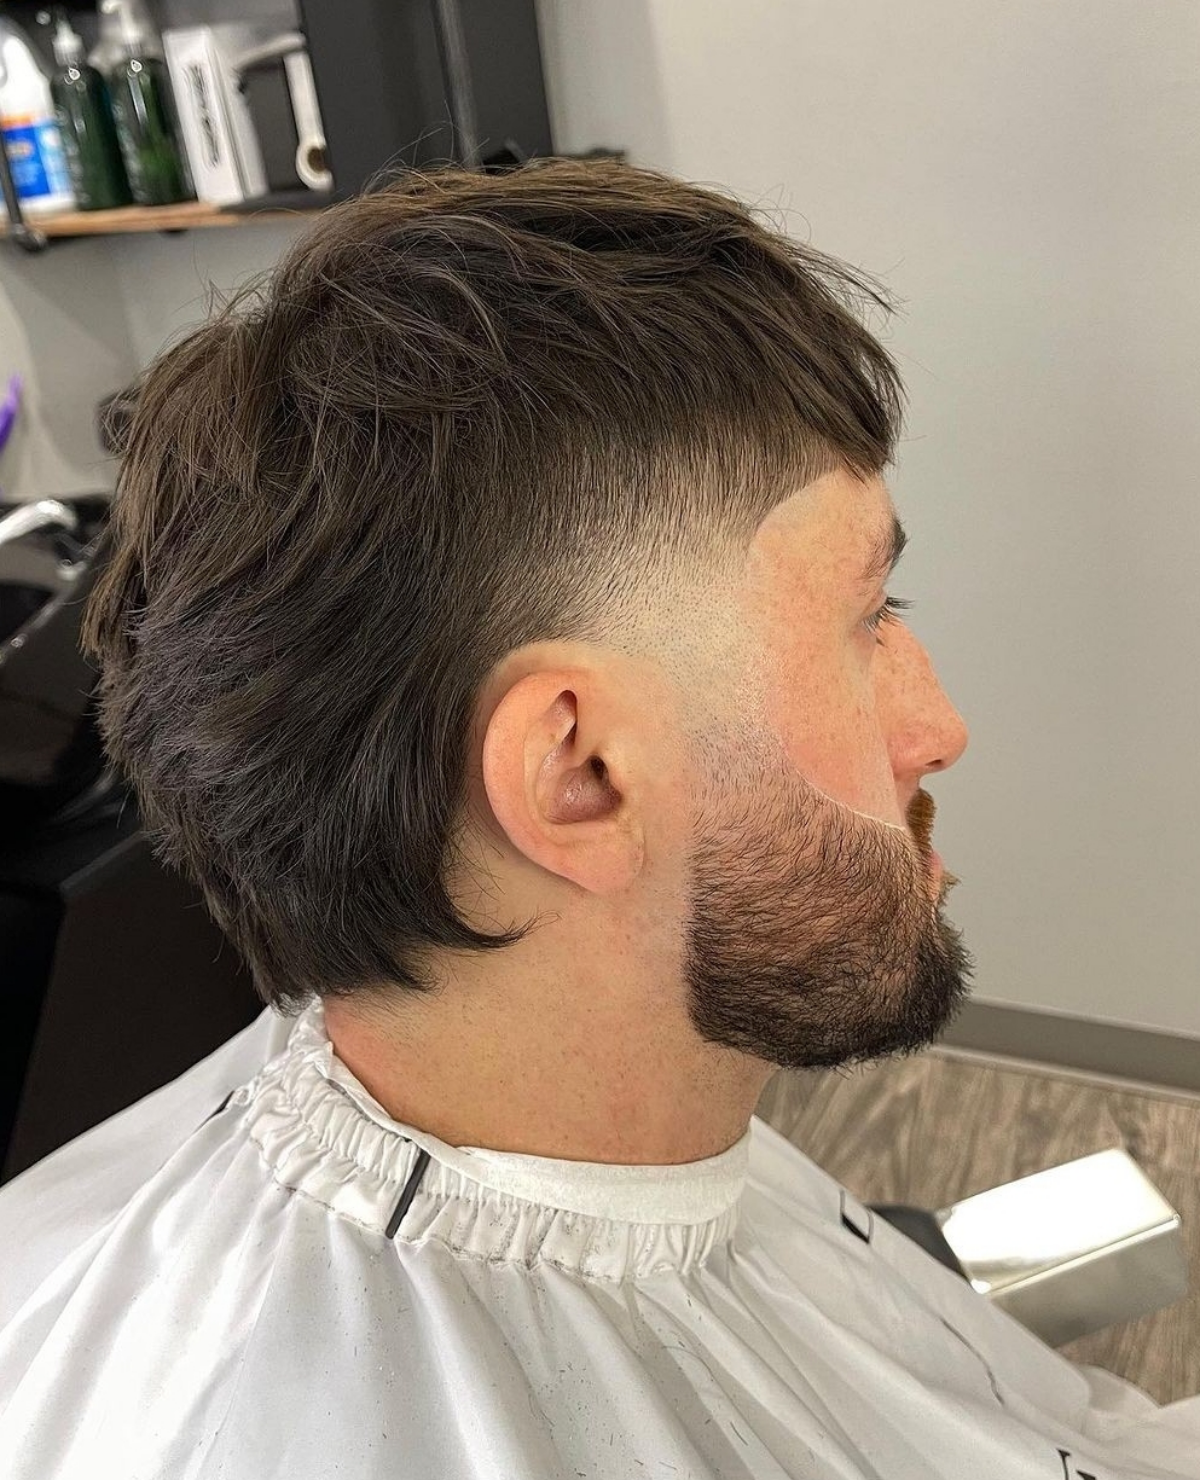
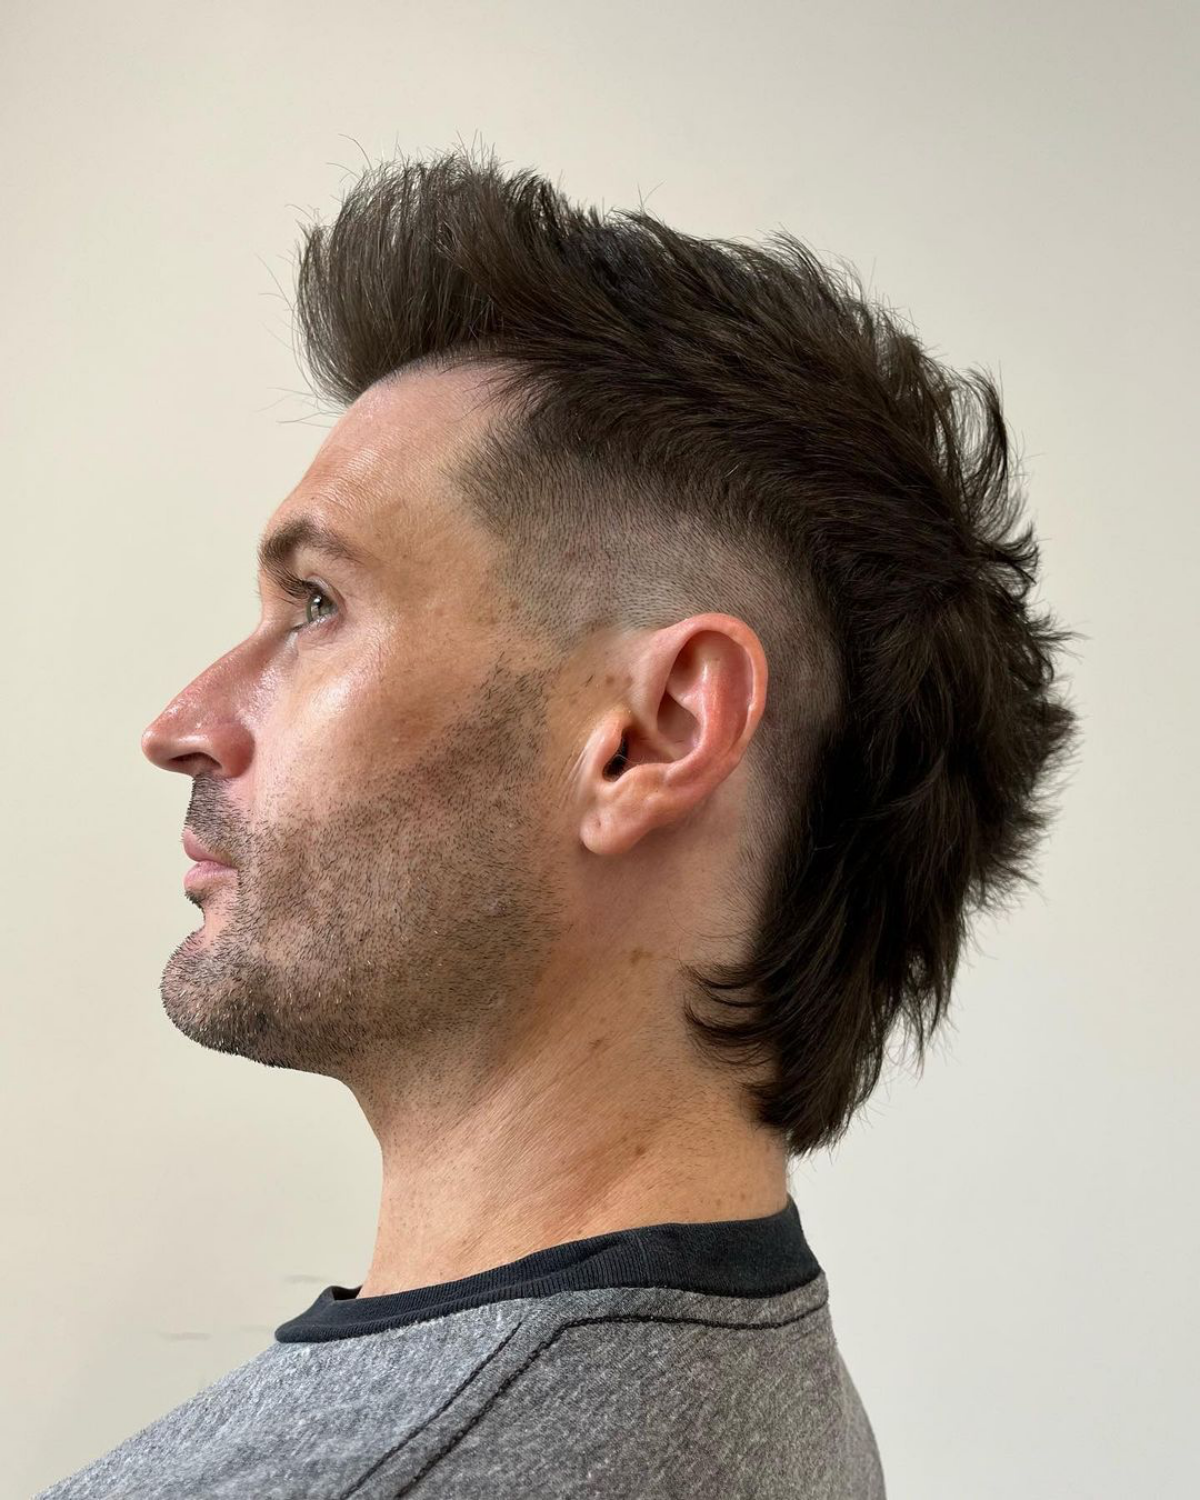
The Euro Mullet: This is a more subtle, high-fashion version you might see on pro soccer players. It’s a bit more conservative. The top is often a bit longer and styled neatly, while the back is just long enough to cover the collar (maybe 2-3 inches). The sides usually have a clean, gentle taper. It’s the mullet you can wear with a blazer. Vibe: Stylish, modern, and understated. Best for: Most hair types. Maintenance: Low to medium.
Your Home Game: Styling and Upkeep
A great cut from the shop is only half the work. How you style it at home makes all the difference. Good news: you don’t need a whole cabinet of products.
The Mullet Starter Kit
Here’s a simple shopping list you can find at places like Ulta, Sally Beauty, or online:
- Sea Salt Spray ($15-$25): Your best friend for creating texture and grit, especially in straight or fine hair.
- Texturizing Powder ($20-$30): A little shaker of magic. A few taps at the root gives you instant, lasting volume.
- Curl Cream ($15-$25): Essential for wavy or curly hair. It defines your pattern and fights frizz.
- A Good Hairdryer with a Nozzle ($30+): The nozzle is non-negotiable! It directs the air for precise styling.
Quick Fix for Flat Hair: Flip your head upside down, blast the roots with your hairdryer for about 20 seconds, then flip back up. While it’s still warm, tap a tiny bit of texturizing powder onto your scalp and work it in with your fingers. Instant, rock-solid volume.
Keeping It Fresh
Plan on visiting your barber every 4 to 6 weeks. The sides, especially if they’re faded, will grow out fast and make the whole cut look sloppy. A quick tune-up keeps the shape intentional.
When Things Go Wrong: Common Mistakes & Fixes
I’ve seen it all. I’ll never forget the kid who came in after his friend tried to give him an Edgar mullet with a pair of dog clippers. The line was so crooked we had to take it up to a skin fade way higher than he wanted and basically reset the whole top. It was a salvage operation.
To avoid that fate, steer clear of these top 3 DIY mistakes:
- Creating the “Shelf”: Cutting a hard, straight line to separate the top and back instead of using point-cutting to soften it.
- Frying the Ends: Using thinning shears on the last inch of hair in the back, which just makes it look see-through and damaged.
- Botching the Fade: Trying to fade your own sides without the right clipper guards and creating patchy, bald spots. There’s no fixing that besides buzzing it all off.
And a quick heads up on safety: any good barbershop follows strict sanitation protocols. We clean our tools and submerge them in a hospital-grade disinfectant (that blue stuff, Barbicide) between every single client. If you don’t see your barber doing this, walk out. It’s a major red flag.
Ultimately, the mullet has a wild history, but its future is all about creativity. It’s a cut that takes skill, planning, and confidence to wear. Find a barber who gets that, and you won’t just get a haircut—you’ll get a style that’s 100% you.
Galerie d’inspiration
How do I even ask my barber for this without sounding like an idiot?
Forget vague descriptions. The single best tool is your phone. Find 3-4 photos of mullets you like, especially on guys with a similar hair texture to yours. Point out exactly what you like: “I like the length in the back here, but the texture on top from this photo.” This gives your barber a clear visual blueprint to work from.
The hashtag #mullet has amassed over 15 billion views on TikTok.
This isn’t just a niche trend; it’s a global phenomenon. What this means for you is an endless library of inspiration. Before your next appointment, spend ten minutes scrolling. You’ll discover variations—from the subtle ‘shullet’ to extreme punk styles—that you didn’t even know existed, helping you fine-tune your vision.
The right product is not optional: it’s the architecture of the cut. For that piecey, textured look on top, a matte finish styling paste or clay is your best friend. A small dab of something like Reuzel Matte Styling Paste or Layrite Cement Clay, worked through dry hair, gives hold and definition without the high-shine ‘helmet’ look of old-school gels.
- Reduced frizz and split ends.
- A defined, healthy-looking flow.
- Easier detangling after washing.
The secret? Treat the back like a separate entity. While the top needs texturizing products, the length in the back craves moisture. A quality leave-in conditioner applied only to the longer sections will keep your ‘party in the back’ looking intentional, not neglected.
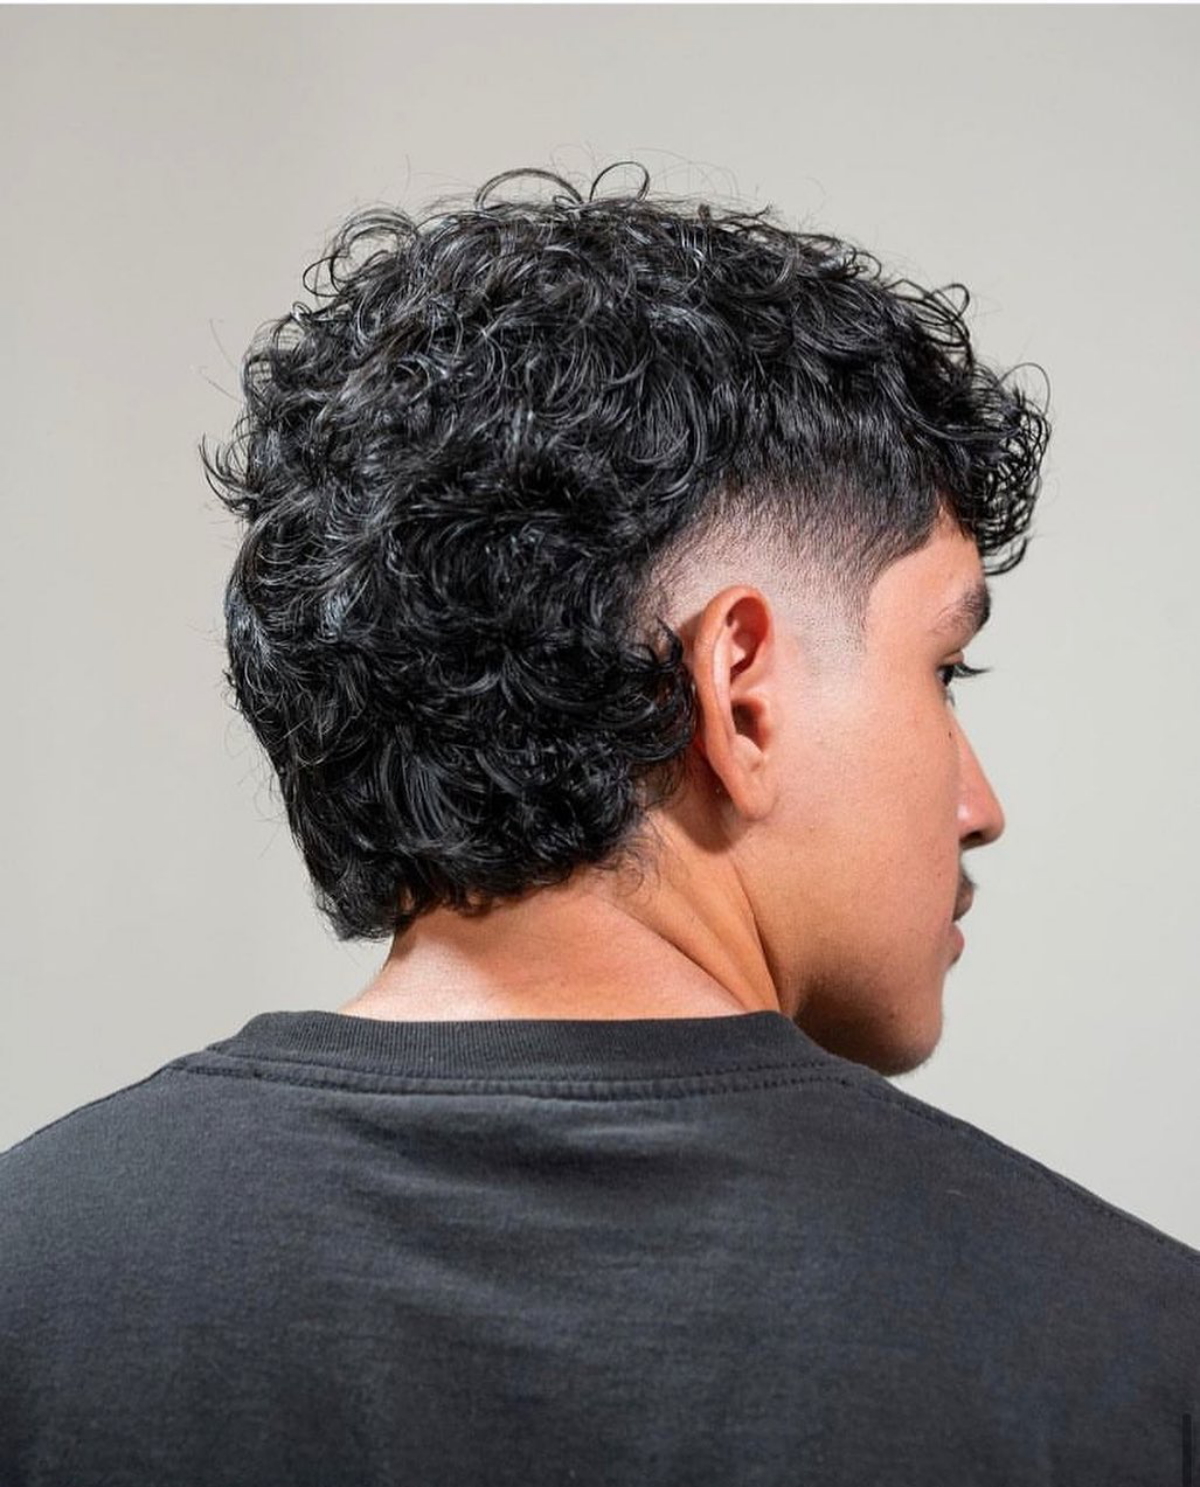
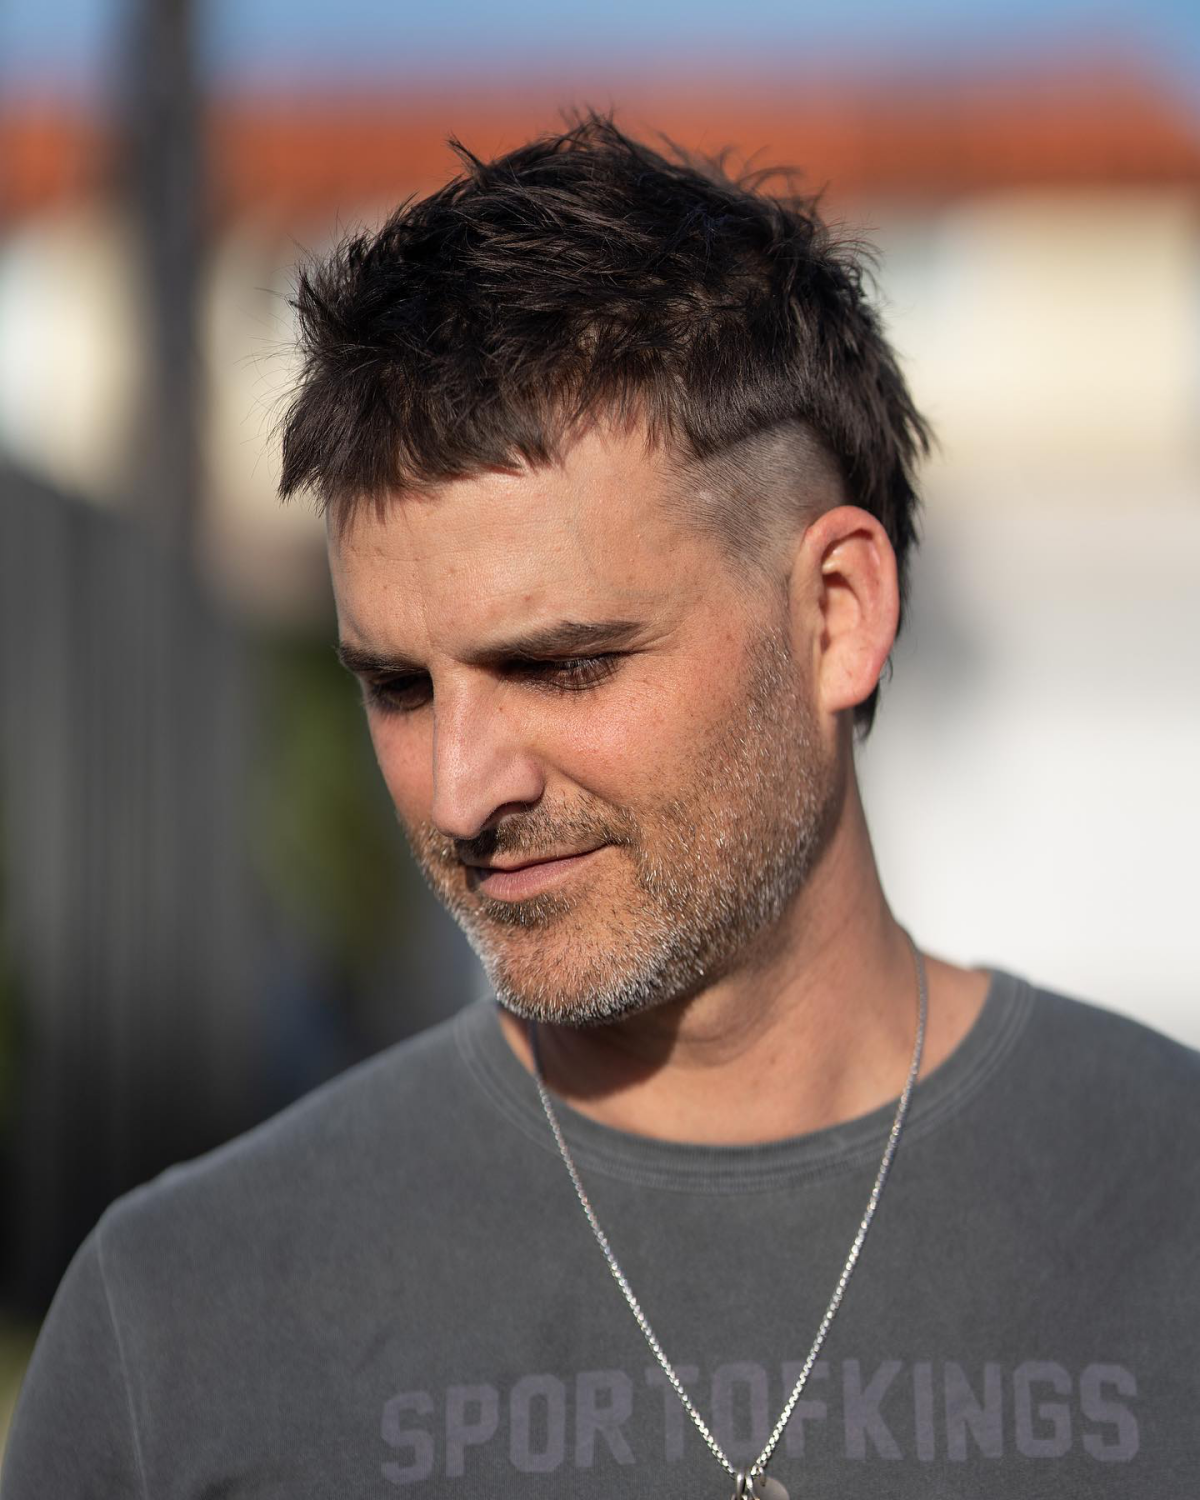
The Shag Mullet, popularized by stars like Paul Mescal, is the gentler, more romantic cousin of the classic cut. Instead of a hard disconnection, it relies on soft, razored layers that seamlessly blend the shorter top into the longer back. It works beautifully with natural waves and creates a lived-in, rock-and-roll vibe that’s less aggressive and more effortless.
Clipper Fade: Delivers a sharp, graphic, and high-contrast look. It’s clean, modern, and makes the disconnection at the crown very deliberate. Requires frequent touch-ups to stay crisp.
Scissor-Over-Comb: Creates a softer, more textured finish on the sides. It grows out more gracefully and gives the overall style a more organic, less severe feel. This is often the best choice for finer hair.
Don’t overlook the so-called ‘Euro Mullet’. Often seen on European soccer players, this version is typically shorter and more conservative. The sides are kept neat and tightly tapered, and the back is just long enough to flip over the collar. It’s the perfect way to test the waters if you’re not ready for a full-blown, dramatic mullet.
Getting through the awkward phase while growing your mullet requires a strategy. Here’s your survival kit:
- Embrace Hats & Beanies: They are your best friend on bad hair days.
- Get Regular Clean-ups: Keep the sides and neckline sharp. This makes the uneven length on top look intentional.
- Lean into Texture: A bit of sea salt spray, like Bumble and bumble’s Surf Spray, can make messy growth look like a deliberate style choice.

Can I get a mullet if my hair is dead straight?
Absolutely, but it demands more from your barber and your daily routine. For straight hair, the key is aggressive texturizing with scissors or a razor to create movement and avoid that dreaded ‘shelf’. You might even consider a modern perm on top to build in body, a popular choice that gives you that coveted wavy texture from day one.
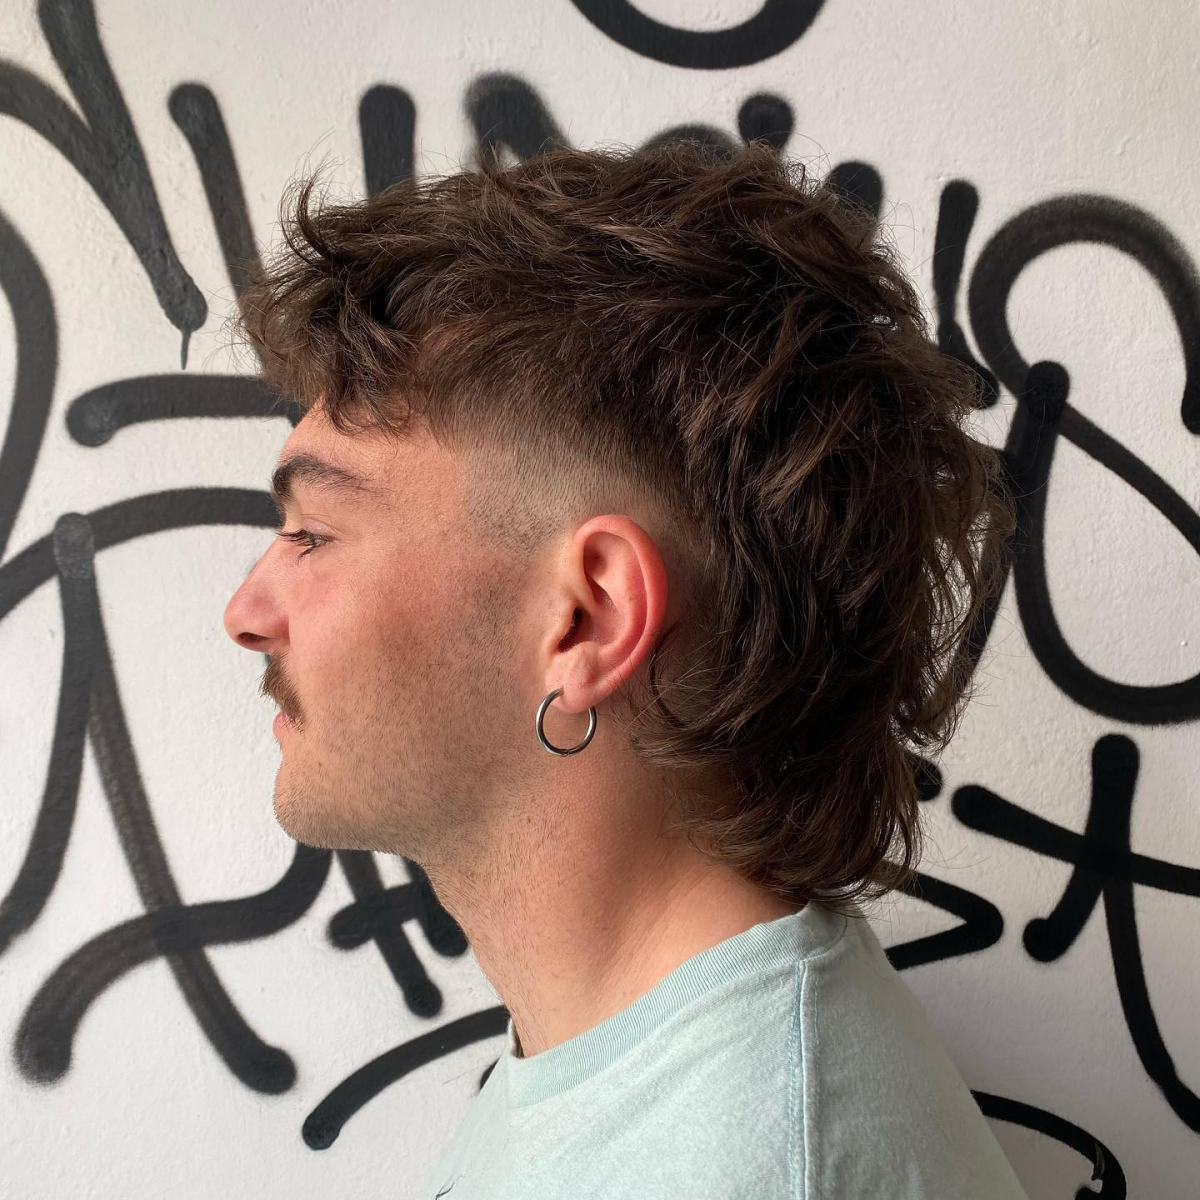
That sharp-fringed style you see, often paired with a low fade, is the ‘Takuache’ or ‘Edgar’ mullet. It’s a hugely popular sub-style with roots in Mexican-American truck culture. The defining feature is the severe, straight-across bang, which creates a bold contrast against the faded sides and flowing back. It’s a high-impact look that screams confidence.
Sea Salt Spray: Use on damp hair before air-drying or diffusing. It gives a gritty, matte, just-left-the-beach texture. Ideal for enhancing natural waves and creating a looser, more lived-in style.
Texturizing Powder: Use on bone-dry hair, focusing on the roots. It provides instant lift, volume, and a dry, grippy hold. Perfect for reviving flat hair and adding height to the top section. American Crew’s Boost Powder is a classic for a reason.
Important: A mullet is not one haircut, it’s two—and they need different maintenance schedules. To keep the whole look sharp, plan on seeing your barber every 3-5 weeks to tighten up the fade or taper on the sides and clean up the fringe. The length in the back, however, only needs a trim every 2-3 months to get rid of split ends and maintain the desired shape.
Adding color can elevate your mullet from a haircut to a statement piece. Consider these pro-level approaches:
- The Skunk Tail: Bleaching just the longest section in the back for a high-contrast look.
- Hidden Panels: Placing flashes of bright color underneath the top layer for a surprise effect.
- Frosted Tips: A modern, more subtle take on the 90s classic, adding texture and dimension to the top.
While associated with the 80s, the haircut’s description can be traced back to the ancient world. In the Iliad, Homer describes a group of spearmen with their ‘forelocks cropped, hair grown long at the backs.’
This proves the core concept—short and functional in the front, long and protective (or just stylish) in the back—is a timeless idea, reinvented for every generation.
Your essential at-home mullet styling kit:
- A pre-styling spray (like a sea salt or thickening tonic) to build a foundation.
- A matte-finish styling product (clay, paste, or powder) for texture and hold.
- A blow-dryer with a diffuser attachment, especially if you have wavy or curly hair, to enhance texture without creating frizz.
Stop worrying about your face shape. The beauty of a modern mullet is its adaptability. A skilled barber doesn’t fit your face to a standard mullet; they tailor the mullet to your face. For a rounder face, they might keep the sides leaner and build more height on top. For a long face, they might opt for more width and a shorter length in the back. The focus should be on proportion and balance, not rigid rules.