How to Draw Whales That Don’t Look Like Cartoons
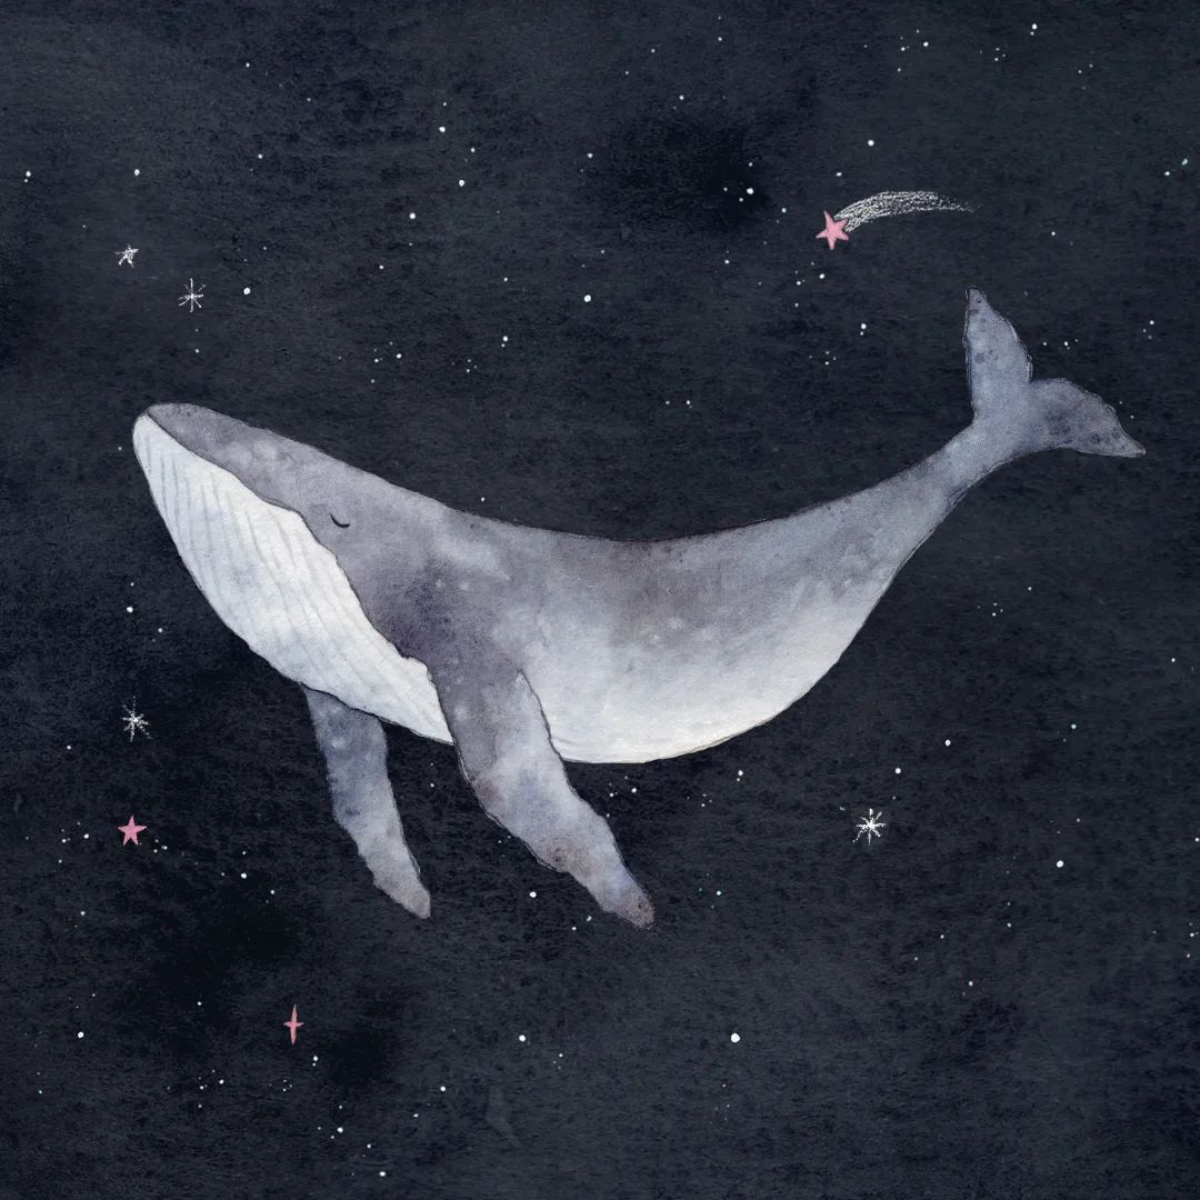
I’ve spent more hours than I can count on the water, from chilly northern coasts to the warm, clear bays of the tropics. My mission was always the same: to sketch whales. Not the simple, bathtub-toy figures from kids’ books, but the real deal. The ones with incredible mass, raw power, and scars that tell a life story. For a long time, my drawings were just… flat. They had no weight, no life. I realized I wasn’t just drawing a shape; I was trying to capture a living, breathing animal sculpted by the physics of water itself.
In this article
To draw a whale, you first have to understand it. This isn’t going to be a quick, step-by-step guide for a cute icon. We’re going deep into the methods I’ve pieced together over years of field observation and studio practice. I’ve filled sketchbooks on rocking boats, chatted with marine researchers, and made every mistake in the book. My goal is to save you the trouble and share what actually works.
We’ll cover the core anatomy that gives a whale its shape, the techniques to capture its incredible motion, and the tiny details that make a drawing feel truly alive. This is about moving beyond a basic outline to create something that feels authentic.
The Foundation: Thinking Like a Sculptor
Honestly, you can’t draw what you don’t get. For an artist, a whale isn’t just a big, smooth torpedo. It’s a complex machine made of bone, muscle, and blubber. Getting a feel for this structure is the most important step toward making your drawings look real. It guides every single line you put on the paper.
Skeleton, Muscle, and That Classic Shape
Whales have what the pros call a fusiform body shape. All that means is that it’s tapered at both ends, like a spindle. This design is incredibly efficient for slicing through water with minimal drag. While a skeleton provides the basic frame, it’s the massive layers of muscle and blubber that create the powerful, rounded form we actually see and draw. The spine is surprisingly flexible, which allows for that powerful up-and-down thrust of the tail. When you start any drawing, try to feel out that underlying spinal curve first. It’s the engine of the whole animal.
And that blubber? It’s a game-changer. It can be a foot thick or more on some of the big guys. This layer smooths over all the sharp angles of the skeleton and muscles, creating the whale’s iconic, flowing look. But here’s a pro tip: it’s not perfectly smooth. Around the pectoral fins and where the tail meets the body, the skin and blubber will crease and fold when the whale moves. Capturing these subtle compressions is what adds that extra 10% of realism.
Head Games: Filter Feeders vs. Hunters
A classic rookie mistake is drawing all whale heads the same. They’re fundamentally different depending on how they eat. The two big groups are baleen whales and toothed whales, and their head shapes couldn’t be more different.
- Baleen Whales (like Humpbacks and Blue Whales): These gentle giants have two blowholes, side-by-side. Their standout feature is a gigantic lower jaw that can expand to gulp enormous volumes of water. Because of this, their heads are super broad, often looking like a U-shape from above. Humpbacks, by the way, have those cool bumps all over their head and jaw, called tubercles.
- Toothed Whales (like Orcas and Sperm Whales): These guys are active hunters and have a single blowhole. Their heads are usually more streamlined and weapon-like. The Sperm Whale has that iconic, massive blocky forehead, while an Orca has a more conical shape. Their jaws are built for grasping, not filtering.
Knowing this basic biology stops you from making glaring errors, like giving a Humpback a single blowhole. It’s these little details that show you’ve done your homework.
The Right Tools for the Job
You really don’t need a fancy studio to get started. I’ve learned that a few reliable tools are way better than a huge, expensive collection you never touch. It’s all about knowing what a tool does best.
For Sketching and Planning
- Pencils: A basic set is perfect. I use a 2H pencil for my first light sketches because the lines are faint and easy to erase. To build up shadows and form, I switch to a 2B and a 6B. The softer lead gives you rich, dark tones without having to press hard and ruin the paper.
- Kneaded Eraser: This is more of a drawing tool than a mistake-fixer. You can pinch it into a fine point to lift out tiny highlights, like the glint in an eye or light catching on wet skin. Plus, it doesn’t leave any messy eraser dust behind.
- Paper: For pencil, a smooth paper (around 90 lb) is great. But if you think you might add ink or watercolor, you’ll need something heavier, like a 140 lb cold-press watercolor paper that won’t buckle. A fantastic choice for making your whales pop is toned paper (gray or tan). It gives you a neutral mid-tone to start with, so you can add both shadows and highlights.
A Beginner’s Kit on a Budget
Heads up! You can get a solid starter kit for less than $20. Seriously. Grab a good 2B graphite pencil (about $2), a kneaded eraser ($3), and a decent 9×12 inch sketchbook from a craft store like Michaels ($10-$15). That’s it. Master the basics with these before you even think about buying pricier gear.
Pro Techniques for Lifelike Whales
A stiff, static whale drawing just doesn’t work. These animals are all about fluid grace and power. This is the process I use that focuses on energy first and details second, which always gives a more dynamic result.
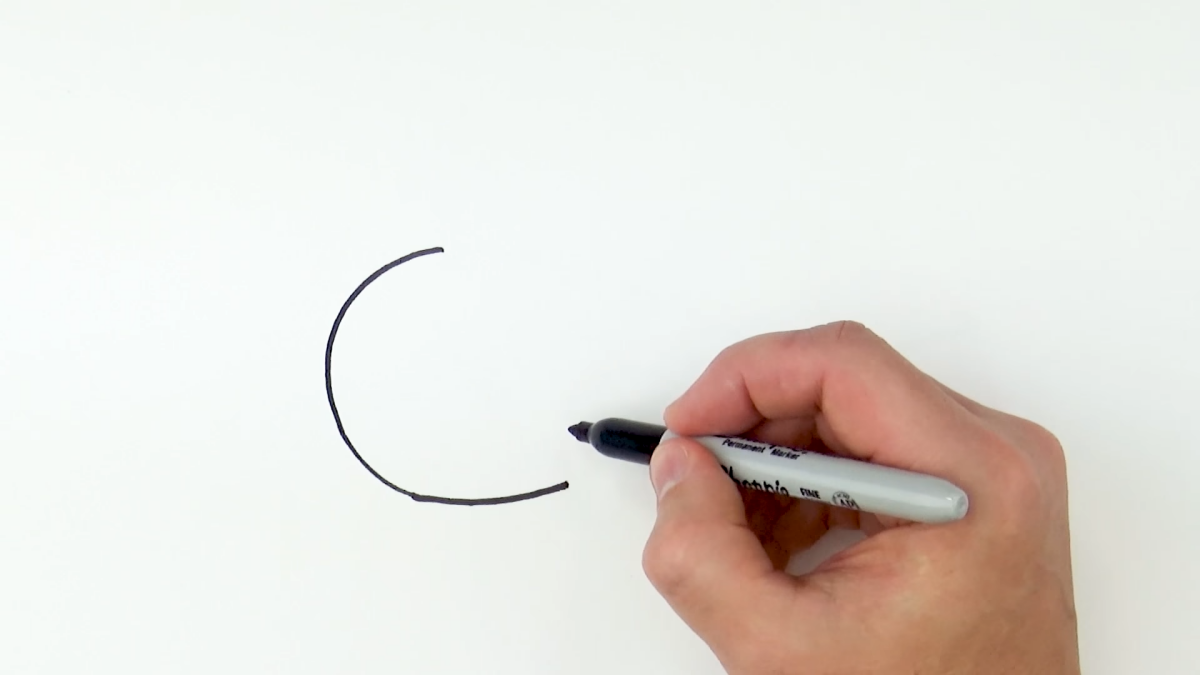
Step 1: The Line of Action
Before you draw a single body part, capture the entire movement of the whale in one, single, flowing line. This is its line of action. Is the whale breaching? The line will be a powerful C-curve. Diving deep? It’ll be a sharp S-curve as its back arches and its tail lifts. This one line sets the energy for the whole piece. A weak line of action almost always leads to a stiff, boring drawing.
Try This Now: Grab a scrap of paper and a pen. Spend the next 60 seconds drawing nothing but the C-curve of a breaching whale, over and over. Feel that explosive energy? That’s what you’re trying to capture.
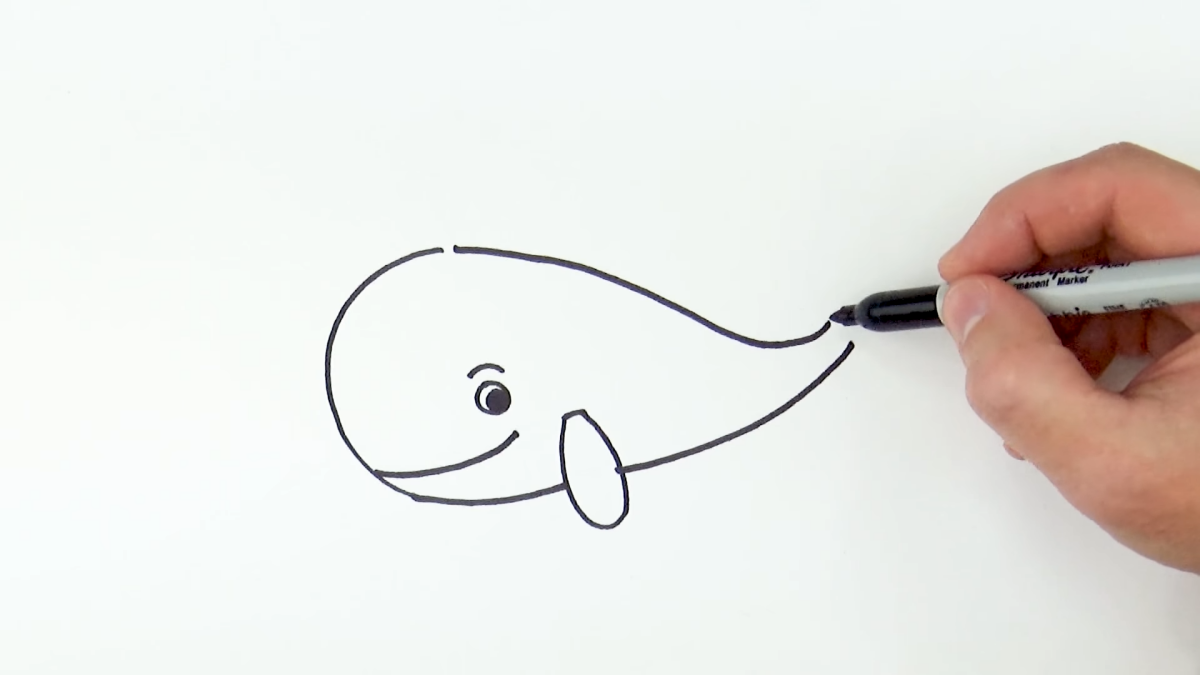
Step 2: Block In with Simple Shapes
Using your line of action as a guide, block in the major parts of the body with simple 3D shapes. Don’t even think about the final outline yet. Think in volume. (Seriously, just a big tapered oval for the body and a simple wedge or box for the head. Don’t get fancy yet!)
- The Body: A large, tapered cylinder or a long, fat oval.
- The Head: A sphere, a wedge, or even a big rectangle for a Sperm Whale.
- The Tail Section: A smaller, sharply tapered cylinder leading to two flat triangles for the flukes.
Keep this stage loose and light. You’re just building a scaffold. It’s way easier to adjust a simple cylinder than to redraw a fully detailed whale.
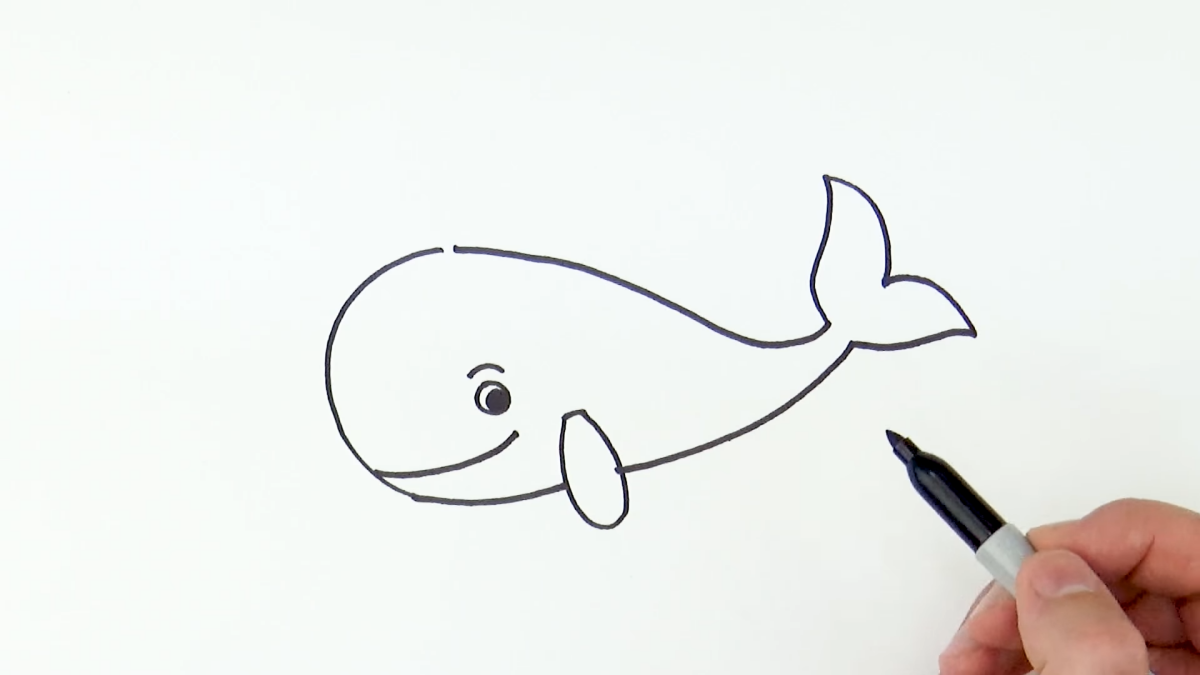
Step 3: Refine the Contour and Add Light
Now, connect those simple shapes into one flowing outline. This is where your anatomy knowledge pays off. Define the massive jawline, the subtle bump of a dorsal fin, and the powerful base of the tail. Once you have the shape, establish a light source. Is the sun overhead? Is it a cloudy day with diffuse light? This decision controls everything.
A whale’s body is basically a giant cylinder, so it will have a core shadow along the side that’s turned away from the light. But here’s the trick: the underside isn’t pitch black. It will catch faint, cool light reflected up from the water. Adding a touch of this reflected light on the belly instantly makes the whale look round and three-dimensional.
A Quick Tip for Underwater Light (Caustics)
On sunny days, the water’s surface creates shifting patterns of light on the whale’s back. These are called caustics. To draw them, try this: lightly shade the back with the side of your pencil, then use your kneaded eraser shaped to a sharp edge to “draw” and lift out bright, web-like patterns of light. A subtle suggestion is way more effective than overdoing it.
Common Pitfalls & How to Fix Them
We all hit roadblocks. Here are a couple of the most common issues I see and how to push past them.
- The Problem: My whale looks flat and stuck on the page.
The Fix: You probably forgot about reflected light and core shadows. Go back and darken the side of the whale turned away from the sun (your core shadow), but then add a faint, soft highlight to the very bottom of its belly. This suggests light bouncing up from the water and immediately gives it volume. - The Problem: My whale looks stiff, like a statue.
The Fix: You likely skipped the Line of Action. Go back to basics. Before you draw the whale, draw the movement. Also, check for subtle details: add creases where the fins meet the body and give the pectoral fins a slight curve. Nothing on a living animal is perfectly rigid.
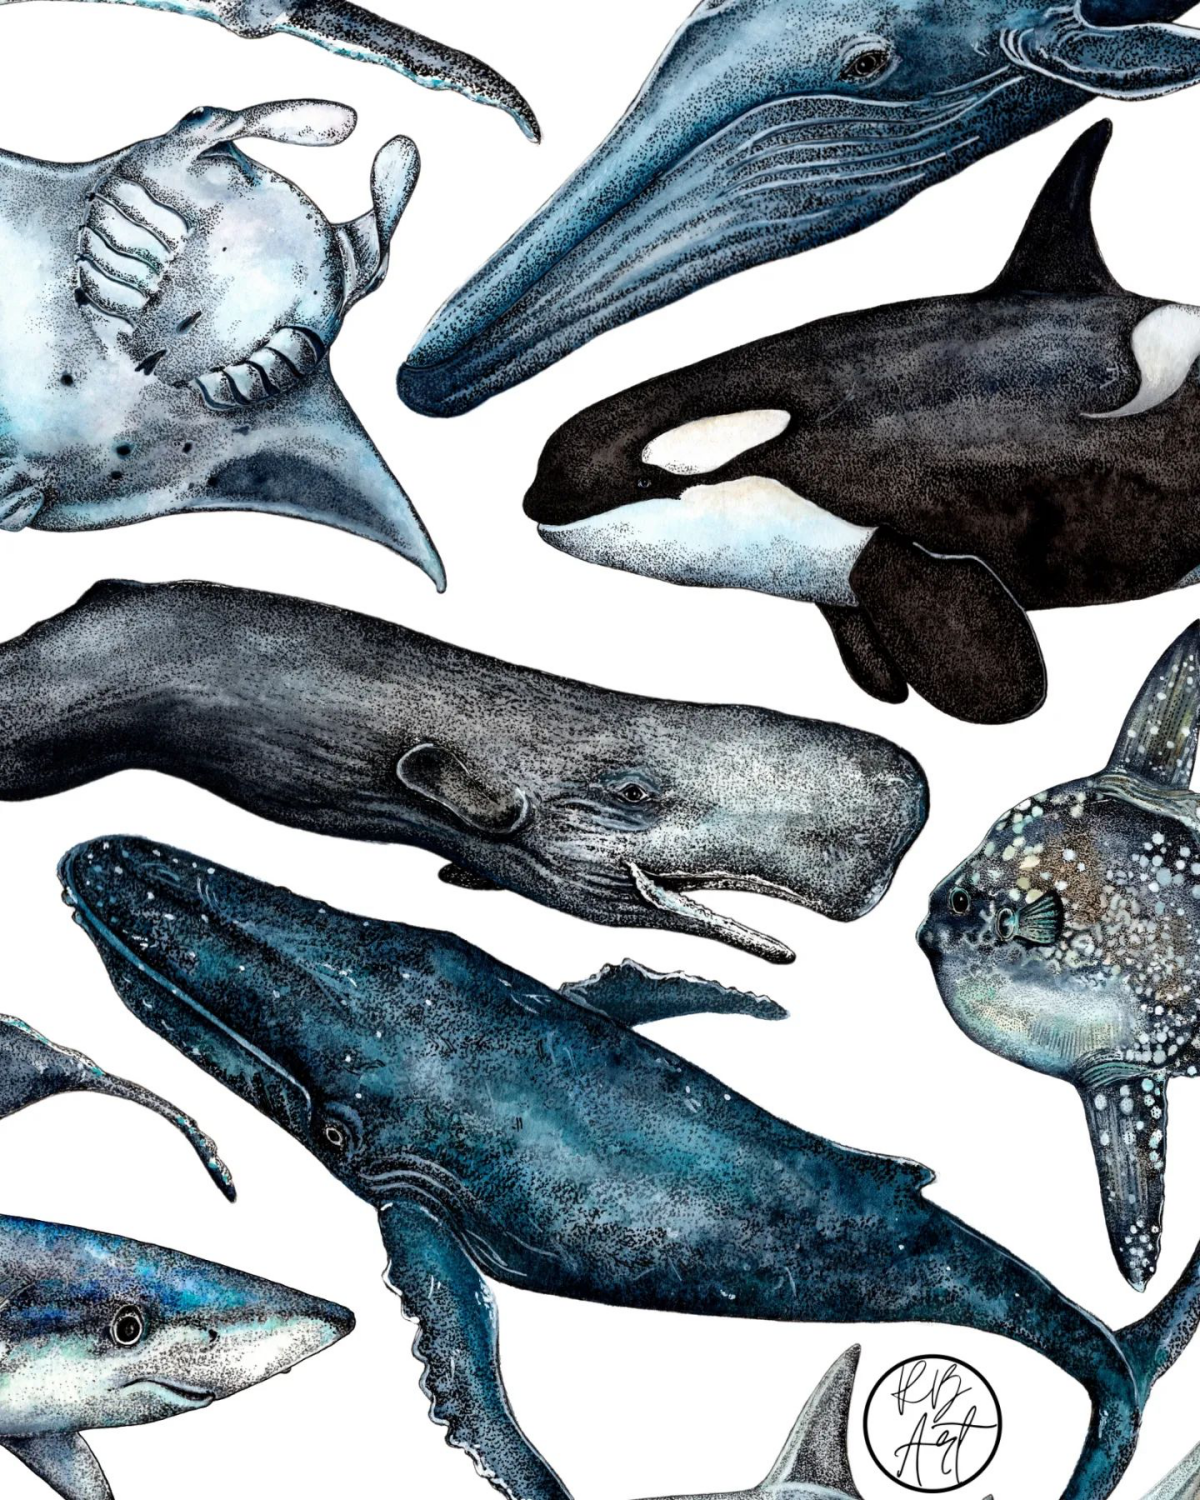
A Quick Field Guide to Three Giants
To really level up, you have to draw specific species. Each one has its own personality. Instead of a boring chart, let’s just break down three of the most iconic whales you might want to draw.
The Humpback Whale is the acrobat. Its defining features are those incredibly long pectoral fins and the bumpy tubercles on its head. When drawing one, focus on gesture—they are famous for breaching, so practice that powerful arc. Remember to draw their long fins with a gentle curve, not like stiff planks. For an extra touch of realism, give the underside of the tail flukes a unique black-and-white pattern; it’s like their fingerprint.
The Orca is all about contrast and power. It’s a top predator, and its body shows it—more muscular and torpedo-shaped than a Humpback. The most obvious feature is that massive dorsal fin. On adult males, it can be six feet tall and very straight. On females and younger Orcas, it’s smaller and curved. I remember my first attempt at an Orca’s dorsal fin; it looked like a floppy shark fin because I didn’t realize how rigid and tall a male’s is. That’s when I learned to always check my references! Pay close attention to the white eye patch and the gray “saddle patch” behind the dorsal fin, as these are unique to each individual.

The Sperm Whale is an exercise in texture and wild proportions. Its head is almost a third of its body length and is huge and squarish. Its skin isn’t smooth; it’s wrinkled and prune-like, which is a great detail to suggest its life spent in the crushing pressures of the deep sea. The lower jaw is very narrow and underslung. And a key detail: its blowhole is on the left side of its head, so its spout of mist shoots forward and to the left. It’s a small thing that instantly identifies the species.
Field Sketching: Ethics and Practical Tips
If you ever get the chance to sketch whales in the wild, do it. It’s unforgettable. But it comes with major responsibilities. On my first few trips, I was so eager that I didn’t think enough about safety or my impact.
There are strict regulations about how close boats can get to marine mammals, usually at least 100 yards. A good tour captain will know and follow these rules. Never, ever pressure them to get closer. A stressed whale won’t act naturally, so your drawings will suffer anyway. Learn to love a good pair of binoculars. A decent pair can be found for between $50 and $150 and will be your most valuable tool.
A boat is also an unstable place to draw. You have to be fast. I use a small, hardcover sketchbook I can hold in one hand and focus on quick gesture drawings, trying to capture a pose in 30 seconds or less. I take photos to check details later, but the real life in the drawing comes from that rapid observation. And always secure your gear. I once lost a favorite sketchbook to a single gust of wind. A painful, but valuable, lesson.
To be frank, you’ll never capture everything perfectly in the field. The goal is to gather information and impressions—to train your eye to see and your hand to record. The polished, detailed work happens back home, on solid ground, with your sketches, photos, and some great reference material (check out the NOAA photo libraries online or a great documentary series like “Secrets of the Whales” on Disney+ for amazing, high-quality footage).
Drawing a whale is an incredible process. It connects you to one of the most magnificent creatures on the planet. It starts with curiosity, is built on knowledge, and is realized through patient practice. The challenge isn’t just to draw what a whale looks like, but to convey what it feels like to see one.
Galerie d’inspiration


Graphite Pencils: Ideal for precision. Use a hard pencil like a 2H to sketch the underlying anatomy and a softer 6B from a brand like Staedtler Mars Lumograph to render the subtle shadows and textures on the skin. Perfect for capturing fine scars and eye wrinkles.
Charcoal Sticks: Unbeatable for drama and scale. Willow charcoal allows for broad, soft shading to build up the whale’s immense volume, while compressed charcoal sticks from Faber-Castell create the deep, velvety blacks needed for the deep sea or the dark topside of a Humpback.
For a blend of both, try using graphite for the base drawing and then applying charcoal for the darkest values.
The heart of a Blue Whale is the size of a small car, and its tongue alone can weigh as much as an elephant.
When you’re drawing, keeping this incredible scale in mind can change your entire approach. It’s not just about drawing a large shape; it’s about conveying a sense of immense weight and power that dwarfs everything around it. Let that reality inform the pressure of your pencil and the gravity in your composition.
- It gives your whale a unique identity and backstory.
- It adds a convincing layer of texture that breaks up the massive form.
- It immediately tells the viewer this is a wild animal, not a toy.
The secret? Look beyond the clean outline. Spend time studying reference photos specifically for skin details. Add the parallel rake marks left by the teeth of other whales, the unique callosities of a Right Whale, or the subtle mottling and circular scars from cookiecutter sharks. These imperfections are what bring it to life.
How do you make the whale feel like it’s truly underwater and not just floating on a white page?
The key is to draw the environment, not just the animal. Use a kneaded eraser to lift out faint, shifting beams of light (crepuscular rays) filtering down from the surface. With a sharp pencil point, lightly stipple tiny dots and specks around the whale to represent marine snow or particulates in the water. This adds depth and atmosphere, instantly placing your subject in its world.
According to marine biologists, the unique patterns of pigmentation and scars on a whale’s fluke are as individual as a human fingerprint, used by researchers to identify and track specific animals over decades.
Don’t fall into the trap of thinking you need a high-end digital tablet or a vast collection of expensive pastels to start. Your most powerful tools are observation and practice. A simple, high-quality sketchbook with heavyweight paper, like the Canson XL Mix Media pad, and a basic set of graphite pencils are more than enough to create stunningly realistic whale drawings. Focus on mastering form and light before investing heavily in materials.


