Don’t Toss That Tin Can! A Beginner’s Guide to Upcycling Metal
More Than Just Trash: The Magic of Tin Can Crafting
I’ve worked with all sorts of materials in my workshop—wood, clay, you name it. But the one I always come back to is the humble tin can. It’s funny, most people see a can of beans and think “trash.” I see a perfectly formed, sturdy, and (best of all) free building block. There’s a special kind of satisfaction in turning something destined for the landfill into a beautiful lantern or a super-durable desk organizer.
In this article
But this isn’t about just slapping some craft paper on a can and calling it a day. We’re talking about really working with the metal, using proper techniques to create things that are built to last. I’m going to walk you through the exact methods I’ve shared in countless workshops, so you can make things that are safe, sturdy, and genuinely impressive.
First Things First: Safety and Your Basic Toolkit
Before you even think about making your first cut, let’s talk safety. We’re dealing with cut metal, which can be incredibly sharp. Seriously, don’t skip this part.
Your number one priority is a good pair of work gloves. Not flimsy kitchen gloves, but something leather or canvas that offers real protection. You can find a solid pair for around $5 to $10 at any hardware store. Eye protection is also a smart move, especially if you plan on cutting or drilling.
Okay, with that out of the way, let’s talk tools. You don’t need a massive, expensive setup to get started. Here’s your basic shopping list:
- A Safety Can Opener: This is the secret weapon. Unlike a traditional opener that leaves a razor-sharp edge inside the rim, a safety opener cuts along the side, leaving a smooth, safe edge. This is a non-negotiable for me. They run about $15-$20 and are worth every penny.
- Tin Snips: For cutting the can itself. Look for a basic pair of straight-cut snips. You’ll find them at Home Depot or online for about $15.
- A Metal File: For smoothing out any rough or sharp spots that might happen. A simple, flat metal file costs around $5.
So, for about $40, you have a complete starter kit that will last you for ages.
Understanding Your Material: Not All Cans Are Created Equal
So, you’ve got your can. But what exactly are you holding? Knowing the difference between can types is the key to a successful project. And by the way, that “tin can” name is a bit of a leftover from another era—most cans aren’t made of tin anymore.
Here’s the easiest way to tell what you have: grab a magnet. If it sticks, you’ve got steel. If it doesn’t, it’s aluminum.
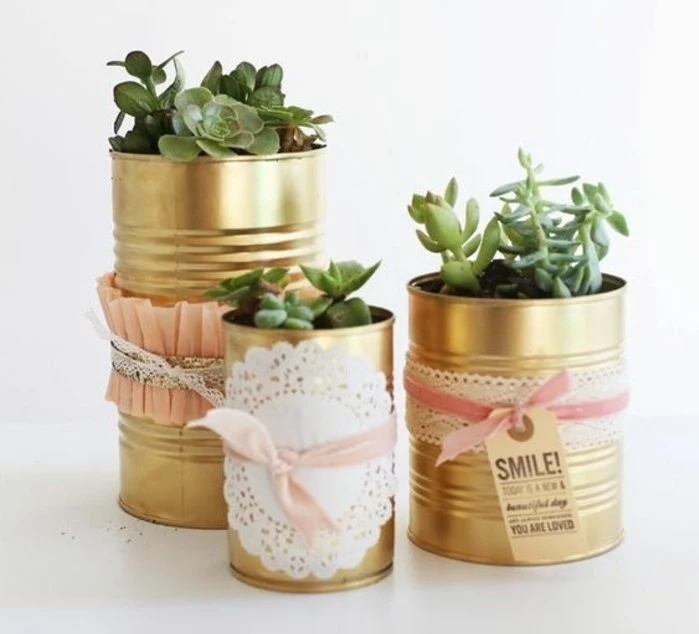
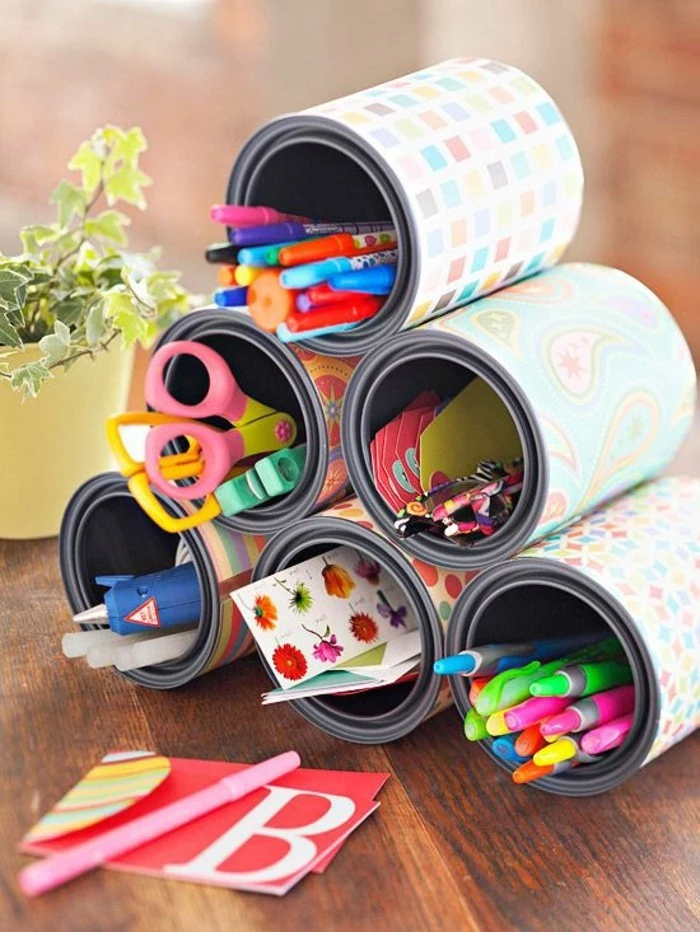
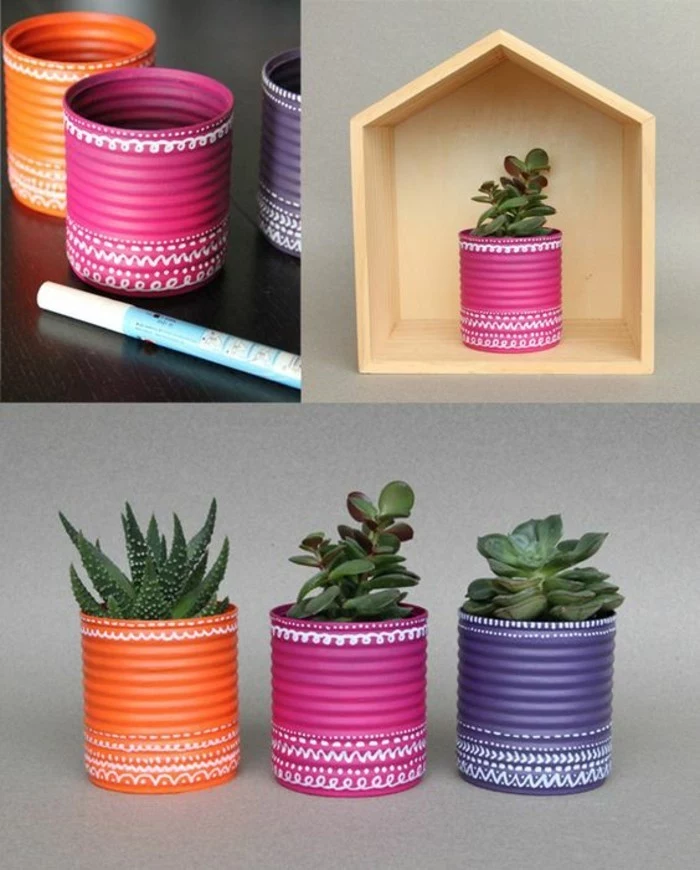
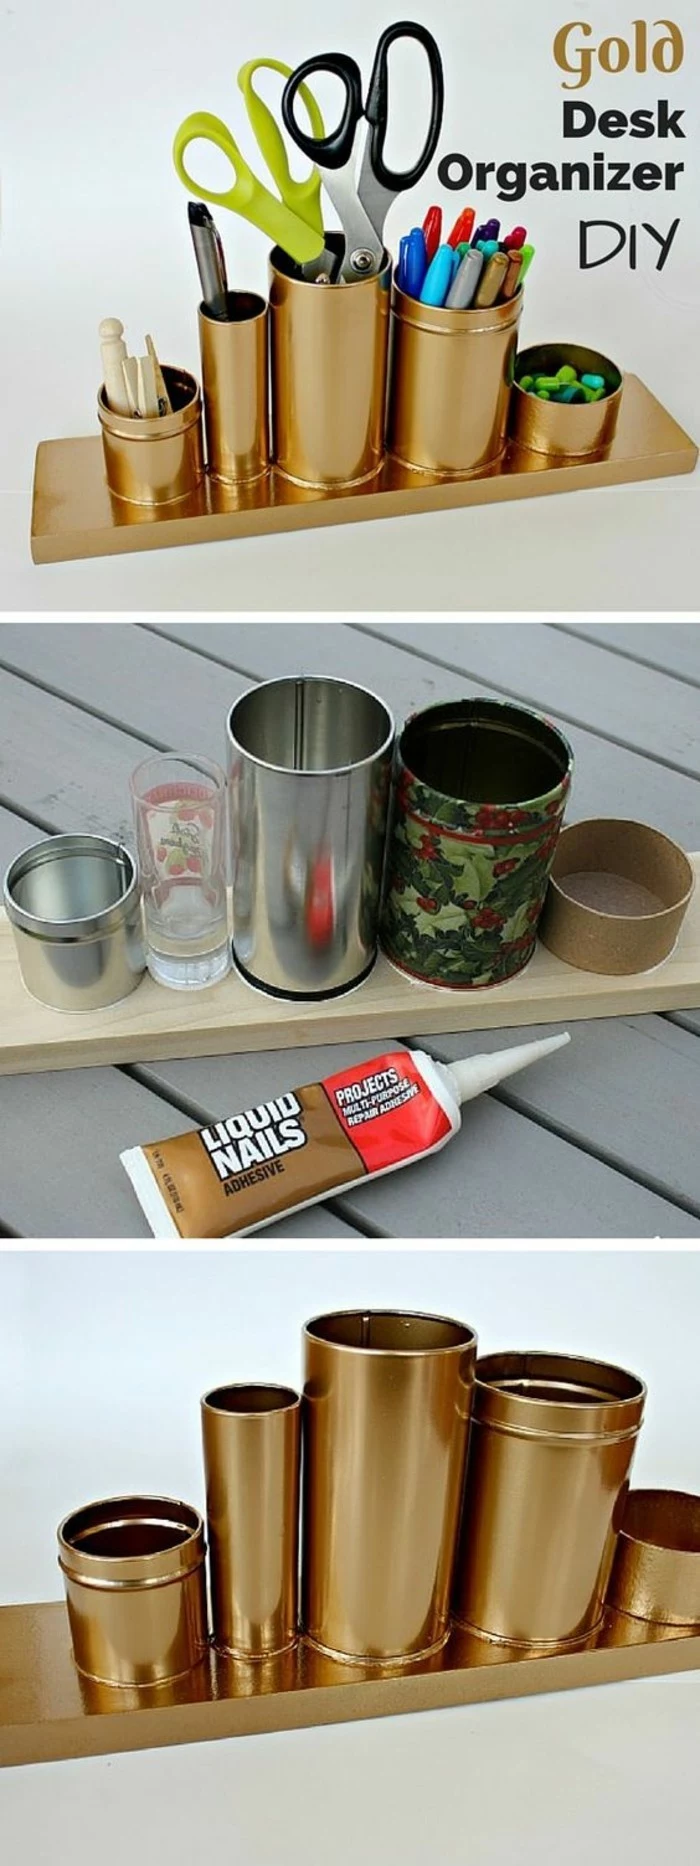
Steel cans are your workhorses. These are the cans that hold veggies, soup, or coffee. They’re incredibly strong and rigid, making them perfect for anything structural, like pencil holders or tiered shelving units. Those little ridges on the side? They’re not just for show; they add a ton of strength, which is a gift for us crafters. The only real downside is that exposed steel will rust. If your project might get wet, you’ll need to seal it. A quick tip: I use a clear acrylic spray sealer like Krylon or Rust-Oleum. A can costs about $5-8 and will cover dozens of projects.
Aluminum cans, on the other hand, are the softies. Think soda or beer cans. Because aluminum is so much lighter and more malleable, it’s a dream to cut, punch, and emboss with designs. It’s the go-to for decorative work where you don’t need a lot of strength—things like holiday ornaments, delicate luminaries, or metal feathers for other art projects.
Heads Up: A Common Beginner Mistake
From my experience, the most common mistake is trying to use the wrong tool for the job. Please, do not try to cut a steel can with your good kitchen scissors. I did this once, a long time ago, and all I accomplished was completely ruining a perfectly good pair of scissors. That’s what tin snips are for! Use the right tool, and you’ll save yourself a lot of frustration (and money).
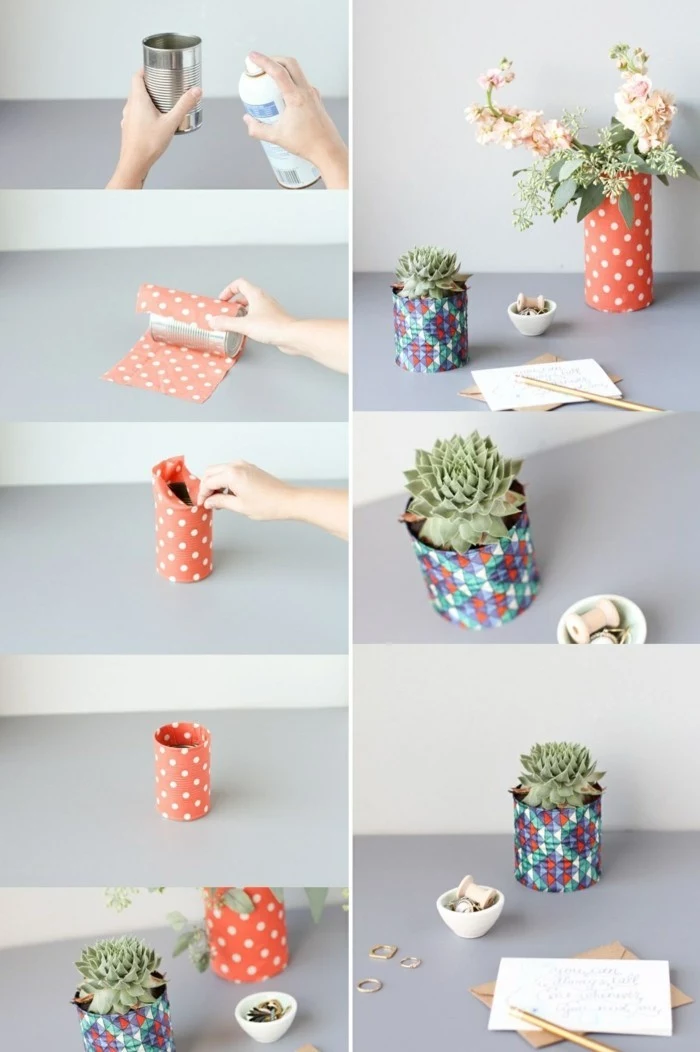
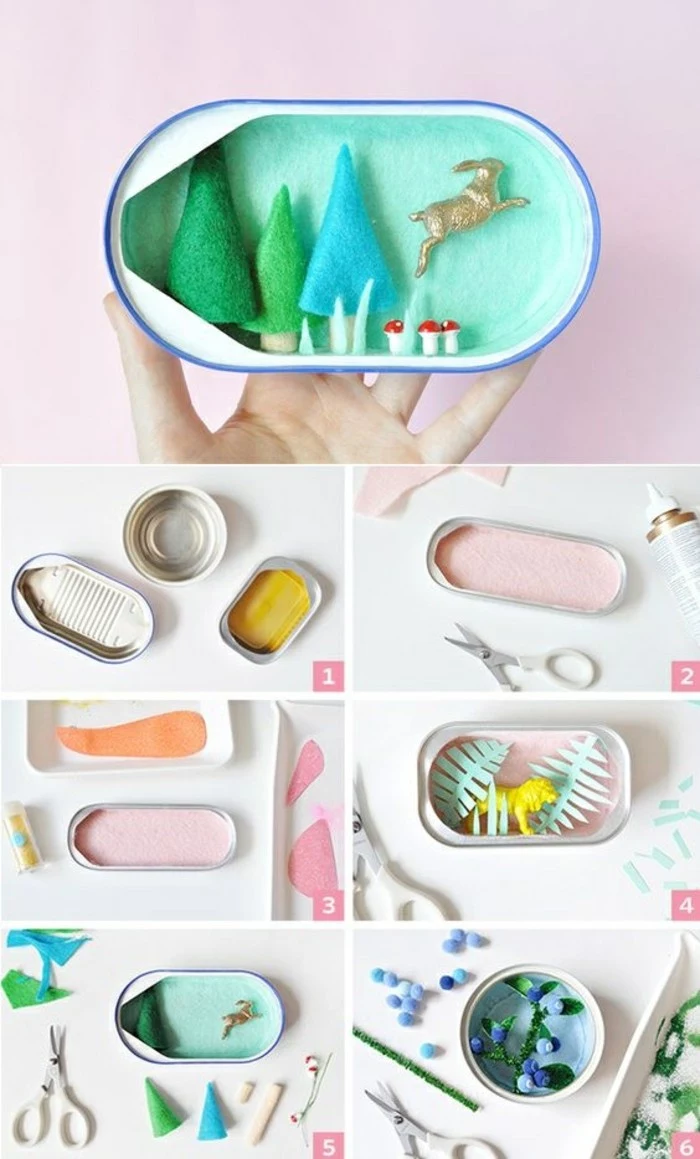
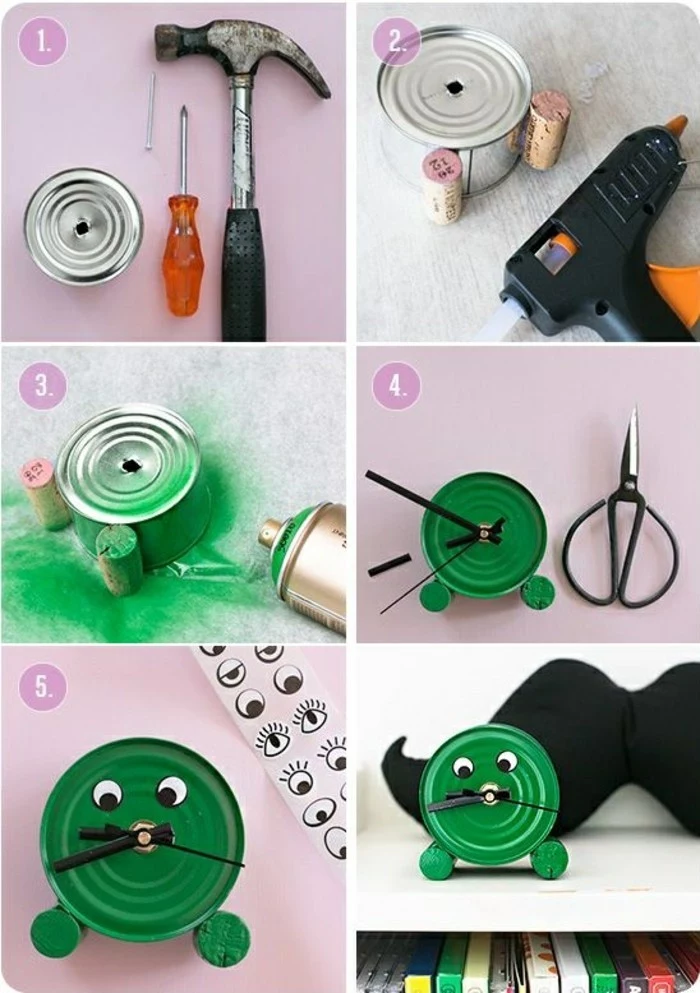
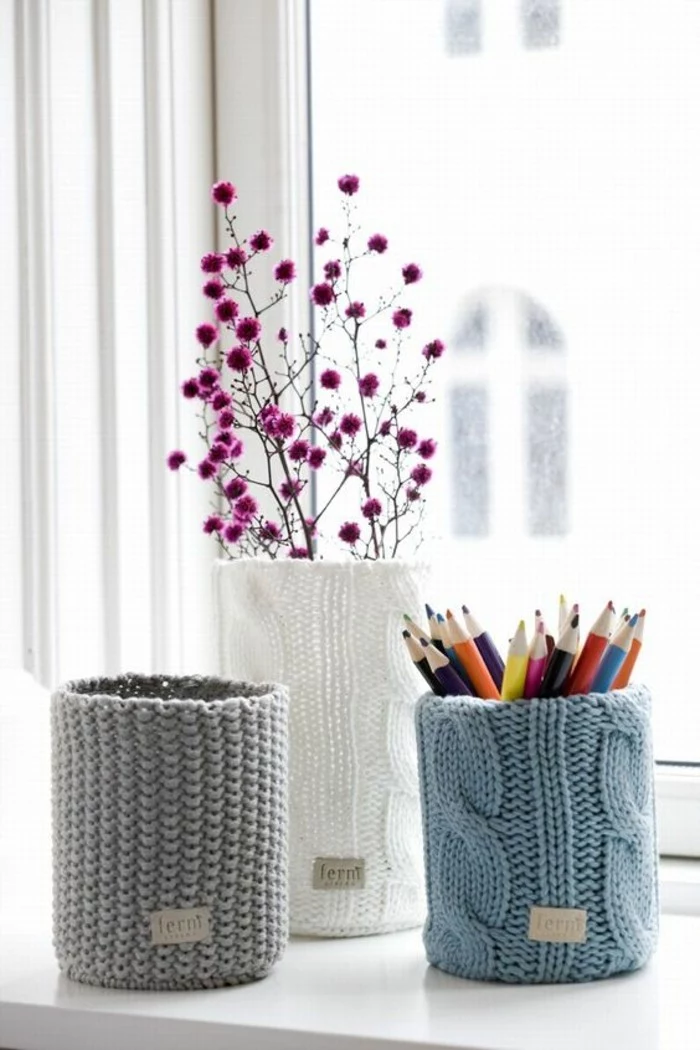
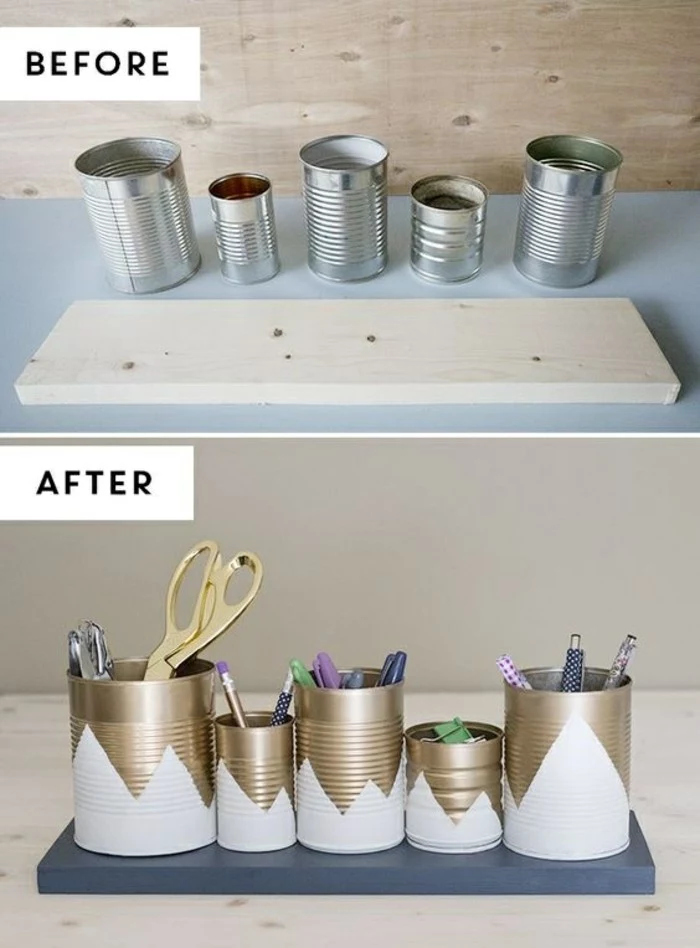
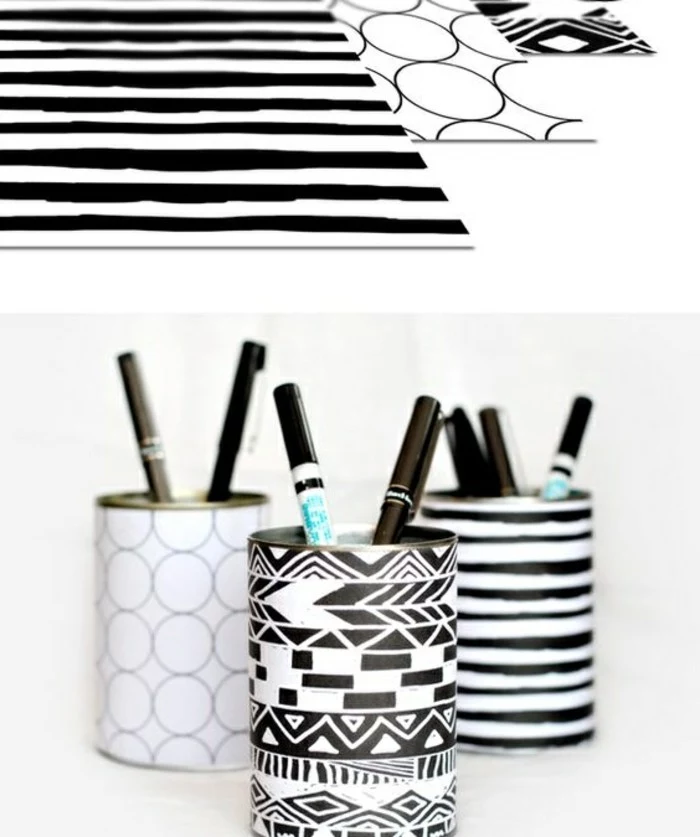
Your First Project: The Super-Simple 10-Minute Organizer
Ready to make something? Let’s start with a quick win. This is so easy and gives you a feel for the process.
- Grab a Can: Find a sturdy steel can (remember the magnet test!) from soup or vegetables.
- Open & Clean: Use your safety can opener to remove the lid. Empty the contents and wash the can thoroughly with soap and water, then dry it completely. Peel off the label. (A little goo-gone can help with any sticky residue).
- Smooth It Out: Even with a safety opener, it’s good practice to run your metal file around the inside rim a few times just to be absolutely certain it’s smooth.
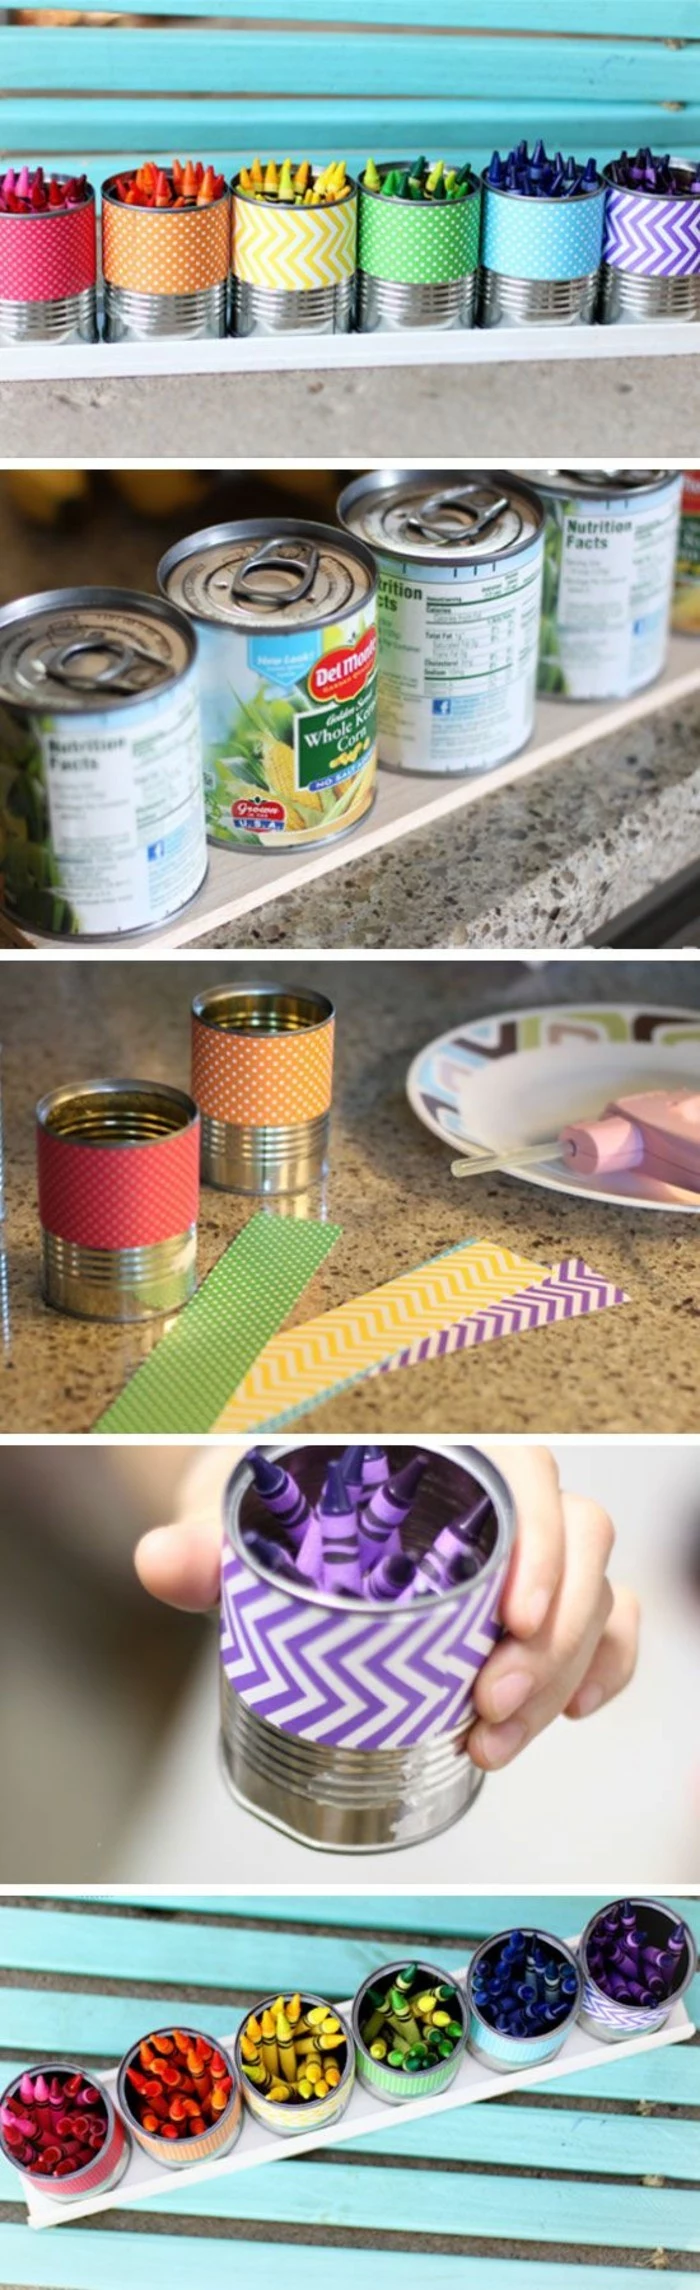
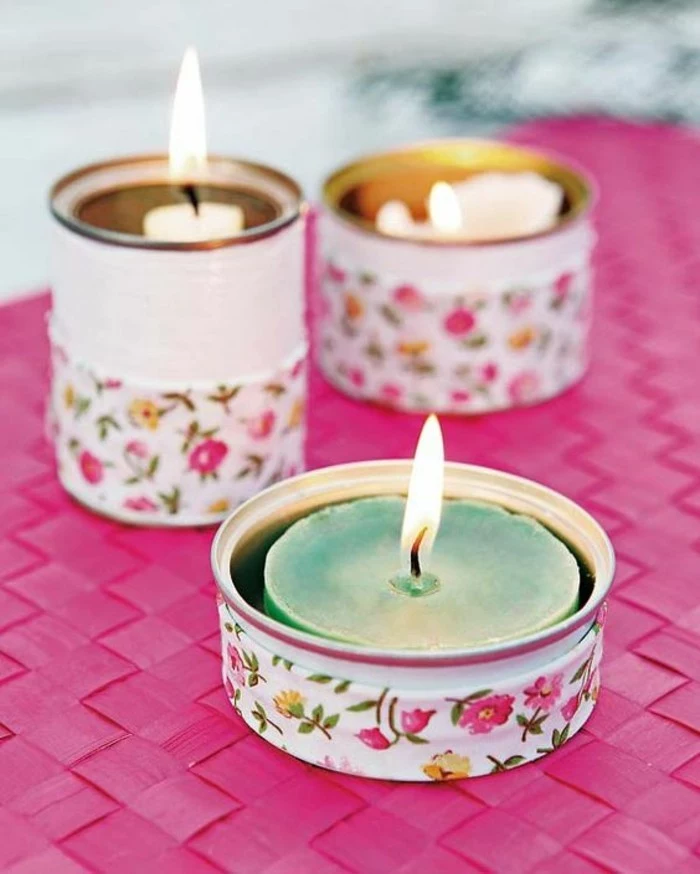
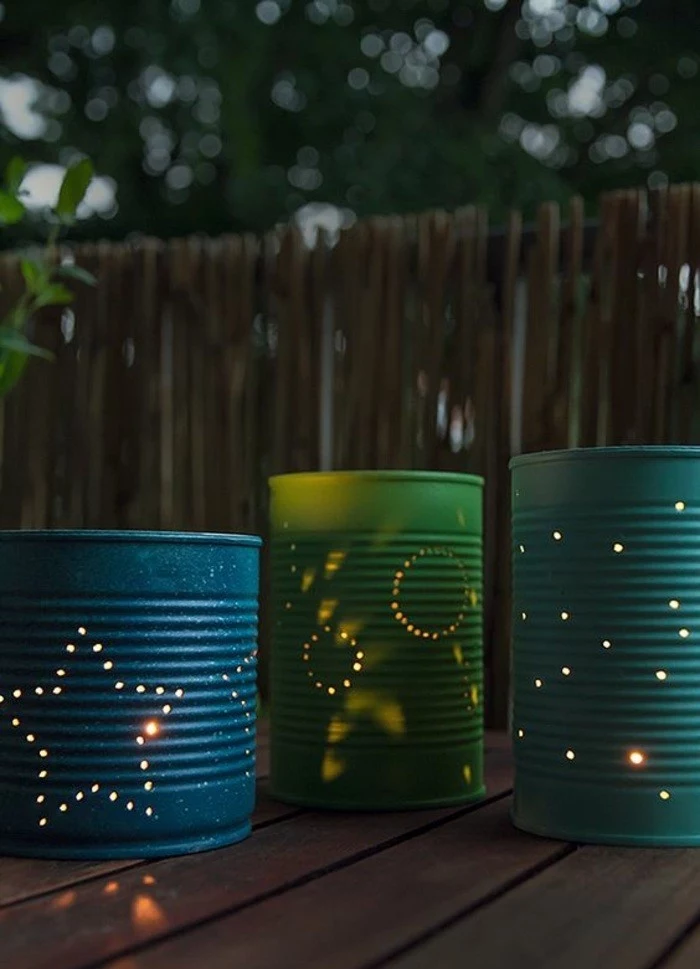
- Decorate: This is the fun part! You can leave it with its industrial metallic finish, or take it outside and give it a couple of light coats of spray paint. Let it dry, and you’re done!
And just like that, you have a rock-solid pencil holder or utensil caddy. It’s a small thing, but it’s the first step. From here, you can start experimenting with different shapes, sizes, and techniques. The possibilities… well, they’re pretty much endless.
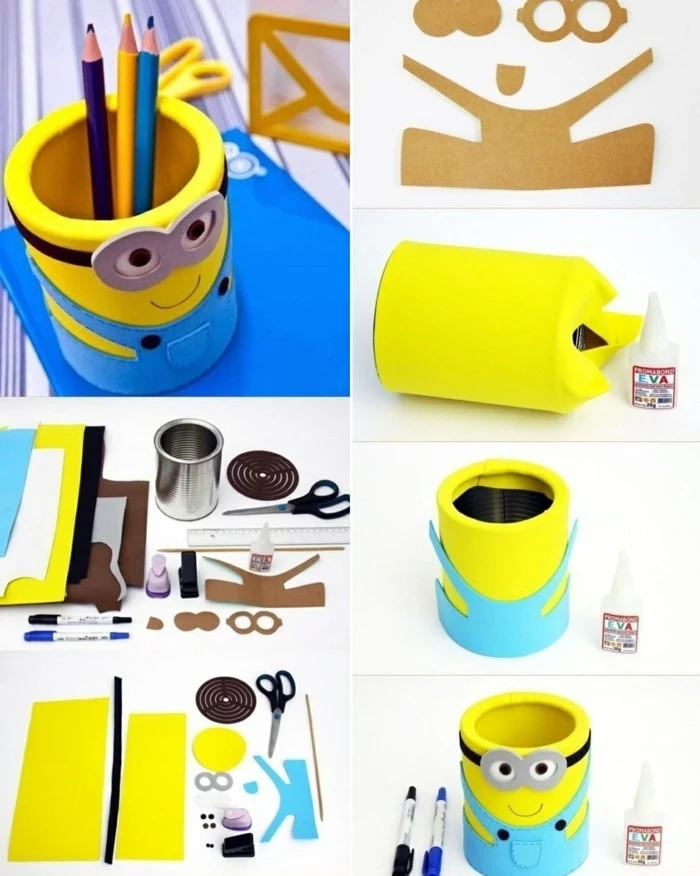
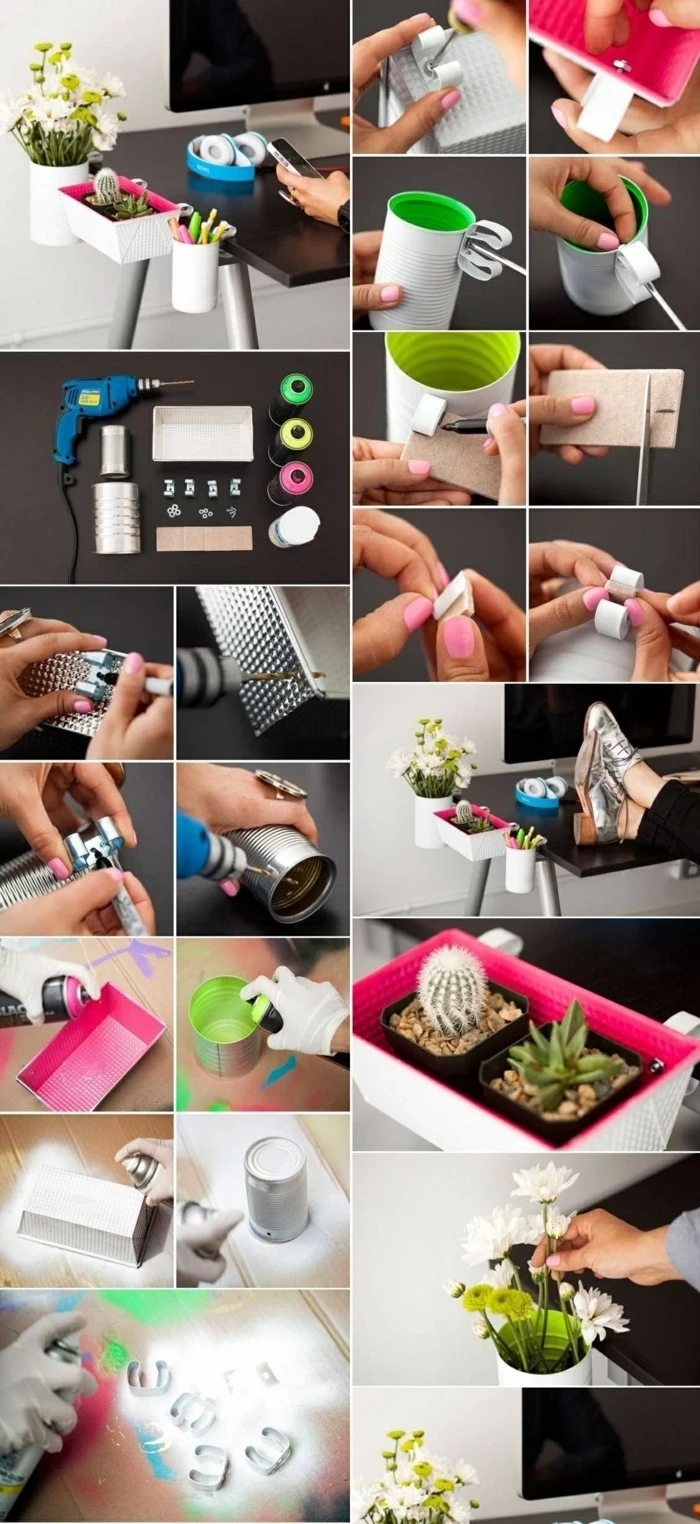
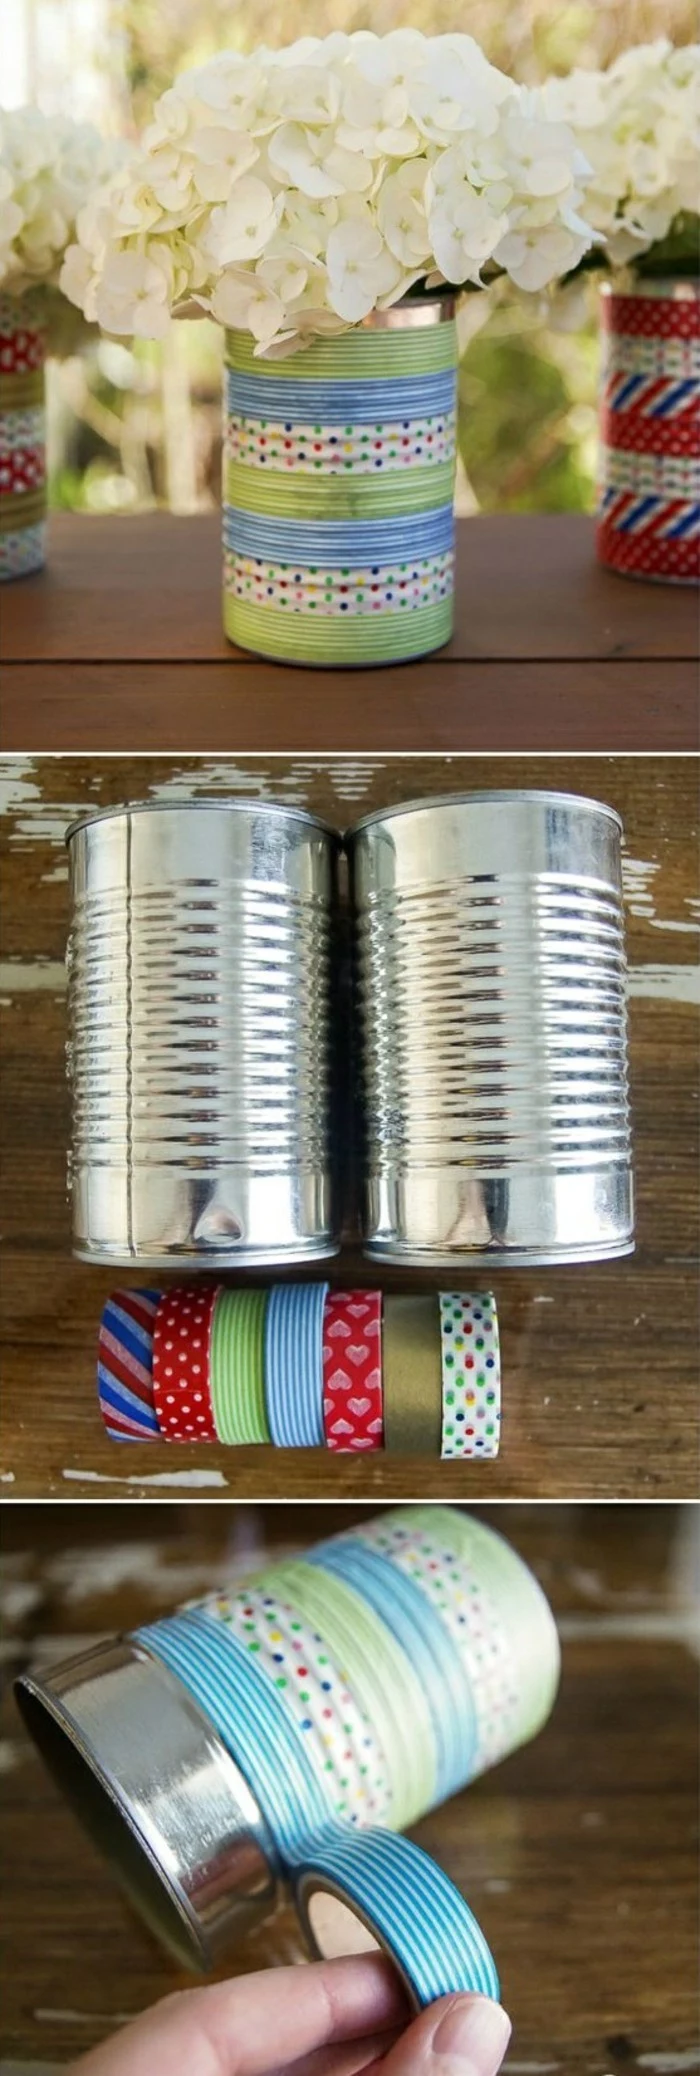
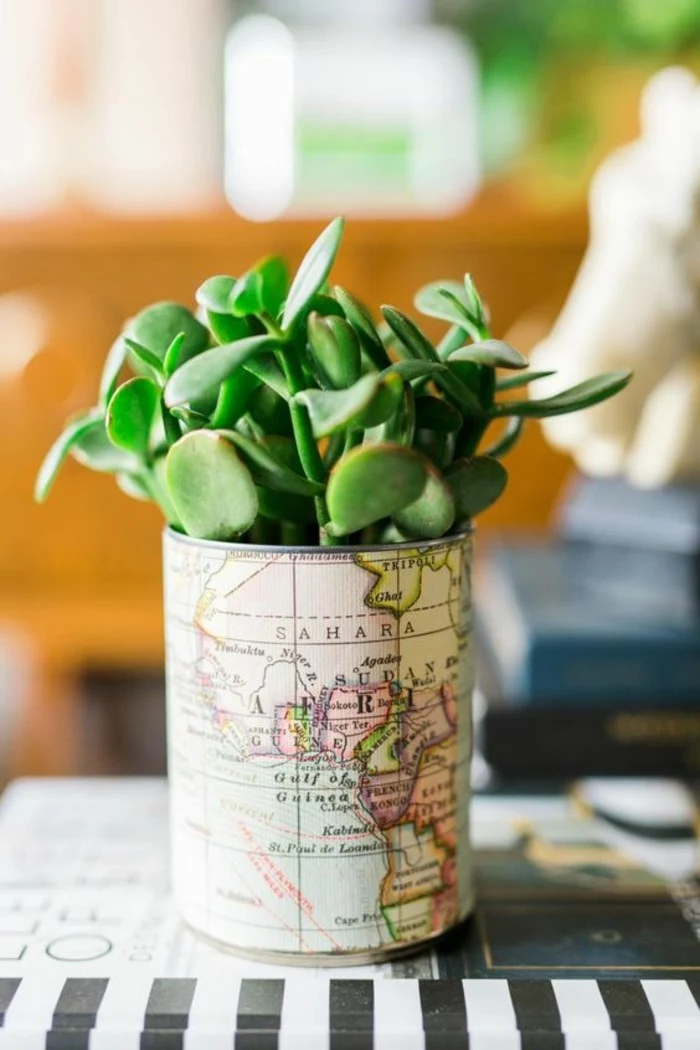
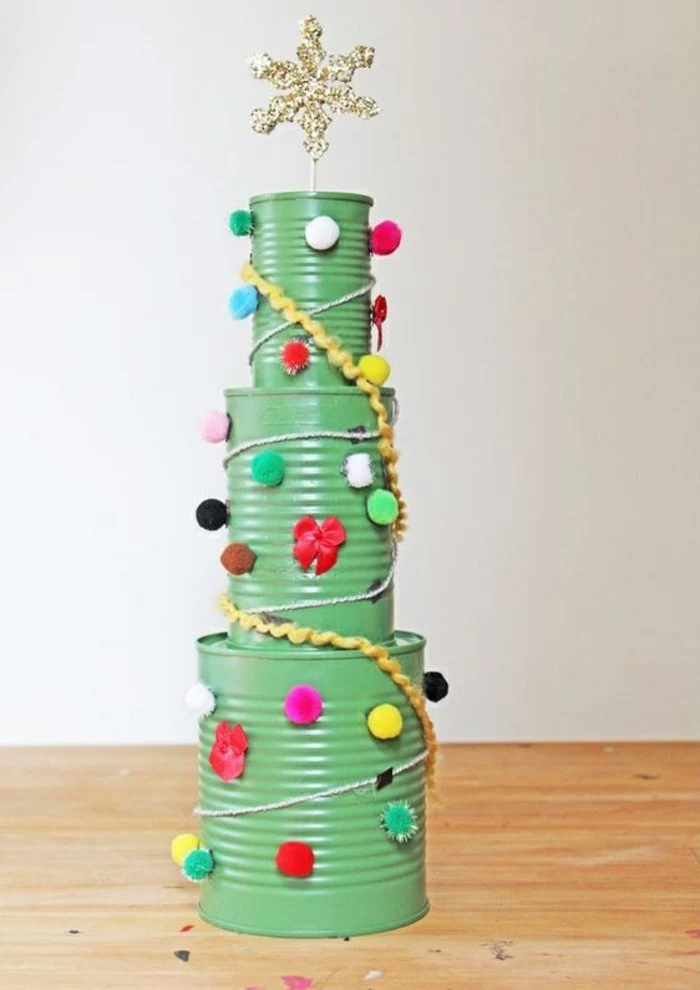
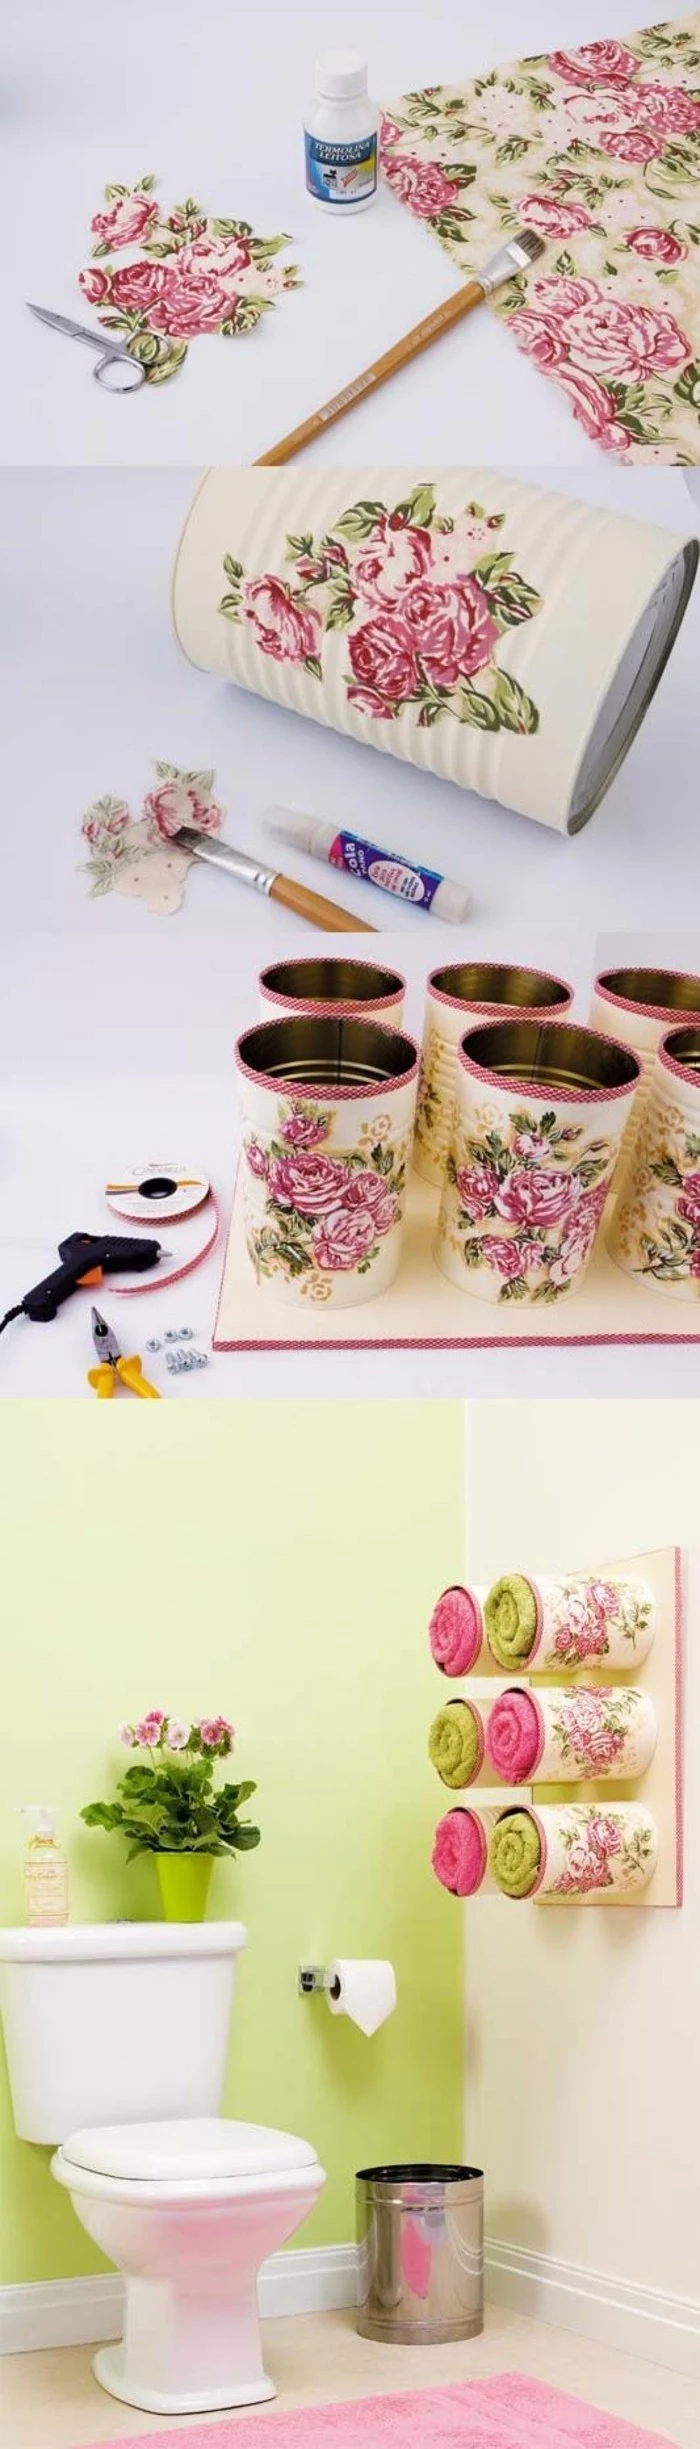
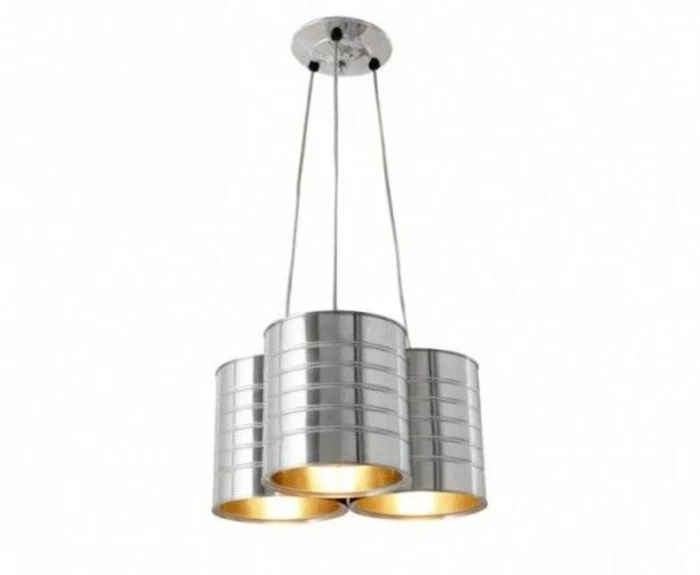
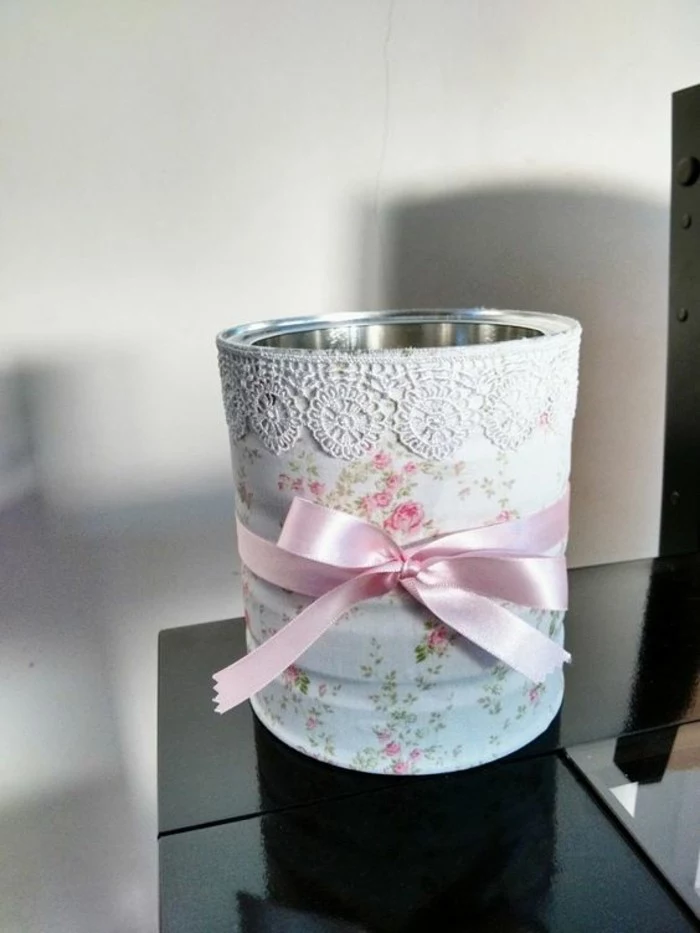
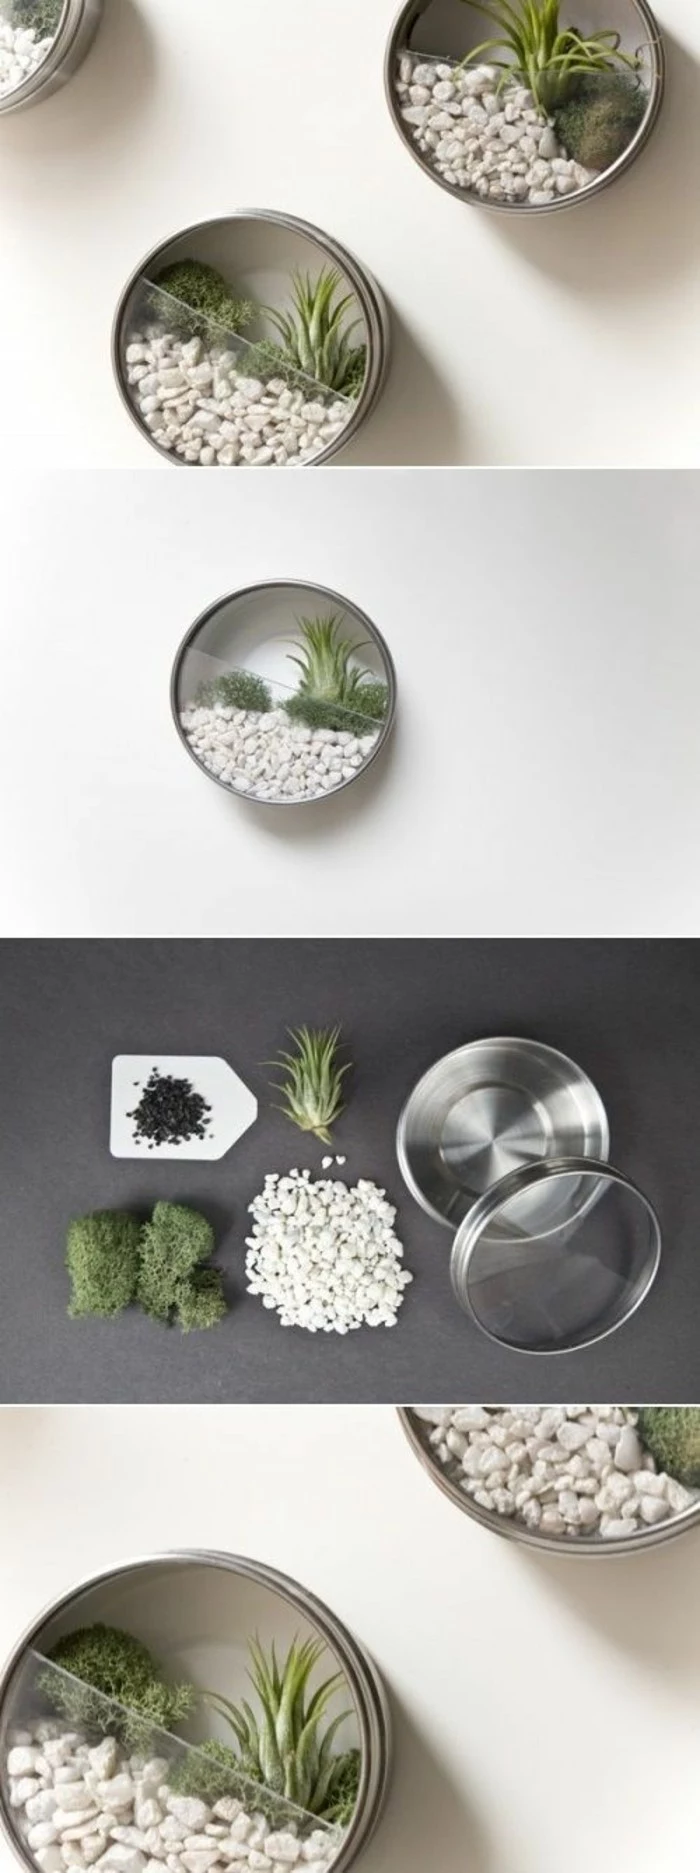
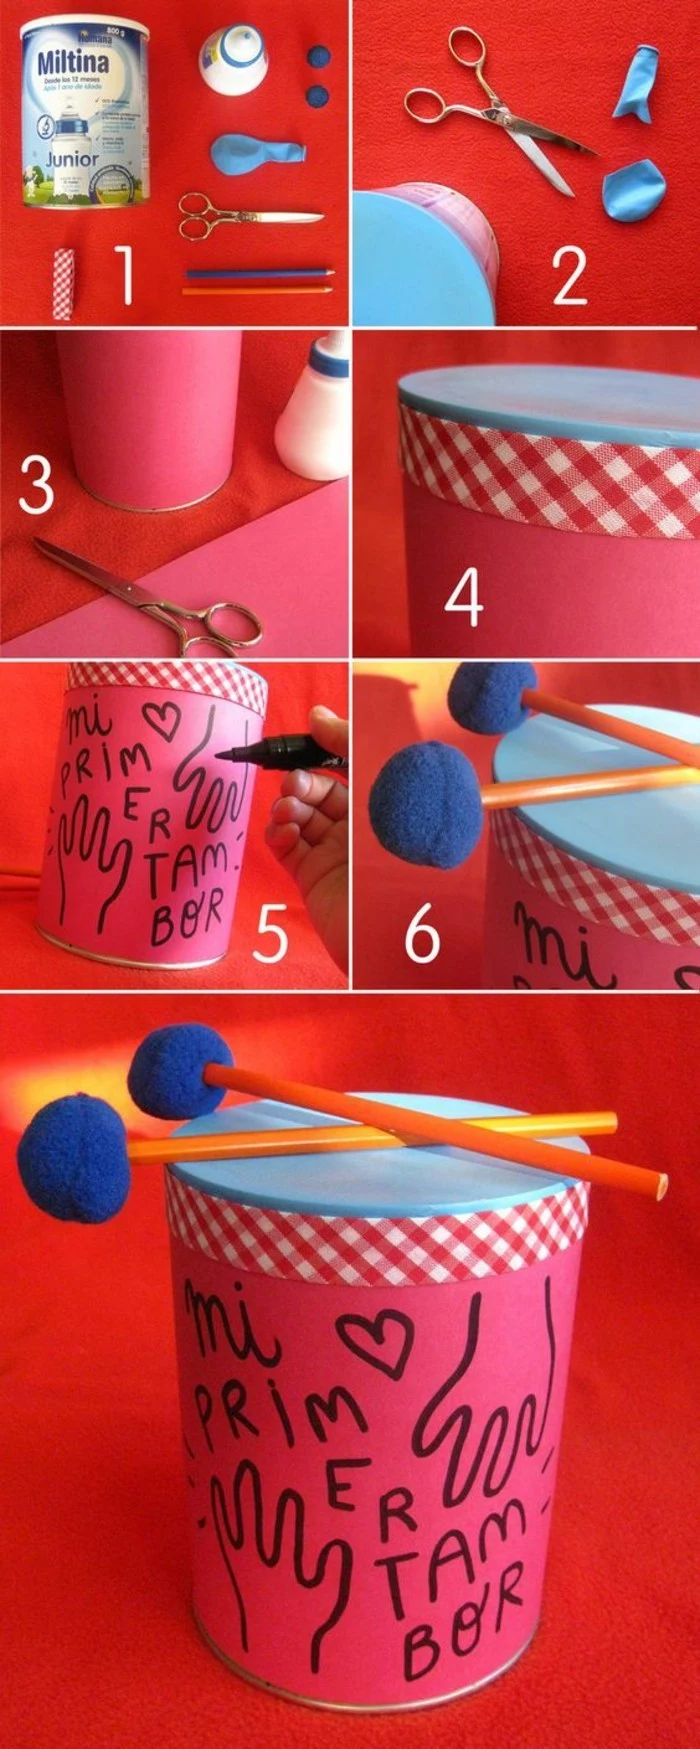
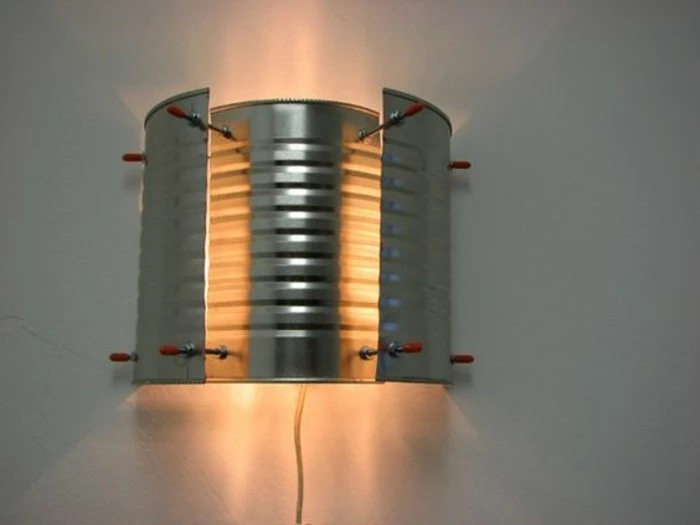
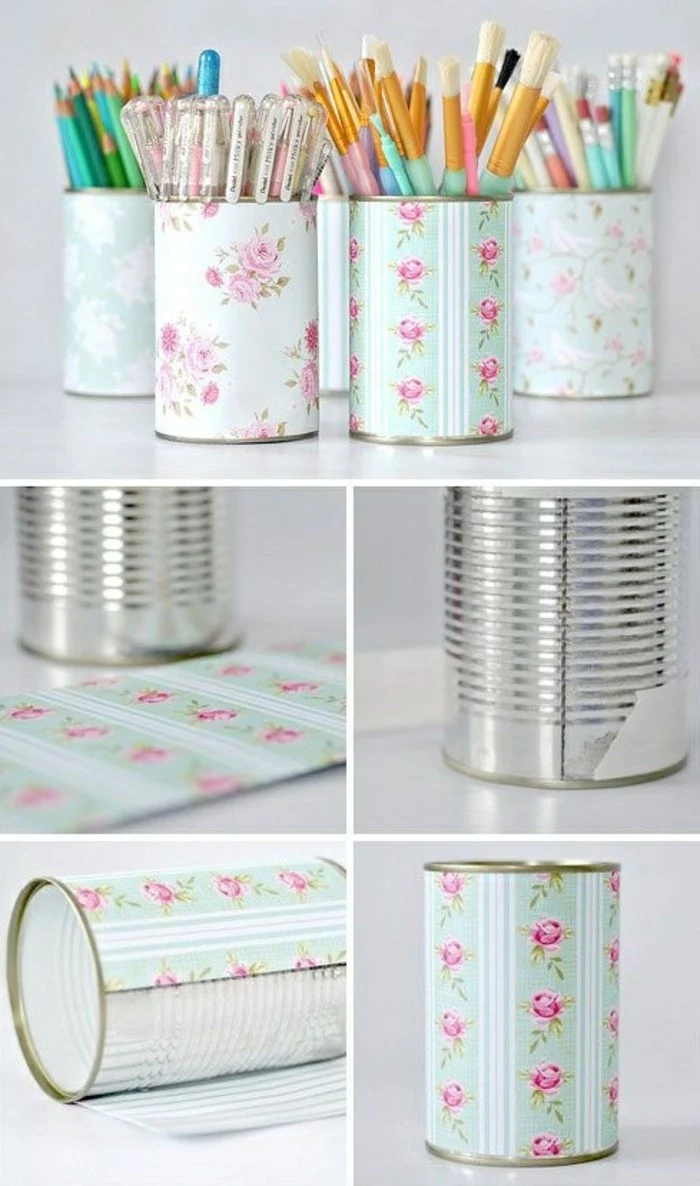
Inspiration Gallery

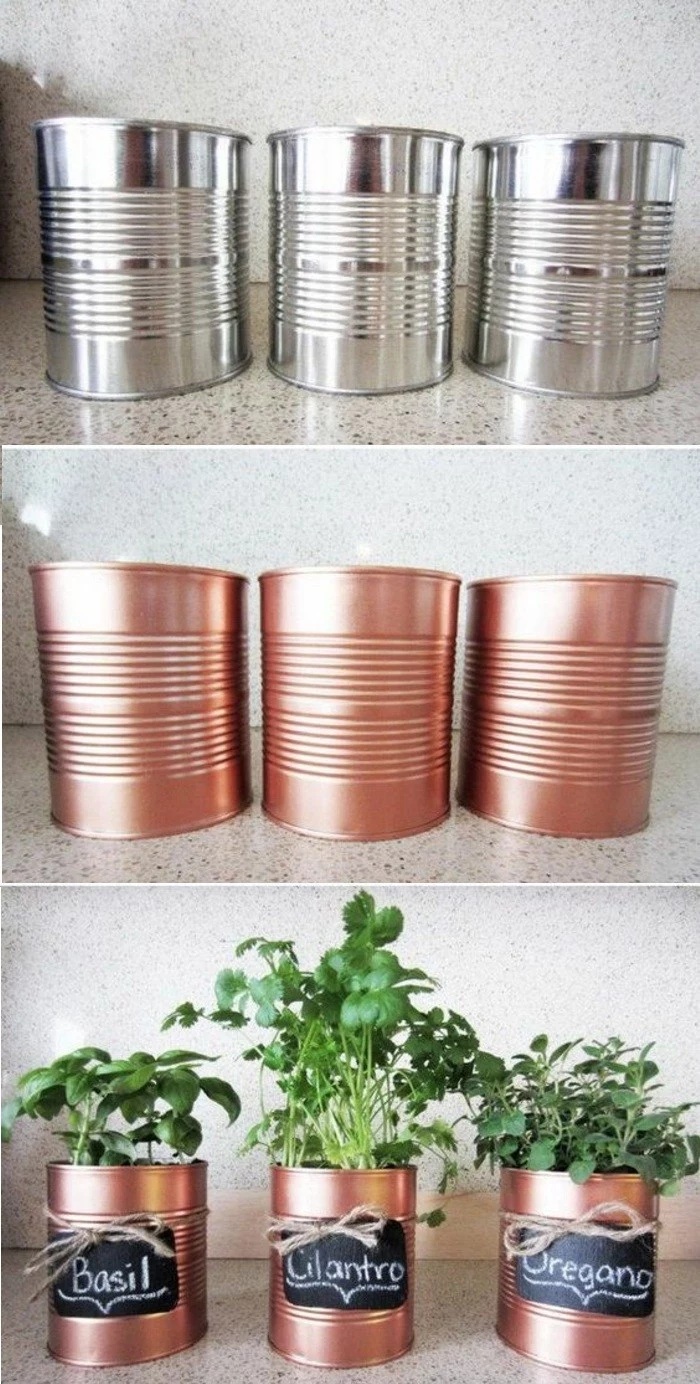
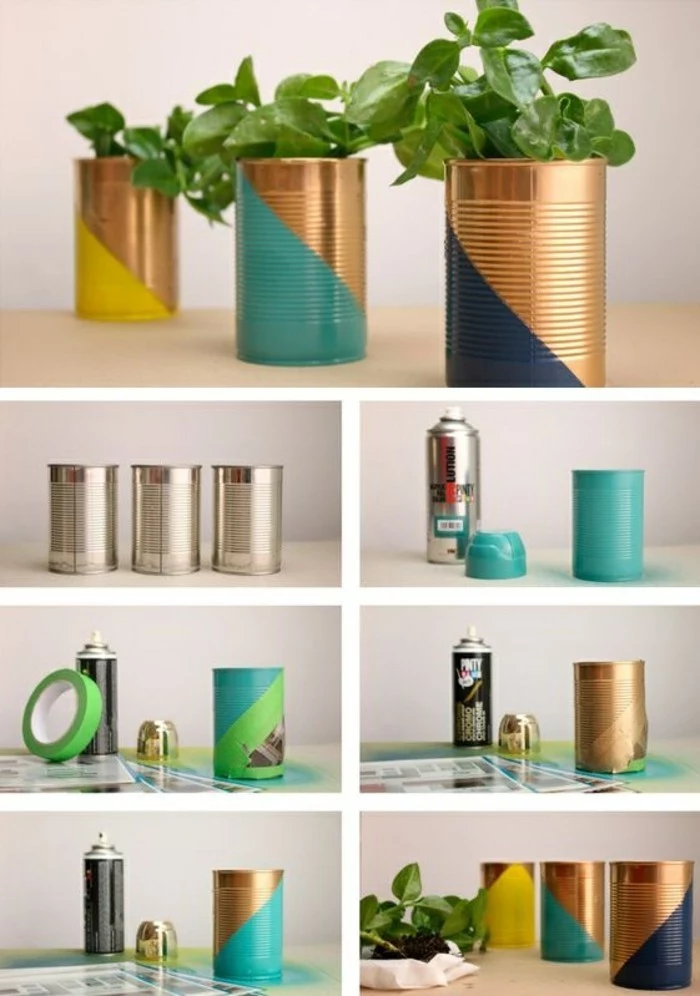
The secret to paint that doesn’t flake: Primer is non-negotiable. Metal is a non-porous surface, so regular acrylics will peel right off. A quick coat of a spray-on metal primer, like Rust-Oleum’s Clean Metal Primer, creates a surface the paint can actually grip. It’s the five-minute step that makes your project last for years instead of weeks.
Recycling one aluminum can saves enough energy to run a television for three hours.
While recycling is great, upcycling is even better. By turning a can into a planter or lantern, you completely bypass the energy-intensive industrial recycling process, giving the material a new, immediate purpose right in your home.

How do I get that perfectly smooth, professional-looking finish?
The trick is thin, even coats. Whether you’re using a brush or a spray can, resist the urge to apply one thick layer. Apply a light first coat, let it dry completely (at least an hour), then apply a second. For spray painting, hold the can about 8-10 inches away and use sweeping motions. This prevents drips and creates a flawless, factory-like surface.
Before you even think about painting, a thorough cleaning is key. The slightest trace of food residue or oil will ruin your finish.
- First, wash with hot, soapy water.
- For stubborn sticky labels, a soak in hot water or a dab of Goo Gone works wonders.
- Finally, wipe the can down with rubbing alcohol or white vinegar to remove any remaining grease before you prime.
Steel Cans: These are your typical vegetable or soup cans. They are sturdier, magnetic, and a bit tougher to cut, making them ideal for projects that need durability, like tool holders or wind chimes.
Aluminum Cans: Think soda cans. They are much softer, lighter, and easier to cut, punch, or emboss. They are perfect for delicate decorative work like luminaries or crafting metallic ‘feathers’.
Choose your can based on the project’s demands for strength versus workability.
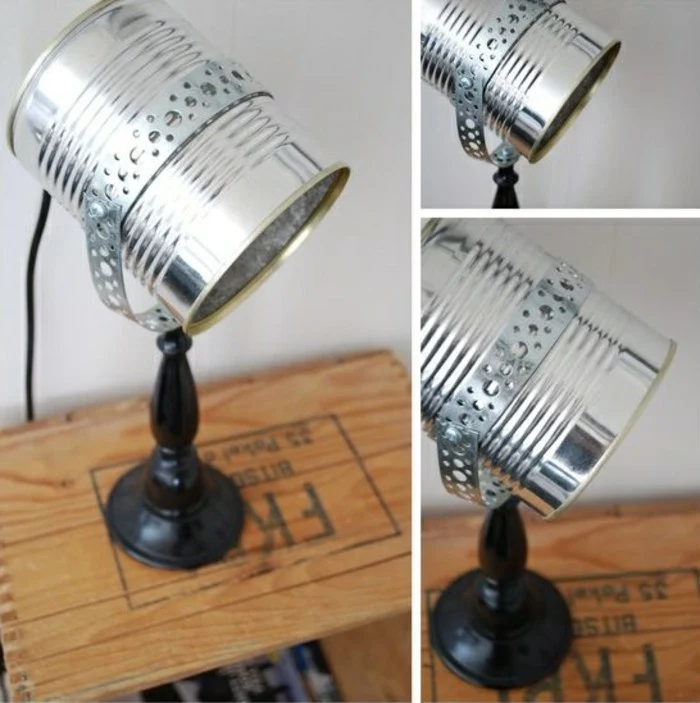
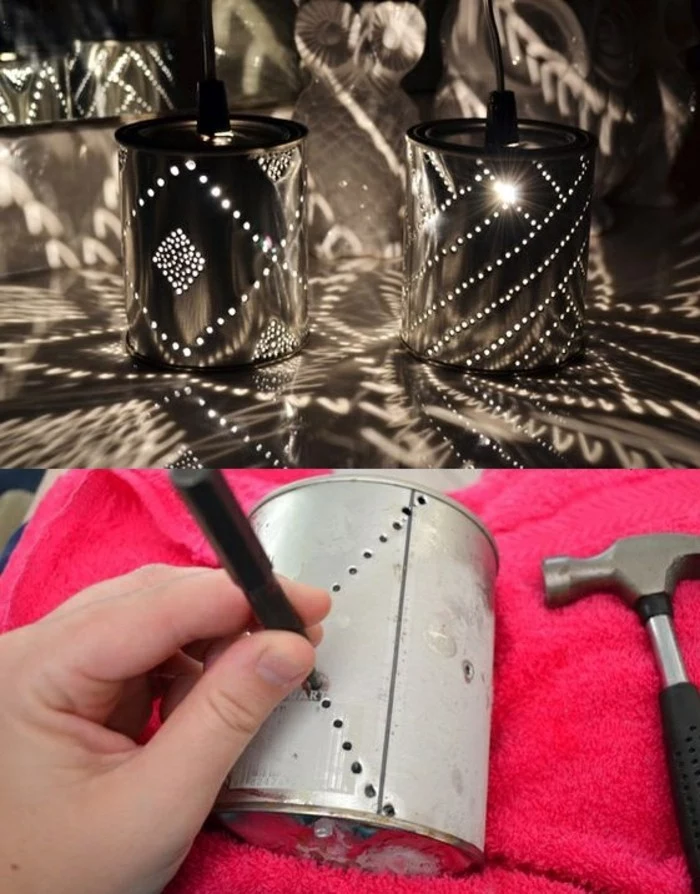
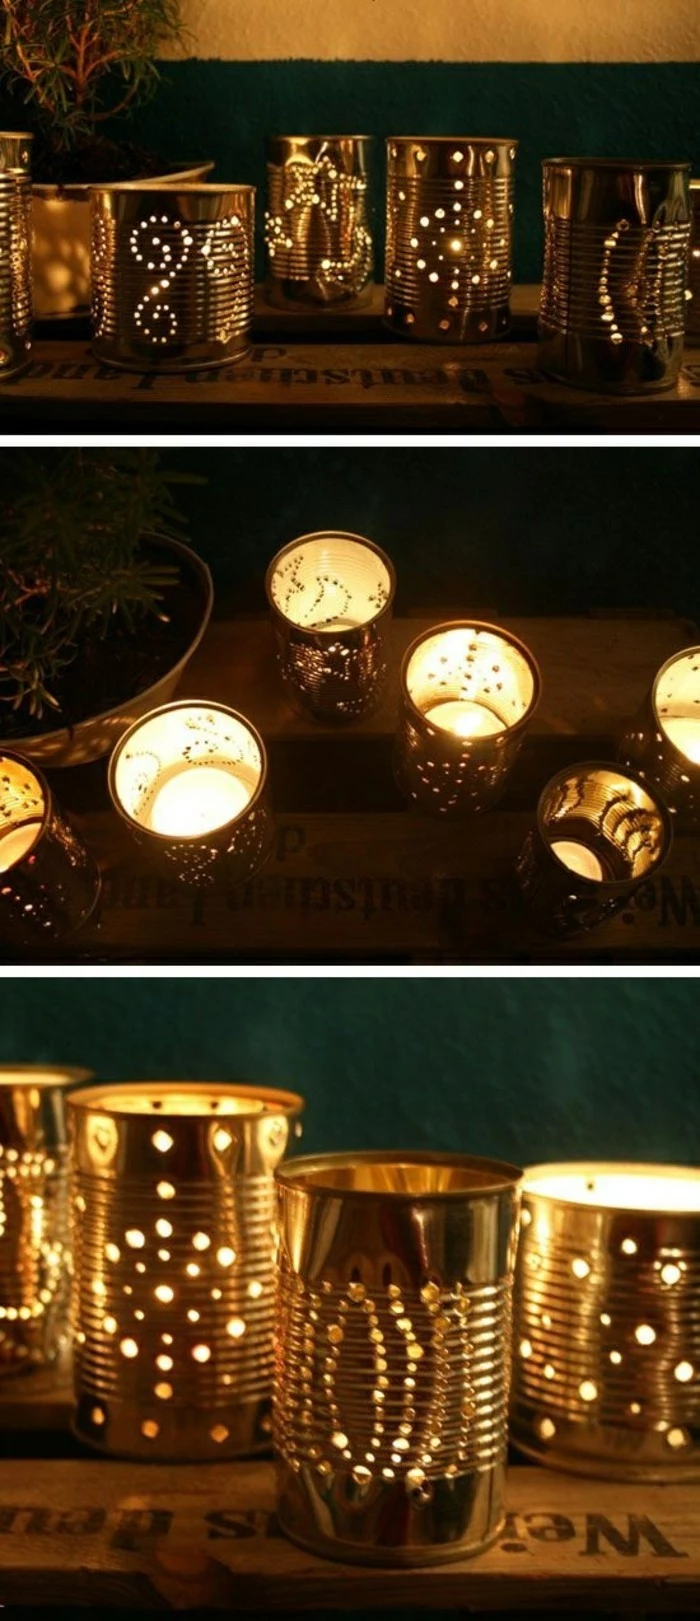
Ready to level up from simple holes? A Dremel rotary tool with a tungsten carbide cutting bit allows for incredible precision. You can cut out intricate shapes, letters, or lace-like patterns, turning a simple can into a true work of art. Start on a low speed and always wear your eye protection, as small metal filings will fly.
“The art of Hojalata, or Mexican tin art, has been around since the 16th century, turning inexpensive tinplate into vibrant, embossed folk art.”
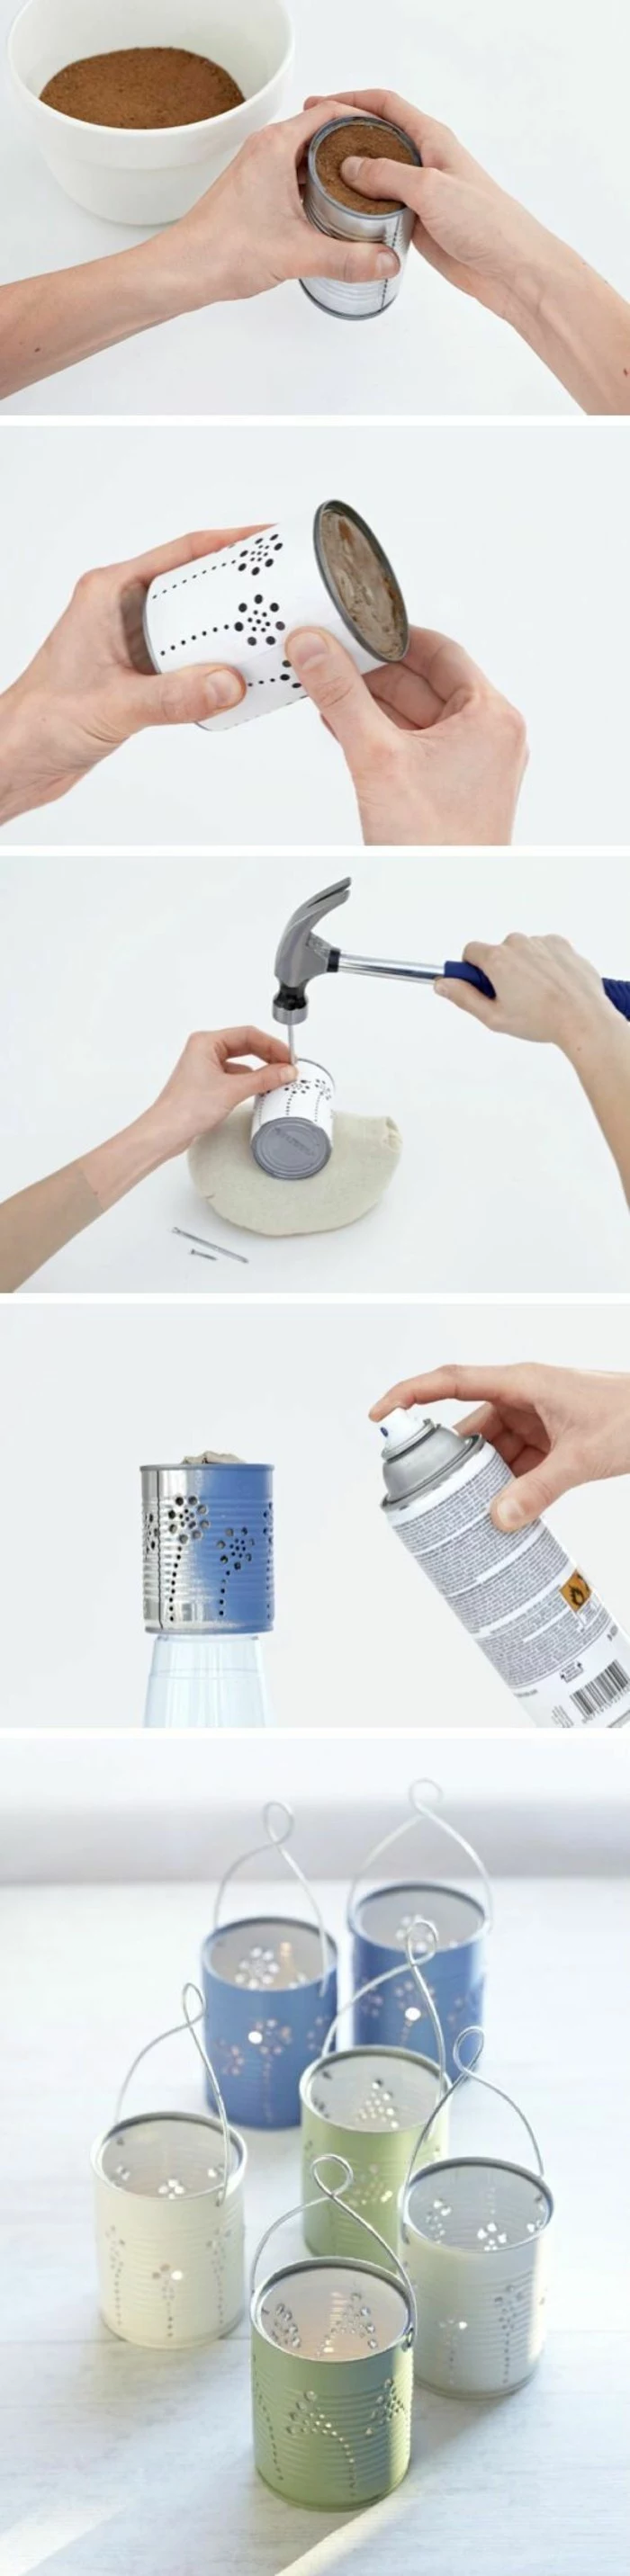
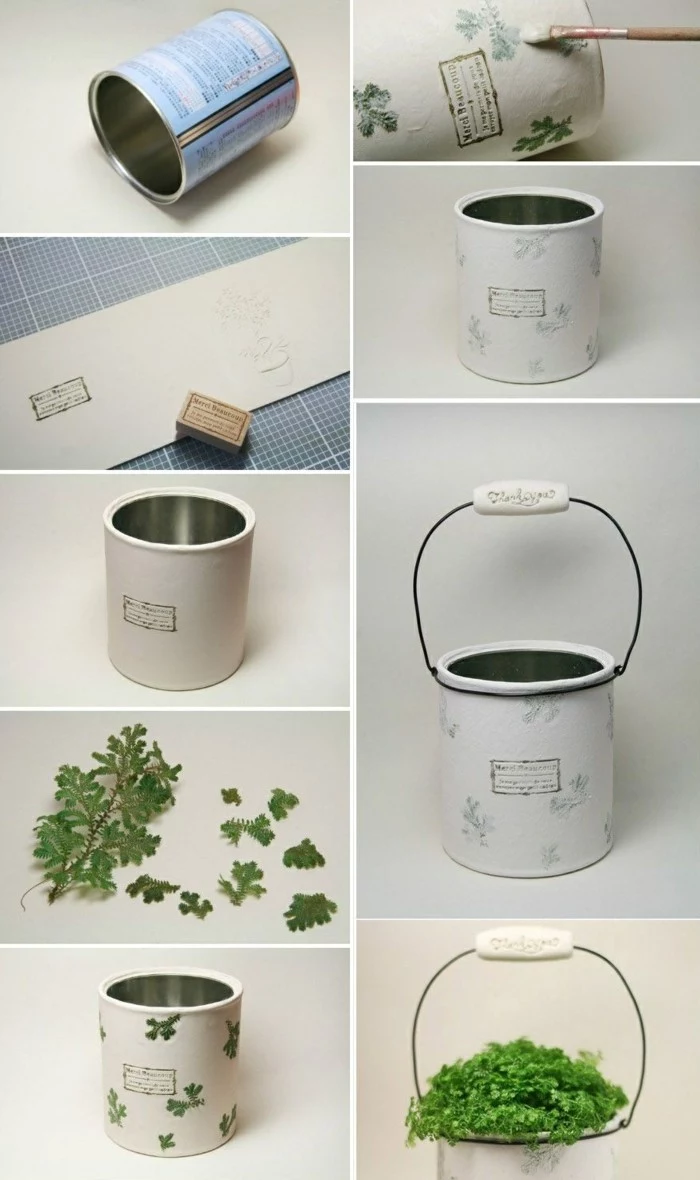
Take inspiration from this tradition! You don’t need special tools to start. Use a blunted pencil or the back of a spoon to press patterns into the soft metal of an aluminum can from the inside. This creates a beautiful, low-relief embossed effect on the outside.
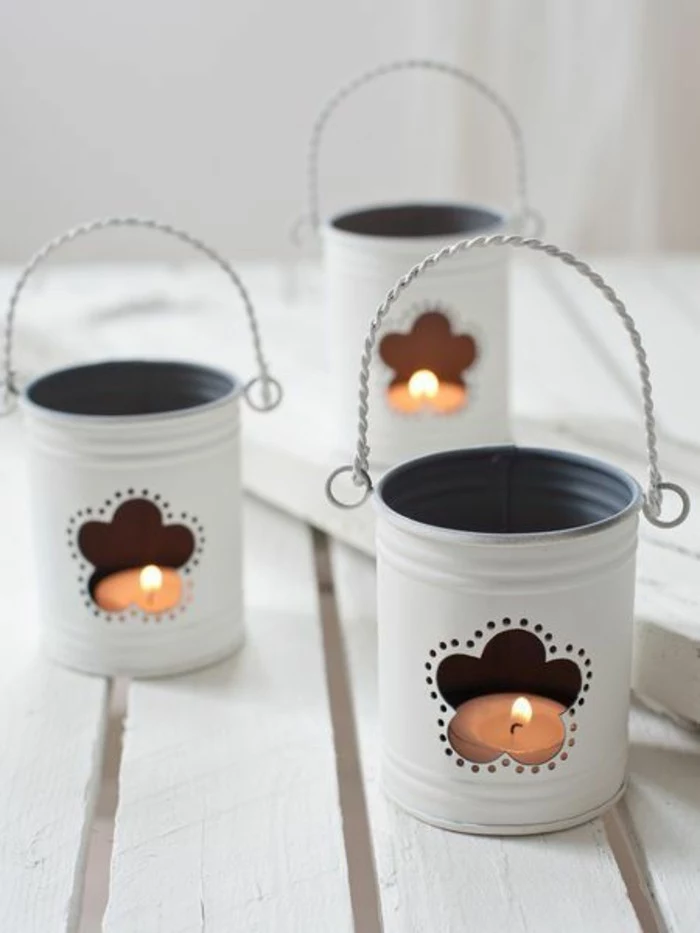
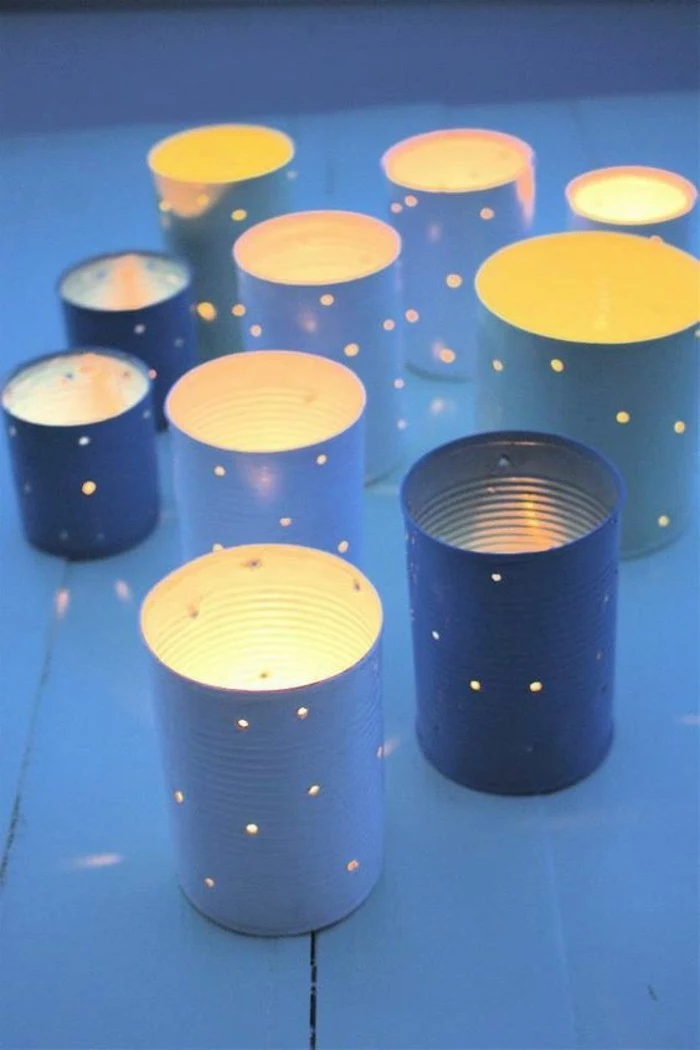
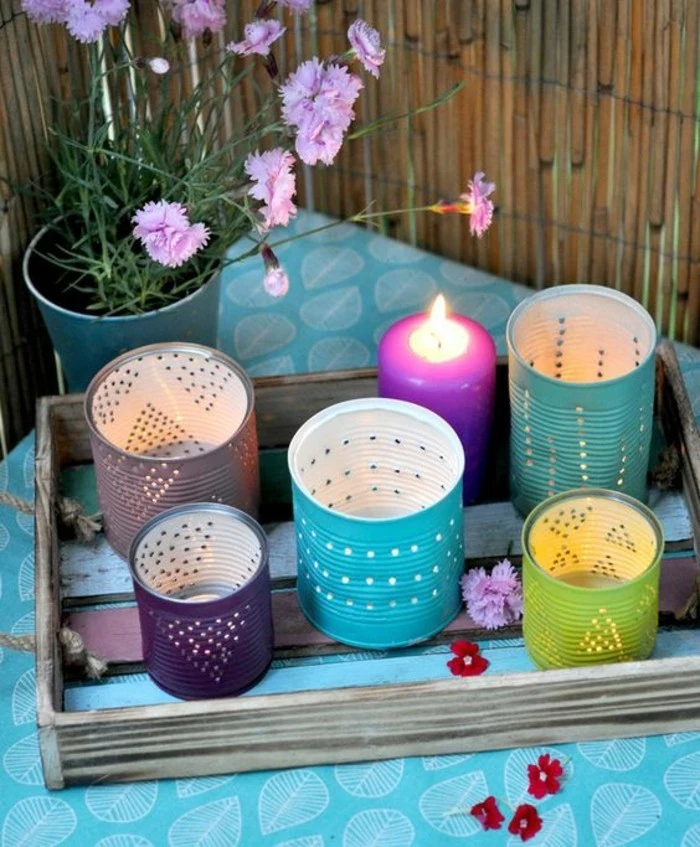
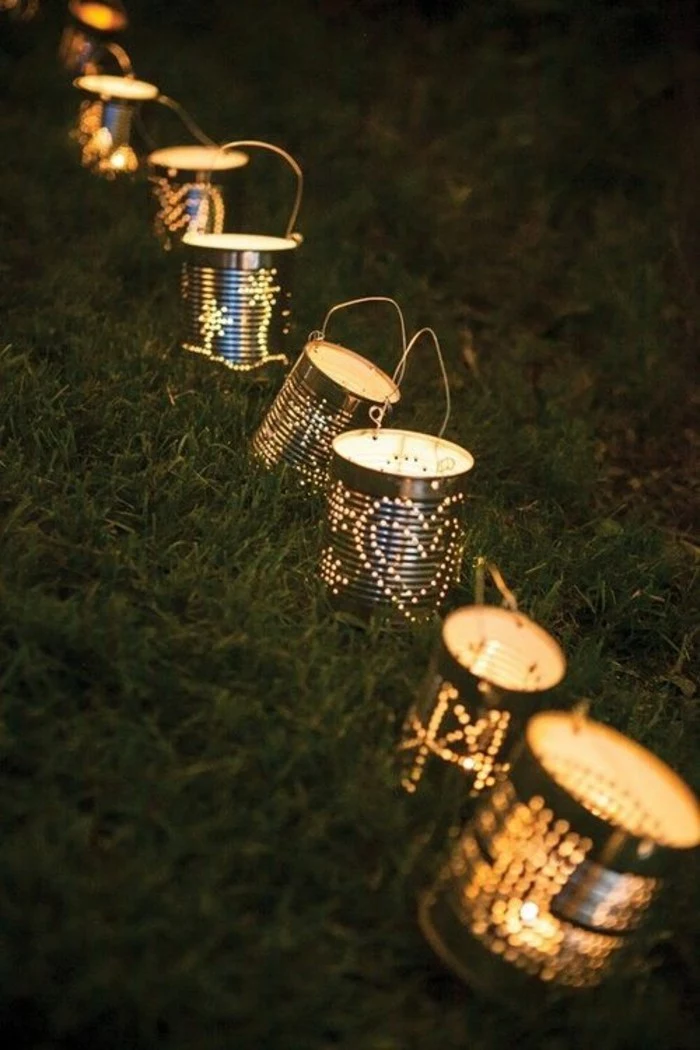
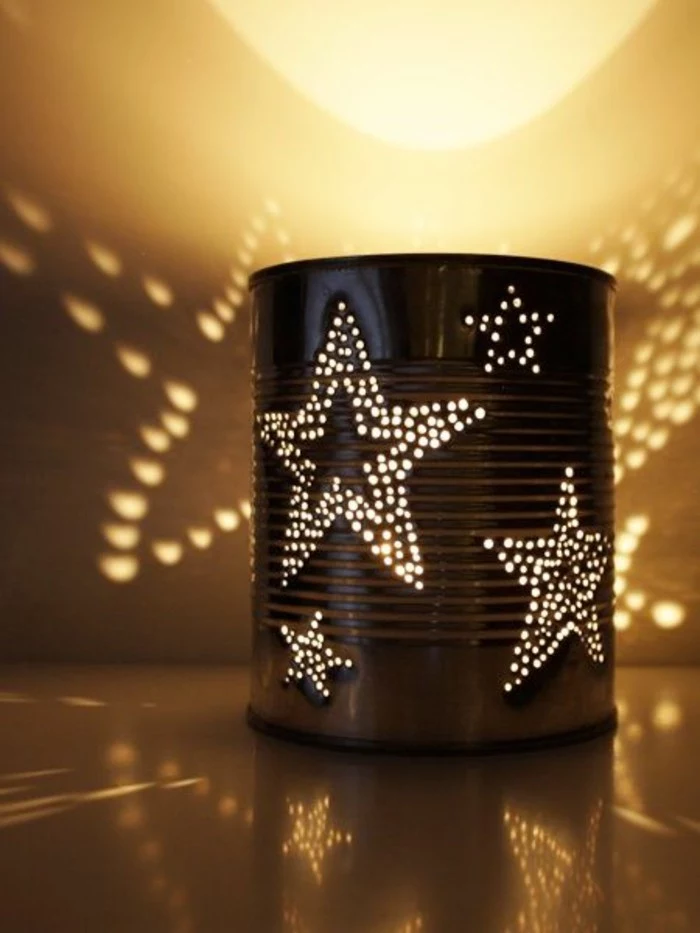
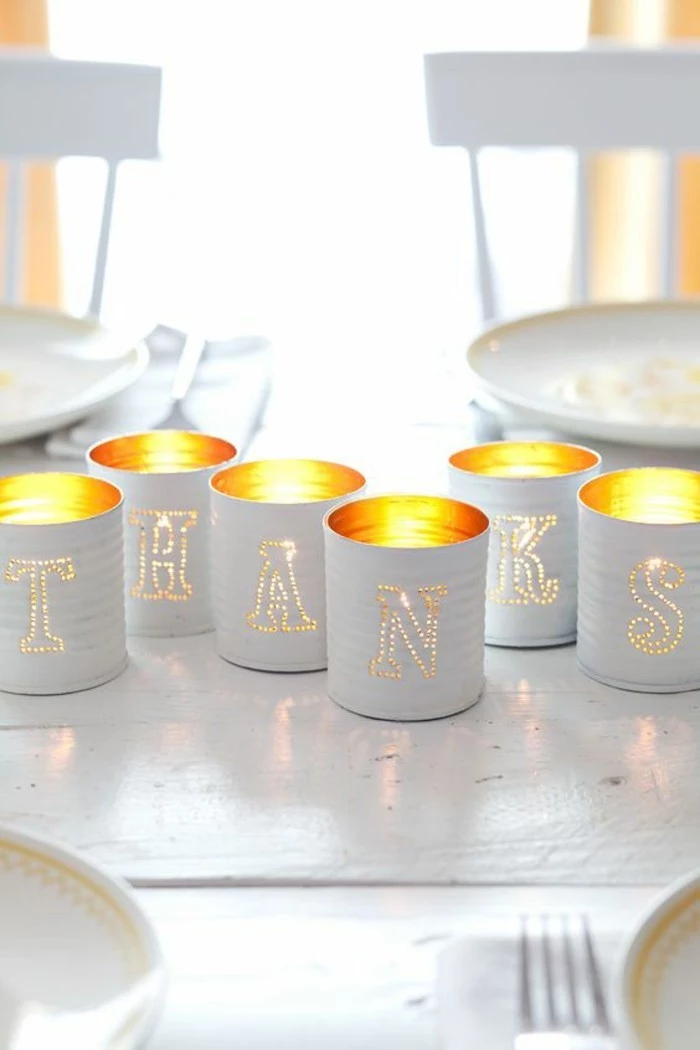
- Creates charming, star-like points of light.
- Requires no special drill bits.
- Lets you make intricate patterns easily.
The secret? Fill the can with water and freeze it solid. The ice provides internal support, preventing the can from buckling as you use a hammer and a nail to punch your designs. Just let the ice melt when you’re done!
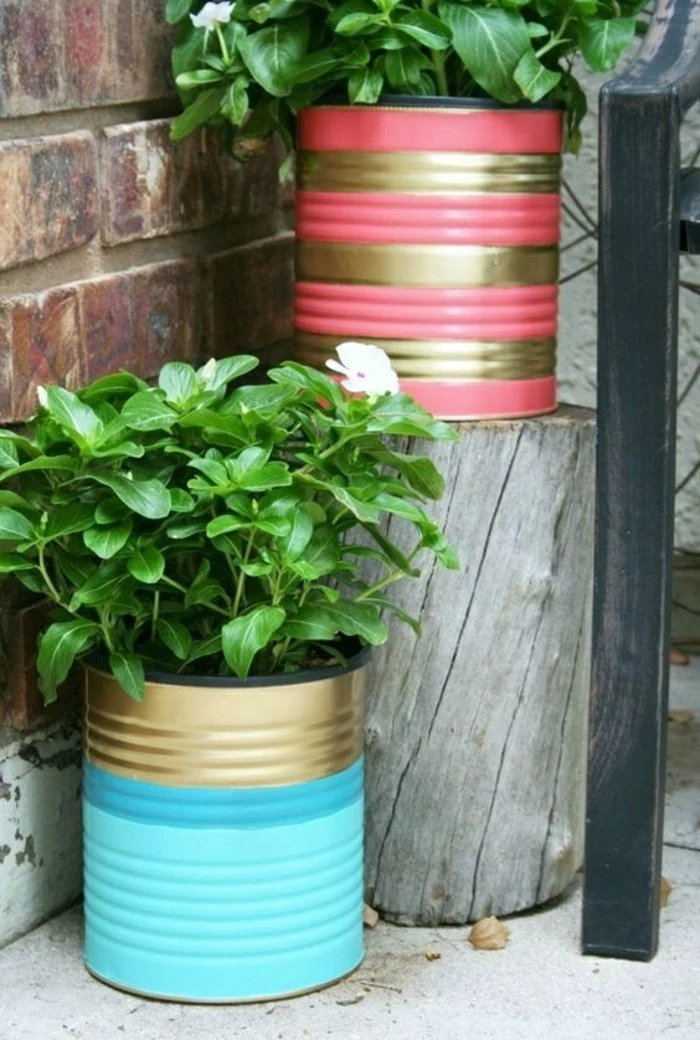
Don’t limit your creations to the indoors. To make your tin can planters or luminaries weatherproof, the key is sealing them. After your paint has fully cured (wait at least 24 hours), apply two coats of a clear, UV-resistant sealant spray, like Krylon’s UV-Resistant Clear Acrylic Coating. This will protect your design from rain, rust, and sun-fading.
What’s the best way to glue things onto a tin can?
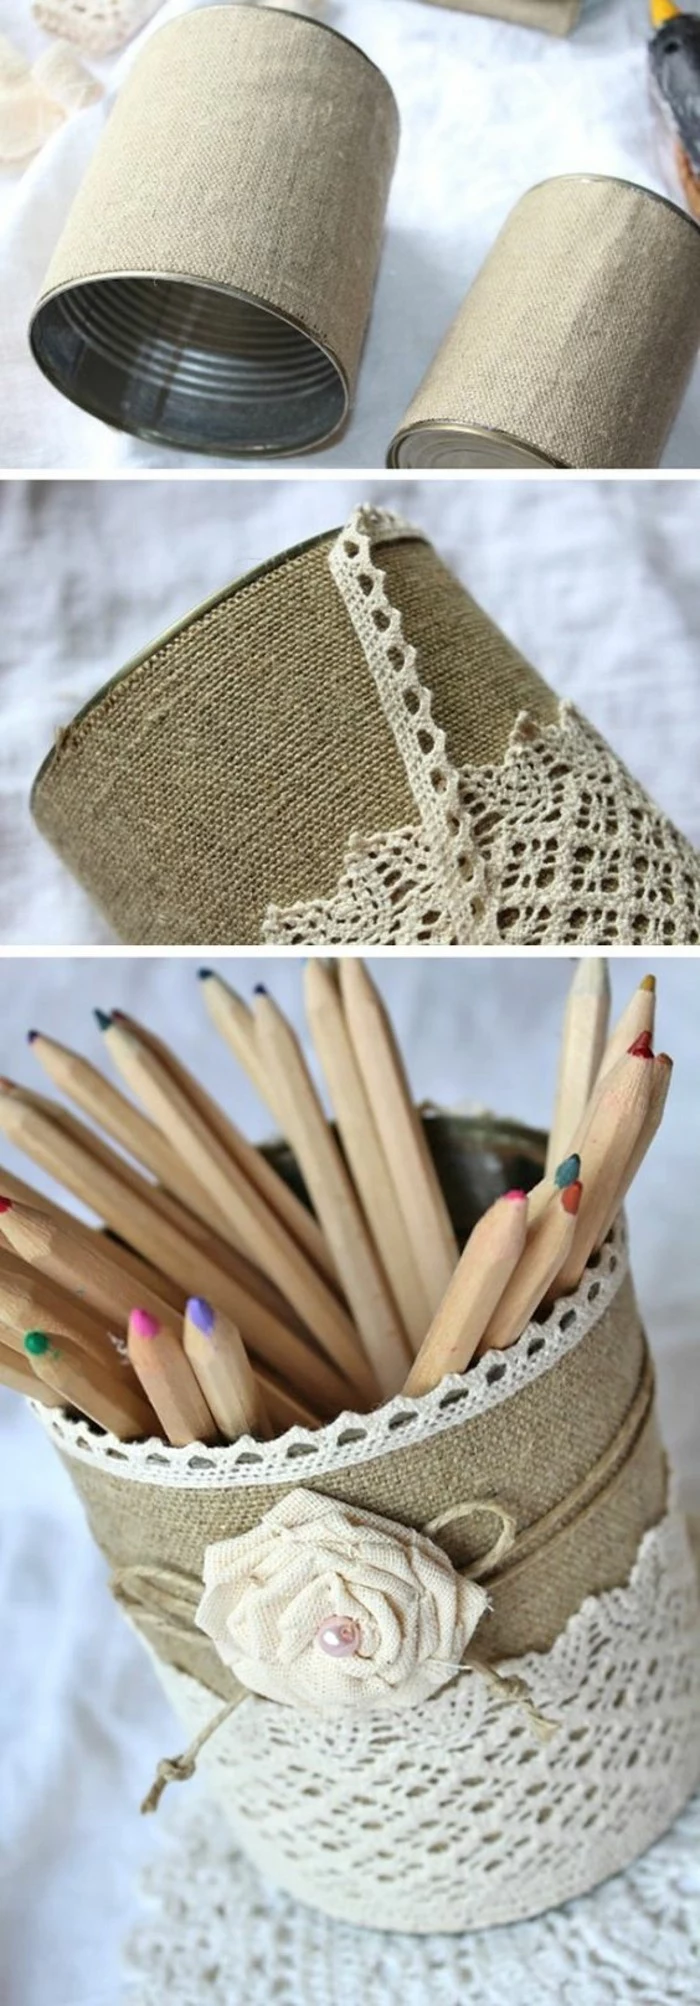
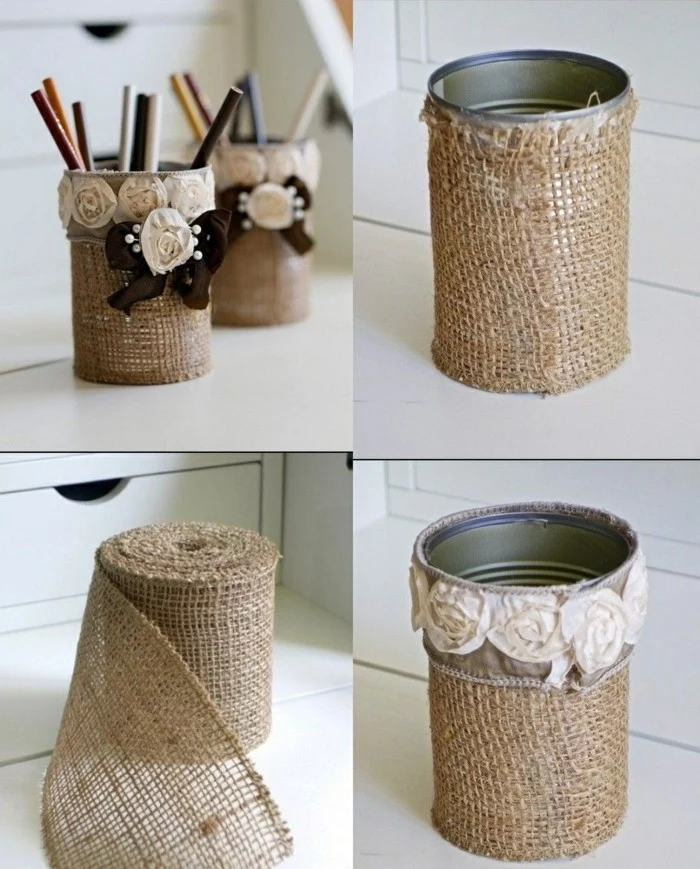
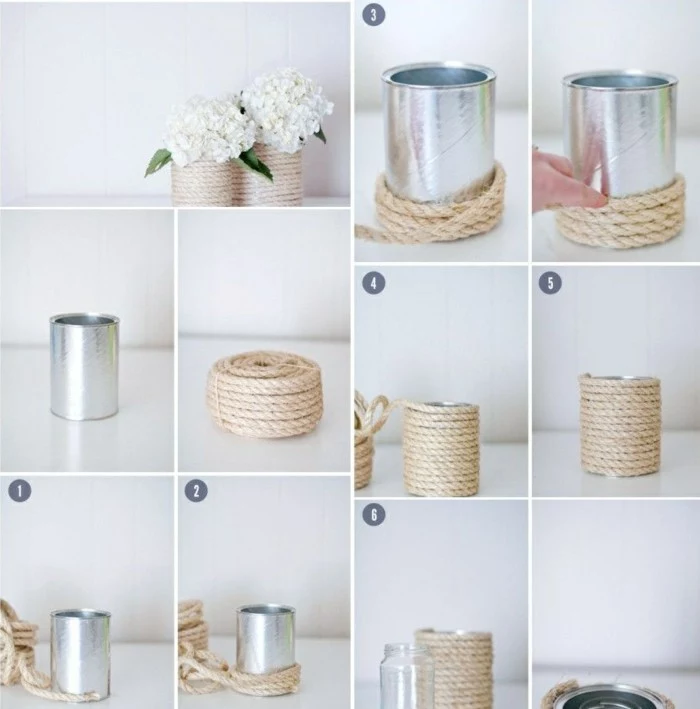
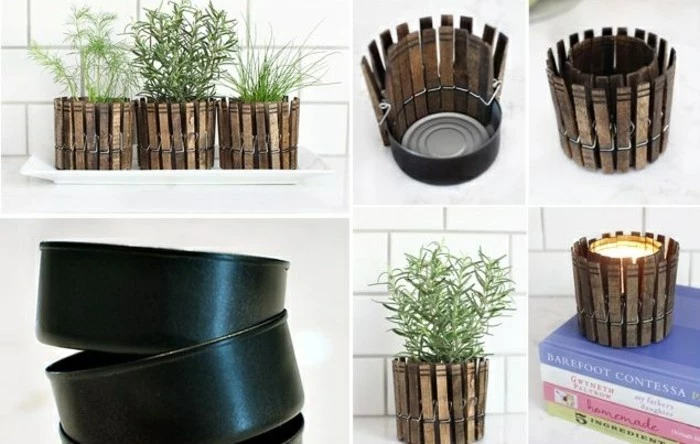
Your child’s school glue won’t cut it on a slick metal surface. For heavy-duty additions like wood, stone, or other metals, you need a strong, permanent adhesive like Gorilla Glue or a two-part epoxy. For lighter materials like fabric, burlap, or rope, a high-temperature hot glue gun provides a quick and surprisingly strong bond.
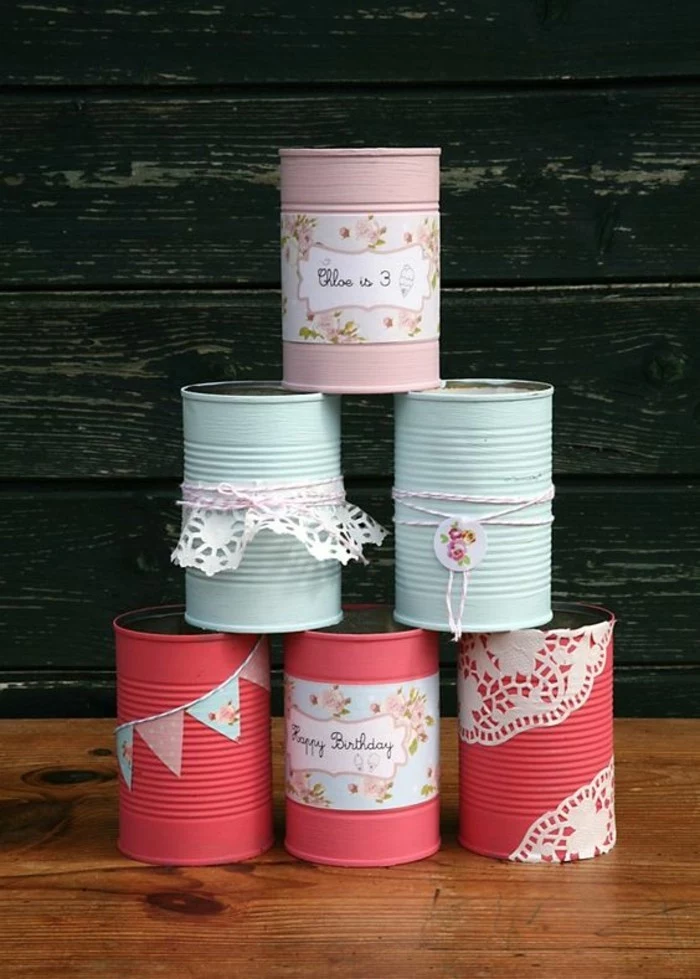
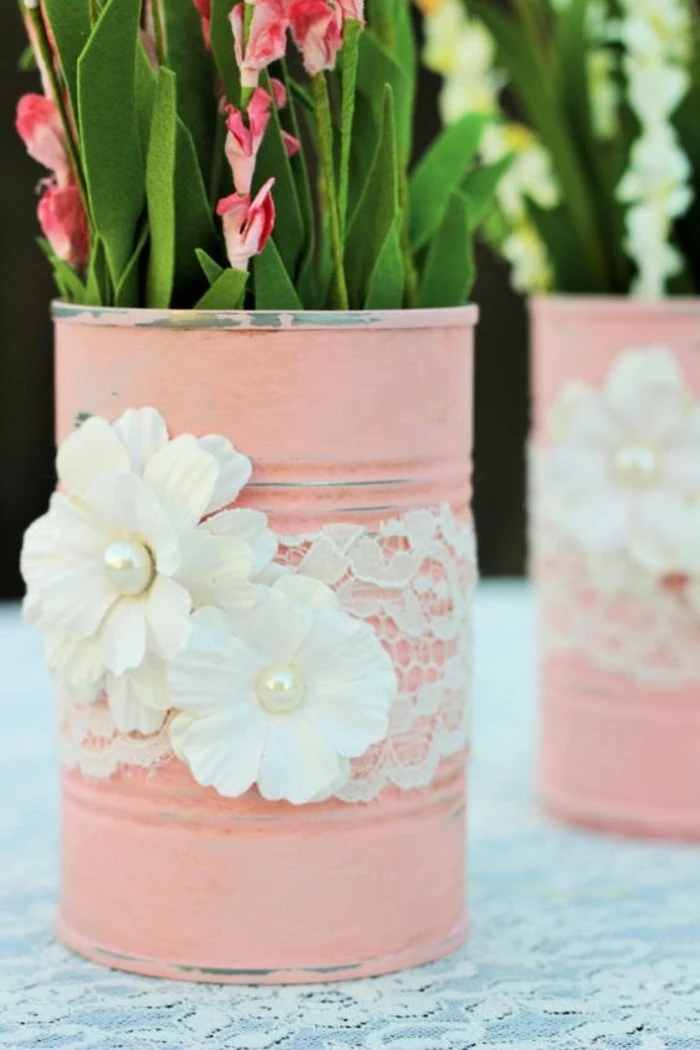
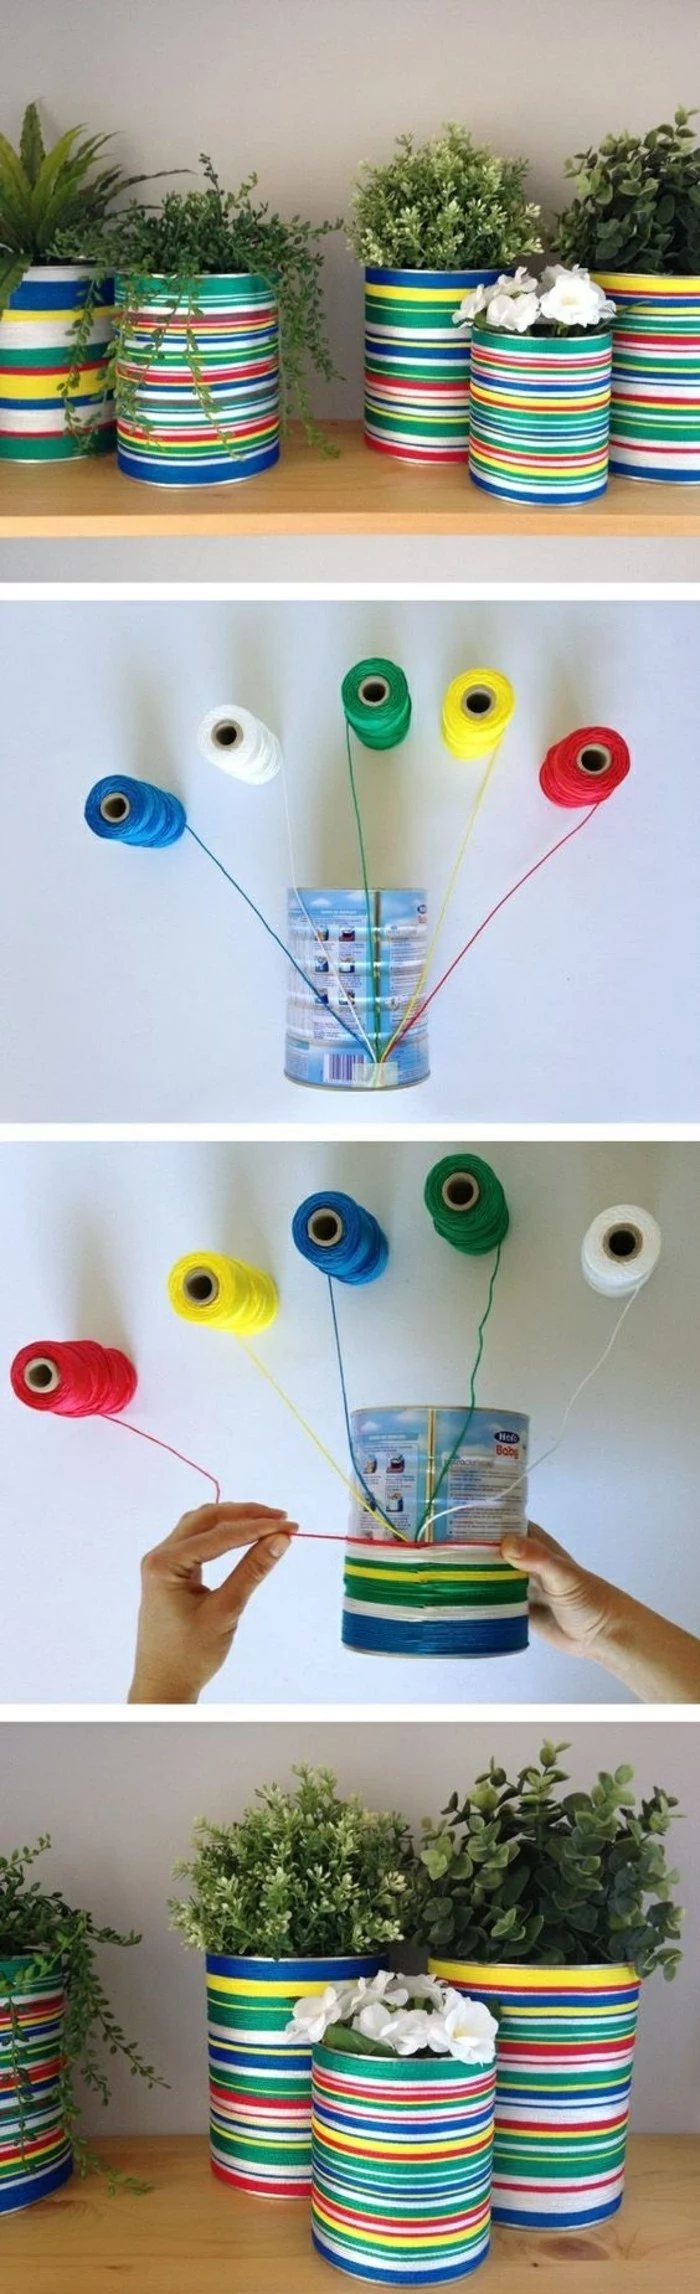
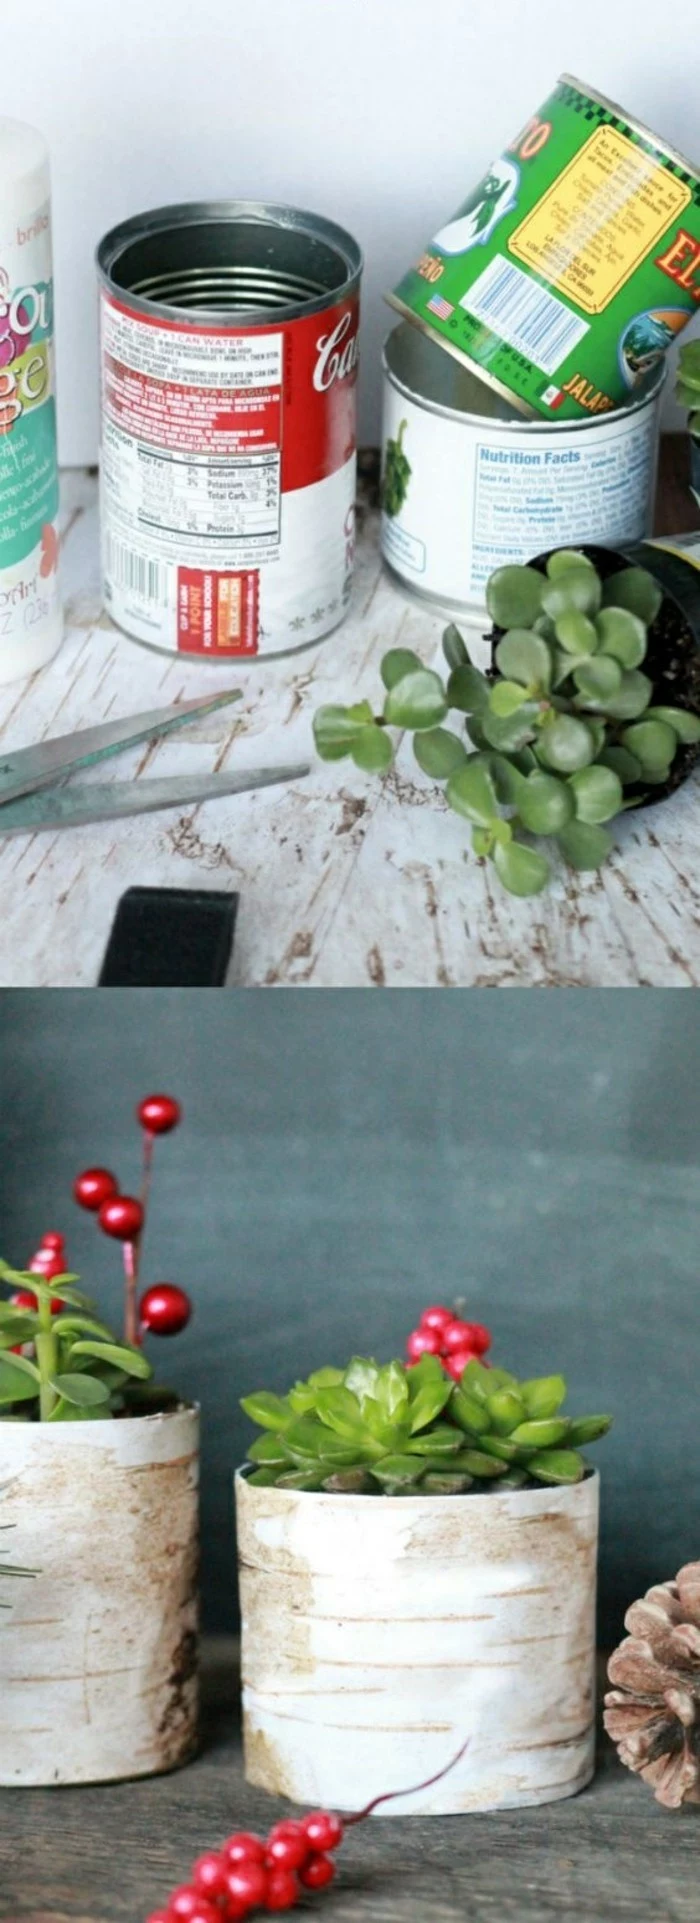
For a chic, rustic look, try combining metal with natural textures. Wrap the can in jute twine, a wide strip of burlap, or even thin sheets of cork. A hot glue gun is your best friend for these projects, allowing you to secure the material quickly as you wrap. The contrast between the cold, smooth metal and the warm, rough natural fiber is visually stunning.
Mistake #1: Skipping Drainage Holes.
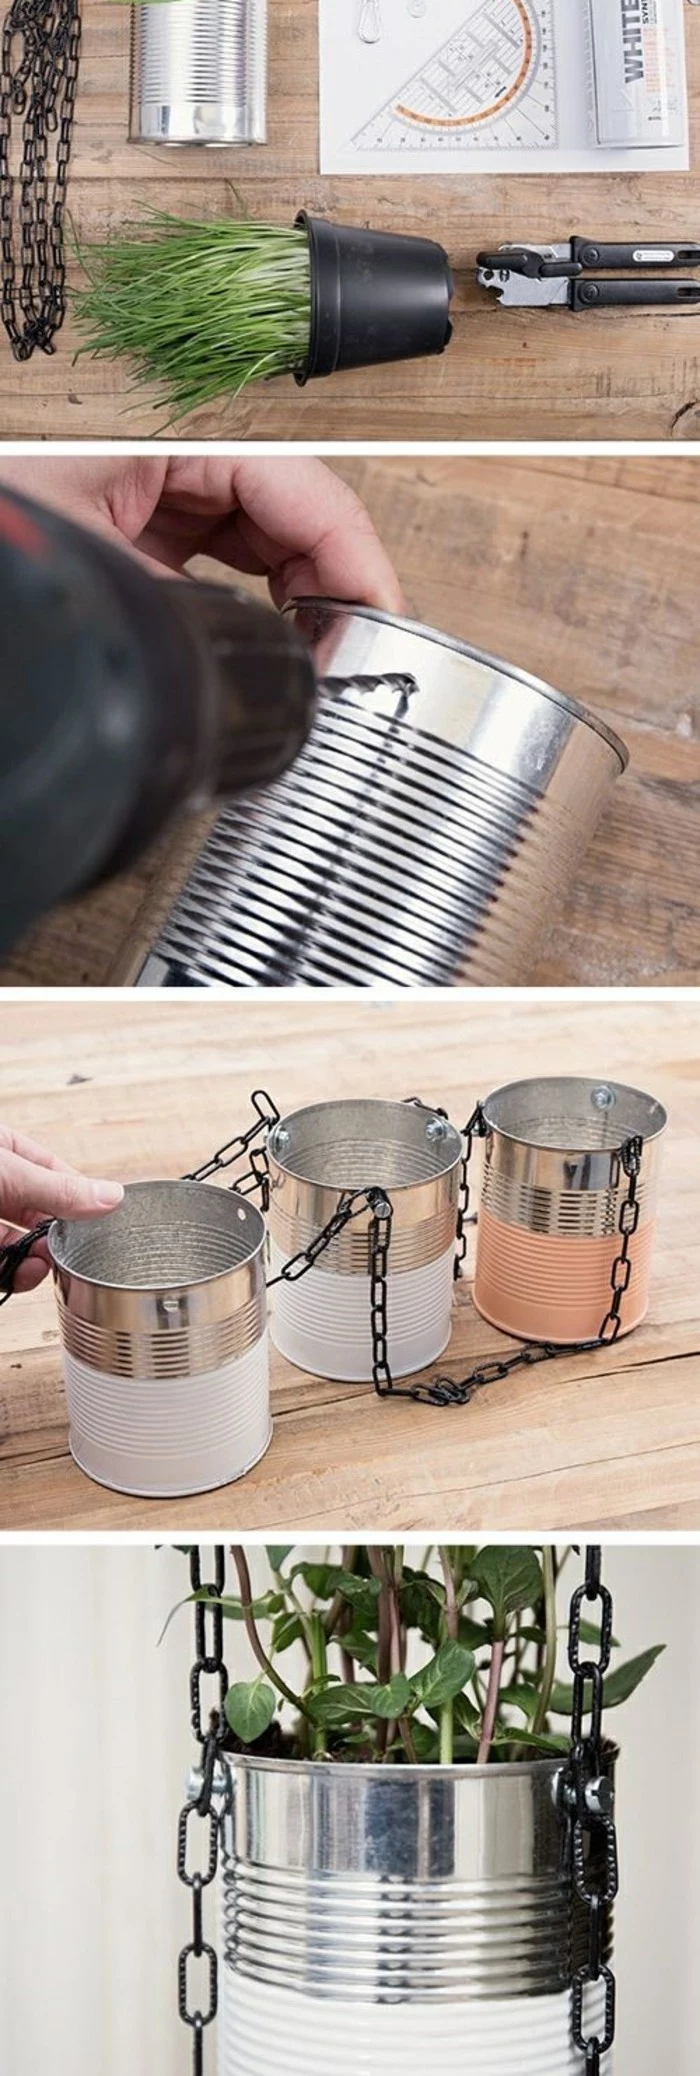
When making a planter, it’s tempting to just drop the soil in and go. But without drainage, water will pool at the bottom, leading to root rot. Simply use a hammer and a thick nail (or a drill) to punch 3-4 holes in the can’s base before you add soil. Your plants will thank you.

Go beyond a simple coat of paint by adding texture. Before your final color coat, apply a layer of textured spray paint, like Rust-Oleum’s Stone Textured Finish. Another easy trick is to mix fine sand or baking soda into your brush-on paint to give it a gritty, earthenware feel. It’s a simple way to add depth and a more organic look to your metal project.
Hot Glue: Perfect for lightweight, porous materials like fabric, ribbon, and twine. Fast-setting but can weaken in direct, hot sun.
E6000 Adhesive: An industrial-strength craft glue. Ideal for permanently bonding non-porous items like glass beads, pebbles, or other metal pieces. It’s waterproof and flexible but requires a longer curing time.
Choose your glue based on what you’re attaching, not just what you have on hand.
- A beautiful, aged, non-rusty finish.
- A deep, mottled, industrial look.
- A unique piece every time.
The technique? A vinegar bath. After stripping any coating from a steel can, soak a paper towel in white vinegar and wrap it around the can. Leave it for several hours. The acetic acid will gently etch the surface, creating a gorgeous, dark gray patina. Rinse and seal with clear varnish once you’re happy with the effect.
The ridged lines on many food cans aren’t a bug; they’re a feature! Use them as a guide for painting perfect stripes or for wrapping twine with even spacing. You can also create a fun sound-maker for kids by running a stick along the ridges. Embrace the built-in texture.
Critical tip: Don’t try to hold a small can in one hand while drilling or punching with the other. The force can easily cause the can to collapse or spin, leading to injury. Secure the can firmly in a bench vise or with a clamp before you apply any real force to it. Safety first!
For a truly unique look, consider what’s inside the can. Painting the interior a bright, contrasting color creates a delightful pop of surprise when someone looks inside your pencil holder or utensil caddy. A flash of neon pink inside a matte black can, or a brilliant gold inside a navy blue one, adds a professional, designer touch.
If your safety can opener leaves the lid attached, don’t discard it! That smooth-edged metal disc is a perfect crafting material. Use it as a base for a custom refrigerator magnet, a plant saucer for a tiny succulent pot, or as a decorative element to be glued onto a larger project.

- Paint peeling after a week.
- Ugly rust spots appearing on outdoor projects.
- A lumpy, drippy paint job.
- Cans that look dented and misshapen.
These common frustrations are almost always caused by skipping prep work. Properly cleaning, priming, and sealing are the unglamorous but essential steps that separate a homemade craft from a handmade treasure.

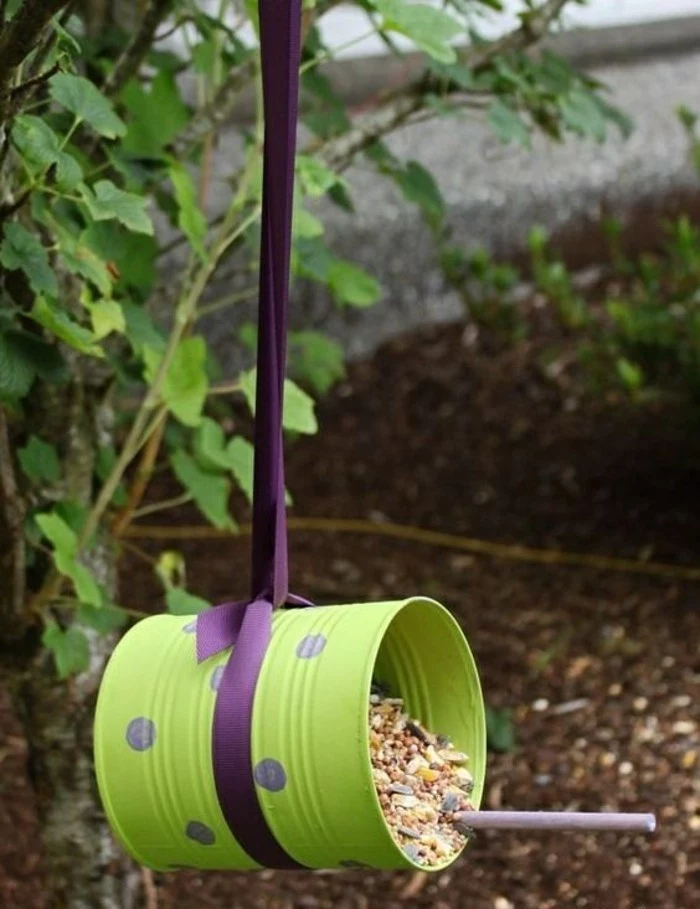
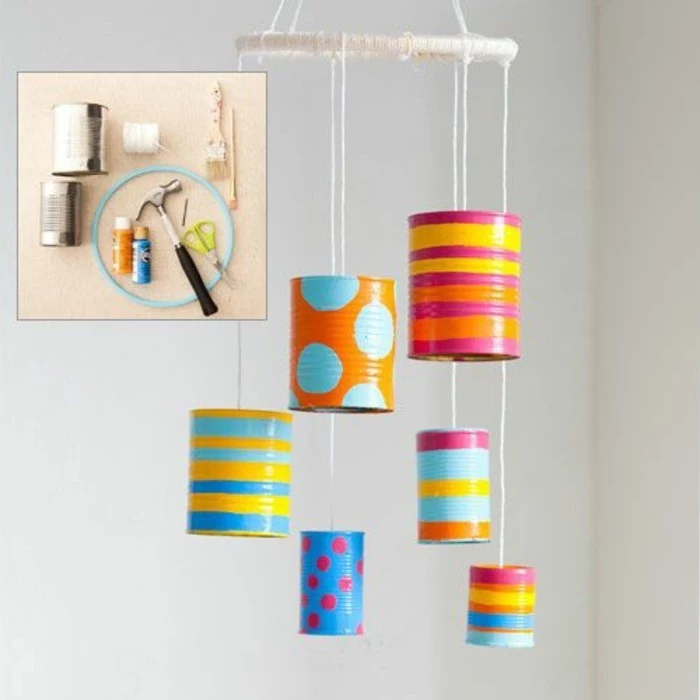
Tin can wind chimes are a classic for a reason. Use different-sized cans to create a variety of tones. You can leave them as-is for a rustic look or paint them in vibrant colors. For the clapper (the part that strikes the cans), consider using a wooden bead, a large metal nut, or even a flattened metal bottle cap for different sounds.
Did you know? The humble tin can is actually made of steel sheet coated with a very thin layer of tin to prevent rusting. This is why they are strong and magnetic.
This steel core is what gives your projects such fantastic durability. Unlike plastic, a tin can planter won’t crack in the frost, and a desk organizer won’t get brittle and snap over time.
How do I cut a window into the side of a can without a Dremel?
Start by drilling a pilot hole large enough to fit the tip of your tin snips. From there, you can carefully cut out your desired shape. For straight lines, use straight-cut snips. For curves, aviation snips (the ones with colored handles) offer much better control and maneuverability. Always file the cut edges smooth!

The industrial-chic trend is perfect for tin can upcycling. Don’t hide the can’s origins—celebrate them!
- Leave the silver interior exposed.
- Use stencils to add bold, black, utilitarian numbers or letters.
- Pair the cans with raw materials like concrete, copper pipe, or reclaimed wood.
Even without a special safety opener, you can make the rim safer. After opening the can conventionally, use a pair of needle-nose pliers to carefully bend the sharp inner edge downward and flatten it against the inside wall of the can, working your way around the entire rim. Then, run a metal file over it to dull any remaining sharpness.


