The Artist’s Guide to Drawing Dragonflies That Look Real
I swear, I spent my first few summers as an artist chasing dragonflies with a sketchbook instead of a net. I’d sit by our local pond for hours, just trying to capture that impossible shimmer and speed of their wings. Honestly, my first drawings were clumsy. They looked more like cartoon helicopters than the elegant predators I was watching. The bodies were just tubes, the wings were flat ovals, and they had zero life to them. The frustration was real.
In this article
It wasn’t until I stopped just looking and started truly seeing that things clicked. I picked up an old insect field guide at a used bookstore, and that was my lightbulb moment. The secret wasn’t some magic pencil or a fancy technique; it was in understanding the creature itself. Anatomy, I realized, is the grammar of realistic drawing.
For years now, I’ve been refining that process, and I can tell you that the first lesson is always the same: respect your subject enough to learn how it’s built. So, let’s go beyond simple shapes and dive into the functional anatomy that makes a dragonfly drawing feel like it could lift right off the page.
Know Your Subject: The Foundation of a Great Drawing
Before your pencil even hits the paper, the most important work happens with your eyes and your brain. A dragonfly is an incredible flying machine, and every single part has a purpose. When you get why a part is shaped a certain way, you can draw it with so much more confidence and accuracy.
The Three-Part Body: Head, Thorax, and Abdomen
Like all insects, a dragonfly’s body is split into three main sections. Nailing the proportions and connection points of these parts is the absolute first step to a believable drawing.
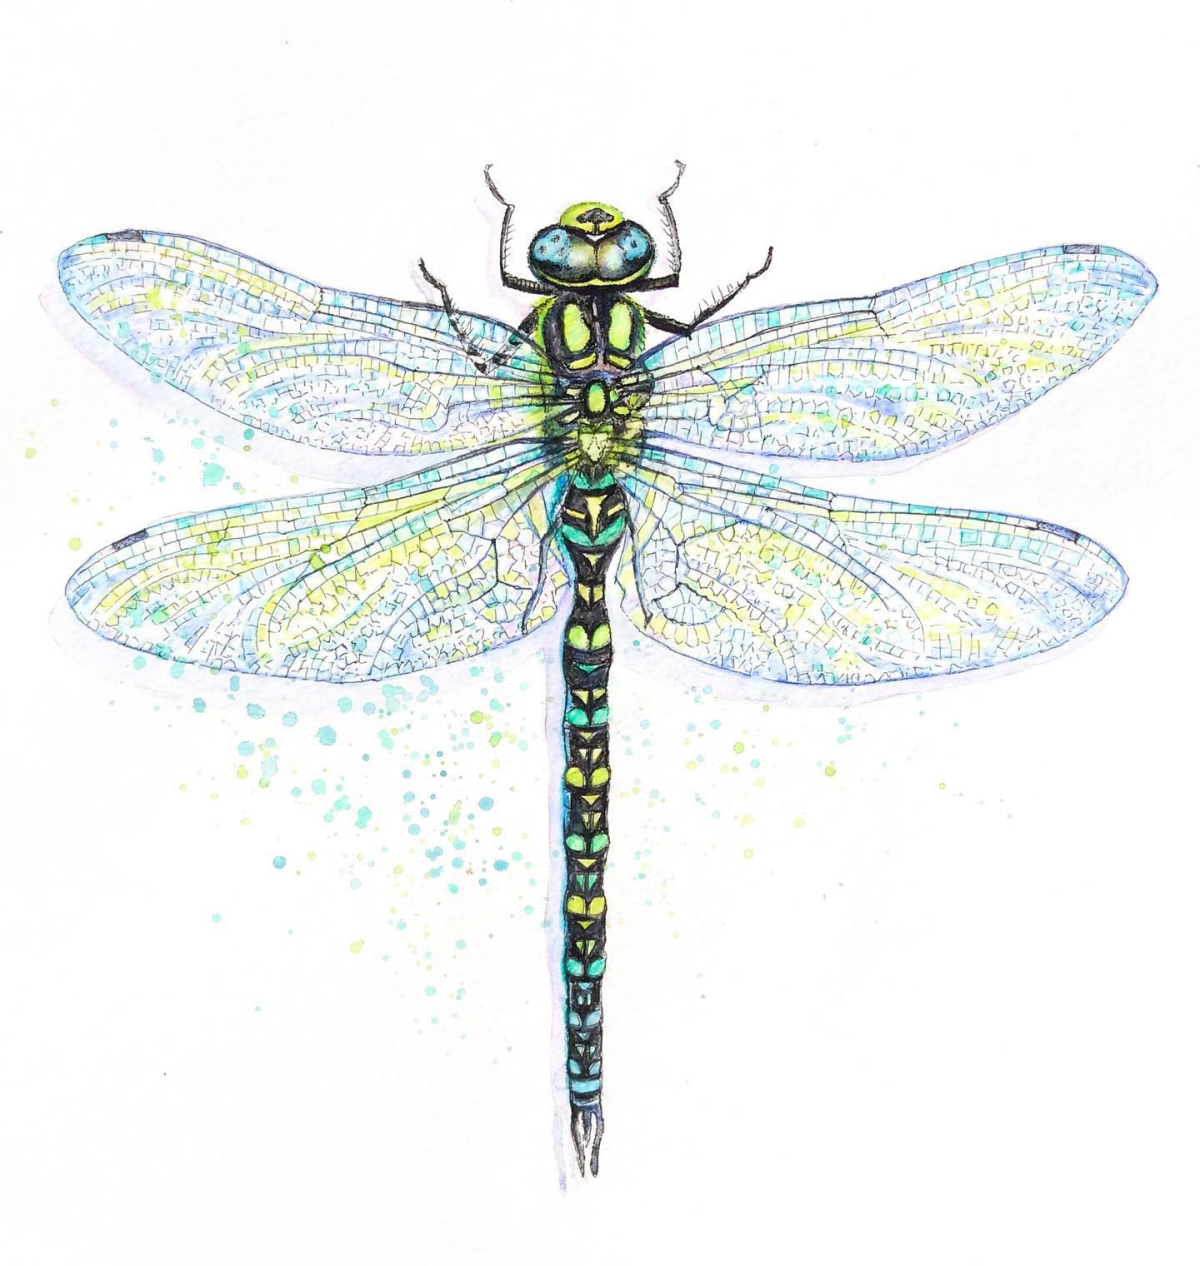
- The Head: This is way more than just a ball on a stick. It’s almost entirely dominated by two massive compound eyes. By the way, here’s a cool little detail to look for. On some types, like the slender Darners, these eyes meet in a seam right on top of the head. On others, like the stout-bodied Skimmers, the eyes touch but are more clearly separated. Getting this right is a small thing that makes a big difference. The head is also super mobile, so showing it at a slight angle from the body can add a ton of life to your drawing.
Did you know? A dragonfly’s head is almost all eye, giving it nearly 360-degree vision. That’s why they’re so incredibly hard to sneak up on! Patience is key if you’re trying to sketch them in the wild.
- The Thorax: Think of this as the engine room. It’s a boxy, muscular section where the legs and wings attach. A classic beginner mistake is drawing it as a simple, soft oval. In reality, it’s robust and angled, packed with powerful flight muscles. When you draw the thorax, really try to feel its sturdiness. This is where all the power comes from.
- The Abdomen: This long, segmented structure isn’t just a tail; it’s used for balance, breathing, and reproduction. It’s not a stiff cylinder, either. It has a natural, gentle curve and taper. I always tell my students to count the segments (there are 10) to get the length right. On males, the final segments often have little claspers, and including small details like that can instantly boost the realism of your work.
A quick note on proportion: The head and thorax together are usually about half the length of the abdomen, sometimes a bit less. A fantastic warm-up is to do a quick gesture sketch focusing only on the size relationship between these three parts. It really trains your eye.
The Magic is in the Wings
Okay, let’s talk about the wings. They’re often the most captivating part of the dragonfly, but also the most intimidating to draw. Their complexity is what makes them beautiful, but it’s also what trips most artists up. The key is to simplify without losing the structure.
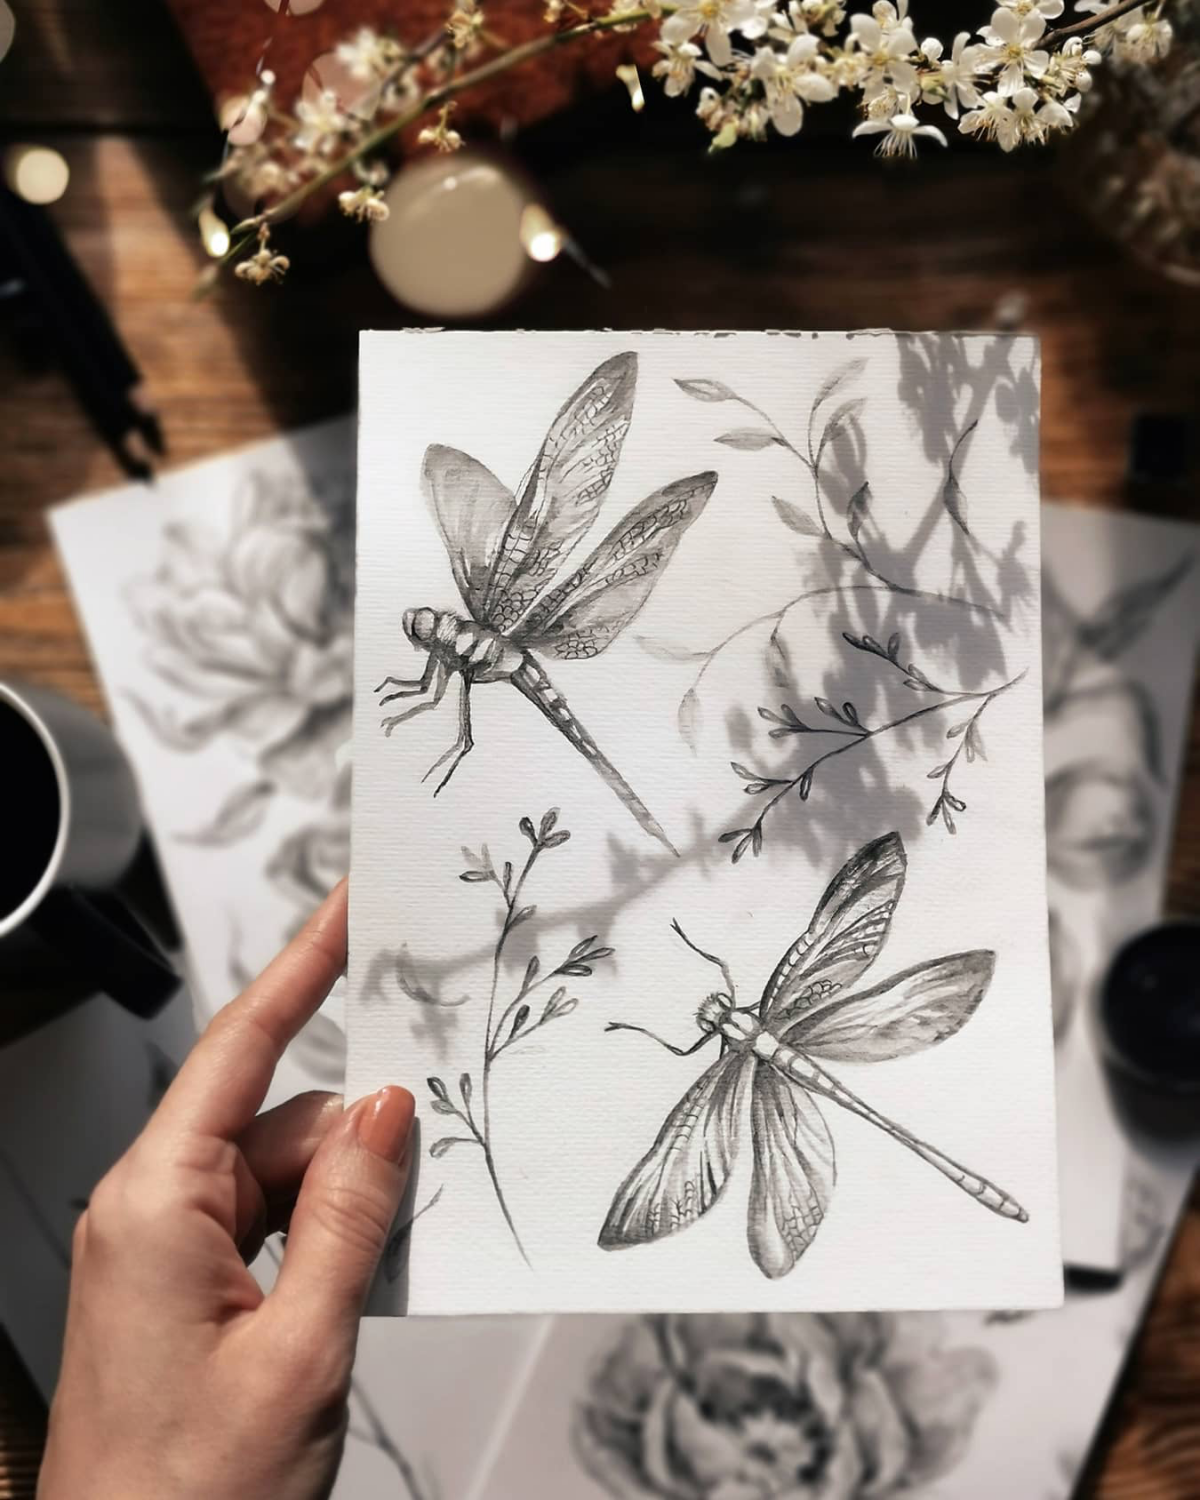
A dragonfly has two pairs of wings—the forewings (front) and hindwings (back)—and they don’t move in perfect sync. The hindwings are usually a bit shorter and broader at the base than the forewings, which gives them extra lift and agility. Drawing all four wings as identical copies is a tell-tale sign of a beginner. So, always remember to show that subtle difference in their shape and size.
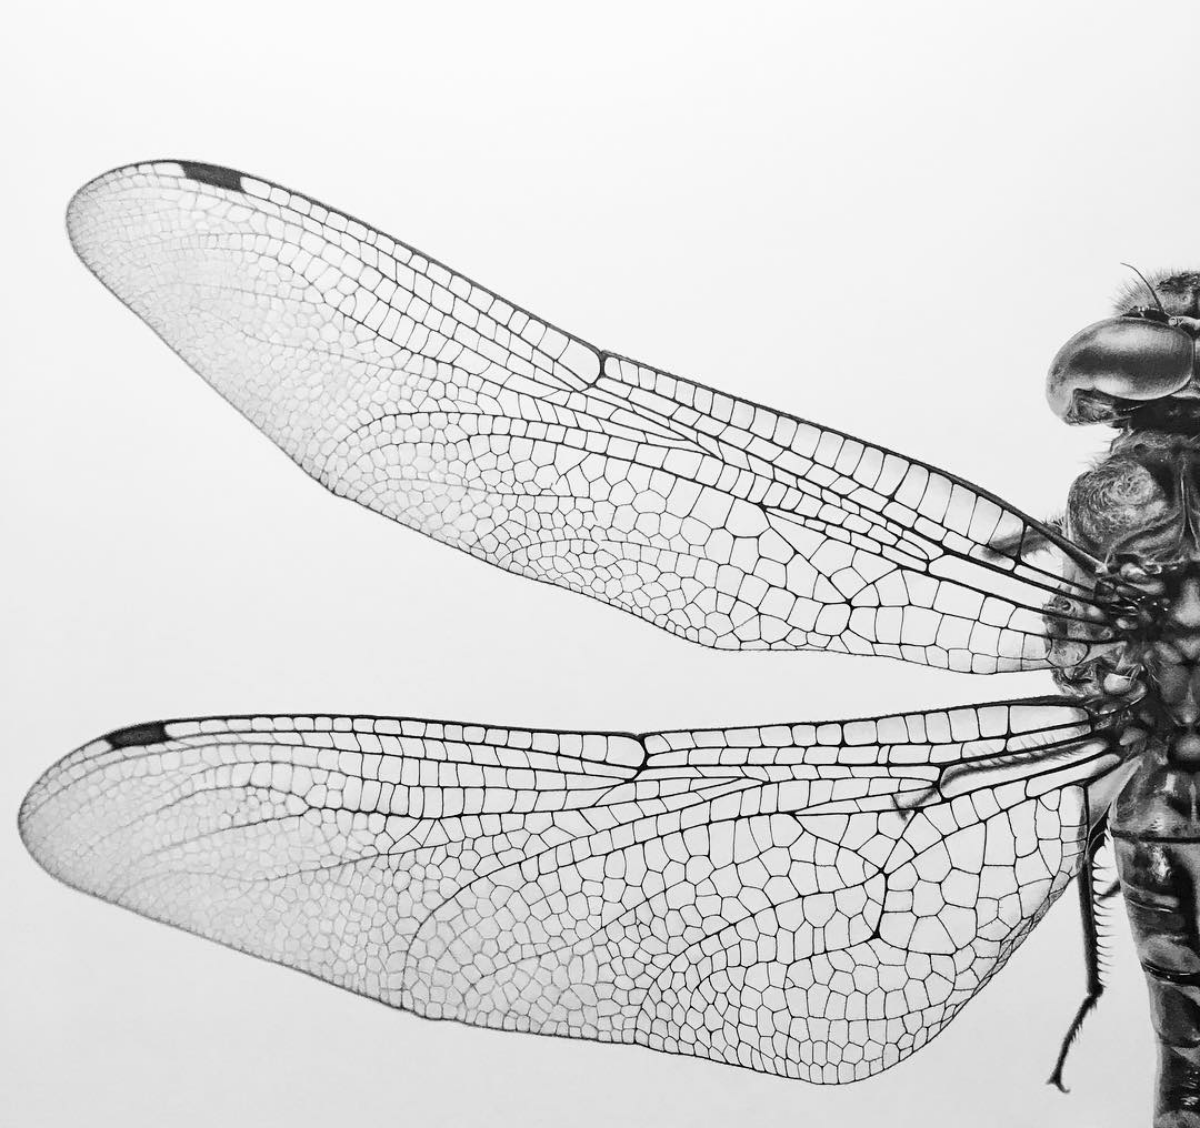
That intricate, crackled-glass pattern on the wings is called venation. It looks random, but it’s a precise system of veins that provides strength. Here’s the good news: you do not need to draw every single cell. That would drive you crazy and make the drawing look overworked. Instead, just focus on the main structural veins:
- The Costa: This is the strong leading edge of the wing. Draw this first to establish the wing’s overall shape and gesture.
- The Nodus: Look for a small notch or ‘joint’ along that leading edge, about halfway down. It’s a key landmark.
- The Pterostigma: This is that small, colored, and slightly thickened cell near the tip of each wing. It acts as a counterweight to prevent the wing from fluttering out of control at high speeds.
Lesser-known trick: The Pterostigma is your secret weapon. Seriously. It’s the single fastest way to make your drawing more believable. Adding that little colored box near the wingtip takes five seconds and adds instant realism.
When you’re ready to draw the veins, start with the main ones, almost like you’re drawing the big branches of a tree. Then, use a much lighter touch and finer lines to just hint at the smaller, secondary veins. Your goal is to create the impression of complexity, not a perfect replica. The viewer’s eye will fill in the rest.
Gearing Up: My Go-To Drawing Tools
You really don’t need a fancy studio full of expensive gear. To be frank, a few reliable tools are all you need. Quality over quantity is always the rule here.
- Pencils: I lean on mechanical pencils for my initial linework. A 0.5mm lead is great for general sketching, but a 0.3mm is a game-changer for the fine details in the wings. For shading, I switch to traditional wood-cased pencils. A basic set ranging from a hard 2H (for light construction lines) to a soft 4B (for rich shadows) is perfect. You can find a good starter set from a brand like Staedtler for about $15 to $25 at any art supply store.
- Paper: The paper you choose makes a huge difference. For detailed graphite, I love a smooth hot-press paper like Bristol board. It lets you create crisp, clean lines. If I’m planning to add watercolor, I’ll grab a cold-press watercolor paper (look for 140 lb. or 300 gsm), which has more texture or ‘tooth’ to hold the paint. For just sketching in the field, any hardbound sketchbook with decent paper will do the job.
- Erasers: I always have two on hand. A kneaded eraser is a must-have. You can mold it into a fine point to lift out tiny highlights or just dab it to lighten an area without roughing up the paper. For really precise edits, a pen-style detail eraser is invaluable.
- Ink and Color: When I want a permanent line drawing, I use archival ink fineliners. A set with nibs from 0.05mm to 0.5mm gives you a great range. For color, professional-grade wax or oil-based colored pencils are worth the investment (think Prismacolor or Faber-Castell). They let you layer and blend to capture that amazing iridescent sheen on a dragonfly’s body.
Quick Tip: How to Fake Iridescence with Colored Pencils
That metallic, color-shifting shimmer seems impossible to draw, but it’s easier than you think. Here’s a simple method:
- Base Layer: Start by laying down a light, even layer of a metallic-like color, such as a shimmering blue or a light green. Don’t press too hard.
- Shadow Color: Gently shade one side of the body part with a contrasting dark color, like a deep purple or a dark green. This creates the illusion of a color shift.
- Burnish and Blend: Now, take a white or cream-colored pencil and go over both colors with heavy pressure. This is called burnishing. It blends the colors together, smoothes out the texture, and creates that magical, glossy sheen.
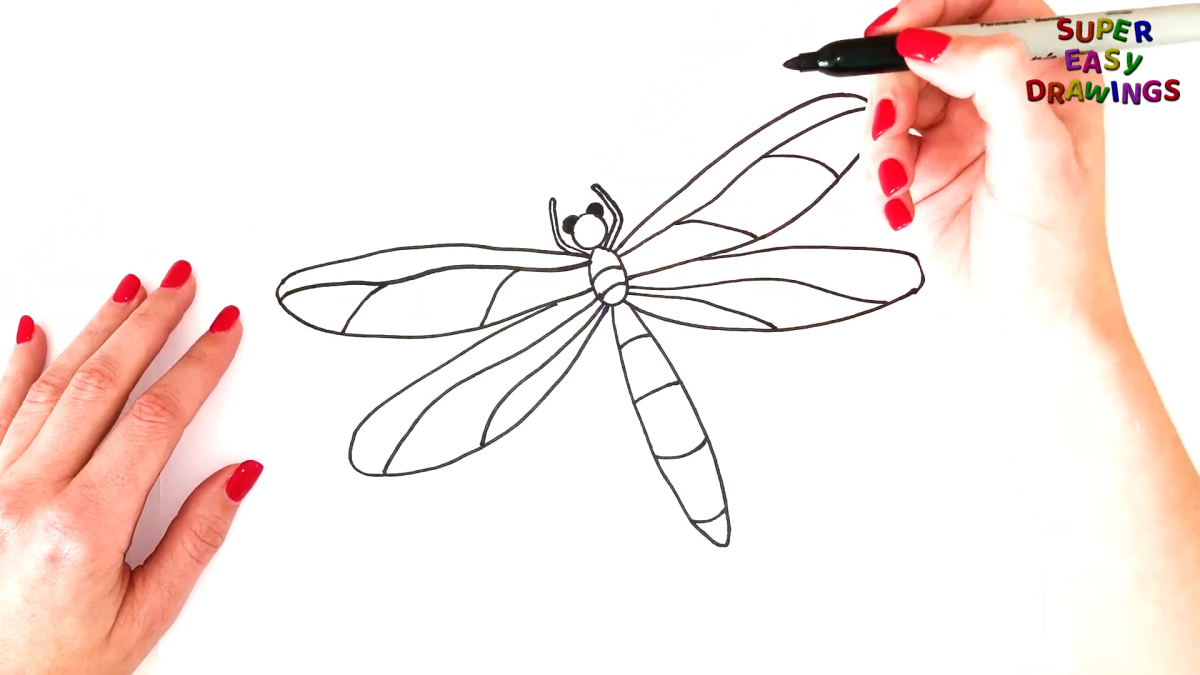
Let’s Draw One: A Step-by-Step Method
This is the process I use in my workshops. We’ll draw a dragonfly perched on a reed—a classic pose that’s great for practice.
- Gesture and Placement: Before any detail, capture the energy. Use a light 2H pencil to draw a single ‘line of action.’ Is the body curved? Straight? Tilted? This one line establishes the entire pose. Also, lightly sketch in the reed it’s resting on to compose your drawing on the page. Try this now: Find a dragonfly photo online and spend just two minutes trying to capture its ‘line of action.’ That’s it! This one exercise will massively improve your ability to capture poses.
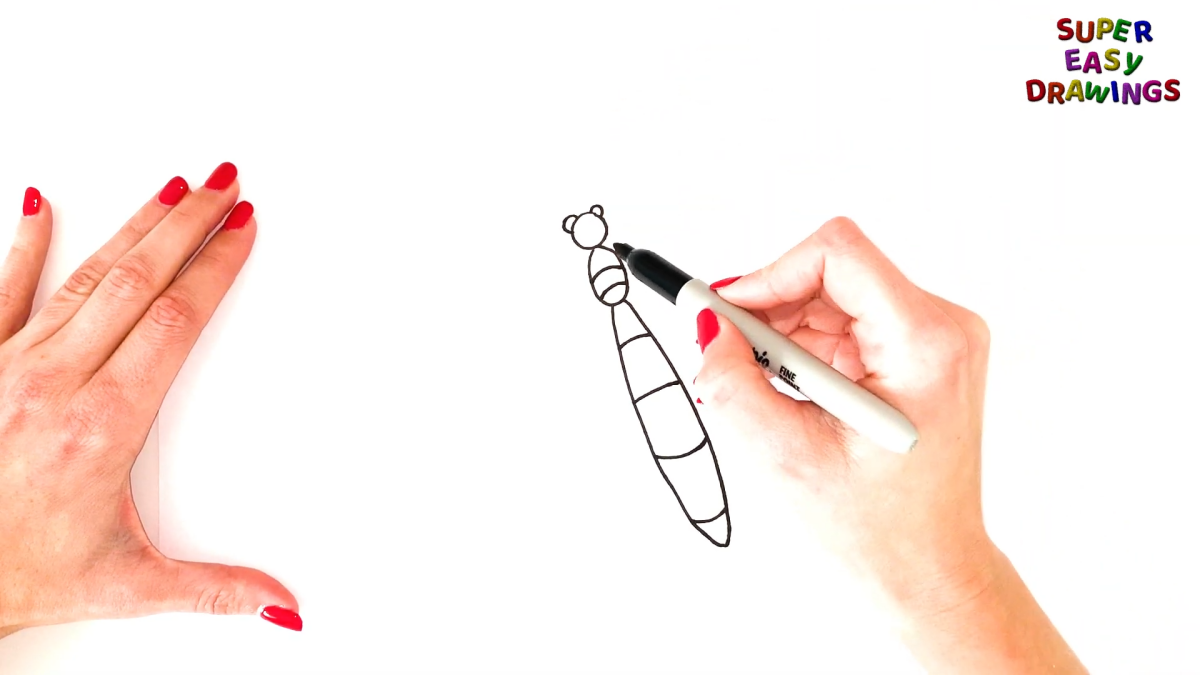
- Blocking in Major Forms: Using that gesture line as a guide, block in the three main body parts with simple shapes: a sphere for the head, a boxy oval for the thorax, and a long, tapered cylinder for the abdomen. These are your construction lines, so keep them light! This is the easiest stage to check your proportions and make corrections.
- Refining the Anatomy: Now, let’s turn those blobs into a dragonfly. Refine the head, defining the huge compound eyes. Connect it to the thorax with a small ‘neck.’ Shape the thorax, thinking about its muscular, angled form. Add the segments to the abdomen with light, curved lines. A common pitfall is drawing ‘noodle legs.’ Remember they have joints! Think of drawing a pointy ‘Z’ shape instead of a simple curve.
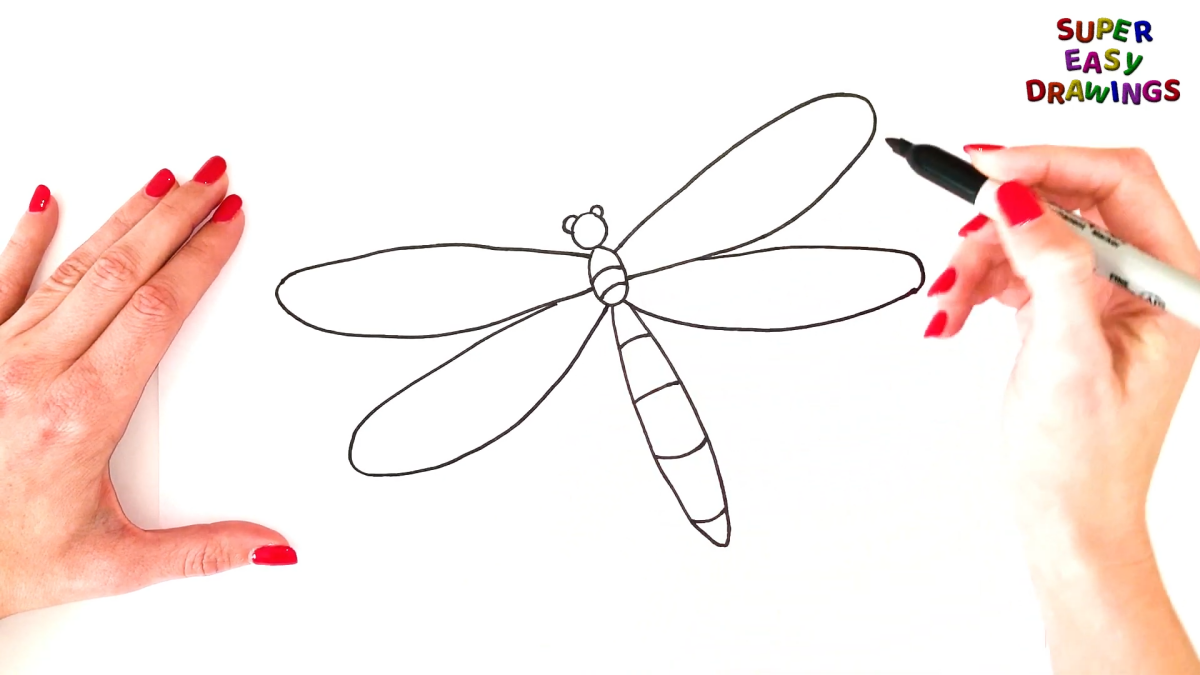
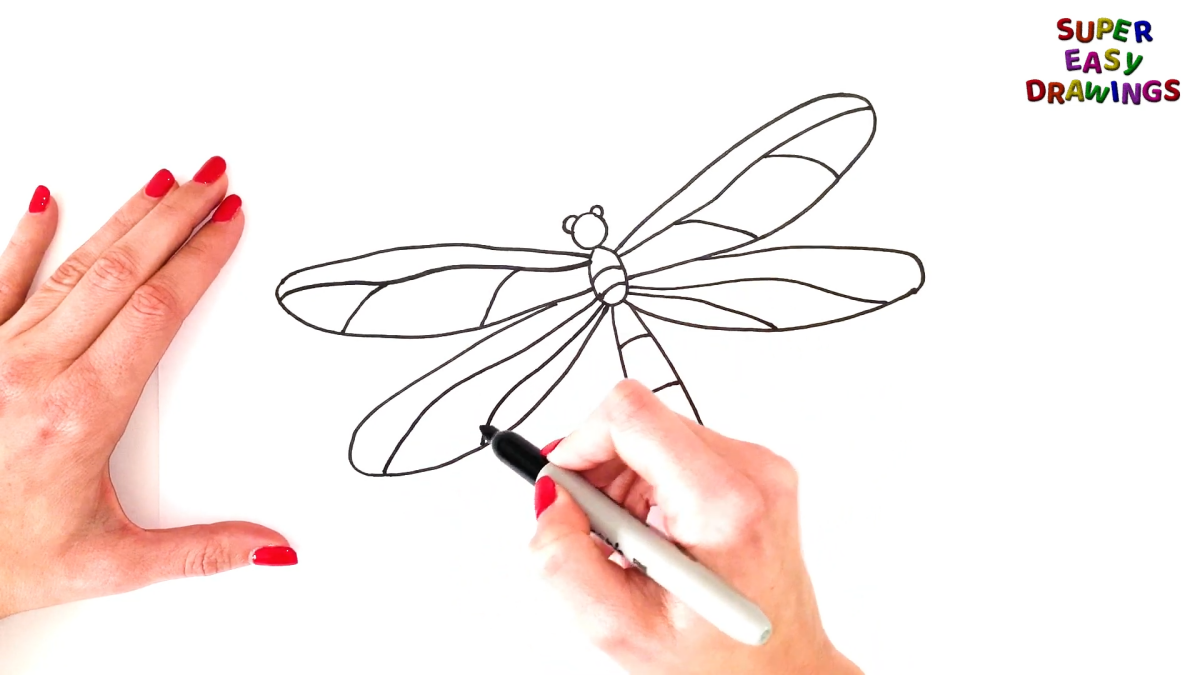
- Placing and Shaping the Wings: This is a critical step. Lightly draw the leading edge (the costa) of all four wings. Remember, the hindwings are shorter and broader at the base. Pay close attention to the angles and perspective. The wings on the far side will look a bit smaller—getting this right is key for a 3D look. Add the pterostigma near the tip of each wing as your anchor point.
- Adding Detail: With the structure solid, you can have fun with the details. Draw the main veins in the wings, then use a lighter touch to suggest the finer network. Move to the body and use a softer pencil (like a 2B or 4B) to add shading, especially where the legs meet the thorax and the head meets the body. This creates depth and form.
- Final Touches: This is where it all comes to life. Darken your shadows to create strong contrast. Use your kneaded eraser to lift out some bright highlights on the eyes and the shiniest parts of the body. If you’re adding color, now’s the time to start with light washes or layers, building them up slowly.

In the Field vs. at Your Desk
Your approach will definitely change depending on where you’re working. Both sketching from life and working from photos in a studio are valuable, and they really inform each other.
Field Sketching: The Dragonfly Spotter’s Guide
Drawing a live, moving subject is a challenge, but it teaches you more about gesture and behavior than any photo ever could. To get started, you need to find them first!
- Where to Look: Your best bet is on sunny, calm days near freshwater. Think ponds, lakesides, marshes, and slow-moving streams.
- How to Approach: Move slowly and deliberately. Dragonflies have amazing eyesight and are sensitive to sudden movements. Often, the best strategy is to find a comfortable spot and just wait for them to come to you. They are creatures of habit and will often return to the same perch.
- What to Bring: My field kit is minimal: a sketchbook, a mechanical pencil, a kneaded eraser, and sometimes a small set of travel watercolors. The goal is to work fast and capture quick impressions.
Drawing from Photos (Without Making it Look Flat)
Most of us will start by drawing from photos, and that’s perfectly fine! The trap is copying the photo exactly, which can lead to a stiff, lifeless drawing. The trick is to use the photo as a reference for anatomy, not as a blueprint. Start with a dynamic gesture line (like in Step 1) even when using a photo. Exaggerate the curve of the abdomen slightly or tilt the head a bit more. This injects life back into the drawing that a flat photo might have lost.
A Few Helpful Resources
Looking for great, high-quality reference photos? The website BugGuide.net is a fantastic, non-commercial resource run by insect enthusiasts. For art supplies, I often order from online retailers like Blick Art Materials, but your local art store is always a great place to start and get advice.
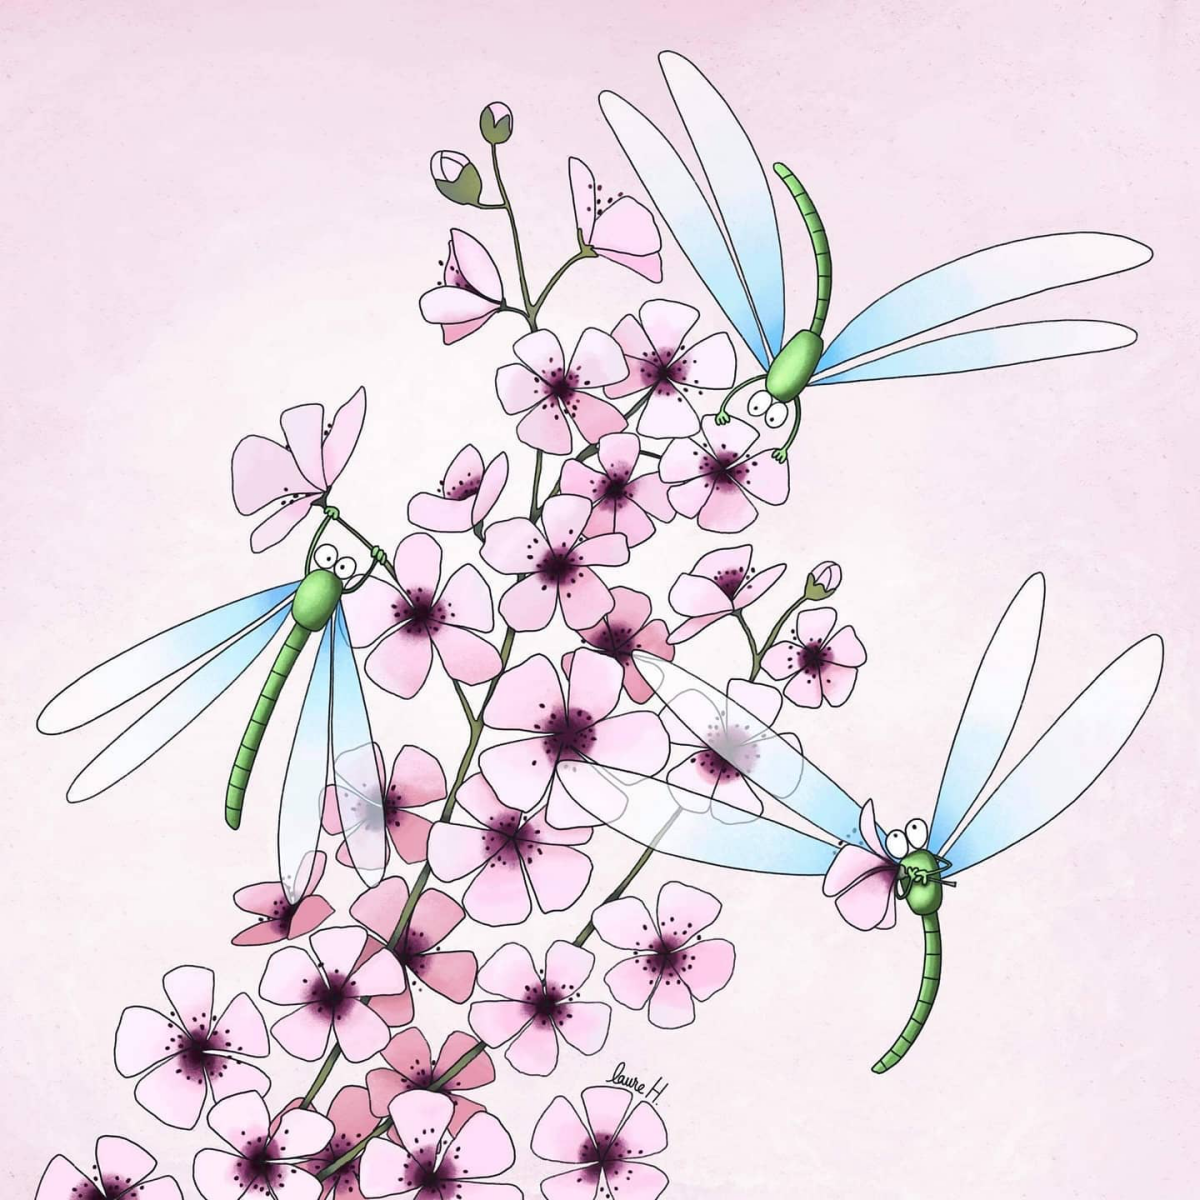
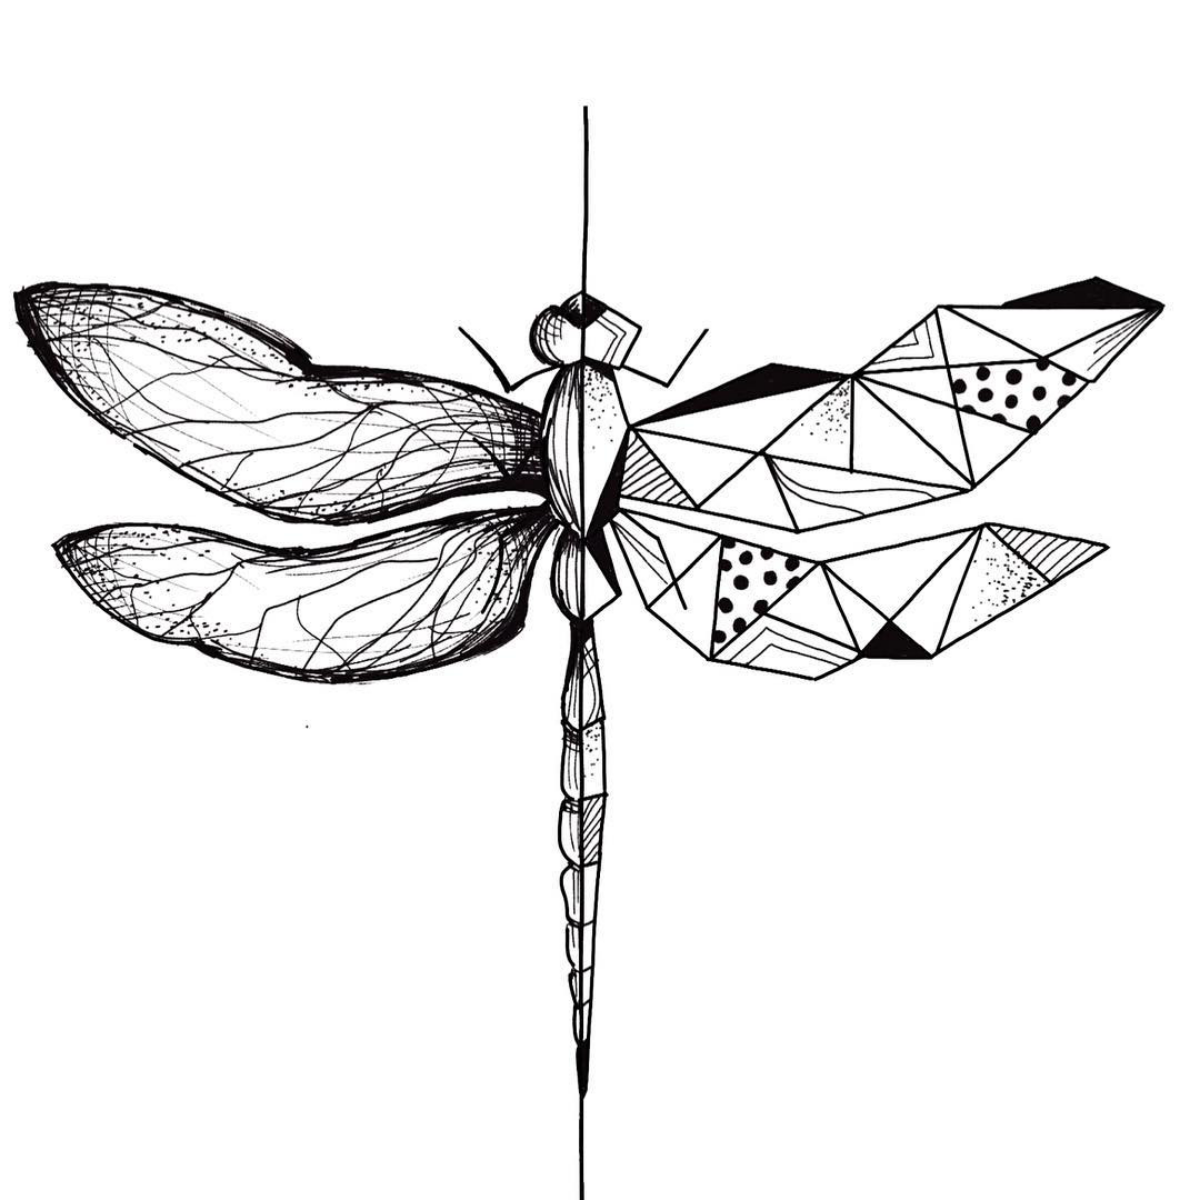
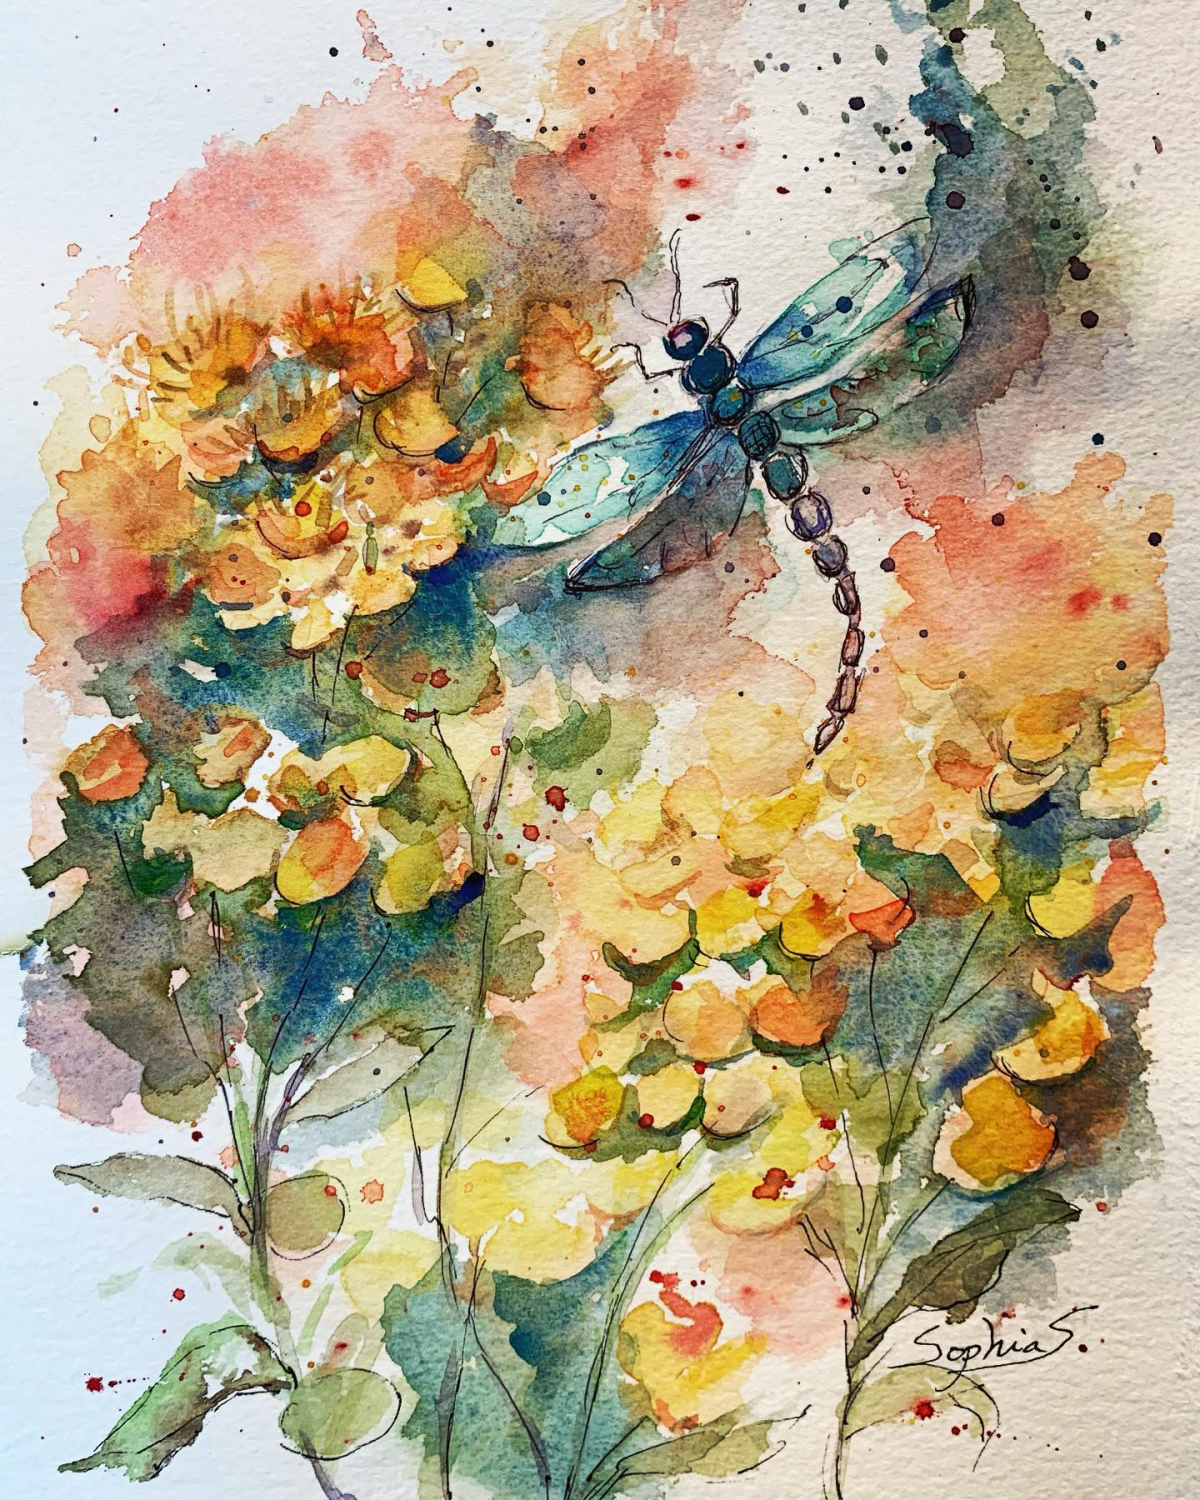
Galerie d’inspiration

The right tool for the job: A delicate subject demands a delicate touch. For the intricate veins in the wings and the fine hairs on the legs, a needle-sharp line is key. A set of Sakura Pigma Micron pens, especially in sizes 005 and 01, provides crisp, permanent lines that won’t smudge when you add watercolor. If you prefer graphite, a mechanical pencil with 0.3mm 2H lead offers incredible precision without needing constant sharpening.
The dragonfly, a favorite motif of Art Nouveau artists like René Lalique, symbolized the fusion of nature, speed, and delicate beauty at the turn of the 20th century.
How do I capture that impossible, metallic shimmer on the body and wings?
The secret is in the paint, not just the technique. While wet-on-wet watercolor washes create a good base, a touch of specialized pigment makes all the difference. Try adding a tiny dab of Daniel Smith’s Duochrome or Iridescent watercolors to your mix. Applied sparingly over a dry base color, these paints catch the light and mimic that magical, color-shifting effect that makes a dragonfly so mesmerizing.
A common trap: Drawing the four wings as perfect, symmetrical mirror images. While their structure is similar, they rarely appear that way to the observer. To add dynamism, remember that the wings operate independently. Overlap them slightly, draw the far-side wings a little smaller to suggest perspective, and vary the angles to show they are in motion or at rest on an uneven surface. This subtle asymmetry is the key to a drawing that feels alive.
Inspired to do some field sketching? Your local pond is your best studio, but be prepared. Your dragonfly observation kit should include:
- A pair of binoculars to observe details from a distance without scaring them off.
- A sketchbook with smooth paper, like a Moleskine Art or a Stillman & Birn Zeta series, that can handle both pencil and light ink washes.
- A camera with a good zoom lens for capturing reference photos of wing patterns and posture.
- Patience. Lots of it.
- Create the illusion of speed and lightness.
- Suggest intricate, natural complexity.
- Avoid a heavy, overworked look.
The secret? Suggestion over replication. A dragonfly’s wing venation is incredibly dense. Instead of trying to draw every single cell, focus on rendering the main structural veins accurately. Then, use light, loose stippling or cross-hatching to suggest the texture of the smaller cells in between. This approach gives the impression of detail without overwhelming the drawing.