Forget the Fruit Bowl—Here’s How to Draw a Pineapple That Looks Real
I remember, early in my art training, an instructor put a single pineapple on a stand in the middle of the room. We all thought we were about to start a simple still life. We were wrong. For an entire week, we weren’t allowed to draw. We just had to look.
In this article
We measured the angles of the spirals. We watched how light glanced off the waxy tips of the leaves. We even touched the rough, sharp skin. Honestly, that one pineapple taught me more about form, texture, and light than a dozen apples ever could. It’s a beautifully complex subject that forces you to slow down and really see what’s in front of you.
So, this isn’t going to be one of those connect-the-dots drawing tutorials. Instead, I want to walk you through the way a pro approaches a subject like this. We’ll break down its structure, figure out how light works on its weird surfaces, and build a drawing that feels like you could pick it up. This is how you level up from just copying something to truly understanding it.
First, What Are We Even Looking At?
Before you even think about picking up a pencil, a good artist gets to know their subject. A pineapple’s shape isn’t random; it follows a cool set of rules. Knowing them is the secret to a drawing that feels believable.
The Body is a Bunch of Berries
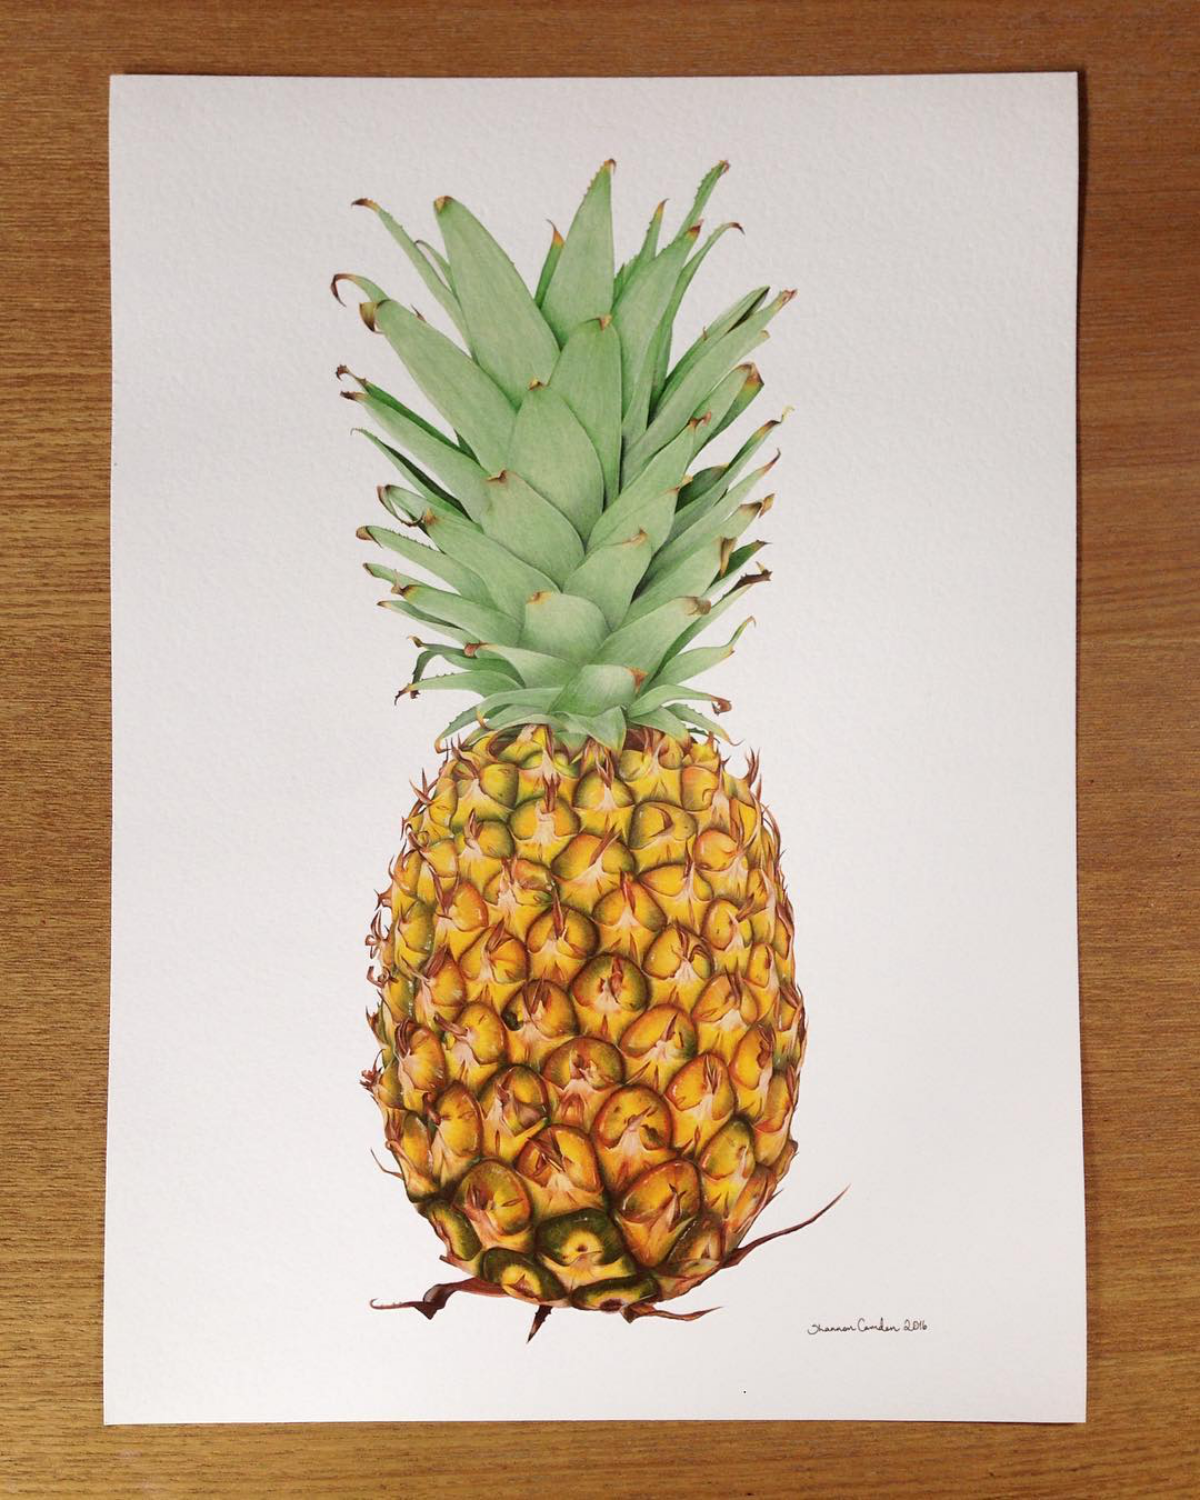
Here’s a fun fact: a pineapple is actually a bunch of individual berries that have all fused together. Each of those diamond-shaped bumps on the skin is technically its own little fruitlet. This is key! They aren’t just a flat pattern on a cylinder. They’re slightly rounded forms arranged in a stunning mathematical spiral.
If you look closely, you’ll see the spirals go in two different directions. You don’t need to count them, but just recognizing that they exist and that they curve around the body is what will stop your drawing from looking like a simple grid. The main body itself is an ovoid—kind of like an egg that’s been stretched out, usually a bit wider at the bottom.

The Crown is a Spiky Star
The leafy top is called the crown, and these leaves have attitude. They aren’t soft and floppy. They’re thick, waxy, and often have sharp little teeth along the edges. They all sprout from a central point, with the smaller, newer leaves standing straight up in the middle and the older, larger ones curving down and outward. The secret to making the crown look full and three-dimensional is all in the overlap. Think of them as individual, stiff blades, and draw them crossing over and under each other.
By the way, not all pineapples look the same. The kind you usually find at the grocery store might be tall and cylindrical, while others are more squat and reddish. Take a second to notice the unique personality of the one you chose. Does it lean a little? Is the crown huge or small? Capturing these little quirks is the first step toward a drawing with character.
Your Drawing Toolkit (The Under-$25 Starter Kit)
The right tools definitely make the job easier, but you don’t need to break the bank. You can get a fantastic starter kit with everything you need for under $25 at a craft store like Michael’s or online. It’s not about having the most expensive gear; it’s about knowing what to do with it.
Here’s what I’d put in your basket:
- A Few Graphite Pencils: Pencils come in different hardness levels. For this project, you really only need a few. A 2H pencil is hard, which means it makes light lines that are easy to erase—perfect for your first rough sketch. An HB pencil is your jack-of-all-trades, great for defining your lines. And a couple of soft pencils, like a 2B and a 4B, are your shading powerhouses for creating those deep, rich shadows.
- The Right Paper: For graphite, you want paper with a little texture, or “tooth.” A basic drawing pad (around 130 gsm or higher) is perfect. It has enough grit to grab the graphite, which helps you build up dark values. I’d grab something like a Canson or Strathmore pad.
- A Kneaded Eraser: This is an artist’s best friend. It’s a soft, putty-like eraser that you can mold into any shape. It’s a game-changer for lifting highlights without smudging.
- Blending Stumps: These are basically tightly rolled paper sticks. They let you blend and smudge your graphite with precision, way better than using your finger (which can leave oils on the paper that you can’t erase later).
Quick Tip: A kneaded eraser is a tool, not just a mistake-fixer. To use it for creating highlights, don’t rub! Shape the eraser into a sharp point or a thin edge, press it firmly onto the graphite, and lift straight up. It’s more of a blotting motion that pulls the graphite off the page cleanly.
Before You Start: A Warm-Up & Common Pitfalls
Jumping into the full pineapple can feel a little intimidating. So before you commit, let’s do a quick warm-up and talk about a few common mistakes to avoid.
A 15-Minute ‘Quick Win’ Exercise:
Just focus on a small section. Try drawing just three or four of the leaves in the crown, paying close attention to how they overlap. Or, try to perfectly shade one single fruitlet on the body, capturing its highlight and shadow. This little exercise builds confidence and gets your eyes and hands warmed up.
Heads Up! Watch Out For These Common Mistakes:
- The Flat Grid: This happens when you draw the spiral lines straight instead of curving them around the body of the pineapple. Remember, it’s a rounded object, so your lines need to follow that curve!
- The Floating Pineapple: If you don’t ground your subject, it will look like it’s floating in space. The trick is to add a dark cast shadow right at the base where the pineapple touches the table.
- Murder by Blending: It’s so tempting to blend everything until it’s perfectly smooth, but don’t do it! A pineapple has a rough, sharp texture. Over-blending will kill that effect. Let some of those gritty pencil marks show through.

Let’s Draw: From Big Shapes to Fine Details
Alright, let’s get started. For a beginner, a detailed drawing like this can take a good 2-4 hours, so put on some music, get comfortable, and enjoy the process. We’ll work from big general shapes to small details.
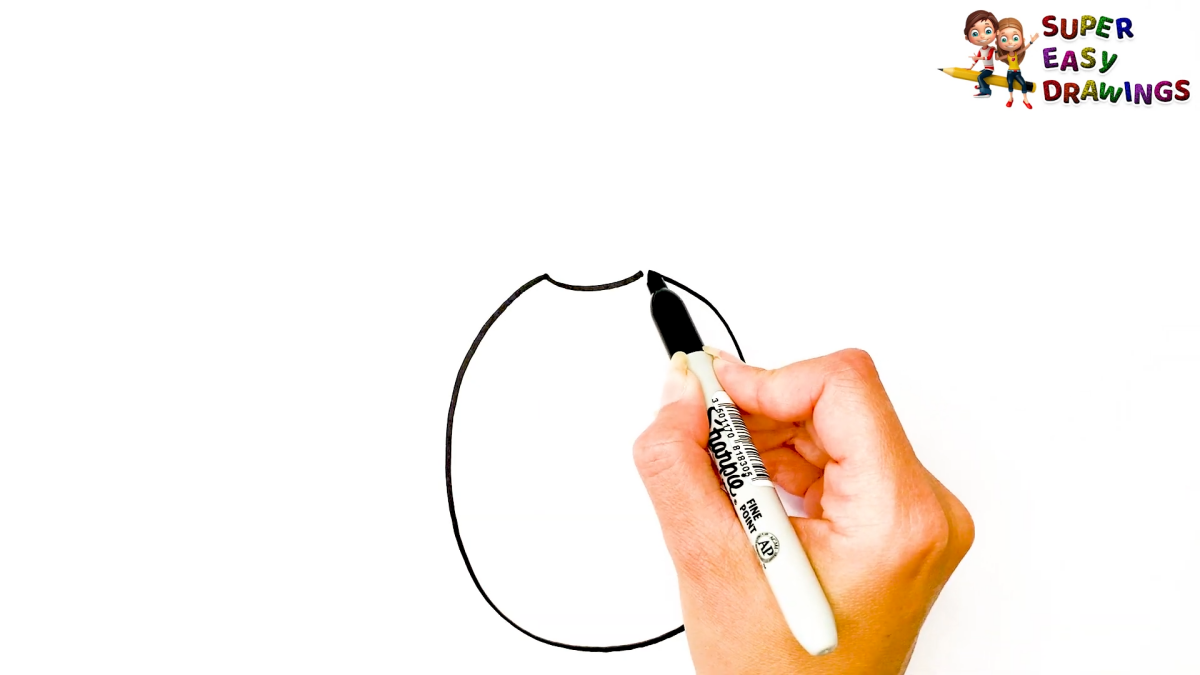
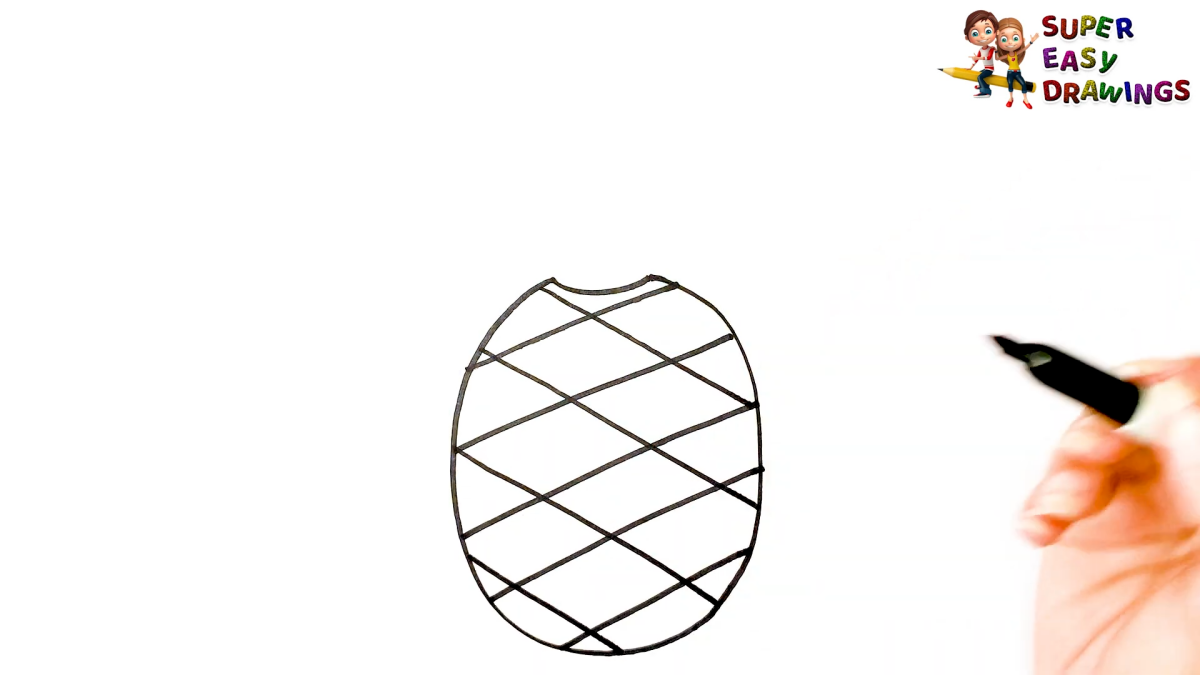
Step 1: Get the Basic Shape Down
First, set up your light source. A simple desk lamp placed about 3 feet away and slightly to one side is perfect. This will create strong, clear shadows that are easy to see and draw.
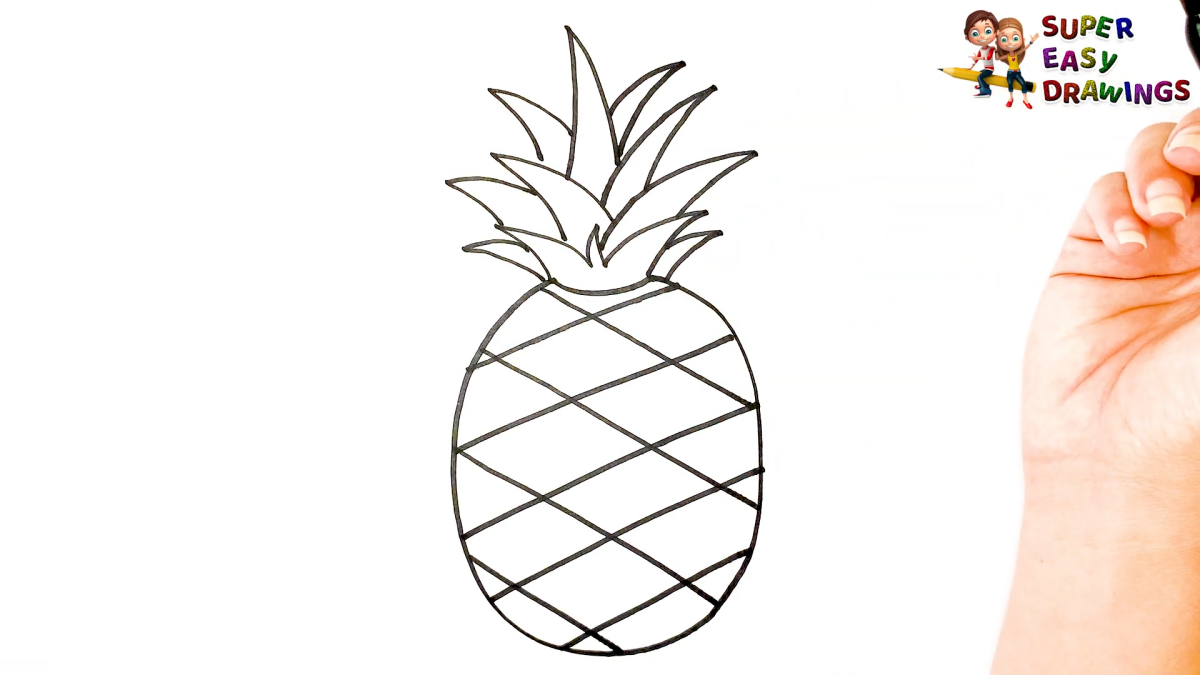
Now, grab your 2H pencil and lightly sketch a large oval or cylinder for the body. Don’t press hard; these are just guide lines. Then add a smaller, tapered shape on top for the base of the crown. Check your proportions. Is the crown taller than the body? Is it wider? Fix it now while it’s still easy.
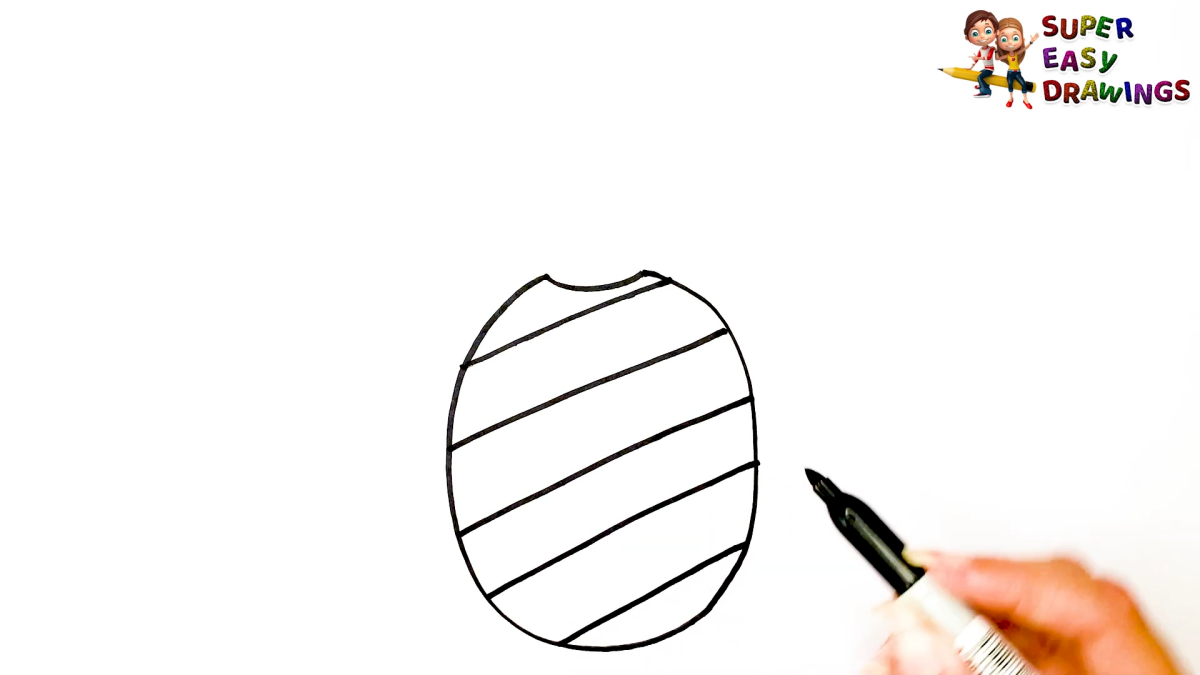
Step 2: Map That Spiral Pattern
This is where that anatomy knowledge comes in handy. Lightly draw the diagonal grid lines on the body, making sure they curve and wrap around the form. Don’t stress about perfection here. A great pro-tip is to focus your energy on the front-facing third of the pineapple. If you get the contours and texture right in the area the viewer sees most clearly, their brain will fill in the rest. It’s a great way to avoid getting overwhelmed.
Step 3: Define the Details
Switch to your HB pencil. Now, start defining the individual fruitlets within your grid. Look closely—each one might have a tiny, dry sprout in the center. For the crown, start with the biggest, outermost leaves and then draw the ones behind them. Letting the leaves overlap is what will create that crucial sense of depth.
Bringing It to Life with Shading and Texture
A good line drawing is the skeleton. Shading is what gives your drawing muscle, weight, and life. This is where the magic happens.
First, identify the main areas of light and shadow on your pineapple: the bright highlight, the mid-tones, the dark core shadow, and the shadow it casts on the table.
Using your 2B pencil, start shading the body. Think about each individual fruitlet. The side facing the light will be lighter, and the side facing away will be darker. Use the sharp point of your 4B pencil to punch in the really dark crevices between them. This contrast is what screams “bumpy texture.” Use your blending stump sparingly to soften some transitions, but remember our warning: don’t overdo it!

For the waxy leaves, use your kneaded eraser, shaped to a fine edge, to lift out sharp, bright highlights. Then use your 2B pencil to shade the parts of the leaves that are turned away from the light. And don’t forget that leaves cast shadows on each other. Those little pockets of darkness are what make the crown look dense and full.
Where to Go From Here
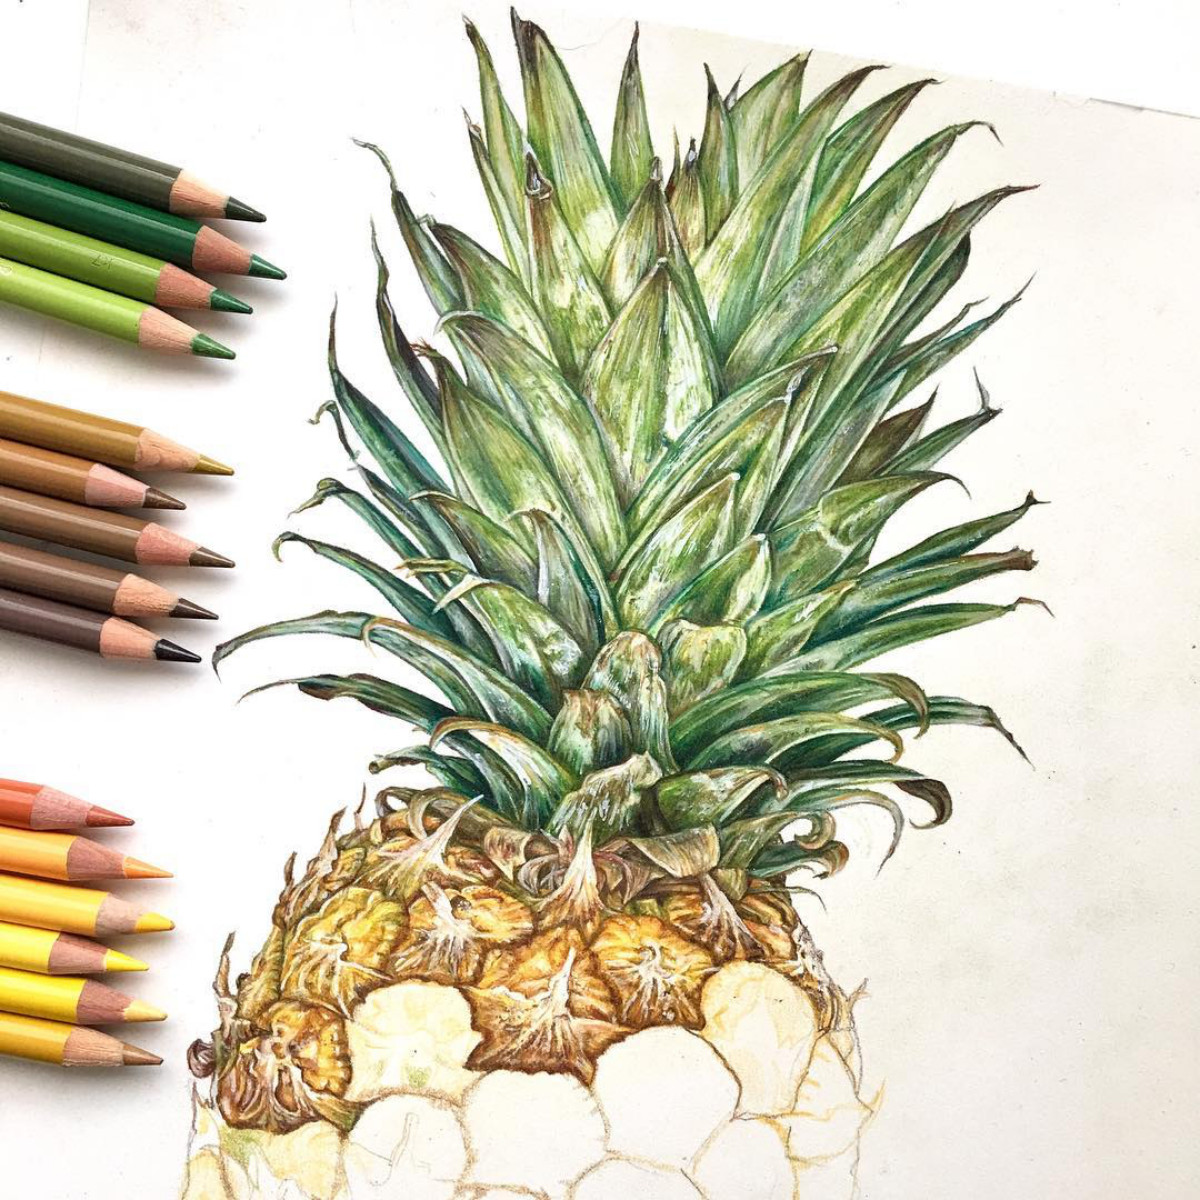
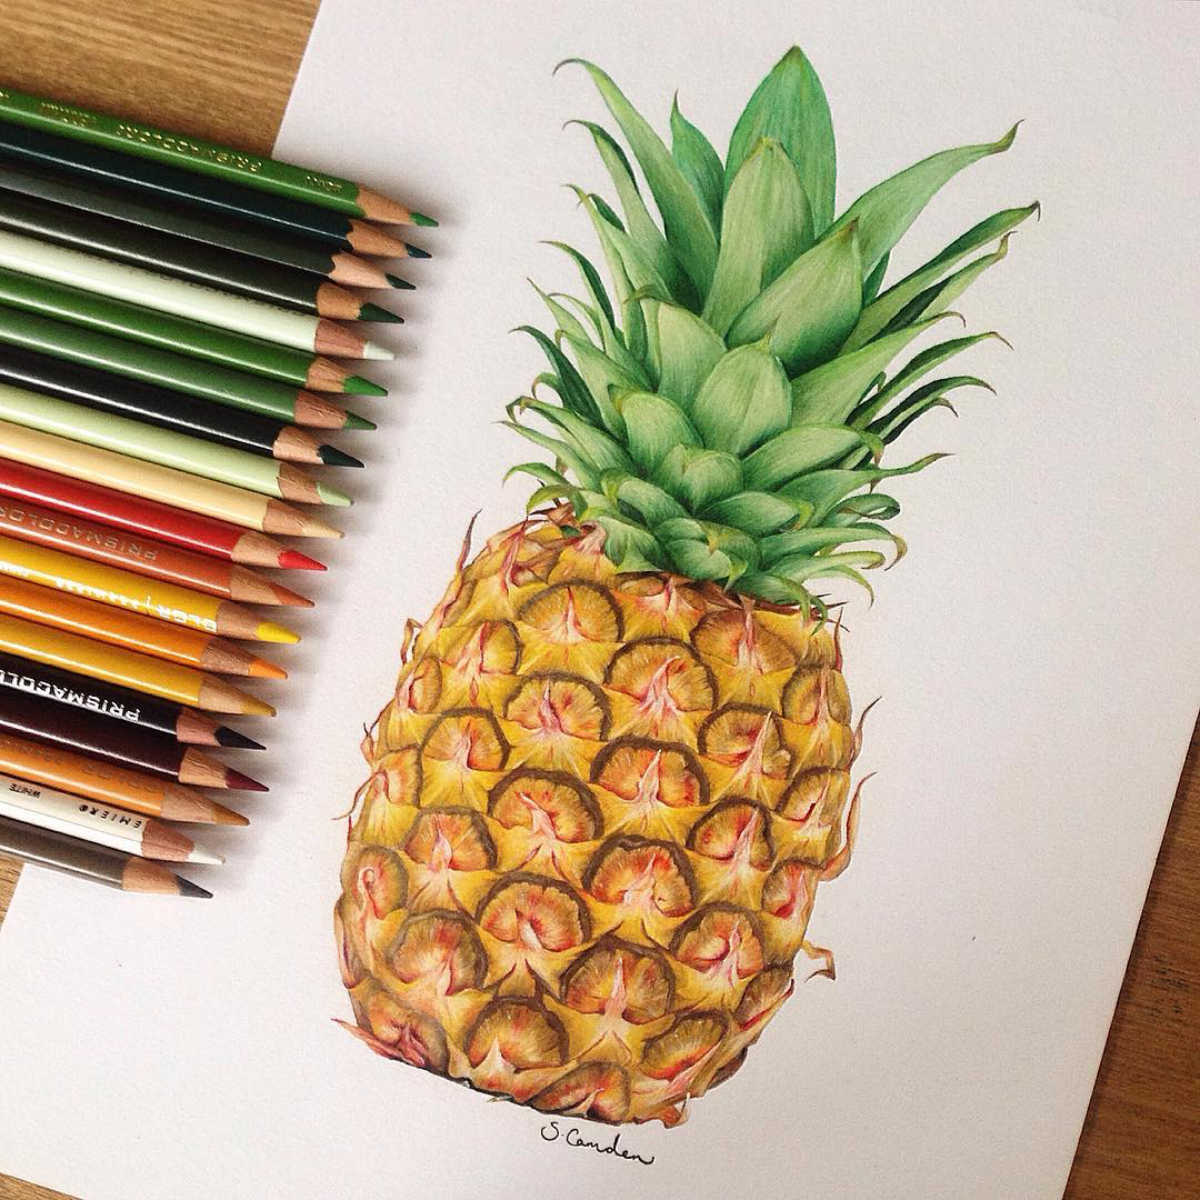
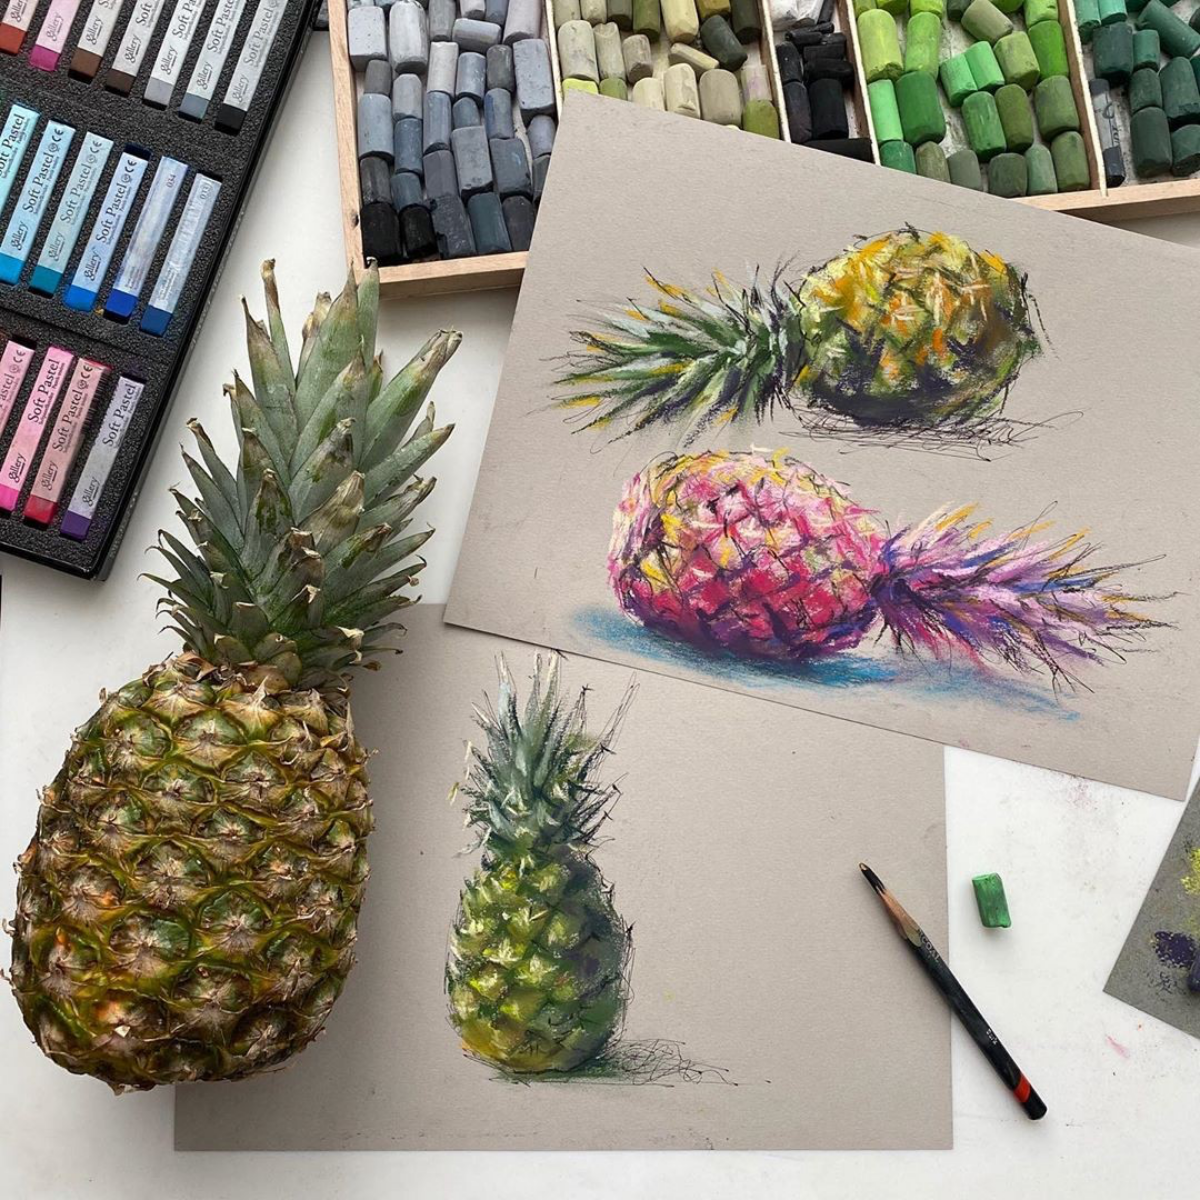
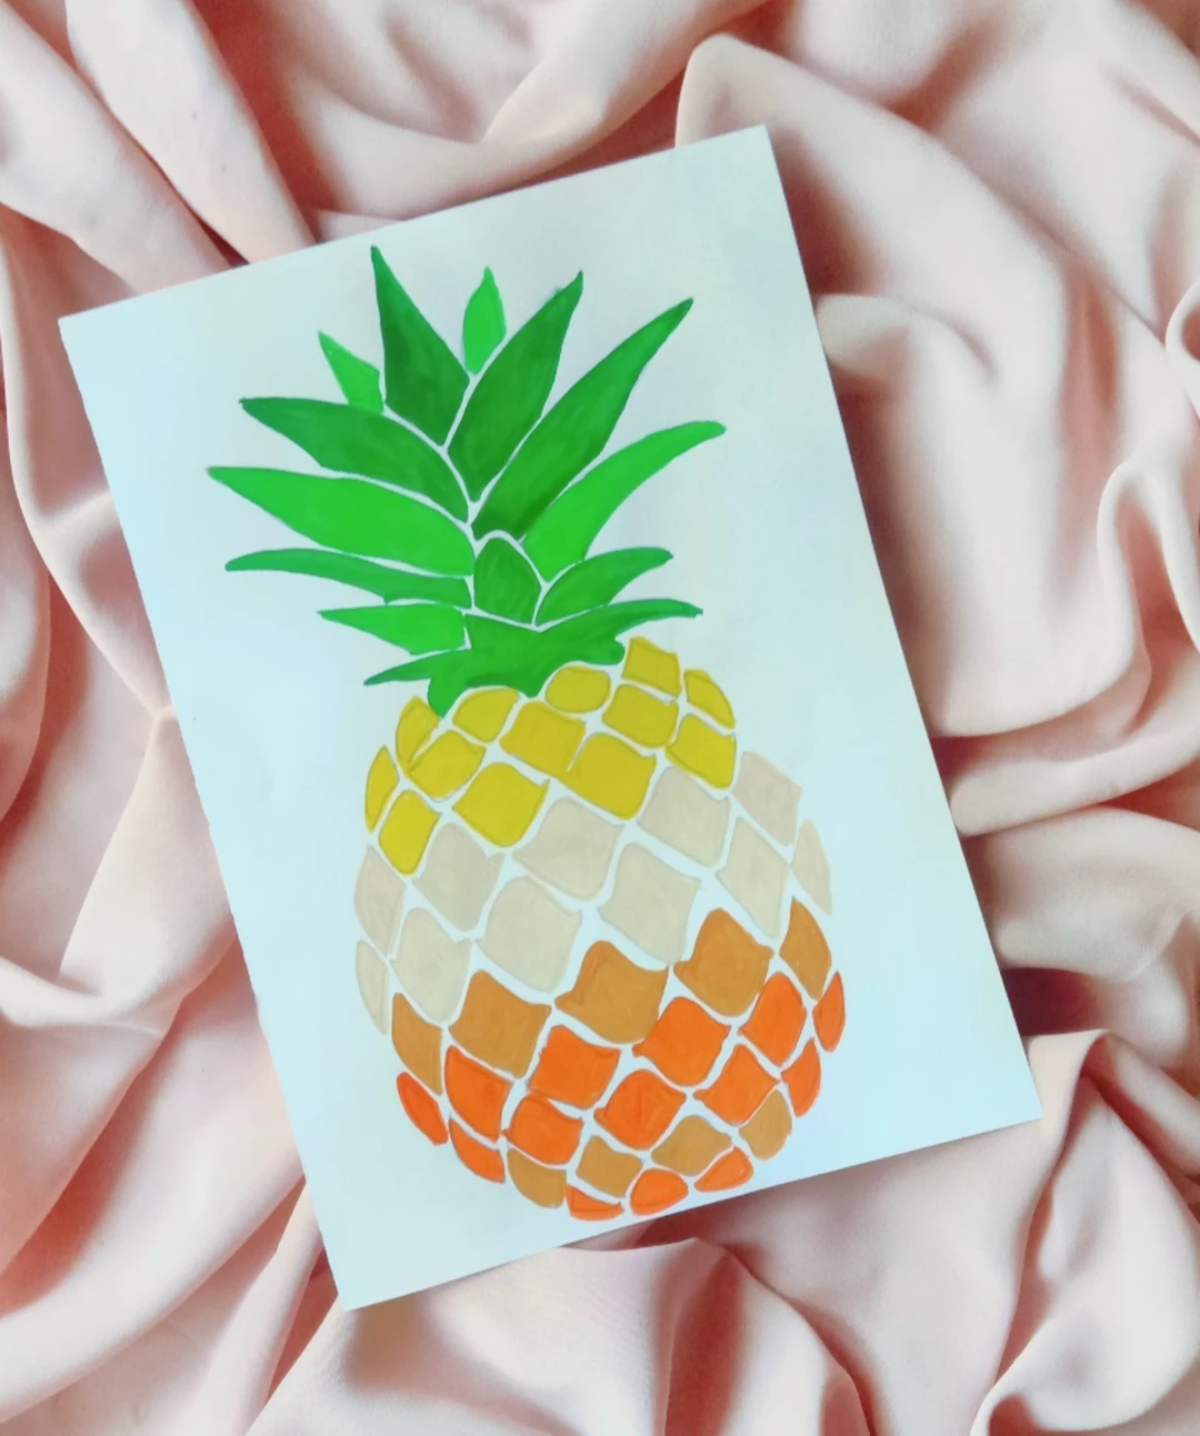
Once you’re comfortable with graphite, the pineapple is an amazing subject for other styles. You could try a pen and ink drawing, using cross-hatching or stippling (thousands of tiny dots) to build up the texture. Or you could break out colored pencils or watercolors. Just remember to look closely. A pineapple isn’t just ‘yellow’—it’s a symphony of greens, oranges, and deep browns.
No matter the medium, the core lesson remains the same. The pineapple is one of the best teachers an artist can have. It demands patience and forces you to master the fundamentals. So go find a good one, set aside some time, and just start looking. The drawing will follow, I promise.
Galerie d’inspiration

How do I make the pineapple’s skin look genuinely rough and not just like a criss-cross pattern?
The key is to think about each diamond-shaped segment, or ‘fruitlet,’ as its own small, slightly puffy pillow. Instead of drawing a flat grid, focus on giving each segment a subtle shadow on one side and a highlight on the other, depending on your light source. Use stippling (creating texture with tiny dots) with a sharp 2B pencil in the shadowed areas to mimic the porous skin. This small detail will transform a flat pattern into a believable, touchable surface.
The pineapple became a symbol of hospitality and immense wealth in 17th and 18th-century Europe. They were so rare and expensive that you could rent one for a party just to display it!
When you draw a pineapple, you’re not just drawing a fruit; you’re capturing a piece of history. Channel that sense of luxury and exoticism. Think of the crown as a regal, spiky diadem and the body’s golden hues as a treasure. This mindset can influence your line work, making it more deliberate and appreciative.
Graphite Pencils: Ideal for precision. A hard pencil like an H or 2H is perfect for lightly sketching the geometric spirals, while softer pencils (2B to 6B) are great for building up shadows and texture. Perfect for a detailed, controlled study.
Charcoal Sticks: Best for drama and deep texture. Willow or vine charcoal creates soft, blendable tones, while compressed charcoal gives you rich, dark blacks. It’s messier, but unmatched for capturing the fruit’s rugged, high-contrast feel.
For this subject, starting with graphite for the structure and then adding charcoal for the deep shadows can offer the best of both worlds.
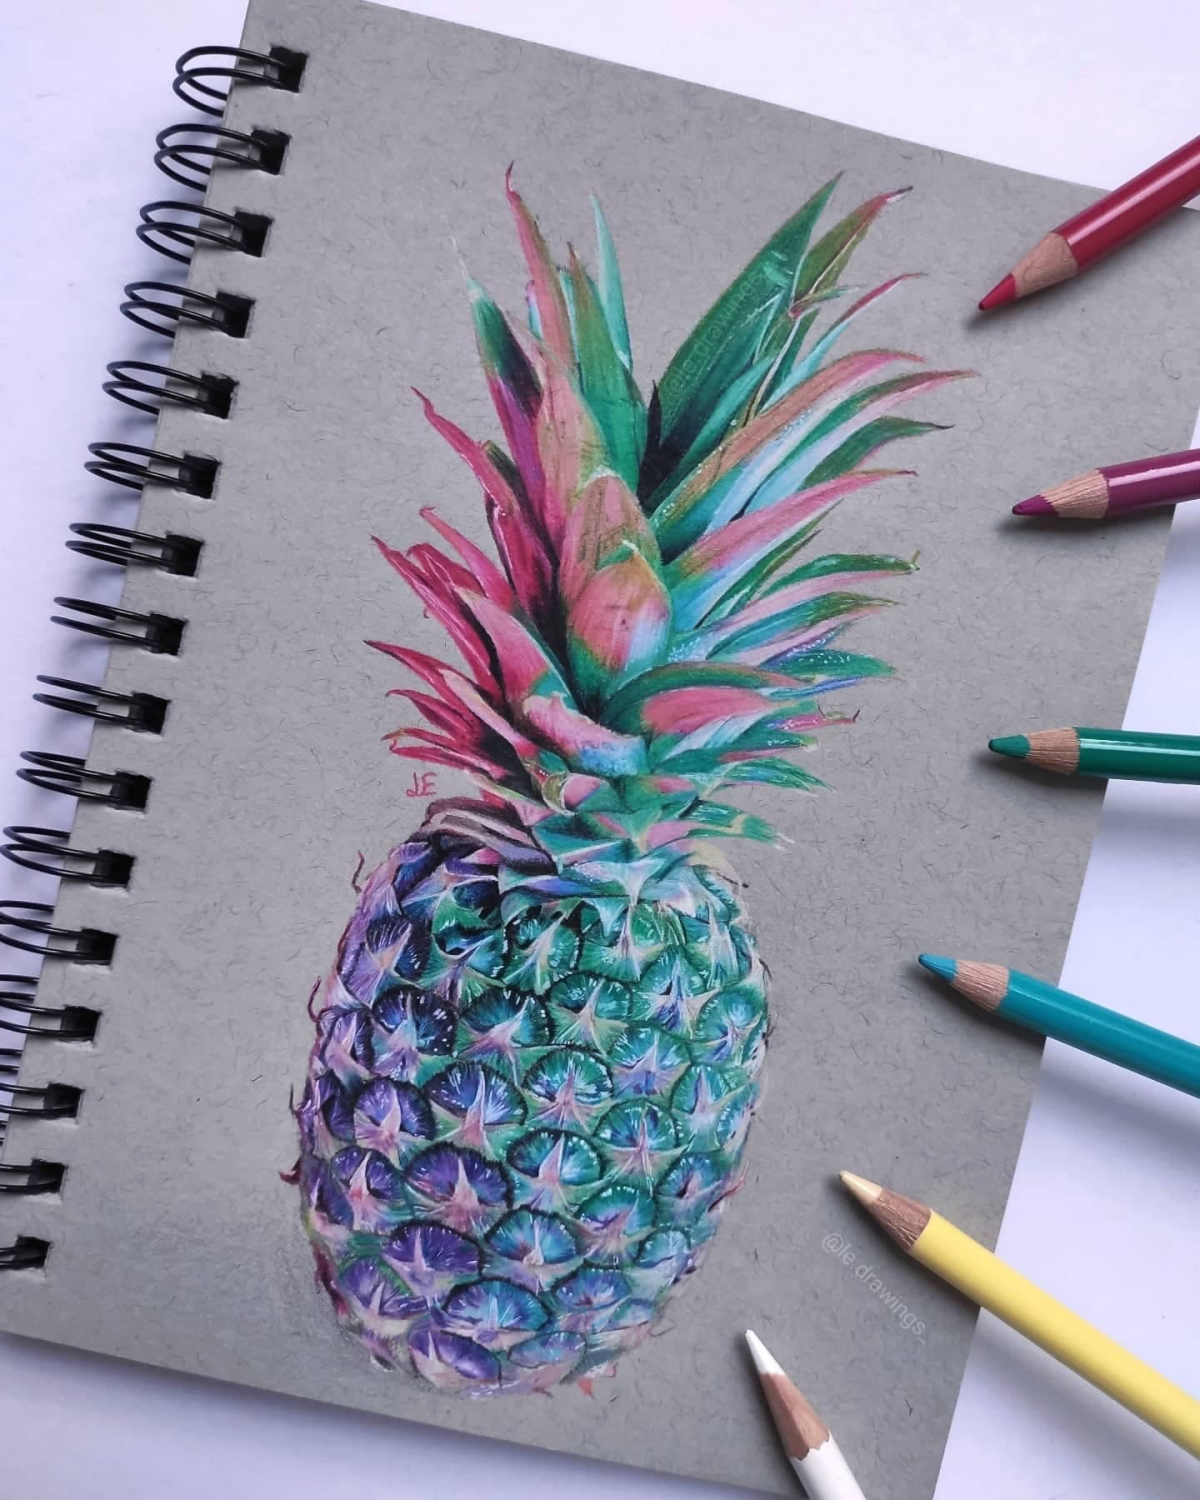
To truly bring your pineapple to life with color, think beyond a single yellow and green. A realistic pineapple has a complex palette. A good starting set of colored pencils, like Prismacolor Premier or Faber-Castell Polychromos, will give you the layering ability you need.
- For the body: Layer Canary Yellow, Yellow Ochre, and a touch of Burnt Ochre in the crevices.
- For the crown: Use Chartreuse for the younger leaves, blending into Grass Green and Prussian Green for the older, darker ones. A touch of lilac or violet in the deepest shadows will make the greens pop.
Don’t neglect the shadow it casts. A common mistake is to spend hours on the pineapple itself, only to have it floating in space. A well-rendered cast shadow will anchor your drawing to the surface, instantly giving it weight and context. Observe its shape—it won’t be a simple oval. The spiky leaves will create a more complex, interesting shadow shape.
- It makes your highlights pop with minimal effort.
- It provides a beautiful, warm mid-tone automatically.
- It reduces the time spent rendering background values.
The secret? Drawing on toned paper. Using a sheet of Strathmore Toned Tan or Gray sketch paper gives you a head start. Your graphite creates the shadows, and a simple white charcoal pencil, like a General’s Primo Bianco, lets you add brilliant, waxy highlights on the leaves and fruitlets. It’s a professional technique for achieving depth quickly.
The leaves of the crown aren’t just green; they have a waxy, almost silvery sheen that reflects light. To capture this, a kneaded eraser is your best friend. After laying down a smooth layer of graphite (a 2B works well), gently press and lift the eraser to pull out soft highlights along the center of each leaf. For a sharper glint of light, the fine point of a Tombow Mono Zero Eraser allows for incredibly precise marks.
The mathematical pattern of a pineapple’s skin, known as a parastichy, almost always follows numbers from the Fibonacci sequence.
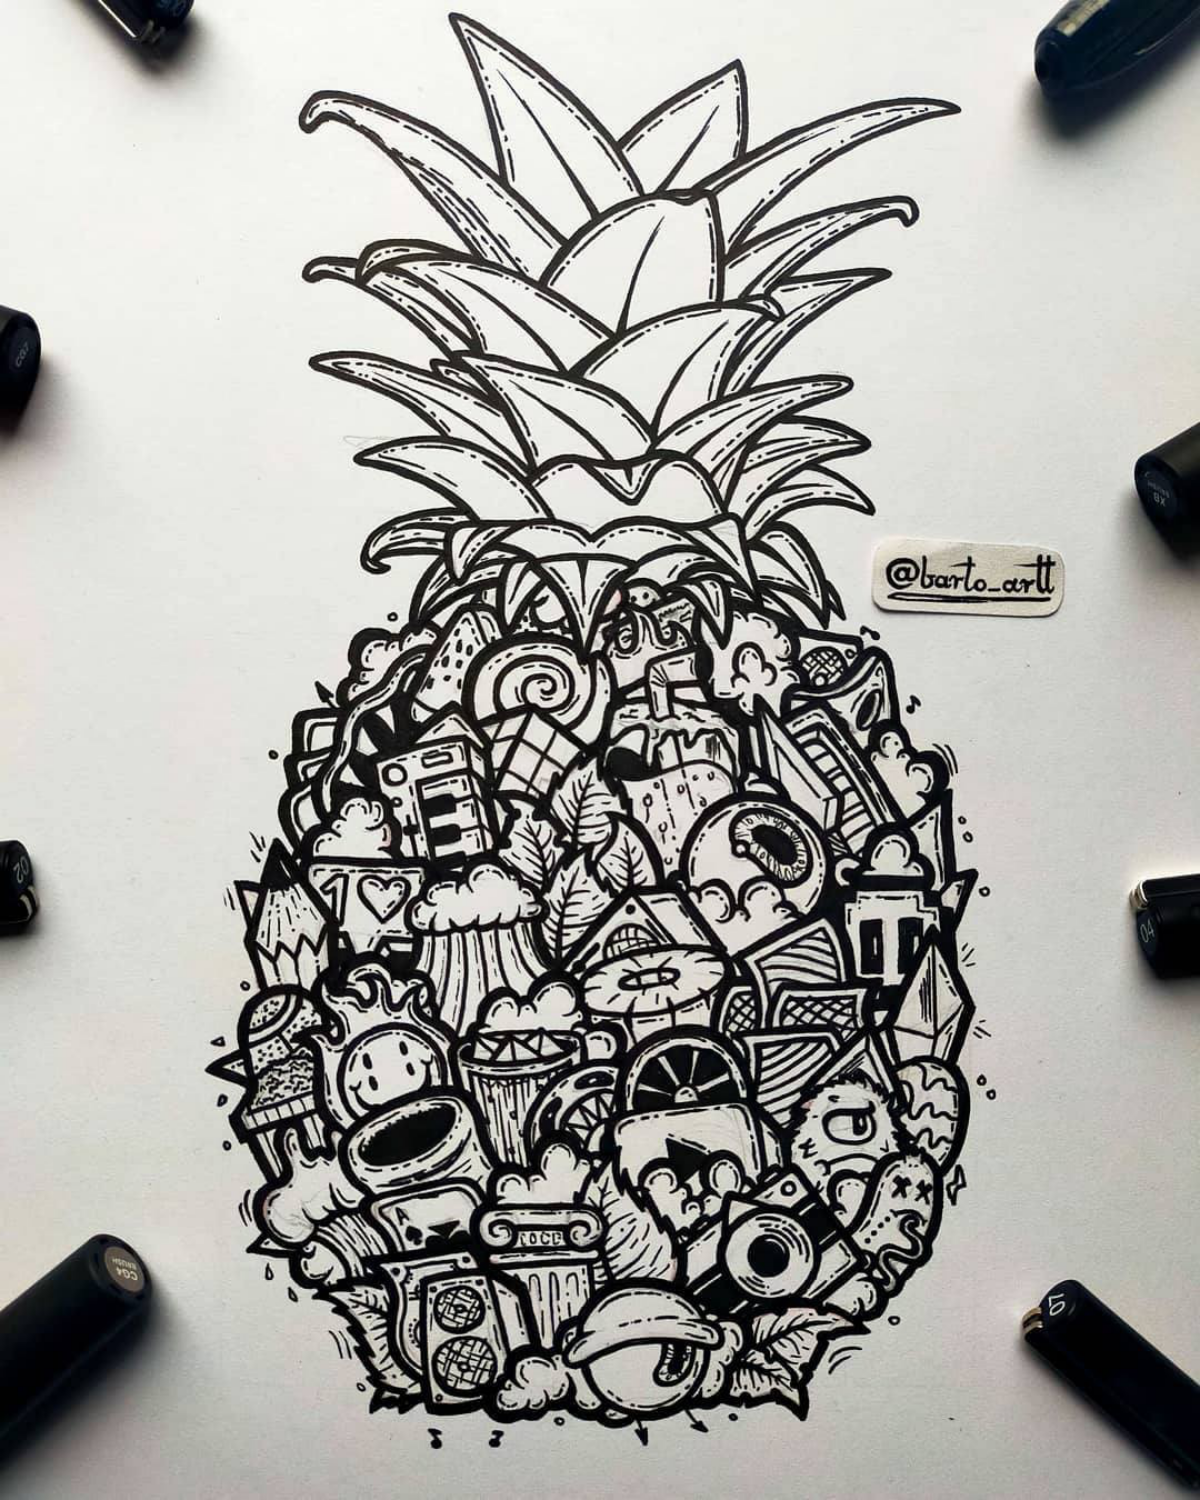
Once you’ve mastered the realistic pineapple, why not transform it into a stylized motif? Scan your best drawing at a high resolution (at least 300 DPI). In an app like Procreate or Photoshop, use it as a base to create a clean, modern line-art version. This single illustration can become a repeating pattern for custom fabrics, phone cases, or unique gift wrap, turning your art study into a versatile design asset.
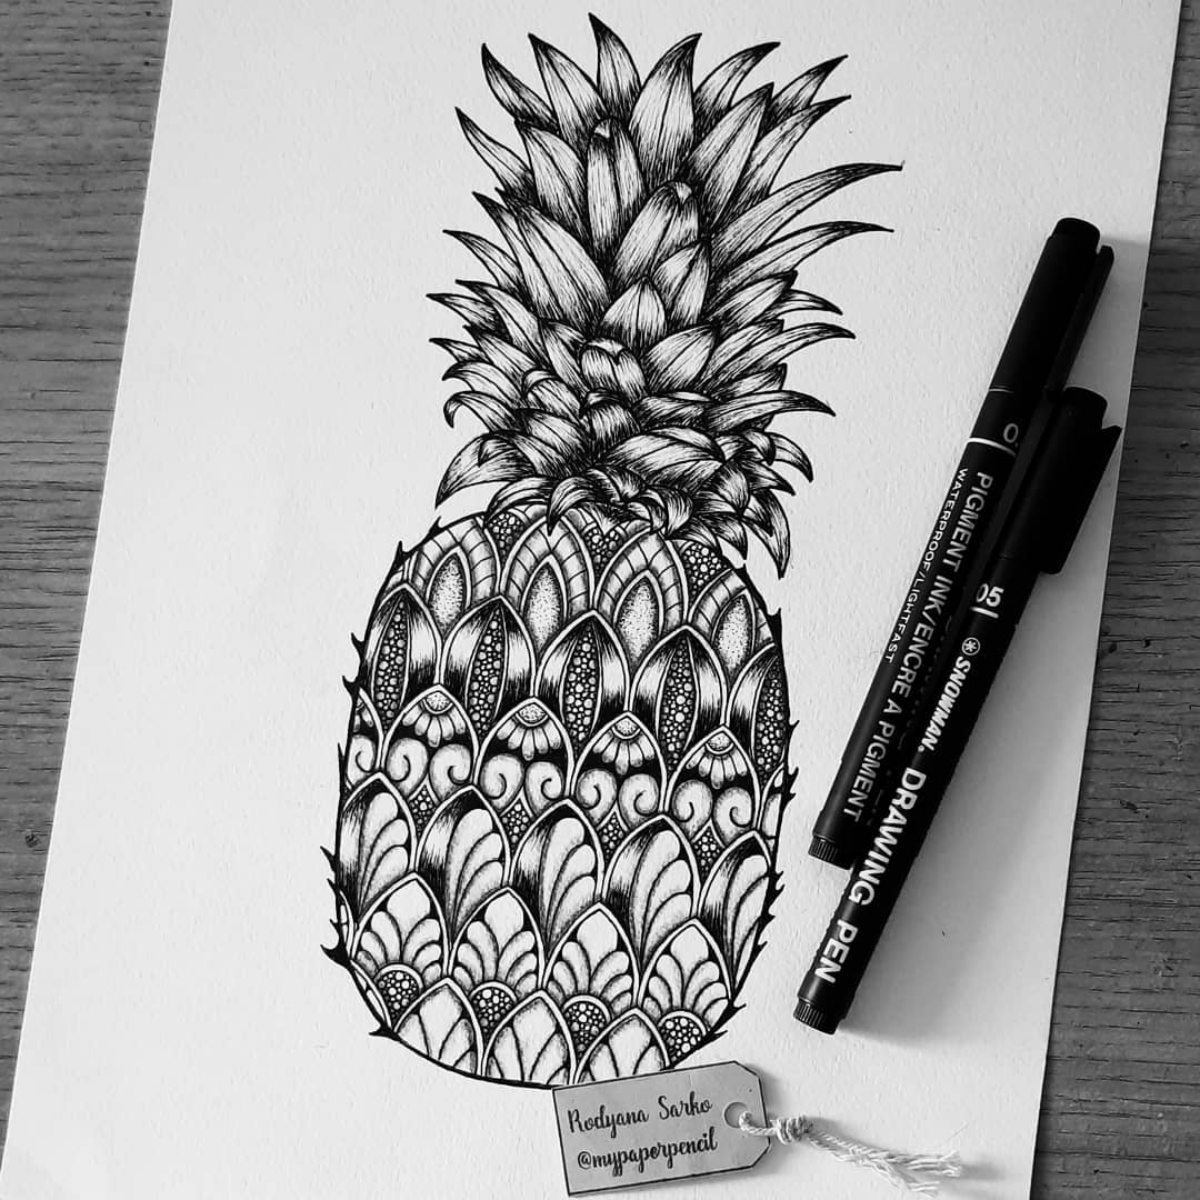
- Hatching: Parallel lines to create shadow. Keep the lines closer together for darker areas.
- Cross-hatching: Layers of hatching in different directions to build deep, rich tones in the crevices of the skin.
- Stippling: Using tiny dots to render the subtle, rough texture on the surface of each segment.
- Blending: Using a tortillon or blending stump to soften the graphite for the subtle curve of the main body.
Don’t just draw the pineapple; evoke its environment. Even in a black and white drawing, you can suggest a tropical atmosphere. Keep your shadows sharp and high-contrast, as if cast by a strong, direct sun. Leave some areas of the paper completely white to convey a bright, sun-bleached glare. This play of intense light and dark is what will make your pineapple feel warm and vibrant, not like a studio object.