Your Ultimate Guide to Making Perfect Slime (That Actually Works!)
I’ve spent a ton of time in workshops with kids, parents, and teachers, and let me tell you, nothing gets a room more excited than making slime. I’ve seen it all—the initial thrill, the super-frustrating sticky failures, and the absolute joy of finally creating that perfect, stretchy batch. But honestly, most of the advice you find online is confusing. It throws a dozen recipes at you but never explains the simple secret that makes slime… well, slime!
In this article
Without that basic know-how, you’re just blindly following steps. You can’t fix a batch that’s gone wrong or get creative with your own ideas.
This guide is different. We’re going to tackle this just like I would in a hands-on workshop. We’ll focus on one core recipe, break down why it works, and cover the essential safety rules I absolutely insist on. My goal is to give you the confidence to go beyond the recipe, so you can invent your own amazing slime creations safely every single time.
The Secret Science Behind the Goo
Before we even think about mixing, let’s quickly cover what slime actually is. It’s what’s known as a non-Newtonian fluid. That’s just a fancy way of saying it breaks the normal rules for liquids. Sometimes it pours like a liquid, and other times it acts more like a solid. Think about ketchup in a glass bottle—it just sits there until you shake it, and then it flows. Slime is a bit like that; it flows when you pour it but gets firm when you squeeze it.
The real magic happens through a chemical reaction called cross-linking. We start with two key things:
- A Polymer Base: For us, this is the polyvinyl acetate (PVA) found in most white and clear school glues. Just picture PVA as a big bowl of cooked spaghetti strands. They’re long and can slide past each other easily, which is why glue is liquid.
- An Activator: This is a solution that contains borate ions. When you add this to the glue, the borate ions are like tiny magnets that connect all those separate spaghetti strands. They build a web.
That web is what turns your liquid glue into a squishy, semi-solid gel. It traps all the water from the glue, giving you that perfect slime texture. Understanding this is your superpower for troubleshooting. If your slime is too sticky, it just means not enough of those spaghetti strands are connected. If it’s tough and rubbery, you’ve connected too many.
Safety First! This is a Non-Negotiable
I can’t say this enough: adult supervision is a must when making slime. We’re dealing with household chemicals, and safety has to be priority number one. The main concern is always the activator, as they all contain some form of boron. While they’re safe to handle, you definitely don’t want anyone ingesting them, and they can irritate very sensitive skin.
So, let’s clear up what these activators really are and how to choose one.
- Contact Lens Solution: This is my go-to for workshops because it’s so easy to control. But heads up! Many online recipes get this wrong. For this to work, the solution must list boric acid and sodium borate in the ingredients. Plain old saline solution won’t do a thing. Always check the label on the bottle. Store brands from places like Target or Walmart work great and are usually cheaper.
- Borax Powder: This is a laundry booster you mix with water. It’s a very strong and effective activator, but it requires careful handling. An adult should always mix the solution, and everyone should wash their hands well after playing. If your child has extra-sensitive skin, I’d suggest they wear disposable gloves.
- Liquid Starch: Another laundry product that works because it also contains borate compounds. The same safety rules apply—handle with care and wash your hands.
My Essential Safety Checklist:
- Adults Only: An adult should always be the one to handle and pour the activators.
- Protect Your Space: Slime is a magnet for fabric, wood grain, and carpet. Cover your table with a cheap plastic tablecloth or a craft mat. A baking sheet also works great to contain the mess.
- Wash, Wash, Wash: Wash hands before and after playing. This keeps your slime from getting gross and gets any chemical residue off your hands.
- Slime is Not a Snack: I once had to stop a kid from trying to taste a bright pink, bubblegum-scented slime. It’s a serious risk. If any is ingested, call your local poison control center immediately for advice.
- Do a Patch Test: If you’re worried about skin sensitivity, just test a tiny dab of the finished slime on the inside of the wrist. Wait a few minutes and if you see any redness, it’s best to avoid it.
The ‘Can’t-Fail’ Classic Slime Recipe
Instead of a dozen confusing options, here’s my tried-and-true master recipe. Once you get this down, you can tweak it to make anything.
Time Commitment: About 10-12 minutes total. (Prep & Mixing: 5 mins, Kneading: 5-7 mins).
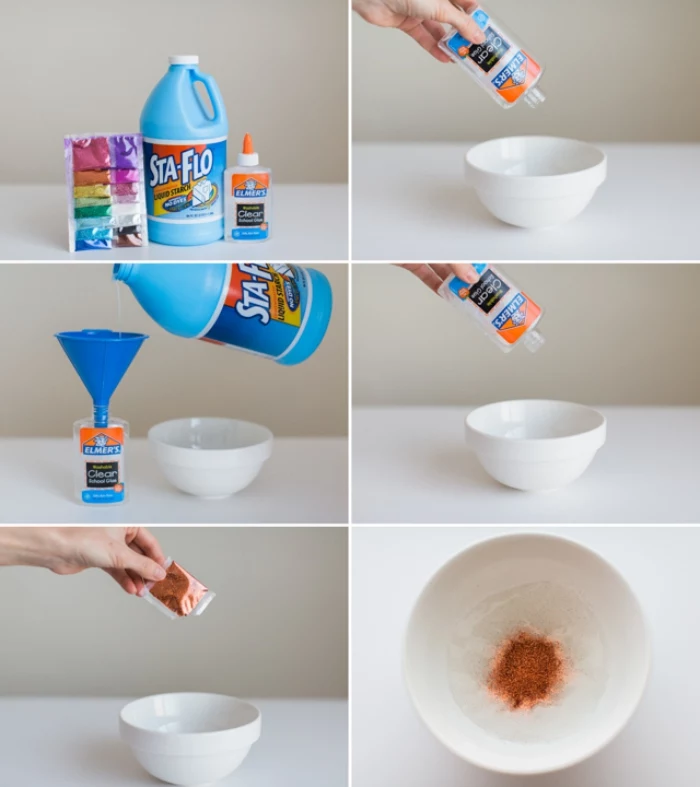
Your Shopping List & Estimated Costs:
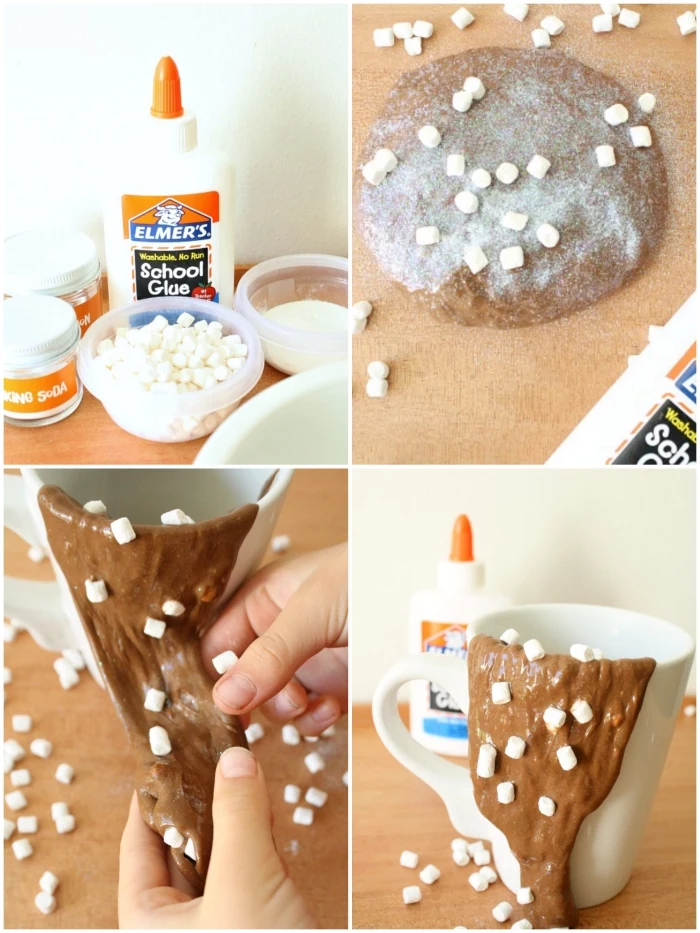
- White School Glue (PVA): You’ll need a 4 oz bottle, which is about $1-$2. For this recipe, Elmer’s School Glue is super reliable. Avoid generic “Glue-All” or gel formulas, as they can be inconsistent.
- Baking Soda: You probably have this already! If not, a box is about $1.
- Contact Lens Solution: A store-brand bottle costs around $4-$8 and will make many, many batches. Remember to check for boric acid!
- Mixing Bowl & Spoon: Use plastic or glass ones you don’t mind getting messy.
- Measuring Cups/Spoons: Kitchen standards are perfect.
Step-by-Step Instructions:
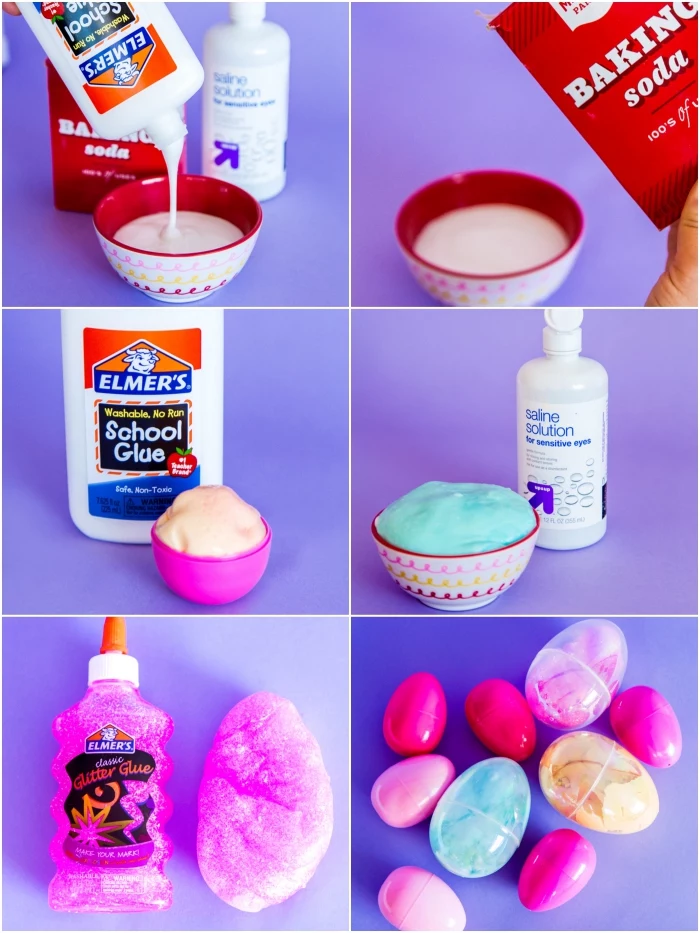
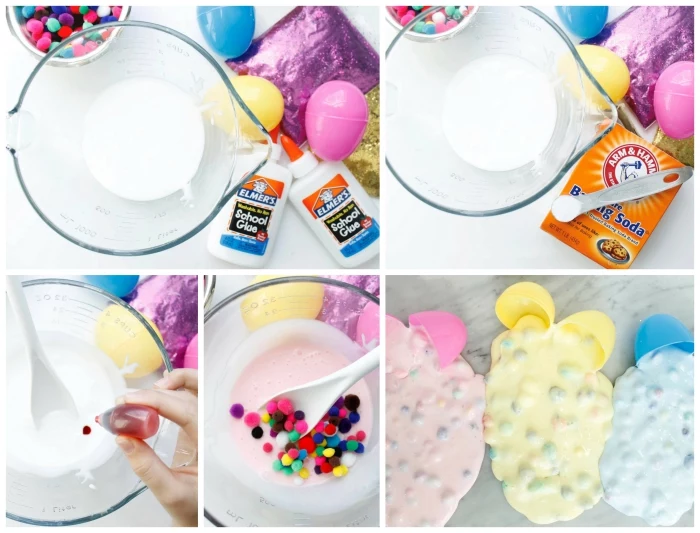
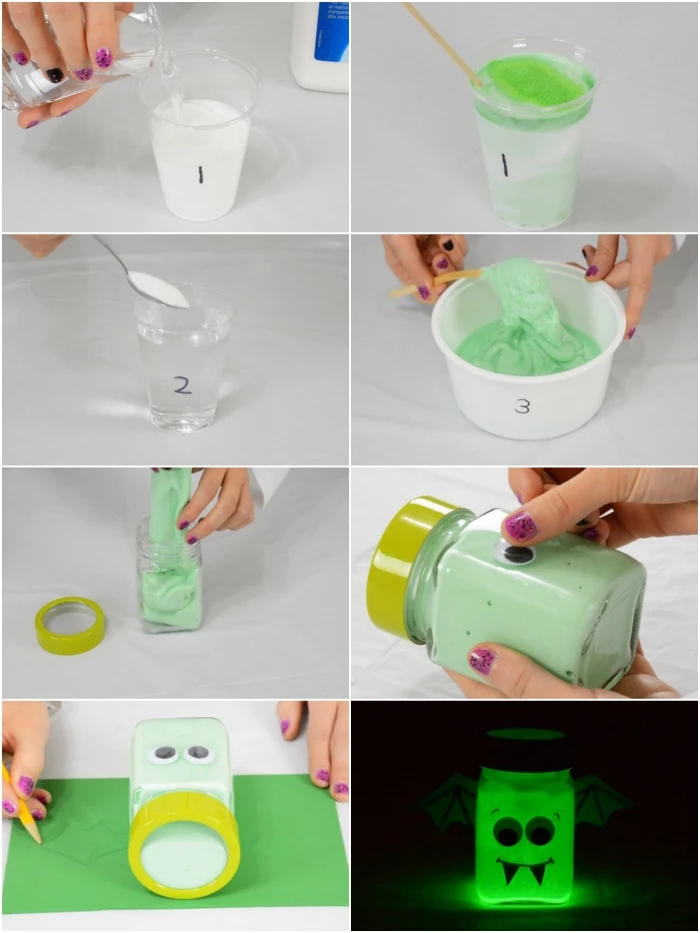
- Get the Glue Ready: Pour 1/2 cup (the whole 4 oz bottle) of white school glue into your bowl.
- Add Water: Stir in 1/4 cup of room temperature water. Mix until it’s completely smooth.
- Mix in Baking Soda: Add 1/2 teaspoon of baking soda and stir until it’s totally dissolved. You shouldn’t feel any grit. This step is a game-changer for getting a great texture.
- Add the Activator: Now, add 1 tablespoon of the contact lens solution. Start stirring, and you’ll see the magic happen instantly. The mixture will start to get clumpy and pull away from the sides of the bowl.
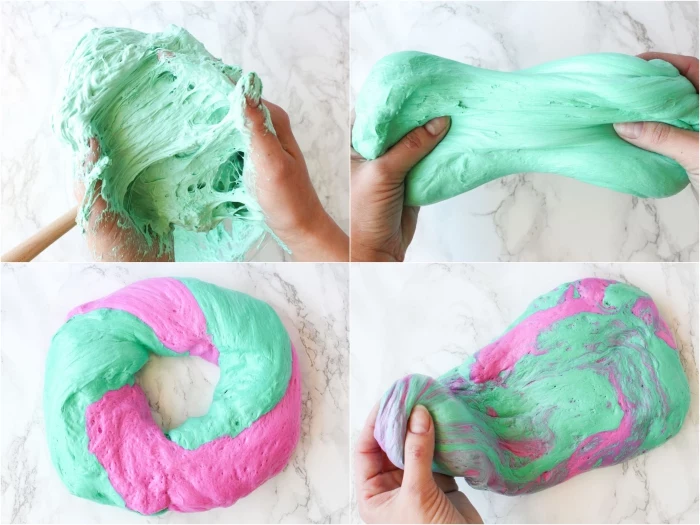
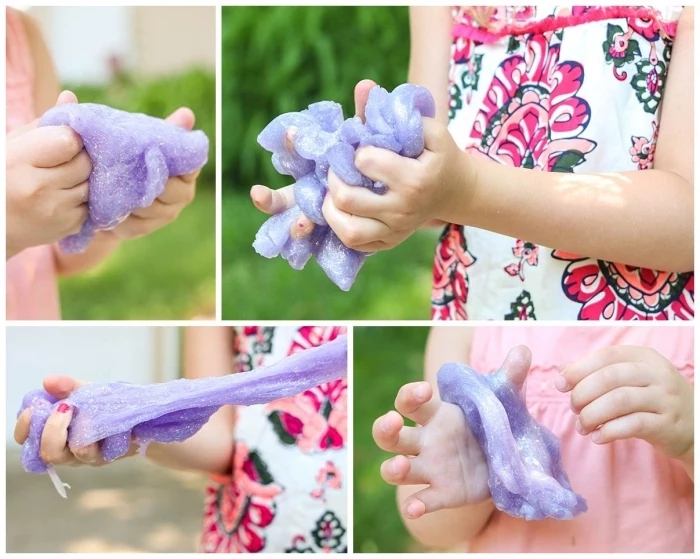
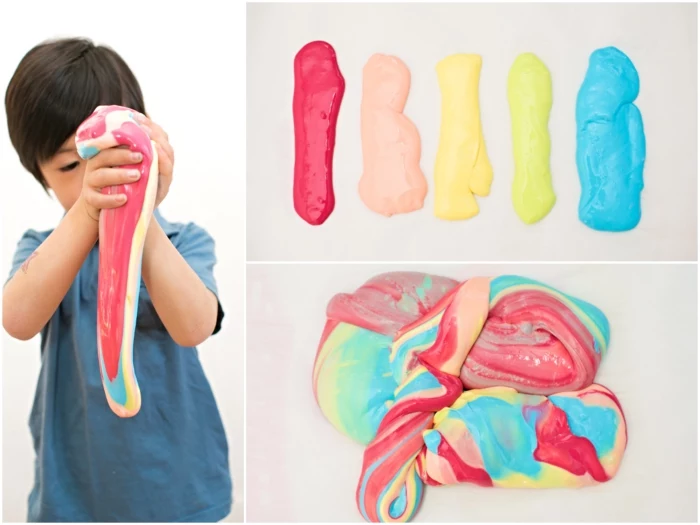
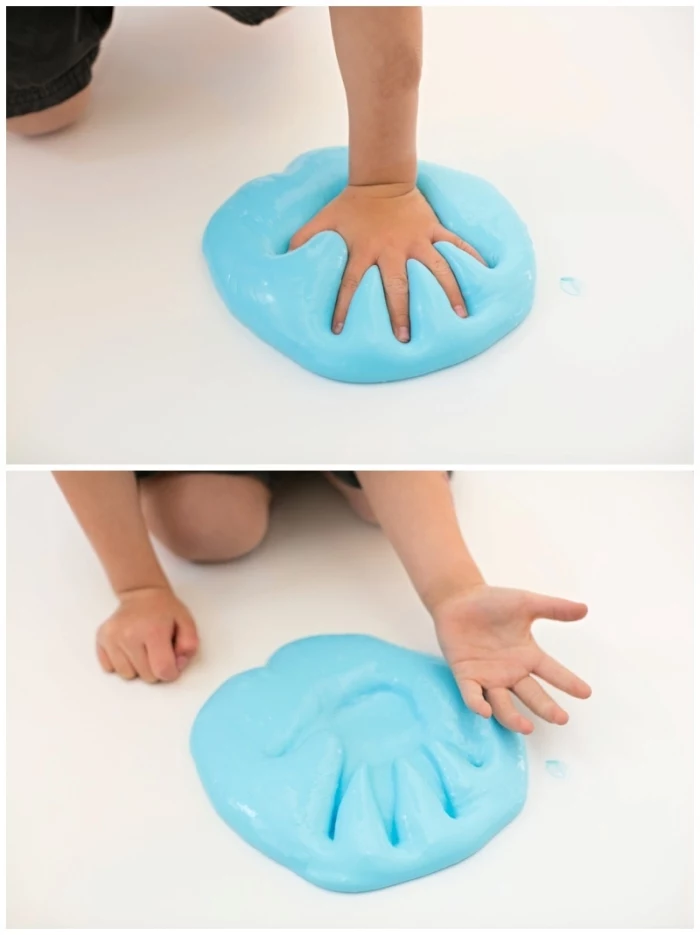
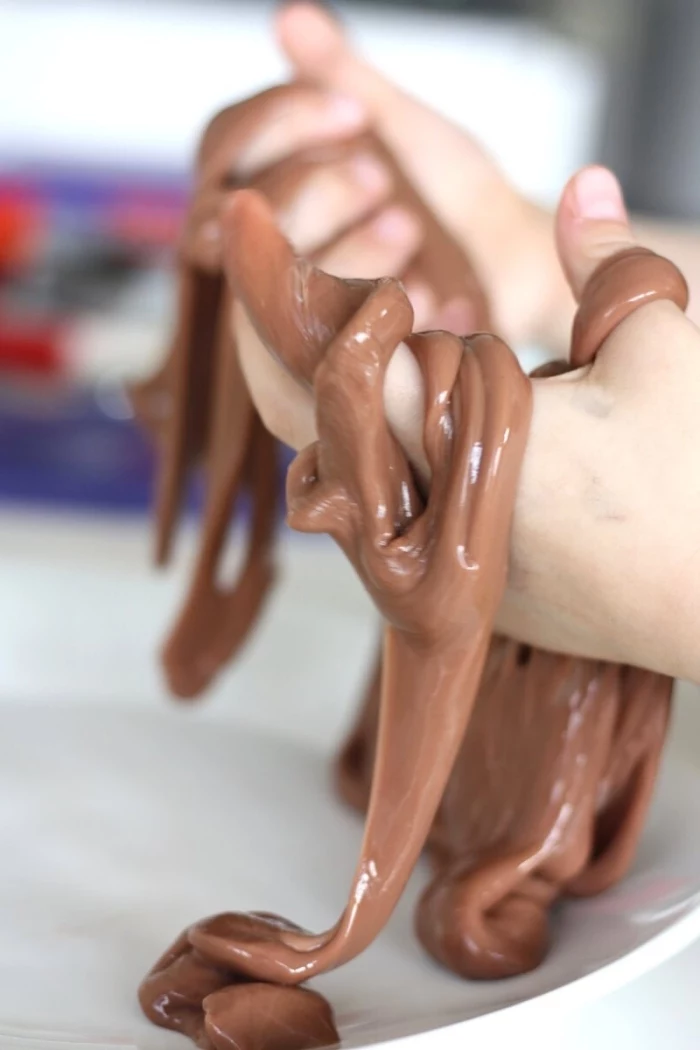
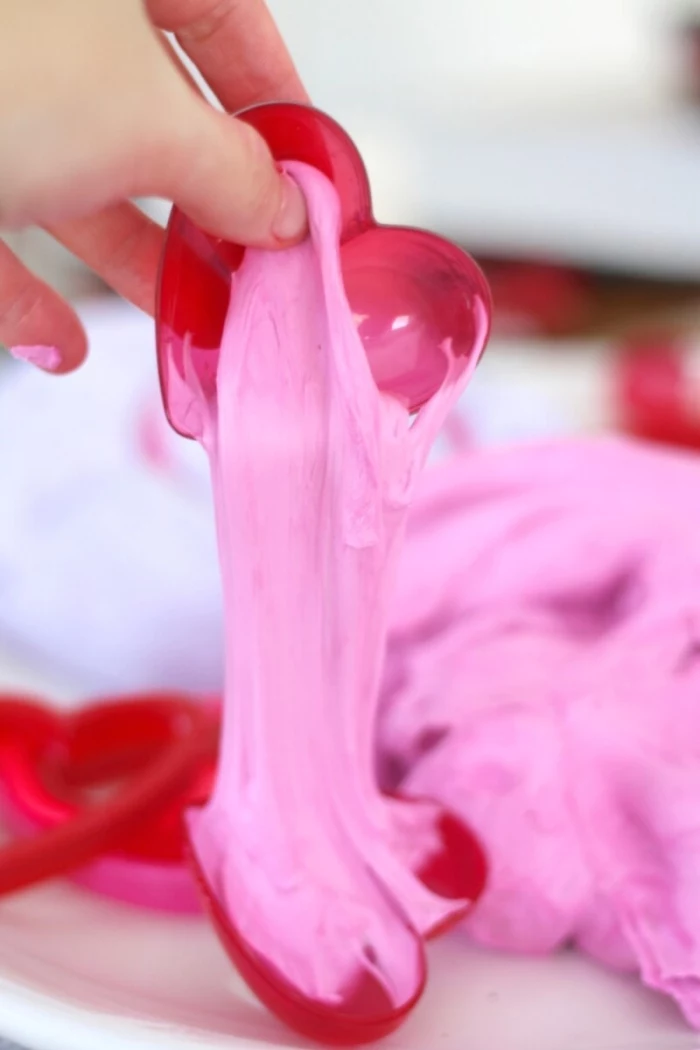
- Time to Knead: Okay, this is the most important part. The slime will be a sticky mess at first. Resist the urge to add more activator! Scrape the glob onto your clean work surface and start kneading it with your hands. Fold it, stretch it, and squish it. You’ll need to do this for a solid 5-7 minutes. You will physically feel it transform from a sticky disaster into a smooth, stretchy slime. You’ll know it’s ready when it stops sticking to your hands and you can stretch it about a foot without it breaking.
Troubleshooting Like a Pro:
- Problem: “Help! My slime is still a sticky nightmare after 7 minutes!”
Solution: It just needs a tiny bit more activator. Don’t pour it straight from the bottle! Add just 1/4 teaspoon more of the contact solution and knead it in for a full minute. Repeat only if needed. This is the #1 mistake people make—they get impatient and add way too much at once. - Problem: “My slime is like a rubber ball. It just rips.”
Solution: Ah, the classic over-activation. You added too much activator. To be frank, this is tough to fix completely. You can try kneading in a pump of lotion or a teaspoon of warm water to soften it, but it may never be perfect. The lesson? Patience is key. I made dozens of “slime bricks” my first year teaching this.
Level Up: Creating Pro-Level Slime Variations
Once you’re a pro at the basic recipe, you can start experimenting. It’s all about adding one new ingredient.
Fluffy Slime: For that light, airy, satisfying texture.
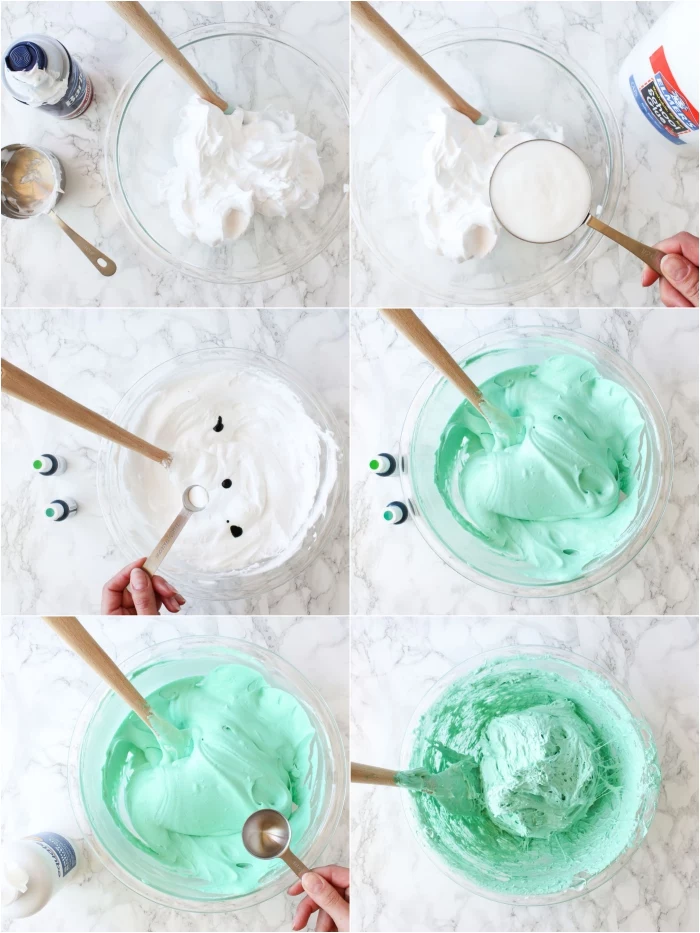
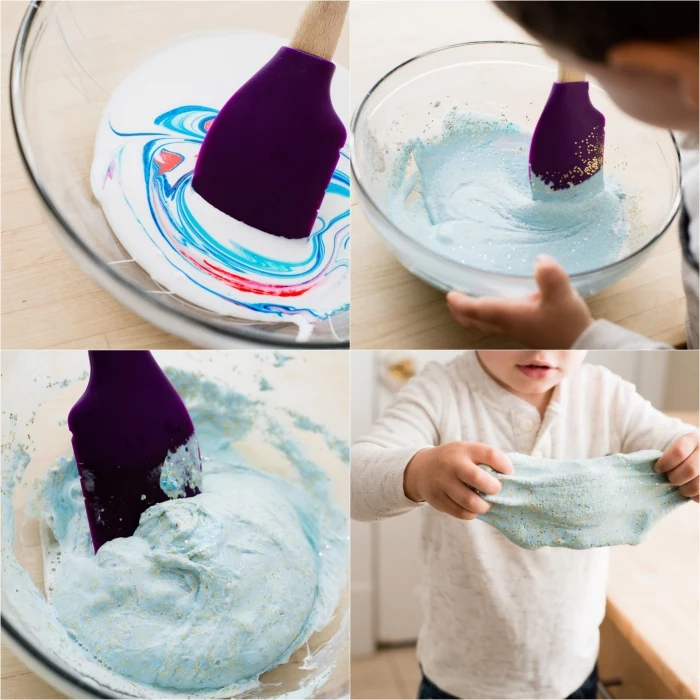
Simply add 2-3 cups of foaming shaving cream (not the gel kind!) to your glue/baking soda mixture before you add the activator. Gently fold it in to keep the air bubbles. You might need a little extra activator to handle the extra volume. Oh, and good to know: fluffy slime will deflate over a day or two as the air escapes. That’s totally normal!
Crystal Clear Slime: This one looks like liquid glass but requires serious patience.
Follow the master recipe but use clear PVA glue instead of white, and skip the baking soda. The trick here is mixing very, very slowly to avoid creating air bubbles. Even then, it will look cloudy and white at first. Don’t worry! Put the slime in an airtight container and store it somewhere safe for 3 to 7 days. DO NOT TOUCH IT. The air bubbles will slowly rise and pop, leaving you with a perfectly clear slime. The ‘after’ is so worth the wait!
Butter Slime: Known for its super smooth, spreadable, buttery feel.
First, make a batch of the classic recipe, but make it a little under-activated (a bit sticky). Then, take a chunk of soft modeling clay (brands like Model Magic or Daiso clay are perfect for this). Start with about a 1-inch ball of clay for your 1/2 cup of slime. Knead it in. It will feel like it’s ruining the slime at first, but keep going! After a few minutes, the clay will fully incorporate and transform the texture into that famous butter slime.
Uh Oh… The Inevitable Slime Cleanup Guide
Let’s be real, slime is going to end up where it’s not supposed to be. Don’t panic! Here’s how to deal with it.
- For Carpet & Clothes: Your secret weapon is plain white vinegar. Its acidity is fantastic at breaking down the PVA in the glue. Scrape off as much of the excess slime as you can. Then, pour a small amount of vinegar on the spot and let it sit for a few minutes. You should see the slime start to dissolve. Use a scrub brush and warm water to work it out of the fibers.
- For Hair: This is a classic parent nightmare. The best trick is to use something oily. Work a generous amount of conditioner, baby oil, or even peanut butter into the affected hair. The oil helps lubricate the hair and break down the slime’s grip. Let it sit for a bit, then use a fine-tooth comb to gently work the slime out. Follow with a good shampoo.
- For Hard Surfaces (Tables, Floors): This is the easy one. Scrape off the bulk of it, then use a warm, soapy sponge to wash away the residue.

A Quick Look at “Boron-Free” Alternatives
Many people ask for recipes without any boron compounds. It’s important to know that these create fun, gooey substances, but they won’t feel or stretch like classic slime.
Cornstarch Slime (Oobleck): This is a classic kitchen experiment. Just mix about 1 cup of cornstarch with water, adding the water slowly until it feels like a liquid when you move slowly but turns solid when you tap it. A fun fact: Oobleck is a dilatant fluid, meaning it gets more viscous under stress. That’s why you can punch it and it feels solid! It’s super messy and dries out fast, but it’s great for a quick science lesson.
Fiber Gel Slime (Psyllium Husk): This one uses dietary fiber to make a natural jelly. Mix 1 tablespoon of psyllium husk powder with 1 cup of water in a microwave-safe bowl. Microwave for 4-5 minutes, watching it closely. Let it cool completely. The result is a weird, jiggly, wet gel. Some kids love it, some think it’s gross, but it’s a cool way to see a different kind of gel form.
The Final Touches
Once you have your perfect slime base, it’s time to make it your own.
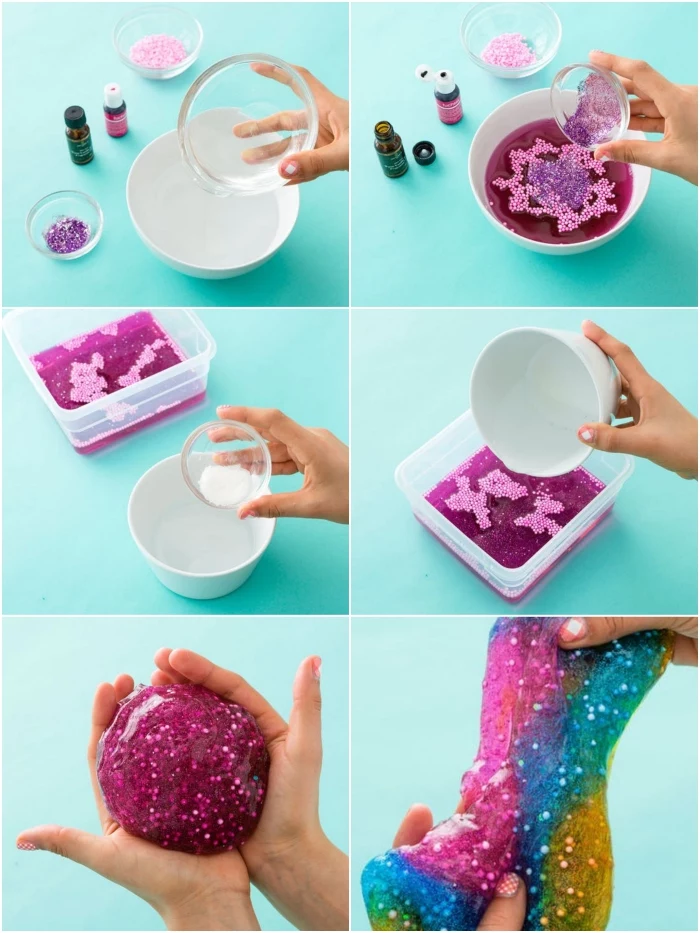
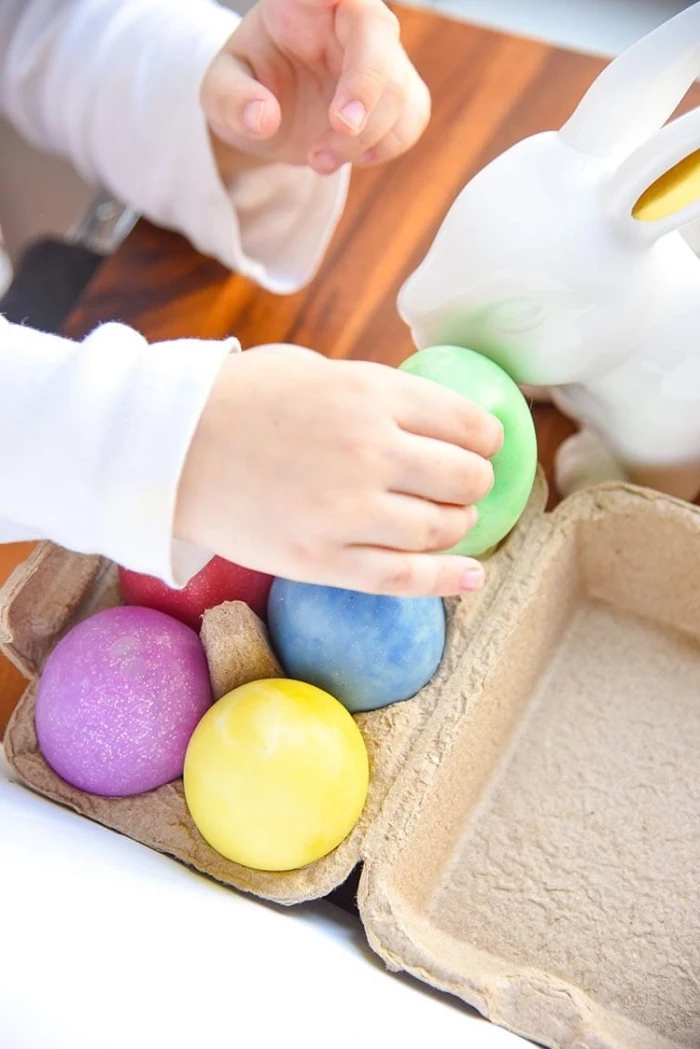
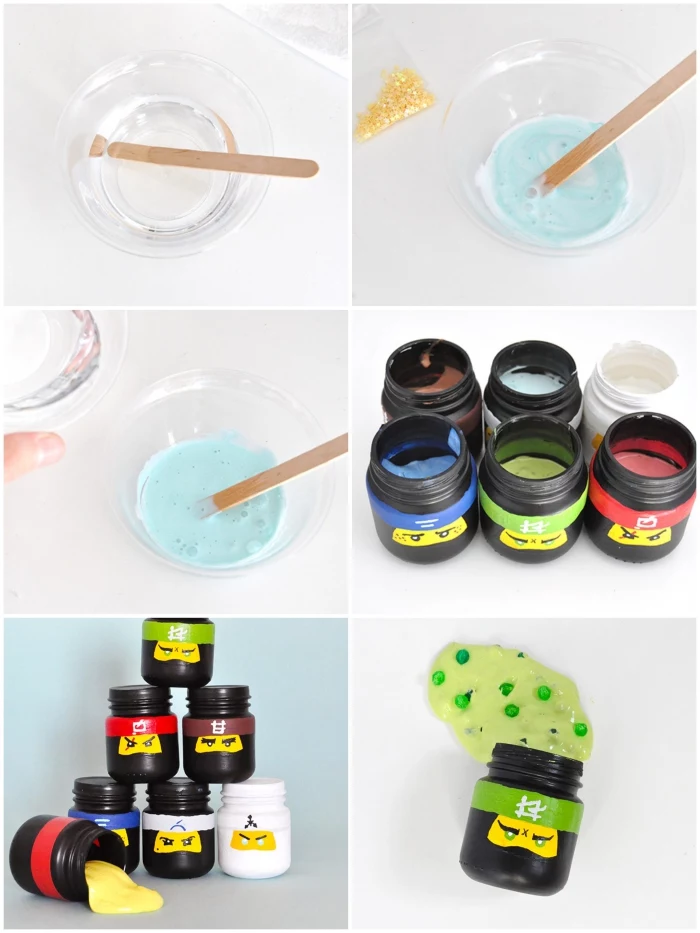
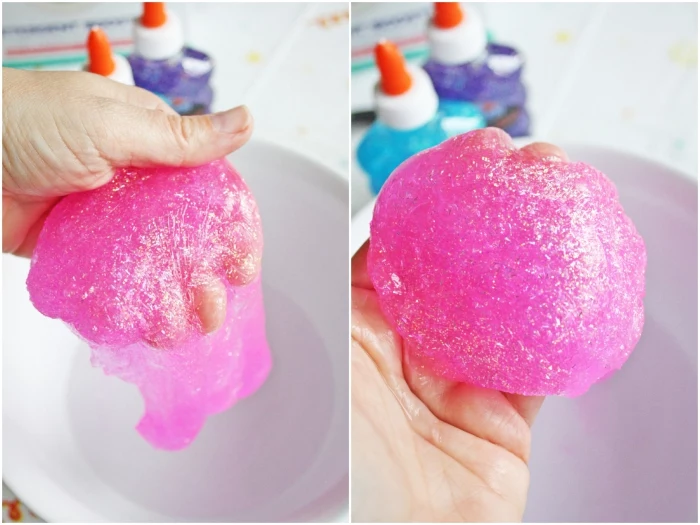
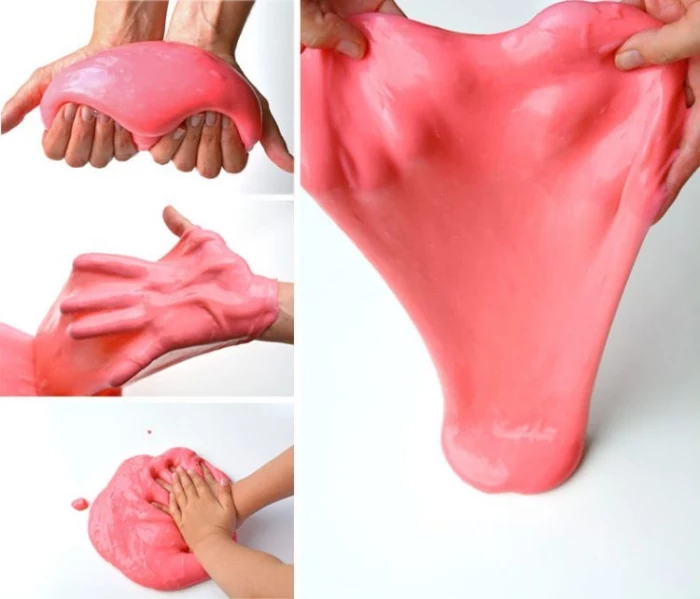
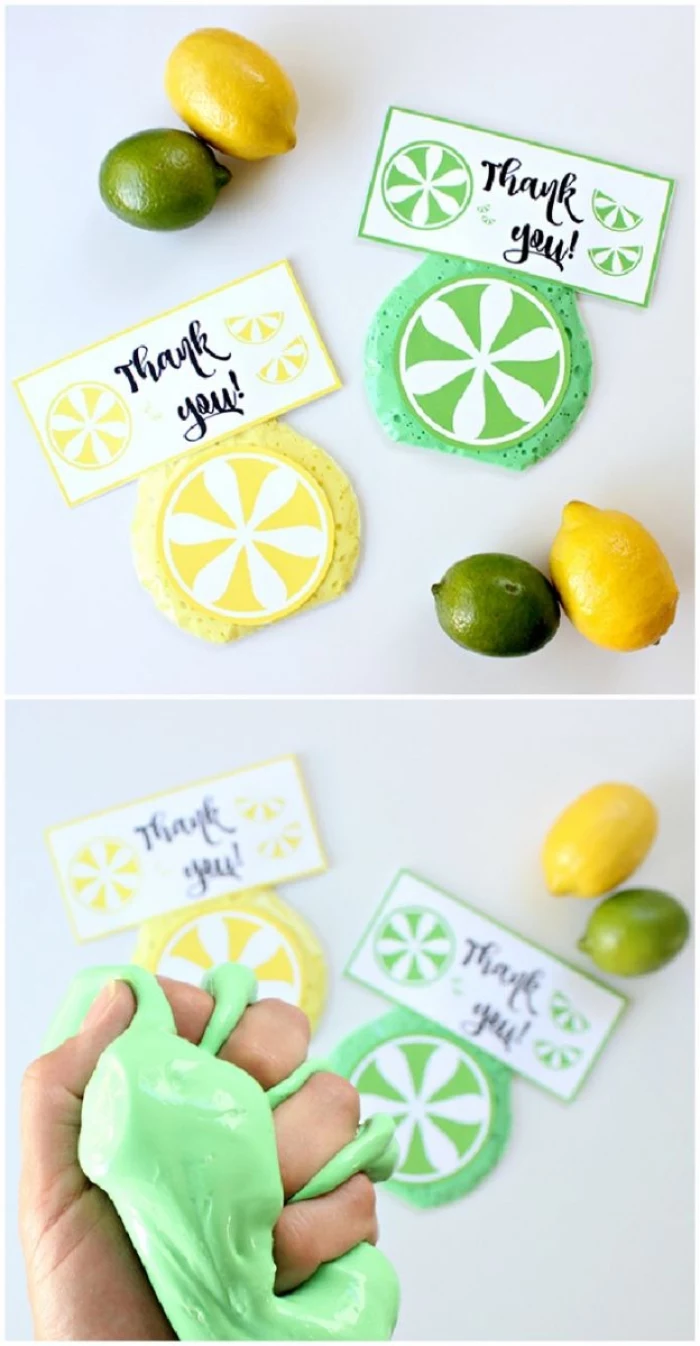
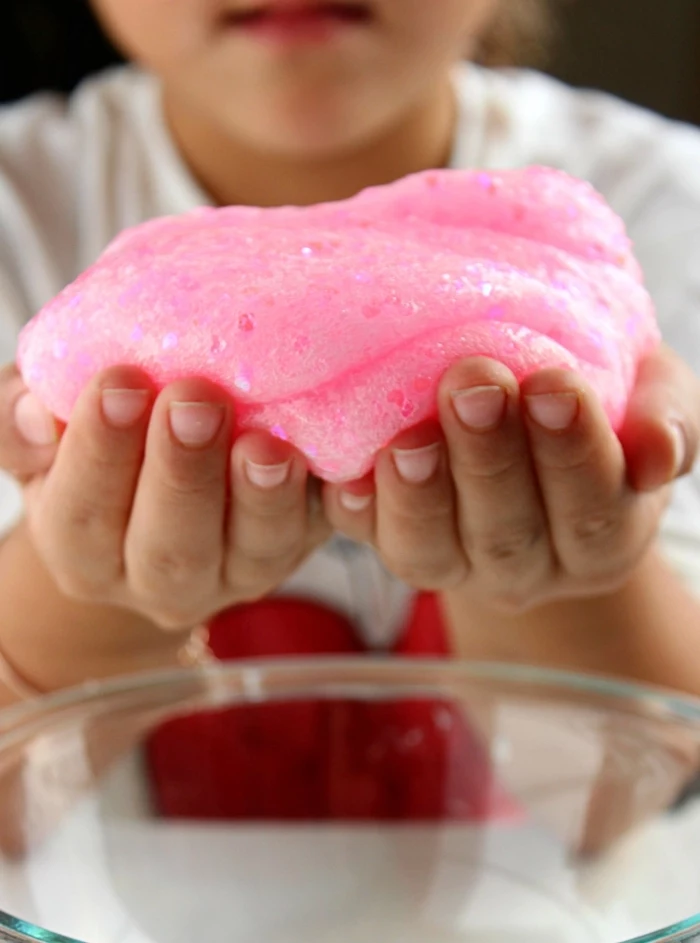
- Color: I recommend gel food coloring (found in the baking aisle for about $3-$4 a set). You only need one tiny drop for rich color, and it won’t water down your slime.
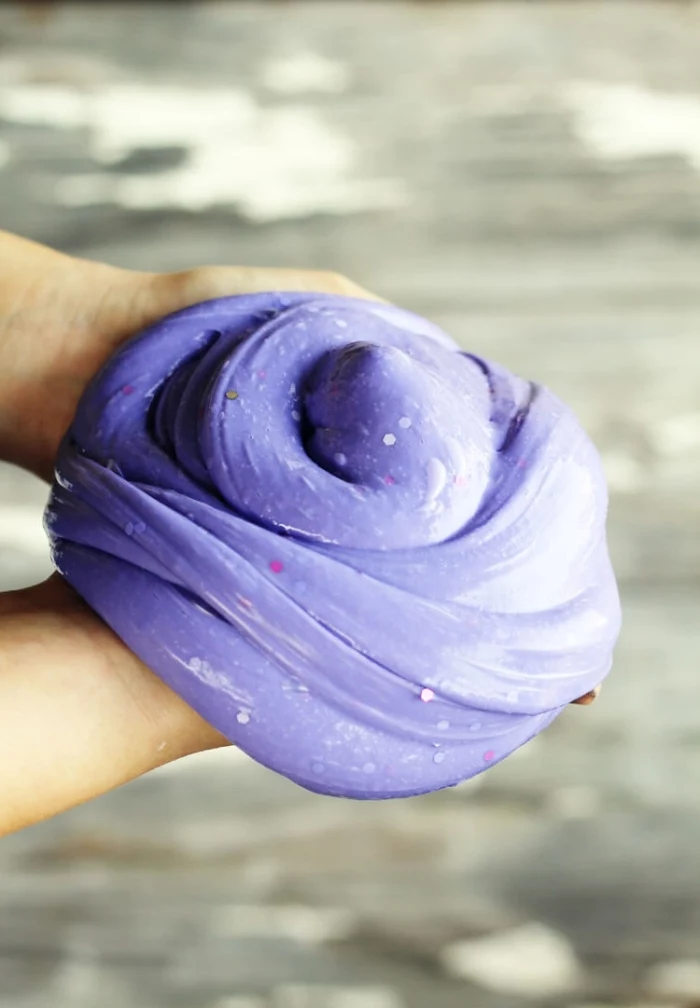
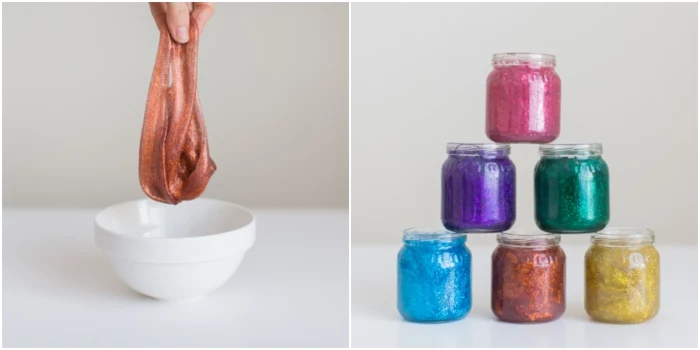
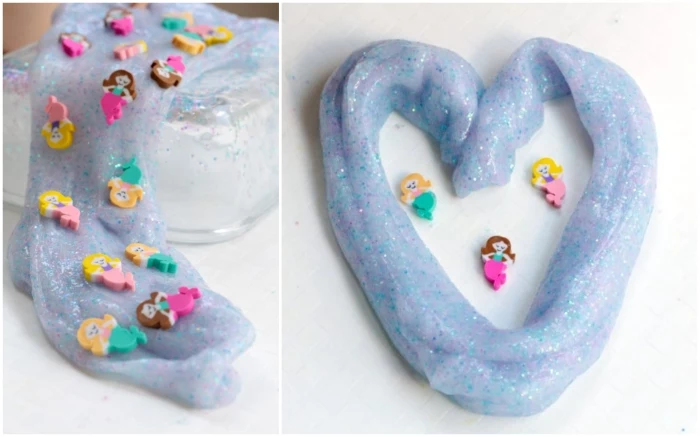
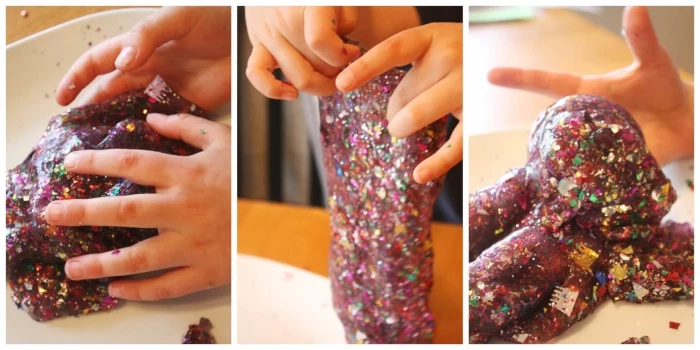
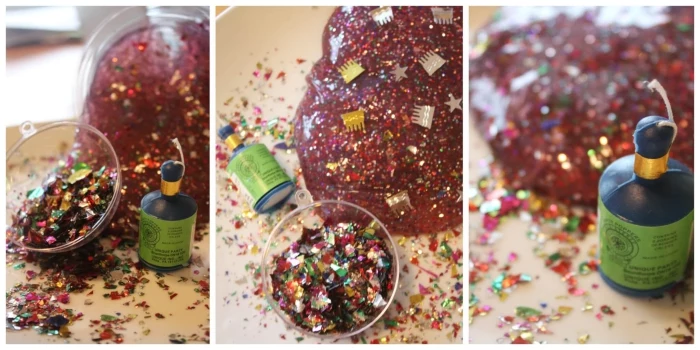
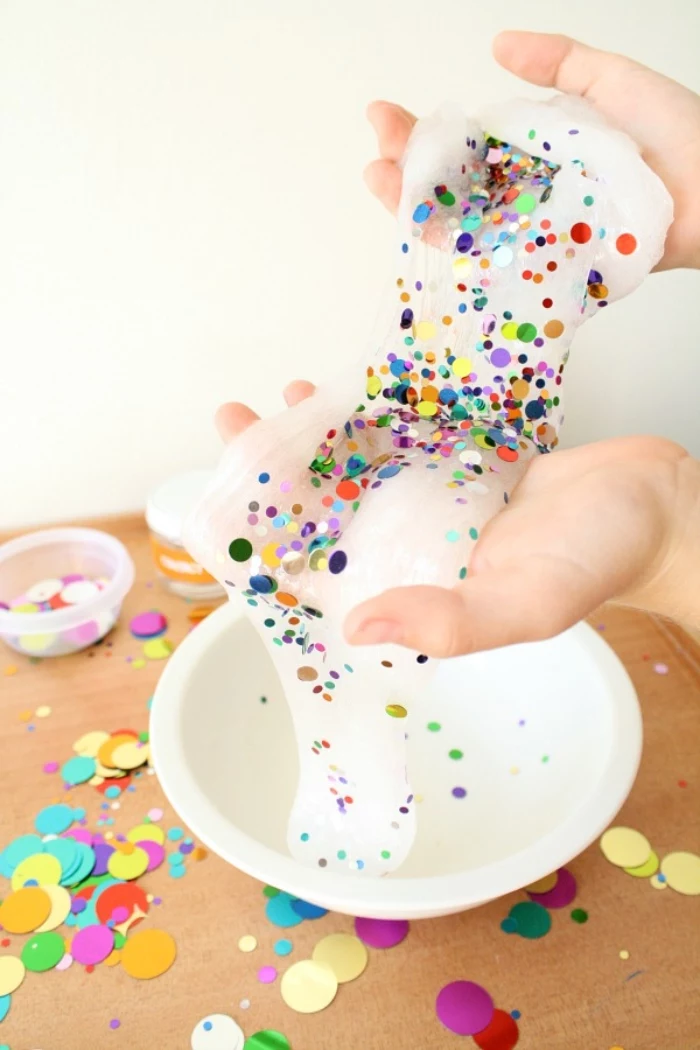
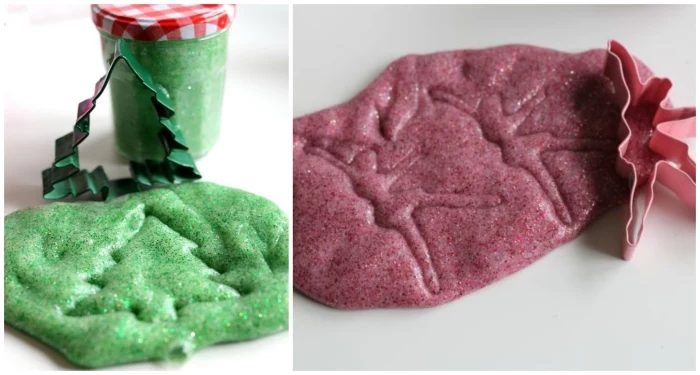
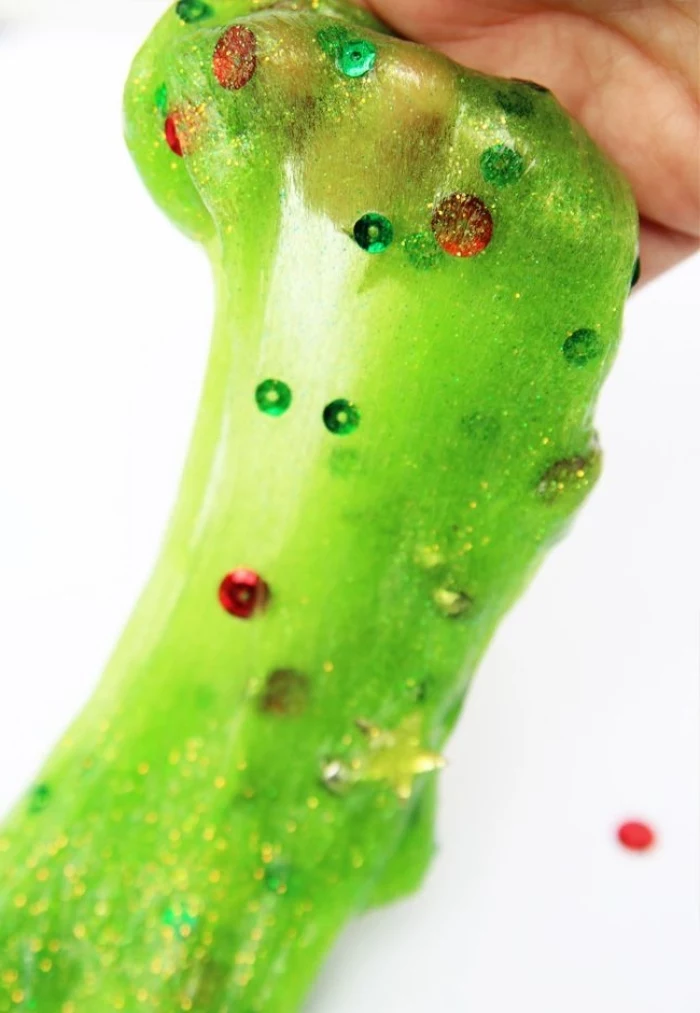
- Glitter: Add it to the glue before the activator for the most even mix.
- Foam Beads: For that crunchy “floam” texture. Quick tip: make your base slime a little thicker and stickier than normal, or the beads will just fall out. Trust me, I learned that lesson the hard way and ended up with a classroom that looked like it had been hit by a foam bead snowstorm.
- Scent: A few drops of vanilla extract or a single drop of a skin-safe essential oil can make it smell amazing.
- Storage: Air is the enemy! Always keep your slime in an airtight container or a Ziploc bag. A good batch can last for weeks if you play with clean hands. If it gets a little stiff, just knead in a small pump of hand lotion to bring it back to life.
And there you have it. You’re not just a slime-maker anymore—you’re a slime scientist. You understand the materials, you know how to troubleshoot, and you’re ready to experiment. So go have fun, and don’t be afraid to get a little messy!
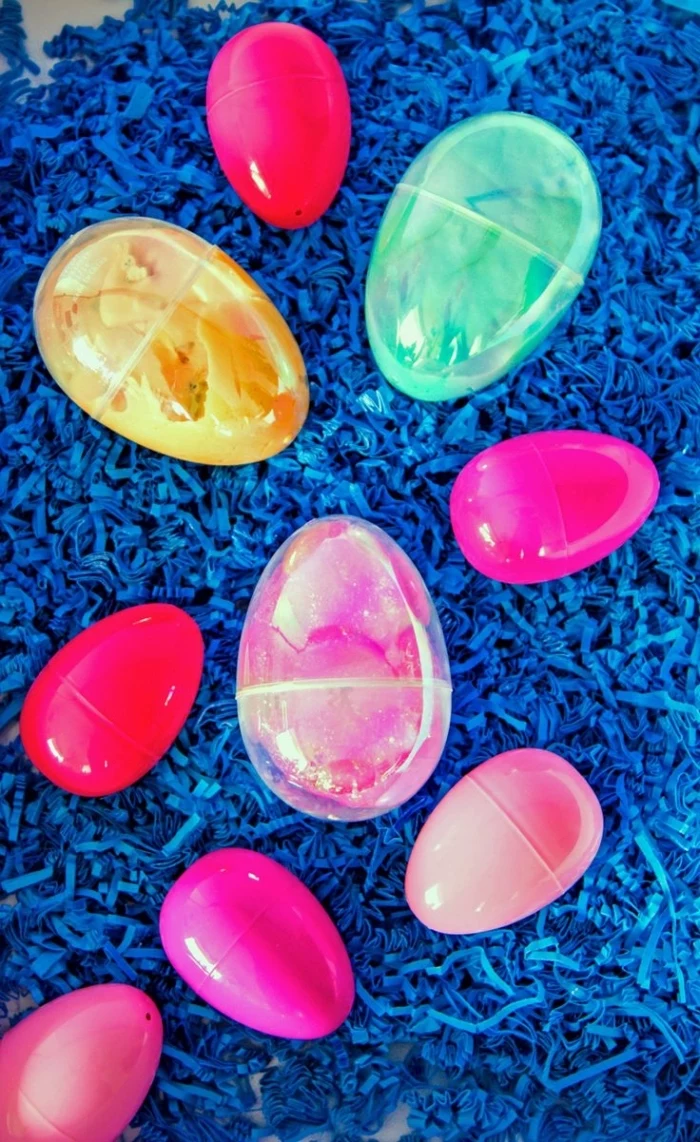
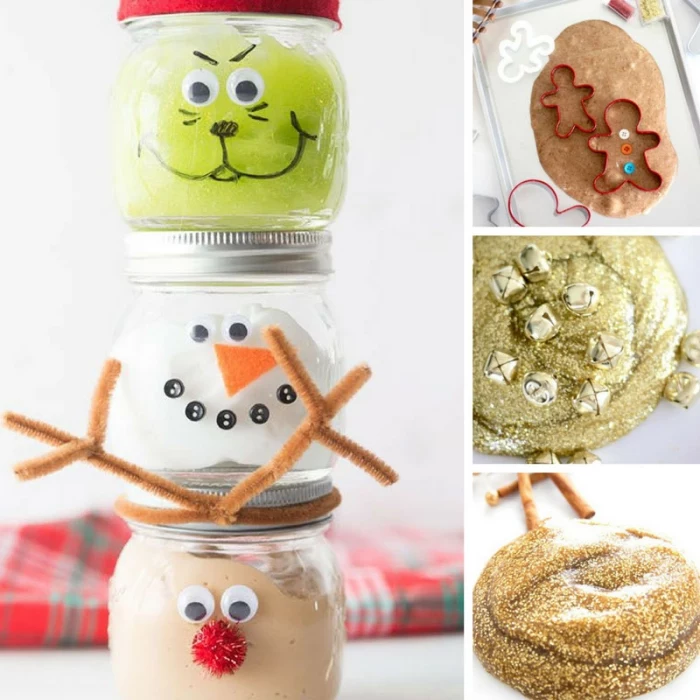
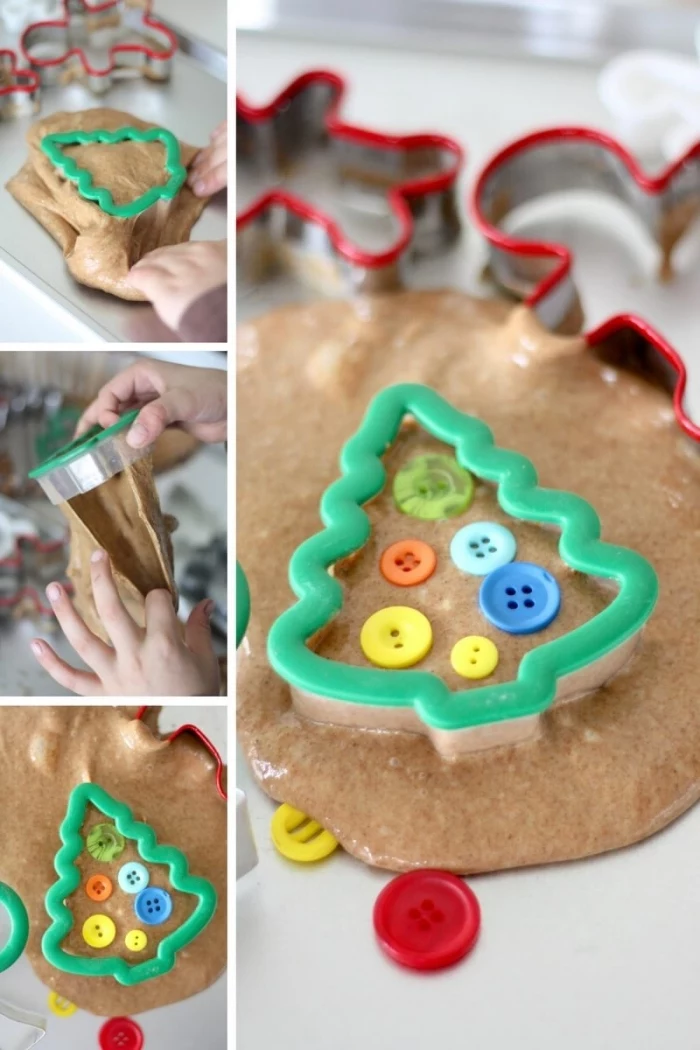
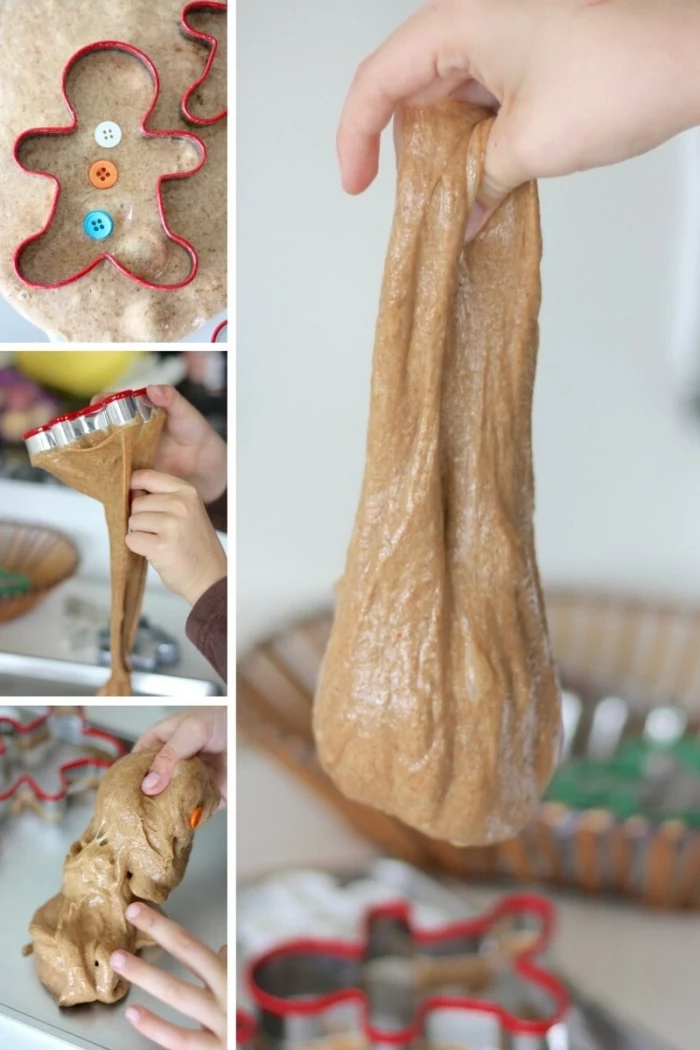
Inspiration Gallery
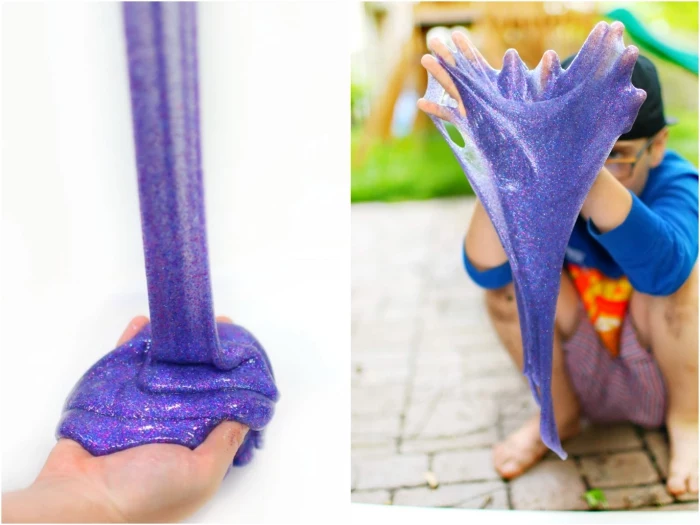
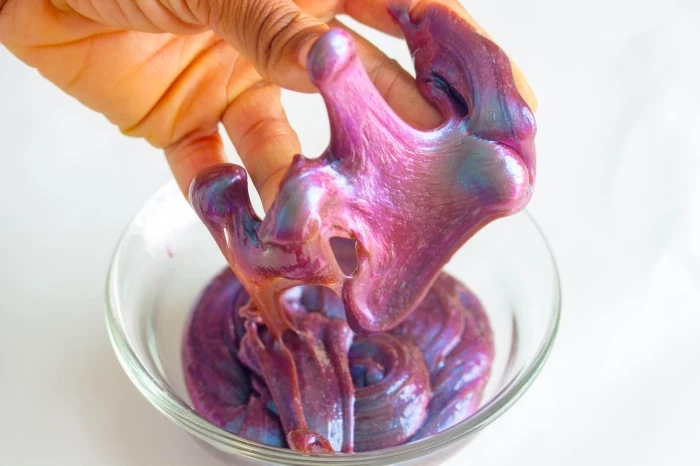
Clear Glue vs. White Glue: The choice of glue is your first creative decision. Use a classic white PVA glue like Elmer’s School Glue for opaque, pastel-colored slimes, and as the perfect base for fluffy slime. For vibrant, jewel-toned slimes or those where you want to see glitter and charms suspended as if in glass, you’ll need a clear PVA glue.
To elevate the sensory experience, a few drops of baking extracts can transform your creation. Vanilla, peppermint, or even lemon extract work beautifully and blend right in. Be cautious with oil-based scents or perfumes, as they can interfere with the polymer chains and cause your slime to break down and become oily.
The first mass-marketed toy slime was sold by Mattel in 1976. It was green, came in a miniature garbage can, and was made primarily from guar gum—a totally different formula from today’s popular PVA glue recipes!
- Create a super stretchy, less rippable slime.
- Give your slime a beautiful, glossy sheen.
- Make the slime softer and more pleasant to hold.
The secret? A small pump of unscented lotion or a teaspoon of baby oil. Add it to your glue before the activator for a simple upgrade to the texture.

Why is my slime still a sticky mess even after mixing forever?
This is the most common issue and it simply means your slime is under-activated. The polymer chains haven’t fully linked up yet. The solution is to add more activator, but do it very slowly. Add just a half-teaspoon at a time, then knead thoroughly for a full minute before deciding if you need more. Patience is key!
A word on safety: While slime is fun, the activator ingredients require respect. Always have an adult handle and mix any concentrated borax powder solutions. Never, ever taste or eat any slime ingredients. And the number one rule in any workshop: wash your hands thoroughly with soap and water both before and after you play!
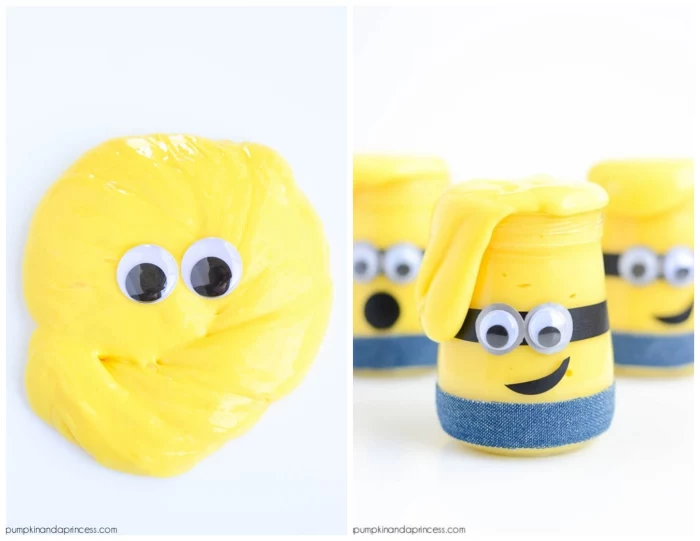
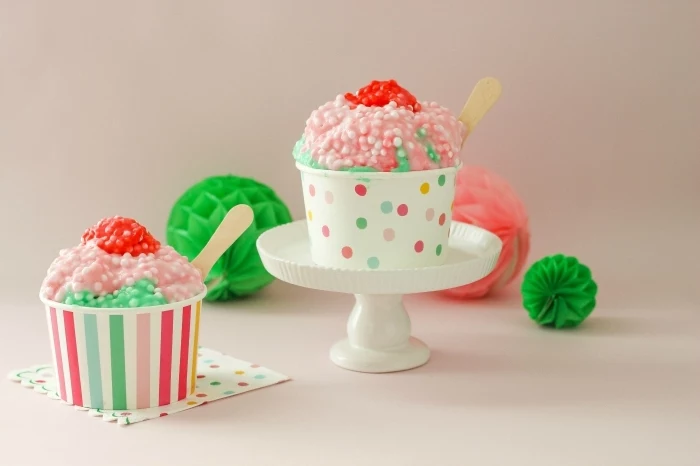
Ready to move beyond basic slime? The world of add-ins is where the real creativity begins. These textures are trending for a reason:
- Foam Beads: For that classic ‘floam’ crunch.
- Soft Clay: A disc of Daiso Japan Soft Clay or Model Magic creates a spreadable ‘butter’ slime.
- Instant Snow: The key to ‘cloud’ slime’s drizzly texture.
- Fishbowl Beads: Plastic faceted beads for a unique, crunchy feel in clear slimes.
On social media, the term ‘ASMR’ (Autonomous Sensory Meridian Response) is intrinsically linked to slime. Videos featuring the sounds of poking, squishing, and crunching slime have garnered billions of views, creating a huge community focused purely on the satisfying sounds of the goo.
This highlights how much the auditory and tactile experience is part of the appeal. When making your slime, pay attention to the sounds it makes! Add-ins like plastic beads or bingsu beads are specifically chosen to create satisfying crunches.
For that ultra-puffy, airy ‘fluffy slime’ you see online, the secret ingredient is foaming shaving cream. Not shaving gel! A classic, cheap can like Barbasol Original is a favorite in the slime community because it creates a dense, holdable fluff that doesn’t deflate as quickly as other brands.
- Store in a truly airtight container or a heavy-duty zip-top bag.
- Keep it in a cool, dark place away from direct sunlight.
- Always press out all the air before sealing the container.
- If it starts to get sticky after a few days, a few drops of activator and a quick knead will revive it.
What exactly is ‘butter slime’ and how do I make it?
Butter slime is famous for its unique texture: it’s smooth, non-sticky, spreadable like frosting, and incredibly holdable. It gets its name from its soft, buttery feel. The magic ingredient is a lightweight, air-dry clay. Simply make a batch of basic white glue slime, and once it’s fully activated, knead in a small amount of soft clay (Daiso clay is the gold standard) until it’s fully incorporated.
Borax Solution: The most potent and reliable activator. It creates the clearest slimes and is cost-effective for big batches. Requires adult supervision and careful measuring.
Saline Solution & Baking Soda: A gentler, more accessible alternative. It’s the boric acid in the saline that reacts with the baking soda to activate the glue. Make sure the ingredients list on your saline solution bottle explicitly says ‘boric acid’ and ‘sodium borate’ or it won’t work.
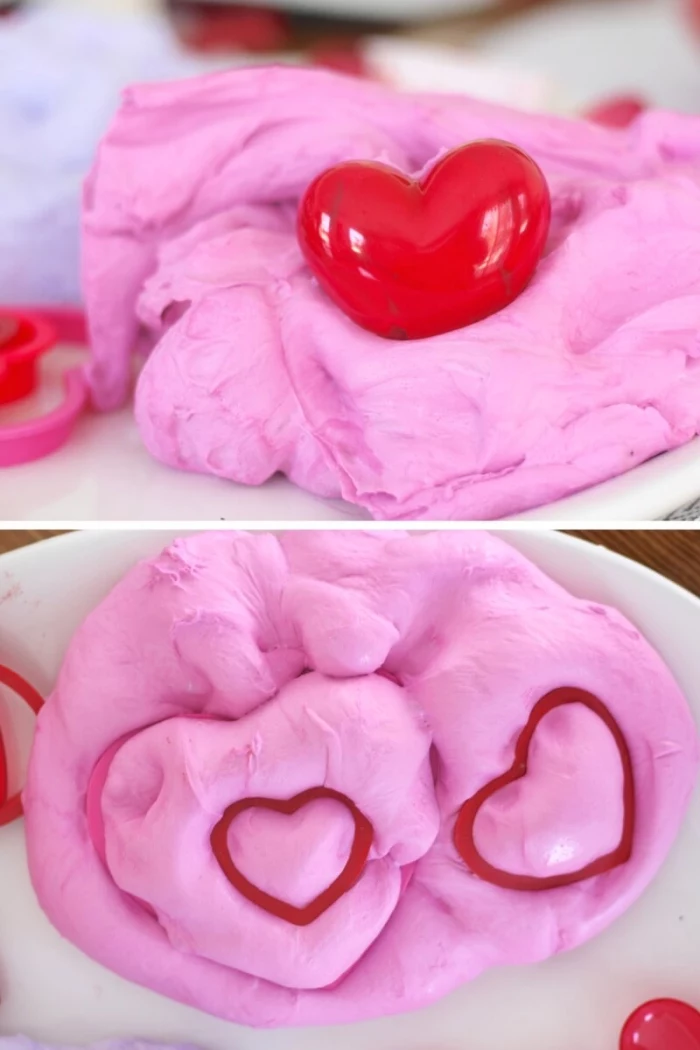
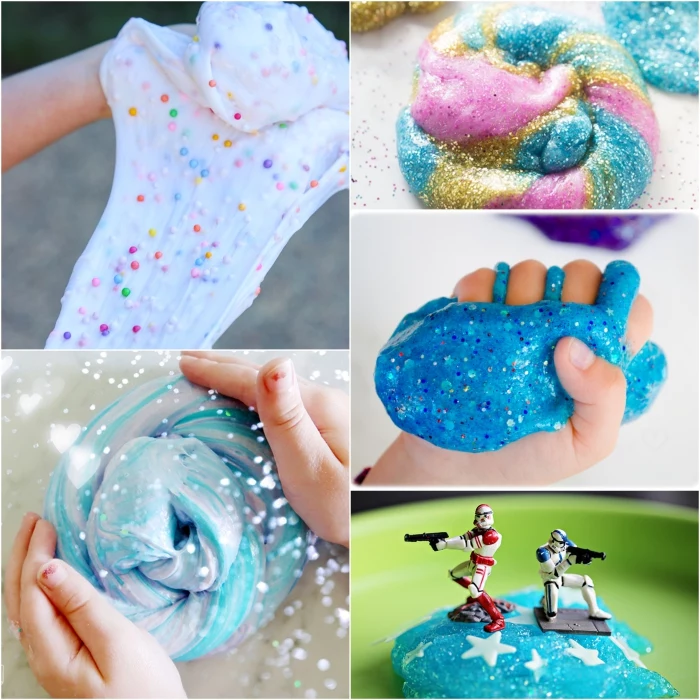
Want to achieve that brilliant, suspended-in-crystal look for your glitter slime? The trick is to add your glitter and any pigments directly to the clear glue *before* adding a single drop of activator. This ensures the glitter particles are fully coated and distributed evenly, preventing them from clumping or sinking to the bottom as the slime forms.
Think green with your sparkle: Traditional glitter is a microplastic, which can be harmful to the environment. For a more eco-conscious slime, look for biodegradable glitter from brands like Today Glitter or Bio-glitter. Made from plant-based cellulose, it provides all the sparkle but will break down naturally over time.

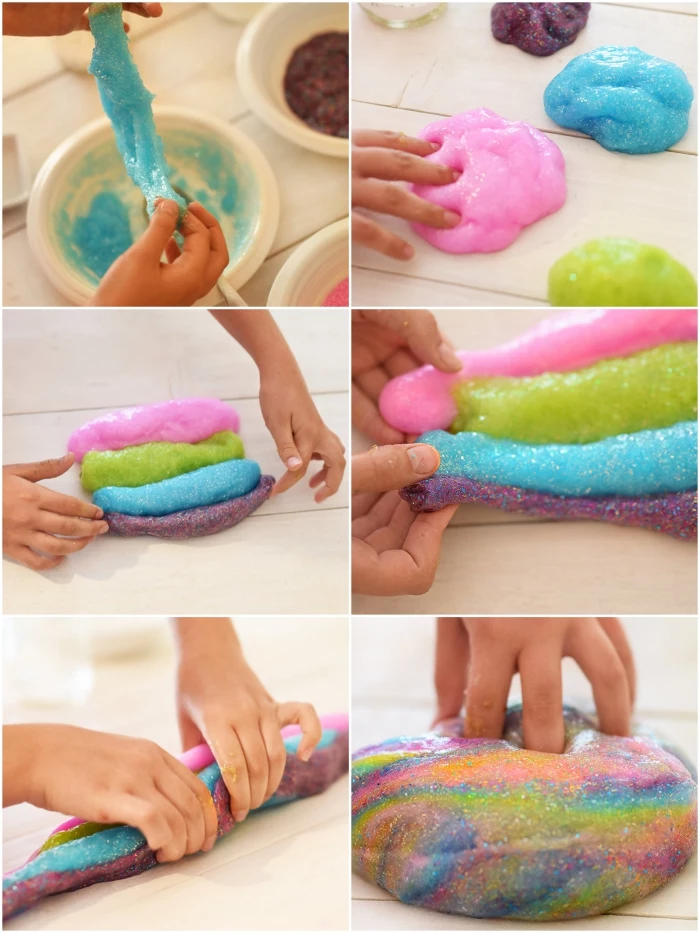
Don’t be afraid to experiment with color, but avoid the dreaded ‘muddy brown’ trap. Start with just one or two drops of food coloring—a little goes a long way. To create custom shades, mix your colors in a separate small dish *before* adding them to the glue, so you know exactly what hue you’re getting.
Did you know? The hashtag #slime has over 25 million posts on Instagram and billions of views on TikTok.
This massive online community is the best place for inspiration. Watching a few ‘slime mixing’ or ‘slime review’ videos can introduce you to textures you’ve never heard of and color combinations you’d never have imagined.
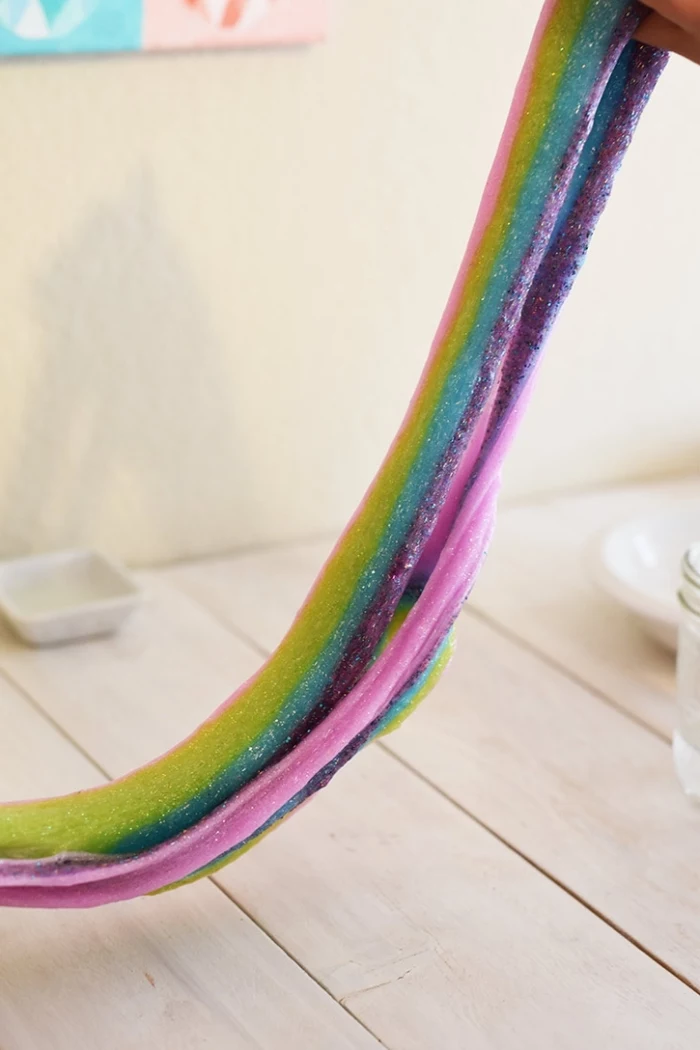
The ‘Avalanche’ slime trend is a project in patience with a stunning payoff. It involves carefully layering a colored clear slime on top of an opaque white slime inside a clear, airtight container. Over 24 to 48 hours, gravity causes the top layer to slowly cascade down into the white, creating a beautiful, organic pattern that’s a joy to watch form before you finally mix it all together.
My perfect slime is now a hard, rubbery puck! Can it be saved?
Often, yes! If it’s just stiff and rubbery, it’s likely slightly over-activated or has dried out. Try kneading in a small amount of hot water or lotion, a little at a time. This can help relax the polymer bonds. If it’s truly rock-solid, it might be beyond saving, but this trick is always worth a try before you toss it.
Set up the ultimate ‘Slime Bar’ for a birthday party or playdate. Prepare large, separate bowls of:
- A big batch of pre-made basic white slime
- A big batch of pre-made basic clear slime
- Small bowls of different colored food coloring
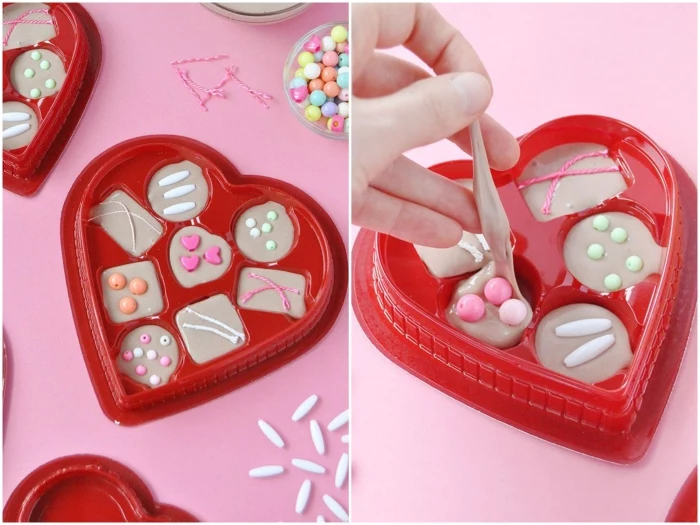
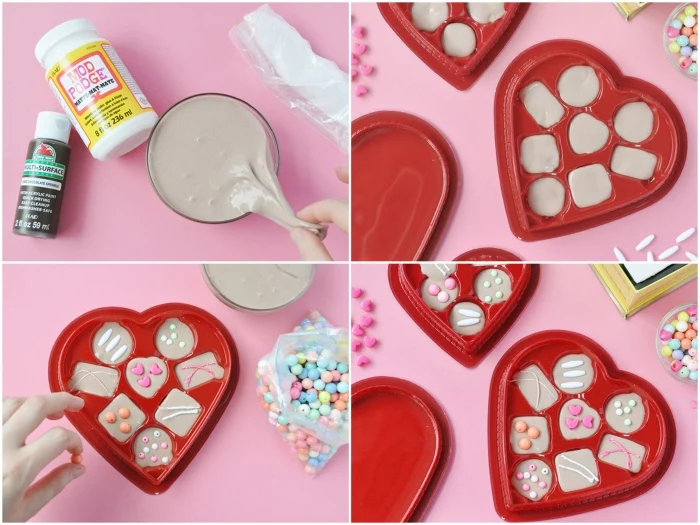
- An assortment of add-ins: various glitters, foam beads, fimo slices, and small charms
- Small, airtight containers for each guest to take their custom creation home.
Making slime is a fantastic budget-friendly activity. A single large bottle of Elmer’s glue-all and a small box of household borax can produce dozens of individual slimes for a fraction of the cost of one store-bought slime kit. Master the basic recipe first before investing in fancier, more expensive add-ins.
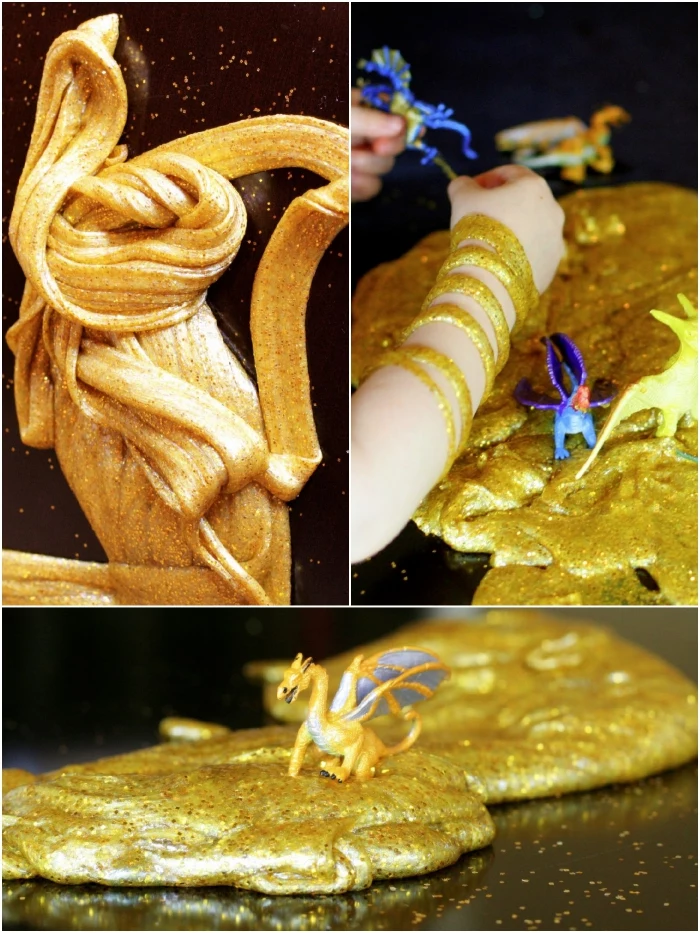
- Galaxy Slime: Use clear glue as your base. Swirl in black or dark blue food coloring, then add generous amounts of fine purple, blue, and silver glitter.
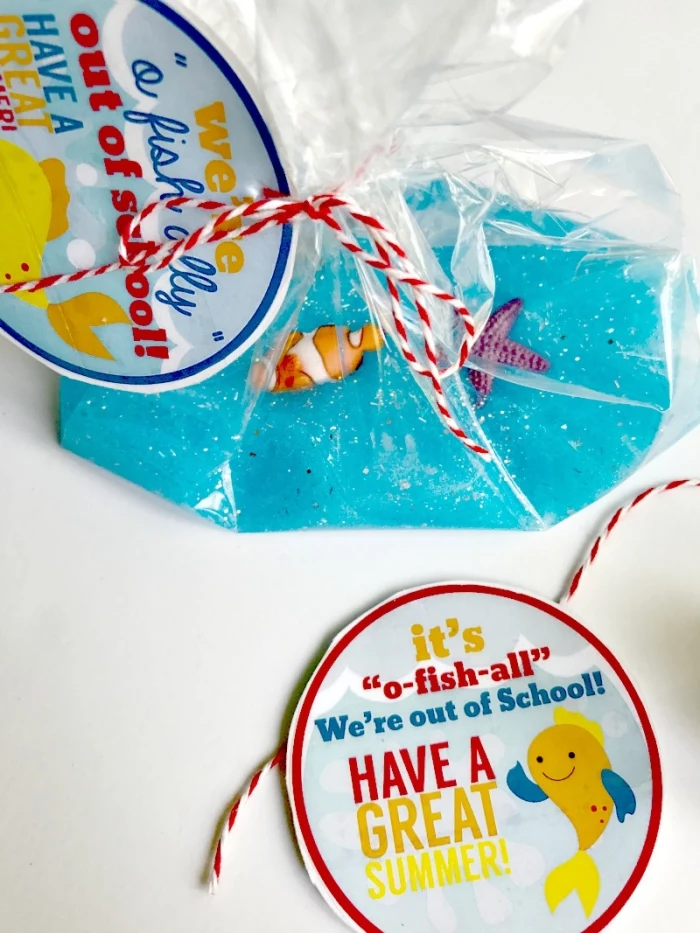
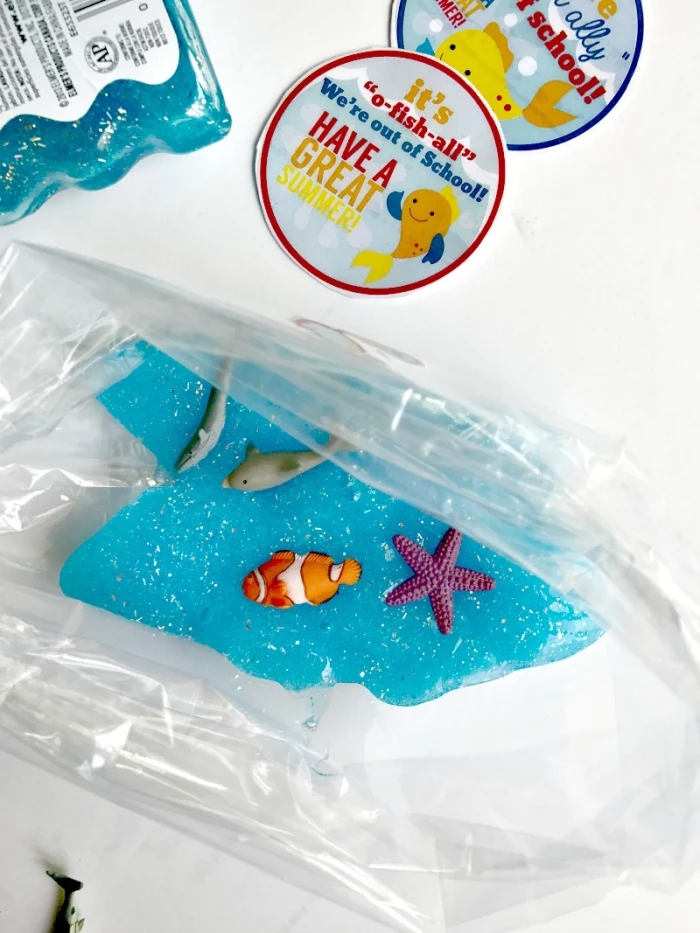
- Ocean Slime: Start with a light blue-tinted clear slime. Mix in some plastic ‘fishbowl’ beads for crunch and a few tiny toy sea creatures.
- Birthday Cake Slime: Use a white, fluffy slime base and mix in rainbow ‘fimo’ sprinkles and soft foam beads.
The biggest rookie mistake: Dumping in the activator too quickly. The chemical reaction needs time and agitation (kneading!) to work. The slime will go through a very sticky, stringy, ‘this is a disaster’ phase before it suddenly comes together. Trust the process and add your activator slowly and patiently.

Jelly Cube Slime: A unique texture made by adding cut-up pieces of a Magic Eraser sponge to a clear slime base. The porous sponges absorb the slime, creating soft, squishy cubes that are satisfying to crush.
Icee Slime: This sizzly, spreadable slime mimics the texture of the famous frozen drink. It’s made by mixing a special ‘hydrated snow’ (instant snow powder mixed with water) into a clear slime base.
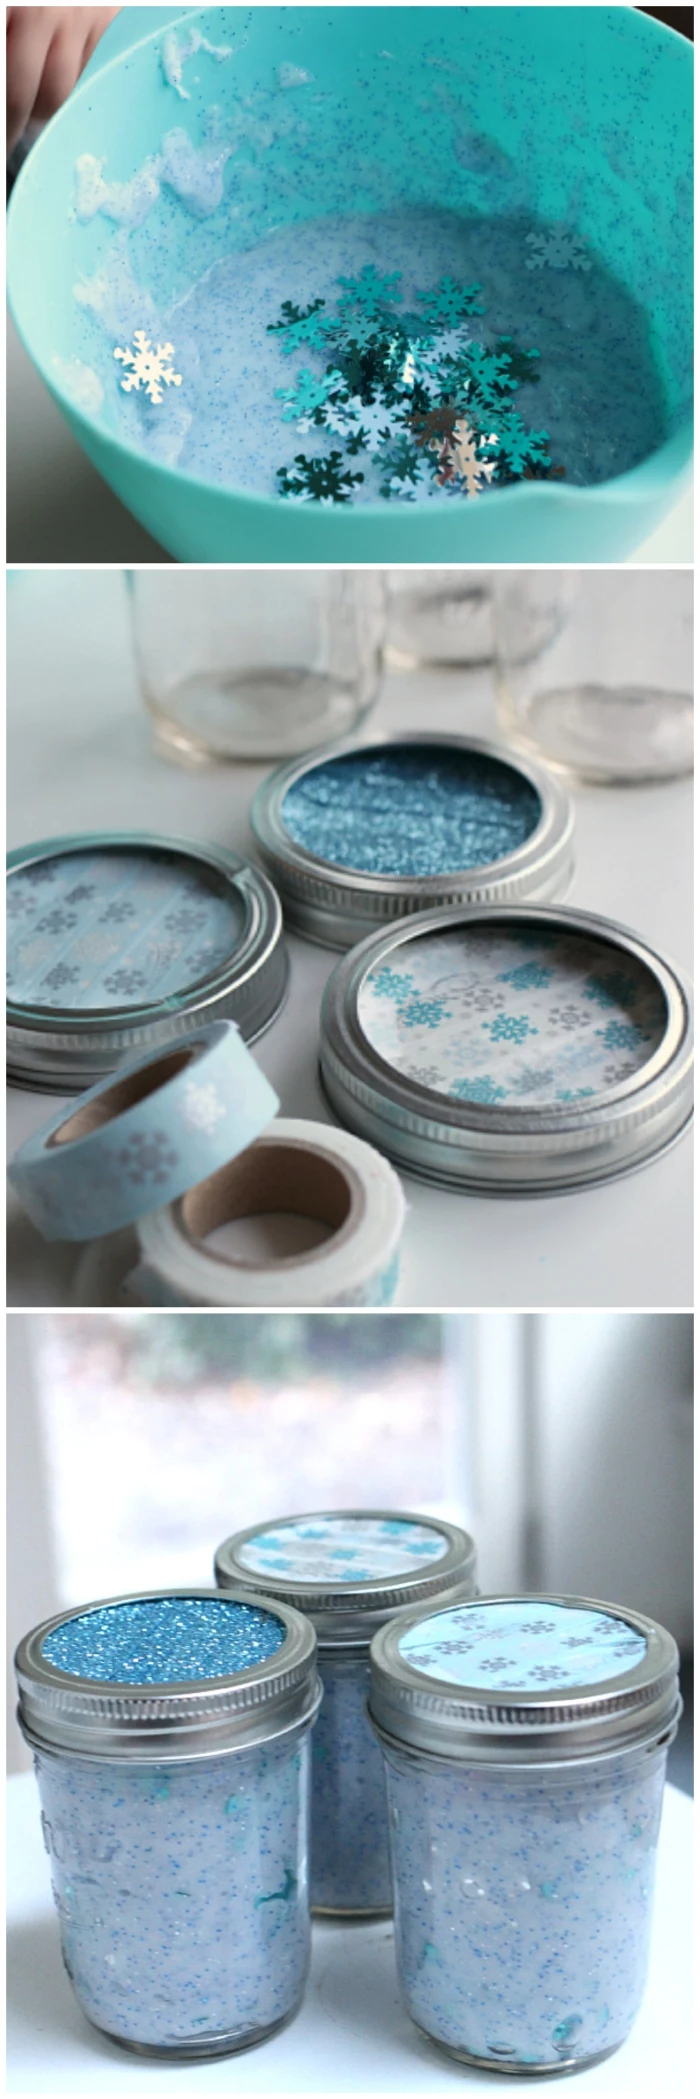
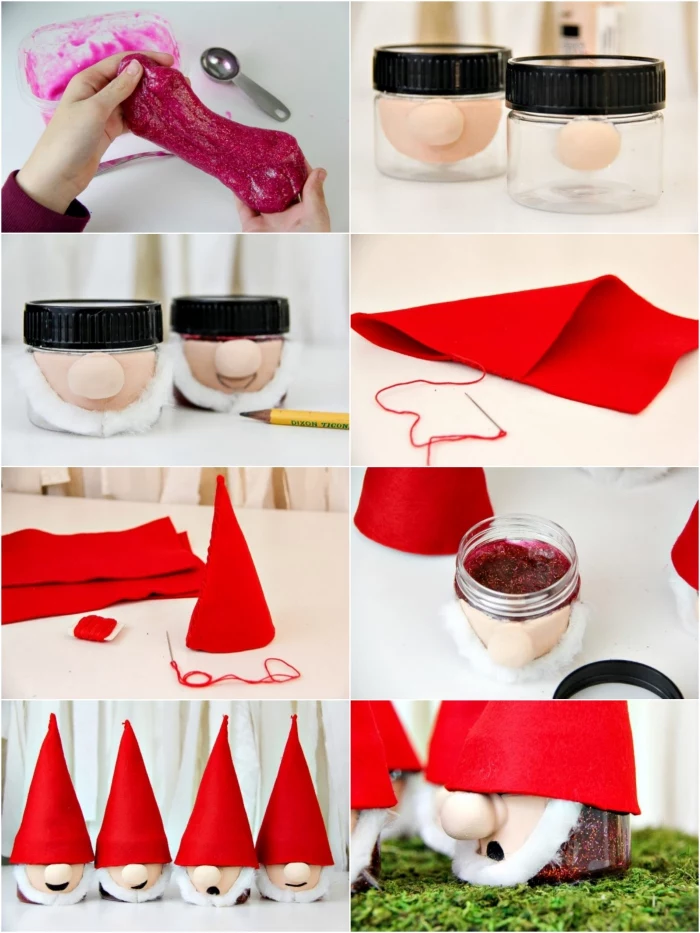
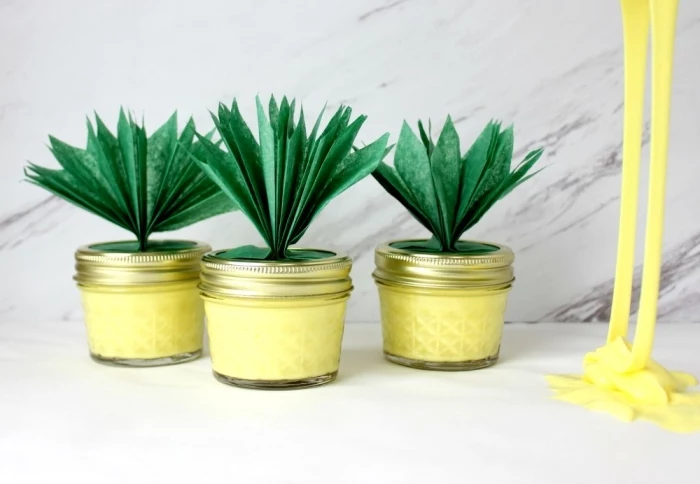
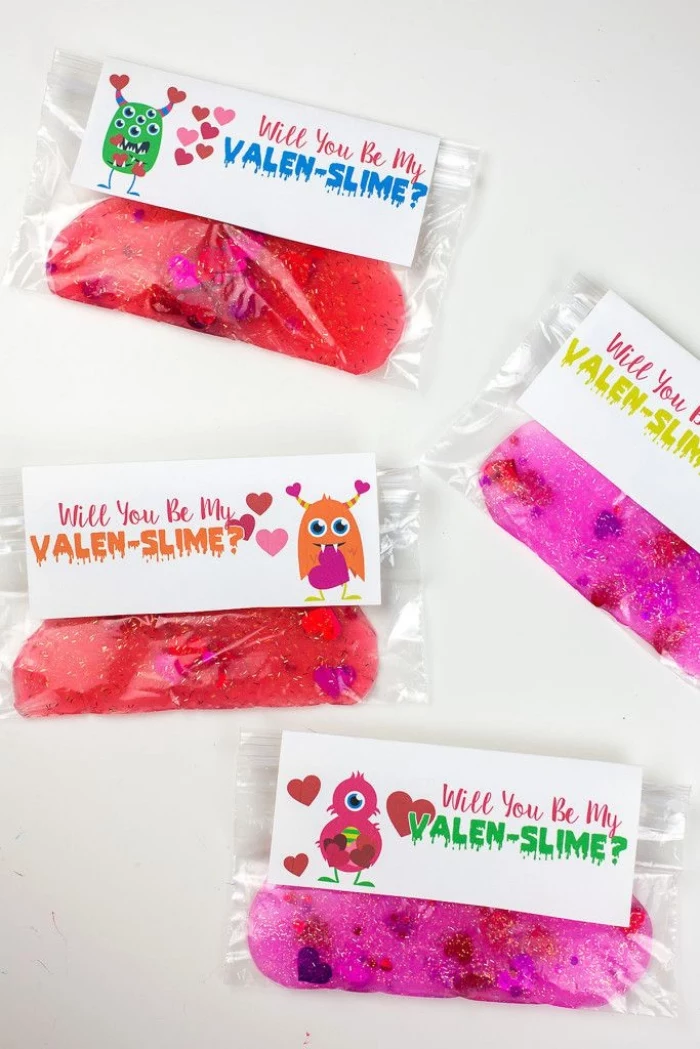
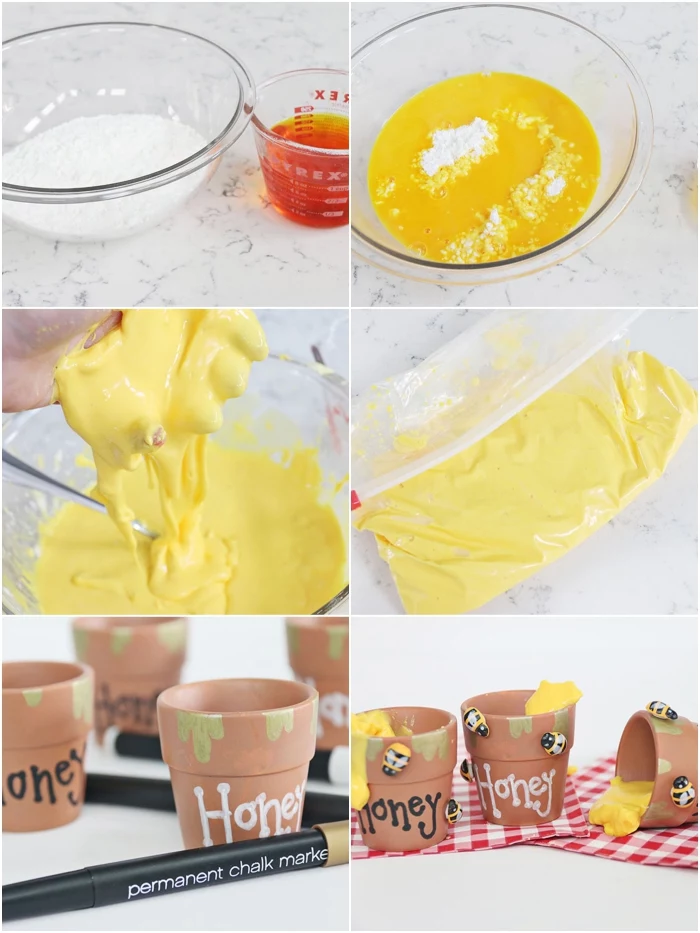
As seen in the gallery, slime makes a fantastic party favor. To create the ‘Valen-slime’ or pineapple jars, make one large batch of slime two days before the event to let it settle. Portion it into small 4oz plastic deli containers with lids—they are airtight and cheap. Print custom labels on sticker paper and apply them to the lids for a personal touch.
Polyvinyl acetate (PVA), the polymer that makes up the backbone of most school glues, was first discovered in 1912 in Germany by Dr. Fritz Klatte. It’s now one of the most common adhesives in the world, from woodworking to bookbinding, but found its most fun use in slime!


