Tired of Carpenter Bees? Here’s How to Build a Trap That Actually Works
I’ve spent years in the building trades, from framing new homes to restoring old trim, and I’ve seen what nature can do to even the toughest wood. One of the most persistent critters we deal with every spring is the carpenter bee. I’ll never forget a beautiful cedar deck we finished for a client. A week later, they called, totally panicked about these big bees drilling perfect, half-inch holes into the brand-new railings. That was a masterclass in the focused, and sometimes expensive, damage these insects cause. They aren’t malicious, but their nesting instincts can really compromise the wood on our homes.
In this article
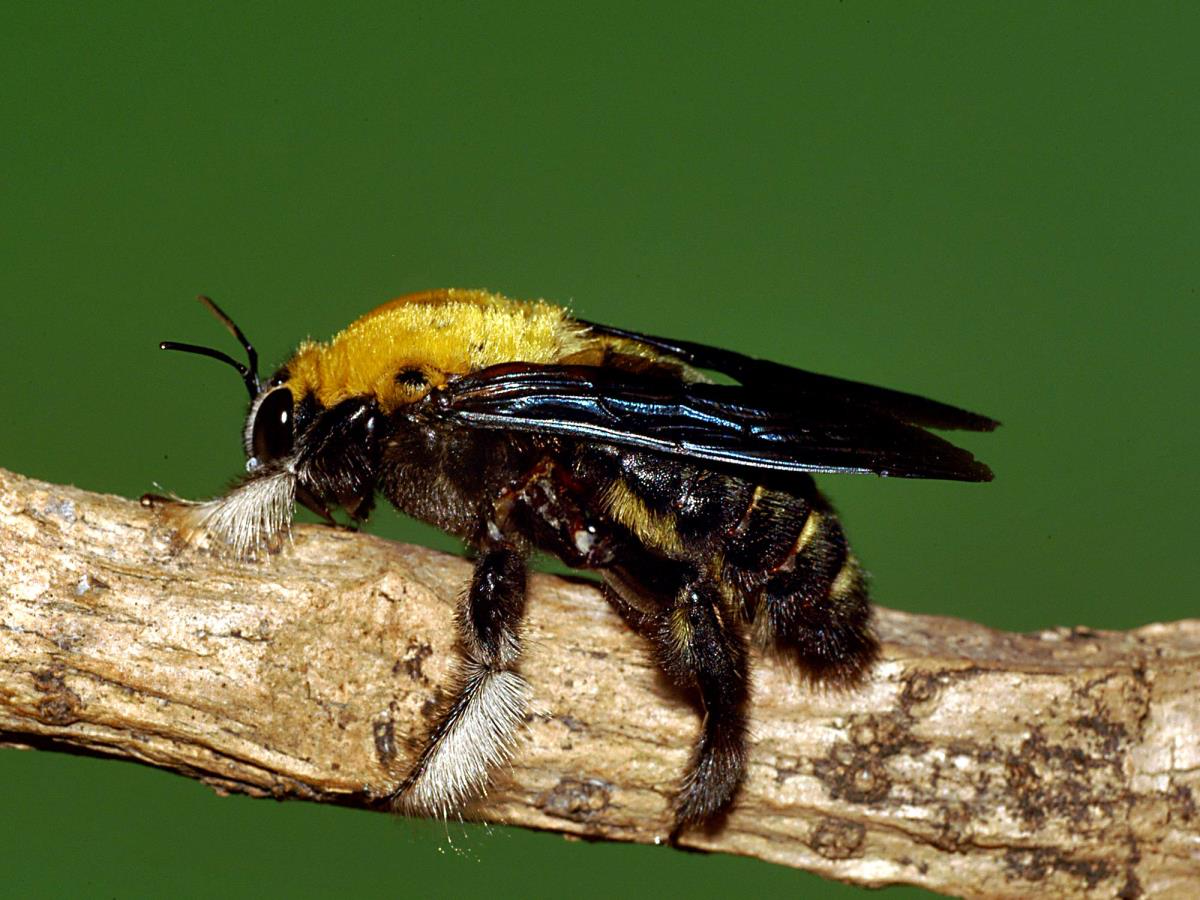
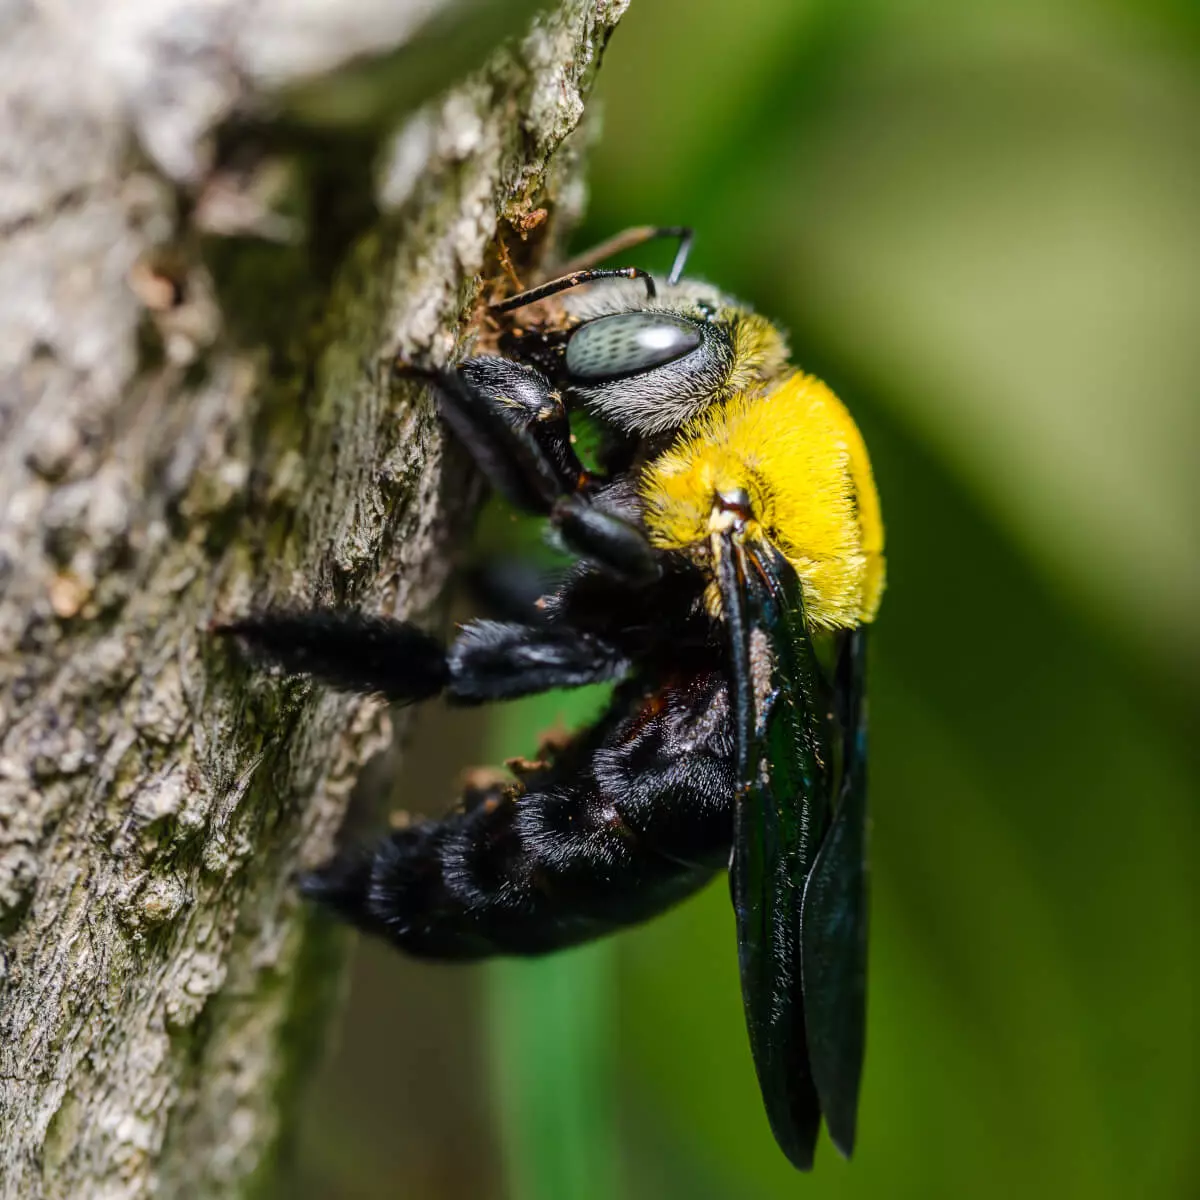
A lot of people mistake them for bumblebees, but there’s a dead giveaway. A carpenter bee has a shiny, black, bald rear end, while a bumblebee’s is fuzzy and yellow. Spotting that difference is step one. Step two is understanding that trapping is about managing the problem, not wiping out the entire species. It’s a targeted way to protect your deck, shed, or the eaves of your house without nuking the whole area with pesticides that harm beneficial insects. This guide is the result of a lot of trial and error, figuring out what works, what doesn’t, and why.
First, Know Your Opponent
Before you even think about building a trap, you have to get inside the head of a carpenter bee. And here’s the key: they are not eating the wood. They are excavating it to build a nursery for their young. Their entire mission in the spring is to find a safe, soft spot to lay eggs, and that instinct is exactly what we’re going to exploit to trap them.
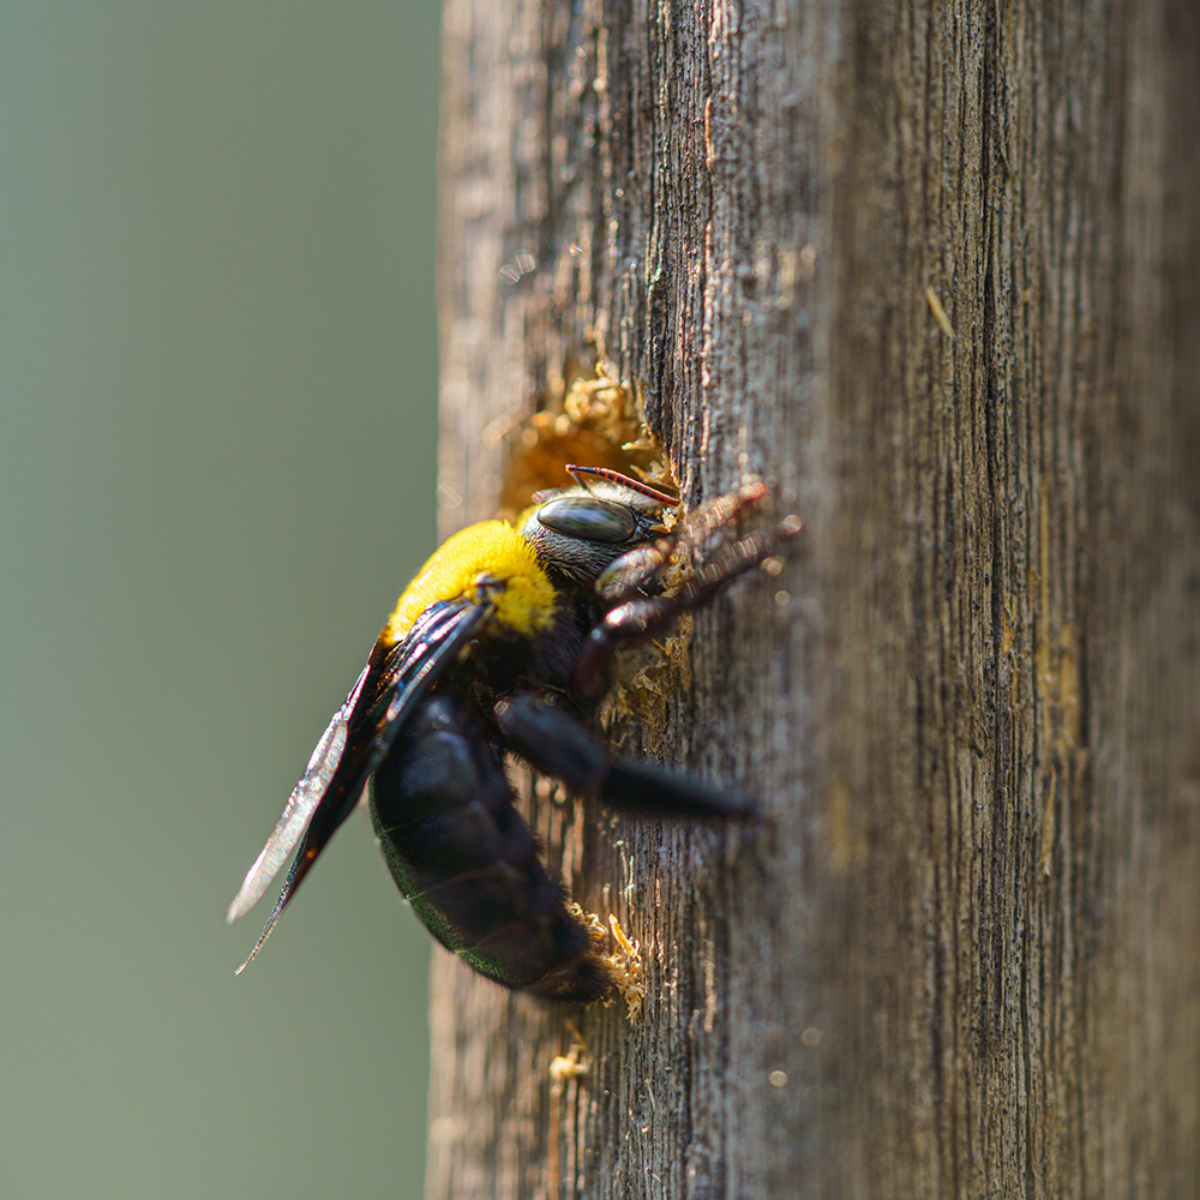
The Science of Their Grind
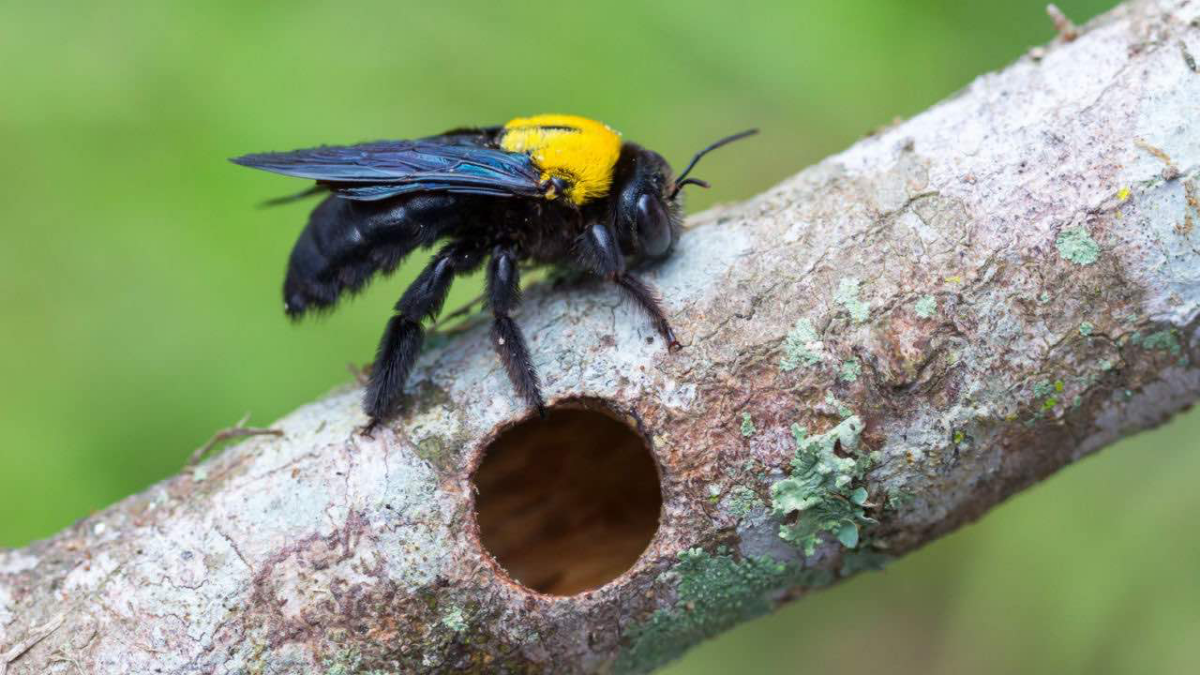
The female carpenter bee is the one doing all the destructive work. She uses her powerful jaws to chew a perfectly round entrance hole, just big enough for her body. She’ll tunnel in about an inch, then make a sharp 90-degree turn to dig a long gallery, following the grain of the wood. Inside this tunnel, she creates little rooms, laying an egg in each one with a small ball of pollen for the larva to eat. That coarse sawdust you see on the ground below the holes? That’s called frass, and it’s the tell-tale sign of her work.
The males are just the security guards. They’re super territorial and will hover aggressively near the nest, buzzing right in your face. But it’s all a bluff, by the way. Male carpenter bees don’t have a stinger. The female can sting, but she’s pretty docile and usually won’t unless you physically grab her. The real threat isn’t a sting; it’s the long-term damage. They often come back to the same spots year after year, making the tunnels bigger and slowly weakening the wood.
Why They Picked Your House
Carpenter bees are picky. They almost always go for bare, unpainted, or weathered softwoods. Pine, cedar, redwood, and fir are their favorites. They’re also suckers for a sunny spot, which is why the south and west-facing sides of a house, along with any structures that get a lot of sun, are often hit the hardest.
Prime real estate for them includes:
- Fascia boards and soffits right under the roofline
- Deck railings, posts, and floorboards
- Wooden siding
- Pergolas, gazebos, and arbors
- Wooden sheds and playsets
A good coat of paint or sealer is a huge deterrent. The bees just can’t get a good grip on a hard, slick surface. That’s your best long-term defense, but for an active problem, trapping is your first move.
Why These Traps Actually Work
A good carpenter bee trap is brilliantly simple. It’s not about bait; it’s about tricking their instincts with smart architecture. The bee is looking for what it thinks is a safe, pre-drilled nesting hole. The trap offers just that: a perfect half-inch opening in a block of softwood.
Once inside the dark chamber of the trap, the bee’s second instinct kicks in: fly towards the light to find a way out. The trap’s design funnels them down into a clear plastic bottle at the bottom. The path to the light is easy, but for some reason, they just can’t figure out how to fly back up into the dark box and out the hole they came in. It’s a simple and effective one-way street.
How to Build My Go-To Box Trap
This is the design I’ve had the most success with. It’s tough, easy to assemble, and it effectively mimics the eaves of a house, which the bees find very attractive. Before you start, let’s talk about cost and time. You can buy a single pre-made trap online for about $20-$30. Or, you can head to a place like Home Depot, grab an 8-foot 1×6 pine board for around $10-$12, and build two or three traps yourself. The choice is yours!

Materials & Tools List
- Wood: One 3-foot piece of 1×6 untreated pine or cedar. It HAS to be untreated.
- Collector: One standard 16-20 oz plastic soda bottle with its cap.
- Fasteners: A handful of 1 1/4-inch exterior-grade deck screws.
- Tools: A tape measure, pencil, and a saw. A miter or circular saw is fastest, but a hand saw and some patience will get the job done. You’ll also need a drill with a 1/2-inch spade bit and a larger bit that matches your bottle’s neck (usually around 1 1/8-inch works well).
Step-by-Step Build Guide
Once you have your wood cut, assembly is a breeze. Plan on about 15-20 minutes to put one of these together.
- Cut Your Wood: From your 1×6 board (which is actually 5.5 inches wide), cut your pieces: two 7-inch side walls, one 5.5-inch back wall, one 4-inch bottom, and one 8-inch roof.
- Build the Box Frame: Stand the two side walls up. Fit the back wall between them, flush with the back edges, and drive screws through the sides to secure it.
- Attach the Bottom: Slide the bottom piece into the box, leaving about a 1.5-inch gap at the front (this helps with airflow). Screw it in place from the sides and back.
- Drill the Entrances: This is the most important part. On the two side walls and the back wall, measure about 1.5 inches down from the top. Drill your 1/2-inch holes here, but drill them at a slight upward angle, around 15-20 degrees. This angle mimics a natural nest and makes it more appealing.
- Drill the Collector Hole: Flip the box over. In the center of the bottom piece, use your larger drill bit to make a clean hole for the bottle neck.
- Attach the Roof: Place the 8-inch roof piece on top, letting it overhang a bit on the front and sides to protect the entrance holes from rain. Screw it down into the walls.
- Install the Bottle: Your trap is done! Just push the neck of the soda bottle up through the bottom hole. The bottle cap will act as a flange and hold it perfectly in place.

Now What? Dealing with a Bottle of Bees
Okay, so your trap is working, and now you have a bottle with a few (or many) angry bees inside. What do you do? The easiest and most humane way to handle it is to unscrew the bottle, cap it, and place it in a freezer for a few hours. The cold will put them to sleep permanently. Then you can just empty it into the compost or trash and put the bottle back on the trap.
Is DIY Better Than Buying a Trap?
Honestly, it depends on you. I’m a big fan of the DIY approach for a few reasons. It’s significantly cheaper if you plan on setting up multiple traps, and you get the satisfaction of solving the problem yourself. Plus, you control the materials, ensuring you’re using the right kind of untreated softwood.
However, if you’re not comfortable with tools or you’re short on time, buying a pre-made trap is a great option. They work on the exact same principles. Just make sure you’re buying one made from solid wood, not plywood, and that it has that all-important clear collector bottle on the bottom.

Other Trap Designs for Different Situations
While the box trap is my top recommendation, a couple of other designs are worth knowing about.
- The Simple Post Trap: This is the fastest build if you happen to have a spare 4×4 post. You just take a foot-long section, drill the angled 1/2-inch entrance holes into the sides, and then drill up from the bottom to create a central chamber and a hole for the bottle. It’s a bit more rustic but works just as well.
- The Mason Jar Trap: This one gets points for style and looks great on a porch. It’s basically a small block of wood that acts as a lid for a wide-mouth mason jar. You drill the entrance holes into the wood block. It looks nice, but I’m not a huge fan because glass is heavy and can shatter if it falls. If you use this design, place it somewhere low and secure.
Placement is Everything: Where to Hang Your Traps
A perfect trap in the wrong spot will catch nothing. Where you put it is just as important as how you build it.
Quick Tip: Don’t have time to build a trap today? No problem. Take five minutes right now and walk around your house. Find the sunny spots on the south and west walls and look for any bare, unpainted wood on your deck, shed, or eaves. You’ve just identified ground zero for your bee problem. That’s where you’ll hang your traps later.
You want to place them near existing damage or right at the corners and eaves of the house, especially on the sunny side. Height matters, so try to get them up near the roofline if that’s where the activity is. And please, be careful on that ladder! The best time to put them out is in early spring, as soon as the weather warms up, so your traps are the most appealing new homes on the block.
Troubleshooting & What to Expect
If your trap isn’t catching anything after a week, double-check that it’s in a sunny spot and made from the right wood. So, what does success look like? If you’re catching 5-10 bees a week during the peak spring season, your trap is definitely doing its job.
By the way, forget about using bait. Many guides suggest it, but in my experience, sweet baits just attract ants and beneficial honeybees, which you don’t want to harm. A well-built trap is all the attractant you need.
The Long-Term Plan: Trapping Isn’t a Magic Bullet
Traps are fantastic for controlling the population, but they’re just one part of a complete strategy.
- Trap in the Spring: This catches the nesting females before they can lay eggs.
- Plug Old Holes in the Fall: This is the step everyone forgets! After the first frost, the nests will be empty. Fill the holes with a wooden dowel and wood glue or some wood putty. Trust me on the timing—I once got impatient and plugged holes in July, and a few very angry bees just chewed their way right back out. Wait for that frost!
- Paint and Seal: The ultimate defense is making your wood unappealing. A good coat of paint or a quality sealer creates a hard barrier that bees just can’t penetrate.
If you see widespread damage that looks like it could be structural, or the problem is in a place that’s too dangerous for you to reach, don’t hesitate to call a professional exterminator. Sometimes, you need a specialist to protect your home. But for most situations, a few well-placed traps and a little preventative maintenance can keep your woodwork safe for years to come.