Stop Buying Flimsy Gift Bags—Here’s How to Make Your Own Like a Pro
I’ve spent a lot of time working in high-end shops, and if there’s one skill that’s saved me more times than I can count, it’s knowing how to whip up a perfect gift bag from a simple sheet of paper. Honestly, it started because we had to. A customer would buy an oddly shaped sculpture or a gorgeous, wide-brimmed hat, and none of our standard bags would work. Handing over a beautiful item in a sloppy package just wasn’t an option.
In this article
So, I figured it out. This isn’t just a little craft project; it’s a seriously practical skill that gives you a professional-looking solution for a super common problem.
Over the years, I’ve trained plenty of people on this, and I’ve seen all the common hangups and shortcuts. The difference between a bag that looks homemade and one that looks like it came from a fancy boutique is all in the details—the right paper, the right folds, and a bit of patience. Let’s get into it.
First Things First: Your Materials Are Everything
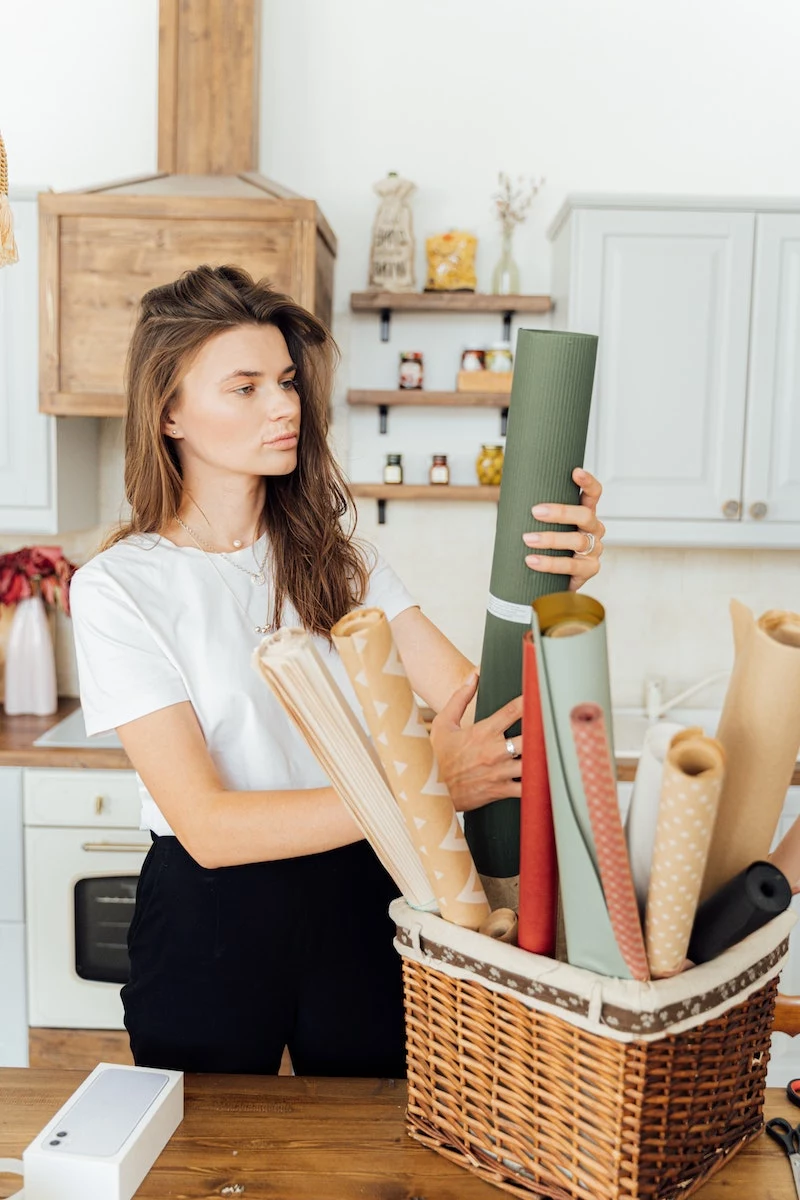
Before you even think about folding, we need to talk about your core materials. Get this part wrong, and you’re setting yourself up for a saggy, disappointing bag. It all starts with the paper.
Paper Weight is a Game-Changer
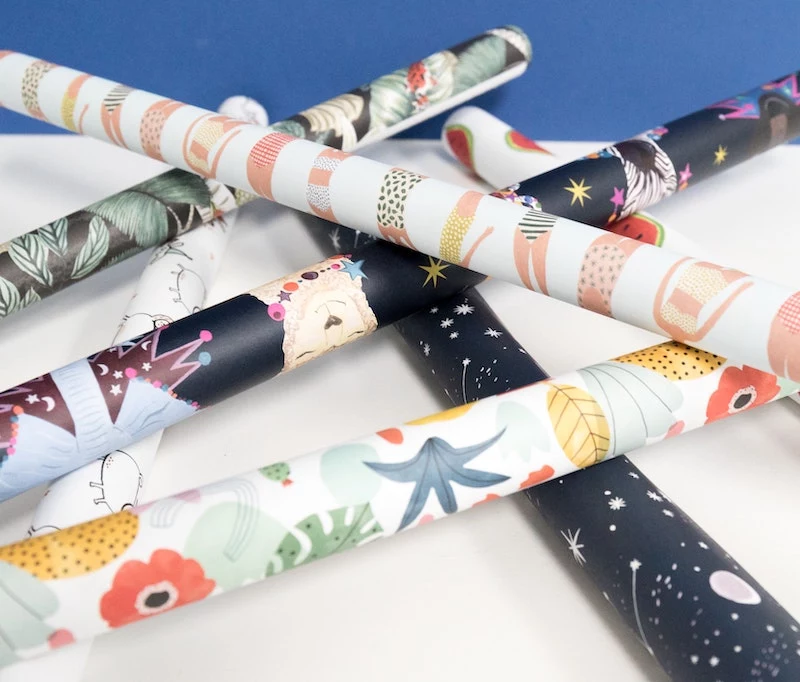
In the paper world, thickness is measured in Grams per Square Meter, or GSM. That cheap, cute wrapping paper from the dollar store? It’s probably around 50-60 GSM. It tears if you look at it wrong and is a terrible choice for this project.
Here’s what you should look for instead:
- Lightweight Gifts (80-90 GSM): This is a great starting point. It’s noticeably thicker than standard gift wrap and can hold its shape for things like books, scarves, or small boxes. Many premium wrapping paper brands hit this sweet spot.
- The All-Rounder (100-120 GSM): This is my go-to range for most gifts. It’s sturdy, gives you beautiful, crisp creases, and can easily handle a bottle of wine, a heavy candle, or a stack of books. A good roll of Kraft paper often falls in this category. You can find quality paper in this weight at art supply stores like Blick or even craft stores like Michaels. Expect to pay between $8 and $15 for a good-sized roll.
- Heavy-Duty Stuff (130+ GSM): Now we’re getting into cardstock territory. This is fantastic for large, heavy items, but it can be tough to fold without scoring it first. It’s best for the more structured bag technique we’ll cover later.
Don’t Forget Paper Grain
Yep, paper has a grain, just like wood. The fibers all line up in one direction. If you fold with the grain, you get a clean, sharp crease. Fold against it, and the fibers can crack and look messy. To find it, take a rectangular sheet and gently bend it one way, then the other (without creasing). It will bend more easily in one direction—that’s the direction of the grain! You’ll want your bag’s main vertical folds to run parallel to the grain for the best look.
The Right Glue Makes All the Difference
Your adhesive choice is critical for a bag that won’t pop open at the worst possible moment.
- Double-Sided Tape: This is the pro’s choice, hands down. It gives you a strong, invisible seam with zero drying time or wrinkling. For most bags, a 1/2-inch width is perfect. From my experience, the Scotch Create double-sided tape (usually in a red package) is incredibly reliable and won’t fail under weight.
- Craft Glue (PVA): A thin layer of white craft glue can be great for reinforcing the bottom flaps, but use it sparingly. Too much will warp the paper. Apply it with a brush and let it dry completely under a heavy book.
- Glue Sticks & Hot Glue: Just… don’t. Glue sticks aren’t strong enough for structural seams and can fail in humidity. And hot glue? It creates ugly, lumpy seams that show through the paper. Its only job here might be to lock the knot of a rope handle in place inside the bag, but that’s it. Heads up: if you do use hot glue for that, keep a little bowl of cold water nearby in case of burns.
Which Method Should You Use?
Okay, you’ve got your supplies. Now you have two main paths you can take. How do you choose?
To be frank, it depends on your gift and your patience. The Classic Diamond-Bottom Bag is your quick and easy solution. It’s perfect for most small-to-medium gifts and you can knock one out in about 15 minutes once you get the hang of it. It’s fantastic for things that don’t have a perfectly rectangular shape.
But if you’re packaging something heavier or you want that sharp, flawless, boutique-quality look, the Box-Formed Bag is your best bet. It takes more time and effort—plan on 30 to 45 minutes—but the result is a super-sturdy bag with perfectly crisp corners. It’s worth it for those really special gifts.
Technique 1: The Classic Diamond-Bottom Bag (The 15-Minute Method)
This is the fastest way to a great-looking custom bag. Your secret weapon for getting those sharp, professional creases is a bone folder. It’s a simple tool, usually made of plastic or actual bone, that costs less than $10 at any craft store in the scrapbooking aisle. If you don’t have one, the back of a metal spoon will do in a pinch.

1. Measure and Cut Your Paper (The Most Important Step!)
This is where most people get tripped up, so let’s make it super clear. Don’t eyeball it! Let’s use a real-world example. Imagine your gift is a book that’s 6 inches wide, 9 inches tall, and 1 inch deep.
- For the Paper’s WIDTH: You need to measure all the way around your gift (the perimeter), then add an inch for the seam. So, for our book: 6″ (front) + 1″ (side) + 6″ (back) + 1″ (other side) = 14 inches. Add 1 inch for overlap, and you get 15 inches.
- For the Paper’s HEIGHT: You need the desired height of the bag (let’s say 10″), plus half the depth for the bottom (1″ depth / 2 = 0.5″), plus about 2 inches for the top fold-over rim. So: 10″ + 0.5″ + 2″ = 12.5 inches.
For that book, you’d cut a perfect rectangle of paper measuring 15 by 12.5 inches.

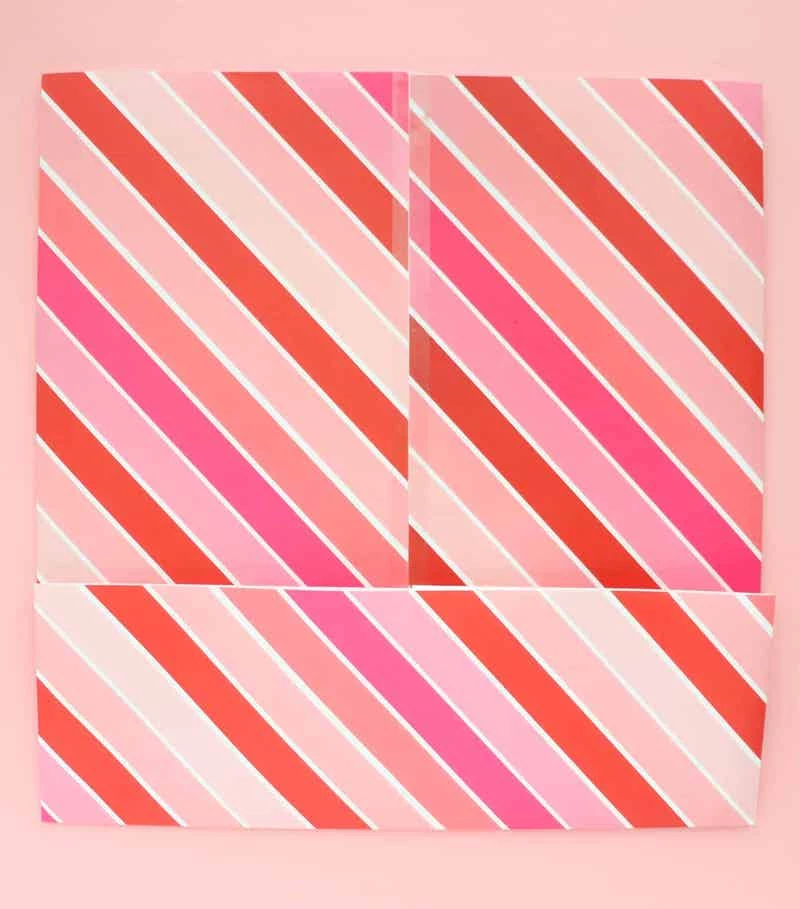
2. Form the Tube
Lay your paper decorative-side down. Along one of the long edges, apply a strip of double-sided tape. Bring the other long edge over to meet it, creating a paper tube. Press that seam down firmly with your bone folder.
3. Create the Bottom Fold
Decide which end is the bottom. Fold that end up. The size of this fold will become the depth of your bag. For our book example, a 4-inch fold would create a bag with a 4-inch depth. Make this crease extra sharp.
4. Form the Diamond
Open up the folded bottom. You’ll see the crease you just made. Push the sides inward along that crease line, collapsing the bottom flat until it looks like a diamond. A common mistake here is not being symmetrical. Make sure the center line of that diamond lines up perfectly with the bag’s side creases.
5. Seal It Up
You now have four triangular flaps. Fold the top flap down to the center line. Then, fold the bottom flap up so it overlaps the first one by about half an inch. Apply double-sided tape to the edge of that second flap before pressing it down firmly.
6. A Quick Tip: Reinforce the Base!
This is a small step that makes a huge difference. Cut a piece of cardstock (from a cereal box works great) to fit the rectangular bottom of your bag. Just make it a tiny bit smaller so it drops in easily. This prevents the bottom from sagging and is essential for anything heavier than a t-shirt.
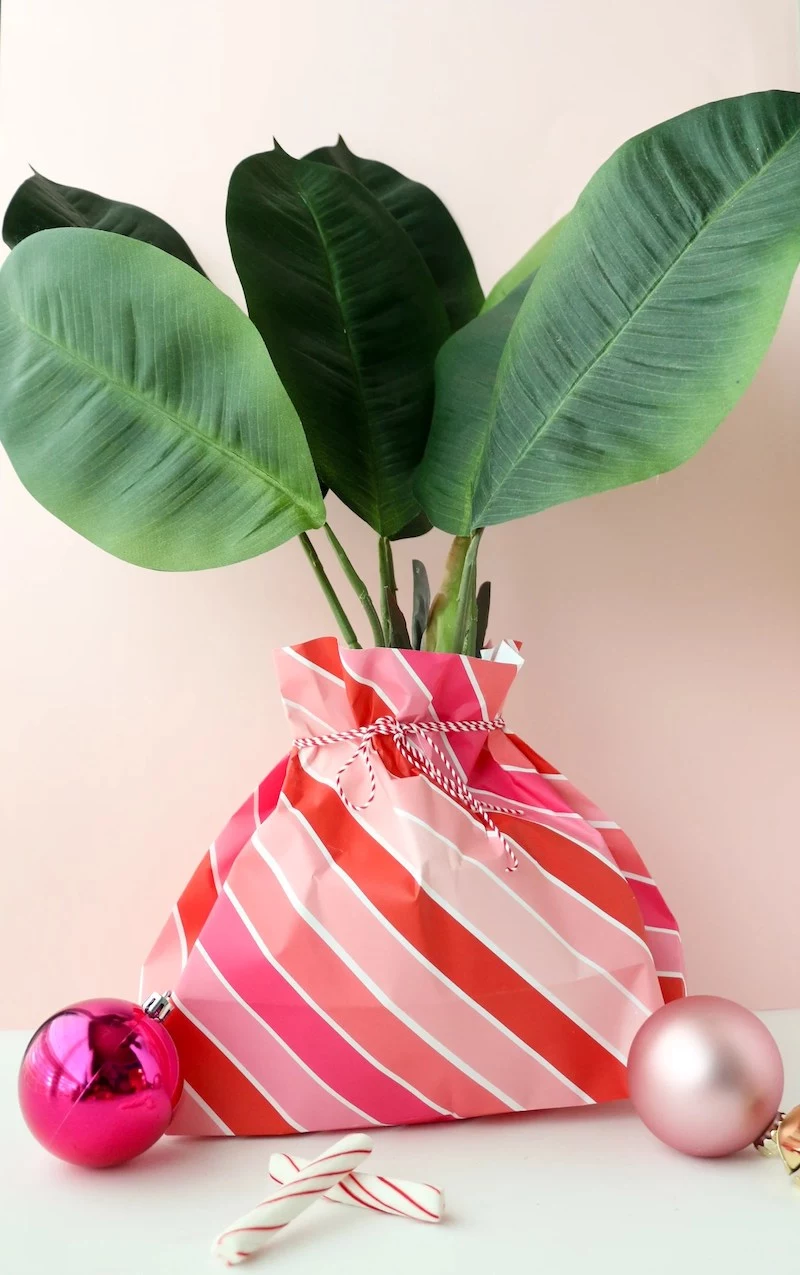
7. Finish the Top
Stand your bag up and shape it a bit. Fold the top edge inward by about 1.5 to 2 inches to create a clean, sturdy rim. If you want handles, punch two holes through this reinforced top edge on each side, thread your ribbon, and tie a strong knot on the inside.
Technique 2: The Box-Formed Bag (The Boutique Method)
This is the technique for when you need your bag to be seriously structural and sharp. You’ll use a cardboard box as a temporary mold. It takes a bit longer, but the results are top-tier.
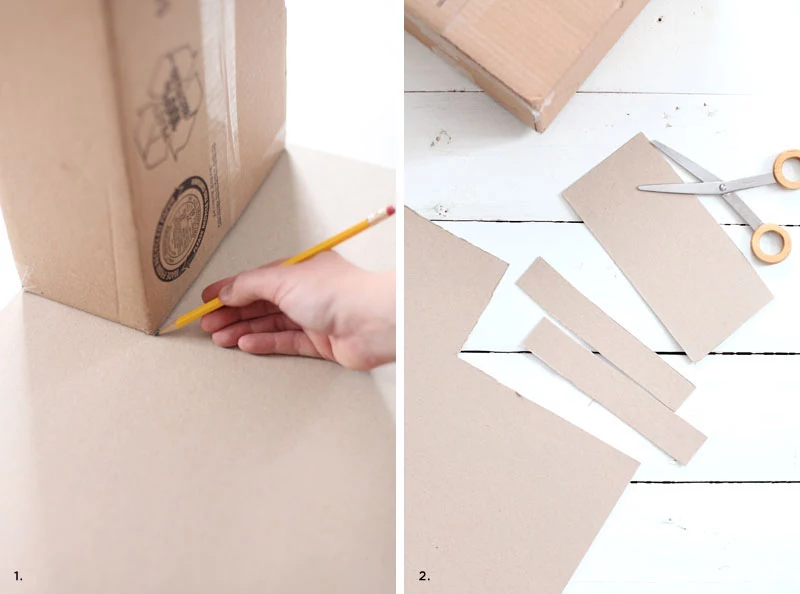
1. Prepare Your Reinforcements First
Before you even touch the pretty paper, cut your cardboard reinforcement pieces. Trace the bottom of your box onto thin cardboard and cut it out. Then, cut two long strips, about 1.5 inches wide, that match the length of the box sides where your handles will go.
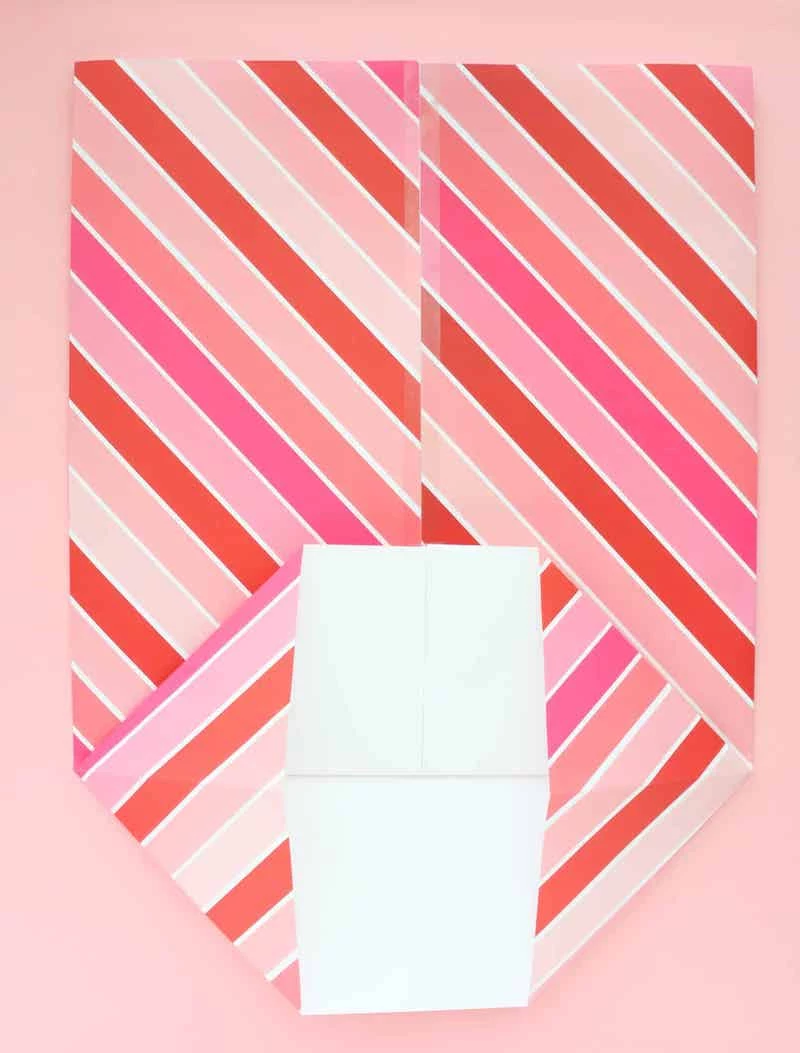
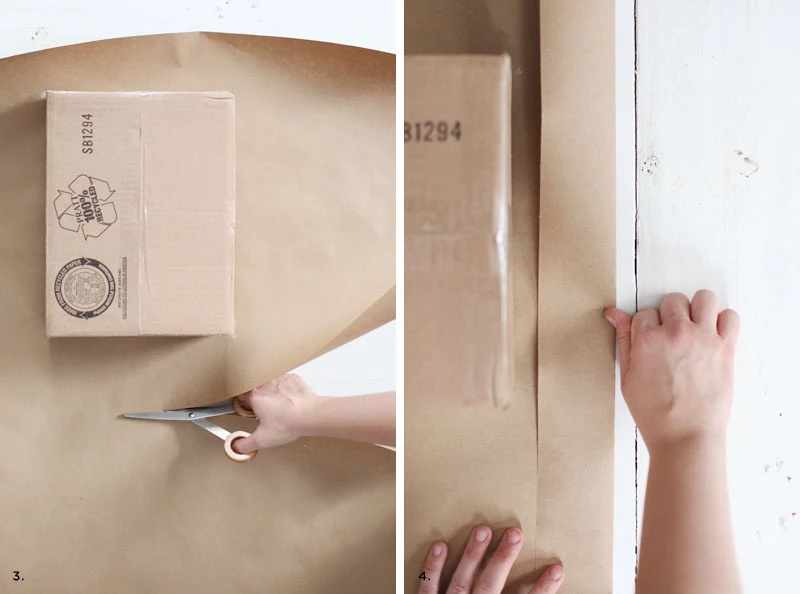
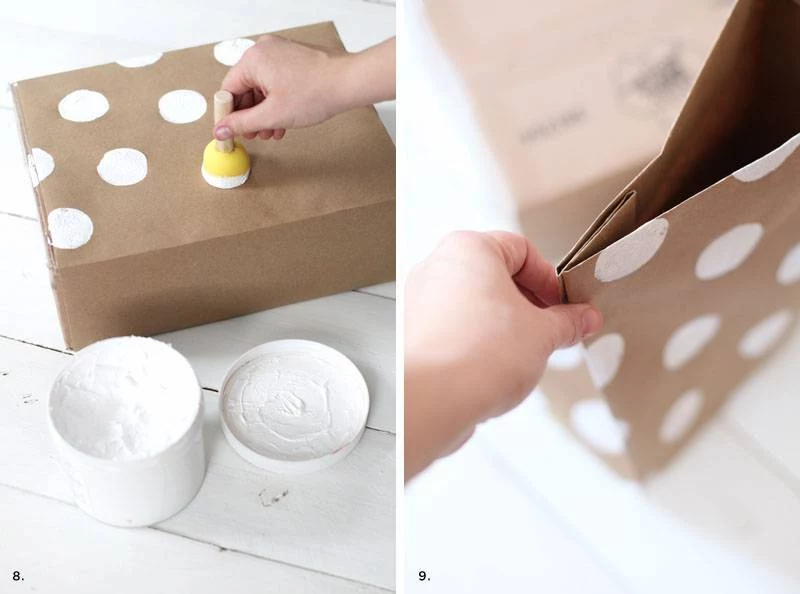
2. Wrap the Box
Place your box on the paper and wrap it like a present, but with a couple of key differences. Leave 2-3 inches of extra paper at the open top of the box. And try to make the vertical seam fall along one of the box’s sharp edges instead of the middle of a panel—it hides it better. Use double-sided tape to secure it.
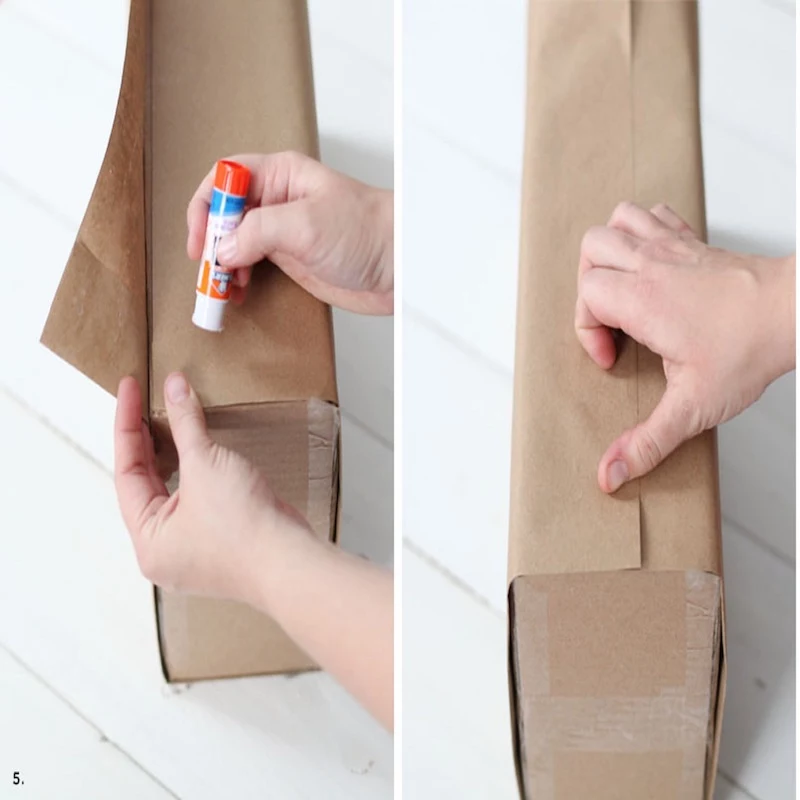
3. Fold the Bottom
With the box still inside, fold and tape the bottom just like you’re wrapping a gift. The box will ensure your creases are perfectly crisp.
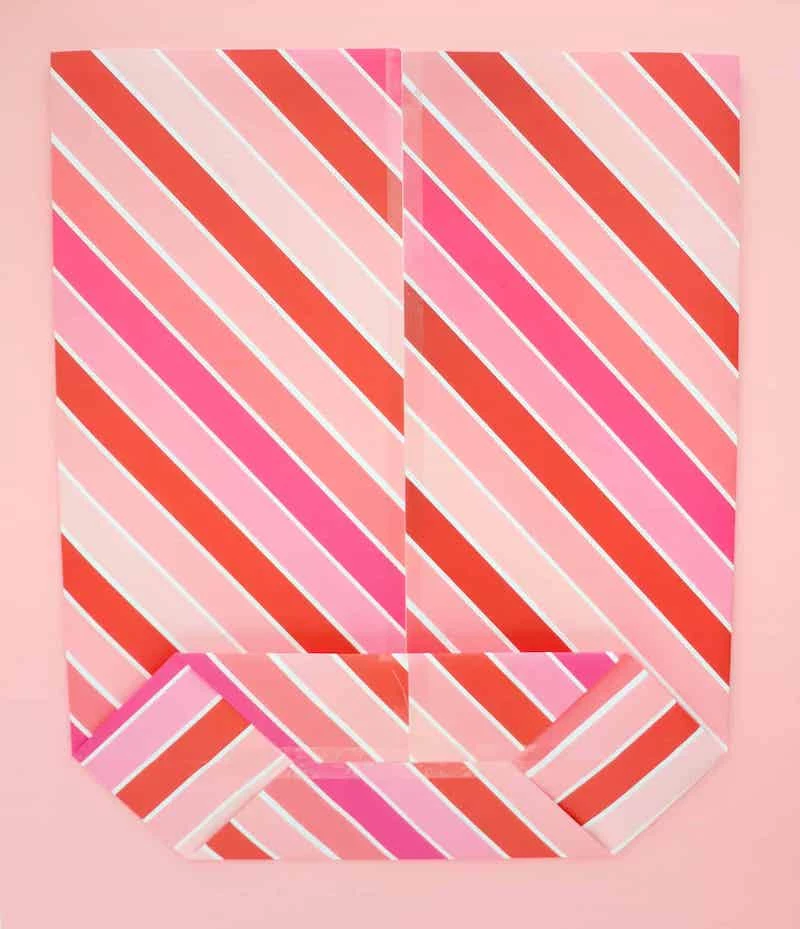
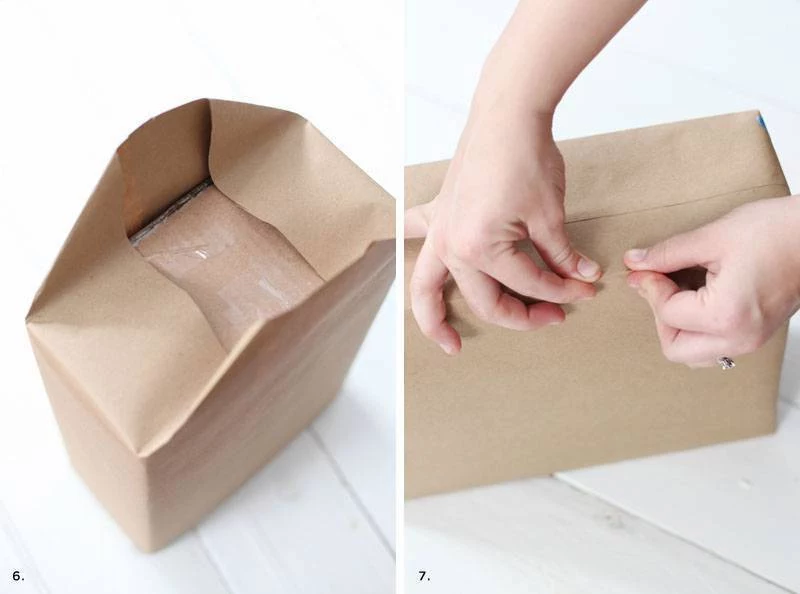
4. Create the Side Gussets
Carefully slide the box form straight out. You now have a paper sleeve. Lay it on its side and fold the sides inward, using the existing corners as your guide. Press a new, sharp crease right down the middle of the side panel. Do this on both sides. Voila—professional-looking side gussets.
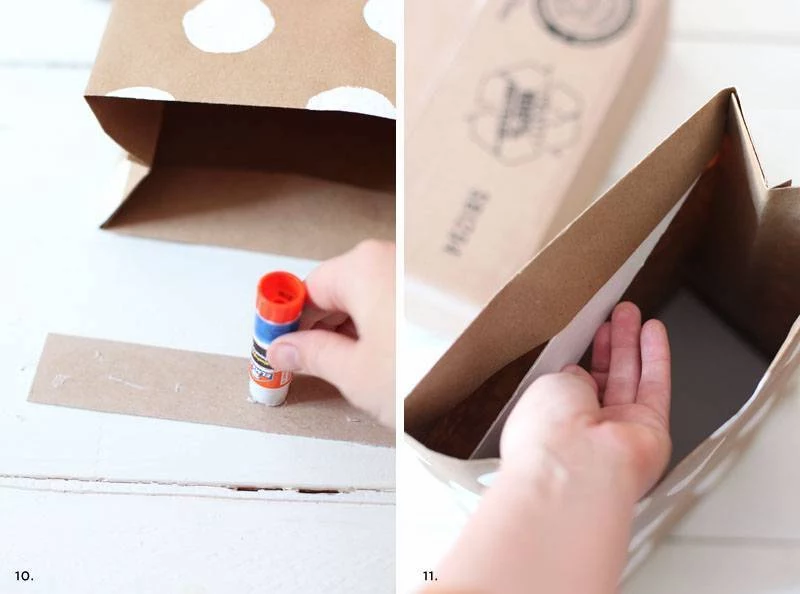
5. Install the Reinforcements
Fold the 2-inch overhang at the top to the inside. Before you tape it down, slide your two long cardboard strips into place under this fold-over rim, one on each side. A little craft glue will hold them in place. This is what keeps ribbon handles from tearing through the paper. Now, seal the rim down with double-sided tape.
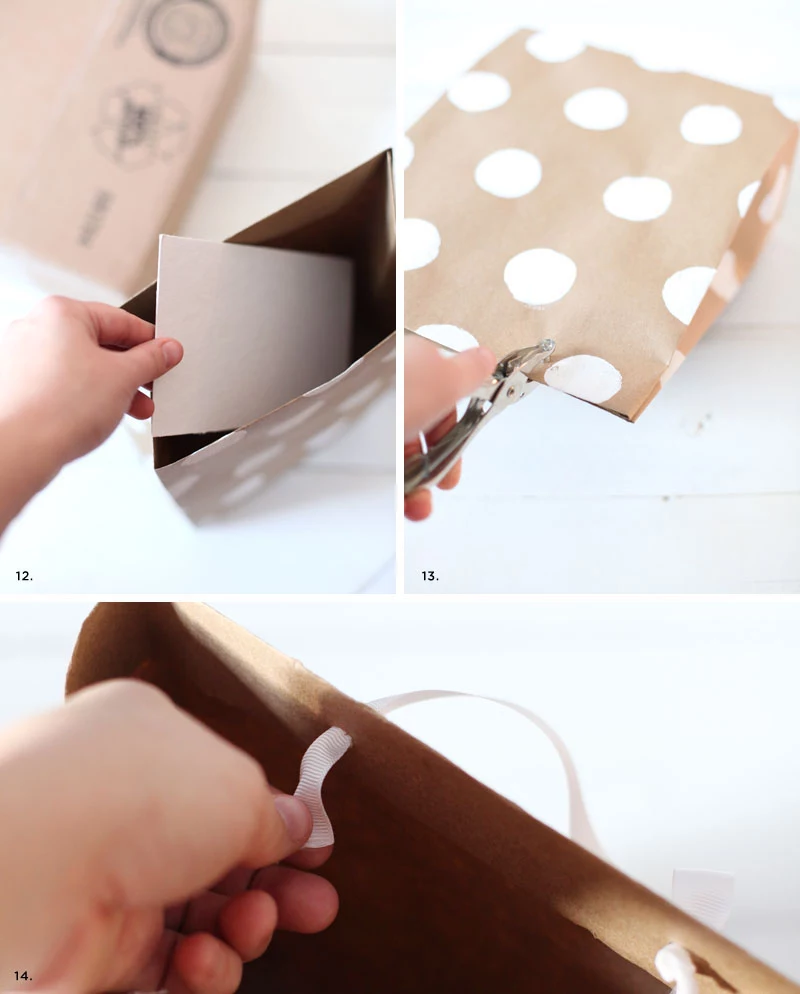
6. Final Touches
Drop your pre-cut base into the bottom. Punch your handle holes through both the paper and the cardboard strip you just installed. Thread your ribbon or rope, tie a knot inside, and you’re done. For a super heavy-duty bag, a small dab of hot glue on the knot will lock it permanently.
Troubleshooting and Tips I’ve Learned the Hard Way
I’ve seen it all. Here’s how to avoid the most common frustrations.
- Problem: “My paper is tearing when I fold it!” This usually means your paper is too thin (low GSM) or you’re folding against the grain. On heavy paper (120+ GSM), try lightly scoring the fold line with the back of a butter knife first.
- Problem: “My bag is totally lopsided!” Ah, a classic. This almost always happens in step 4 of the diamond-bottom method. You have to make sure the center line of the diamond is perfectly aligned with the side creases of your bag. Take your time on that step!
- Problem: “The bottom feels flimsy.” You either didn’t overlap the flaps enough, or you skipped the cardboard insert. You can still fix it by cutting a piece of heavy cardstock and gluing it inside over the bottom.
- Lesser-Known Trick: The Lined Bag. For a truly luxe feel, make a second bag from a contrasting paper that’s just slightly smaller (about 1/4 inch on all sides). Slip it inside the main bag before you fold down and secure the top rim. The top fold will lock both layers together beautifully.
- 30-Second Upgrade for Store-Bought Bags: Don’t have time for all this? A great cheat is to just cut a piece of cardstock to fit the bottom of a regular store-bought bag. It instantly makes it feel 10x more premium and stops it from sagging. Takes no time at all!
Finally, know your limits. While these bags are surprisingly strong, they aren’t meant for carrying a bowling ball. For extremely heavy or sharp items, a professionally manufactured bag is a safer bet. This skill is for adding that personal, thoughtful touch and for solving the problem of that perfectly awkward gift. It shows you cared, from the inside out.
Inspirational Gallery

The Adhesive Debate: Tape vs. Glue. The right adhesive is crucial for a crisp, professional finish, and the choice depends on your paper.
Double-Sided Tape: Your best bet for most papers (80-120 GSM). It provides a strong, invisible bond without any risk of wrinkling. The 3M Scotch brand is a reliable classic. It’s clean, fast, and foolproof.
Craft Glue Stick: Works for heavier paper or cardstock, but apply it sparingly. A high-quality, acid-free stick like UHU Stic avoids the lumps and wetness of liquid glue that can ruin your paper’s finish. Test on a scrap piece first!
For truly sharp, boutique-quality creases, especially on paper over 100 GSM, folding by hand isn’t enough. The secret is scoring the paper before you fold. This creates a perfect channel for the fold to follow, preventing cracking and uneven edges.
- Bone Folder: The professional’s tool. Glide this smooth, blunt-edged tool (made of bone, Teflon, or plastic) along a ruler to create a precise crease.
- Empty Ballpoint Pen: A great DIY alternative. Just make sure the ink has completely run out and trace your fold lines with gentle pressure.
- Dull Edge of a Butter Knife: In a pinch, this works too! Use a light touch to avoid tearing the paper.
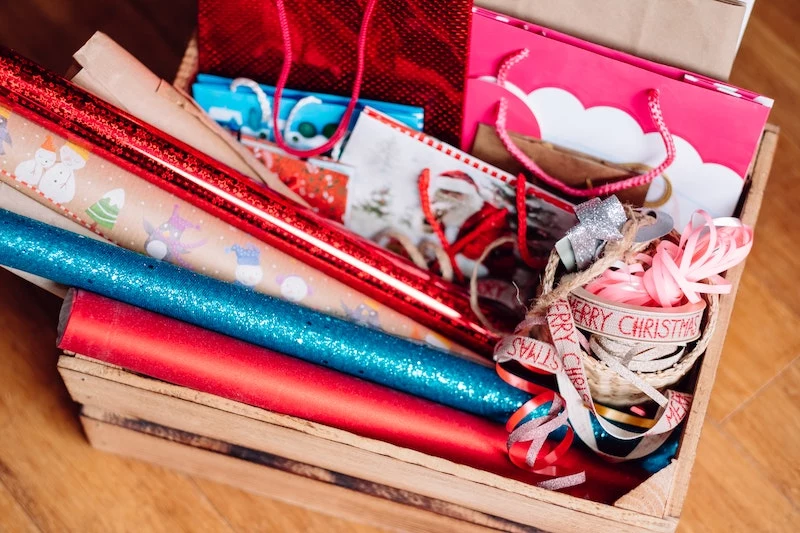
A study by Sundale Research found that an estimated 4.6 million pounds of wrapping paper produced in the U.S. each year ends up in landfills.
By making your own bag, you can choose materials that are kinder to the planet. Look for paper that is uncoated, glitter-free, and printed with soy-based inks, making it fully recyclable. Brands like Wrappily offer beautiful reversible sheets made from 100% recyclable and compostable newsprint, giving your gift a second life long after it’s been opened.
The handles are the final touch that elevates your bag from a folded paper box to a functional, beautiful accessory. Think beyond simple punched holes.
- For a rustic, natural feel, use thick jute twine or twisted paper cord.
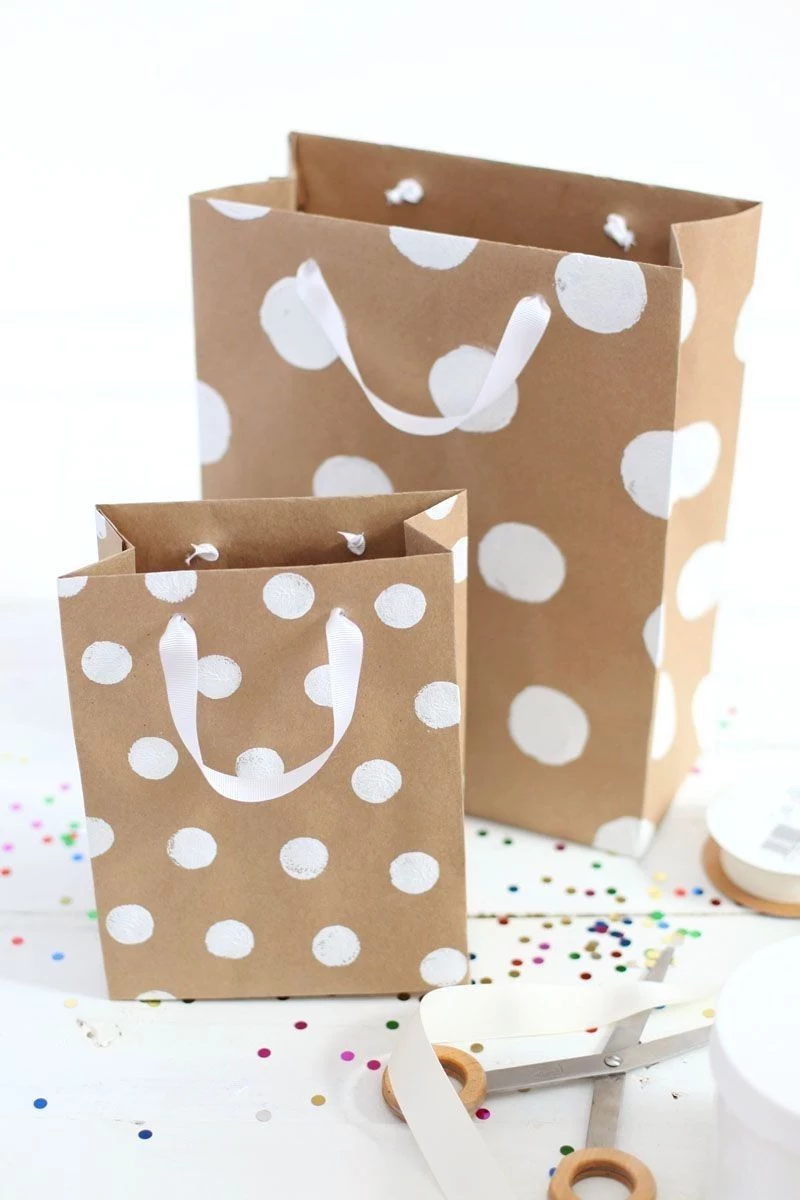
- For a touch of luxury, thread a wide, high-quality grosgrain or velvet ribbon through the top holes and tie a simple knot on the inside.
- For a modern, minimalist look, try thin leather cording or even repurposed fabric strips from old t-shirts.
A lesson in intention: The Japanese art of gift wrapping, known as Tsutsumi, isn’t just about concealing a gift. It’s a form of communication that expresses respect and care for the recipient through meticulous folds and beautiful materials. Your handmade bag carries that same spirit—it shows you invested time and thought into the entire gifting experience.
To prevent the dreaded saggy bottom, especially when gifting heavier items like a candle or a bottle of wine, a simple reinforcement is key. Just cut a piece of sturdy cardboard—an old shipping box or cereal box works perfectly—to fit the exact dimensions of your bag’s base. Slip it inside before placing your gift, and your bag will hold its shape beautifully.
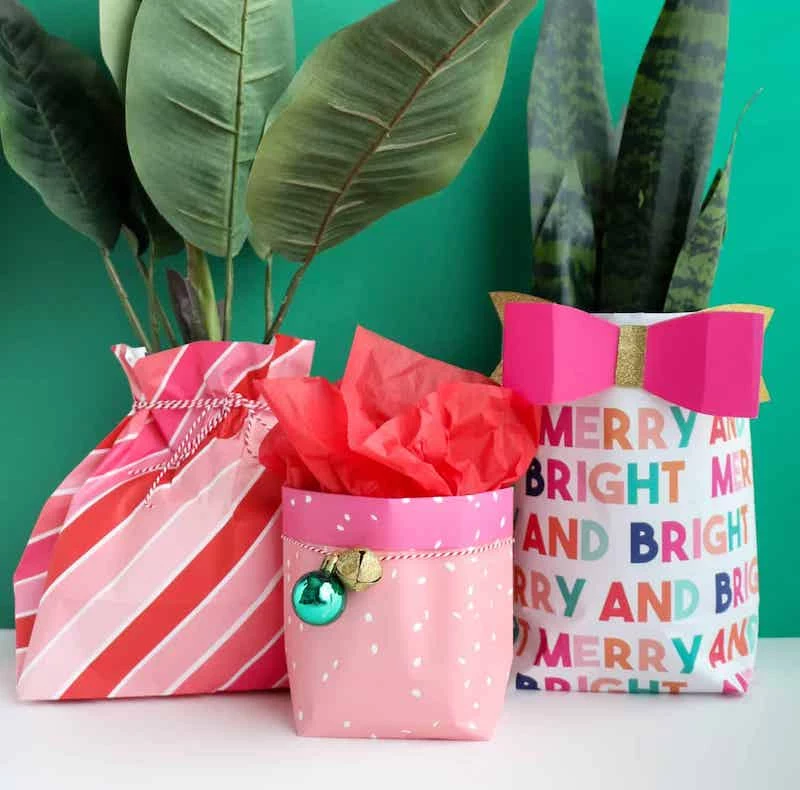
- It looks effortlessly chic and sophisticated.
- It allows a special ribbon or gift tag to truly stand out.
- It feels personal and avoids generic, mass-produced holiday patterns.
The secret? A minimalist approach. Instead of a busy print, choose a solid, high-quality paper in a rich color or simple Kraft paper. The focus then shifts to the structure of your bag and one or two well-chosen embellishments, like a sprig of fresh rosemary or a single wax seal.
The wrapping isn’t just a container; it’s the first part of the gift.
Want a bag that’s both luxurious and incredibly durable?
Look beyond wrapping paper and consider using wallpaper remnants. High-end brands like Farrow & Ball, Graham & Brown, or Rifle Paper Co. offer stunning, intricate designs on thick, textured paper that’s built to last. A single roll can be pricey, but many retailers sell sample sheets or discounted end-of-roll remnants that are perfect for creating a small collection of truly show-stopping, reusable gift bags for special occasions.


