Summer Crafts That Actually Last: My Pro Tips for DIYs You’ll Keep
I’ve been teaching craft workshops for a long, long time, and let me tell you, I’ve seen it all. But my biggest lesson? There’s nothing quite like the satisfaction of making something with your own two hands that is both beautiful and built to last. I’m talking about projects that don’t just look cute for a week, but become part of your home for years.
In this article
My first attempt at a painted terracotta pot was a total disaster. I spent an afternoon painting this gorgeous pineapple design, put it out on my patio, and felt so proud. A few weeks later? The paint was peeling off in sad, flaky sheets. It was a mess. That failure is exactly why I’m so passionate about teaching the right way to do things. It often comes down to a few simple, professional tricks that make all the difference.
So, forget the flimsy, disposable crafts. In this guide, I’m going to walk you through some classic summer projects and share the secrets I use in my own studio to get results that last.
First Things First: Setting Up for Success
Before you even think about opening a paint bottle, let’s talk prep. A little bit of setup saves a massive headache later on. Honestly, skipping this step is the fast track to frustration.
Your Creative Space
You’ll want a spot with good airflow, especially if you’re using anything with fumes like spray paint or certain sealants. An open garage door, a covered porch, or even just a room with a couple of open windows will do the trick. Throw down an old sheet, a flattened cardboard box, or some newspaper to protect your table. Trust me, glue and paint have a magical ability to end up everywhere.
Quick tip: Keep a roll of paper towels and a small bowl of water nearby. It’s a lifesaver for those little drips and smudges.
Know Your Materials (This is a Big One!)
Using the wrong glue or paint is probably the #1 mistake I see beginners make. Not all products are created equal, so let’s quickly break down the essentials for these projects.
- Acrylic Paints: This is your go-to for most things. It’s water-based and easy to clean up. But here’s the deal: there’s a big difference between the cheap stuff and the good stuff. Basic craft acrylics, which run about $2 a bottle, are thin. You’ll probably need 3-4 coats to get solid color. For a few bucks more, artist-grade or heavy-body acrylics (maybe $7 a tube) are packed with pigment. You get amazing, vibrant color in just one or two coats. To be frank, you’re paying for less work and a better result.
- Sealants & Varnishes: Paint is just the outfit; sealant is the armor. It protects your hard work from chipping, sun-fading, and water damage. They come in spray or brush-on versions with different finishes (I personally love a satin finish—not too shiny, not too flat). For something like a coaster, you absolutely need a heat and water-resistant sealant. For an outdoor pot, look for one with UV protection. A good sealant can run you $9 to $15 a can, but it’s worth every penny.
- Adhesives: Please, step away from the school glue stick. For sturdy crafts, you need something with more muscle. A high-temp hot glue gun is great for a quick, strong bond. For something that needs a truly permanent, waterproof hold (like gluing metal to ceramic), a two-part epoxy or an industrial-strength glue like E6000 is your best bet. Always read the label to see what materials it’s designed for.
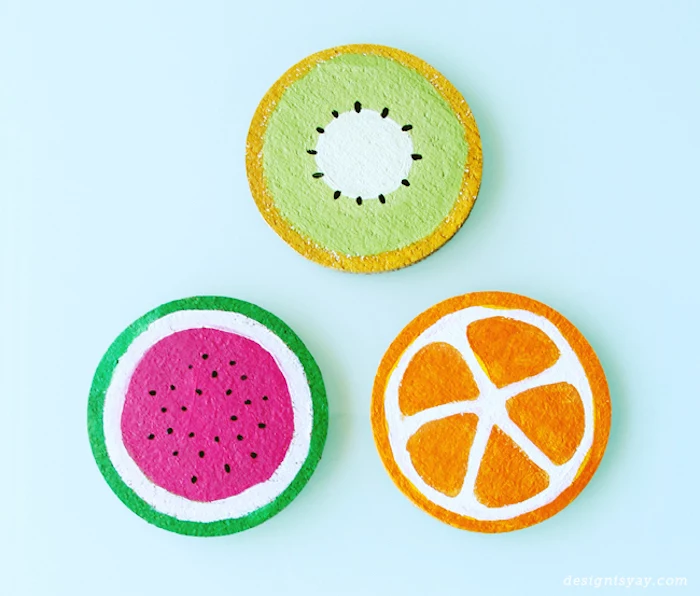
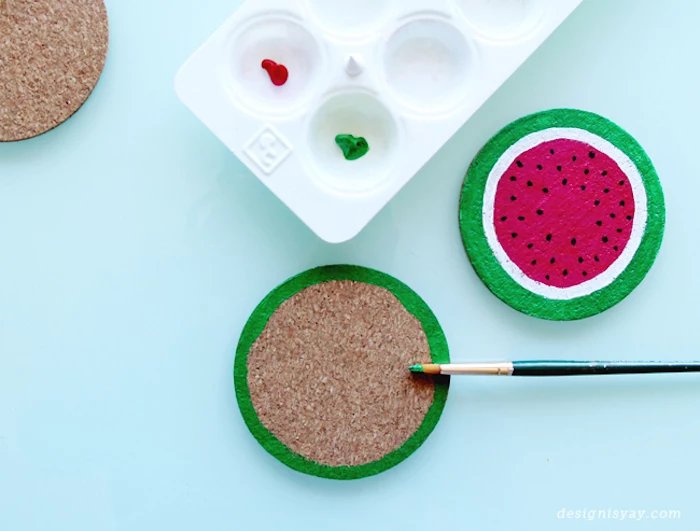
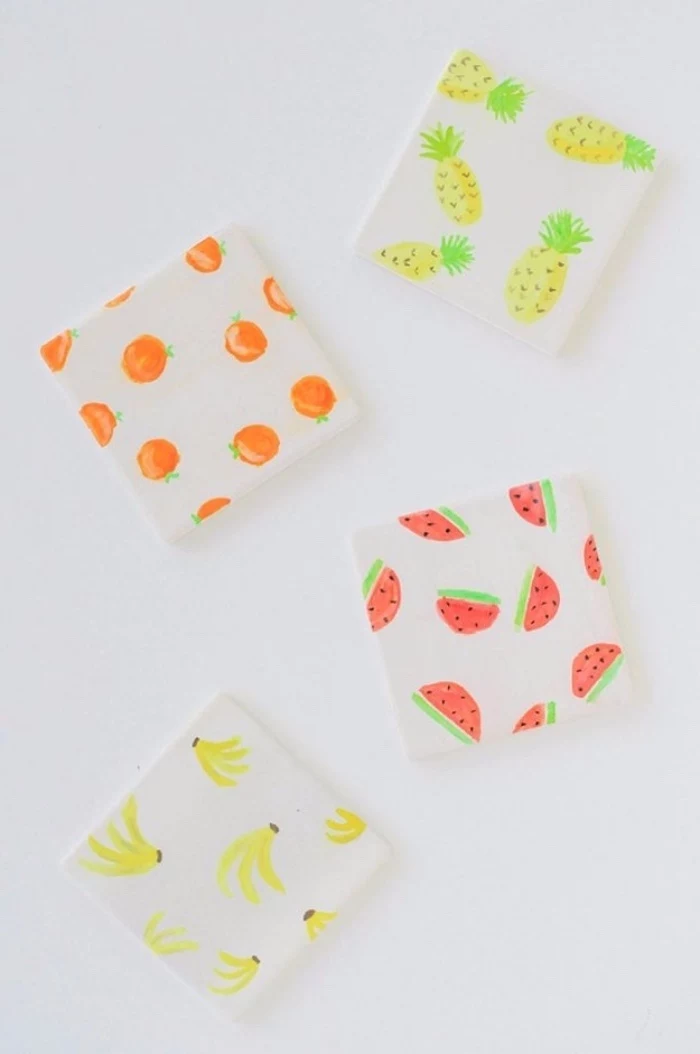
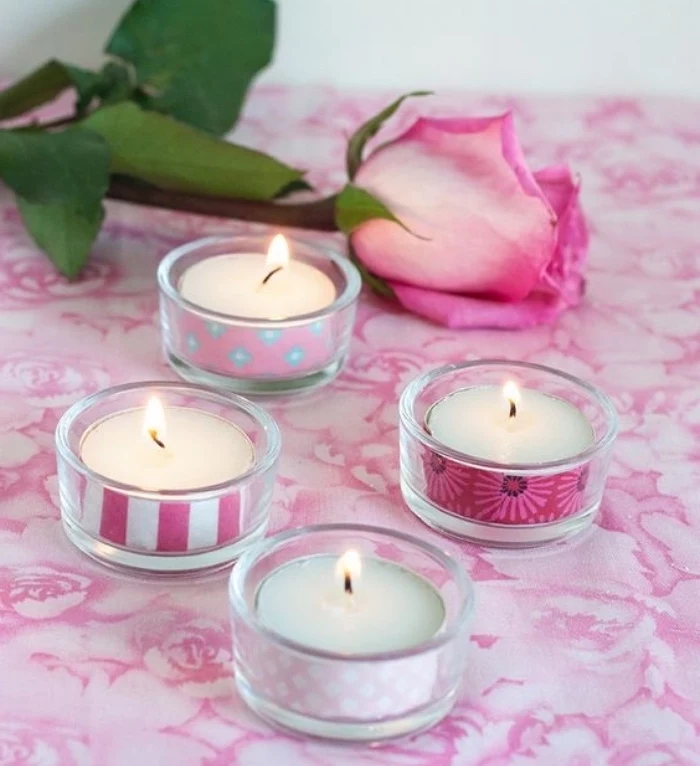
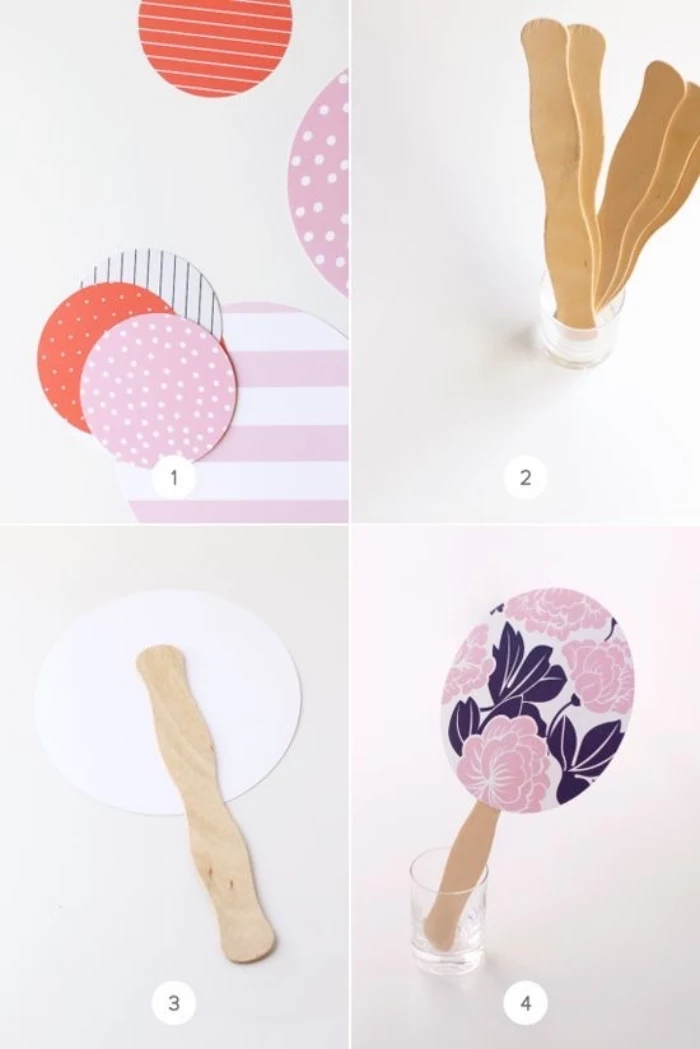
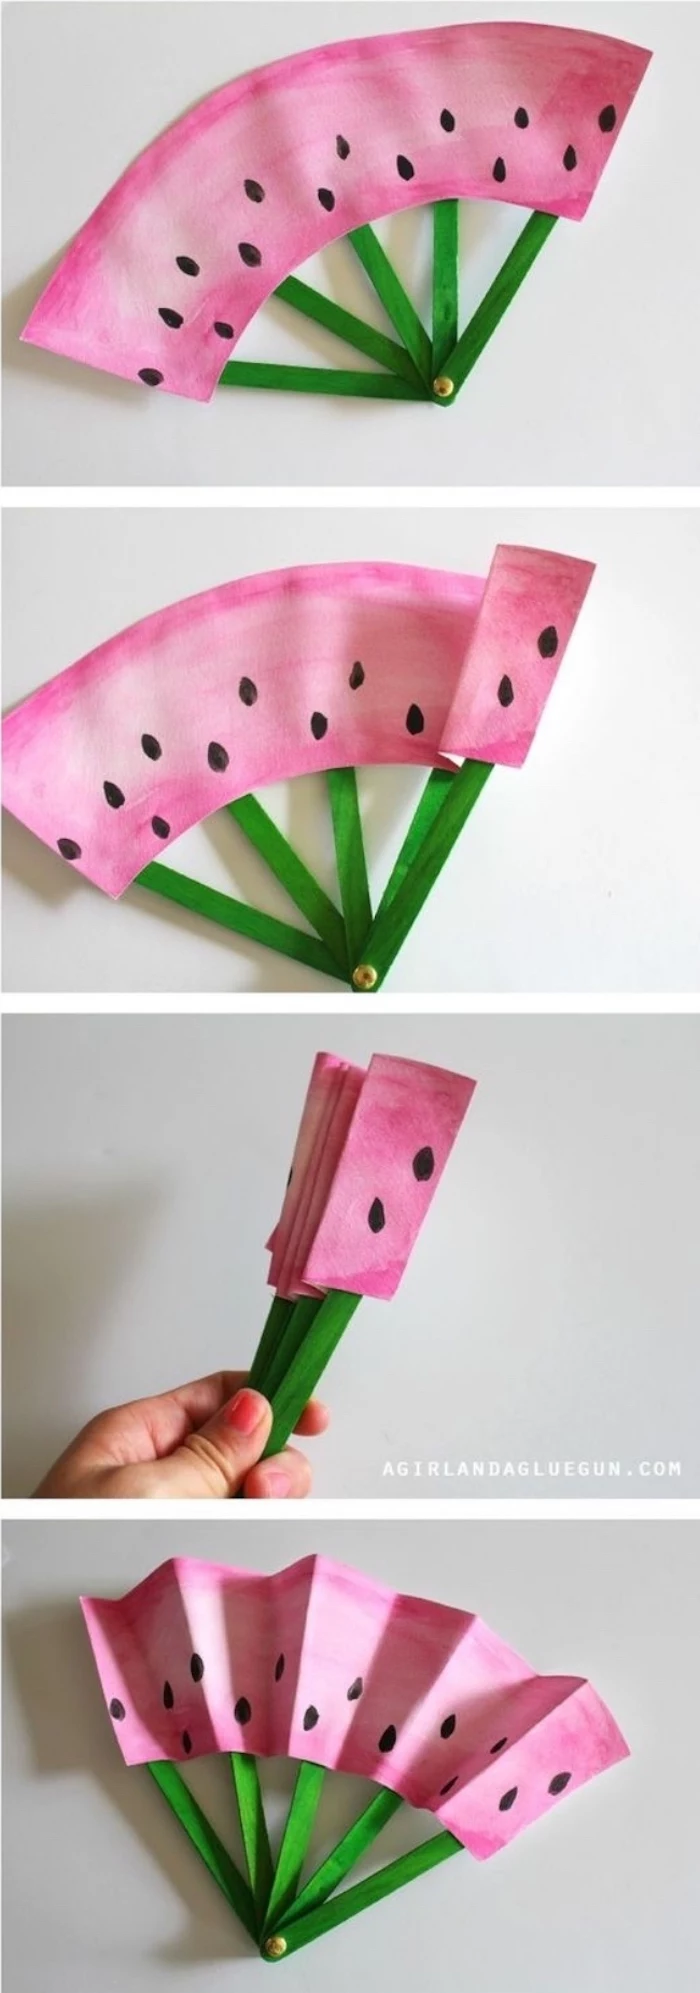
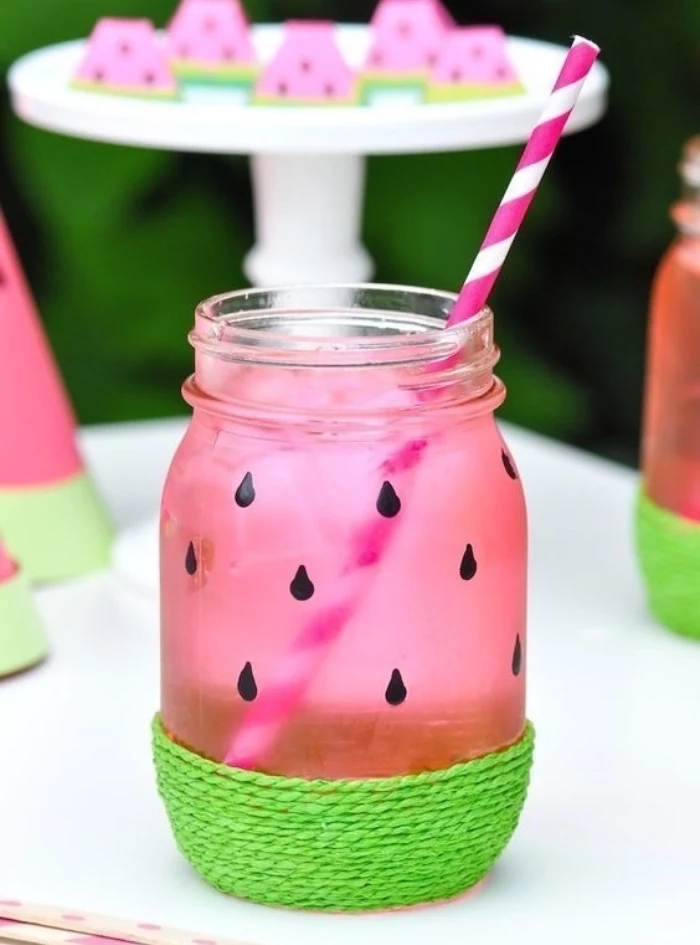
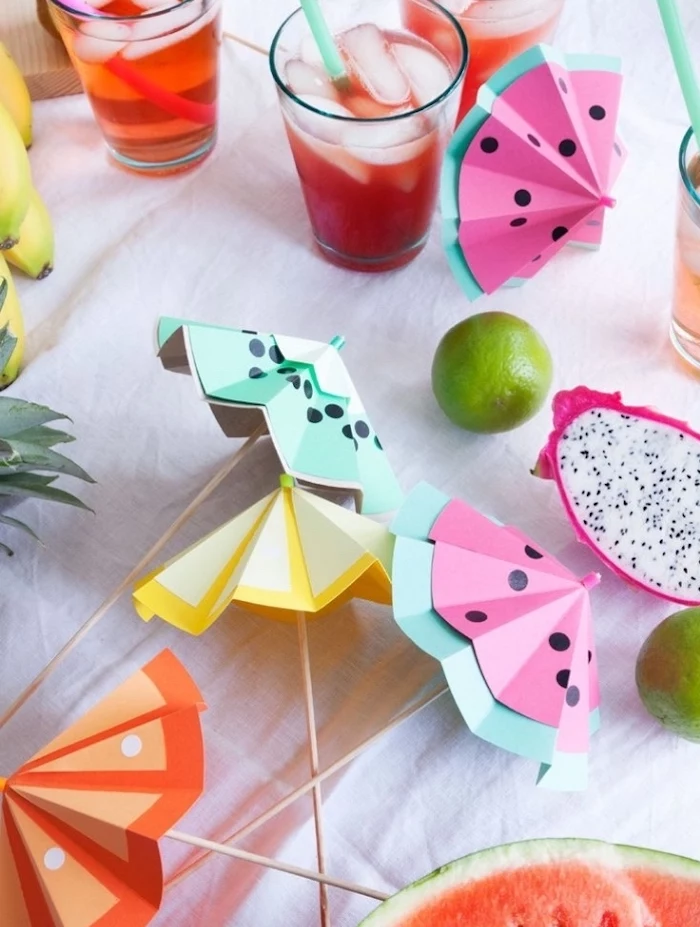
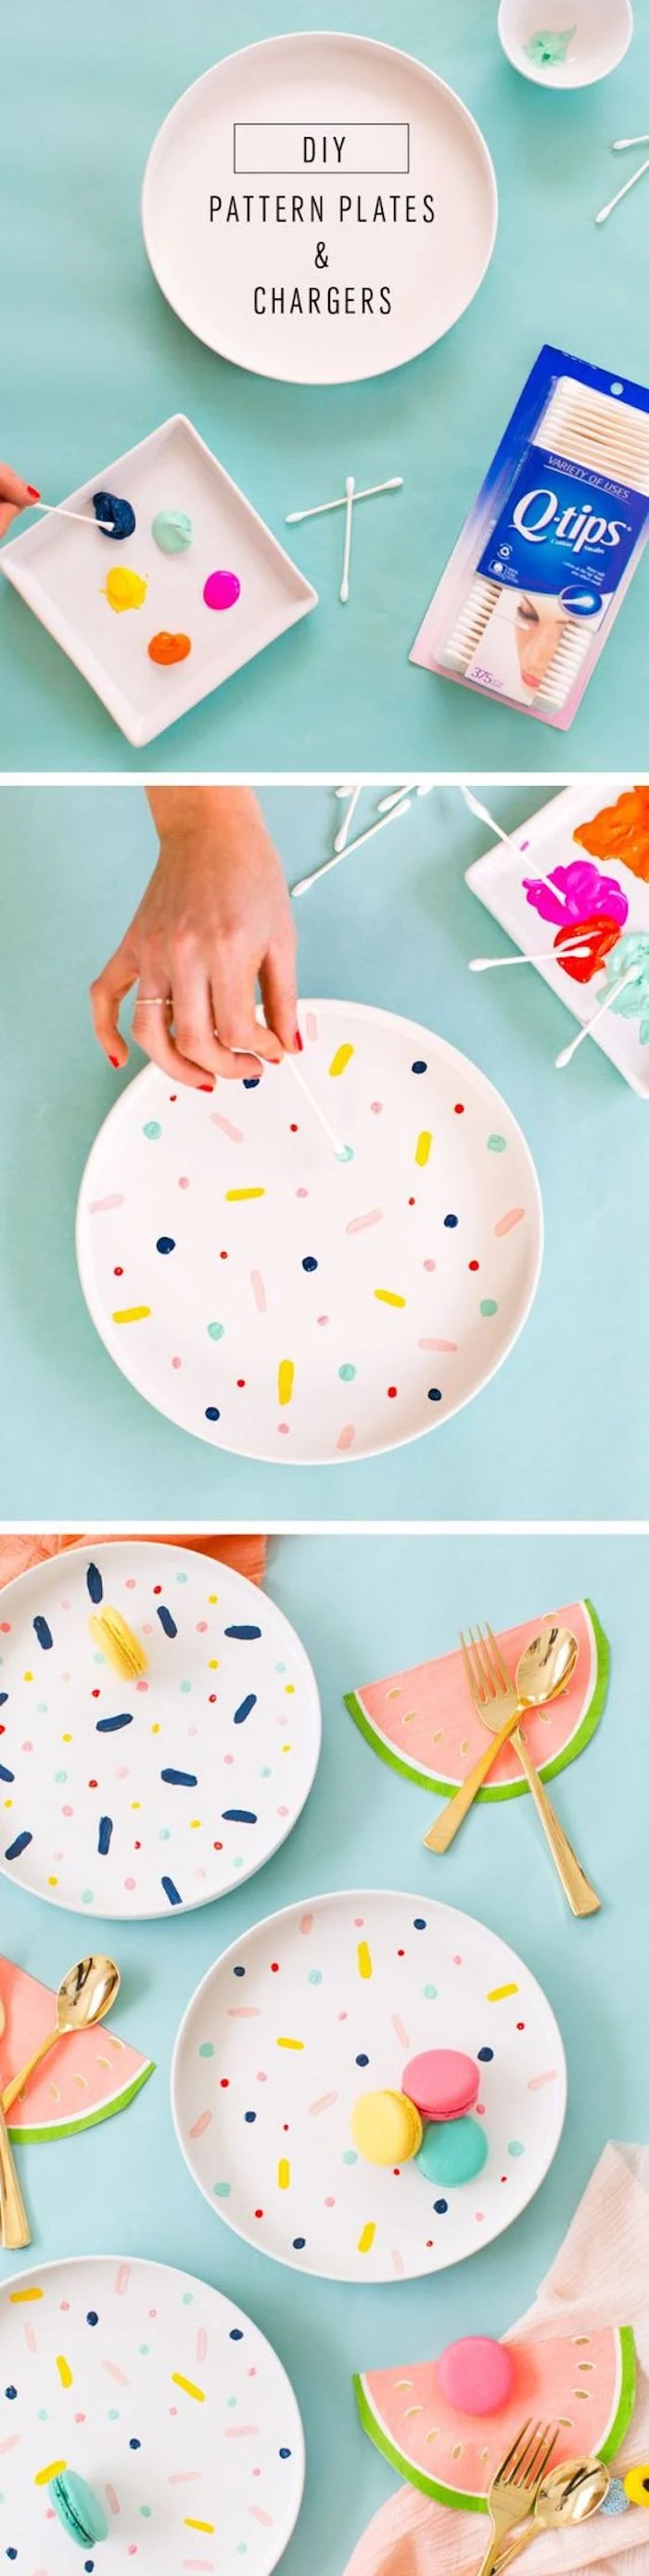
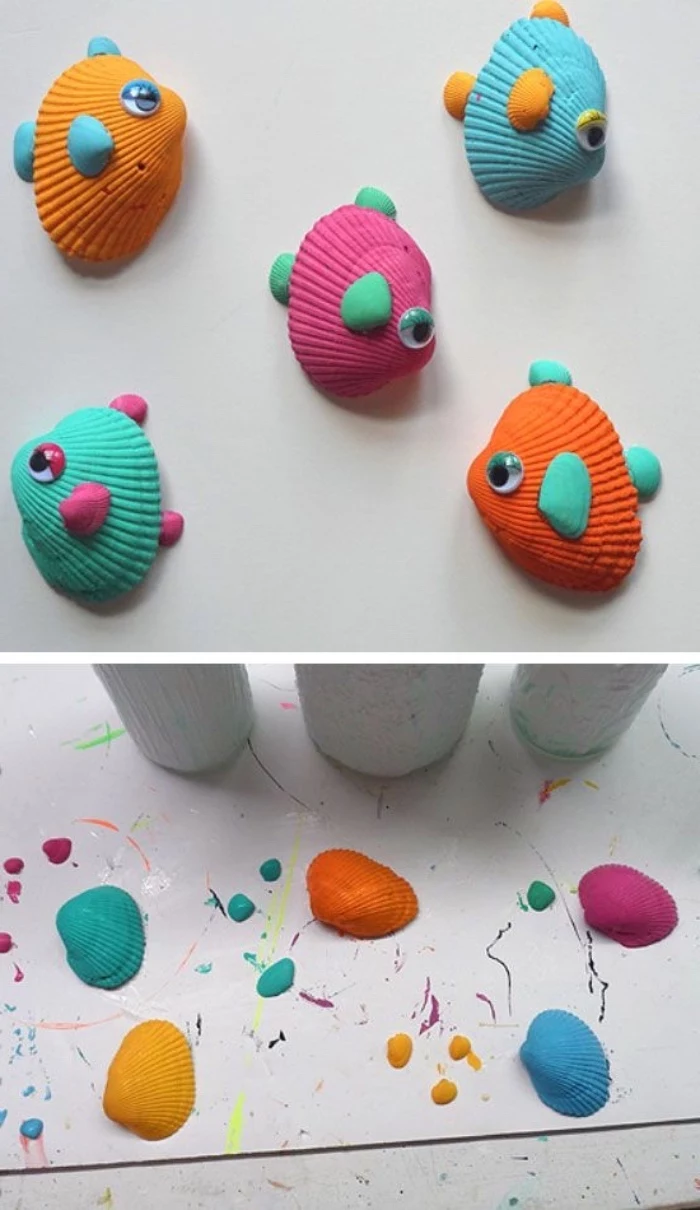
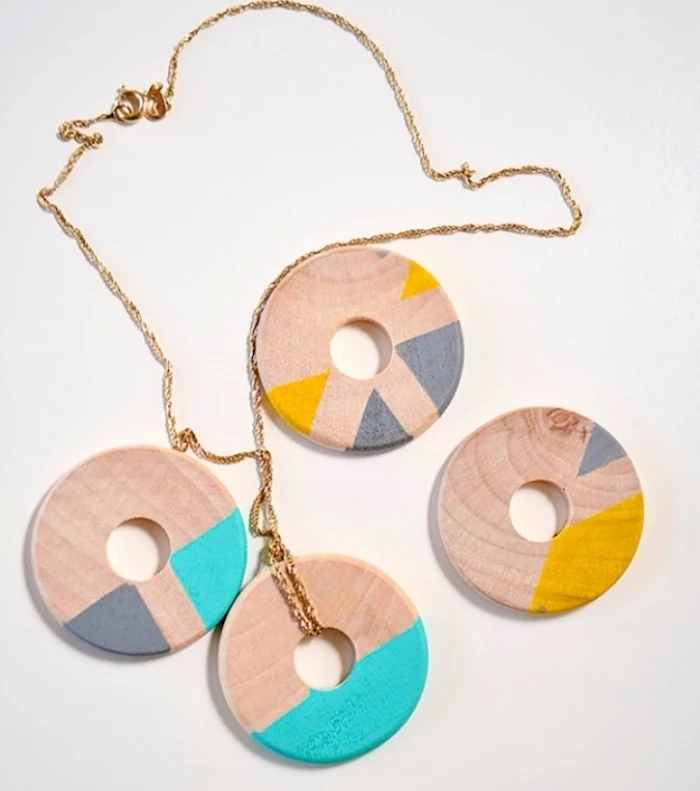
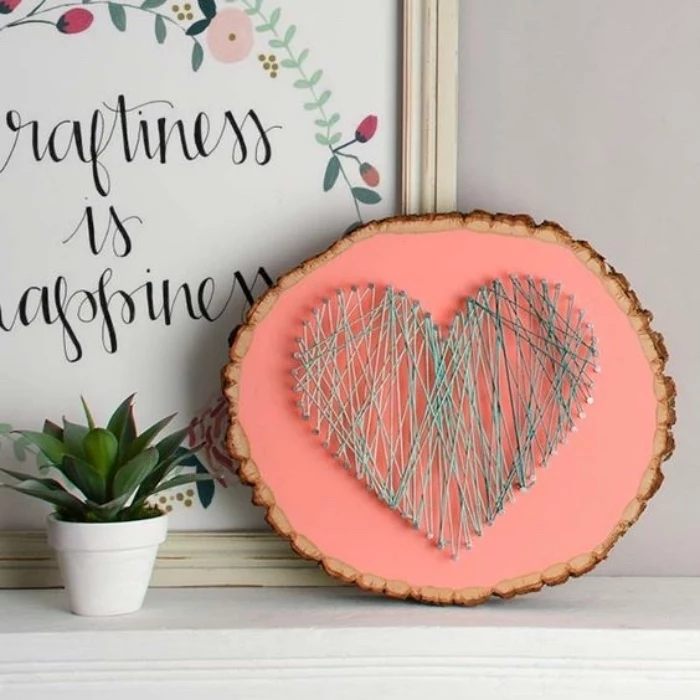
Project 1: Fruity Cork Coasters That Won’t Stick to Your Cup
Everyone loves a handmade coaster set. They add such a personal touch to your coffee table. We’re going to make sure these can handle steamy mugs and icy drinks for years to come.
The secret is all in the prep. Cork is super absorbent, which is great for spills, but it also drinks up paint, making your colors look dull. We’re going to seal it first, then paint, then seal it again. This triple-layer approach is the key.
Your Shopping List:
- Plain cork coasters (4-inch rounds, set of 4): About $5-$8 at a craft store or online.
- Fine-grit sandpaper (220-grit): A small pack is around $5 at any hardware store.
- Clear, water-based primer/sealer: $7-$12. Look for brands like Mod Podge or a multi-surface sealer.
- Acrylic paints: Your choice! Go for the better quality ones for rich, fruity colors.
- Fine-detail paintbrushes: A small pack will be $5-$10.
- Heat-resistant, waterproof top coat: This is crucial! A polyurethane sealant is perfect. Expect to pay $9-$15 at a hardware or craft store.
Step-by-Step Guide:
- Prep the Surface: Give the top of the cork a very light sanding. It knocks off loose bits and helps the primer stick. Wipe off the dust. This tiny step makes a huge difference in the final smoothness.
- Prime Time: Use a foam brush to apply a thin, even coat of your primer to the top and sides of the coasters. Let it dry for about an hour. See how it seals up all those little holes? That’s what keeps your paint from soaking in. Go ahead and apply a second coat for good measure.
- Paint Your Design: Now for the fun part! For a watermelon slice, paint the big areas of pink and green first. Let them dry completely before adding the white rind detail and, finally, the black seeds. Working from background to foreground prevents smudging.
- Seal for a Final Time: This is the most important part! Let your paint dry for a full 24 hours. Then, apply your heat and water-resistant top coat. Use a clean foam brush and apply a thin, even layer. Let it dry for a few hours, then add a second coat. And for good measure, a third. This triple-layer is your shield against heat and moisture.
Heads up! A sealant might feel dry to the touch in a few hours, but it takes several days (I recommend at least 3) to fully cure and harden. Don’t put a hot mug of coffee on it until then!
Oops… Tip: Messed up a watermelon seed or a kiwi speckle? Don’t panic! Let the mistake dry completely, then just paint right over it with the background color. It’s our little secret.
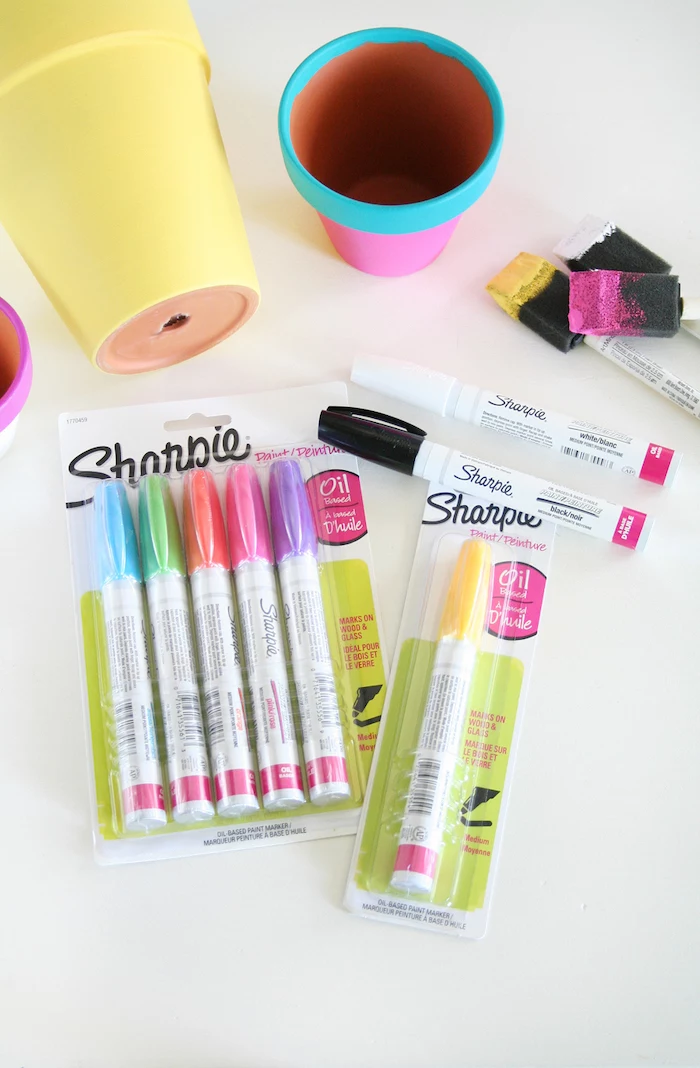
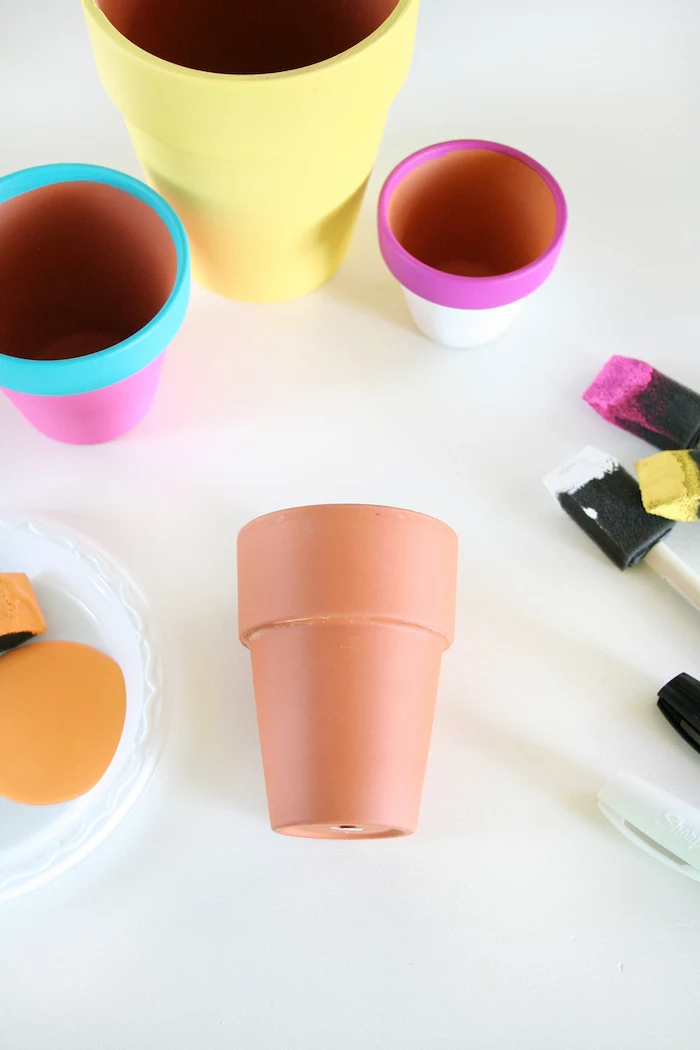
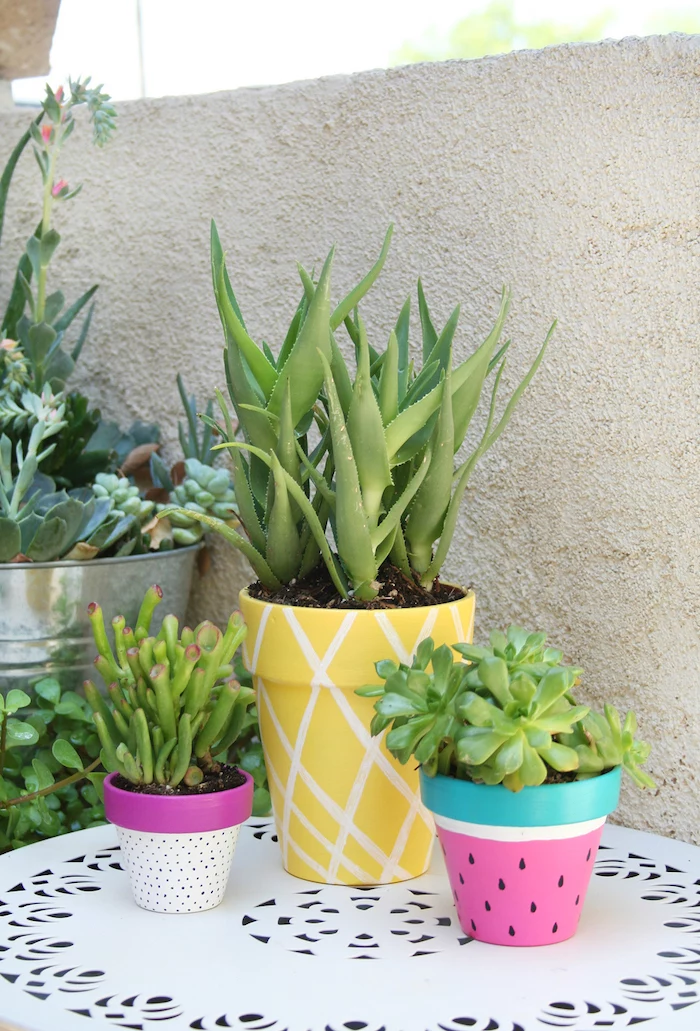
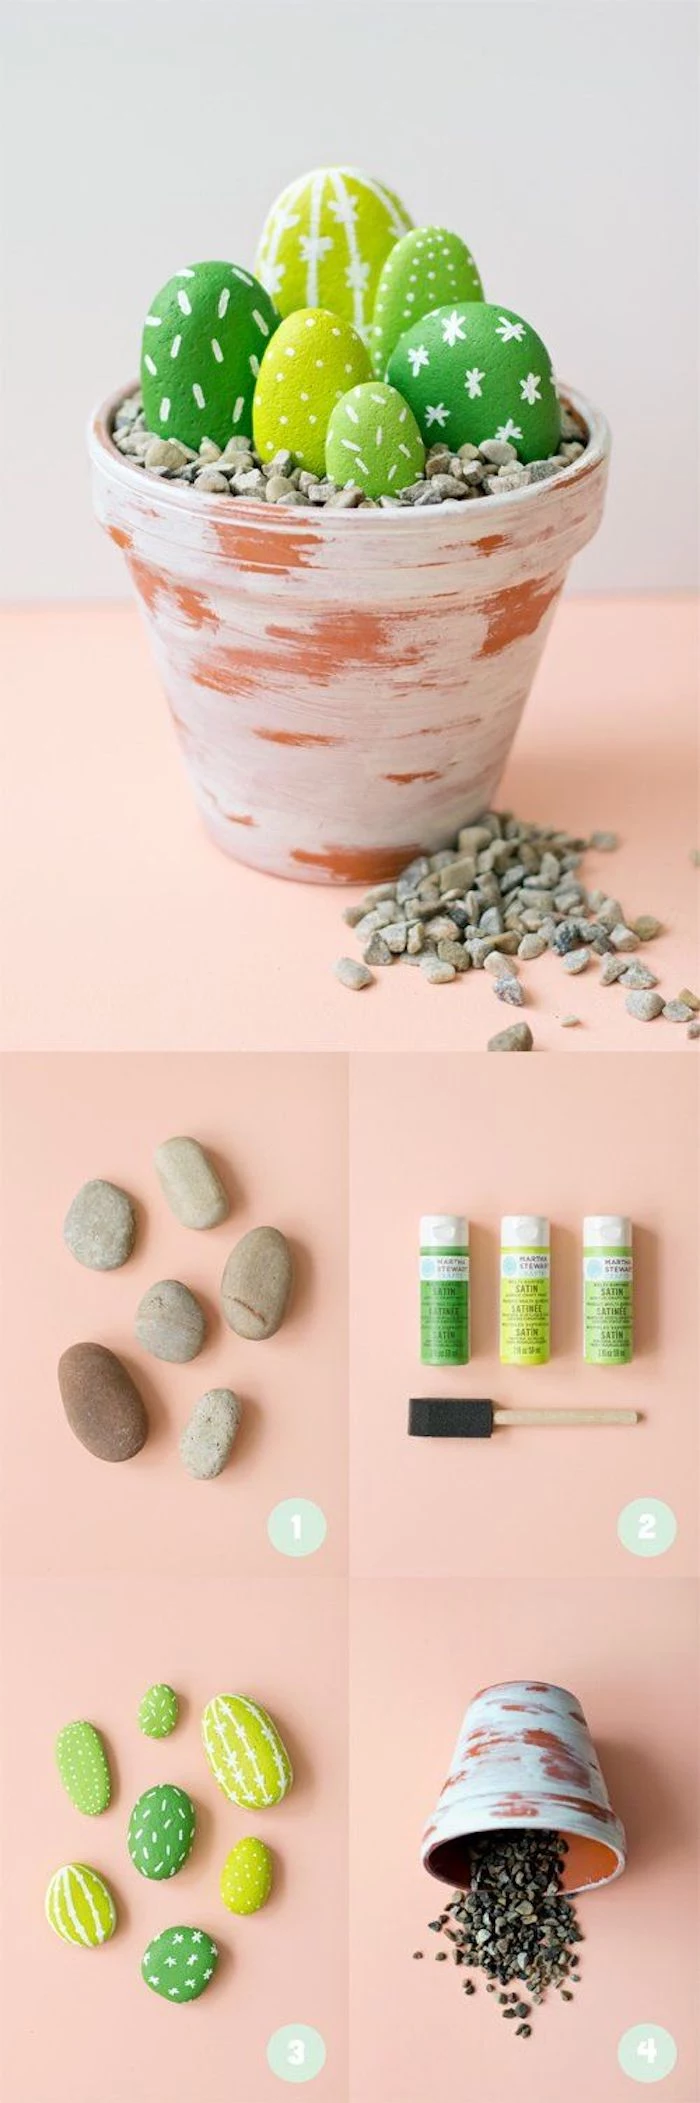
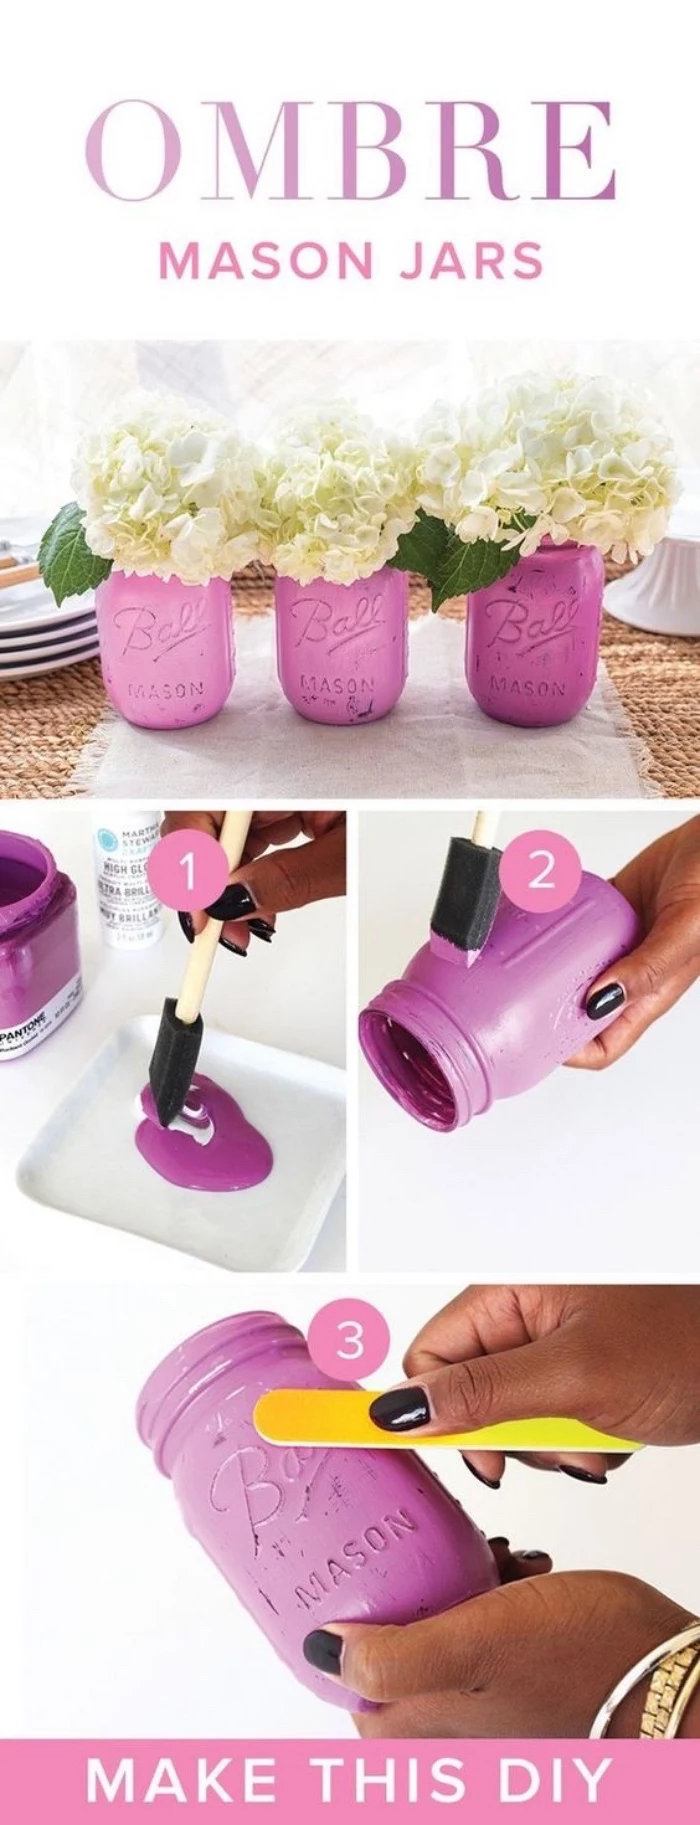
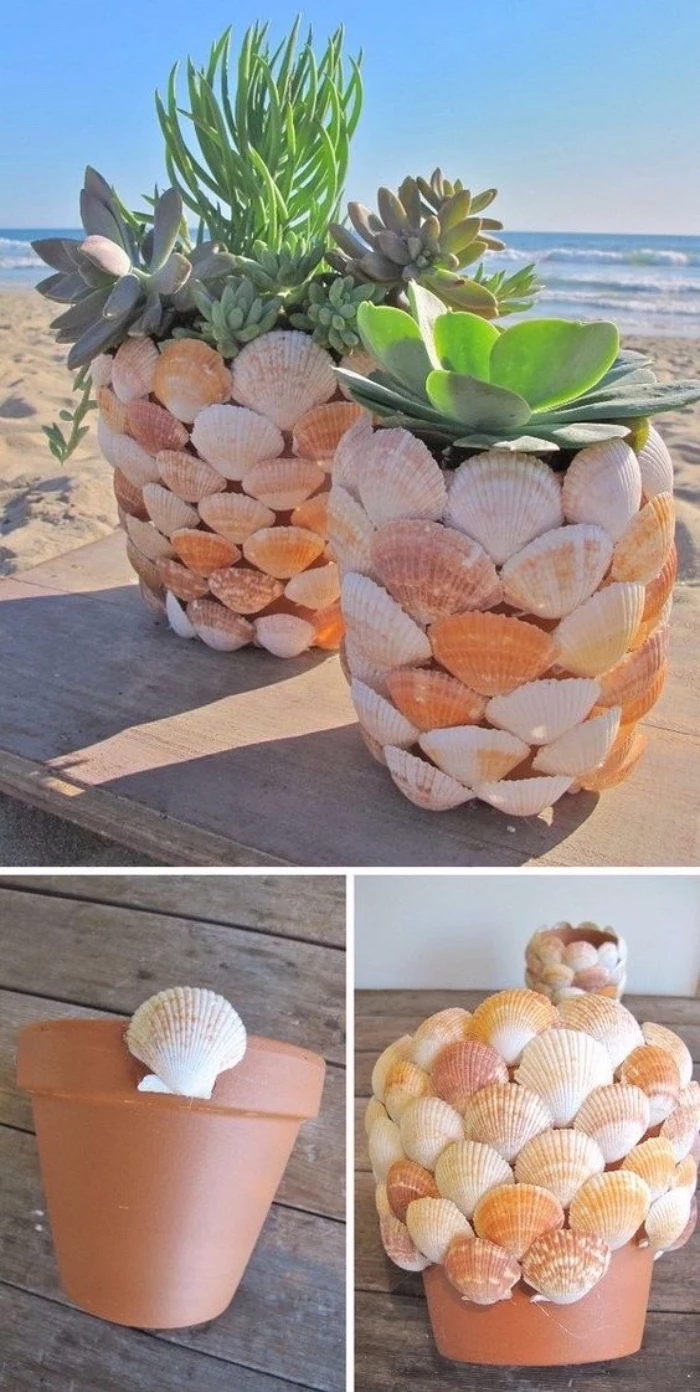
Project 2: Weatherproof Terracotta Pots That Survive the Season
Remember my sad, peeling pineapple pot? This is how you avoid that fate. Terracotta is like a sponge—it lets moisture travel right through it, which pushes the paint off from the inside out. The solution is simple: seal the inside, too!
Your Shopping List:
- Terracotta pot: Can be as cheap as $2 for a small one or up to $10 for something larger. Find them at any garden center or hardware store.
- A stiff brush: For cleaning.
- Clear, waterproof spray sealant: Around $10 at the hardware store. The spray version is perfect for getting the inside coated easily.
- Exterior-grade acrylic paint (or “Patio Paint”): $3-$8 a bottle. It’s specially formulated to handle the weather.
- A UV-resistant clear top coat: Look for one meant for outdoor use to prevent sun-fading.
Step-by-Step Guide:
- Clean the Pot: If it’s new, just wipe off the dust. If it’s old, give it a good scrub with a brush and water to get rid of dirt. Let it dry completely.
- Lesser-Known Trick: If you’re impatient like me, you can pop the clean pot into a 200°F oven for an hour to make sure it’s bone-dry before you start.
- Seal the Inside: This is the game-changing step most people miss. In a well-ventilated area (outside!), spray the entire inside of the pot with two good coats of waterproof sealant. This creates a barrier against moisture.
- Prime the Outside: Now, do the same to the outside. This gives your paint a smooth, non-porous surface to grab onto.
- Paint Your Masterpiece: Once the primer is dry, go wild! Use your exterior-grade paint for the best results.
- Protect Your Work: After the paint has dried for 24 hours, apply two or three coats of your UV-resistant top coat to the outside. This protects against both sun and rain.
By the way, if you live somewhere with frosty winters, it’s still a good idea to bring your painted pots indoors. Even with sealant, the freeze-thaw cycle can be brutal on terracotta.
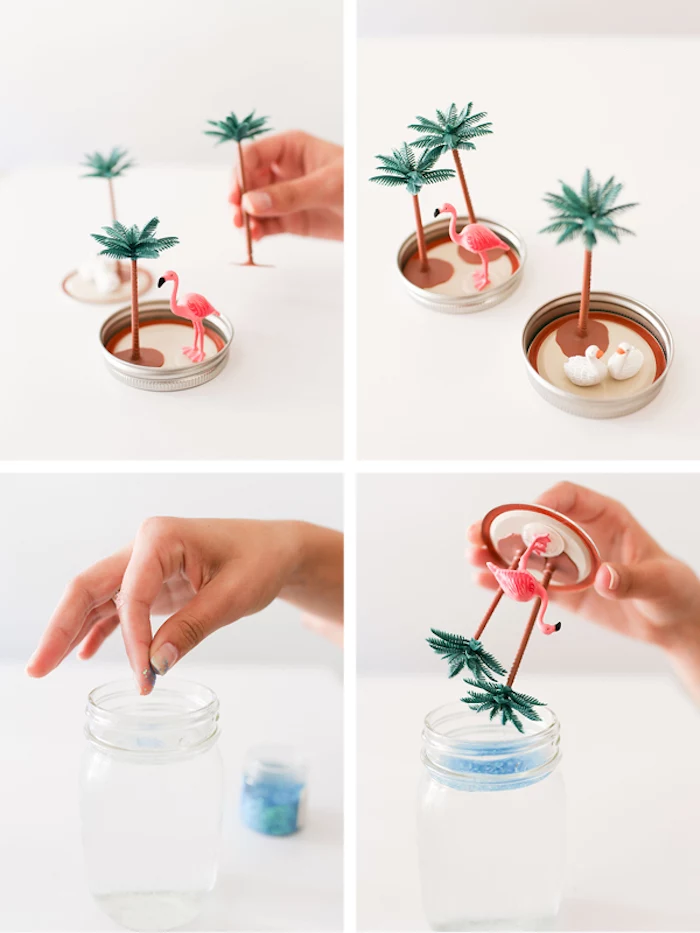
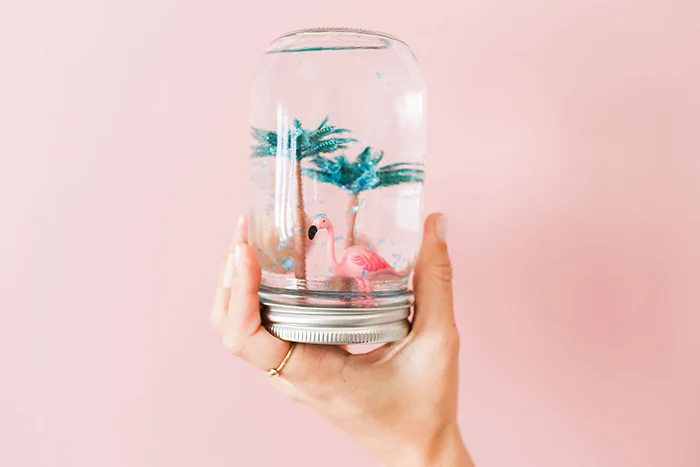
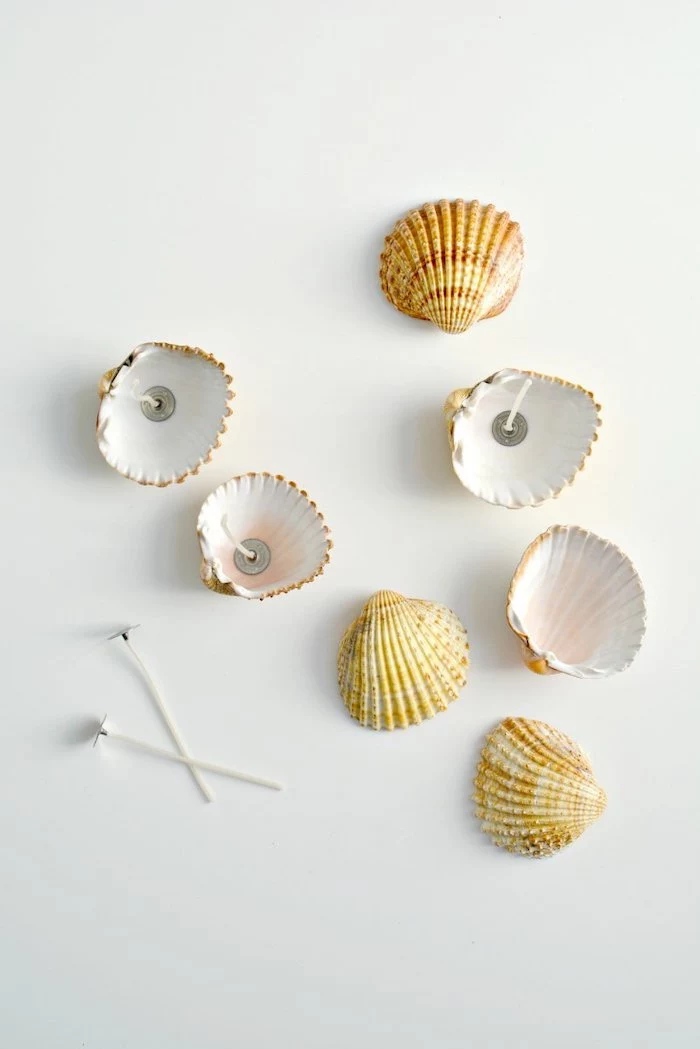
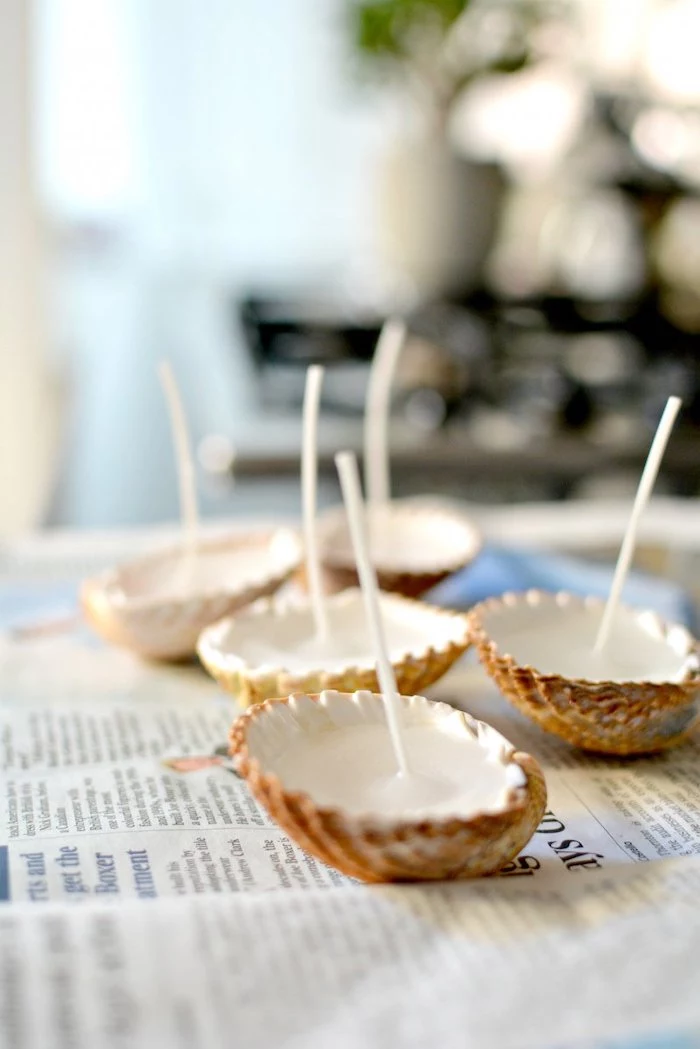
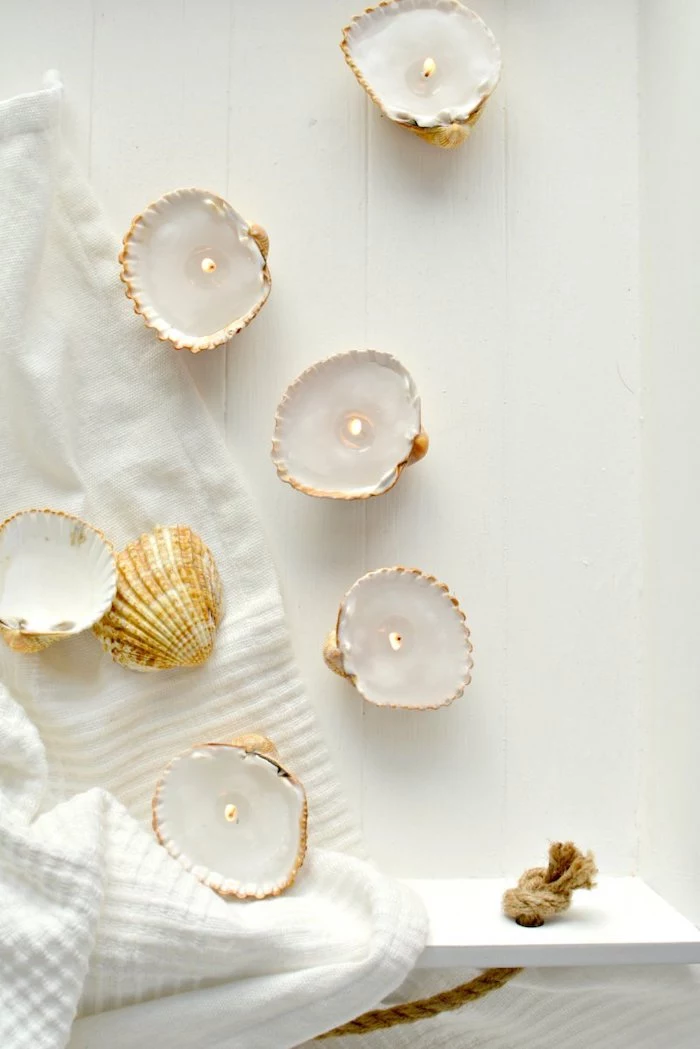
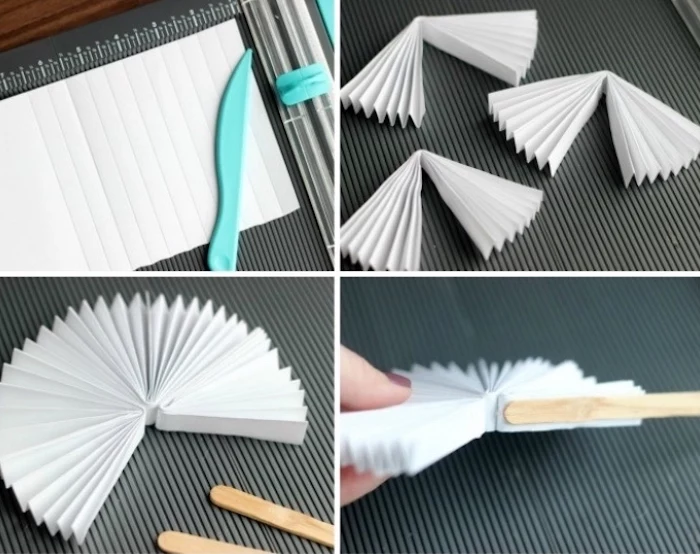
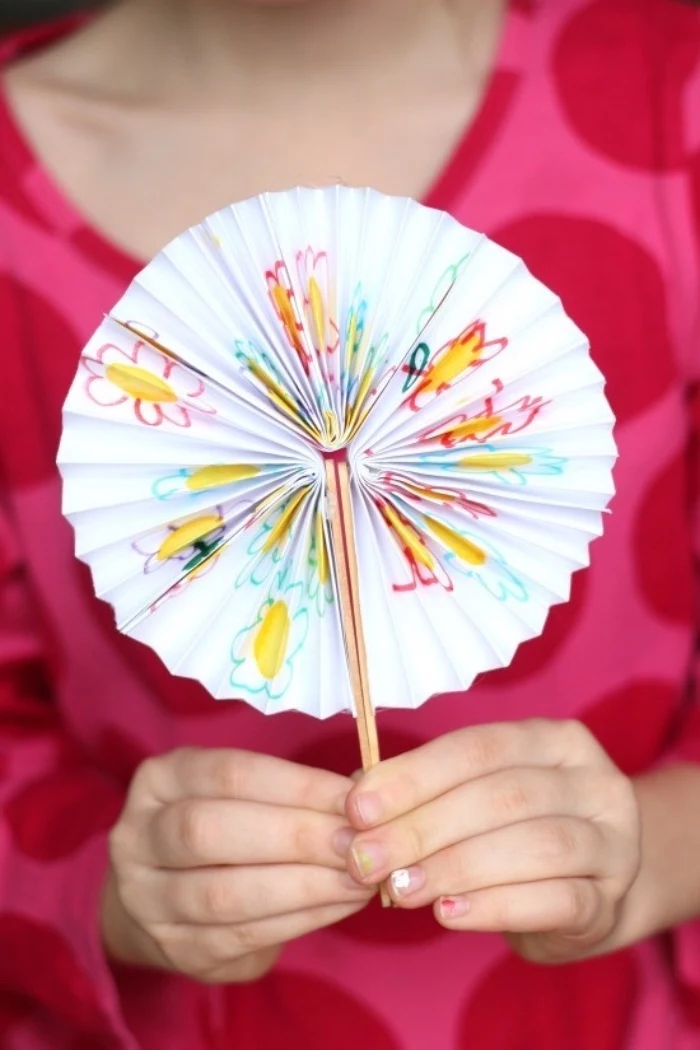
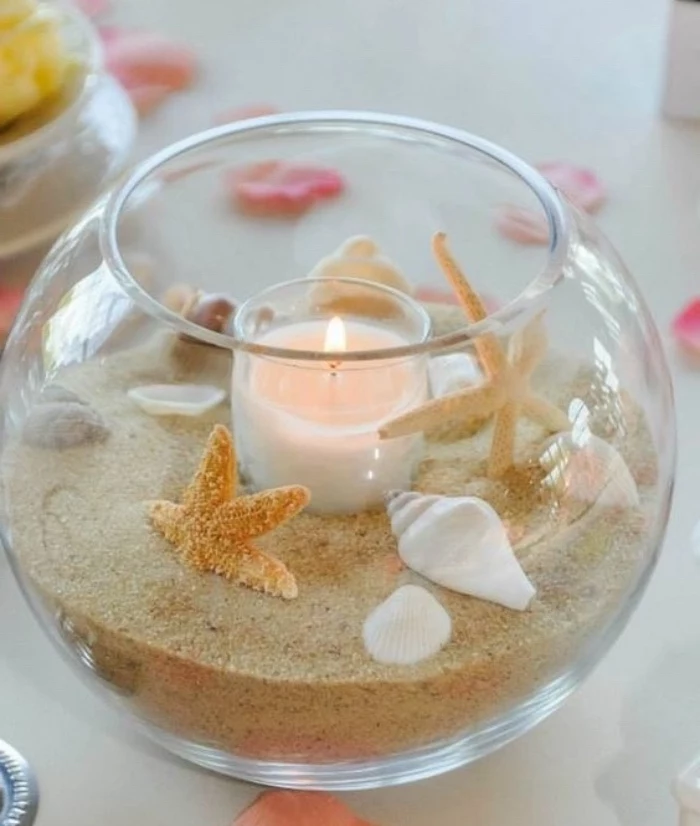
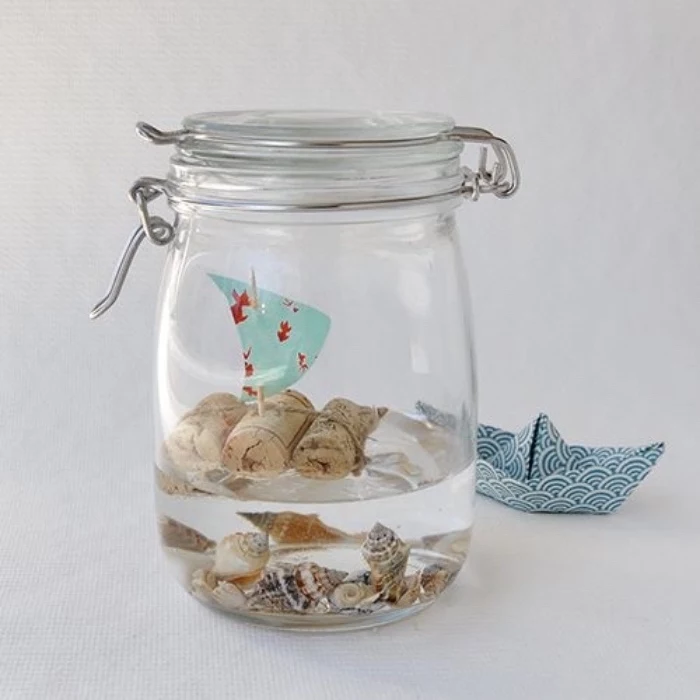
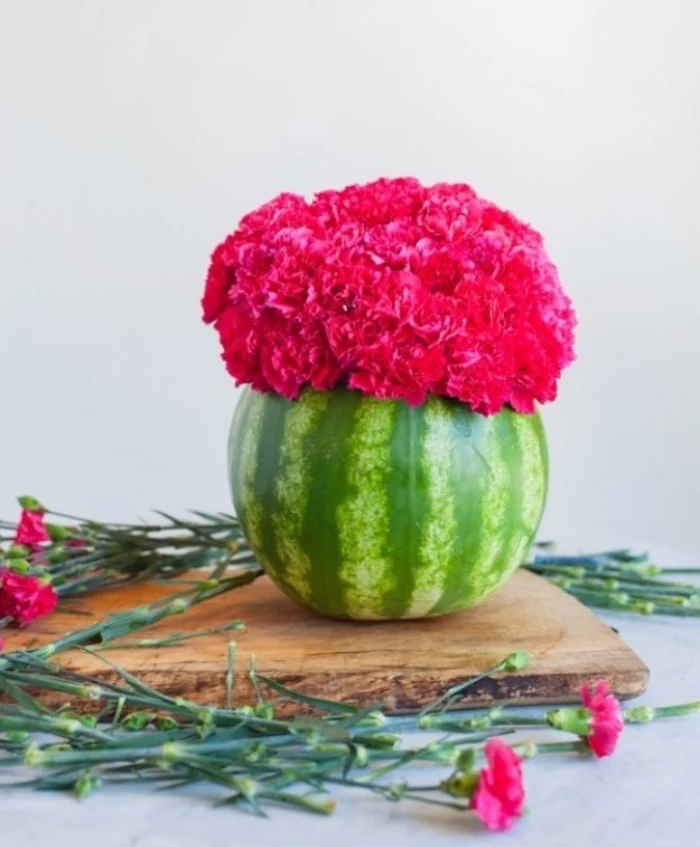
Project 3: The ‘No-Leak, No-Gunk’ Summer Globe
The classic water-filled
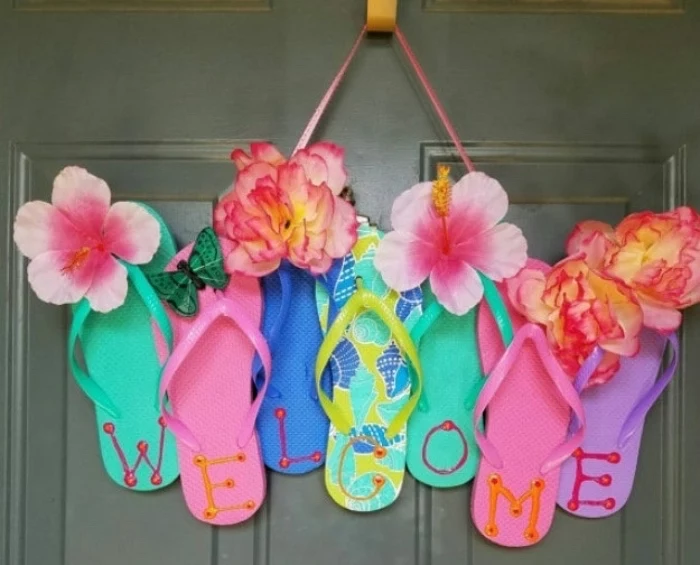
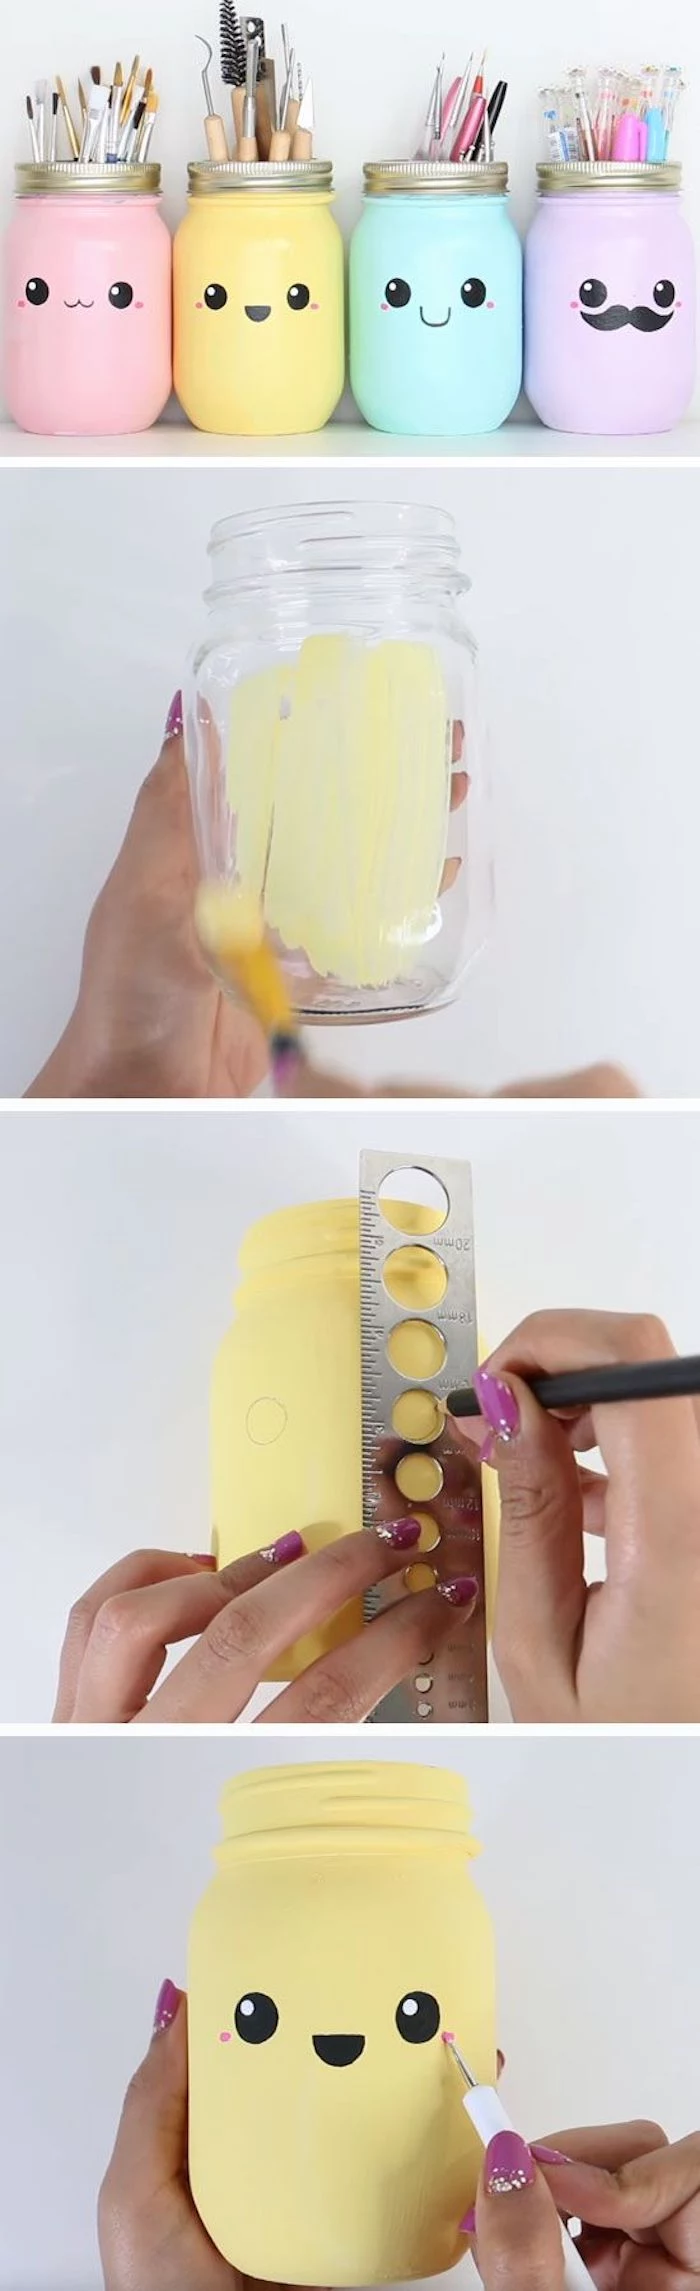
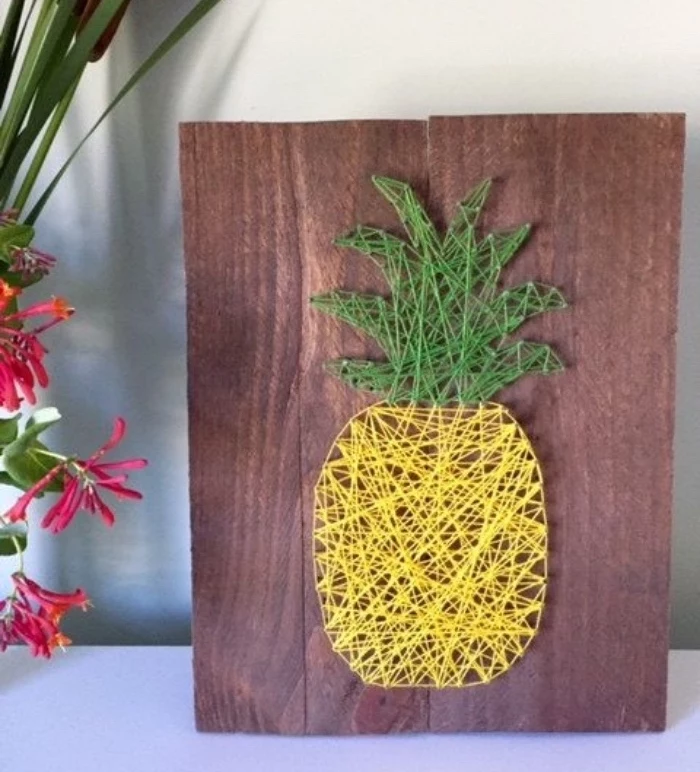
Inspiration Gallery
Pro Tip: Before you paint that terracotta pot, seal the inside first! A simple coat of spray or brush-on sealant on the interior prevents water from seeping through the porous clay and pushing the paint off from the outside. It’s the single best trick for avoiding that dreaded peeling and flaking.

- Prevents colors from fading in the sun.
- Creates a waterproof, easy-to-clean surface.
- Stops chipping and scuffing before it starts.
The secret? A final topcoat. For outdoor projects, a clear, UV-resistant spray sealant like Krylon’s UV-Resistant Clear or Rust-Oleum’s 2X Ultra Cover is your best friend.
More than 60% of us have craft supplies we’ve never used.
That summer project is the perfect excuse to finally use them! Before buying new, ‘shop’ your own stash. Old glass jars, leftover yarn, or that half-used can of spray paint might be the start of your next favorite creation. It’s both budget-friendly and sustainable.
How do I get super crisp, clean lines when painting?
The answer is high-quality painter’s tape, like FrogTape. After applying the tape, run a thin layer of your base color (or a clear sealant) along the edge of the tape. This seals the edge, so when you paint your new color over it, any bleeding will be in the base color, leaving a perfectly sharp line when you peel the tape away.
When it comes to outdoor projects, not all glues are created equal. Hot glue will soften in the summer sun, and school glue will dissolve in the rain. For a permanent, weatherproof bond on materials like glass, metal, or stone, you need an industrial-strength adhesive. Look for brands like E6000 or Loctite Marine Epoxy—they’re the choice of professionals for a reason.


Driftwood Prep: Found the perfect piece of driftwood on the beach? Before you craft with it, give it a good scrub with a stiff brush and a solution of one part bleach to nine parts water. Let it dry completely in the sun for several days. This cleans it, kills any pests, and lightens it beautifully.


For that authentic, rustic farmhouse look that’s so popular, chalk paint is a fantastic choice. But to make it last outdoors, the wax topcoats typically used indoors won’t cut it. You must protect it with a water-based, exterior-grade varnish, like Minwax Helmsman Spar Urethane, to shield it from moisture and UV damage.
Want to paint on mugs or plates that can actually be washed? The secret is in the paint and the process.
- Use a paint pen specifically designed for ceramics, like the Pebeo Porcelaine 150 or DecoArt Glass Paint Markers.
- Let your design air dry for 24 hours.
- Place the item in a cold oven, turn it to the temperature recommended on the paint packaging (usually around 300°F / 150°C), and bake for the specified time. Let it cool down completely in the oven. This heat-setting process makes your design permanent and top-rack dishwasher safe.

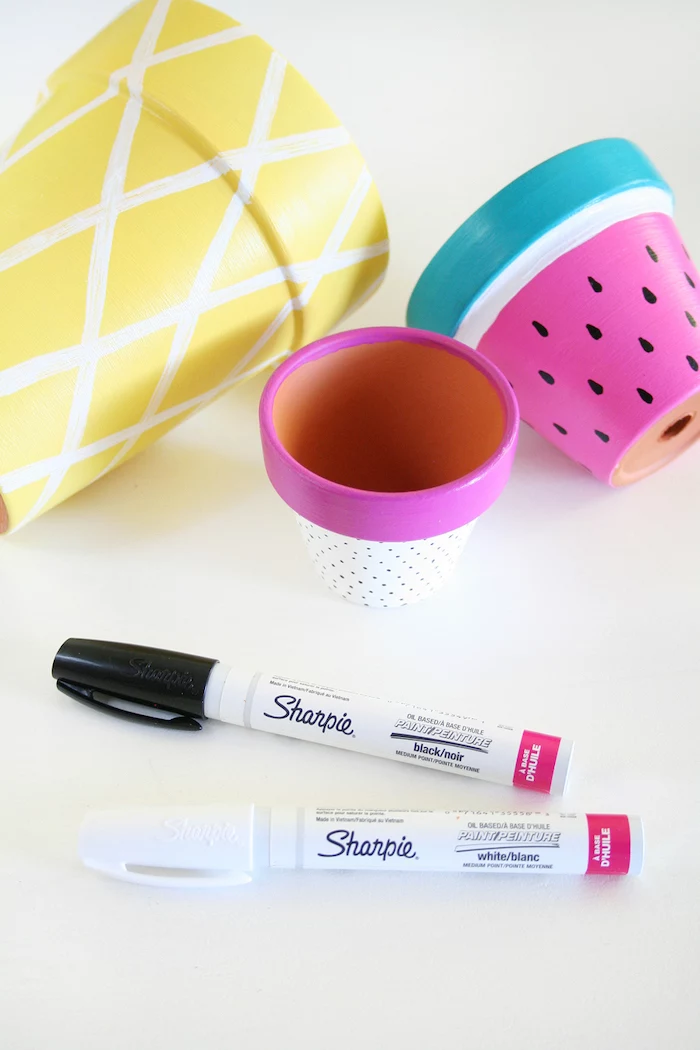
Can I really use a Sharpie for a lasting design?
Yes, but with a crucial caveat! Standard Sharpies can bleed and fade. For best results, use oil-based Sharpie paint markers. They are more opaque and durable. To make the design permanent on a non-porous surface like ceramic or glass, you MUST seal it with a clear spray sealant. Don’t use a brush-on sealant, as it will almost certainly smudge your hard work.


Natural Bristle Brushes: Best for oil-based paints, stains, and varnishes. They hold more product for a smoother finish.
Synthetic (Nylon/Polyester) Brushes: The only choice for water-based acrylic or latex paints. Natural bristles will soak up water and go limp.
Using the right brush not only gives a better result but also saves your brushes from ruin.
To create a cohesive feel for your outdoor space, think like a designer and choose a simple three-color palette. Use it across all your DIY projects—from painted pots and custom cushions to stenciled doormats. A consistent palette ties everything together and makes your creations look intentional and high-end.
The #1 enemy of outdoor paint is UV radiation. It doesn’t just fade vibrant colors; it also breaks down the paint’s chemical structure, leading to cracking and chalking. That’s why choosing a paint with built-in UV protection or adding a UV-resistant topcoat is a non-negotiable step for any piece that will live in the sun.
- A weatherproof bond that holds stone, wood, and glass.
- A flexible hold that won’t crack under temperature changes.
- A crystal-clear finish that doesn’t yellow over time.
The hero product? A tube of clear silicone sealant. It’s perfect for projects like mosaic stepping stones or attaching shells to a planter, offering durability that hot glue can only dream of.
Want to add a touch of the sea to your projects? Don’t overlook the power of texture. Wrap plain glass votives with jute rope, mix coarse sand into acrylic paint to create a stucco-like finish on a picture frame, or glue tiny, flat pebbles around the rim of a planter. These tactile details create a rich, sensory experience.
A single drop of oil from your fingerprint can prevent paint from adhering properly.
This is why ‘prep’ is a crafter’s mantra. Before painting any slick surface like glass, metal, or plastic, give it a quick wipe-down with rubbing alcohol on a lint-free cloth. This simple, 10-second step removes invisible residues and ensures your paint job will stick for years.
For that breezy, sun-bleached coastal look, you don’t need to wait years. The technique is called ‘dry brushing’. First, paint or stain your wooden item in a base color (like a dark brown or navy). Once it’s fully dry, dip the very tips of a stiff, dry brush into a tiny amount of white or light beige paint. Wipe most of it off on a paper towel, then lightly drag the brush over the surface. The white will catch only on the raised grain and edges, creating an instantly weathered effect.
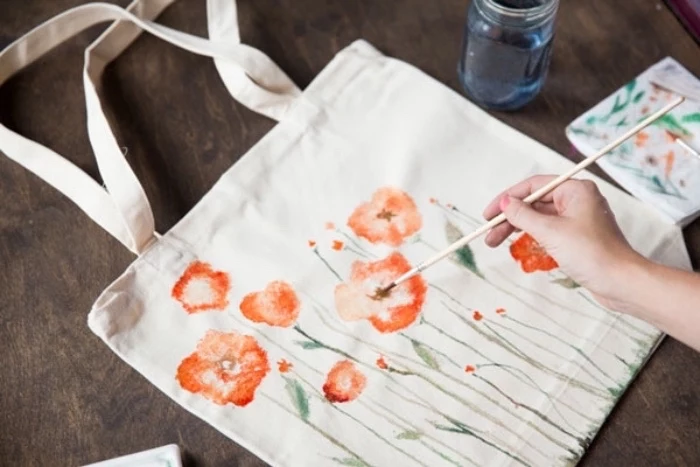
If you’re making your own outdoor pillows or fabric banners, your fabric choice is everything. Look for materials specifically designed for the outdoors.
- Sunbrella: The gold standard for fade and water resistance.
- Olefin: A durable, budget-friendly synthetic that resists stains and mildew.
- Duck Canvas: A heavy-duty cotton that, when treated with a waterproofing spray, can be a great, affordable option.


A critical rule of spray painting: Two thin coats are always better than one thick coat. A heavy coat takes longer to dry, is more likely to drip, and can remain soft and easy to ding. Apply a light first coat, let it dry to the touch (about 15-20 minutes), and then apply a second light coat for full, even coverage.
Fact: The cure time is different from the dry time.
Paint might be ‘dry to the touch’ in an hour, but it’s not fully hardened. Curing is the chemical process where the paint reaches maximum durability, and it can take anywhere from 24 hours to 30 days, depending on the product and conditions. For projects that will see heavy use, respecting the full cure time noted on the can is the secret to a rock-hard finish.
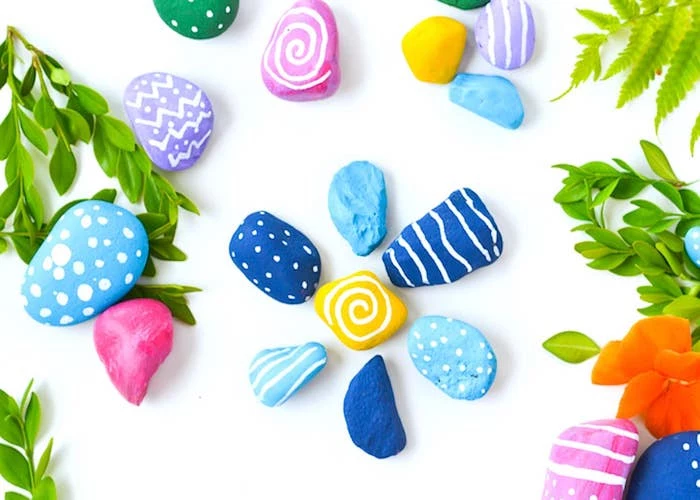
My painted rocks look dull after the sealant. Why?
You likely used a matte finish sealant. While great for a natural look, it can sometimes mute vibrant colors. If you want your painted designs to ‘pop’ with rich color and depth, always opt for a sealant with a gloss or semi-gloss finish. It reflects more light and makes the colors look saturated and vibrant.


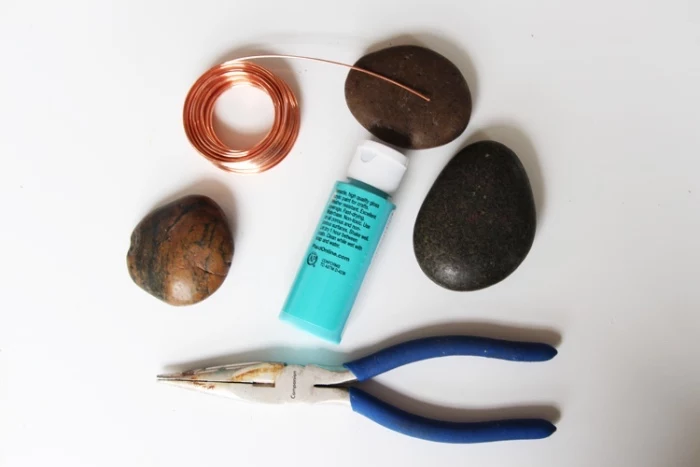
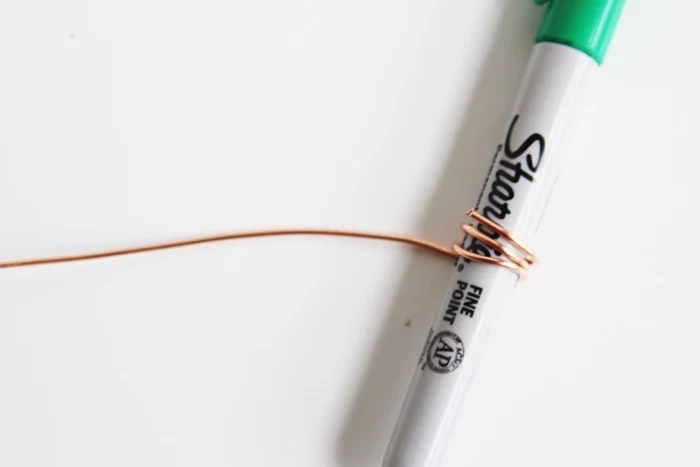
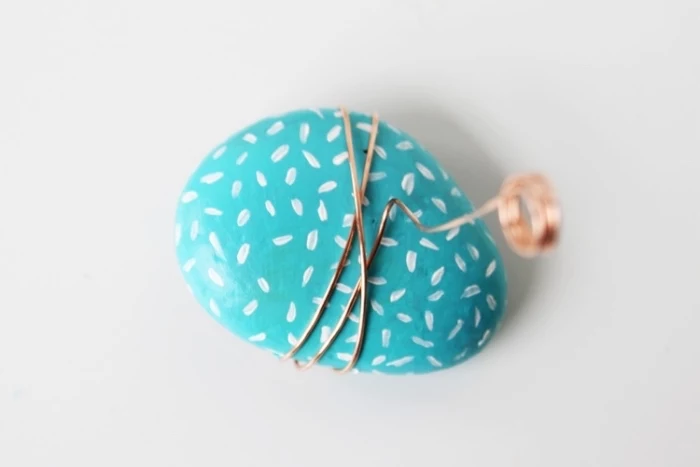
Create a durable photo holder that won’t tarnish or bend with this simple trick. Instead of thin craft wire, head to the hardware store and look for 12 or 14-gauge copper or brass electrical wire. It’s sturdy, easy to shape with pliers, and develops a beautiful natural patina over time when exposed to the elements.
Embrace the Japanese philosophy of ‘Wabi-Sabi’ in your crafting. This worldview celebrates the beauty of imperfection. That slightly uneven line, the unique texture of a found object, or the subtle variations in hand-painted color are what give your creation its soul and story. It’s not a mistake; it’s character.
Primer isn’t just an extra step; it’s a problem-solver. On slick surfaces, it gives your paint something to grip. On porous wood or terracotta, it stops the surface from drinking up all your expensive color. Using a dedicated primer like Zinsser 1-2-3 ensures your final color is truer, coverage is better, and the final result is far more durable.

If you live near the coast, salt in the air is a real threat to your outdoor creations. It can corrode metal and degrade finishes. For maximum protection on wood and metal projects, consider using a marine-grade varnish or sealant, available at boat supply or hardware stores. It’s specifically formulated to withstand the harsh conditions of a saltwater environment.


