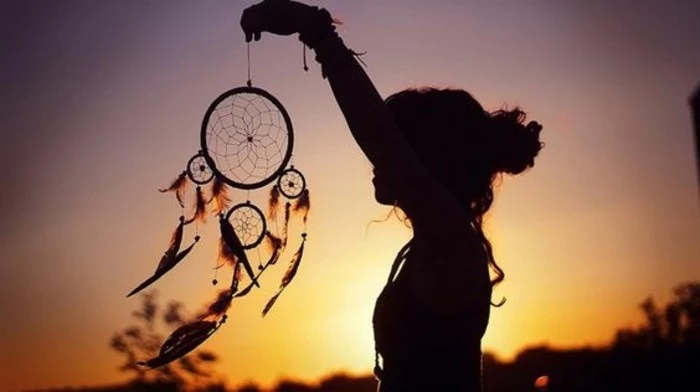
More Than Knots & Feathers: A Mindful Guide to Weaving a Dreamcatcher
I’ve been working with my hands and traditional crafts for a long time, and I still vividly remember my first attempt at weaving a dreamcatcher. It was a total mess. I had one of those flimsy plastic hoops from a craft kit and some generic string. The result was a droopy, lopsided web that looked absolutely nothing like the beautiful, taut patterns I admired. A failure, for sure, but it was a fantastic lesson.
In this article
It taught me that to create something truly meaningful, you have to understand where it comes from and respect the materials you’re using. A dreamcatcher isn’t just a boho wall hanging; it’s a sacred object with a deep cultural story that began with the Anishinaabe people.
So, this is the guide I wish I’d had all those years ago. It’s not about churning out a quick craft. It’s about sharing what I’ve learned through practice and listening, so you can create something that’s not only beautiful but also honors its important origins.
First, Understand the Story
Before you even think about touching a hoop or a string, it’s vital to sit with the story behind the dreamcatcher. The legend comes from its originators and tells of a Spider Woman, a spiritual protector who watched over the people, especially the children. As her community grew and spread out, it became harder for her to visit every single child.
To help her, the women of the tribe began to weave their own protective webs on hoops made from willow branches. These weren’t just decorations; they were sacred tools hung over a child’s sleeping space. The web was meant to filter the night air, which was believed to be full of dreams, both good and bad. The bad dreams would get caught in the web and perish with the first light of morning. The good dreams, however, would know the way, passing through the small hole in the center and gently sliding down the attached feathers to the sleeper below.
It’s also important to know that many of the dreamcatchers you see today have been separated from this original meaning. During a period of widespread cultural exchange, the design was adopted by other Indigenous communities, which brought it into the mainstream. This also led to heavy commercialization, often stripping it of its sacred purpose. Understanding this history is the first real step in making one with respect.
What Each Part Represents
Every single element of a traditional dreamcatcher has a purpose. When you know what they mean, the act of making one shifts from simple assembly to a thoughtful, meditative process.
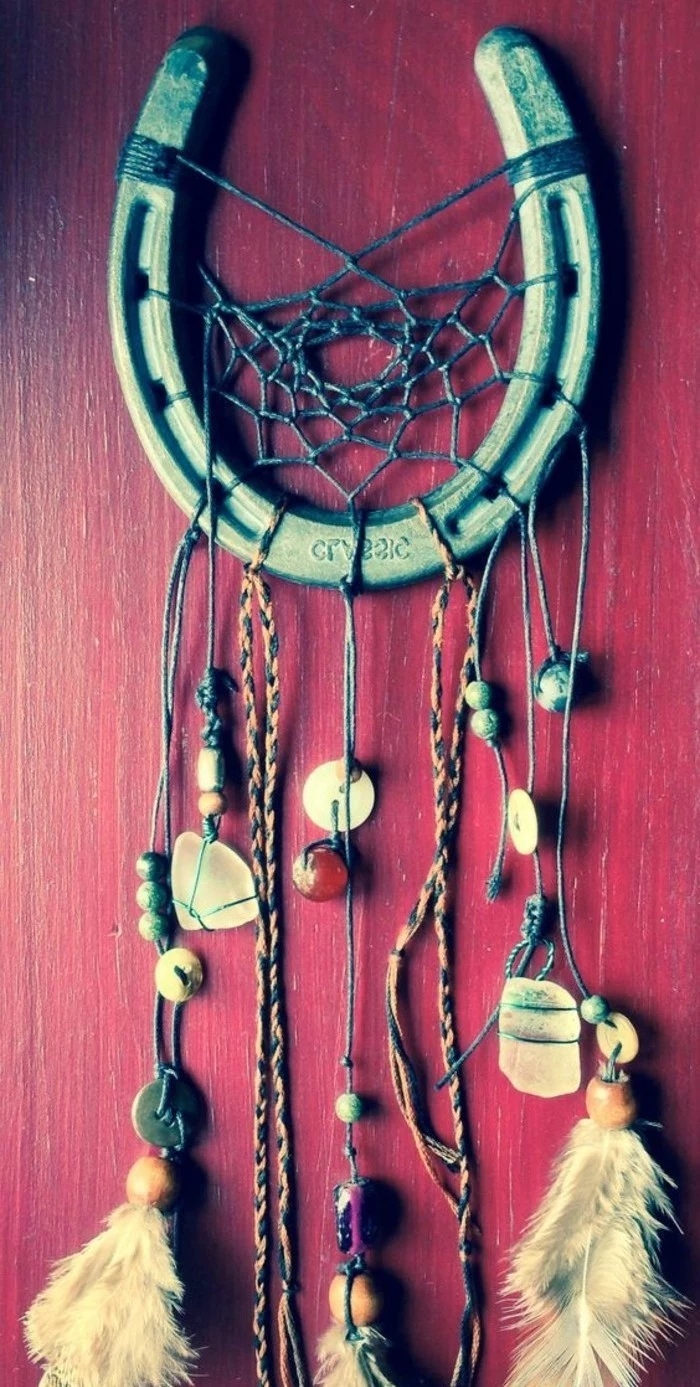
- The Hoop: Traditionally crafted from red willow, the hoop’s perfect circle represents the circle of life. It’s a symbol for the journey of the sun and moon across the sky, with no beginning and no end.
- The Web: This is a direct nod to the Spider Woman from the stories. It’s the protective filter. The number of points where the web connects to the hoop can also hold meaning. Some use eight points to represent the spider’s eight legs, while others might use a different number that is significant to their own stories or traditions.
- The Center Hole: This is non-negotiable! The small opening in the middle is the pathway for good dreams to pass through. A web that is woven completely shut can’t fulfill its purpose.
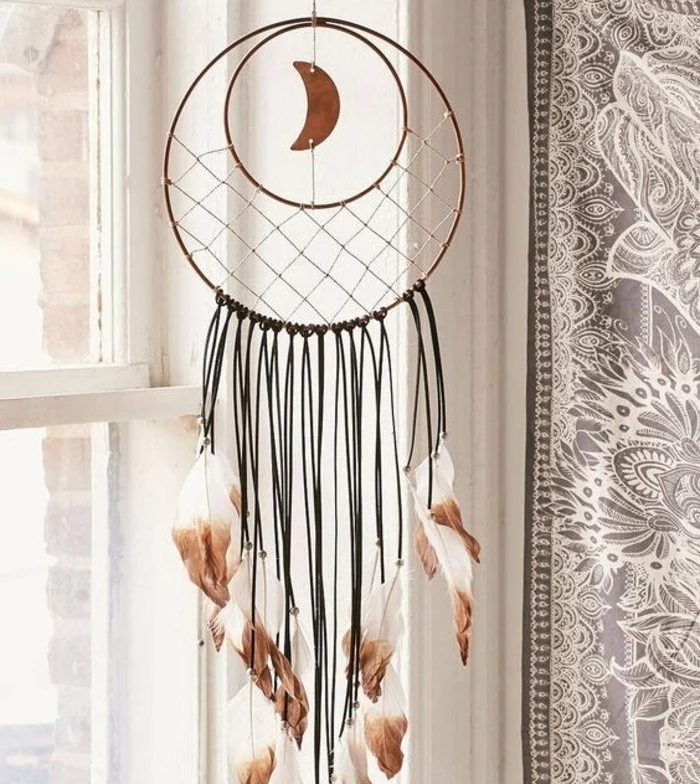
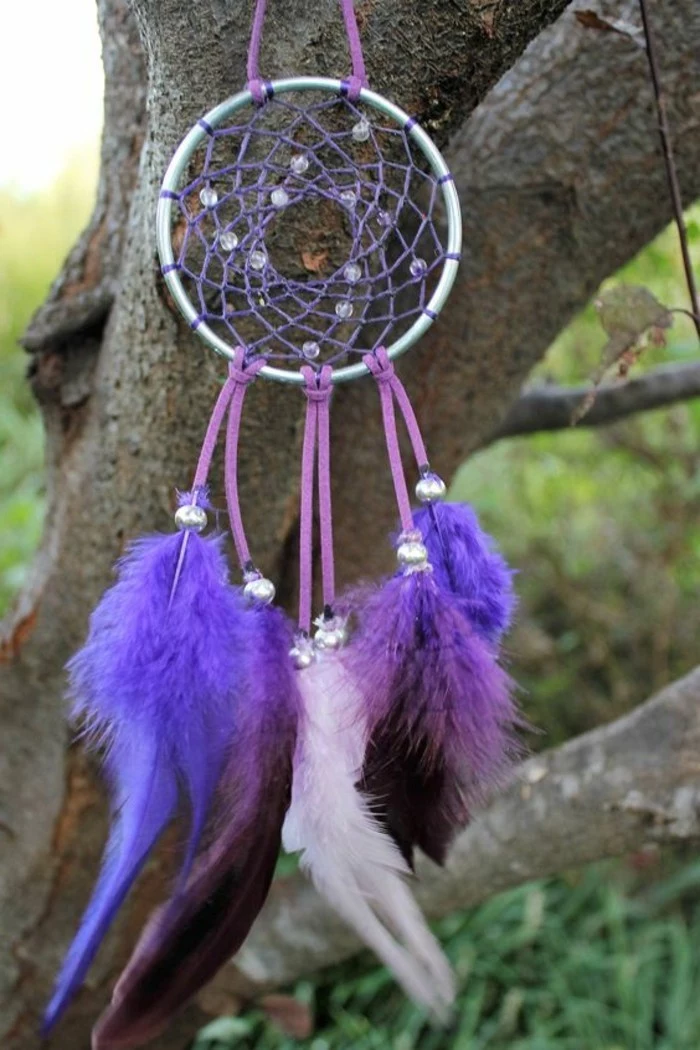
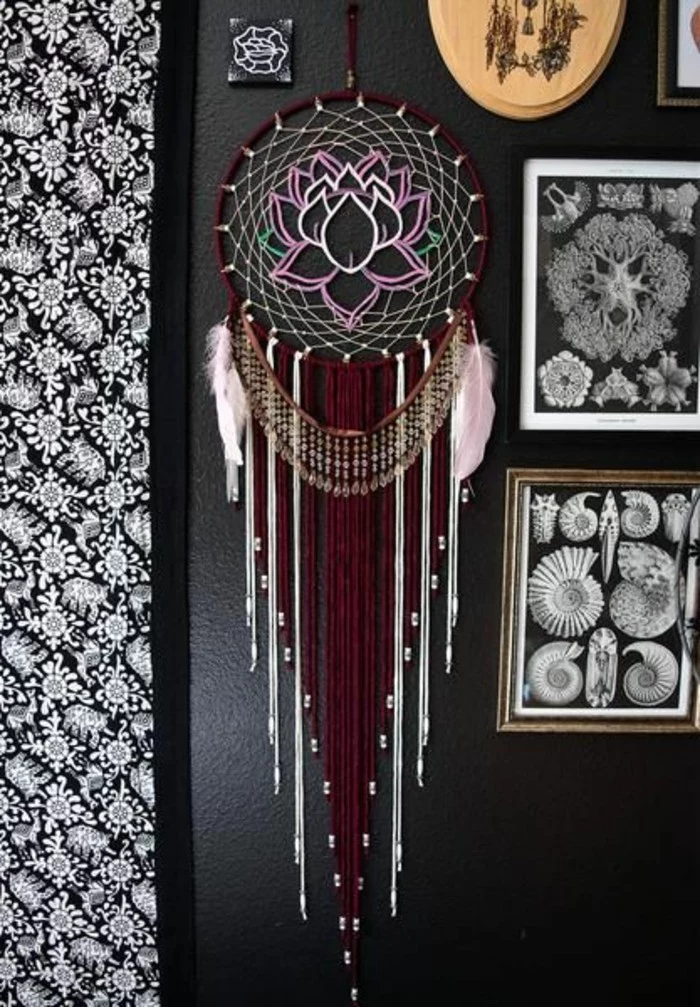
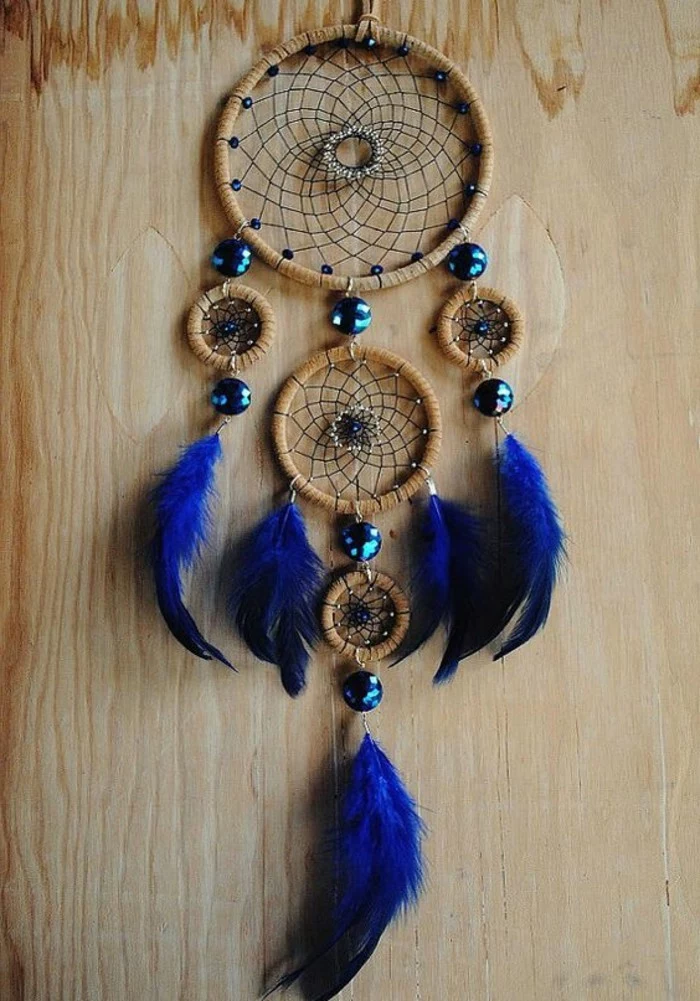
- Feathers & Beads: A single feather was often tied to the bottom, acting as a soft ladder for the good dreams to follow. The type of feather was chosen with intention—perhaps an owl feather for wisdom or an eagle feather for courage. Sometimes, a single bead was woven into the web to symbolize the spider, the creator. Other times, several beads might represent good dreams caught in the web, saved for another time.
As you weave, think about these meanings. Your work becomes an act of storytelling.
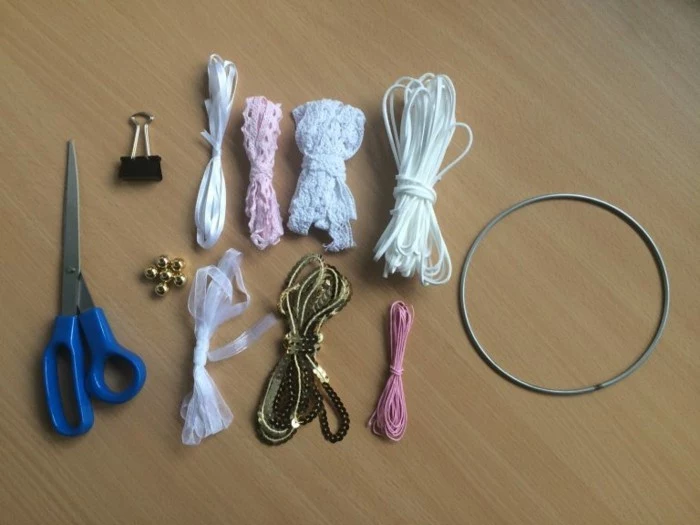
Gathering Your Materials (with Prices!)
The materials you choose will make a huge difference. Here’s a breakdown of the traditional choices and some more practical, budget-friendly alternatives for when you’re just starting out.
For the Hoop:
The hoop is your foundation. A traditional choice is a fresh, pliable branch of red willow or even grapevine. You gently bend it into a circle, overlap the ends, and tie them securely to dry for a week or two until the shape is permanent. The feel of a natural wood hoop is incredible, but it takes patience.
For beginners, a metal or bamboo hoop from a craft store like Joann or Michaels is a great place to start. They’re perfectly round and easy to work with. I’d suggest a hoop between 5 and 8 inches in diameter. Smaller is tough for your fingers, and larger can get saggy if your tension isn’t spot-on. Cost: About $2-$4.
For Wrapping and Weaving:
Traditionally, this was done with sinew made from animal tendon. It’s incredibly strong and gets a little sticky when moist, which helps it grip.
A fantastic modern alternative is artificial sinew or a waxed cord (linen or cotton). You can find this online or at craft stores. The light wax coating is a game-changer for beginners because it stops the cord from slipping, which is a super common frustration. I recommend a 1mm thick cord. To wrap the hoop itself, suede or deerskin lace (about 3mm wide) gives it a soft, grippy finish. Cost: A roll of artificial sinew is about $8-$12 and will last for many projects. Suede lace might run you $5-$7.
For Decoration:
Here’s where you can add personal touches, but you need to be mindful.
- Beads: Wood, bone, glass, or stone beads all work beautifully. Just make sure the hole is big enough for your cord!
- Feathers: Heads up, this is really important. In the United States, laws like the Migratory Bird Treaty Act make it illegal to possess or sell feathers from most native birds (like eagles, hawks, and owls). This isn’t just a legal issue; it’s an ethical one. Please don’t use feathers you find on the ground. Instead, look for ethically sourced feathers from domestic birds like roosters or geese at craft supply stores.
All in all, you can probably get all the supplies for your first dreamcatcher for between $20 and $30.
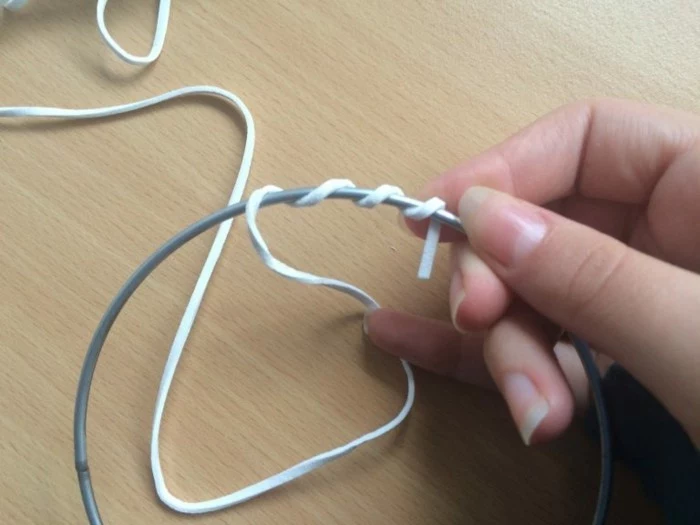
Let’s Get Weaving: Step-by-Step
Okay, let’s start making. My advice? Be patient. This isn’t a race. Put on some quiet music and enjoy the process. For this walkthrough, we’ll assume you have a 6-inch hoop, suede lace for wrapping, and waxed cord for the web.
Give yourself a good chunk of time. Wrapping the hoop might take 30-45 minutes, and the weaving itself could take another hour or two for your first try. It’s a slow, mindful activity!
-
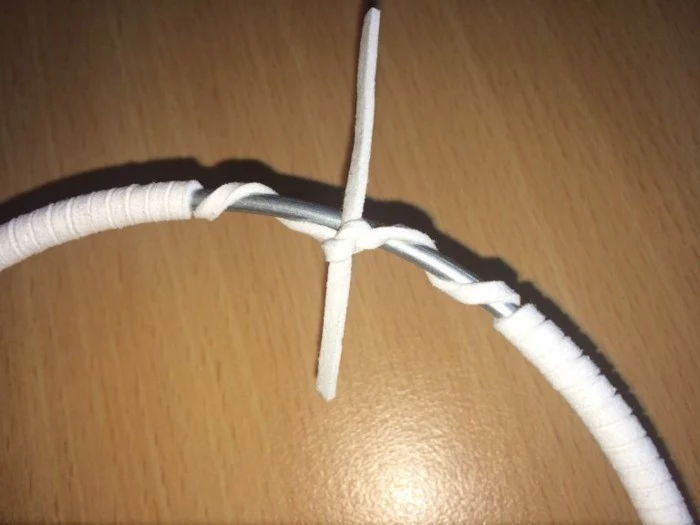
Wrap the Hoop: Secure one end of your suede lace to the hoop with a dab of strong craft glue (like E6000) or just by holding it and wrapping over the tail. Tightly wrap the lace around the hoop, making sure each new wrap is snug against the last. No gaps! When you get all the way around, trim and secure the end with another dot of glue or a tight knot.
-
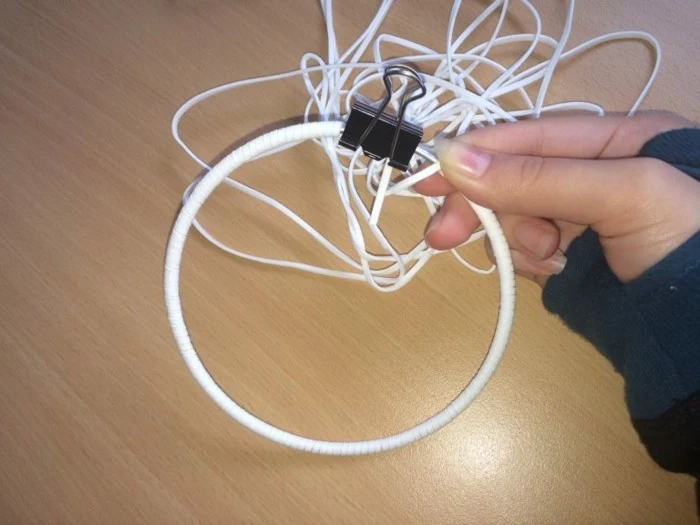
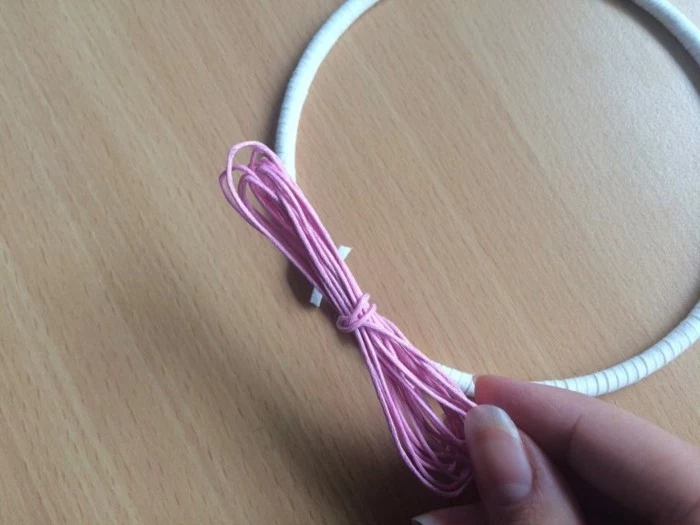
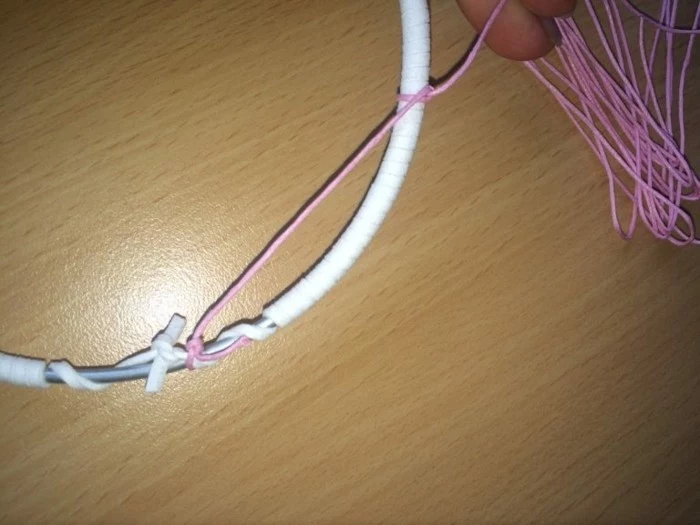
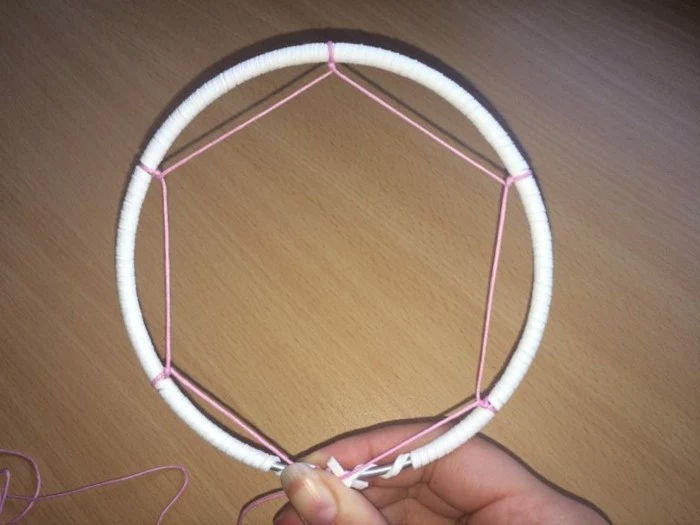
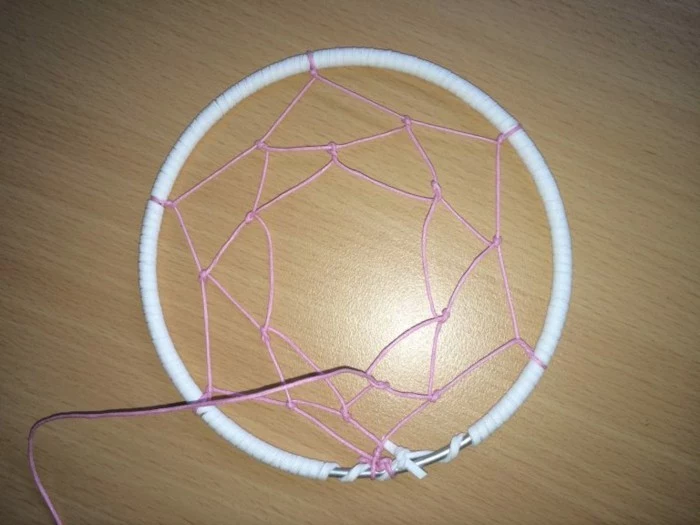
The First Row: Cut a piece of your waxed cord that’s about 10 times the diameter of your hoop (so for a 6-inch hoop, use 60 inches or 5 feet). Tie a hanging loop at the top. Now, move about 2 inches over and loop the cord over the hoop, under it, and back up through the opening you just made. This is a simple hitch knot. Pull it taut. Quick tip: Before you start, use a ruler and a pencil to make 7 or 8 evenly spaced marks on your wrapped hoop. This prevents your first row from looking wonky!
-
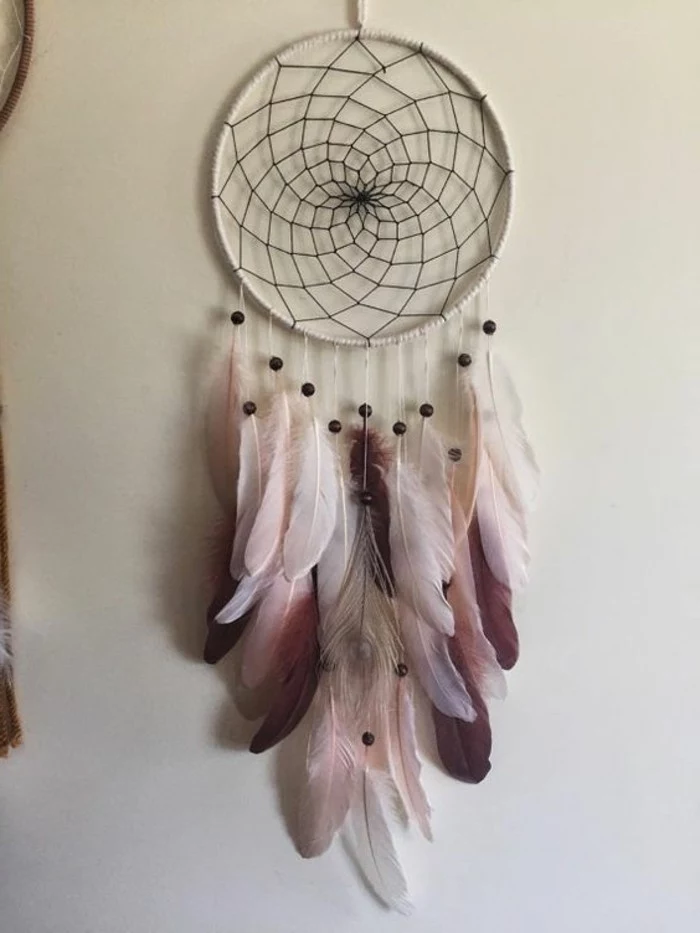
Weaving the Web: Now, instead of looping onto the hoop, you’ll loop onto the cord from the first row. Take your working cord, guide it under the first section of cord between two knots, and make the same hitch knot right in the middle of that section. Pull it taut. Continue this all the way around, creating a spiral. If you want to add beads, just thread one onto your cord before making a knot. The knot will lock it in place.
-
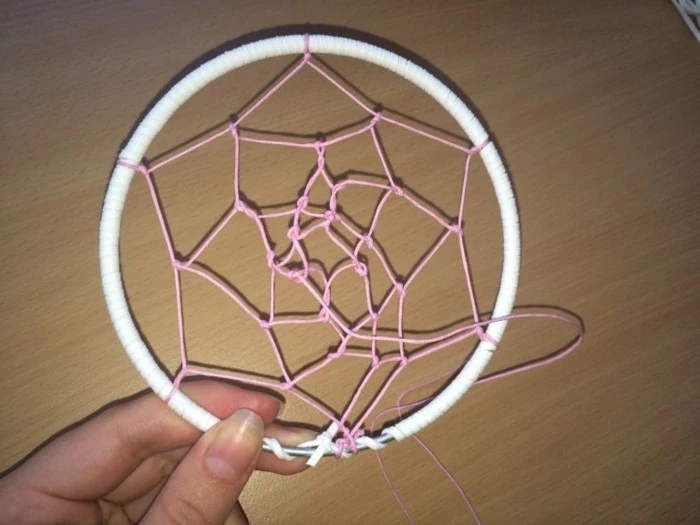
Finishing Up: Keep weaving row after row. The spaces will get smaller, and you might need a needle to help guide the cord. Stop when you have a small hole left in the center—about the size of a pea is perfect. Tie a secure double knot around one of the web threads near the center, trim the excess, and add a tiny, invisible drop of glue for security.
-
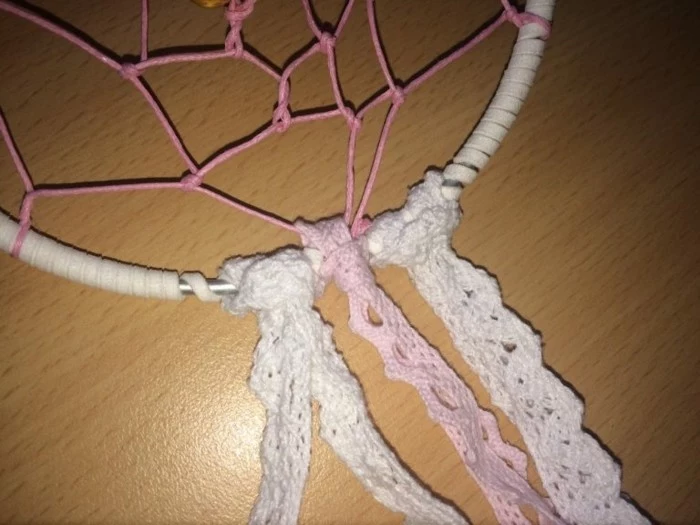
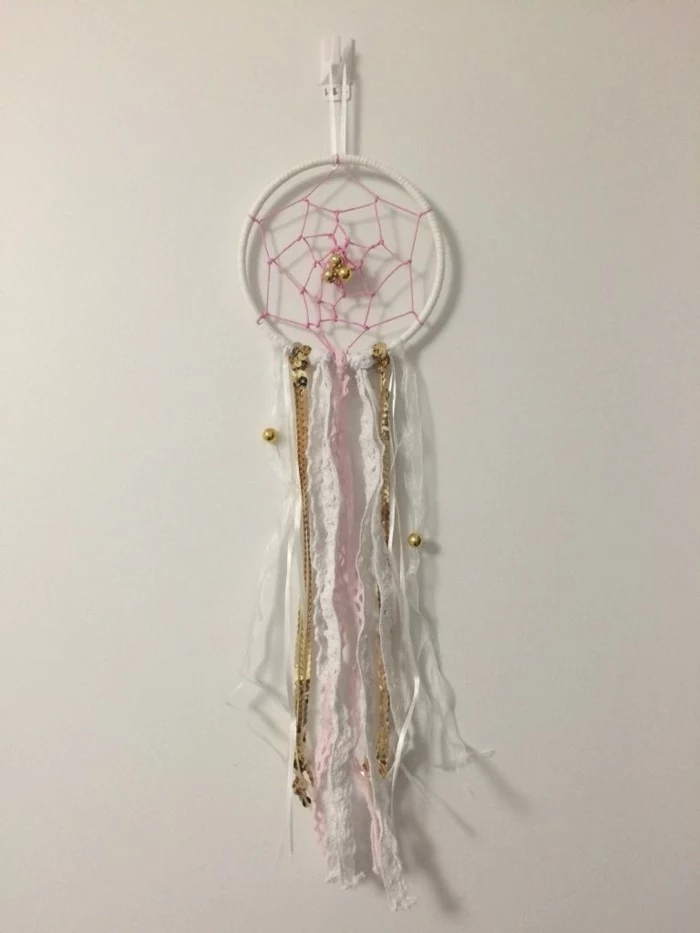
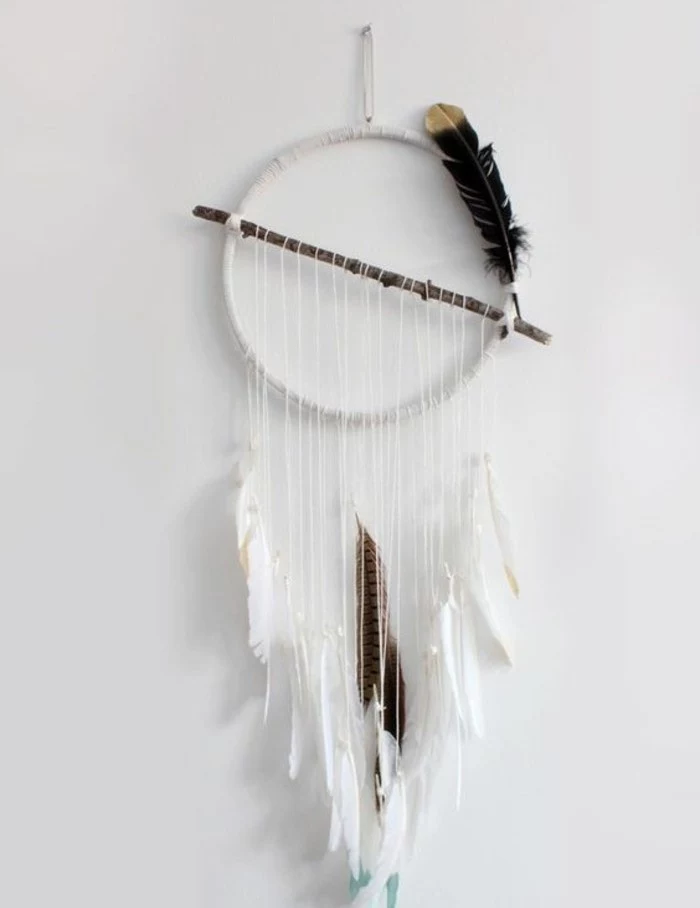
Adding Feathers: Cut a few lengths of your suede lace or cord and tie them to the bottom of the hoop. You can attach feathers using small metal clasps or by carefully tying them on with fine thread. Add some beads for weight and color, and vary the lengths for a more natural look.
Common Pitfalls & Quick Fixes
From my experience, a few things tend to trip people up. Don’t worry, they’re all fixable!
- Problem: “My web is saggy and loose!”
Fix: This is all about tension. The goal is consistency—not too tight, not too loose. This is where waxed cord is your best friend because it grips and helps hold your stitches. If a section is loose, don’t be afraid to undo a few stitches and try again. You’ll get the feel for it. - Problem: “Help! I ran out of cord halfway through!”
Fix: It happens! Just take a new piece of cord and tie it to the end of the old piece with a very small, tight double knot. A tiny dab of glue on the knot will make it extra secure. Try to position the knot so it’s on the “back” of a stitch, and it will be nearly invisible. - Problem: “The first knot is confusing me!”
Fix: Honestly, the hitch knot is much easier to see than to read about. My best advice is to hop on YouTube and search for a quick video on “dreamcatcher hitch knot.” Seeing it done once will make it click instantly.
A Crucial Note on Cultural Respect
We can’t talk about making dreamcatchers without addressing cultural appropriation. It’s a term that can make people feel defensive, but the conversation is essential if we want to be respectful.
Appropriation happens when a dominant culture takes something from a minority culture without understanding or permission, usually for profit or as a passing trend. The dreamcatcher has, unfortunately, become a prime example of this.
So, how can you engage with this craft respectfully as a non-Indigenous person?
- Acknowledge the Source: Always know and share that the dreamcatcher is an Anishinaabe creation. When someone admires your work, tell them the story of the Spider Woman. Education is the antidote to appropriation.
- Stay Humble: After all this time, I still consider myself a student of this craft. You are a guest in this tradition.
- Don’t Sell as “Authentic”: In the US, there are important truth-in-advertising laws that protect Indigenous artists. If you are not a member of a state or federally recognized tribe, you cannot legally market your work as “Native” or “Indian.” Be honest about what you’ve made: a handmade item inspired by a traditional design.
- Buy from Indigenous Artists: This is the big one. The best way to have an authentic dreamcatcher is to buy one from a Native artist. This directly supports their families, communities, and the continuation of their culture.
If you’re looking to buy, check out resources like the Indian Arts and Crafts Board, or marketplaces like Eighth Generation and Beyond Buckskin. They are great places to find and support real Indigenous creators.
Final Thoughts
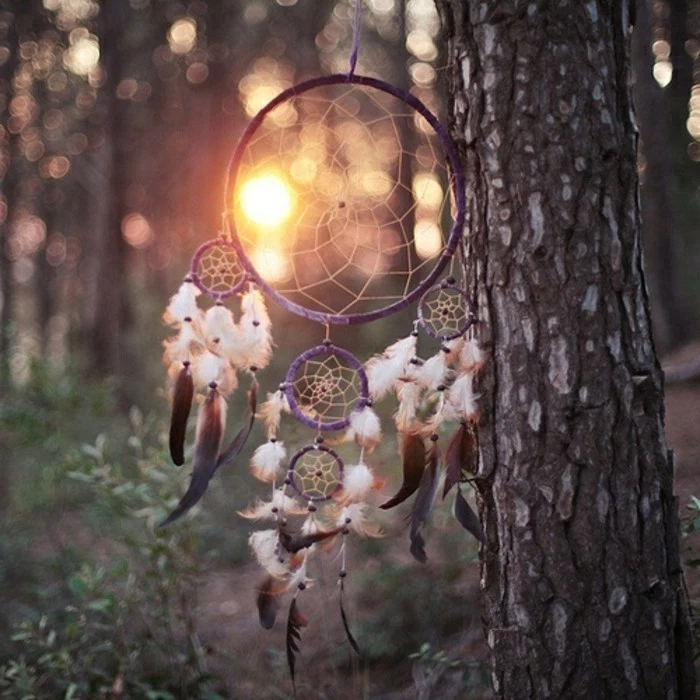
Making a dreamcatcher is a journey. The rhythmic weaving can feel like a form of meditation. Your finished piece will be more than just something to hang on the wall; it’s a reflection of your patience, focus, and—most importantly—your respect for the culture that gave it to the world. I hope this guide helps you start your own respectful journey.
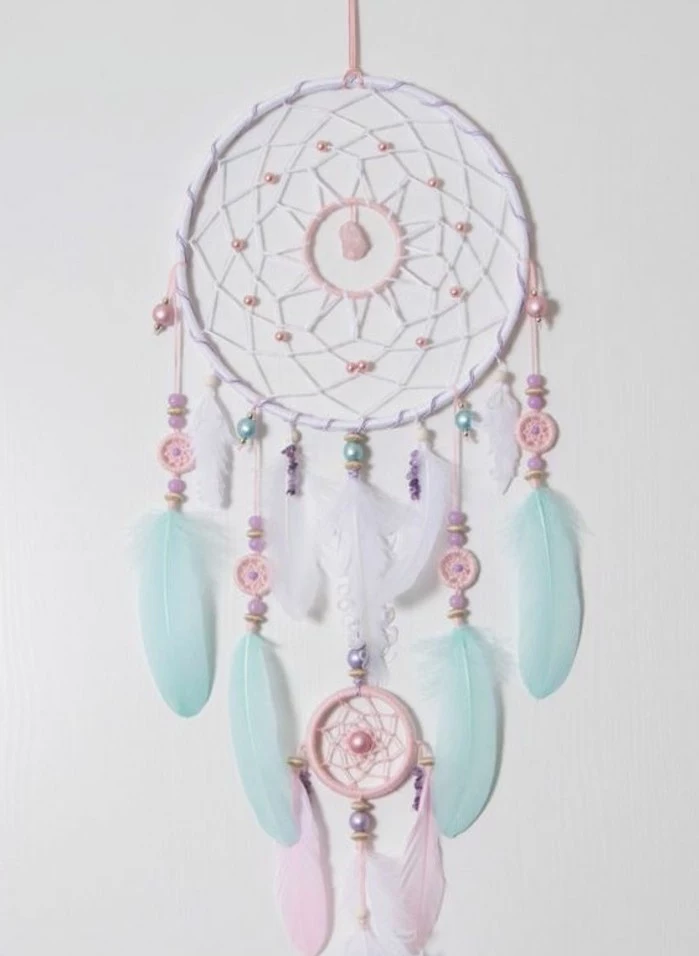
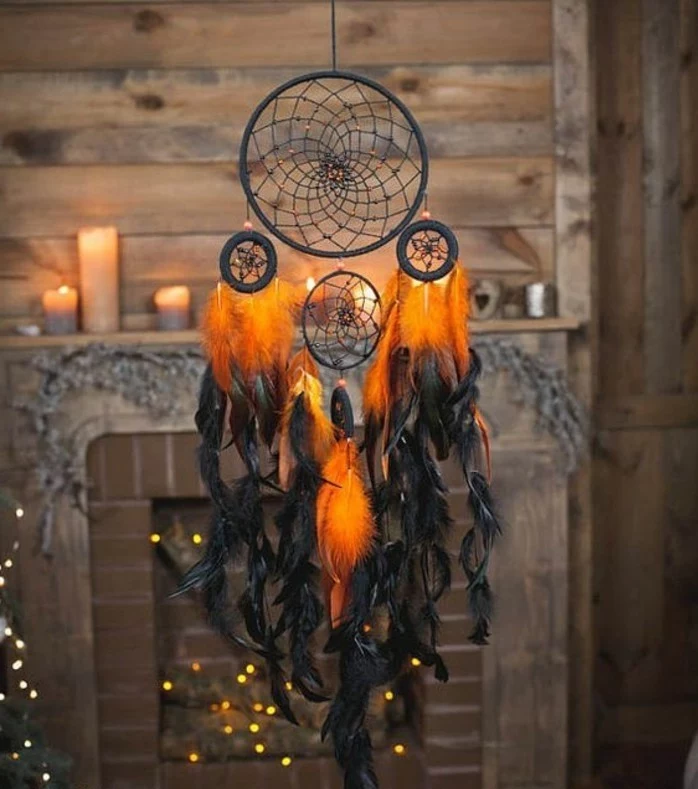
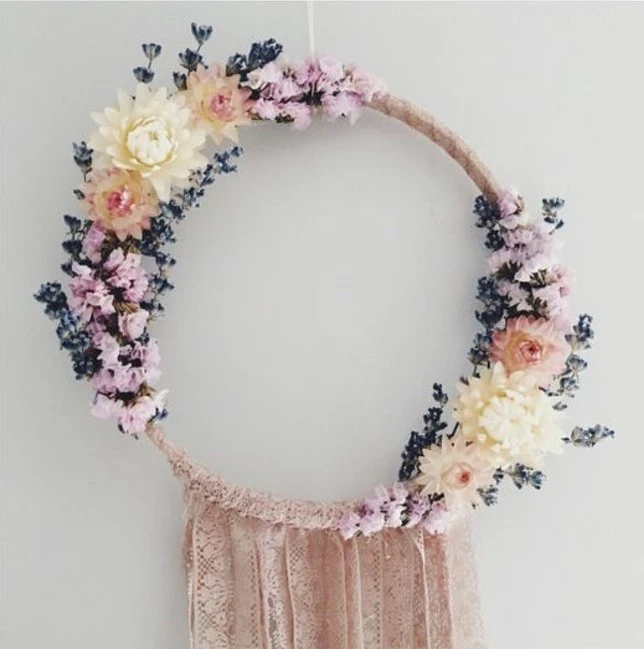
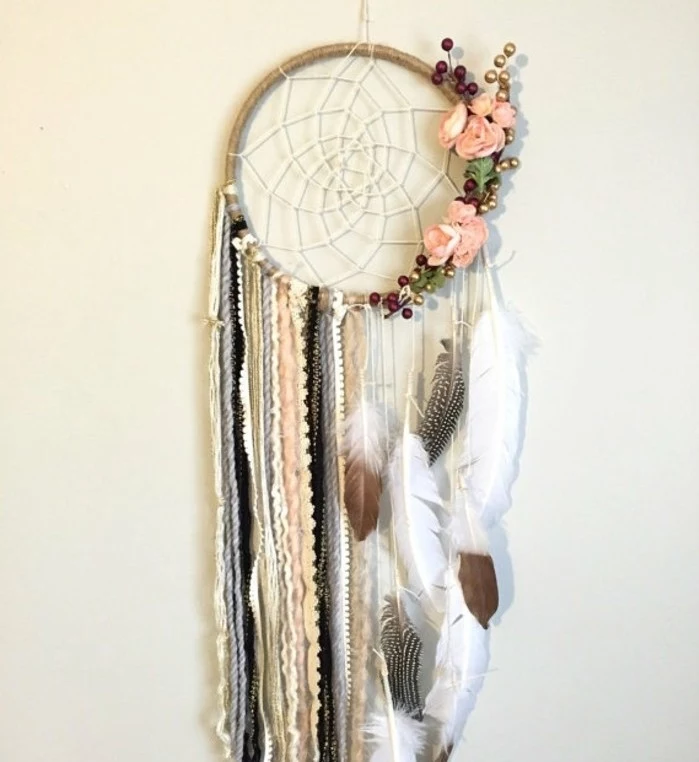
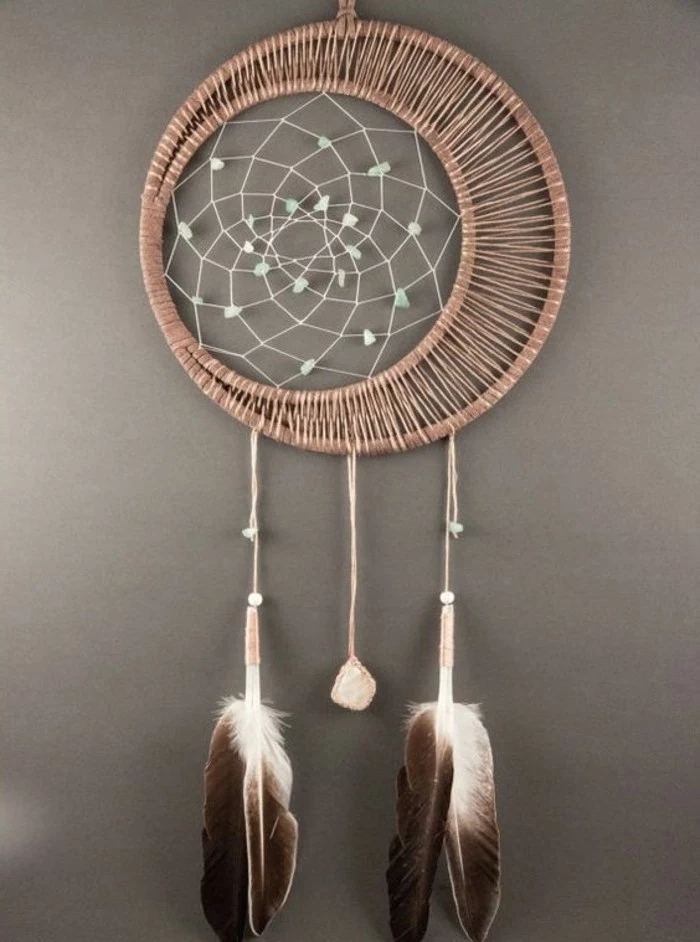
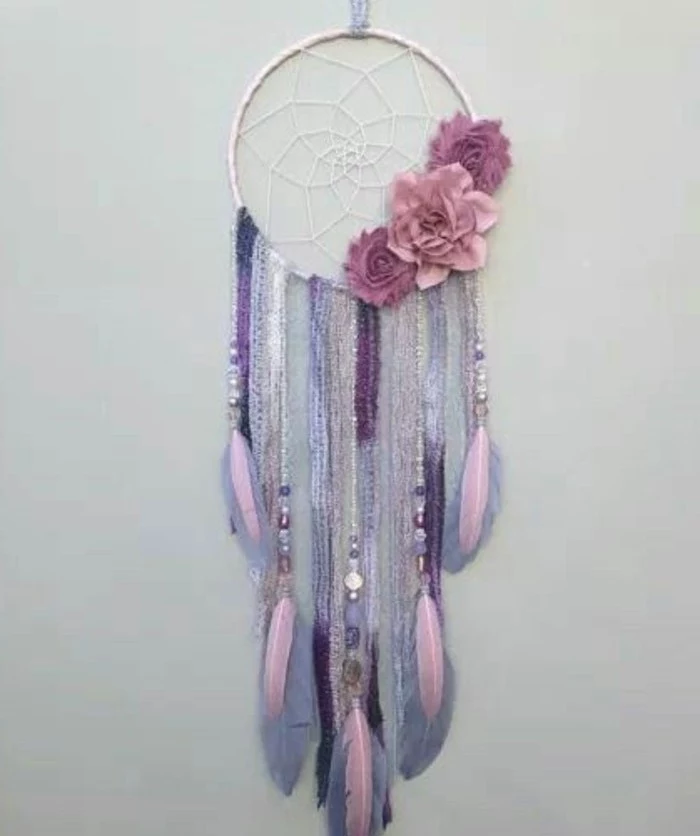
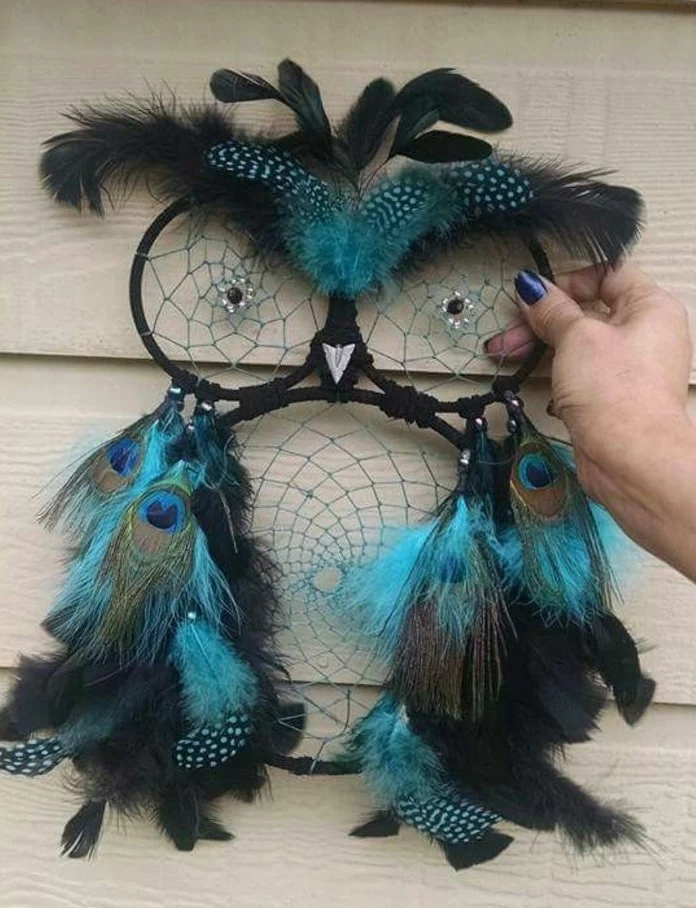
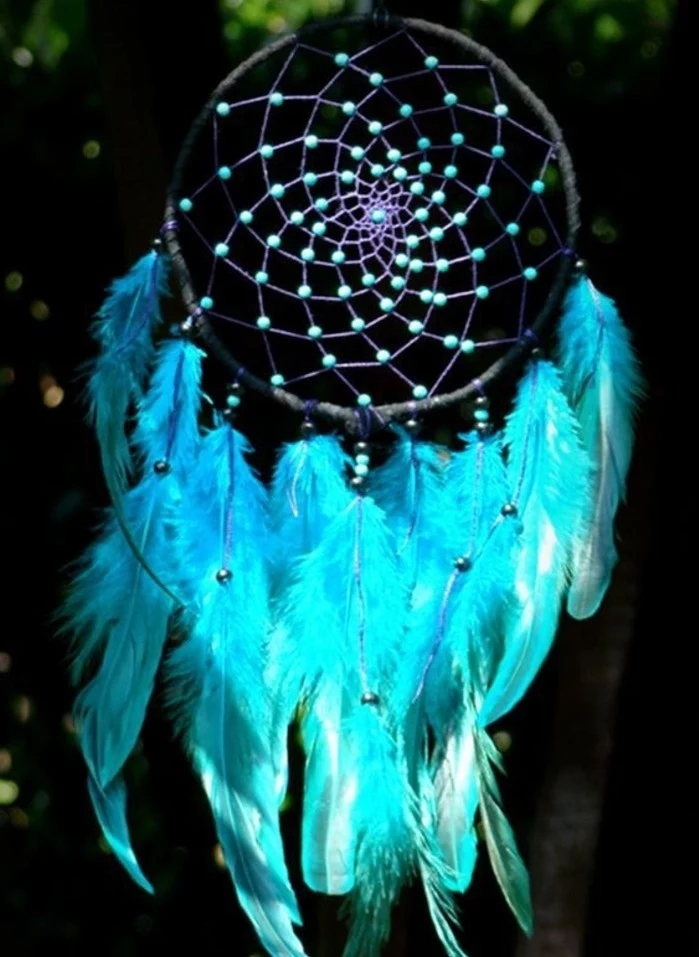
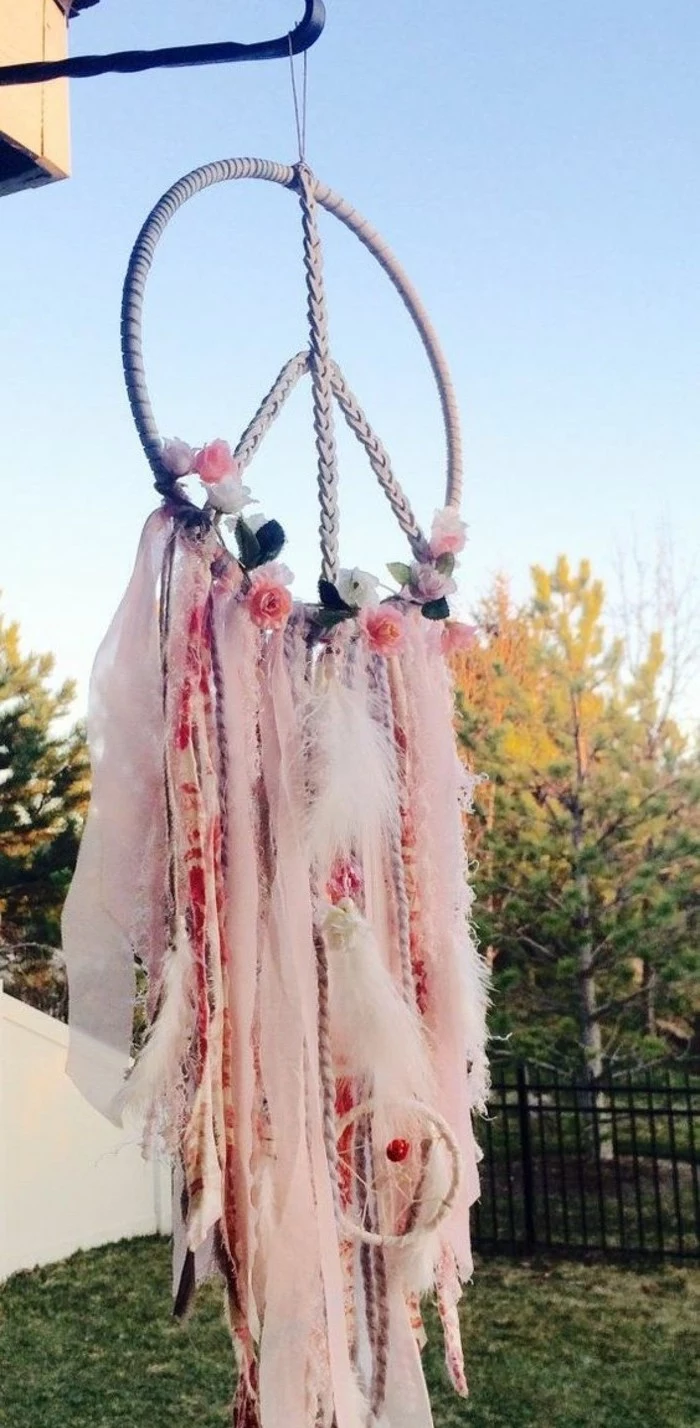
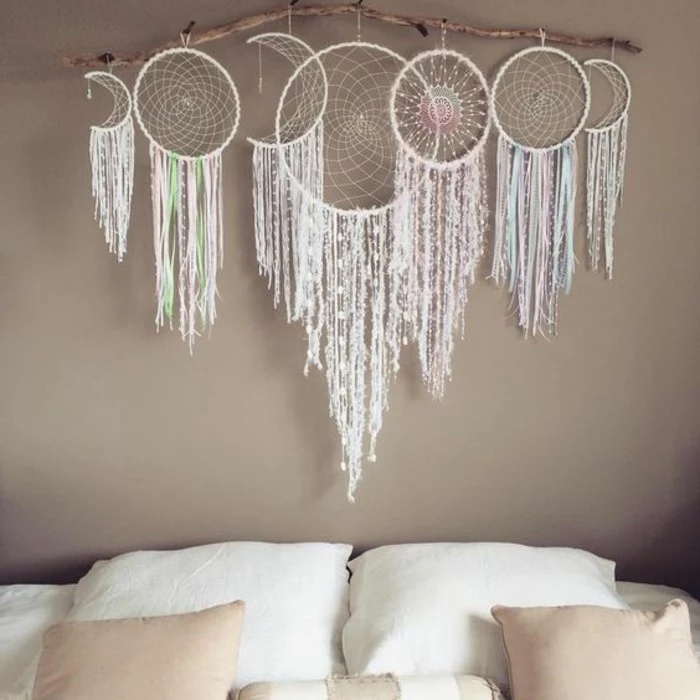
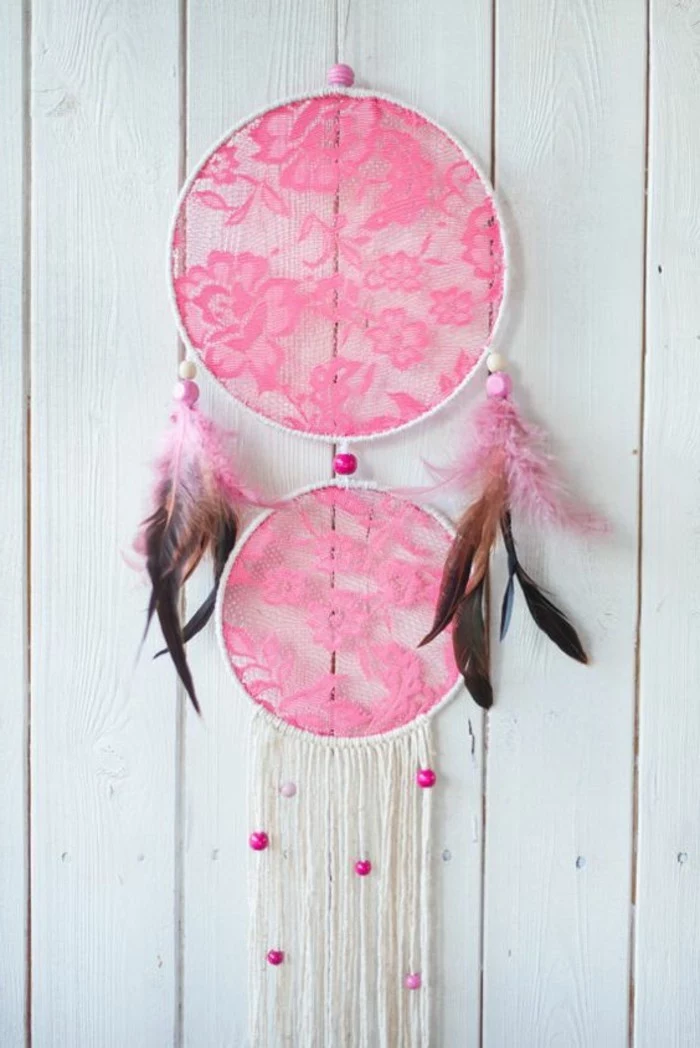
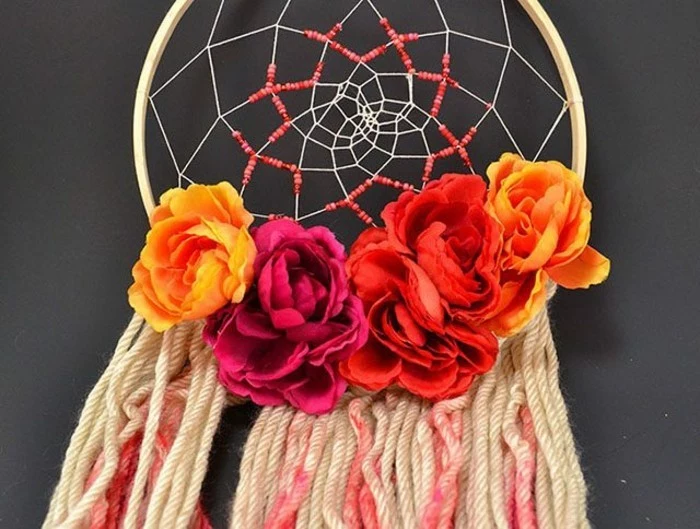
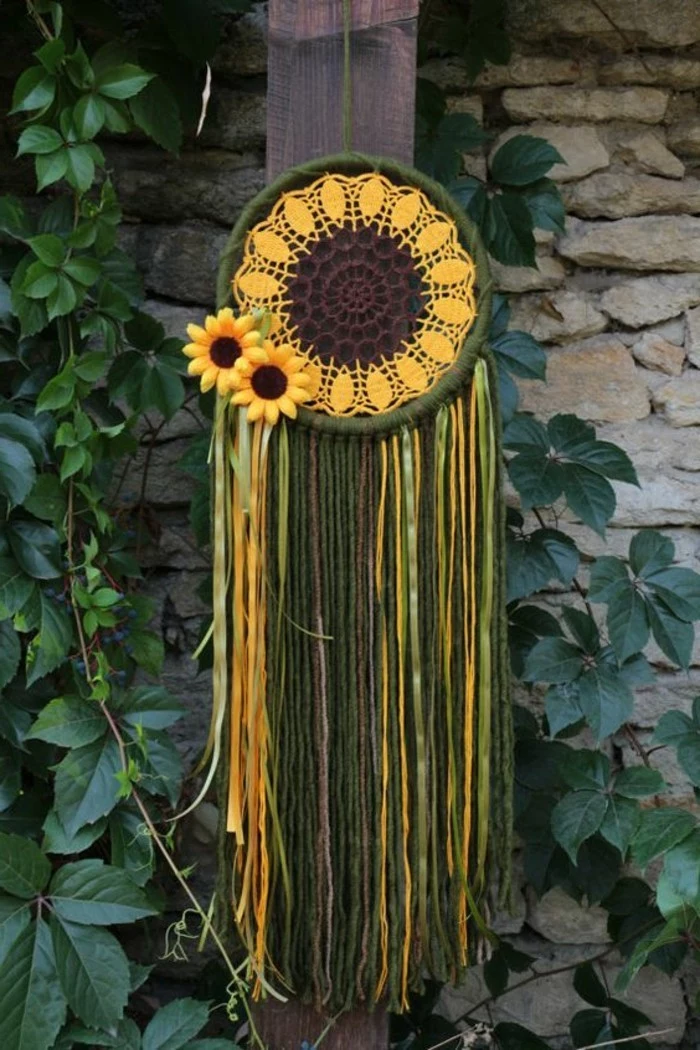
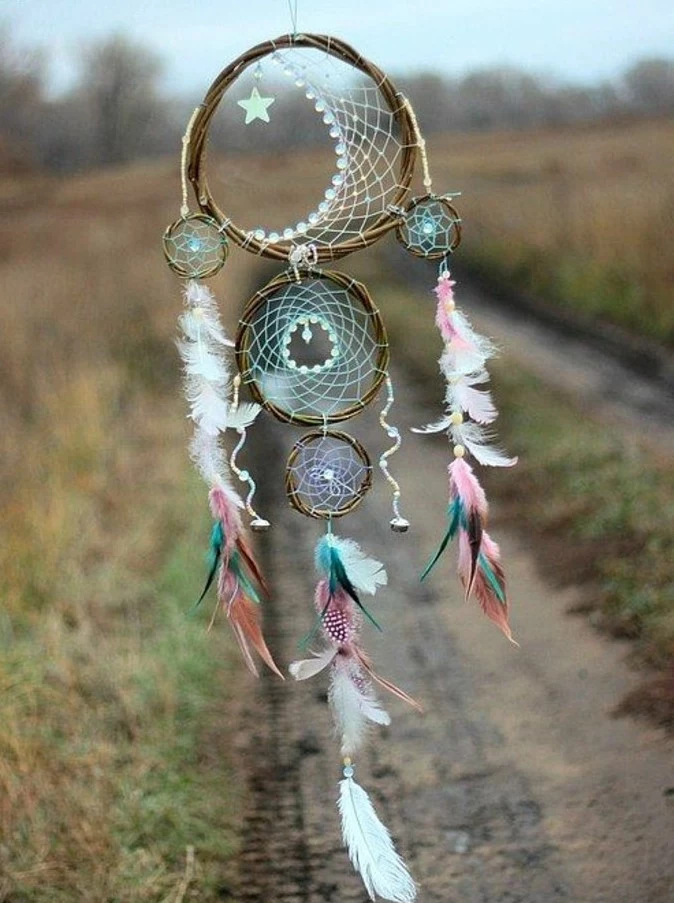
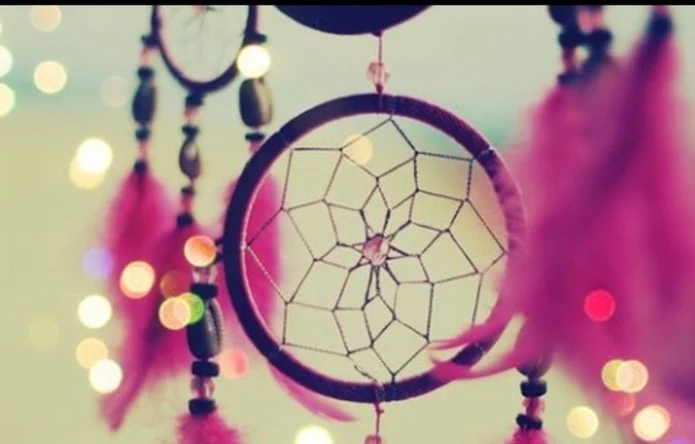
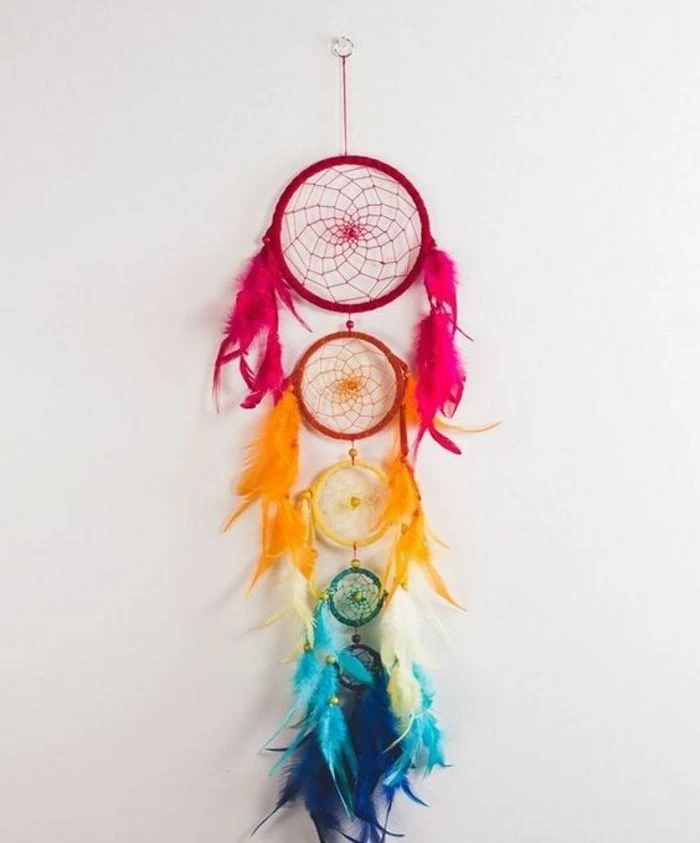
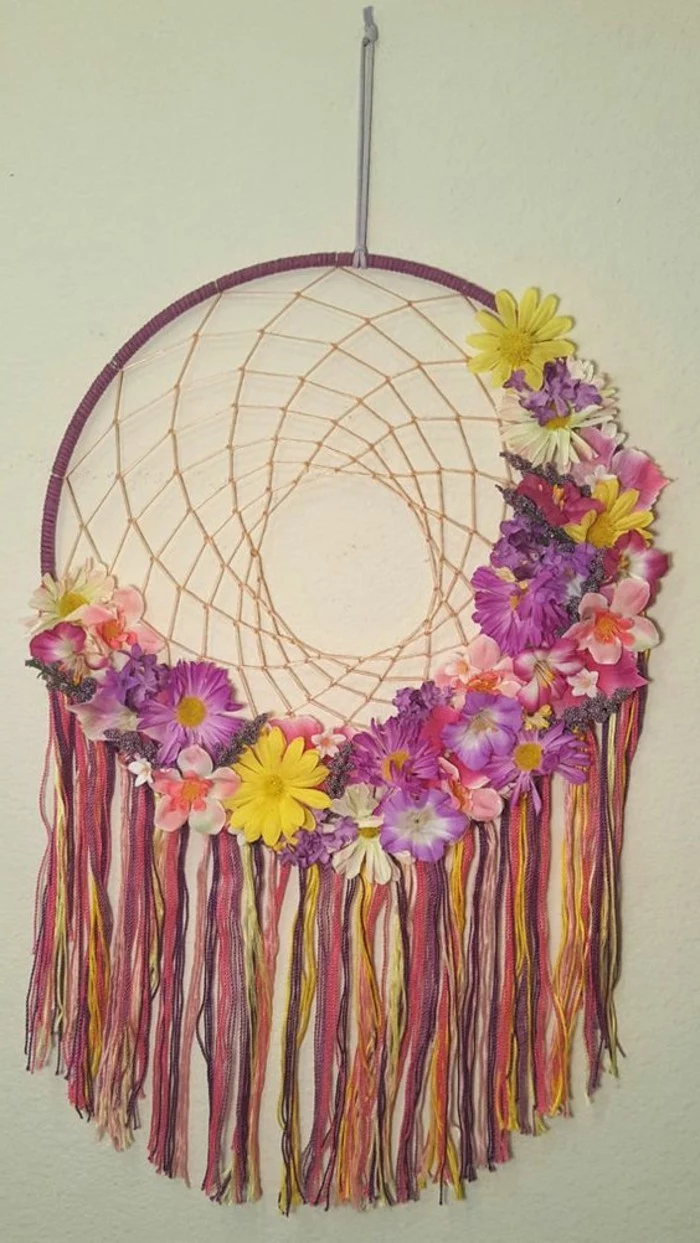
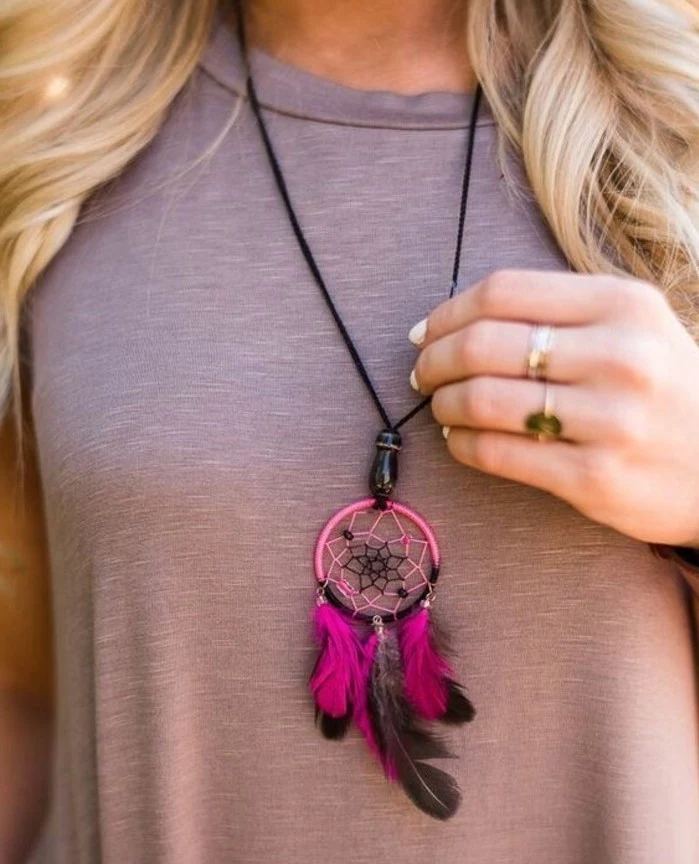
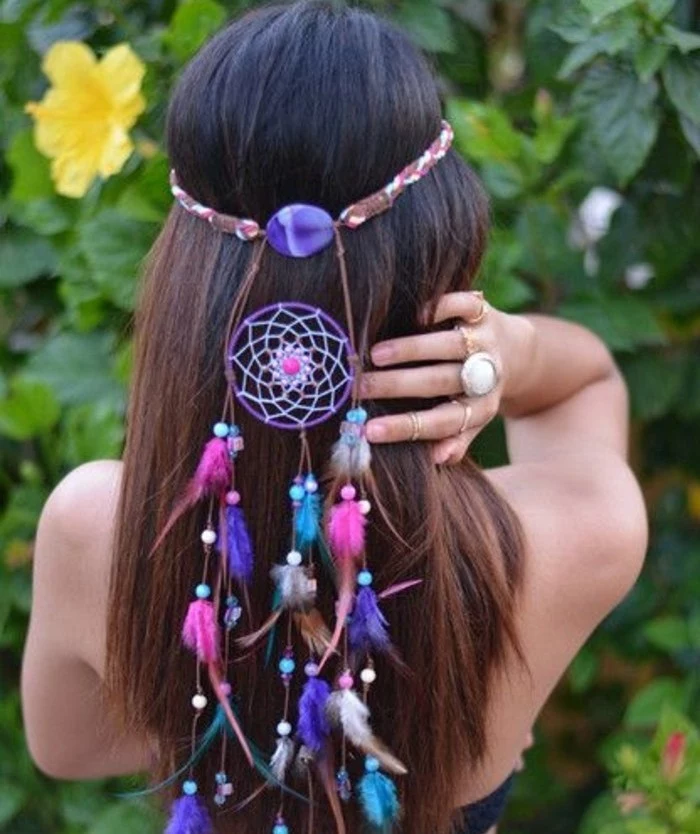
Inspiration Gallery
The Secret to a Taut Web: The key to avoiding a droopy, loose web is consistent tension. After looping the thread around the hoop, pull it taut—not tight enough to warp the hoop, but firm enough to remove all slack. As you weave inward, this tension builds upon itself, creating that beautiful, crisp spiral pattern. Pause after every few knots to check that your tension is even all the way around.
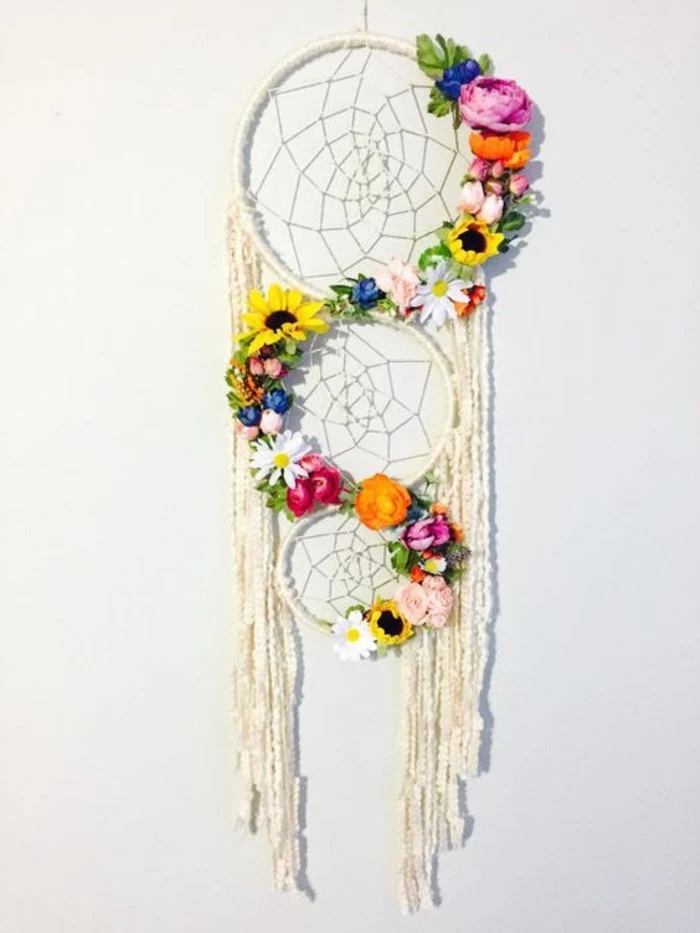
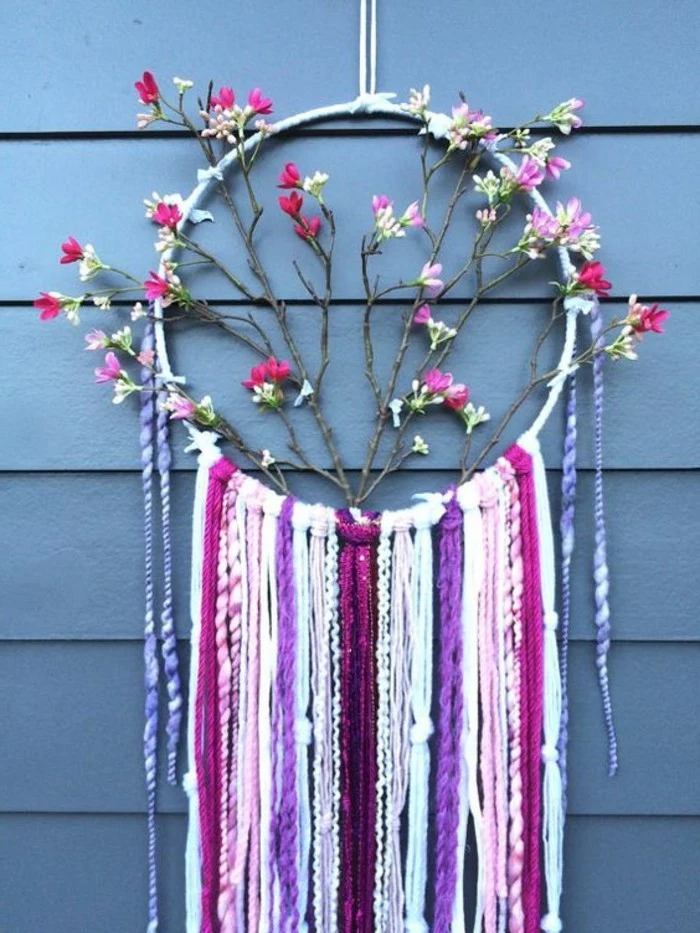
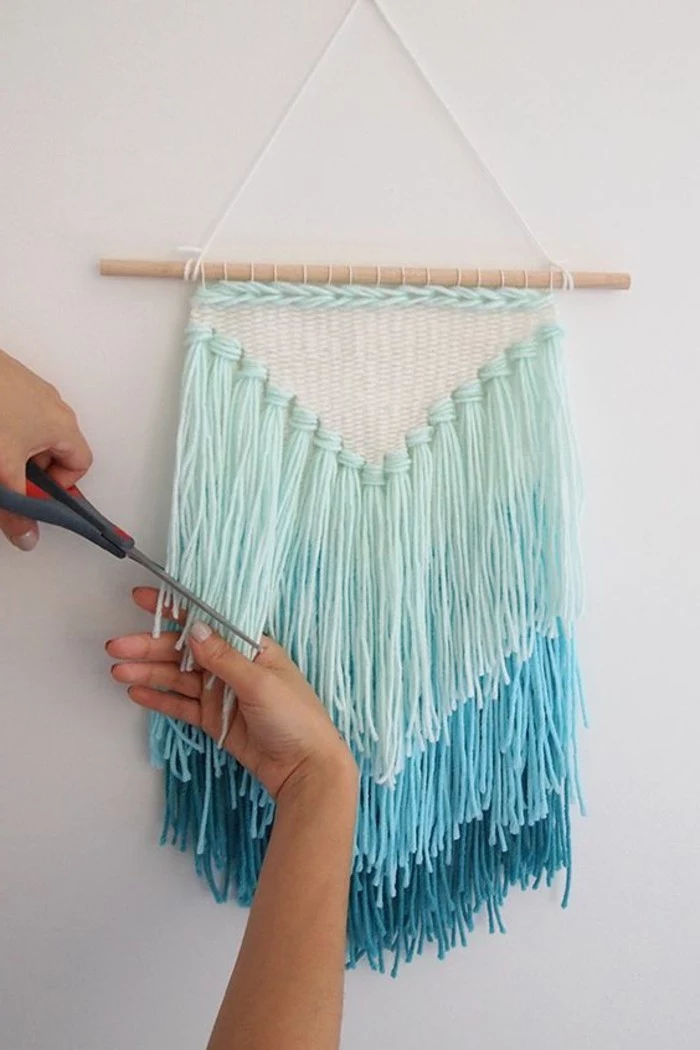
- Create a web that feels alive and connected to the earth by using natural fibers.
- Incorporate textures that tell a story, like soft wool roving or rustic jute twine.
The secret? A balanced design. Let the intricacy of your weave be the star, or let bold, natural tassels draw the eye. Don’t let them compete.
What’s the best thread for a beginner?
While traditional sinew is authentic, it can be tricky to handle. A fantastic modern alternative is waxed thread or a high-quality cotton embroidery floss, like those from DMC. The wax provides a slight grip that helps your knots stay in place, making the weaving process much more forgiving. For a more rustic look, consider natural hemp cord, which is strong and adds a lovely organic texture.
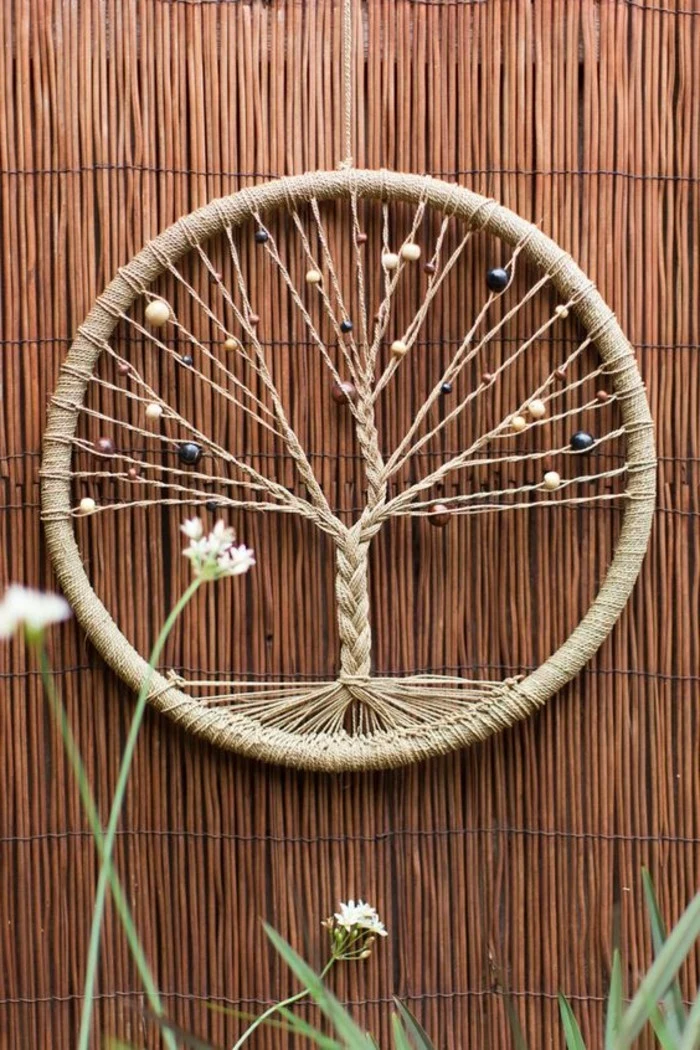
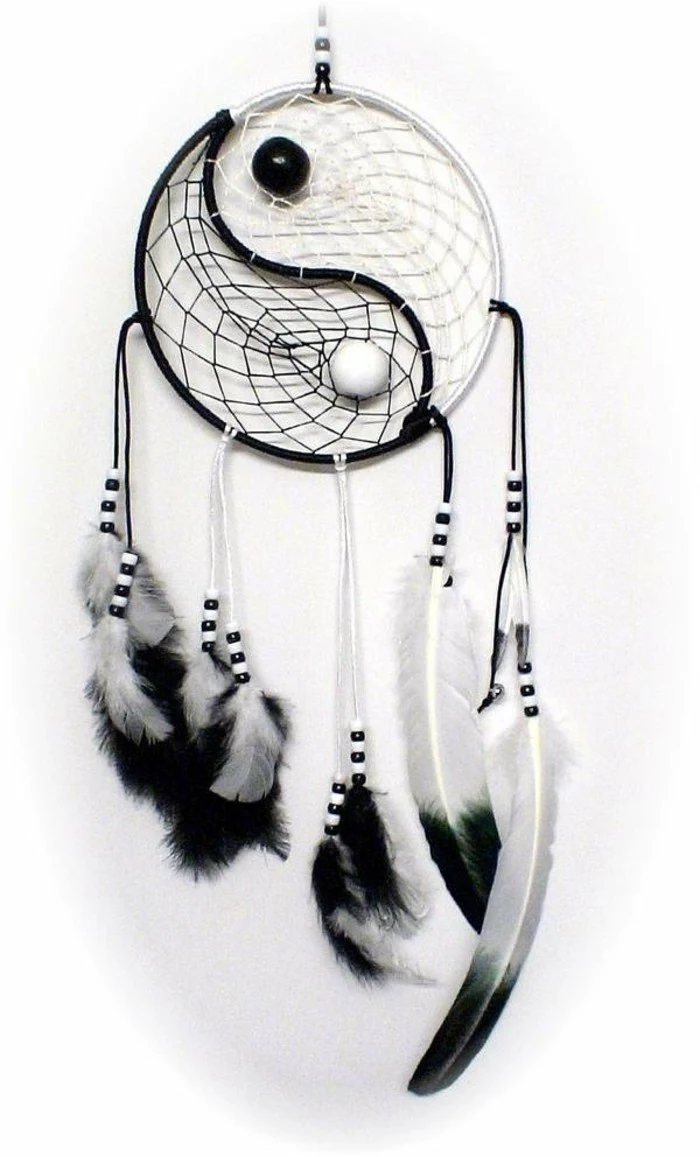
The circle, a central shape in the dreamcatcher, represents the circle of life and the continuous journey of the sun and moon across the sky. It has no beginning and no end.

Willow vs. Metal Hoops:
Natural Willow: Traditionally, hoops were made from red willow, bent into a circle and dried. A willow branch connects your piece directly to nature, offering an organic, imperfect beauty. It’s ideal for a truly traditional and rustic aesthetic.
Metal or Rattan: Hoops from craft stores (often metal, bamboo, or rattan) offer perfect symmetry and strength. They are easier to wrap and provide a sturdy frame for more complex or heavily adorned designs.
For your first project, a sturdy rattan hoop is often the most manageable choice.
Your dreamcatcher can be a vessel for your own story. Weave in elements that hold personal meaning for you.
- A small bead from a piece of inherited jewelry.
- A tiny, smooth stone or shell collected on a meaningful walk.
- A charm that represents a personal goal or memory.
- A strip of fabric from a child’s outgrown piece of clothing.
A note on cultural appreciation: Creating a dreamcatcher can be a beautiful, meditative act. To honor its origins, approach the process with respect. Acknowledge its roots in Anishinaabe culture and understand you are practicing a craft, not a sacred ceremony. If you choose to sell your creations, consider acknowledging the origin story and perhaps donating a portion of the proceeds to Indigenous-led organizations.
According to some traditions, the number of points where the web connects to the hoop can be symbolic. Eight points represent the eight legs of the Spider Woman, while thirteen points can represent the thirteen phases of the moon.
While not a strict rule, choosing a number with intention can add another layer of meaning to your creation. For your first attempt, 7 or 9 points often create a pleasing and manageable pattern.
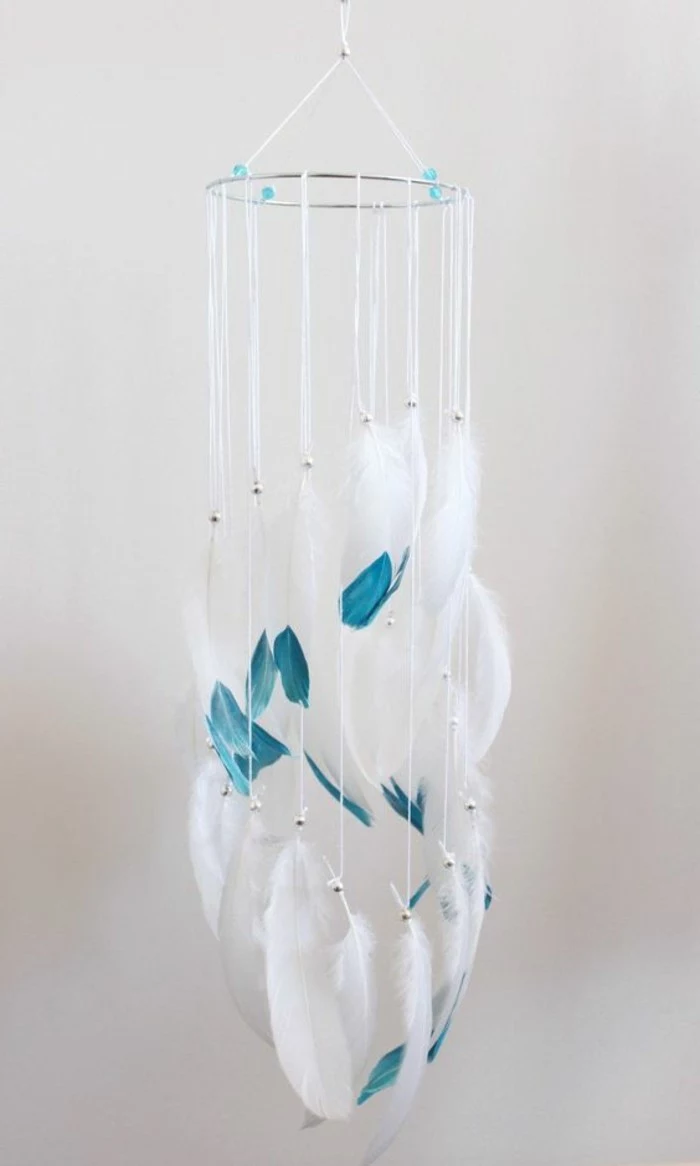
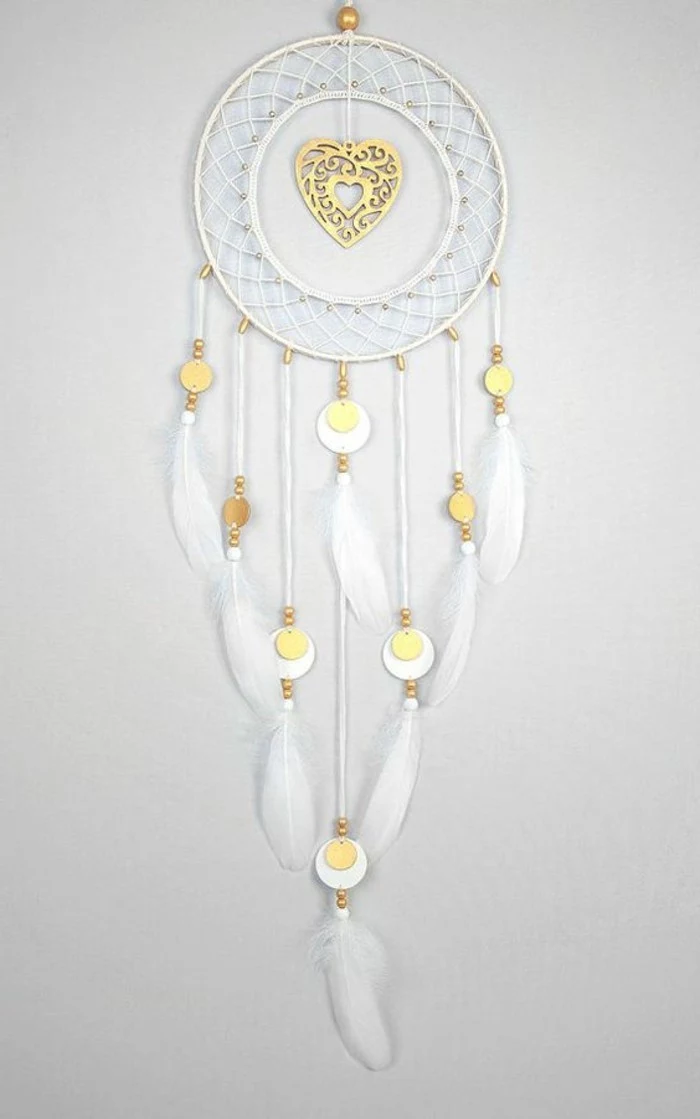
- A clean, crisp and visually light appearance.
- Focus is drawn to the intricate pattern of the weave itself.
- It blends seamlessly into modern, minimalist, or Scandinavian decor.
The secret? Simplicity. A minimalist dreamcatcher often features a single, neutral color like white or beige, a simple web, and very few, if any, embellishments. The beauty is in the form and the quiet perfection of the craft.
Before you begin weaving, take a moment to set an intention. What do you hope to bring into your life or the life of the person you’re making it for? Peace, creativity, courage? Hold the hoop and thread in your hands and focus on this intention. Let the weaving process become a moving meditation, infusing the object with positive energy with every knot you tie.
How do I add beads to the web?
It’s simpler than it looks! As you are weaving a strand from an outer loop towards the center, just thread your chosen bead onto the string before you make the next knot. Slide it down so it rests in the middle of the strand. This works for wooden beads, glass beads, or even semi-precious stone chips like amethyst or rose quartz for an extra touch of meaning.

For an authentic, natural hoop without buying one, look for flexible, young saplings or vines on your next nature walk. Willow, grapevine, and red-twig dogwood are all excellent choices. Gently bend a long, pliable branch into a circle, overlapping the ends. Secure the overlap by tightly wrapping it with natural twine or sinew until it holds its shape, then let it dry for several days.
Many of the feathers available in craft stores are from domesticated birds like turkeys or geese, which are then dyed. For a more meaningful touch, consider ethically sourced options.
Look for sellers on platforms like Etsy who gather feathers moulted naturally from their own birds. Or, keep your eyes open for feathers on your own walks—just be sure to research local regulations, as possessing feathers from many wild, protected bird species is illegal.
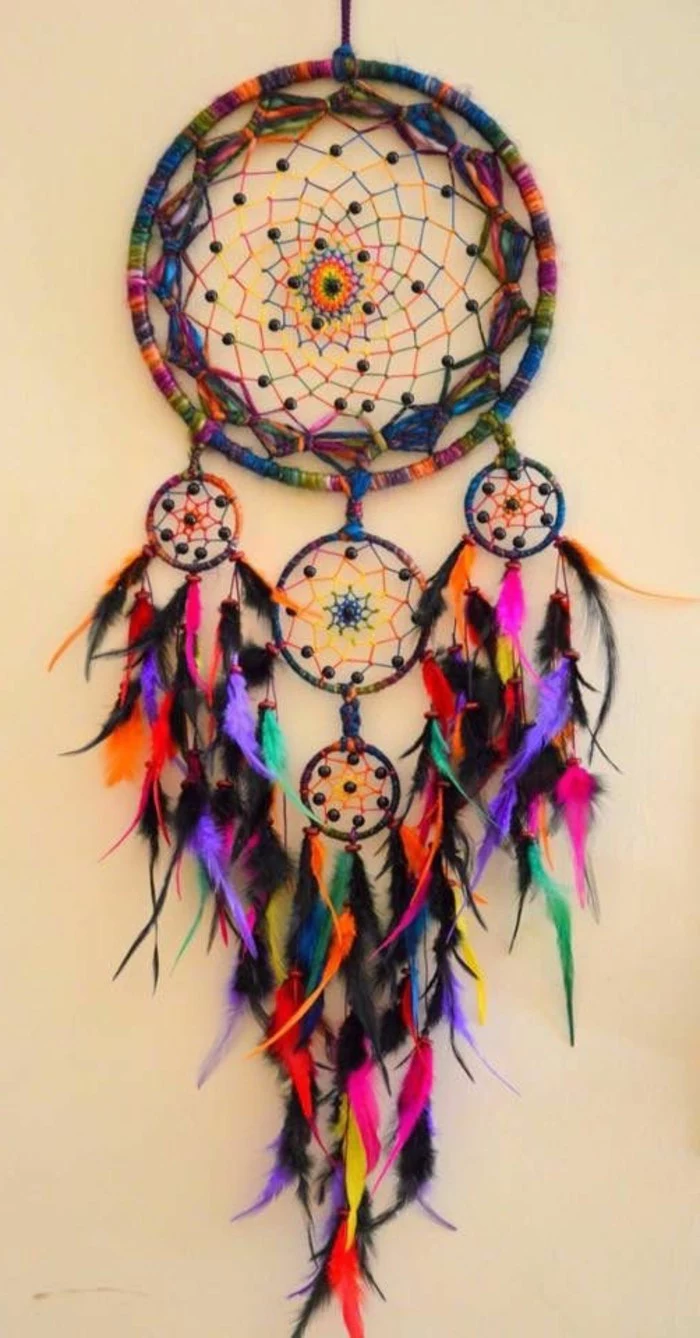
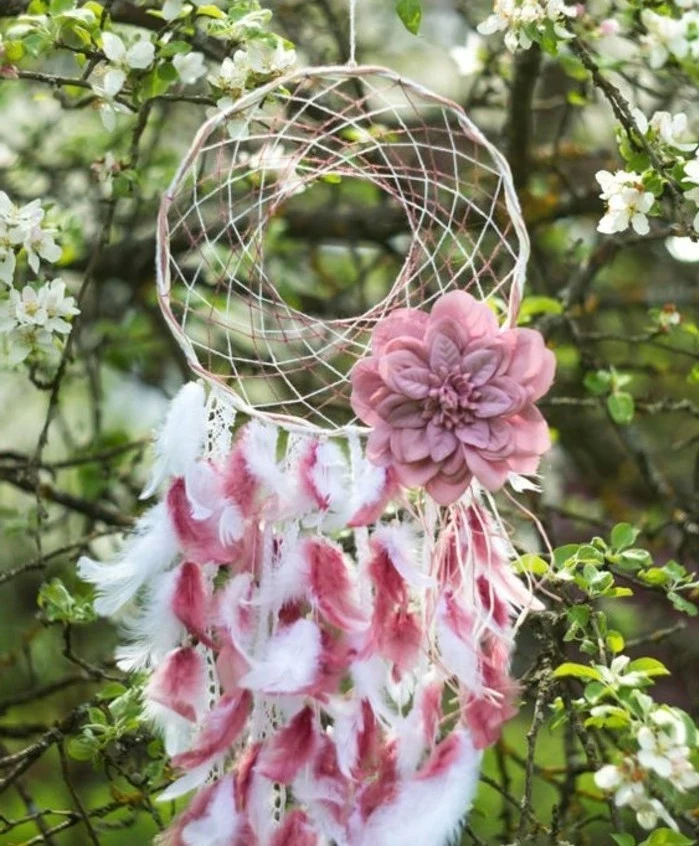
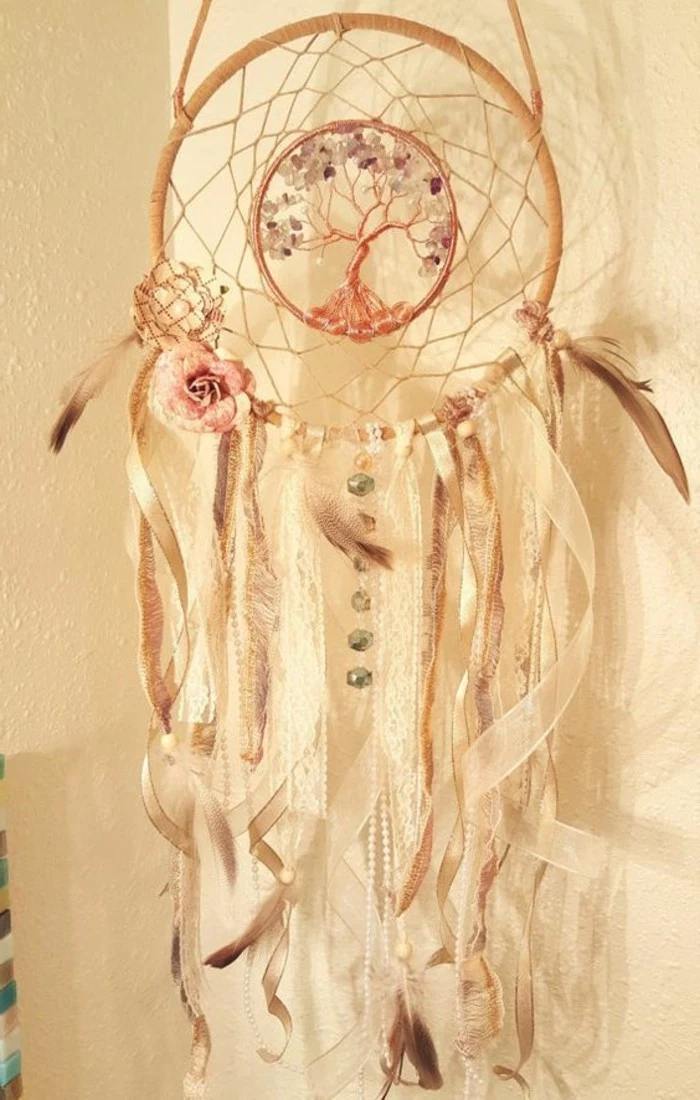
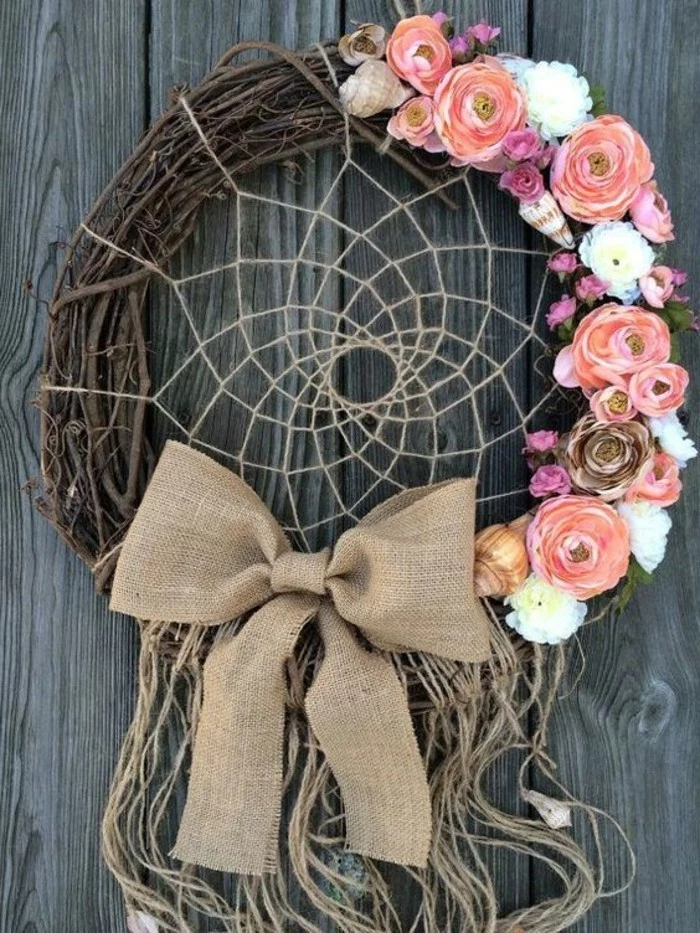
A common mistake: Overloading the bottom. It’s tempting to add dozens of ribbons, feathers, and beads, but this can overwhelm the delicate web and create a visually heavy, unbalanced piece. Start with three or five hanging elements—an odd number is often more pleasing to the eye—and add more only if it feels right. Let the hoop and web have space to breathe.
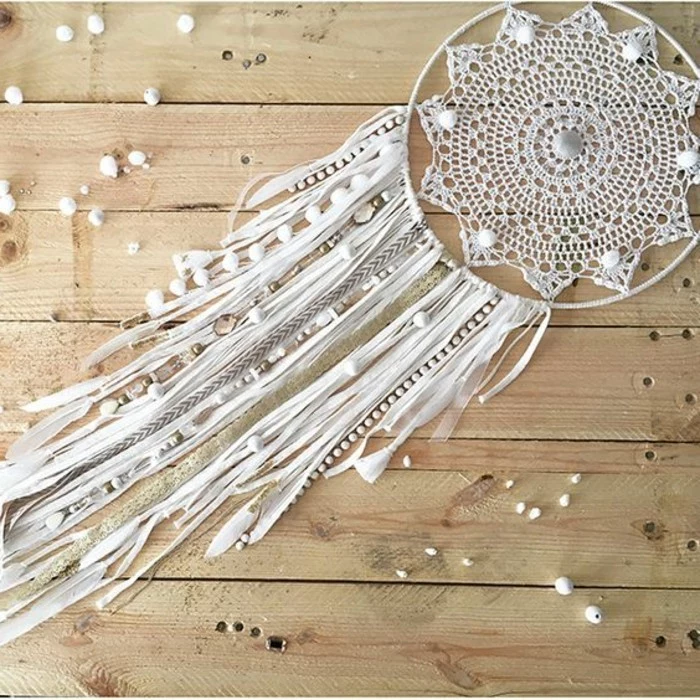
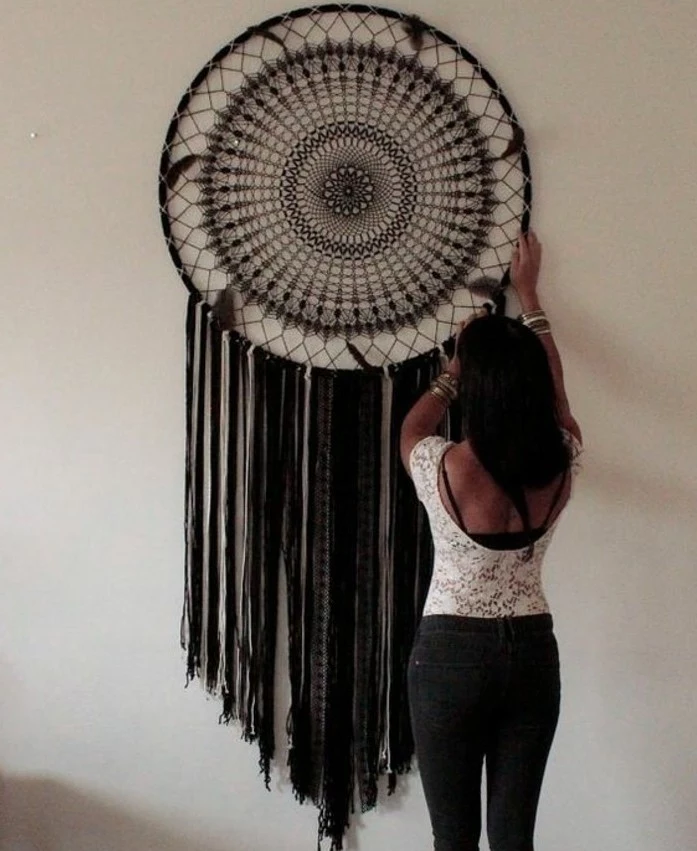
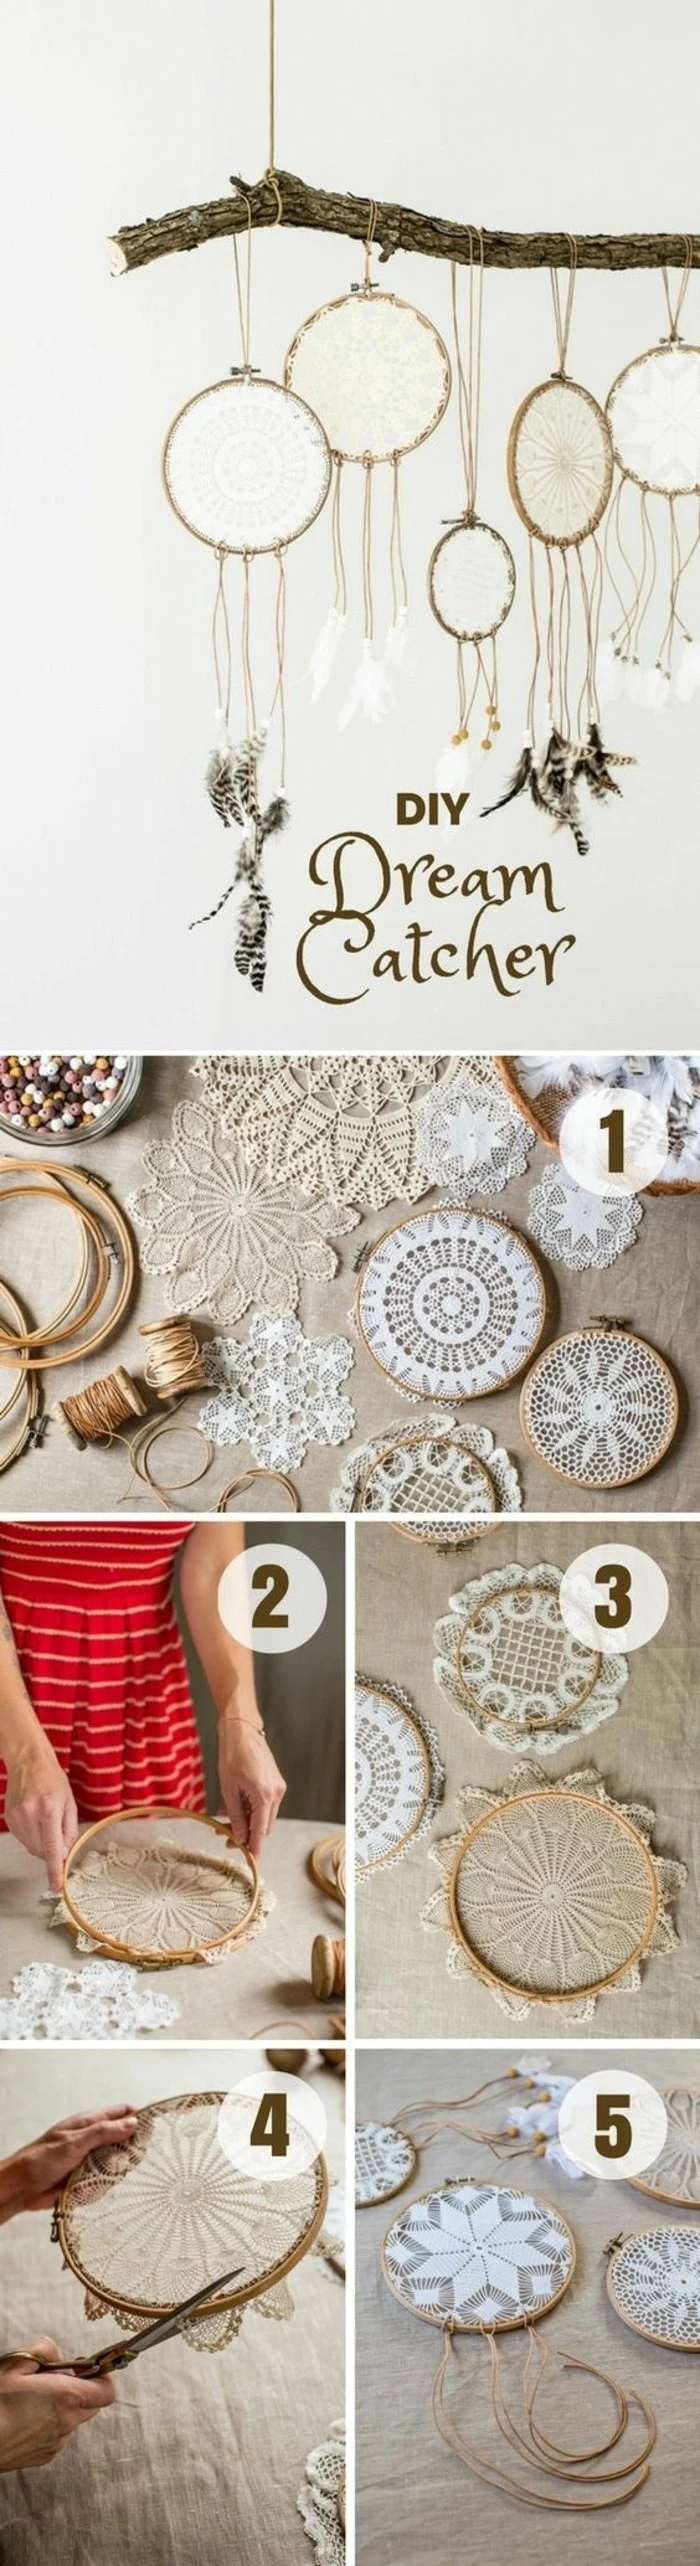
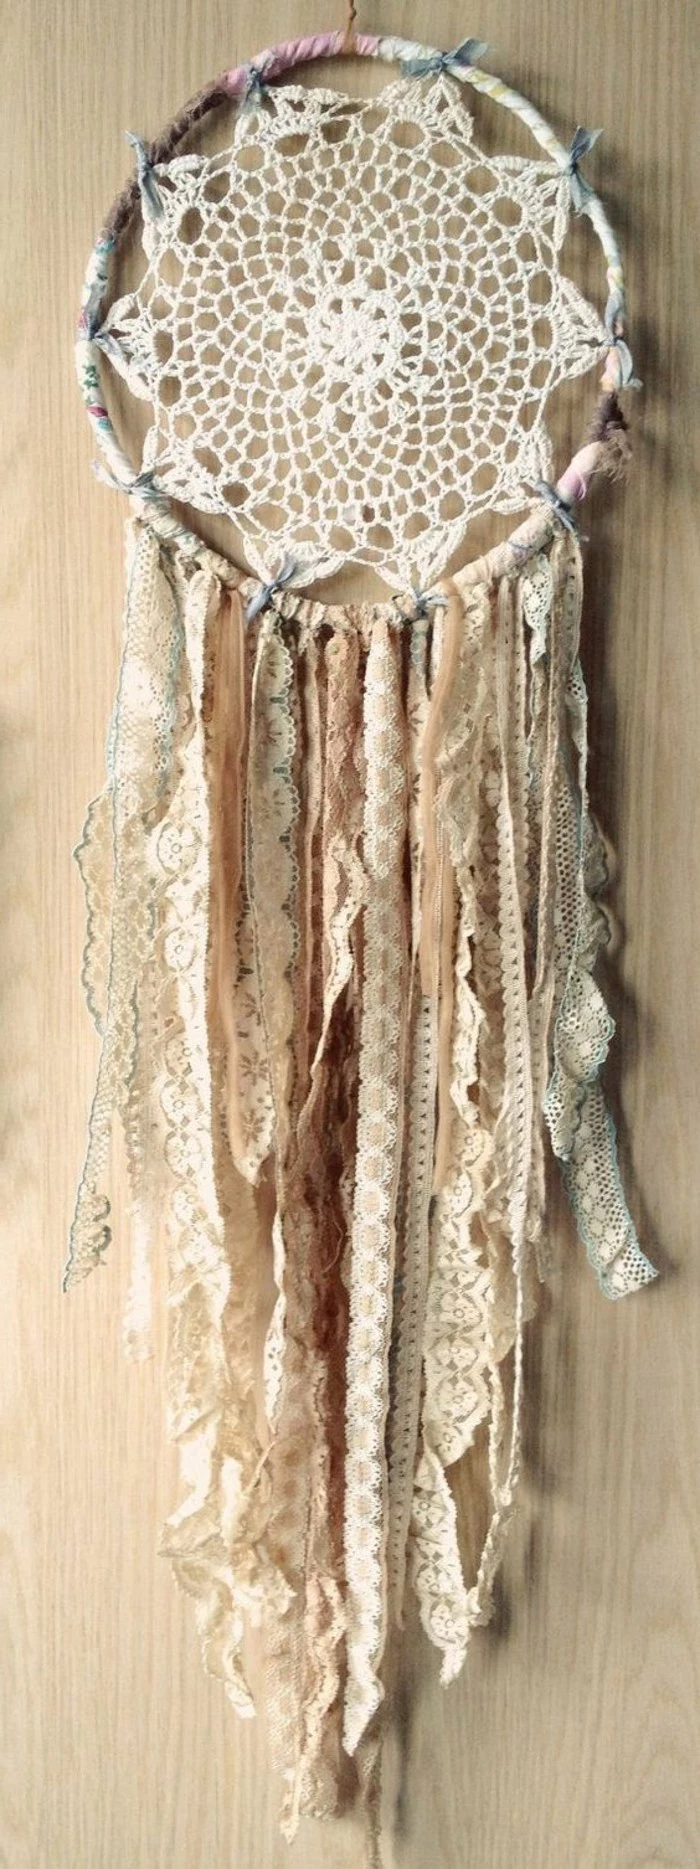
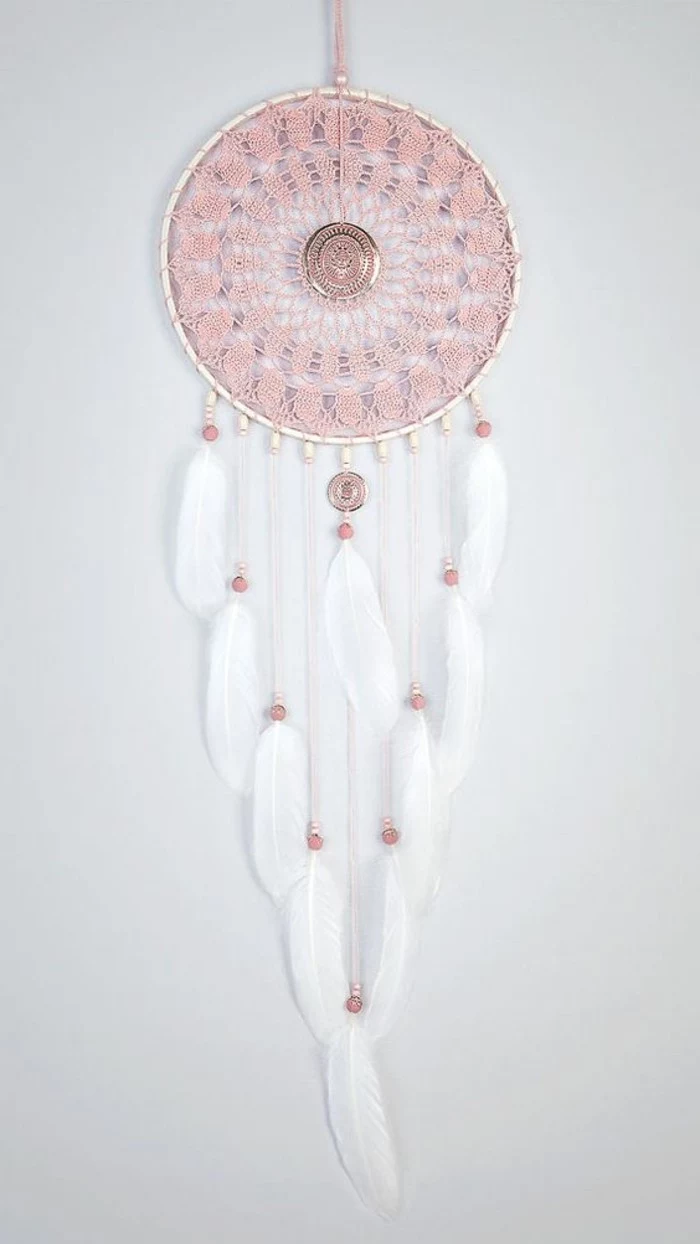
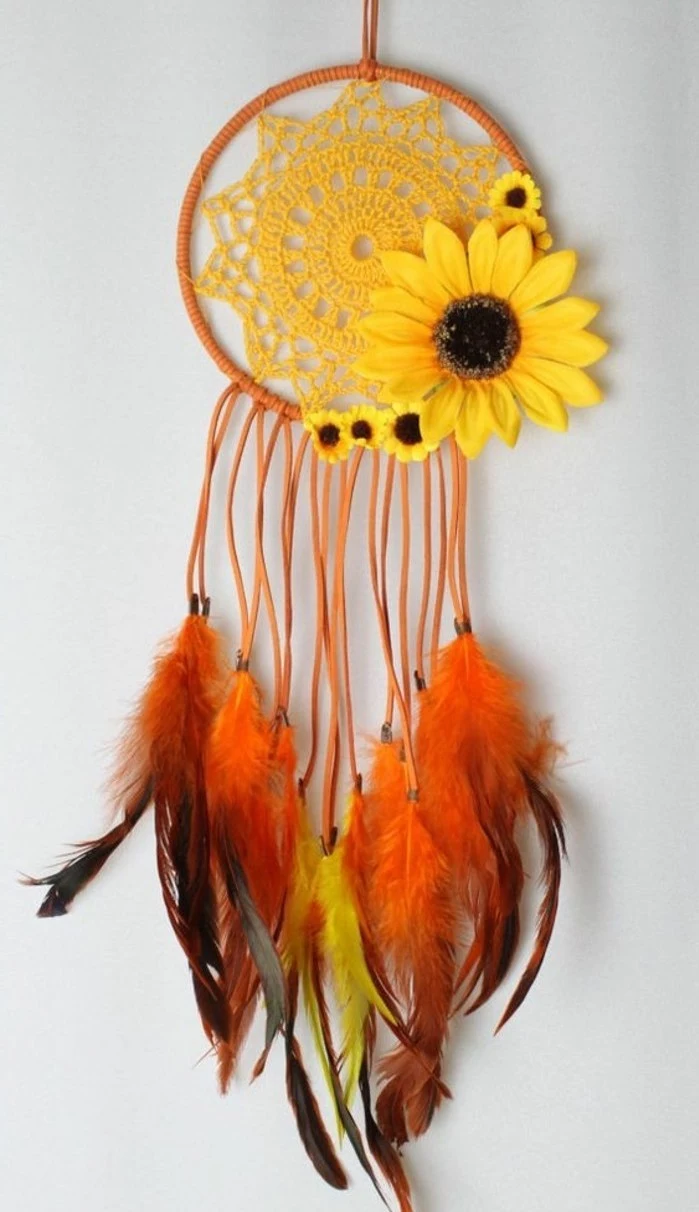
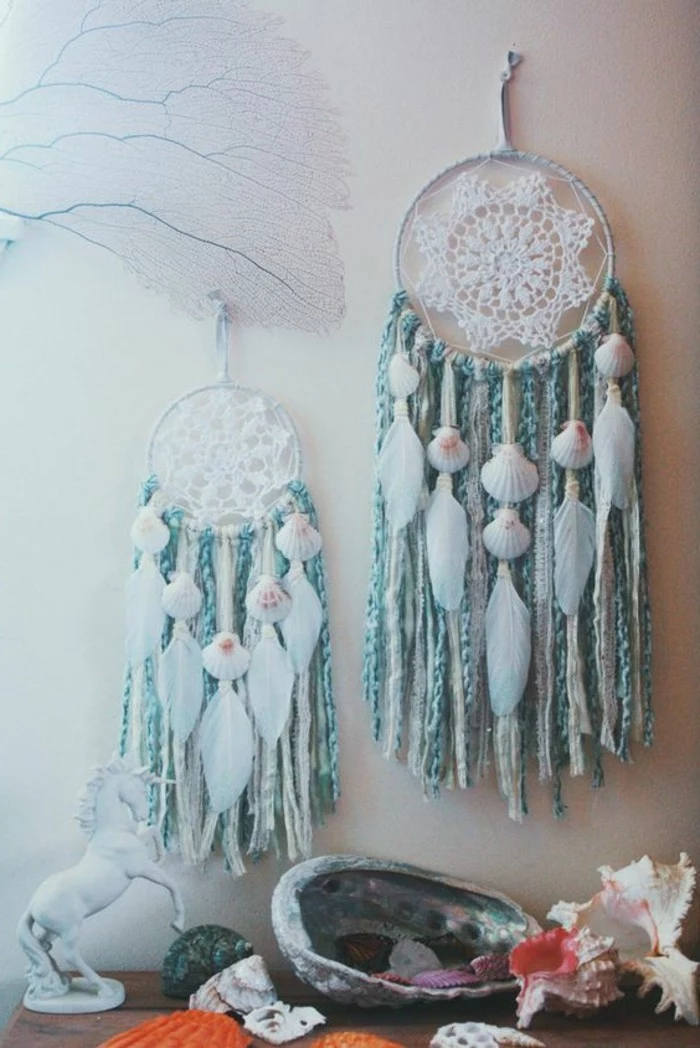
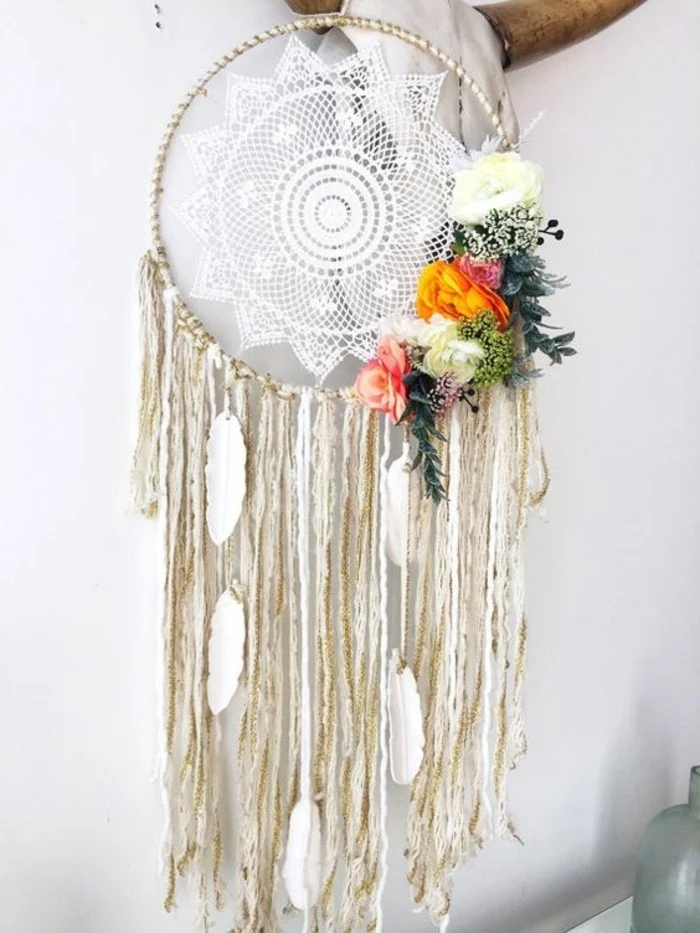
Bring a touch of vintage elegance to your dreamcatcher by using a crocheted doily for the center. You can find beautiful, intricate doilies at thrift stores or flea markets. Simply stretch the doily inside the hoop and secure it to the edges with thread at several points. This method is perfect for creating a stunning piece quickly, blending traditional craft with bohemian flair.
- Choose stones that resonate with you personally.
- Cleanse them with moonlight or smoke before weaving them in.
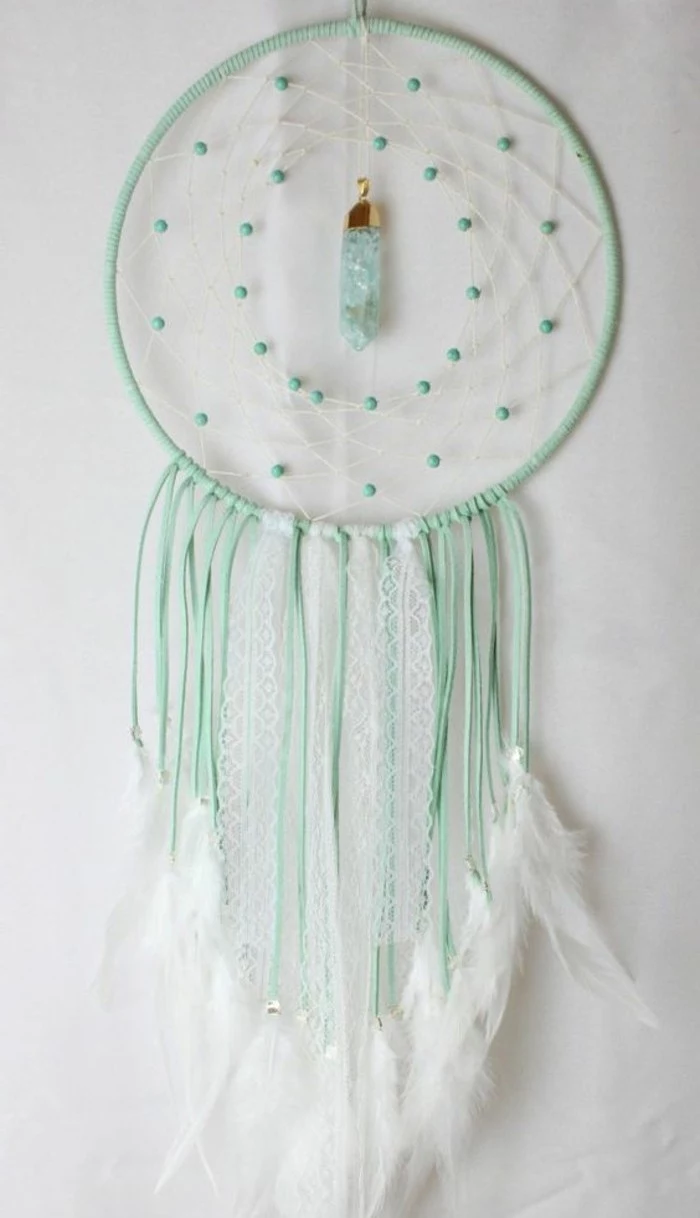
- Place a single, powerful stone in the center or scatter smaller chips throughout the web.
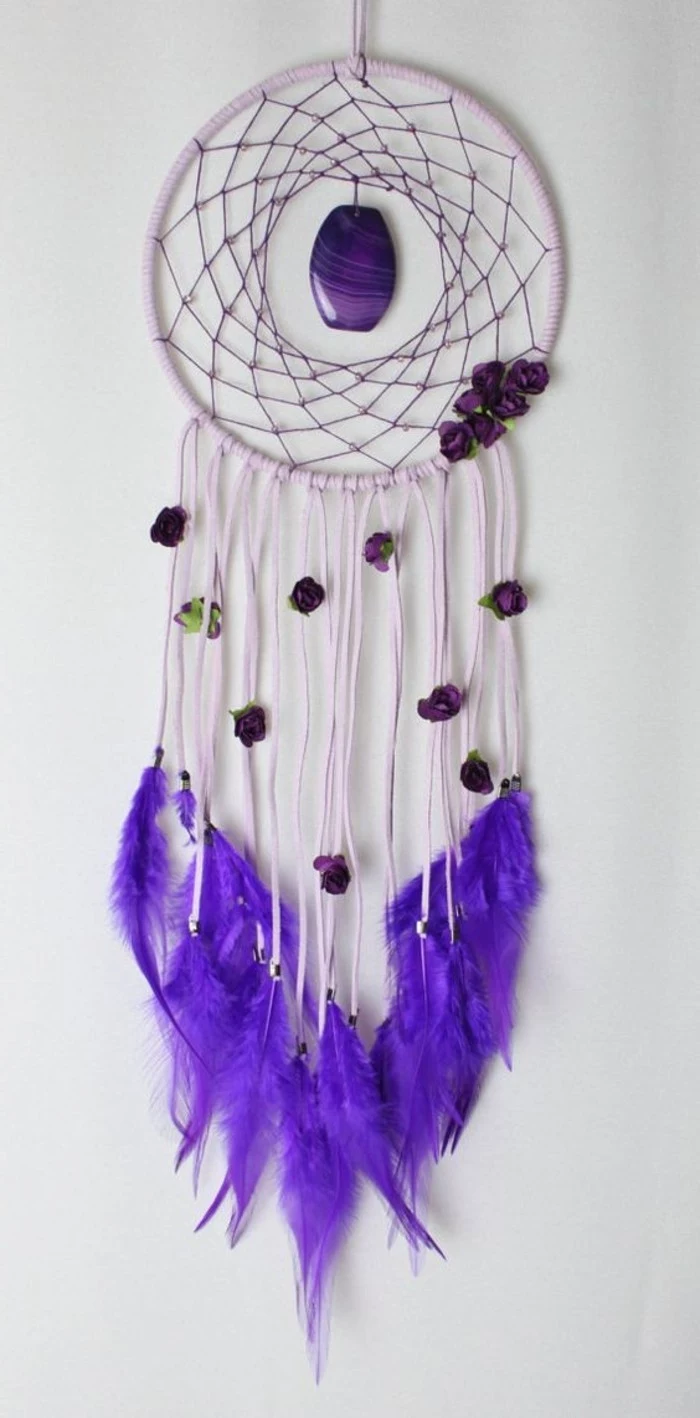
The idea is to imbue your dreamcatcher with specific energies. For example, Amethyst for calm and intuition, Rose Quartz for love, or Black Tourmaline for protection.
Foraging for Embellishments:
- Small, interesting seed pods or pinecones.
- Pieces of weathered driftwood.
- Acorn caps or beautiful dried leaves (which can be preserved with mod podge).
- Small, hollowed-out nuts.
How should I care for my finished dreamcatcher?
To maintain its beauty, hang your dreamcatcher where it won’t be in constant, direct sunlight, which can fade colors and make natural materials brittle. To dust, use a can of compressed air from a safe distance or a very soft, clean paintbrush to gently whisk away dust from the web and feathers. Traditionally, they are ‘cleansed’ by the morning sun, so a spot that gets a little morning light is ideal.

“The traditional craft is not about perfection, but about the heart and spirit you weave into it. Every knot is a prayer or a thought.” – A sentiment shared by many Indigenous artisans.
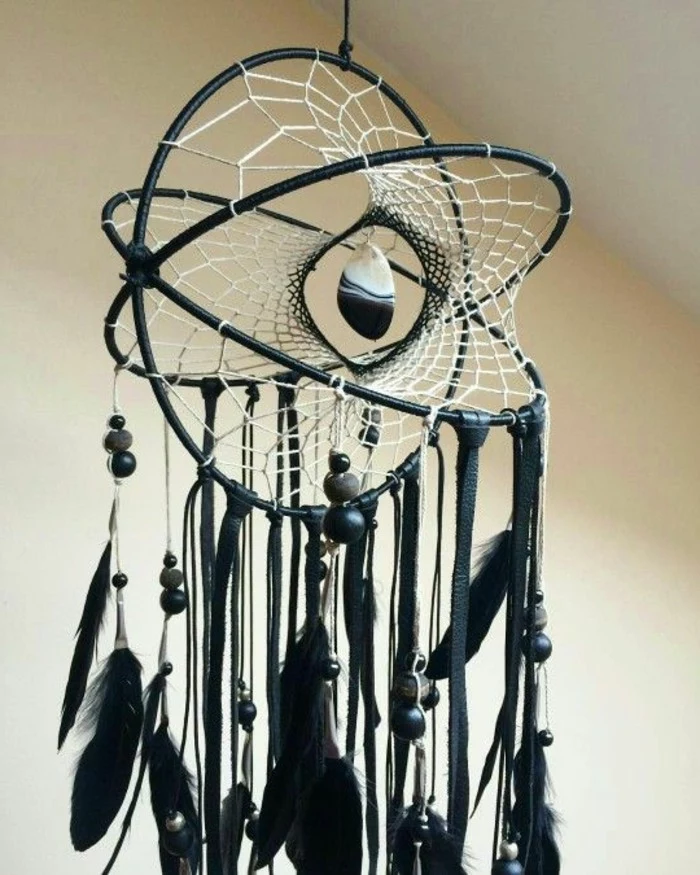
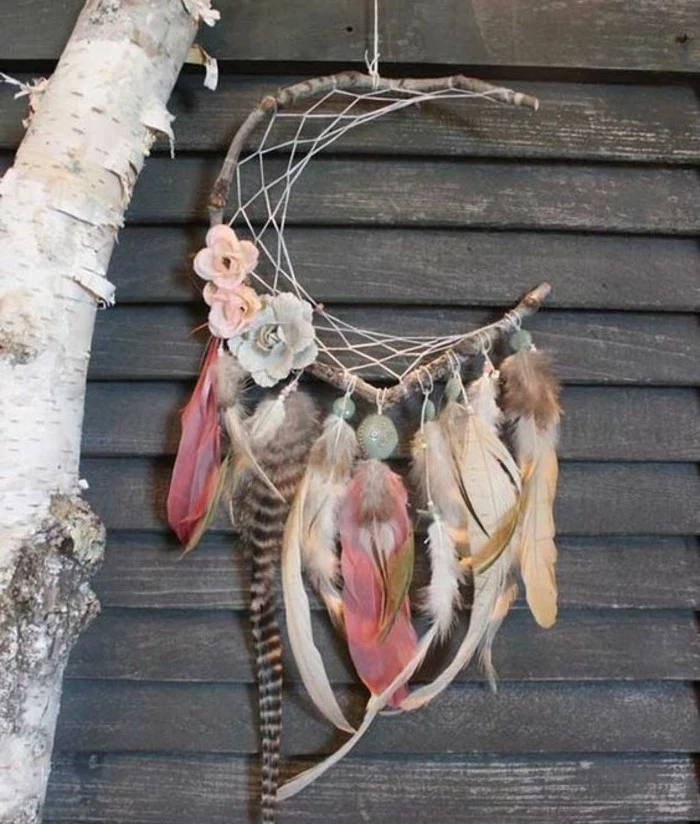
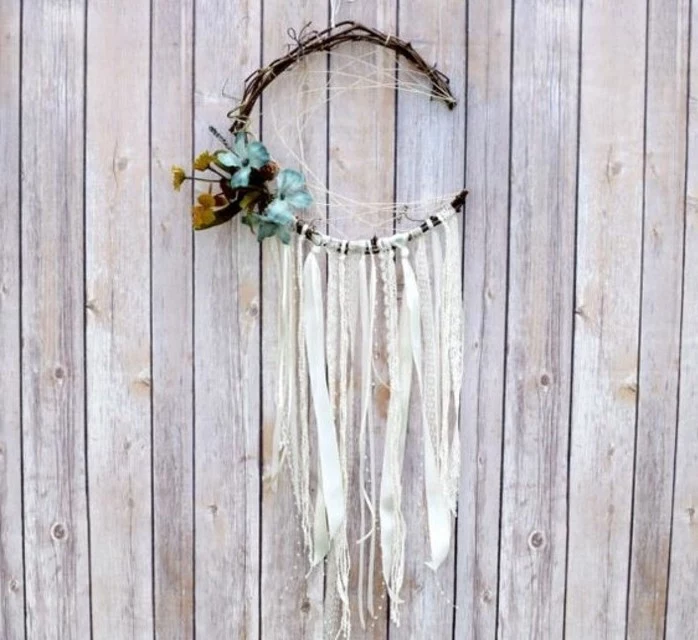
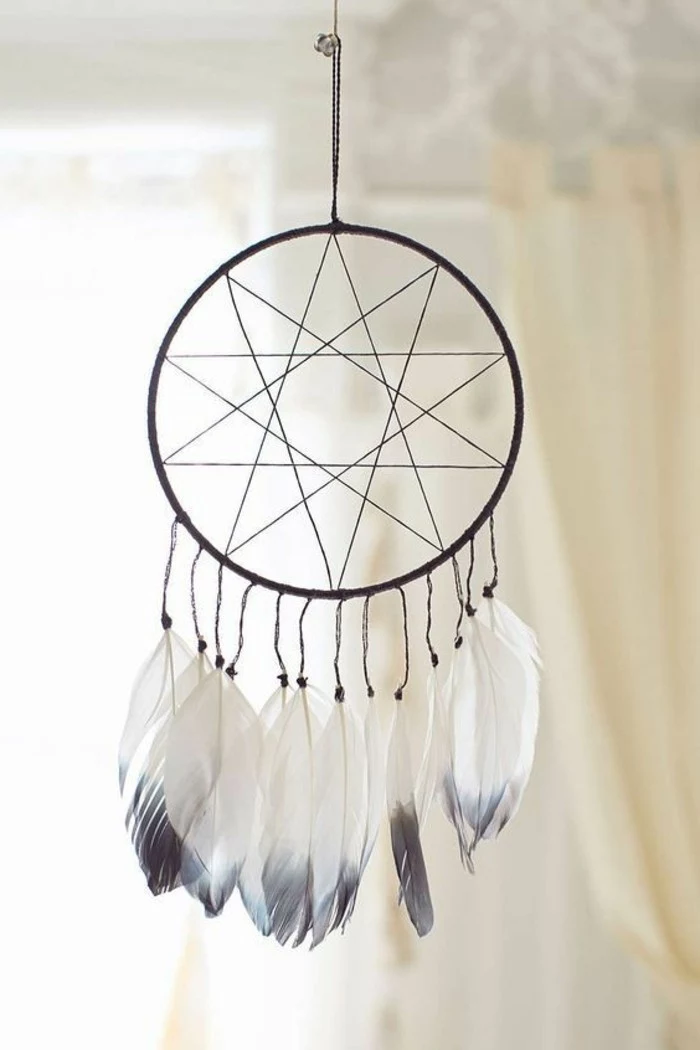
Don’t be afraid of asymmetry. A modern take on the dreamcatcher involves creating the web in just one section of the hoop, leaving the rest open. This creates a beautiful crescent moon shape. You can then balance the composition by hanging your feathers and ribbons from the opposite side of the hoop, creating a dynamic and artistic piece.
Hemp Cord: Strong, rustic, and all-natural. It gives a very earthy, bohemian feel but can be slightly rougher on the hands to work with.
Leather Lace: Offers a supple, traditional look. It’s durable and easy to wrap around the hoop, and thin strips can even be used for weaving the web itself.
For a design that mixes textures, try wrapping the hoop in leather and weaving the web with a contrasting material like fine cotton.
Think about color symbolism when choosing your materials. While personal preference is key, you can add another layer of intention with your palette.
- White: Purity, spirituality, and light.
- Blue: Calm, peace, and healing.
- Green: Nature, growth, and harmony.
- Red: Passion, strength, and courage.

Important detail: Don’t glue your knots! Part of the magic is in the knotting itself. A properly tied hitch knot, pulled taut at each step, will hold itself in place. Glue can look messy and detracts from the natural, handcrafted feel of the piece. Trust the process and your tension.

The Pan-Indian Movement of the 1960s and 70s played a significant role in the dreamcatcher’s journey from a specific Anishinaabe tradition to a widely recognized symbol among many Native American tribes and, eventually, the world.
This period of inter-tribal solidarity led to the sharing and adoption of cultural practices, which is why the dreamcatcher is now often seen as a symbol of broader Indigenous identity, though its specific origin story remains with the Anishinaabe people.
Embrace a zero-waste mindset by looking through your own belongings for materials. Strips torn from an old t-shirt or a patterned dress make for beautiful, soft tassels. An old, broken necklace can be dismantled for its beads and charms. This not only saves money but also weaves your personal history directly into the fabric of your creation, making it truly one-of-a-kind.


