Baby Shower Decor That Actually Looks Amazing (Without the Meltdown)
I’ve been in the event planning world for over a decade, and I’ve seen everything from massive corporate galas to tiny, intimate dinners. But honestly? Nothing has the same kind of magic as a baby shower. It’s all about hope and excitement. But I’ve also seen that excitement turn into pure panic when it comes to decorations.
In this article
Let’s be real: you see these perfect pictures online and immediately think you need a Hollywood budget and a degree in design. That’s just not true. After training a ton of new event planners, I can tell you the secret isn’t a blank check—it’s a smart plan. The decor is the first thing guests feel when they walk in, and getting it right just means making a few key decisions upfront. It’s all about creating a space that feels warm, welcoming, and full of love.
So, let’s walk through the exact process I use, breaking down the pro techniques into simple, doable steps. No fluff, just the good stuff.
First Things First: Plan Before You Buy a Single Thing
I can’t stress this enough. The biggest mistake people make is buying a cart full of cute stuff with no master plan. You end up with a random collection of things that don’t quite match, and you almost always spend more money. The secret to making it all look effortless on the day of the party is doing the thinking part first.
Get to Know Your Space
Before you even think about themes, you have to understand the room you’re working with. Every space has its own quirks and opportunities. When I walk into a venue, whether it’s a living room or a rented hall, I’m not just looking—I’m analyzing.
- Ceilings & Walls: Look up! Are the ceilings high or low? Is it a standard drywall ceiling or a drop ceiling with a grid? That grid is your friend for hanging lightweight garlands with special hooks you can get at any office supply store. But for anything with real weight, you need a structural beam. And heads up, never hang anything heavy without getting the green light from the venue manager. It’s a huge liability.
- Light and Power: Where’s the natural light coming from? A dark room needs brighter, more reflective decor to feel open, while a sunny room can handle deeper colors. I also immediately scan for power outlets. If you’re planning on using fairy lights, a speaker, or a food warmer, you need to know where you can plug in without creating a super dangerous tripwire of extension cords.
- Natural Anchor Points: I’m always on the hunt for existing spots to secure decor. Think curtain rods, fireplace mantels, pillars, or even a sturdy bookshelf. Using these means you don’t have to put a single hole in the wall. If you must stick something to a painted wall, only use high-quality removable hooks (the Command brand is my go-to). Quick tip: always test one in a hidden spot first to make sure it won’t peel the paint off.
- Guest Traffic Flow: Imagine people moving through the room. You don’t want a gorgeous dessert table causing a traffic jam in a narrow hallway. Decorations should guide people, not block them. I often grab a piece of paper and sketch a quick layout of the key zones: gifts, food, seating, and a dedicated spot for photos.
Pick a Vibe (Not Just a Cartoon)
A theme isn’t about slapping a cartoon character on every napkin. A pro-level theme is a feeling, a cohesive idea that guides all your choices. It can be as simple as “Woodland Adventure” or “Twinkle, Twinkle, Little Star,” or even just a color combo like “Dusty Blue and Sage Green.”
Once you have that idea, lock in a color palette of 3-4 colors. A great palette usually has:
- A primary color (the one you’ll use most).
- A secondary color (your supporting actor).
- An accent color (often a metallic like gold or a bright pop of color, used sparingly).
- A neutral (like white, cream, or light gray to give everyone’s eyes a rest).
Sticking to this palette is the secret sauce. It makes everything—even items bought from different stores—look like it was made to go together.
Your Budget: Where to Save and Where to Splurge
A beautiful shower is about spending wisely, not spending a ton. Be honest about your budget, and then decide where the money will make the most impact.
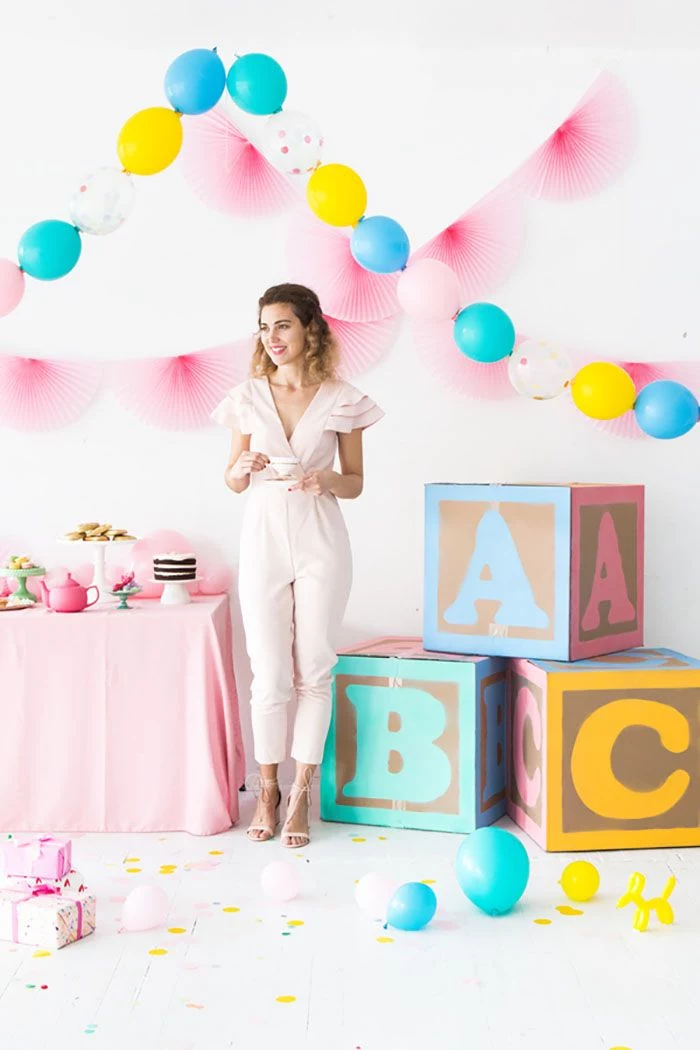
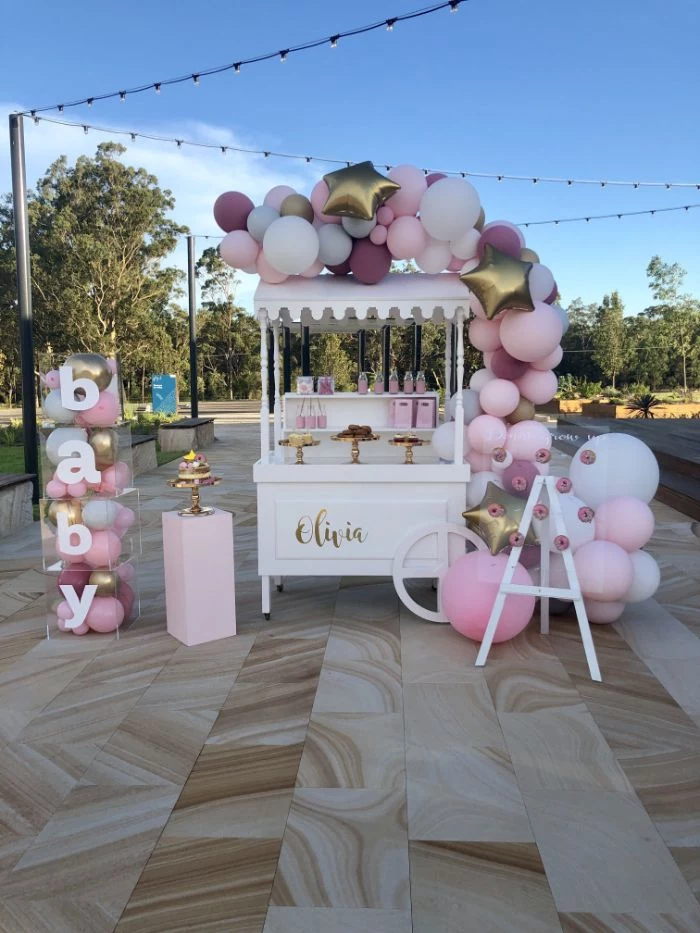
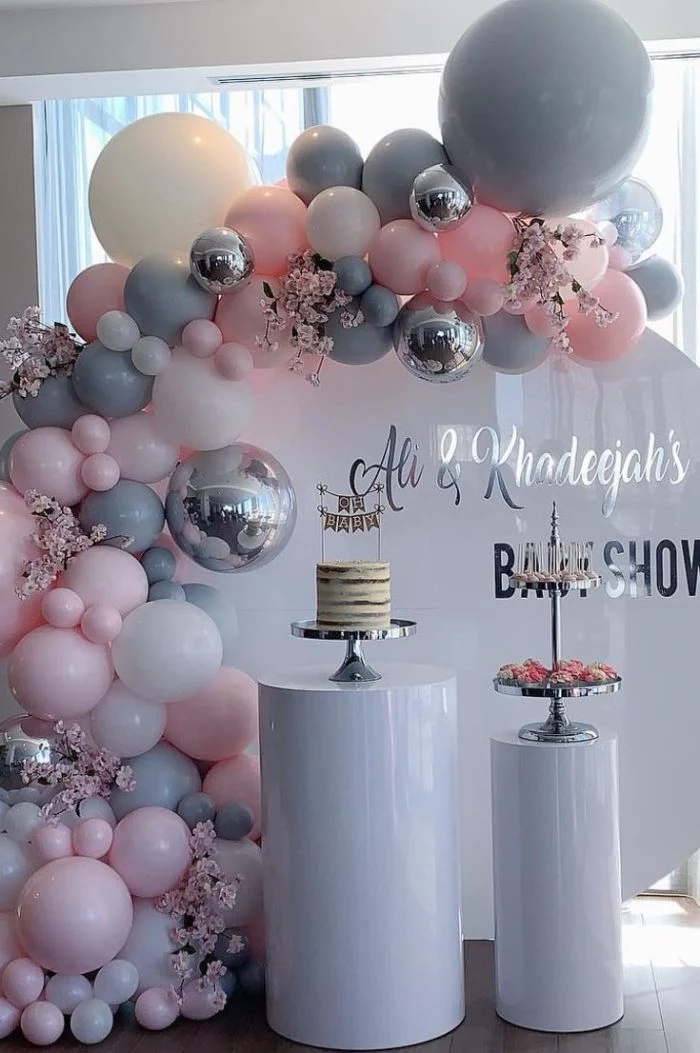
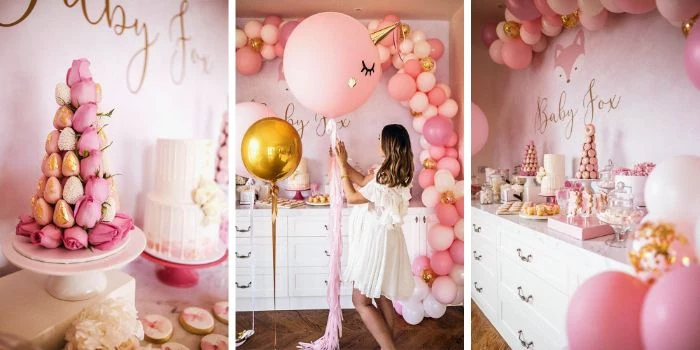
- Splurge Here: The Focal Point. My rule is to invest in one major “wow” moment. This is usually the backdrop for photos or the area around the main cake or dessert table. It’s what everyone will take pictures of and remember most. Think about a cool rented peacock chair for the mom-to-be (usually costs $75-$150 to rent) or a custom neon sign.
- Save Here: The Details. Guests will not notice if you use plain white napkins. Save your money on the small, disposable items. Another huge money-saver is greenery. You can hit up a place like Trader Joe’s and grab a few bunches of eucalyptus for under $5. It fills a ton of space, looks elegant, and smells amazing. Or, ask a local florist for cheap filler greens like ruscus.
- The Reality of DIY: A DIY project can be a fantastic personal touch, but it isn’t always cheaper. Before you commit, add up the cost of all the supplies, including tools you might have to buy, like a decent hot glue gun ($15-$20). Then, be honest about your time. If a project is going to take you 8 stressful hours, buying it pre-made might be the better choice for your sanity.
The Big Three: Pro Techniques for Core Decor
Okay, with a plan in hand, it’s time for the fun part. These are the methods my team uses to get those polished, professional results every time.
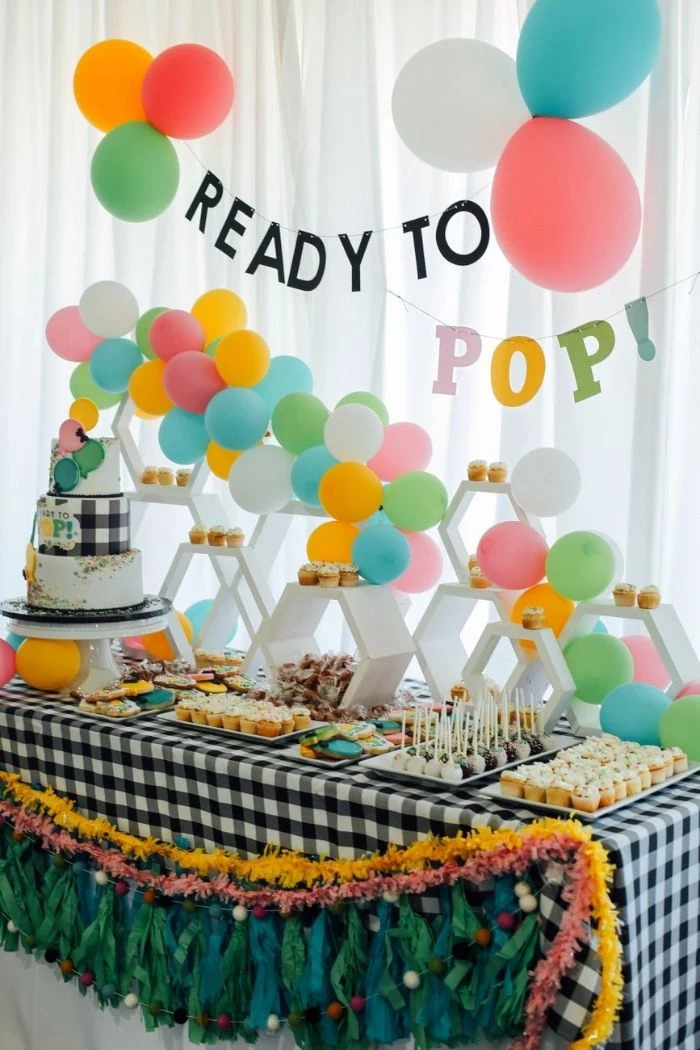
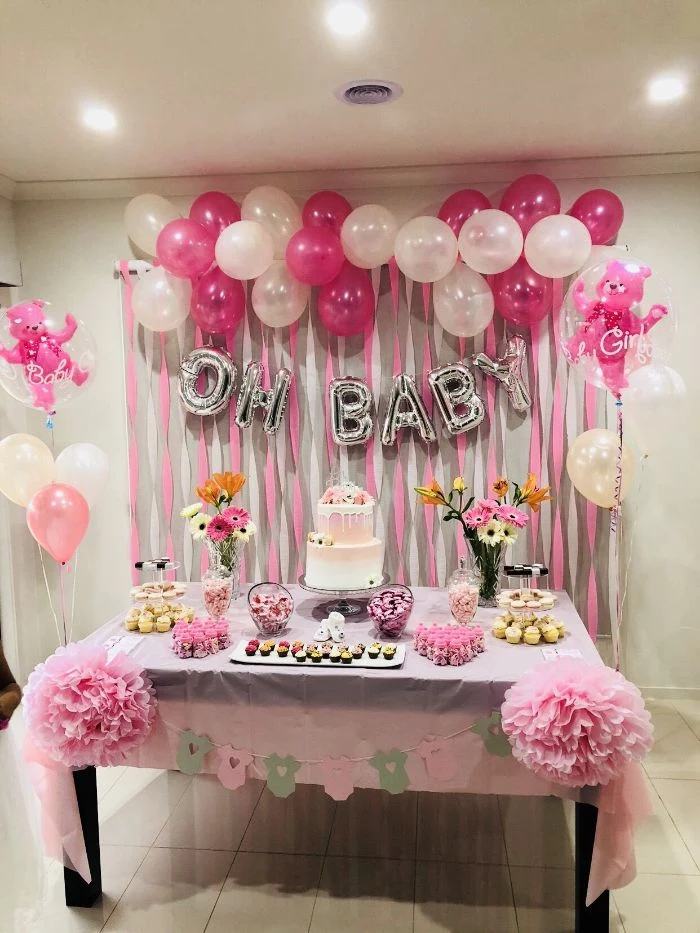
The Secret to an Amazing Balloon Garland
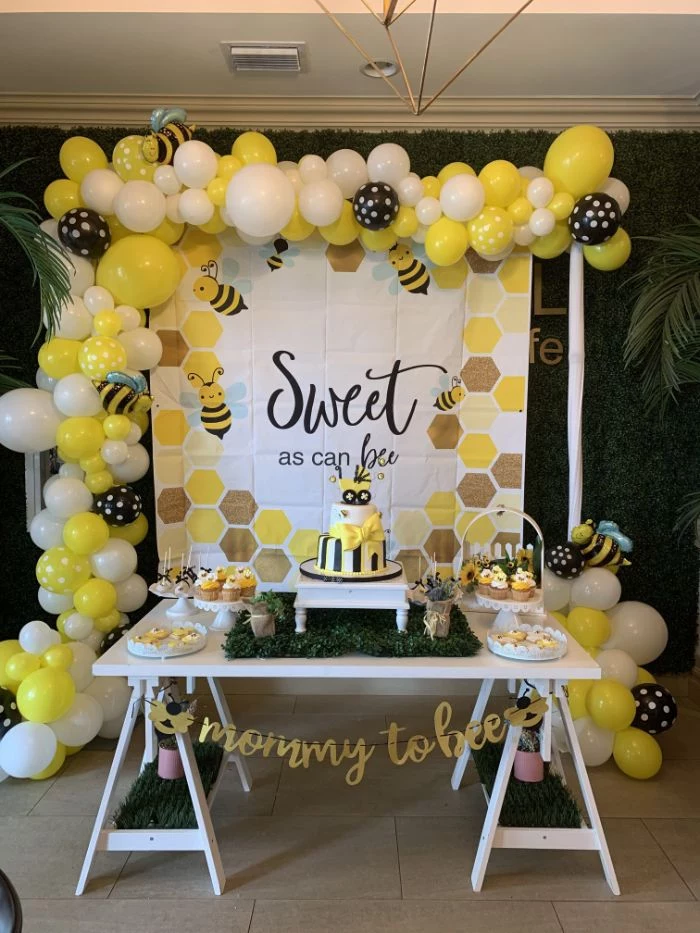
Let’s talk about the most popular baby shower decor item right now: the balloon garland. A sad, single-file line of balloons is not the look we’re going for. A great garland has depth, varied sizes, and an organic shape. For an important event, always buy fresh, quality balloons from a dedicated party store or online—brands like Qualatex or Tuf-Tex are what the pros use. They have richer colors and are far less likely to pop.
Here’s the recipe for a lush, 6-foot garland:
You’ll want a mix of about 70-80 balloons. My go-to formula is four big 17-inch balloons, about fifty 11-inch balloons for the main body, and twenty-five or so 5-inch balloons for filling in the gaps. The size variation is what makes it look expensive!

- Get an electric pump. This is not a suggestion, it’s a requirement. They cost about $20 on Amazon and will save you hours and a headache. Don’t inflate the balloons all the way—under-inflate them slightly so they stay nice and round, not pear-shaped.
- Use the “Quad” Method. Tie two inflated balloons together at the knot to make a “duplet.” Then, twist two duplets together to make a 4-balloon cluster, or a “quad.” This is your main building block.
- Assemble the Garland. Forget those plastic strips with the holes. The pro way is easier. Just use a long piece of ribbon or fishing line. Tie your first quad on, then lay the next quad on top, twisting it slightly. Use the long ribbon to wrap around one of the balloons in the new quad to secure it. Keep adding quads, rotating them as you go to build the shape.
- Fill in the Gaps. Once the main structure is built, use glue dots or a low-temp glue gun to add the tiny 5-inch balloons into all the little crevices. This is the final touch that makes it look full and flawless.
Good to know: An air-filled garland like this will easily last for 2-3 days! You can absolutely make this the night before the party to save yourself a ton of stress on the day of.
So, what’s the real trade-off between DIY and hiring someone? If you do it yourself, you’re looking at a cost of about $50 to $80 for quality balloons and a pump. The catch is the time—budget 3-4 hours, and be prepared for a bit of a learning curve. If you hire a professional, it’s zero work and guaranteed to be stunning, but the price starts around $250 and can easily go up to $500+ for a big, custom installation. It really just depends on your budget for time versus money.
And a quick safety note: popped balloon pieces are a serious choking hazard for kids and pets. Please be super diligent about cleaning up any stray bits.
Creating Tables That Feel Special
The tables are where your guests will spend most of their time, so a little effort here goes a long way. It’s all about layering.
- Linens First: A simple tablecloth is an instant upgrade. For a more modern look, just use a table runner down the center. It adds color and texture for less than the cost of a full specialty linen. A polyester blend or cotton fabric will always drape more nicely than cheap plastic.
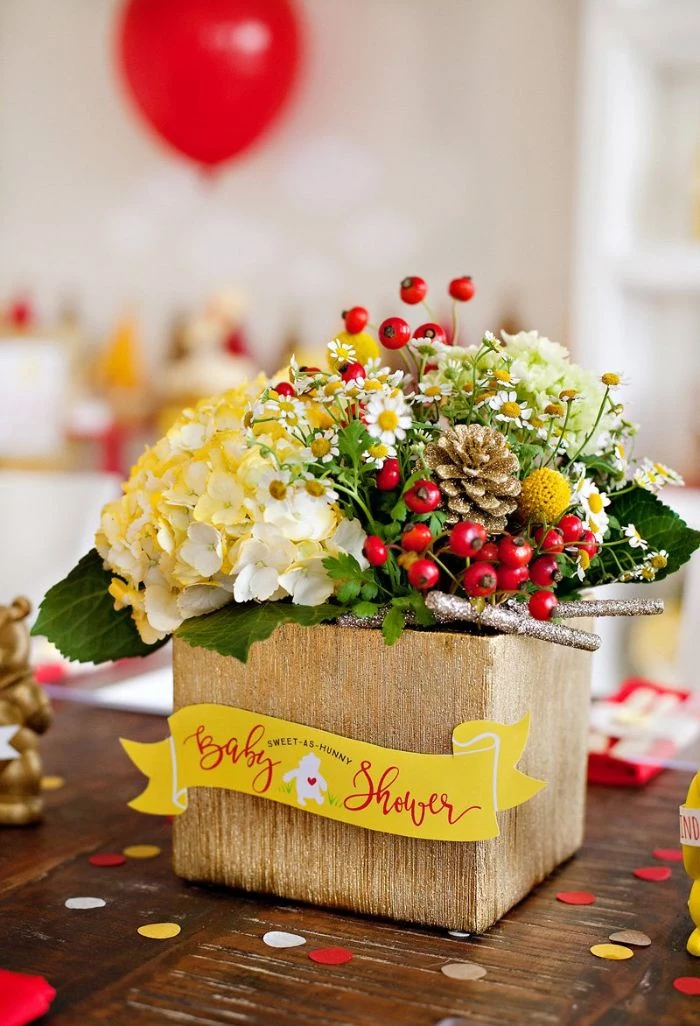
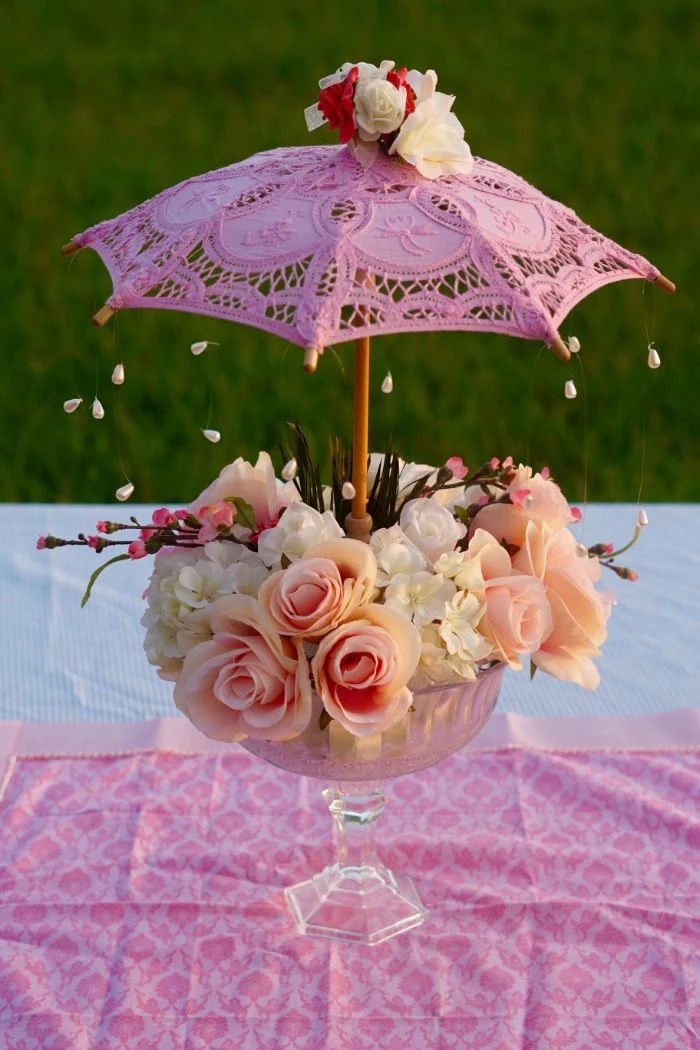
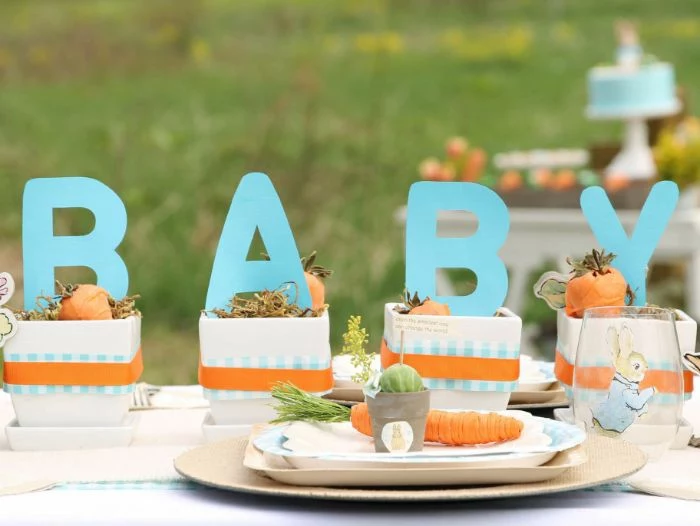
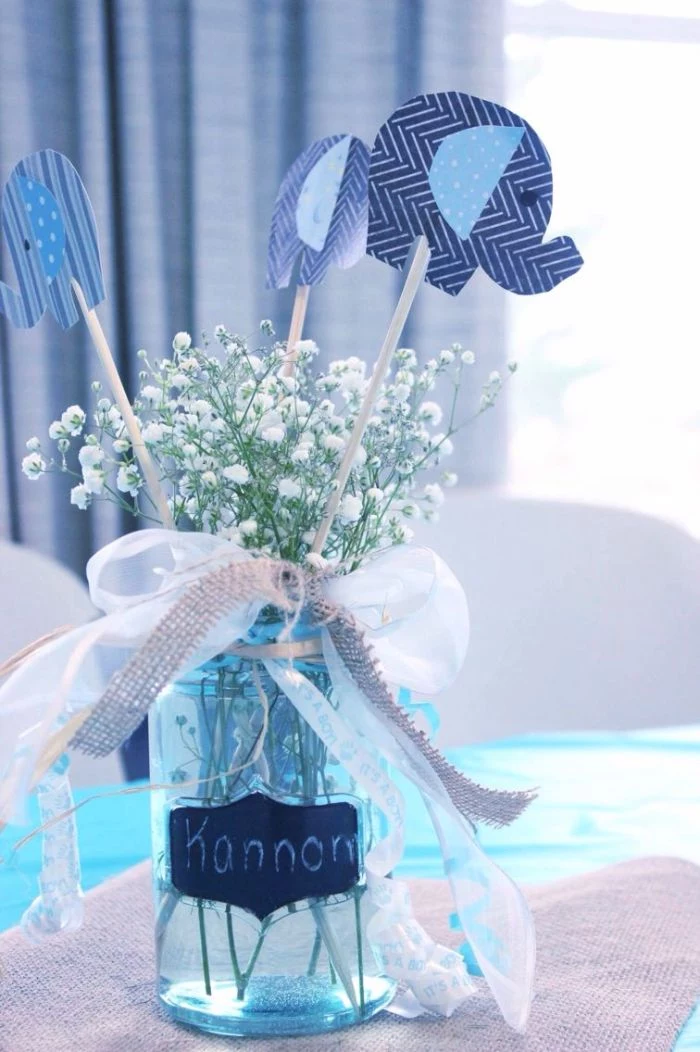
- Centerpieces: The number one rule for guest table centerpieces is that people need to be able to see and talk to each other over them. Keep them under 14 inches tall. You can go big and tall on the buffet or gift table, though! A simple, chic idea is to group three small bud vases of varying heights, each with just one or two stems.
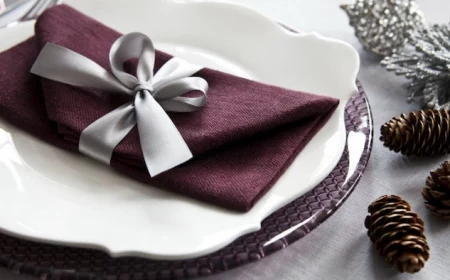
- Place Settings: You don’t need fancy china. A simple white plate on top of a woven placemat or a metallic charger looks incredibly elegant. The charger is just a decorative plate that sits underneath—an inexpensive trick (they’re usually a couple of bucks each) that adds a perfect layer of color.
Building a Backdrop That Won’t Fall Over
Your main focal point needs to be sturdy. I’ve seen way too many flimsy backdrops topple over mid-party. While pros use heavy-duty metal stands, you can easily build a fantastic one out of PVC pipe.
You can build a 6×6 foot frame for under $30. Just go to a hardware store like Home Depot and get: three 10-foot lengths of 3/4-inch PVC pipe (ask them to cut them for you!), two T-shaped fittings, and four end caps for the feet. The pieces just push together like LEGOs, no glue needed. For indoor use, it’s perfectly stable. But if it’s outside or you’re hanging something heavy, you MUST weigh the feet down with sandbags. I learned this the hard way at a breezy outdoor shower where a backdrop nearly flew away.
The Final Touches: Last-Minute Checks & Asking for Help
Alright, the party is almost here. Before guests arrive, I do one final sweep. This isn’t just about making things look pretty; it’s about safety.
My final checklist is simple:
- Trip Hazards: Are all extension cords taped down securely?
- Fire Hazards: Are any candles (I strongly prefer flameless LEDs for this reason) a safe distance from paper, fabric, or balloons?
- Choking Hazards: Do a quick scan of the floor for any dropped pins, balloon scraps, or small decor pieces, especially if little kids will be there.
- Stability Check: Give the backdrop and any tall arrangements a gentle nudge. Are they wobbly? Fix it now.
And my final piece of advice? There is ZERO shame in asking for help. In fact, it’s the smartest thing you can do. Even professionals don’t work alone. Bribe two of your best friends with pizza and delegate! Put one in charge of setting up tables, have another help with the backdrop, and you can direct traffic. Planning a shower is a huge act of love, and you deserve to enjoy the day, too.
In the end, all this planning is just to create a beautiful backdrop for a truly joyful moment. A clean, cohesive, and thoughtfully decorated space will always feel more special than a room cluttered with every idea you found online. Focus on that one gorgeous focal point, add in your personal touches, and you’ll create a day the parents-to-be will cherish forever.
Inspirational Gallery
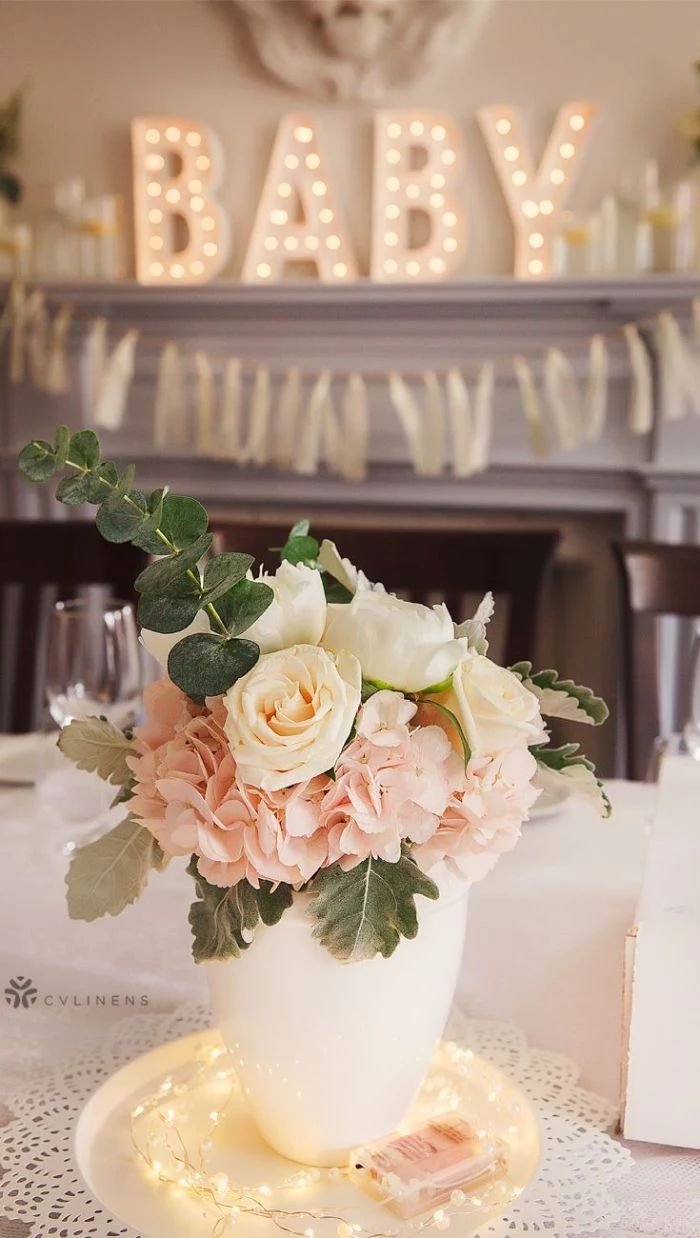
Don’t underestimate the power of lighting. Instead of relying solely on harsh overhead lights, weave in strands of warm white fairy lights. You can wrap them around garlands, tuck them into table centerpieces, or drape them behind a sheer fabric backdrop for a magical, twinkling effect that instantly makes the space feel more intimate and special.
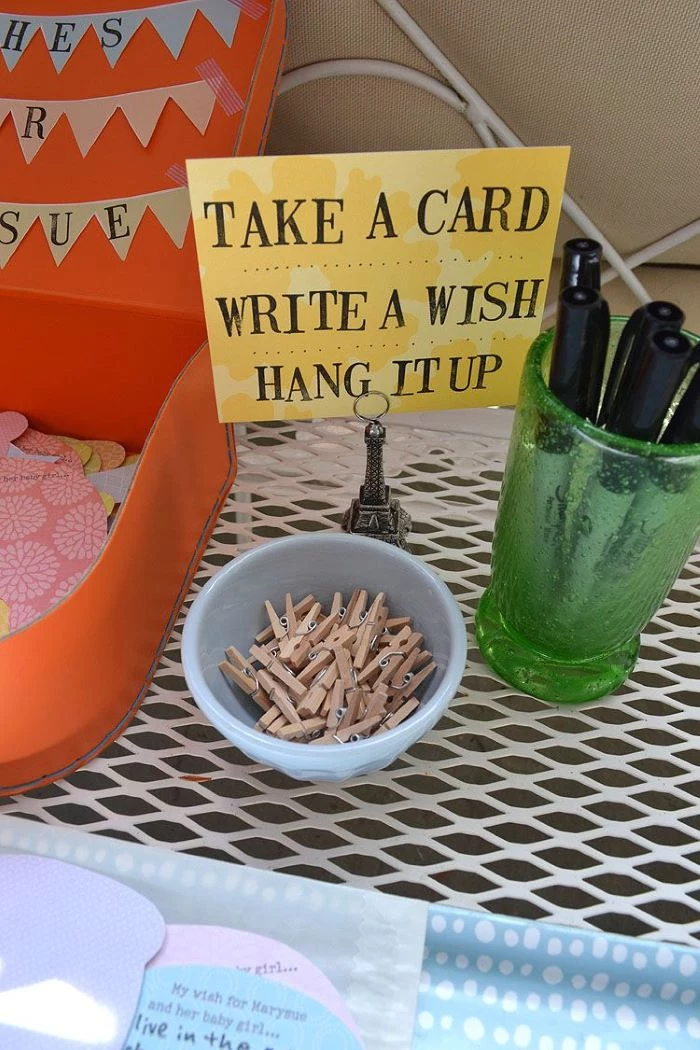
- Create a memorable, interactive focal point with a


Globally, the event industry produces a significant amount of waste. A single event can generate hundreds of pounds of trash, much of it from single-use decorations.
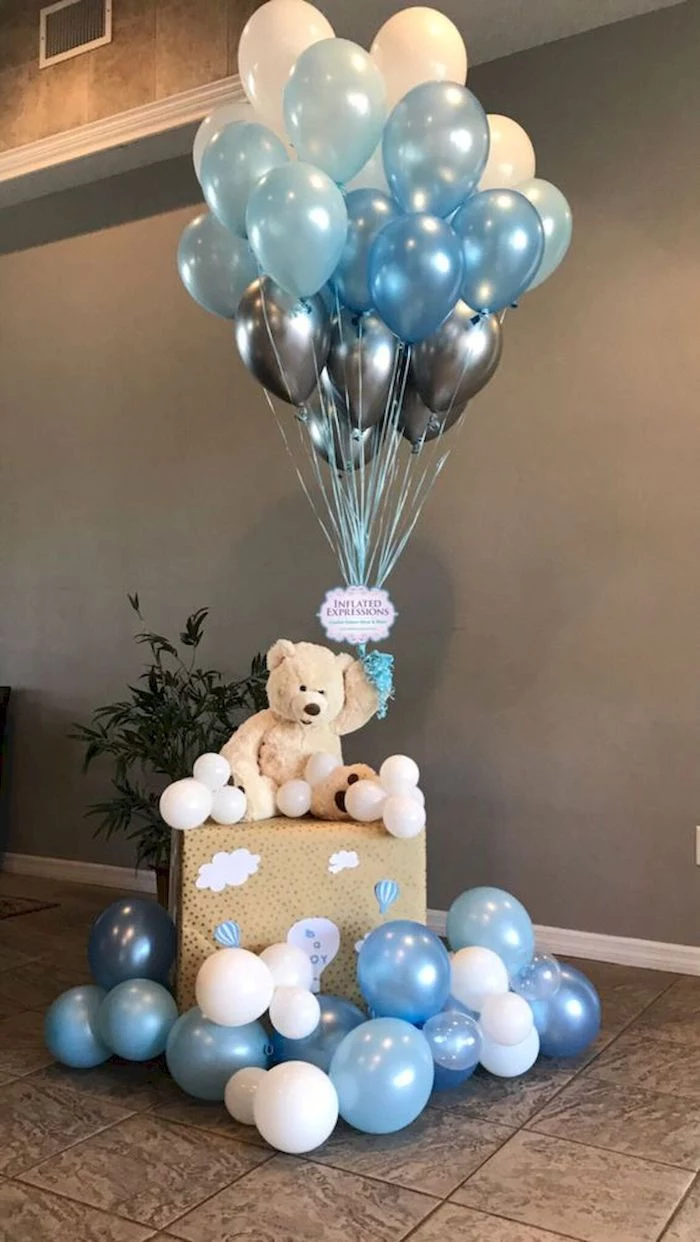
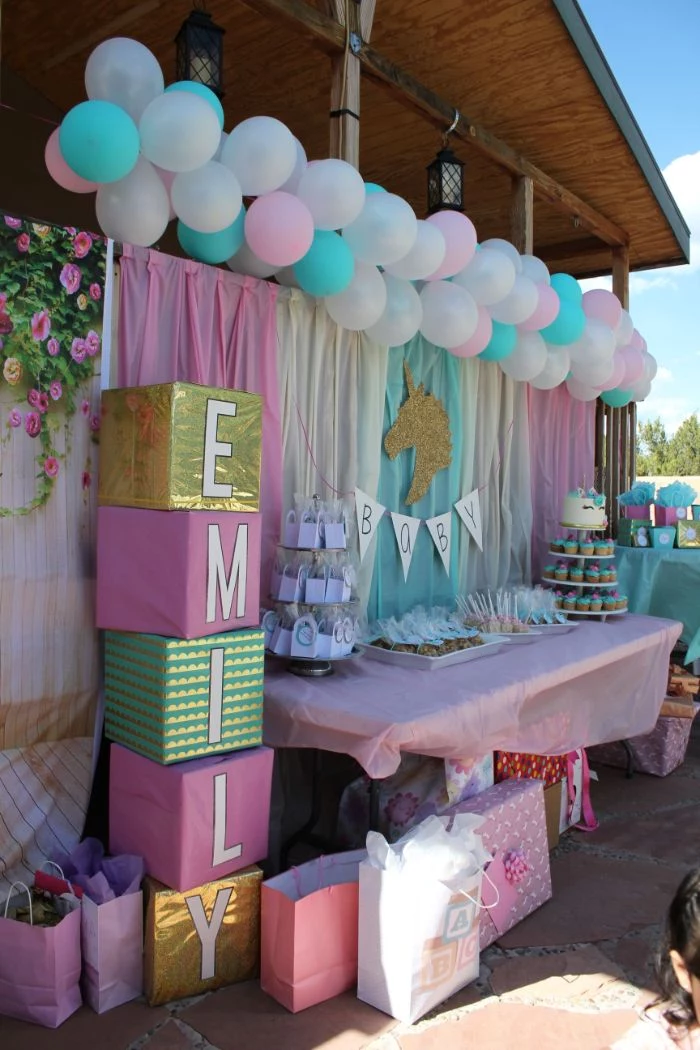
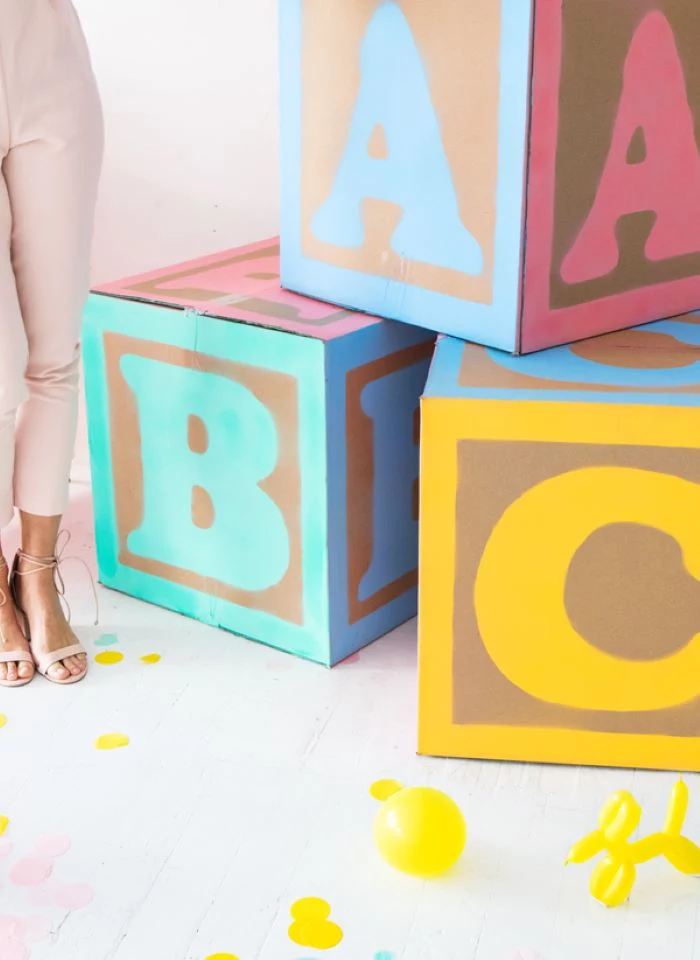
Consider decorations that can be repurposed. A beautiful set of wooden blocks can later be used in the nursery. High-quality fabric banners or a custom neon sign can become wall art. It’s a sustainable choice that extends the joy of the celebration.
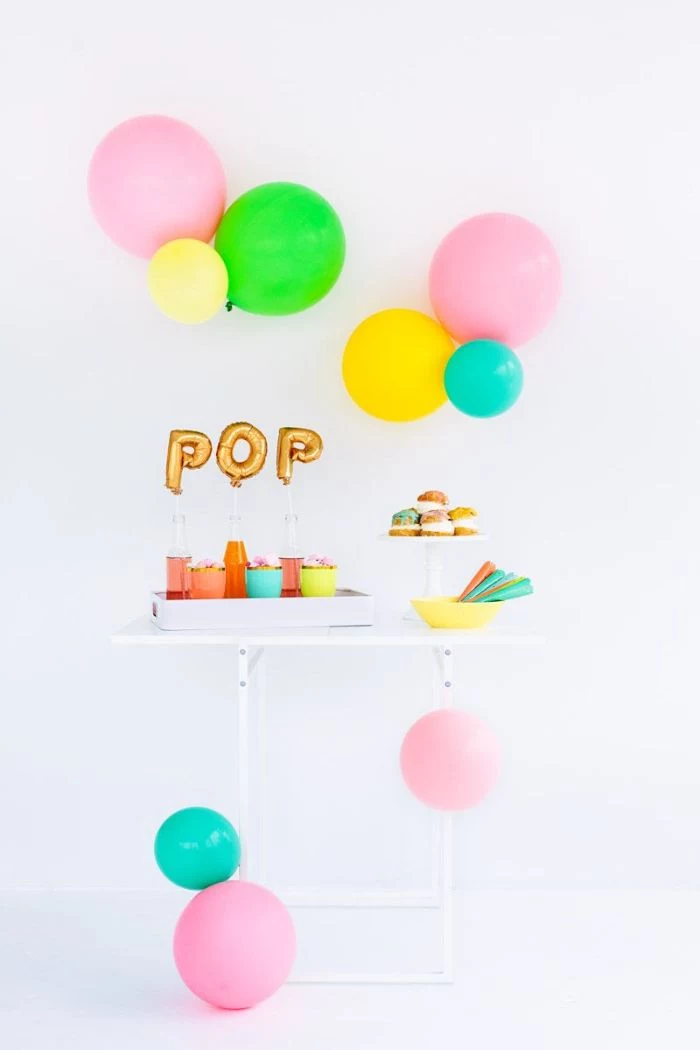
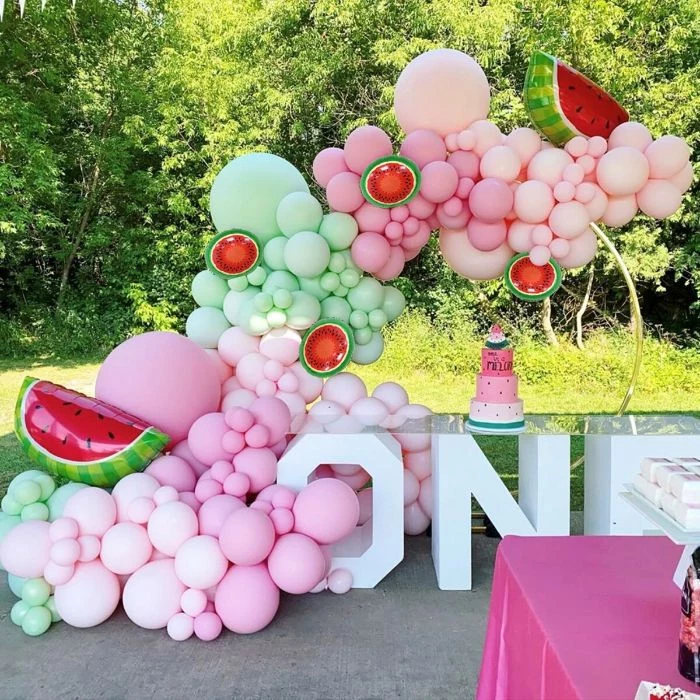
The secret to professional-looking balloon garlands: Vary your balloon sizes! Don’t just use standard 12-inch balloons. Mix in 5-inch and 18-inch balloons to create dimension and a more organic, high-end look. Brands like Qualatex or Tuf-Tex offer a wide range of sizes and colors for this very purpose.


How do I hang decorations without damaging the walls?
Command Hooks are your best friend. They come in various sizes, including tiny clear ones perfect for fairy lights or lightweight garlands. For paper fans or small banners, a bit of painter’s tape or washi tape is a safe bet, as it peels off cleanly without taking paint with it. Always test in an inconspicuous spot first!
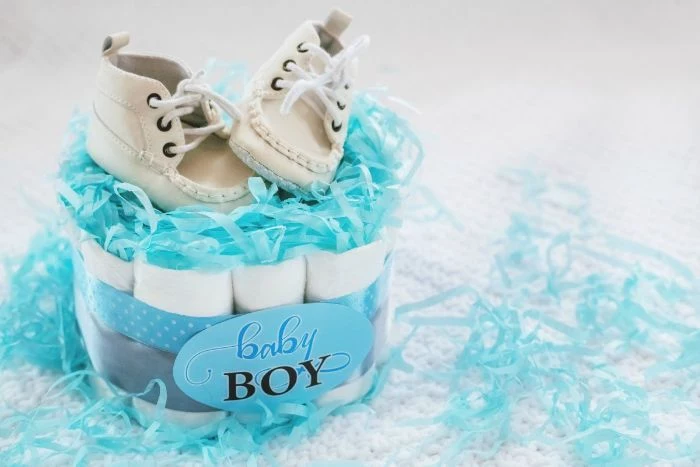
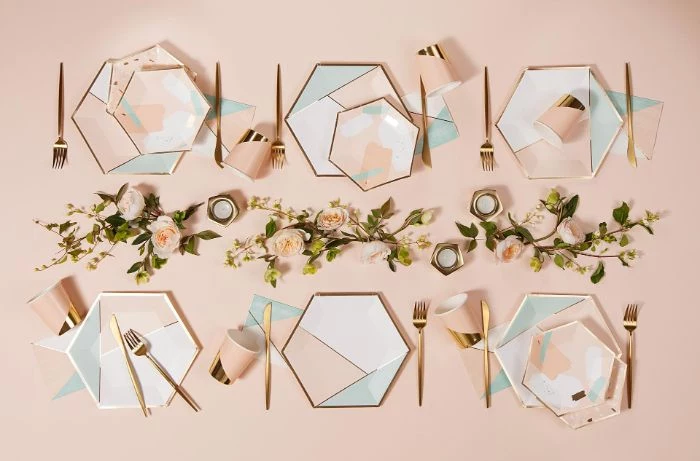
Think beyond pink and blue. Sophisticated, gender-neutral palettes are on-trend and stunning. Consider combinations like sage green and cream, terracotta and sand, or a muted rainbow of earthy pastels. These colors create a calming, modern atmosphere that feels fresh and unique.


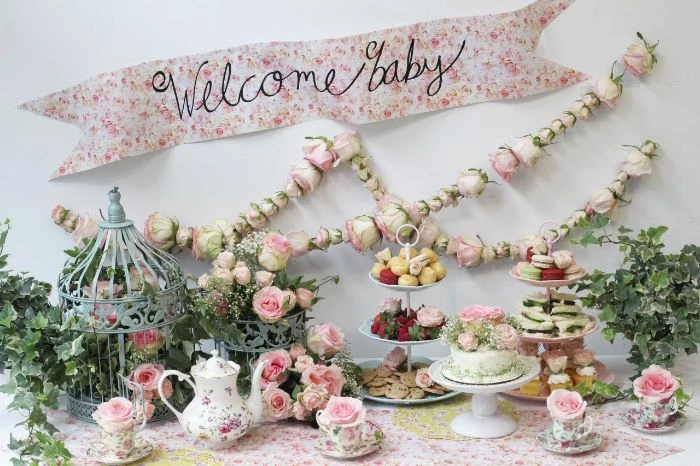
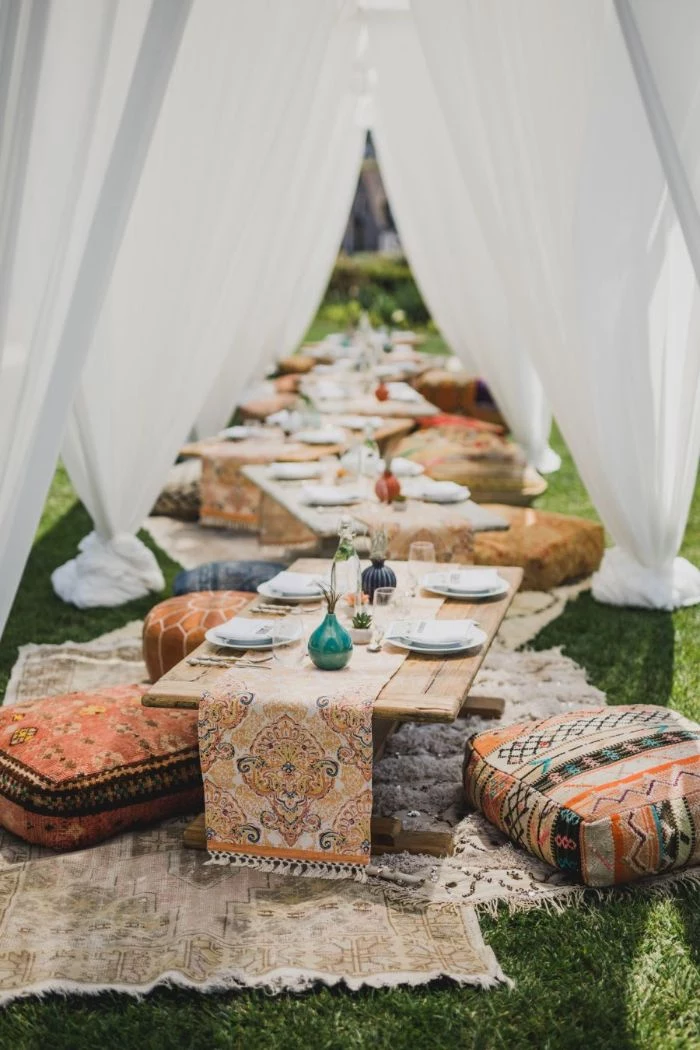
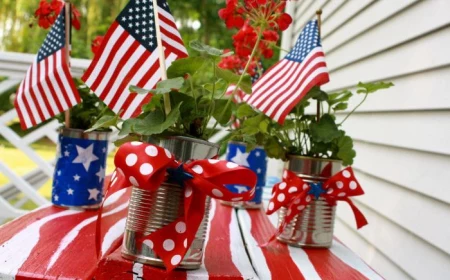
For a touch of rustic elegance: Use natural elements. A few branches of eucalyptus or olive leaves laid down the center of a table can be more beautiful than a complex floral arrangement. They smell wonderful and add a touch of organic texture.
For a modern, clean look: Focus on acrylic. Clear acrylic signage for the welcome message or food labels looks incredibly chic and minimalist. It catches the light beautifully and pairs well with any color scheme.
Both options elevate the decor without overwhelming the space.

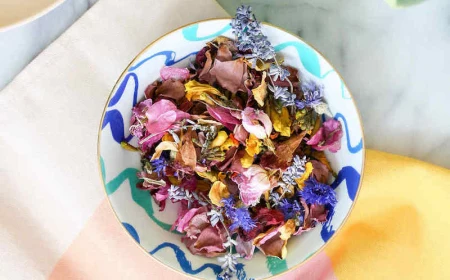
Did you know that scent is powerfully linked to memory? Creating a signature scent for the shower can make the day even more memorable.
This doesn’t mean overpowering air fresheners. A subtle, high-quality scented candle (like a gentle lavender or chamomile from a brand like Jo Malone) or a diffuser with essential oils placed away from the food table can define the atmosphere and create a lasting sensory impression for the guests and mom-to-be.
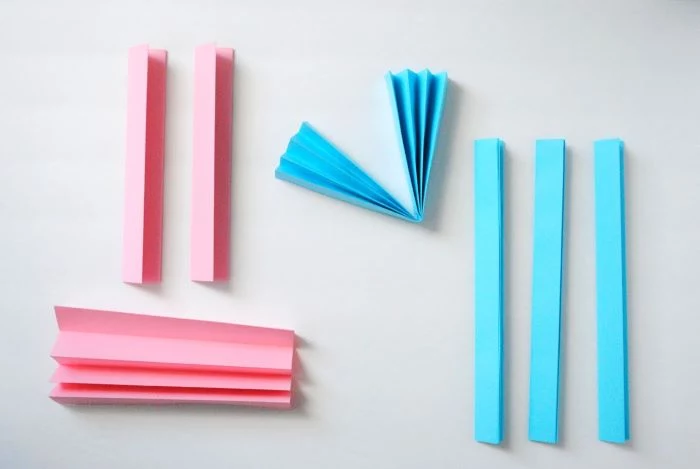
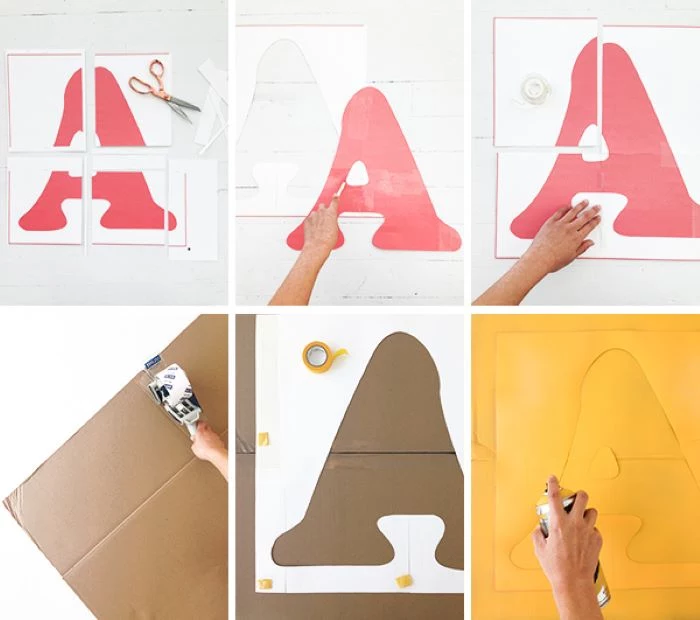
- It can be easily cut, folded, and shaped.
- It provides a high-end feel for a low cost.
- It comes in a vast array of colors and textures.
The secret material? High-quality cardstock. From 3D paper flowers to custom banners and place cards, investing in good paper (65lb weight or more) is a game-changer for DIY decor. A cutting machine like a Cricut can take it to the next level.
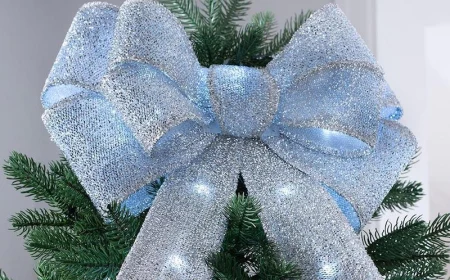
A common mistake is forgetting to decorate the entrance. The first impression is crucial. A simple wreath on the door, a personalized welcome sign on an easel, or a cluster of balloons by the entryway immediately signals to guests that they’ve arrived at a special celebration and sets a festive tone from the moment they walk in.

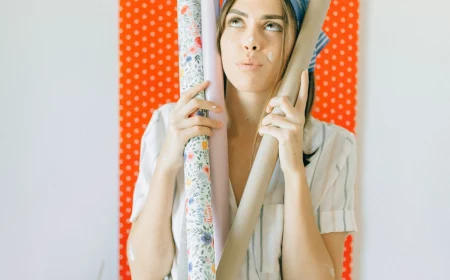
What’s an easy DIY backdrop that looks amazing in photos?
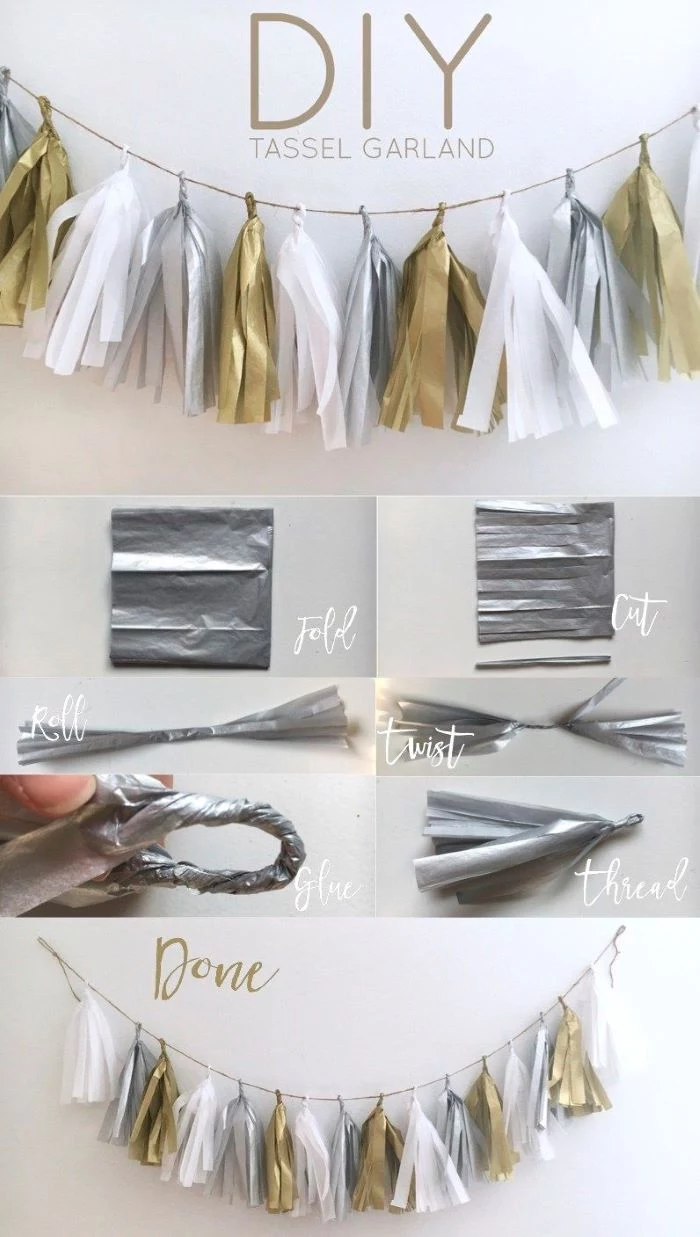
A ribbon wall. All you need is a dowel or piece of string and spools of ribbon, lace, and strips of fabric in your theme colors. Simply cut them to your desired length and tie them onto the dowel. The mix of textures creates a beautiful, soft-focus background that’s incredibly simple to assemble.

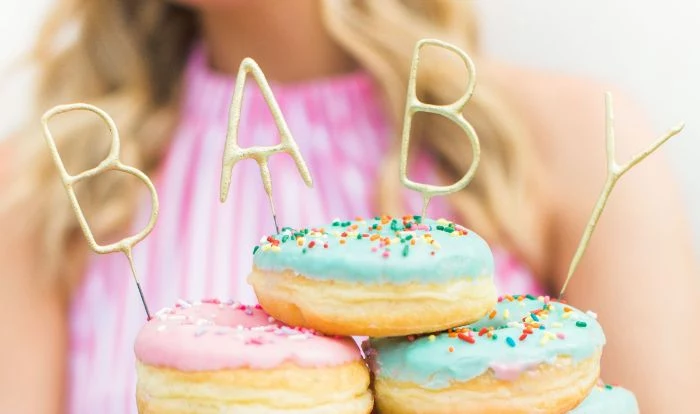
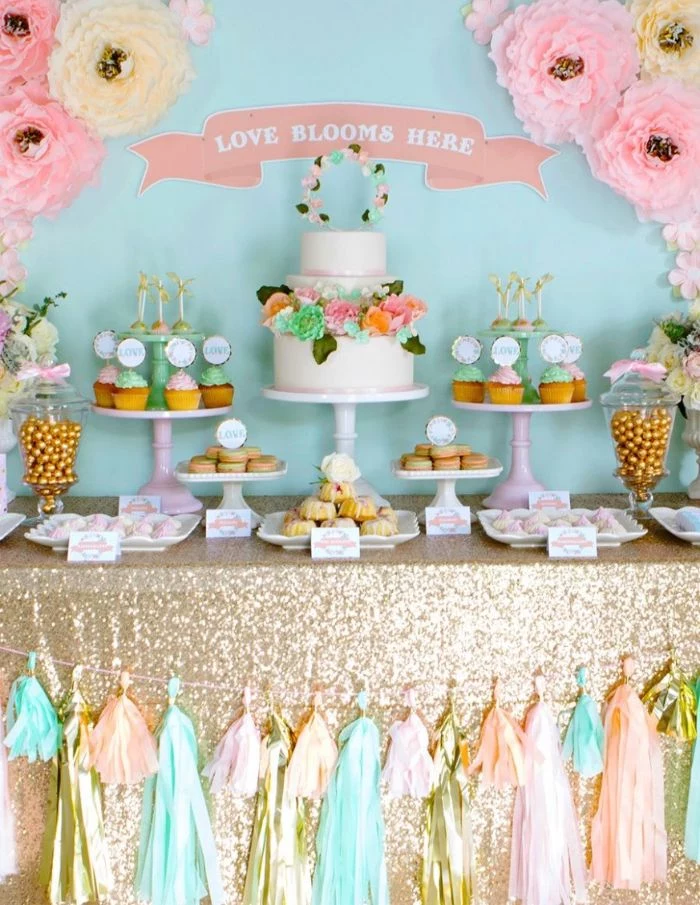
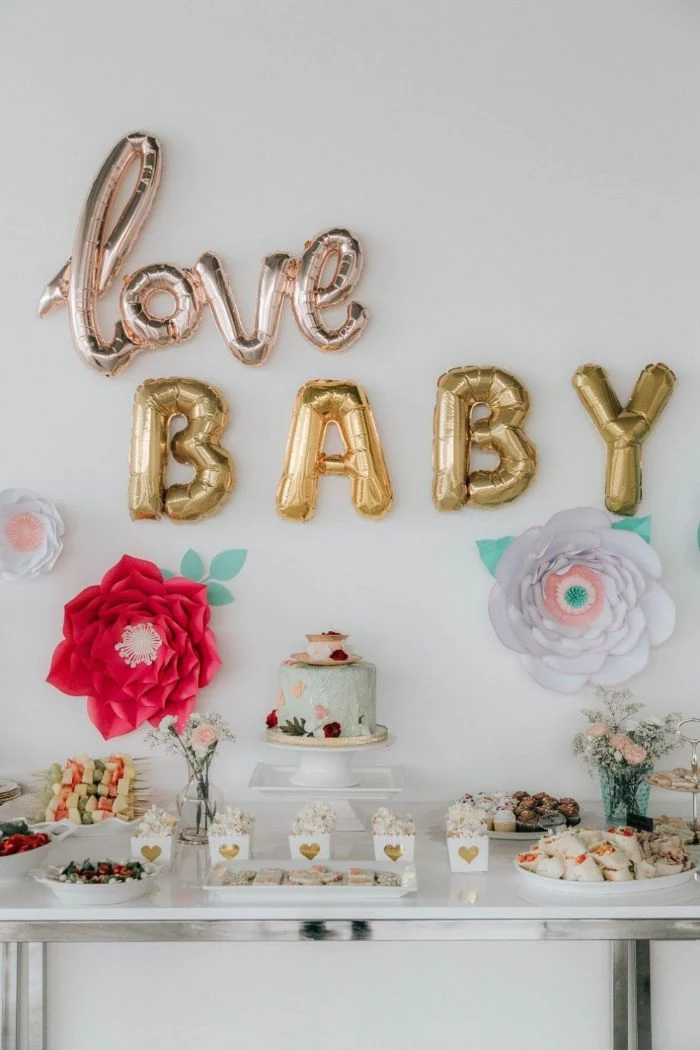
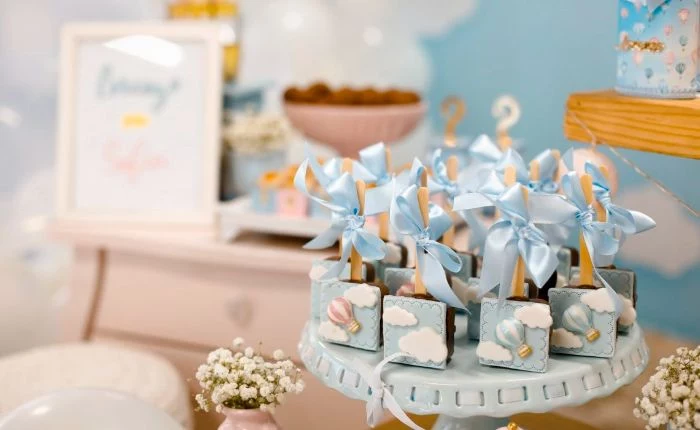
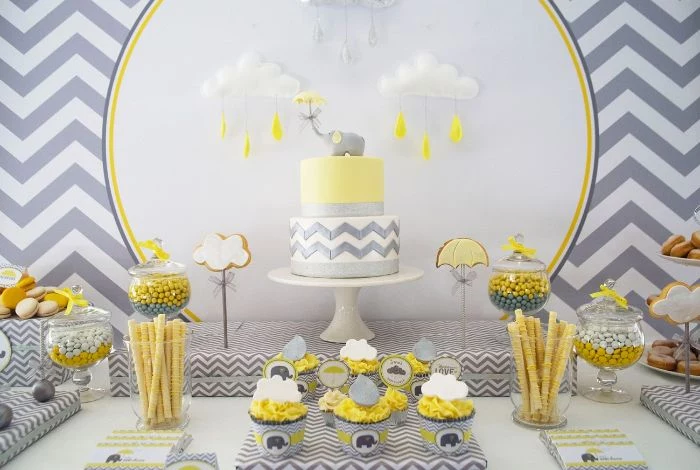
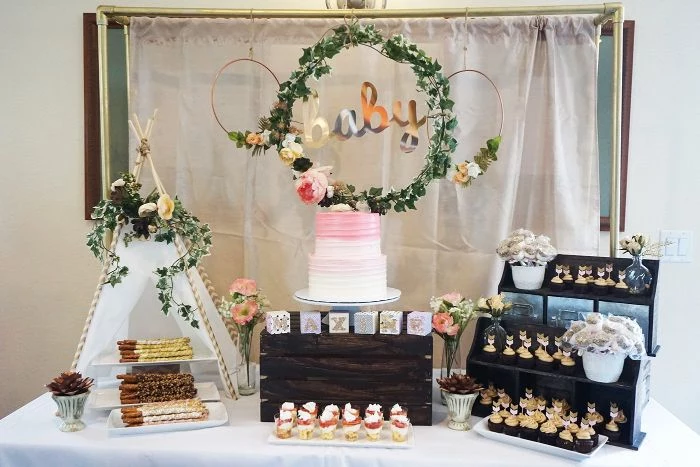
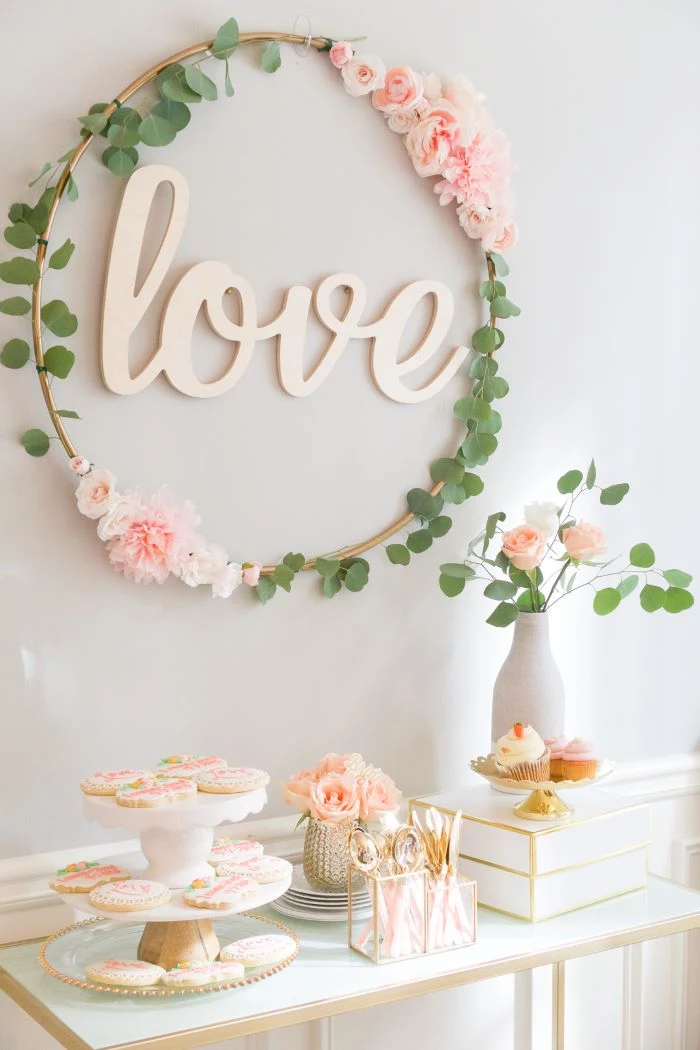
Elevate your dessert table by using serving dishes of varying heights. Use cake stands, tiered trays, and even sturdy, decorated boxes to display cupcakes, cookies, and other treats. This simple trick creates visual interest, makes the food look more abundant, and prevents the table from looking flat and crowded.


- Get professional results without the frustration of hand-tying.
- Create perfectly uniform arches and columns.
- Inflate dozens of balloons in a fraction of the time.
The tool for the job is an electric balloon pump. For less than $30, this device is a lifesaver if you’re planning a large balloon installation, saving you hours of work and a lot of lung power.
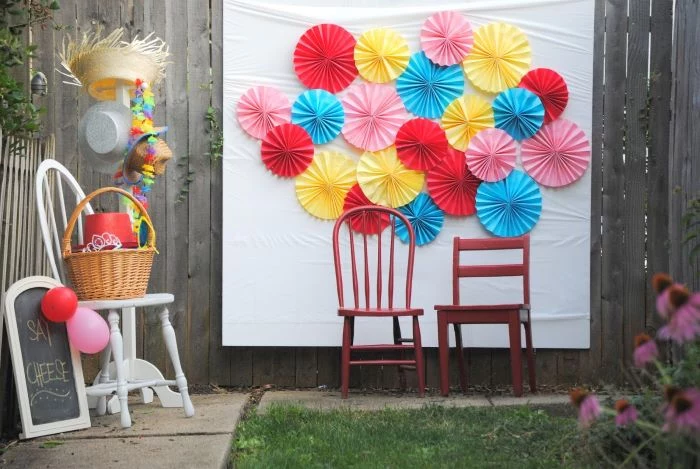
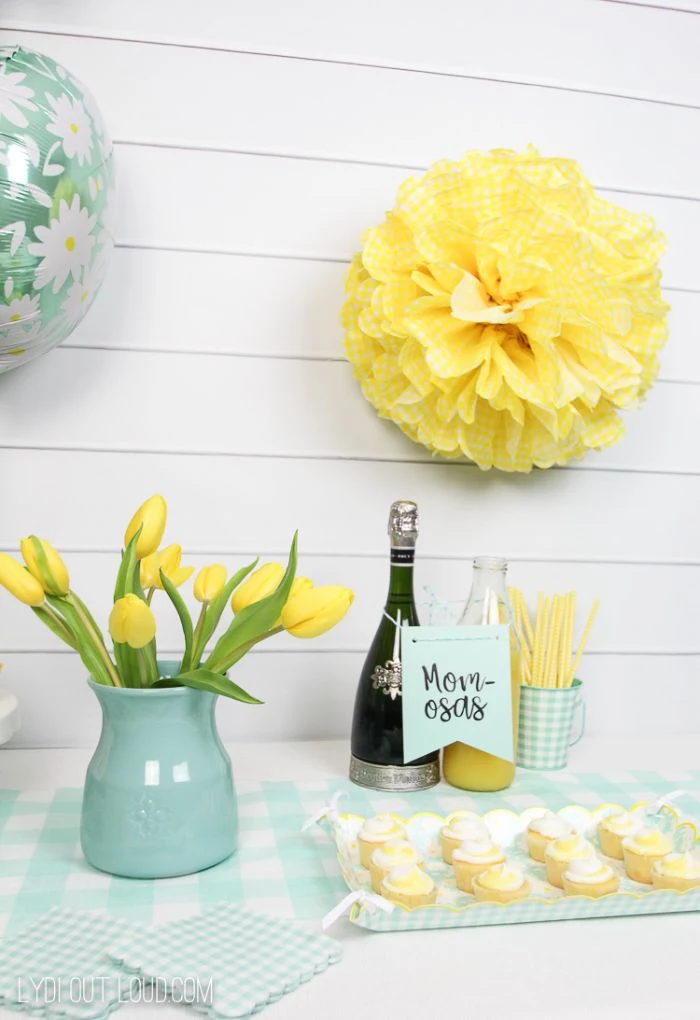
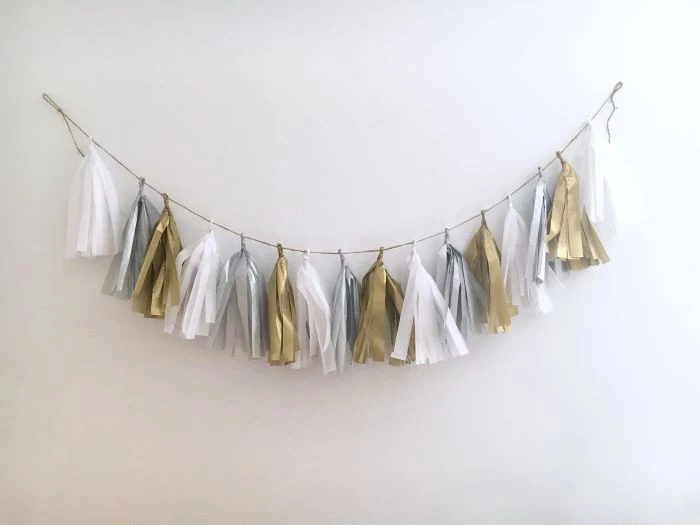
For a high-impact, low-cost installation, think big with paper. A wall of oversized paper fans or giant tissue-paper peonies creates a stunning photo backdrop.

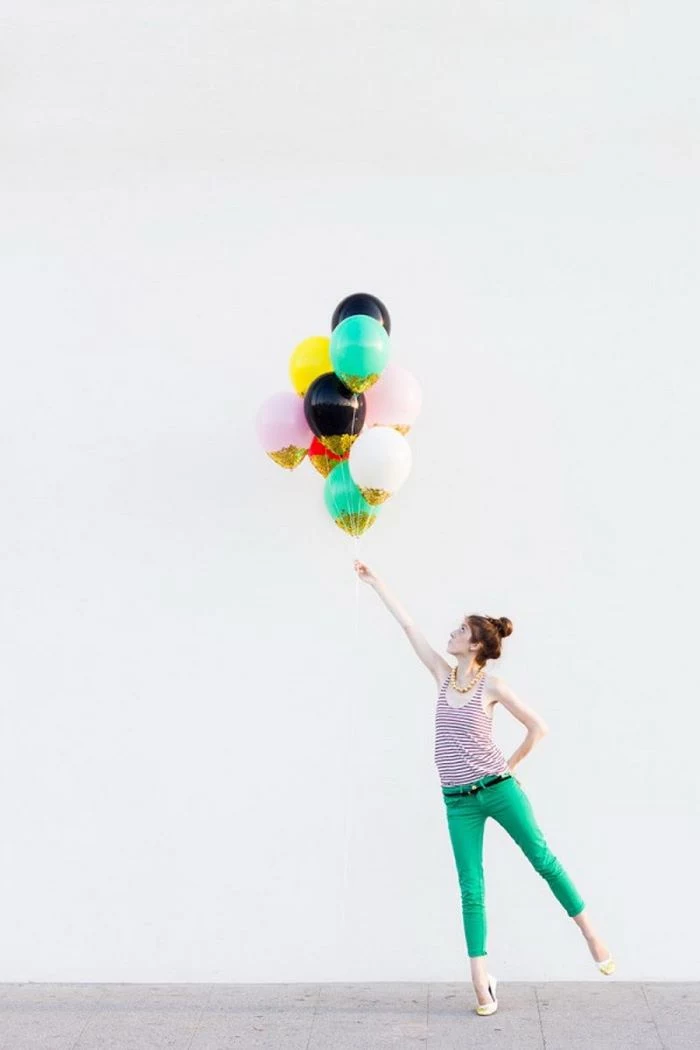
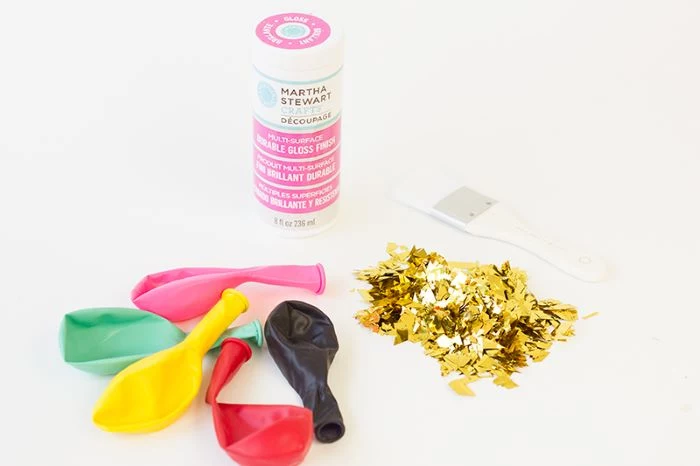
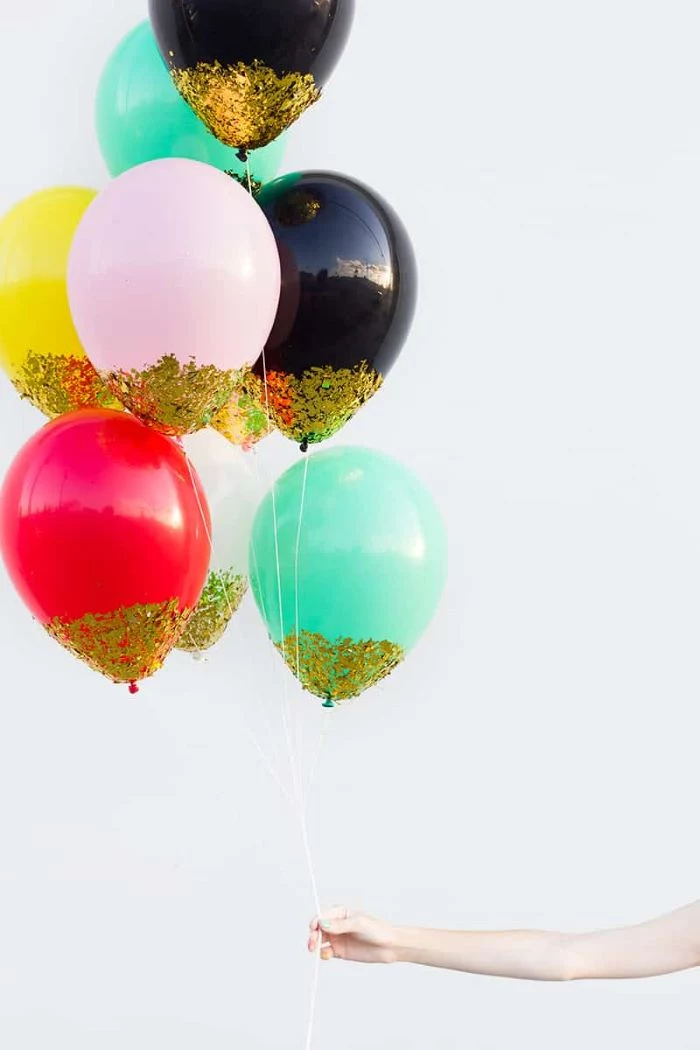
Don’t be afraid to mix metallics. A touch of gold, silver, or rose gold can make any color scheme pop. You can introduce it through spray-painted foliage, metallic-dipped balloons as seen in the gallery, or even with elegant disposable cutlery. The key is to use it as an accent, not the main event.

Theme Spotlight: ‘Twinkle, Twinkle, Little Star’
A timeless classic that’s easy to execute beautifully.
- Colors: Navy blue, silver, and gold.
- Key elements: Star-shaped garlands (metallic or paper), moon-shaped balloons, and an abundance of fairy lights.
- Pro-touch: Scatter star-shaped confetti on the tables for a little extra sparkle.


How much is too much?
It’s easy to get carried away and over-decorate, making a space feel cluttered. A good rule of thumb is to choose three key areas to focus on: the entrance, the main food or dessert table, and one dedicated photo wall or backdrop. Concentrating your efforts makes a bigger impact than scattering small decorations everywhere.

A simple bolt of undyed cheesecloth is one of the most versatile and budget-friendly decor items. You can use it as an airy, ethereal table runner, drape it to soften a doorway, or layer it in a backdrop. It costs just a few dollars per yard and adds instant softness and texture.

According to color psychology, green is associated with tranquility, health, and nature, making it a perfect choice for a serene baby shower.
Instead of just balloons, incorporate green through natural foliage. Garlands of silver dollar eucalyptus, individual fern leaves used as place cards, or small potted succulents as guest favors all contribute to a calming and beautiful atmosphere.


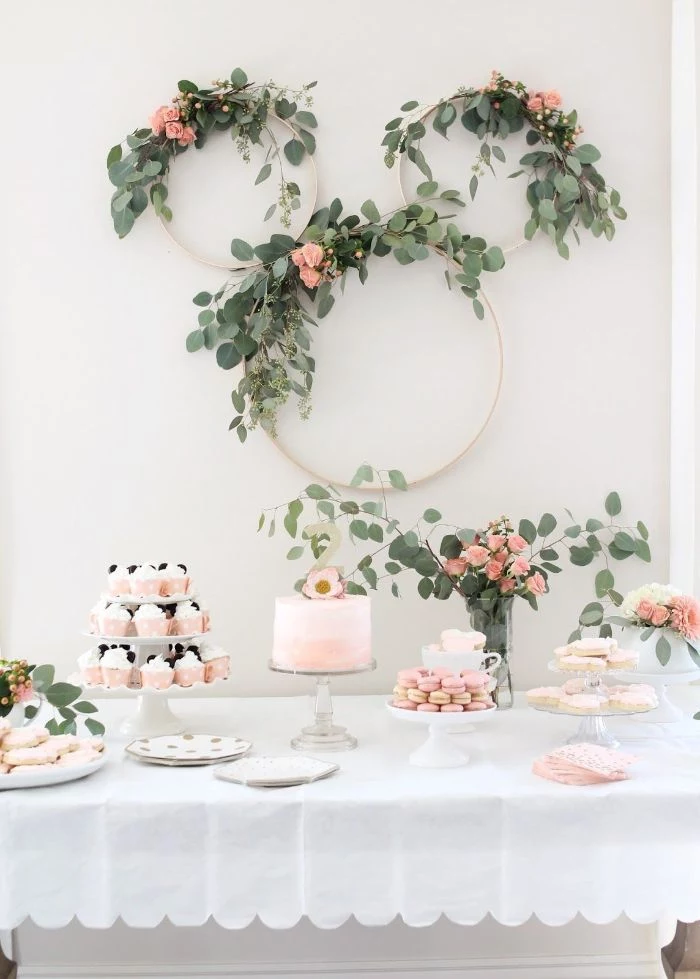
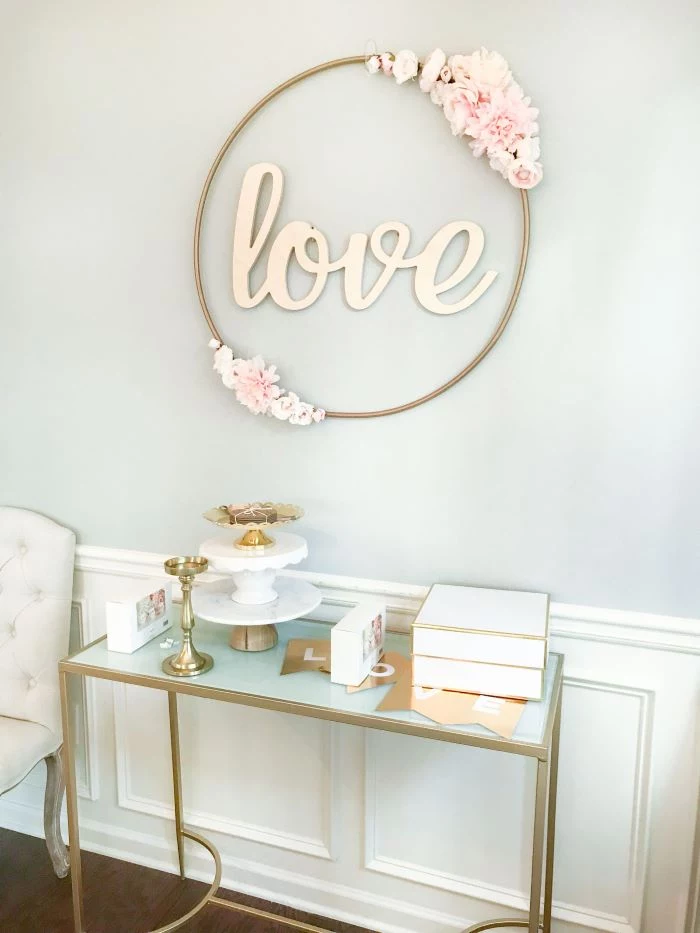
Important detail: When planning your dessert table, place it against a wall. This provides a natural canvas for a backdrop—be it a balloon arch, a flower wall, or a simple banner—and ensures it becomes a clear focal point. A table floating in the middle of a room is much harder to style effectively.


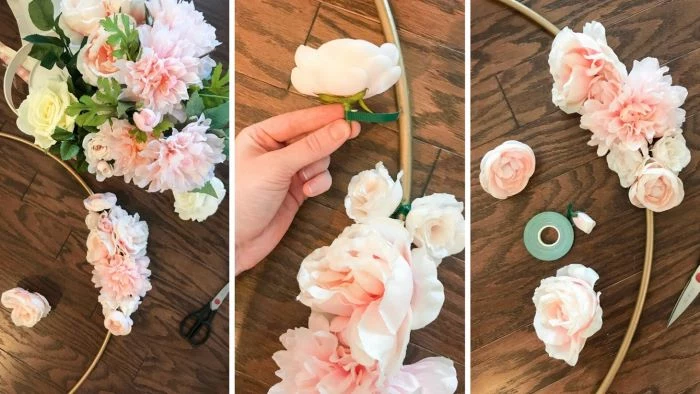
Wooden Hoops: A simple embroidery or hula hoop can be the base for a stunning modern wreath. Wrap it with greenery, attach a few silk flowers, and add a laser-cut wooden word like

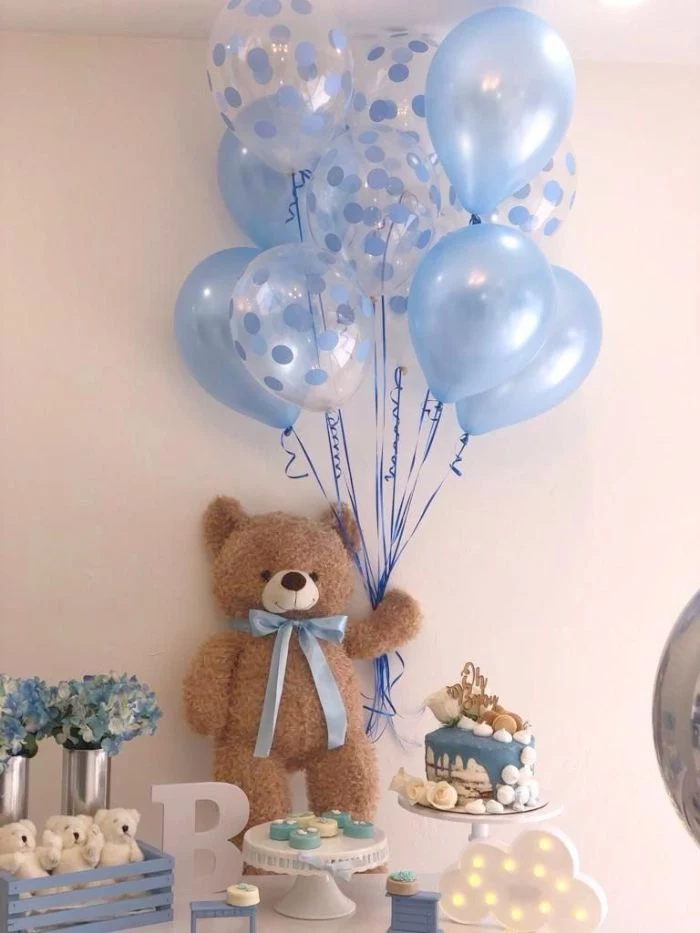
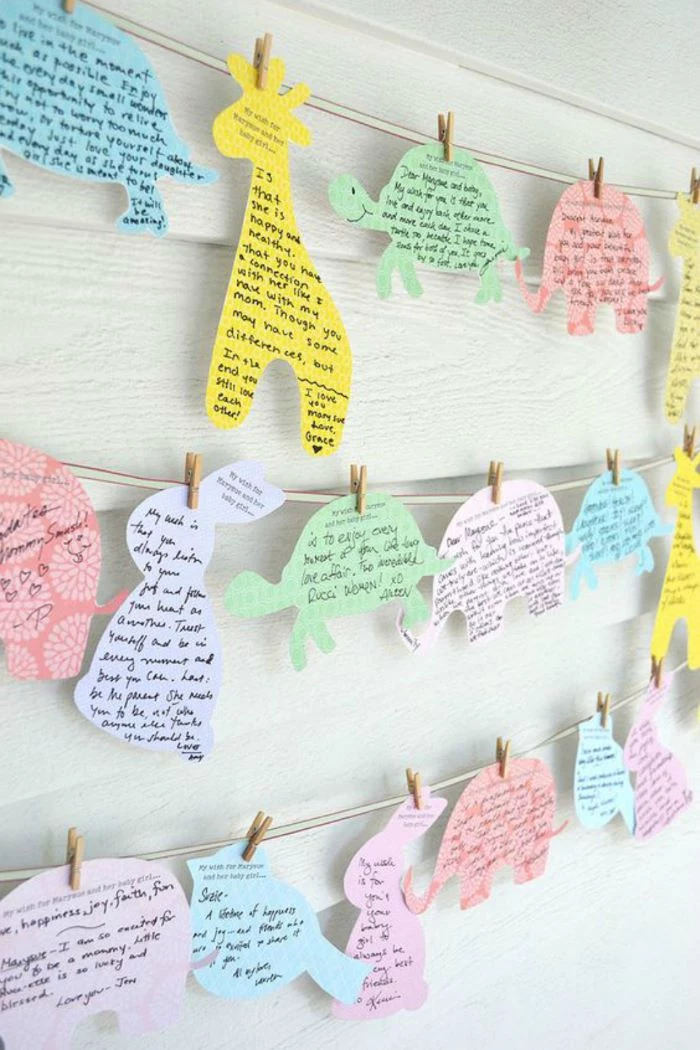
Think about the guest book! Ditch the traditional book for something more decorative. Have guests sign a large wooden letter (the baby’s initial), a vintage-style globe with the message
A baby shower is a celebration of new life; let your decor reflect that. Living elements, like small potted herbs or flowers on the tables, not only look beautiful but can also be given to guests as favors—a gift that continues to grow.