I’ve been designing and building things for events for a long, long time. From massive backdrops for festivals to small, personal touches for family parties, I’ve seen what works and what falls apart. And let’s be honest, the 4th of July is a special kind of celebration. It’s all about community, fireworks, and that classic summer feeling. The decor should match that vibe—it needs to feel honest, well-made, and built to last more than a single afternoon.
So much of the stuff you find in big-box stores is just… flimsy. It’s impersonal, made of cheap plastic, and usually ends up in a trash bag once the last firework has fizzled out. I want to show you a different way. We’re talking about using real materials and solid, time-tested techniques to create pieces you’ll genuinely be proud to bring out year after year. This isn’t just about making crafts; it’s about building traditions.
But before we grab a single tool, a quick and important heads-up about the American flag. The official U.S. Flag Code gives guidelines on how to handle and display the actual flag with respect. While the decorative items we’re making here are just representations, not official flags, it’s good practice to keep that same spirit of respect in mind. We’re using the colors and symbols to honor the occasion, and that’s a great foundation for any project.
The Foundation: Picking Materials That Don’t Quit
The success of any project really starts with your shopping list. Choosing a cheap material guarantees a cheap-looking result, and it almost certainly won’t survive a year packed away in the attic. Understanding the ‘why’ behind each material is what elevates a simple craft into a piece of decor you’ll cherish.
For any fabric projects, like the wreath we’re about to make, my go-to is always 100% cotton. Think cotton bandanas or even a sturdy duck cloth from a fabric store. Why? Because cotton holds its color beautifully in the summer sun, unlike cheap polyester blends that can fade to a sad, washed-out pink in just a few days. Plus, cotton just has a natural, authentic texture. For wreath forms, always grab galvanized steel wire. That zinc coating is your best friend—it stops the wire from rusting after a dewy morning or a surprise rain shower. Use uncoated wire, and I promise you’ll have ugly rust stains bleeding onto your fabric by next year.
And if you’re thinking about working with wood, especially reclaimed pallet wood, safety becomes a huge factor. More on that in a second. When it comes to paint, a little chemistry knowledge goes a long way. For any raw wood that’s going to live outside, you absolutely need an oil-based primer. It seals the wood, blocking moisture that leads to rot. It also prevents tannins (natural oils in woods like cedar) from bleeding through and turning your crisp white paint yellowish. These are the little details the pros learn—often the hard way—that make all the difference.
Heads Up: A Crucial Guide to Pallet Wood Safety
Okay, so you’ve seen those cool pallet flag projects online. They look great, but you can’t just grab any old pallet. Some are treated with seriously toxic chemicals you do not want in your home or yard.
Here’s what to look for. Check the pallet for a stamp or brand. You’re looking for the letters HT, which stands for Heat Treated. This means the wood was baked to kill pests, making it completely safe for projects. The one to run away from is MB, for Methyl Bromide. This is a potent and toxic fumigant. Never, ever use an MB pallet for a home project. If you can’t find a stamp, or if it’s unreadable, it’s better to be safe and just pass on it.
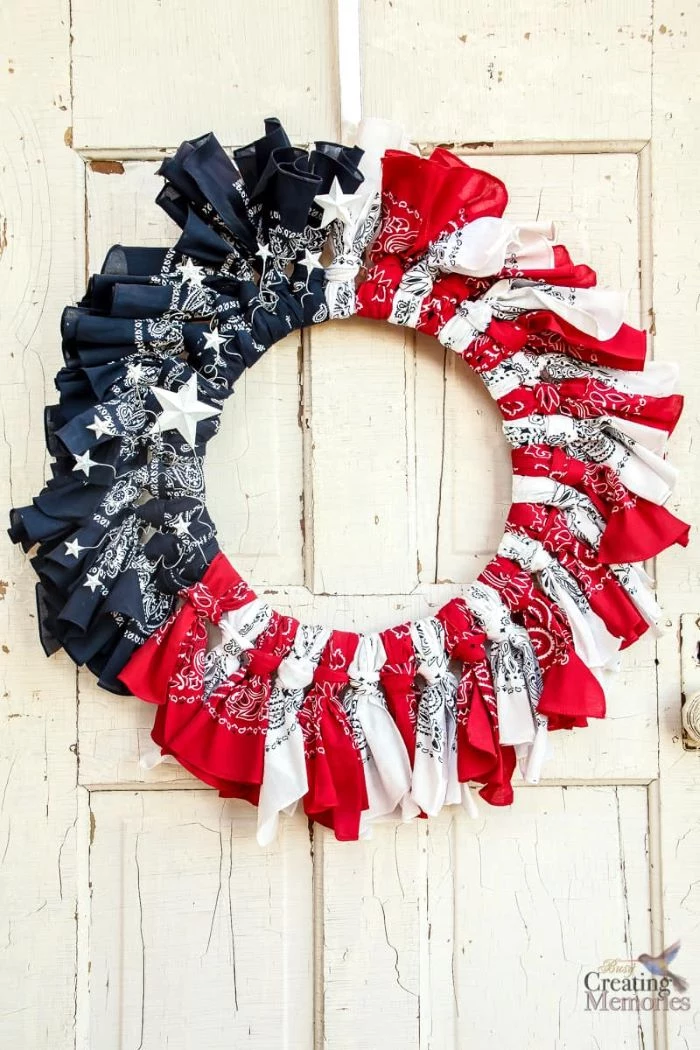
Project 1: The Classic All-American Fabric Wreath
A wreath on the front door is the perfect way to say “welcome.” This fabric wreath is a fantastic project because it’s low on specialized tools but high on charm. Using bandanas is a classic for a reason: they’re cheap, easy to find, and the perfect size.
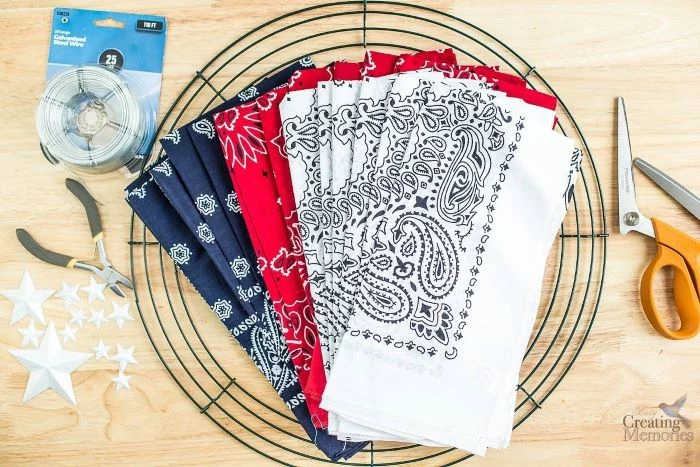
Materials & Tools:
Expect this project to cost between $30 and $45, depending on where you shop. Not bad for a decoration that’ll last a decade, right? You can find all of this at craft stores like Michaels or Jo-Ann; bandanas are often cheapest at Walmart or online.
1 (16-inch) heavy-duty, four-ring wire wreath form
6 red 100% cotton bandanas
6 white 100% cotton bandanas
5 navy blue 100% cotton bandanas
Sharp fabric scissors (or a rotary cutter and mat, which is a huge time-saver)
Optional: Small metal craft stars, a hot glue gun, or thin floral wire
Step 1: Prep That Fabric
First things first, toss those bandanas in the wash. This pre-shrinks the fabric and gets rid of any factory stiffness. Once they’re dry, give them a quick iron. Starting with flat, wrinkle-free fabric makes the whole process smoother.
Now for the cutting. I find that strips about 2 inches wide and 6 inches long are perfect. A rotary cutter will make this step fly by, but sharp scissors work just fine. Here’s the reality check: you’re going to be cutting a LOT of strips. Like, around 500 of them. So, seriously, put on a good podcast or that show you’ve been meaning to binge. Good prep now saves a headache later.
Time-saving trick: If you’re in a hurry and have a little extra budget, look for pre-cut 2.5-inch fabric strips at the fabric store. They’re often sold in rolls (sometimes called ‘Jelly Rolls’) and can save you a solid hour of cutting.
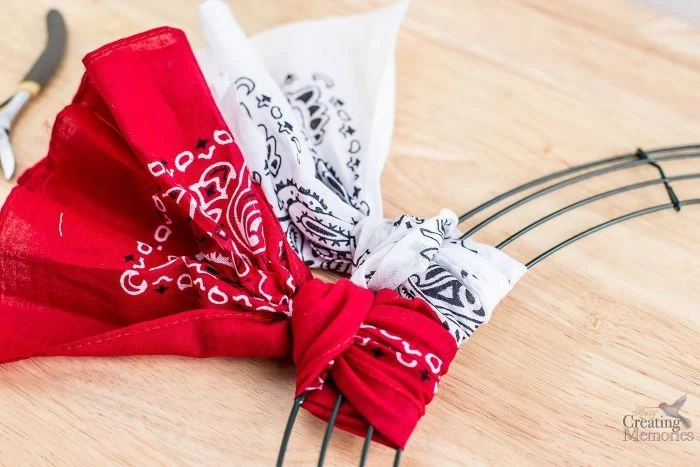
Step 2: The Tying Technique
Here’s a little pro tip for getting that full, lush look. Take one strip of fabric. Place its center over one of the outer wires on the form. Now, loop both ends underneath that wire and pull them up between the two middle wires of the form. Cinch it down tight with a simple, single knot. The real key is to slide each new knot tightly against the last one. Don’t leave any space!
Common Pitfall: A Sparse-Looking Wreath. If your finished wreath looks a bit thin or gappy, it’s because the knots weren’t packed tightly enough. You really have to scrunch them together. No gaps allowed!
Step 3: Building the Pattern
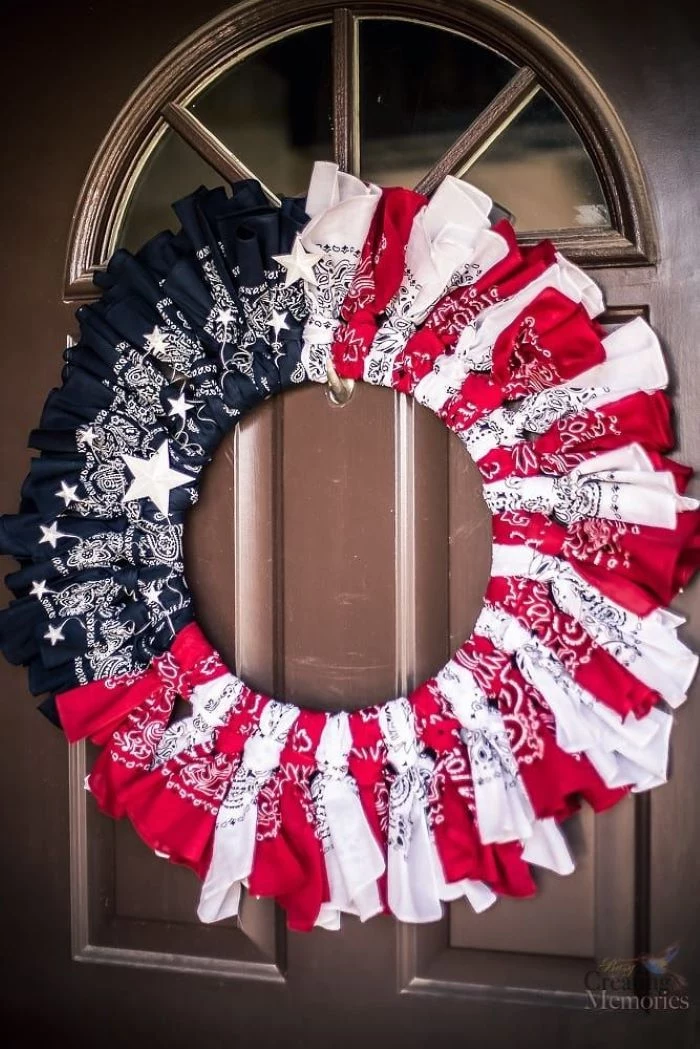
Okay, let’s bring this thing to life. We’re not making an exact flag replica, but we’ll honor the design. A good rule of thumb is to dedicate about two-thirds of the wreath to the red and white stripes and the final third to the blue field.
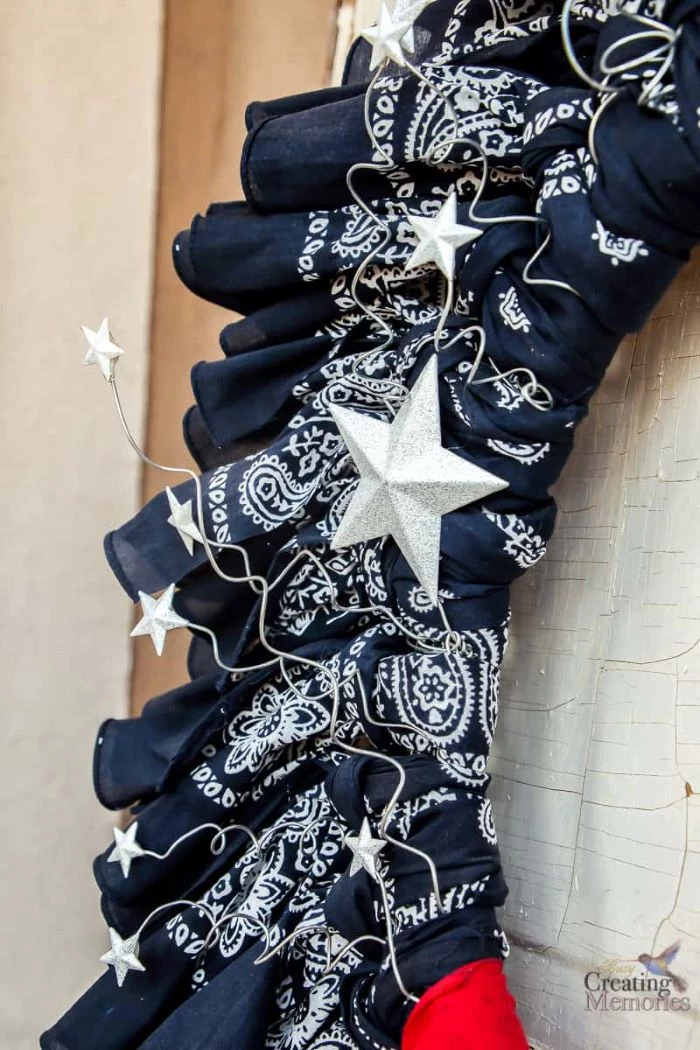
Start with your red and white strips. I like to create distinct blocks of color, so I’ll tie about 5-6 red knots in a row, then 5-6 white knots, and repeat. Continue this alternating red-and-white pattern until you’ve covered about two-thirds of the wreath form. Once that’s done, fill the remaining third of the form completely with your navy blue strips. Remember to keep packing those knots in tightly!
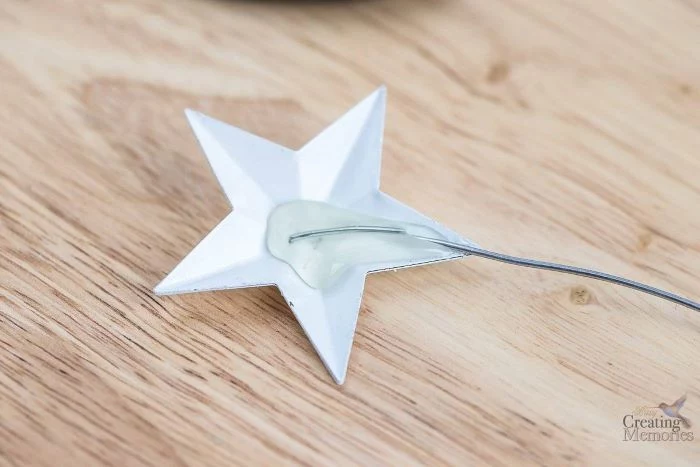
Step 4: Finishing Touches
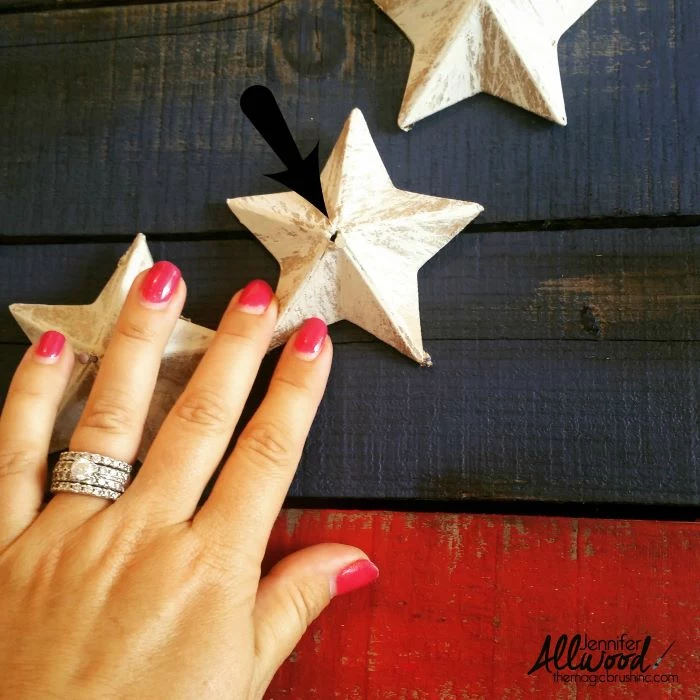
Now for the fun part. The stars! Lay your wreath flat and arrange the small metal stars over the blue section until you like the layout. Then, one by one, put a small dab of hot glue on the back of each star and press it firmly onto one of the blue fabric knots. The fabric gives the glue something great to grab onto.
And that’s it! This project usually takes me about 2 to 3 hours, mostly because of the cutting and tying. But the result is a full, vibrant wreath that you made yourself. Fluff it up, hang it on your door, and get ready for the compliments.
Inspirational Gallery
Spray Paint: Ideal for achieving a smooth, even finish on intricate items like wicker baskets or detailed wood cutouts. Brands like Rust-Oleum 2X Ultra Cover are excellent for coverage and durability.
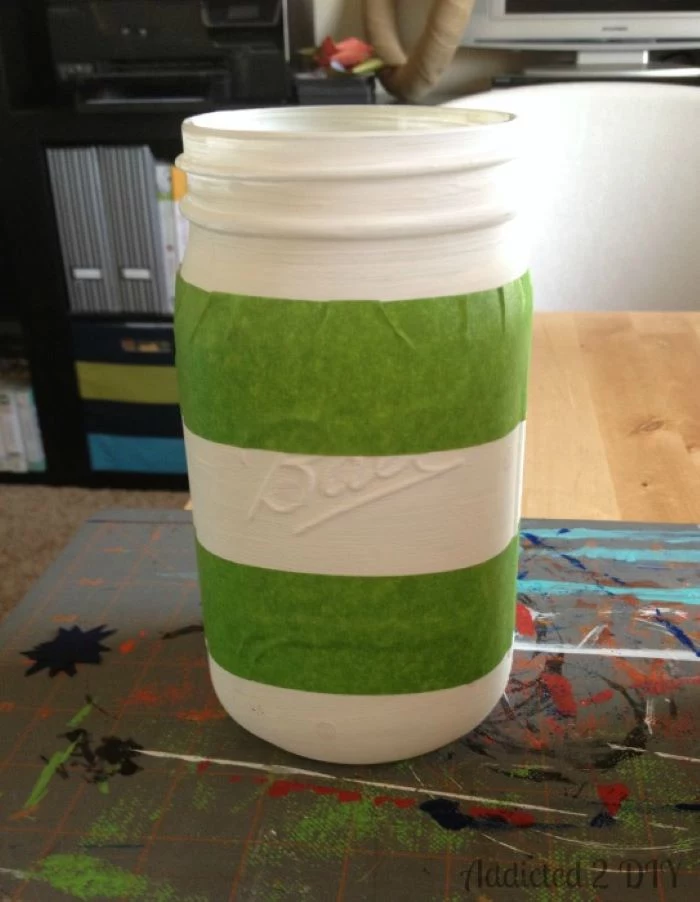
Brush-On Paint: Perfect for a more rustic, handcrafted look on projects like wooden signs or pallet flags. It allows for more control and creating textured effects. A quality exterior latex paint will provide the best weather resistance.
For outdoor longevity, always choose the brush-on exterior option.
The U.S. Environmental Protection Agency estimates that household waste increases by 25% between Thanksgiving and New Year’s Day. By creating reusable holiday decor, you’re not just building traditions—you’re significantly reducing your contribution to landfill waste each year.
How do I prevent my beautiful fabric creations from fading or getting mildewed?
The secret is a post-creation treatment. Once your bandana wreath or fabric banner is complete, give it a light, even coat of Scotchgard Fabric Water Shield. It creates an invisible barrier that repels water and helps block UV rays, drastically reducing sun-bleaching and preventing moisture from settling in. Reapply a light coat at the start of each season to keep it looking fresh.
Protects your hard work from dust and fading.
Prevents crushing or deforming delicate pieces.
Keeps everything organized for next year’s easy setup.
The key? Proper storage. Invest in a sturdy plastic tote. Wrap wooden items in old towels or bubble wrap to prevent chipping, and store fabric wreaths in a large, sealed plastic bag inside the tote to keep them pristine.
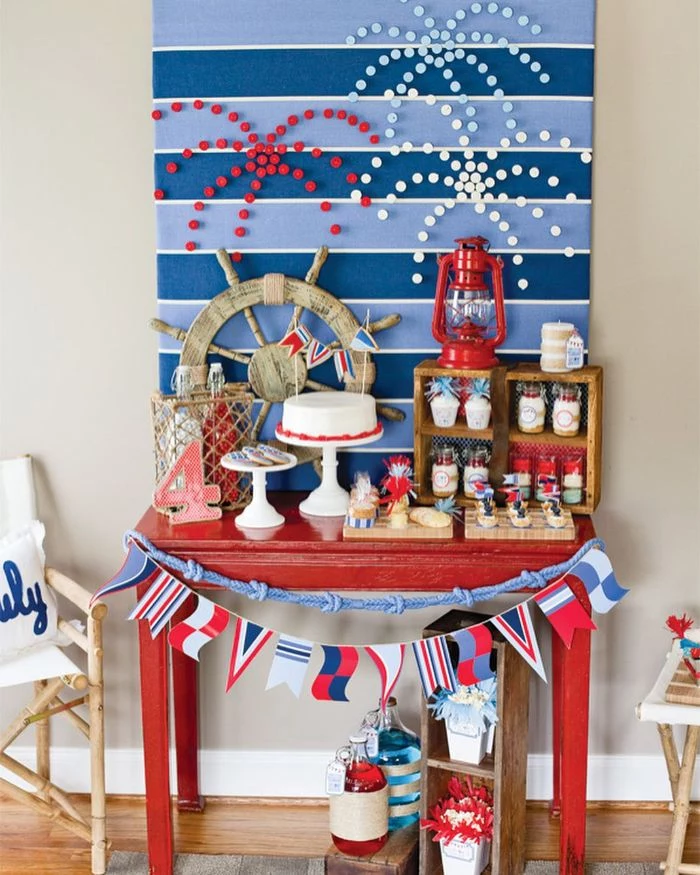
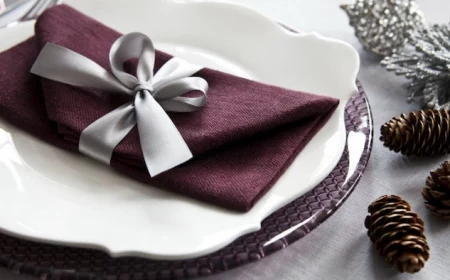
Don’t underestimate the power of natural textures to elevate your patriotic decor. Instead of plastic ribbon, try using jute twine or thick sisal rope to hang signs or wrap around Mason jars. The rustic, earthy feel provides a beautiful contrast to the bold red, white, and blue, making your decorations feel more grounded and timeless.
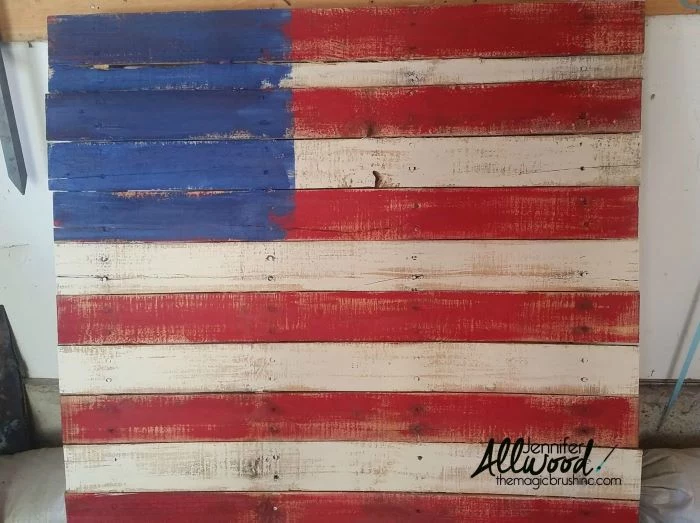
A well-sanded surface is the difference between a craft project and a piece of furniture.
It might seem tedious, but properly sanding your wood pallet or planks before painting is non-negotiable for a lasting finish. Start with a medium-grit sandpaper (around 120-grit) to smooth out splinters and rough spots, then finish with a fine-grit (220-grit) for a silky-smooth surface. This allows the paint to adhere properly without chipping or peeling after one season.
For an elegant, vintage Americana feel, try shifting your color palette slightly. Instead of bright, true red and royal blue, consider these more muted alternatives:
Swap bright red for a deeper barn red or a rich crimson.
Replace royal blue with a classic navy or even a slate blue.
Use an off-white or cream color instead of stark white for a softer, aged look.
Common Mistake: Using indoor craft glue for outdoor decorations. A single dewy morning or unexpected rain shower can cause your entire project to fall apart. Always opt for a waterproof, heavy-duty adhesive like Gorilla Glue or E6000 for any pieces that will be exposed to the elements. It’s a simple swap that guarantees longevity.
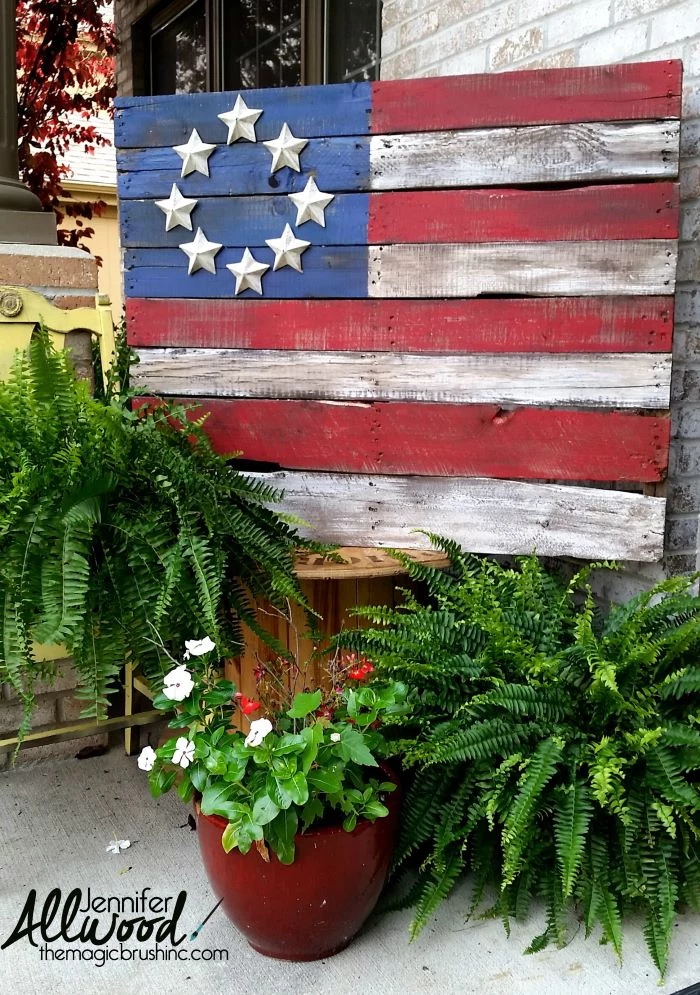
Looking for wood that can brave the outdoors? Cedar is your best bet. It’s naturally resistant to rot and insects, meaning your wooden flag or porch sign will last for years without needing heavy chemical treatments. While more expensive than pine upfront, its durability makes it a worthwhile investment for a piece you’ll treasure.
The original 13-star
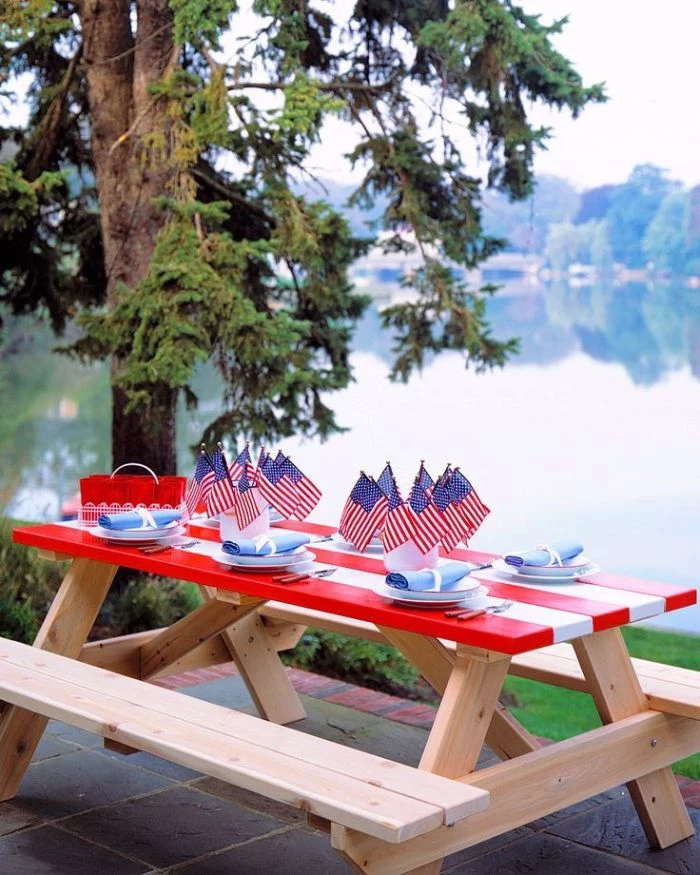
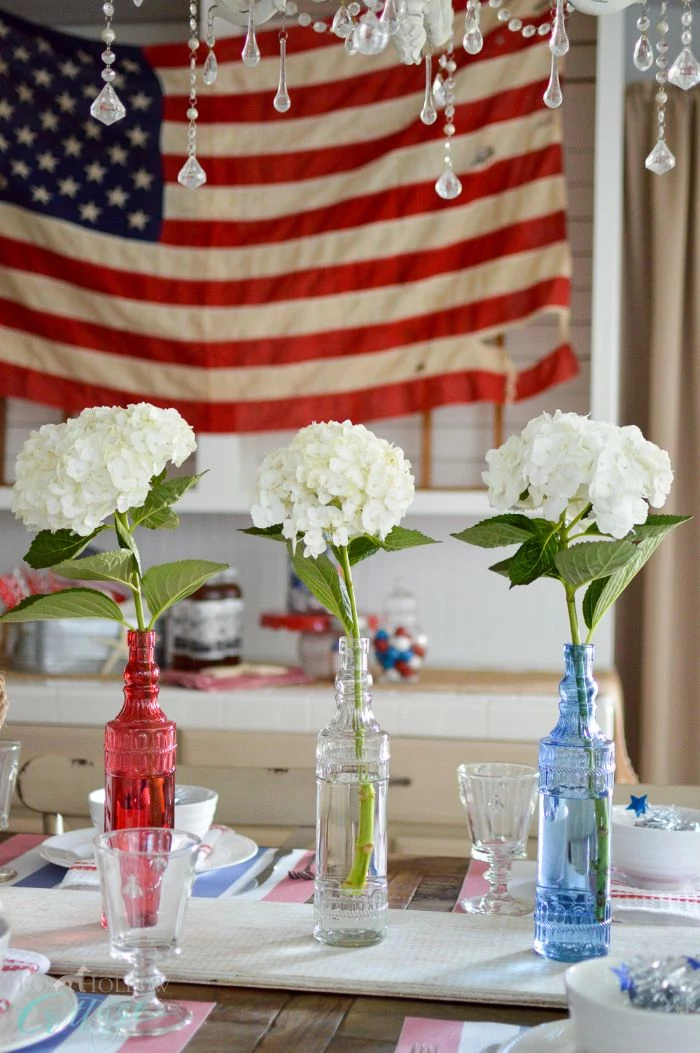
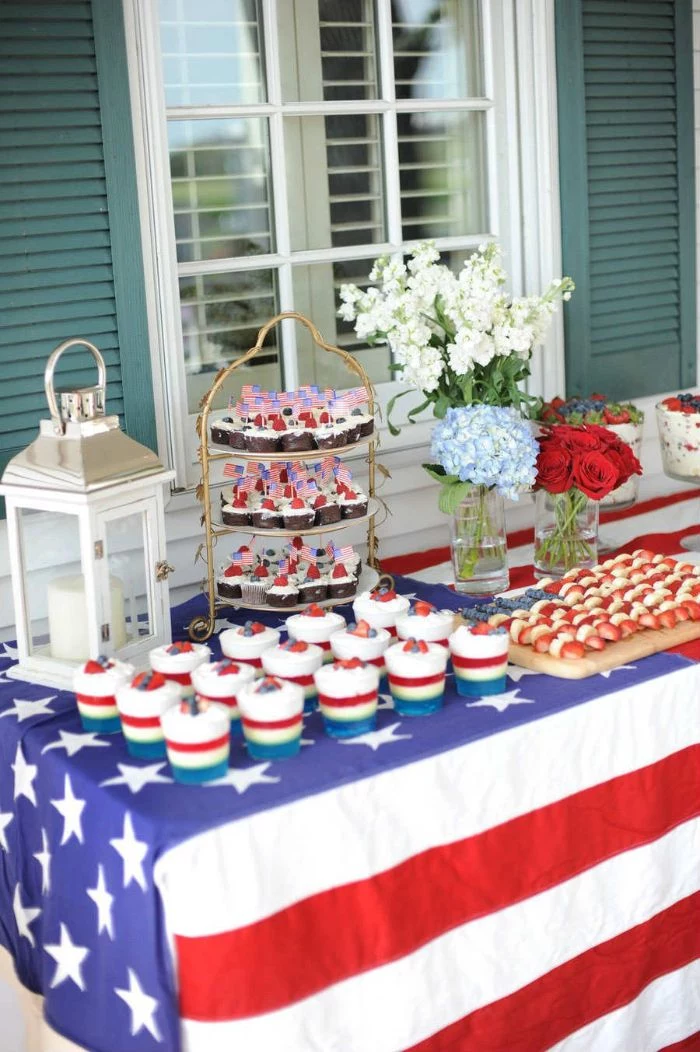
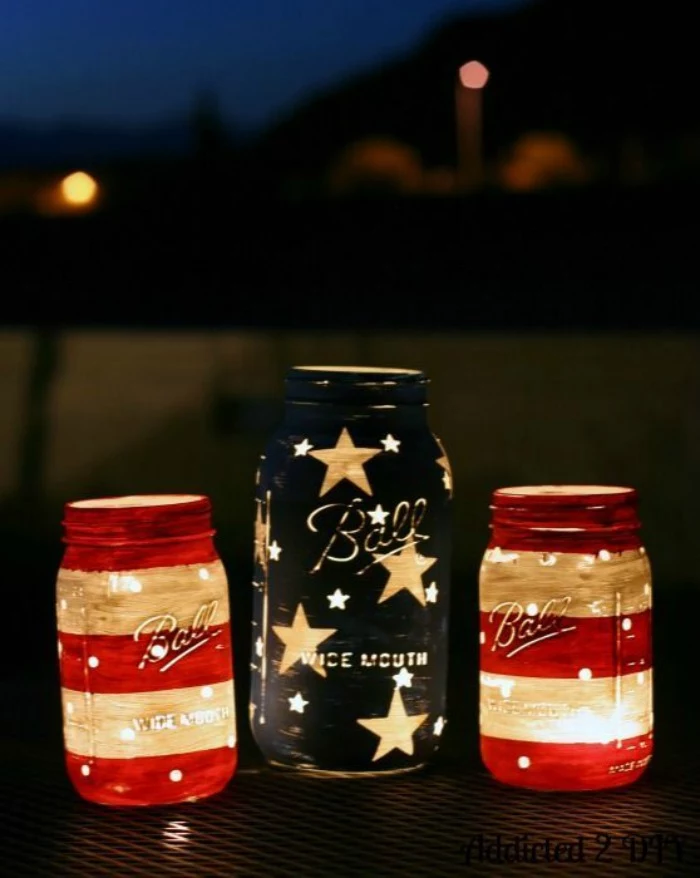
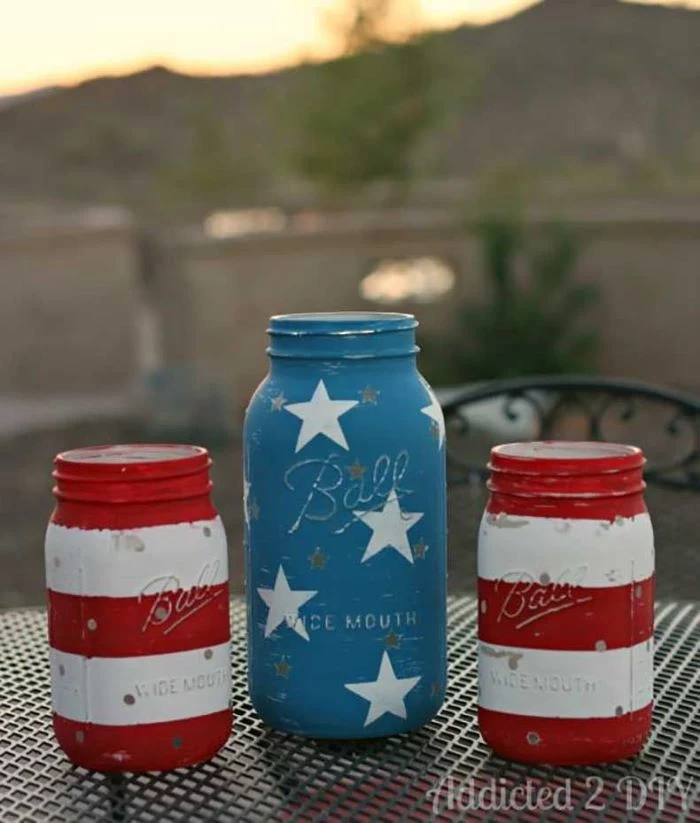
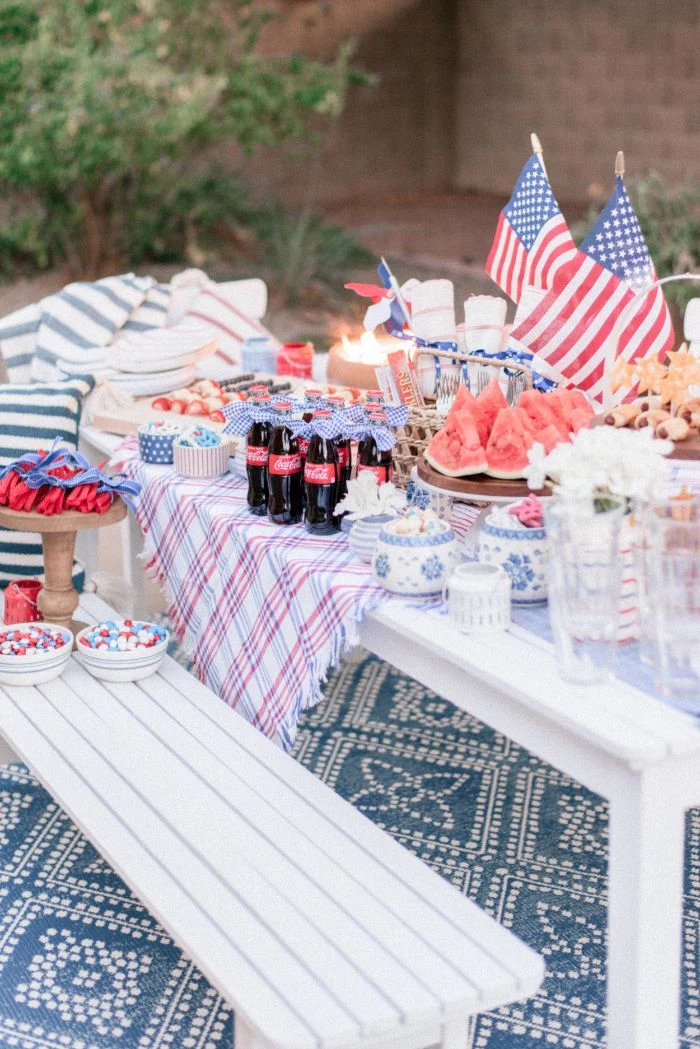
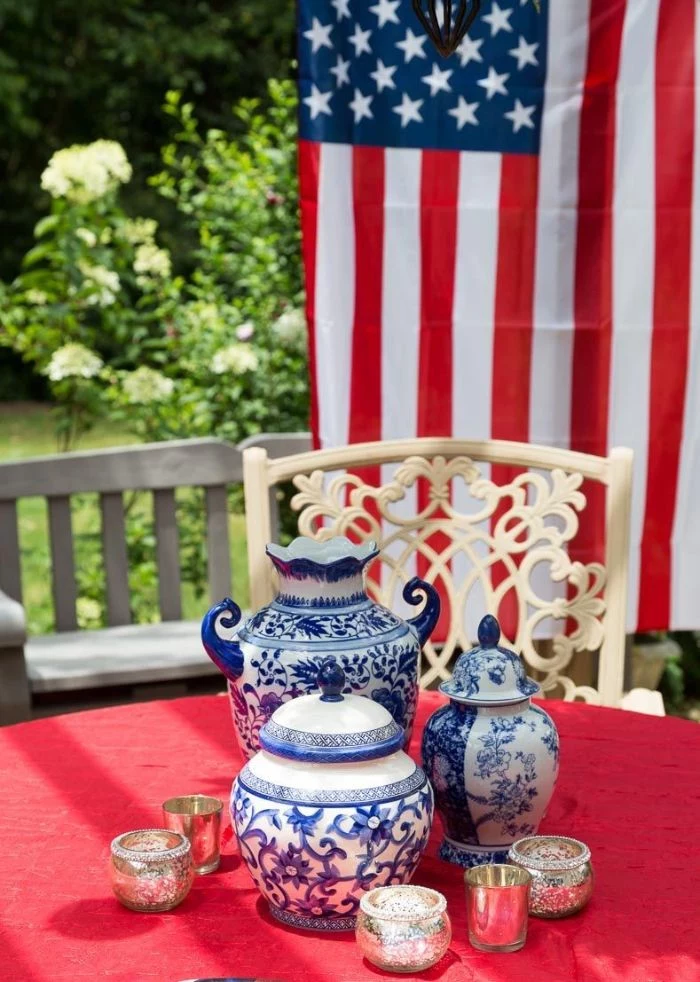
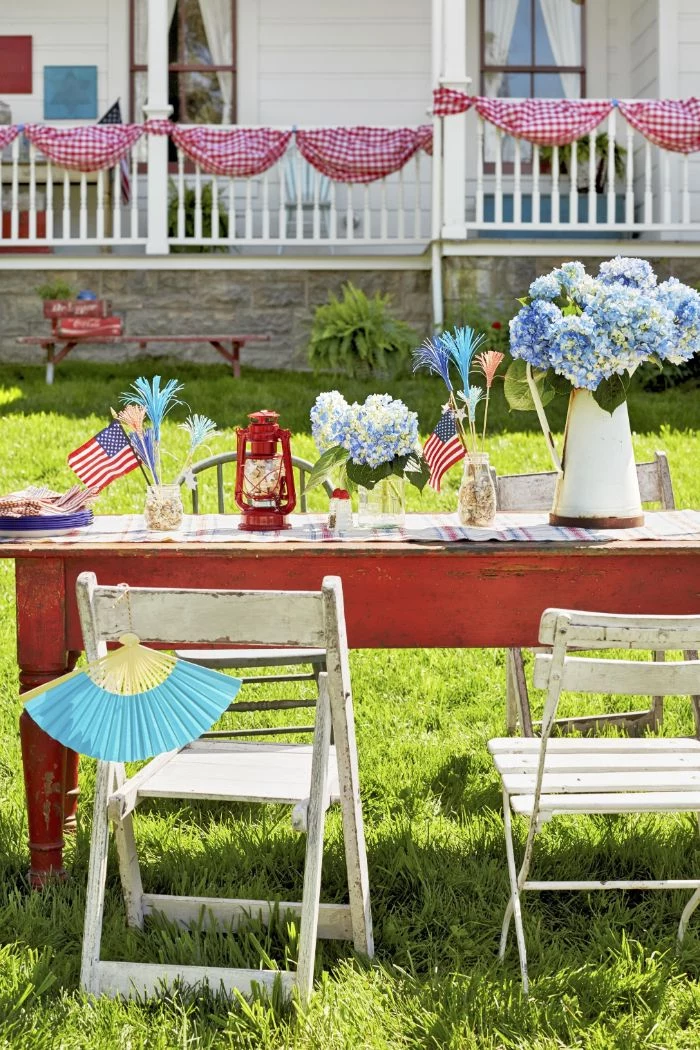
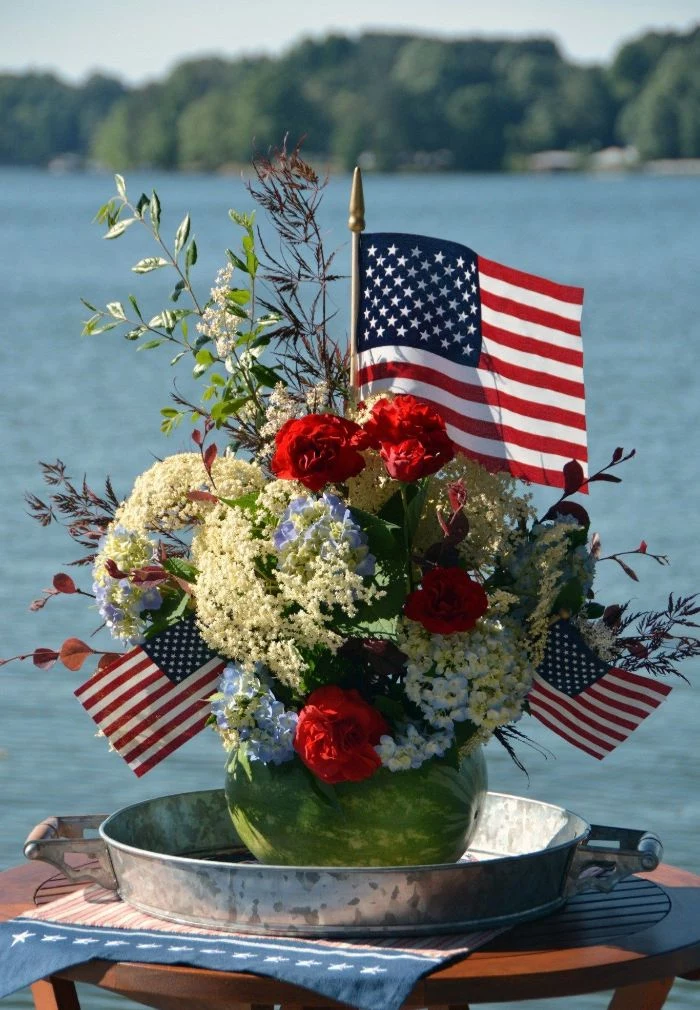
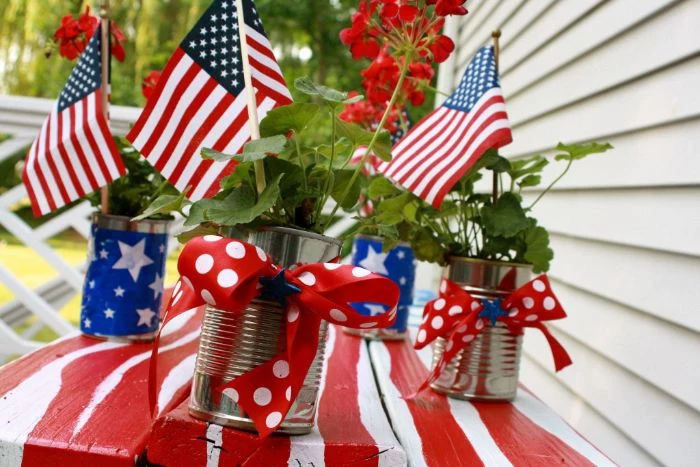
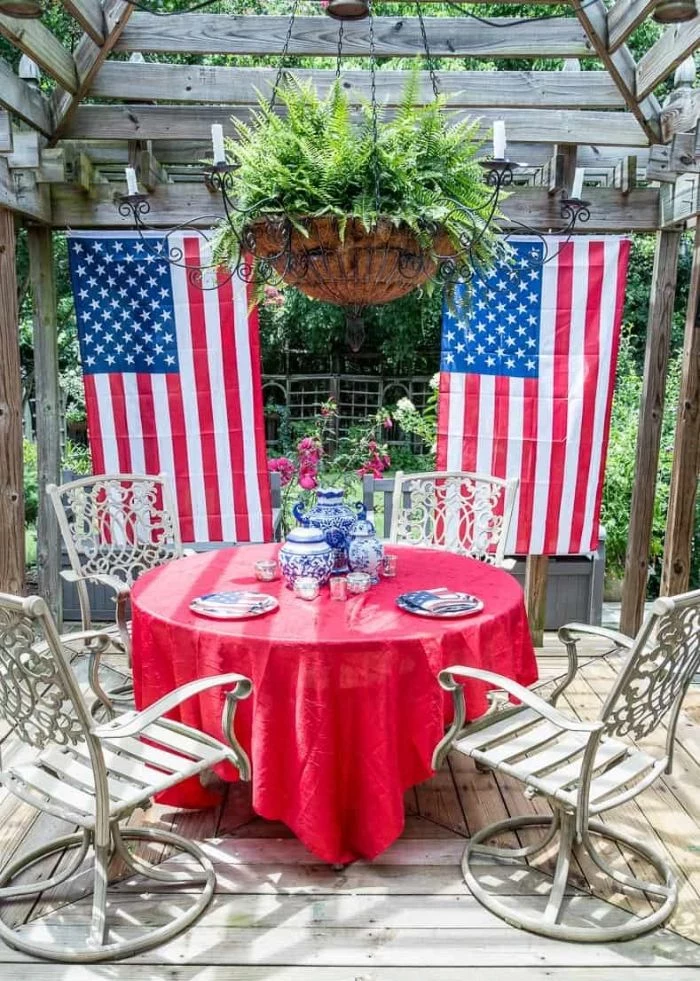
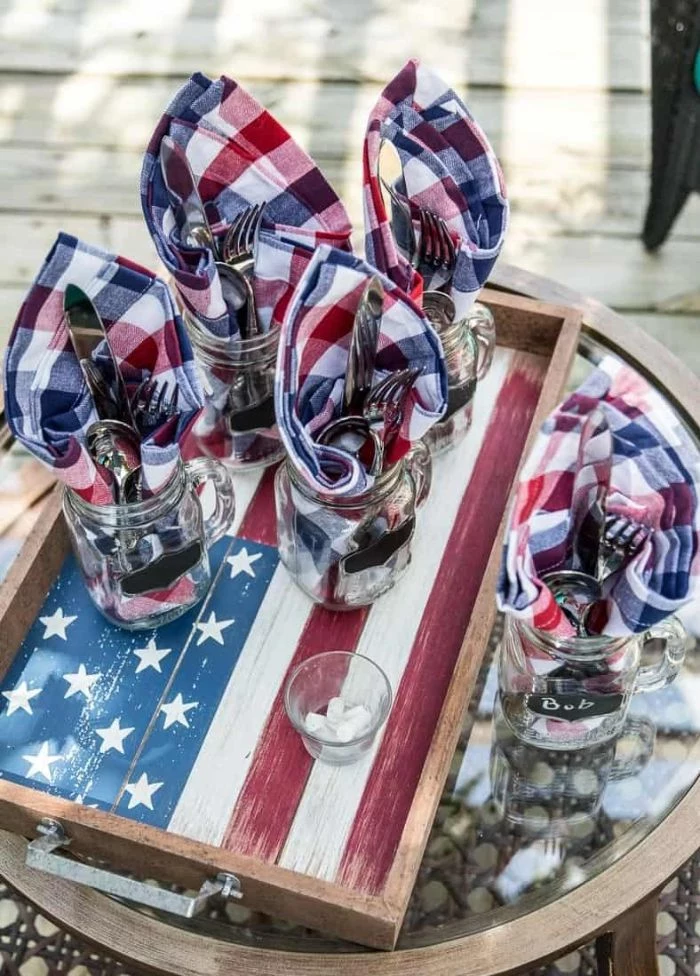
Create a stunning, layered centerpiece for your table. Start with a simple navy blue or red-and-white striped table runner. Then, place a few of your painted Mason jars (using the classic Ball brand jars gives an authentic feel) at varying heights. Fill them not just with candles, but with fresh-cut white hydrangeas or a mix of red and white carnations for a touch of living color.
Use old blue jeans to create denim stars.
Cut strips from old red and white t-shirts for a fabric garland.
Paint discarded wine bottles instead of buying new vases.
The most authentic materials are often the ones you already own. Upcycling adds a layer of personal history to your decor and is the ultimate tribute to resourcefulness.
Want to give your painted wood sign an instant ‘aged’ look?
After your paint has fully dried, apply a thin layer of a dark finishing wax, like Minwax Paste Finishing Wax in Special Dark. Rub it on with a clean cloth, paying extra attention to the edges and corners. Before it dries, wipe off the excess. The wax will settle into the wood grain and crevices, creating a beautiful, time-worn patina.
A Kid-Friendly Project: Lawn Stars. Get large, flat pieces of cardboard and help your kids draw and cut out star shapes of various sizes. On the 4th, lay the stencils on the lawn and use a can of red or white marking spray paint (the kind used for sports fields, which is non-toxic and temporary) to create a festive, starry yard that washes away with the next mowing.
Don’t forget the power of light. Weaving a string of warm-white, outdoor-rated LED fairy lights around your door wreath or along your porch railing adds a magical glow as dusk falls. Unlike old incandescent bulbs, LEDs stay cool to the touch, making them perfectly safe to pair with fabric and wood decorations.
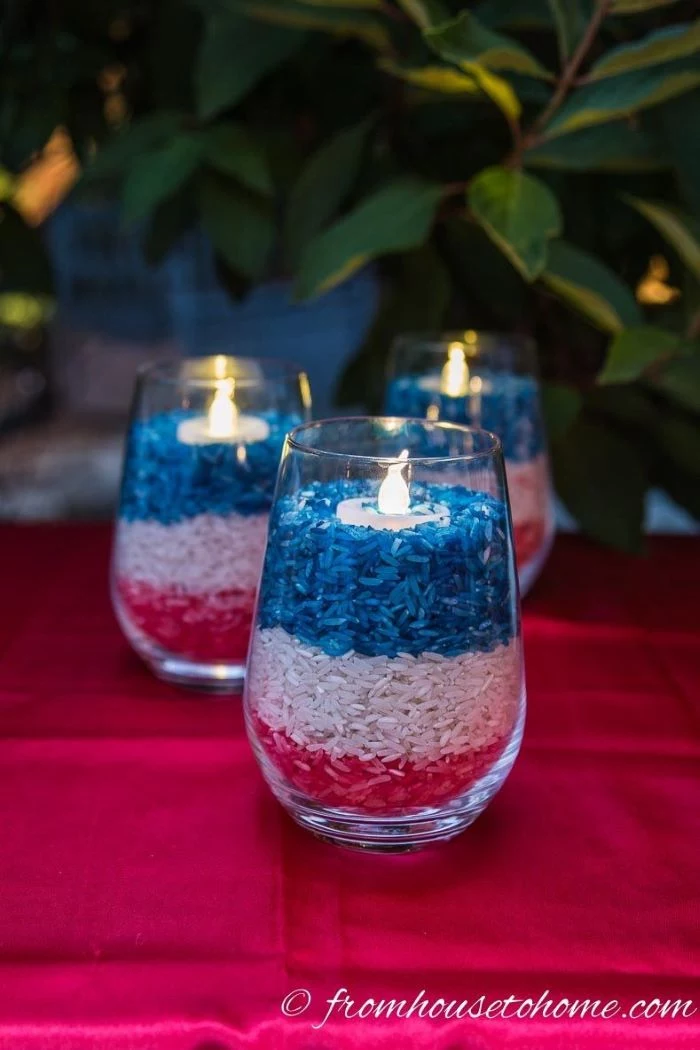
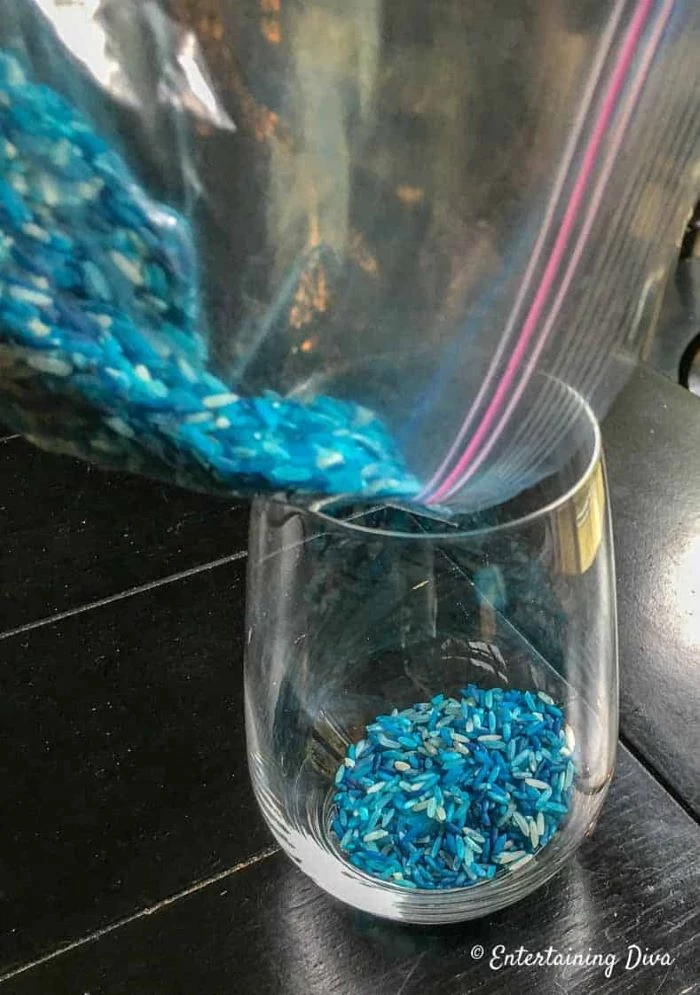
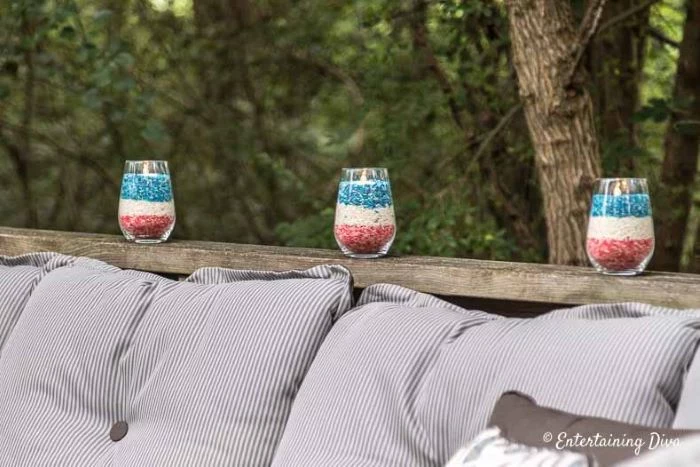
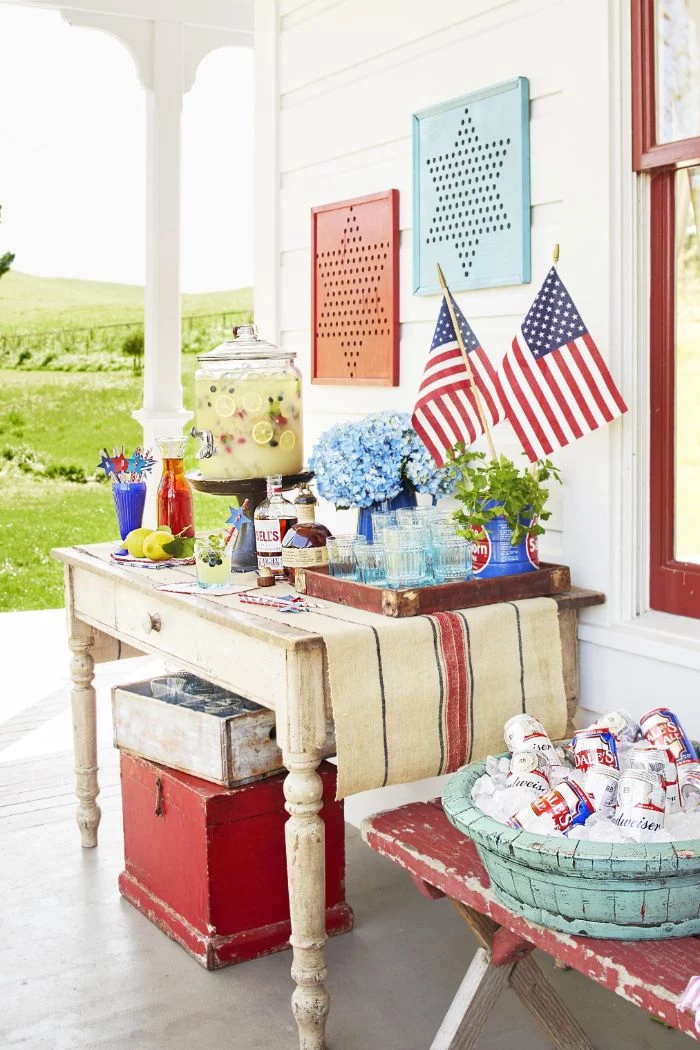
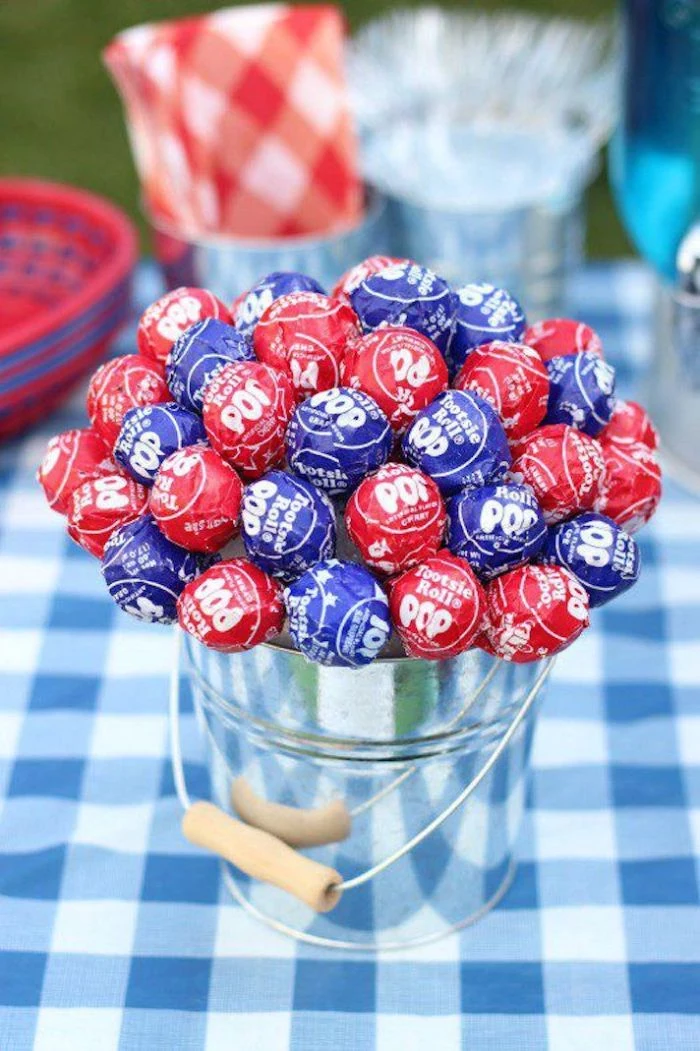
For a quick, 5-minute decoration: Fill a large glass vase or jar with layers of red, white, and blue items. Think simple and textural. Start with a layer of navy blue dried beans, then a layer of white stones or sand, and top with red decorative apples or cranberries. It’s instant, effortless, and surprisingly chic.
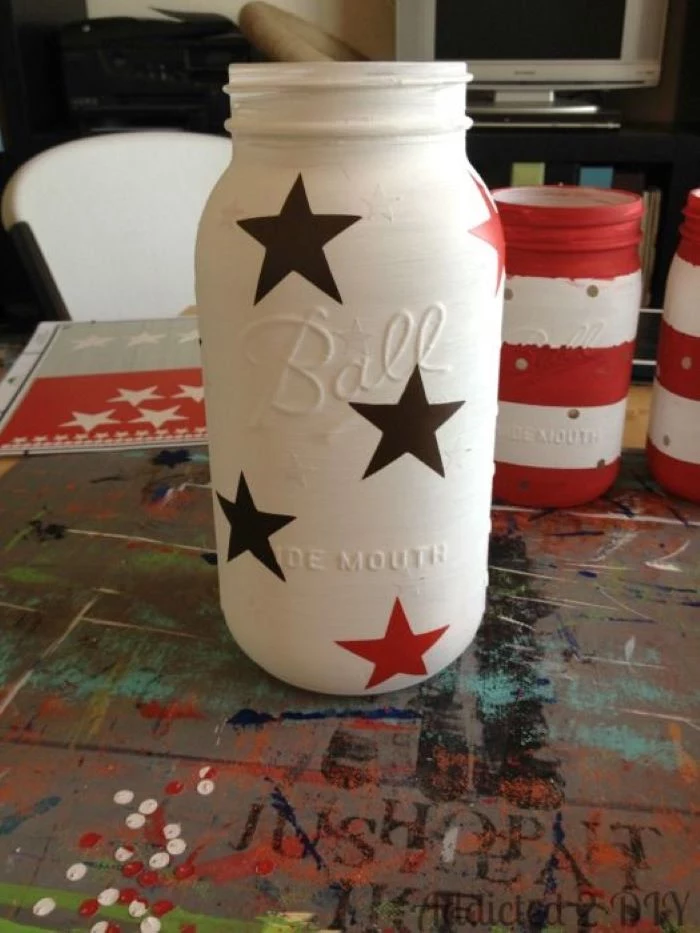
To ensure your stars on a wooden flag project look crisp and uniform, don’t try to paint them freehand. Instead, use a star-shaped craft punch on a sheet of stencil vinyl or even sturdy painter’s tape. Adhere your ‘negative’ stencil to the wood, press the edges down firmly, and then paint. Peel it off for perfectly sharp stars every time.
Outdoor Durability: If your decor will live on an exposed porch or in the yard, you need to seal it. A clear, non-yellowing polyurethane sealant is essential.
Matte vs. Glossy: Choose a matte or satin finish spray, like Krylon’s UV-Resistant Clear, to maintain a natural, rustic look. A glossy finish can sometimes make handmade items look plastic and cheap.
A couple of light coats of a matte sealant will protect your work without sacrificing its handcrafted charm.
The smell of citronella candles warding off mosquitos.
The smoky aroma from the barbecue.
The fresh scent of cut grass and blooming summer flowers.
Atmosphere is more than just visuals. These iconic summer scents are the sensory backdrop to the 4th of July. Lean into them—they’ll make your well-decorated space feel even more immersive and memorable.
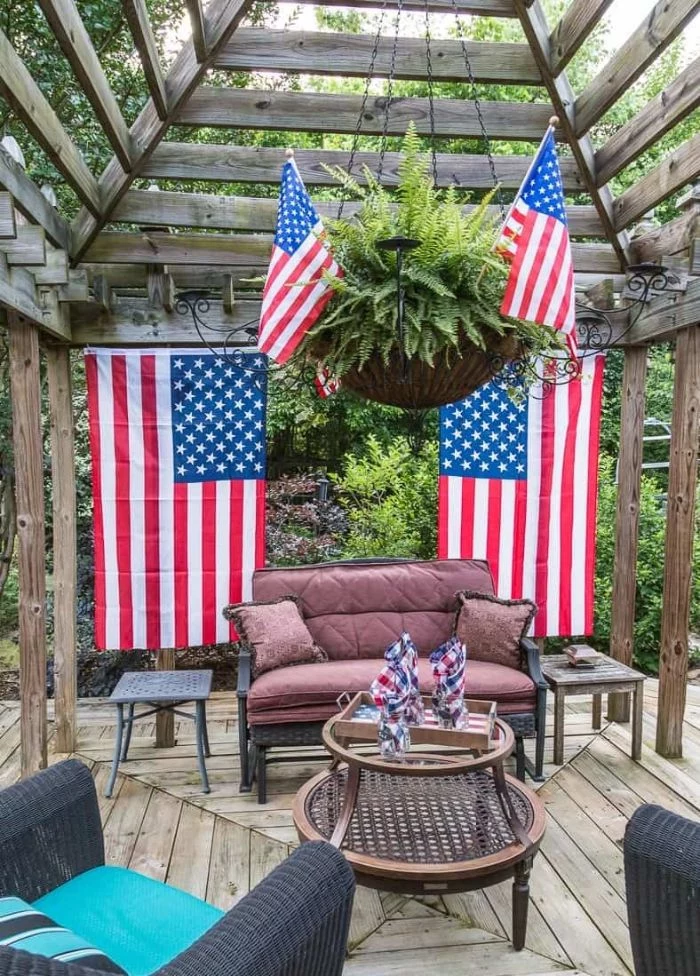
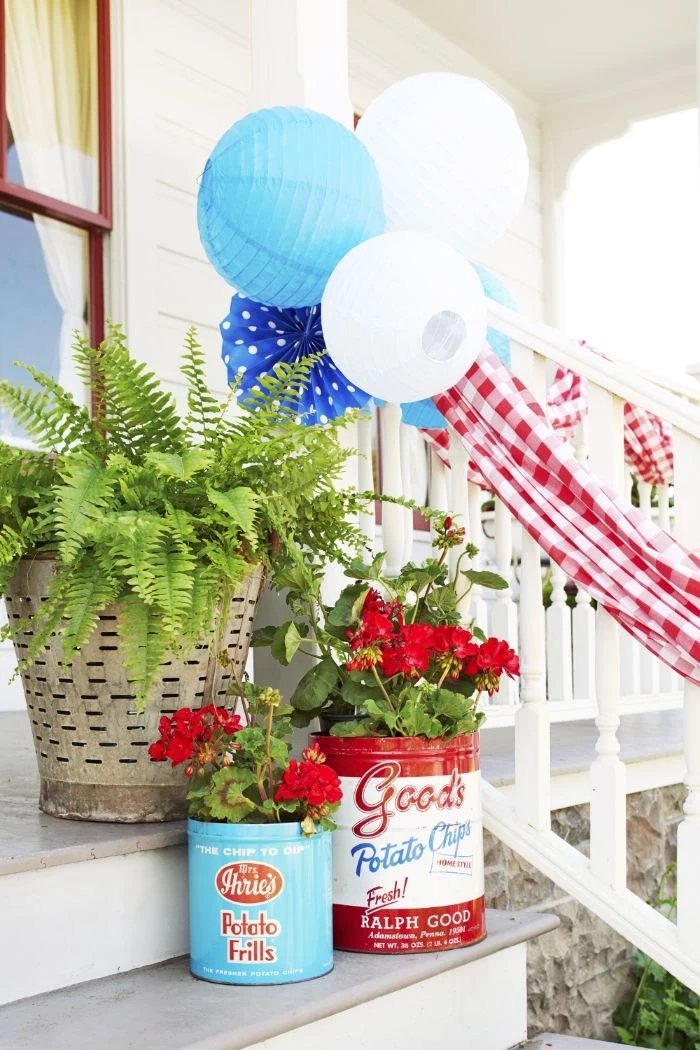
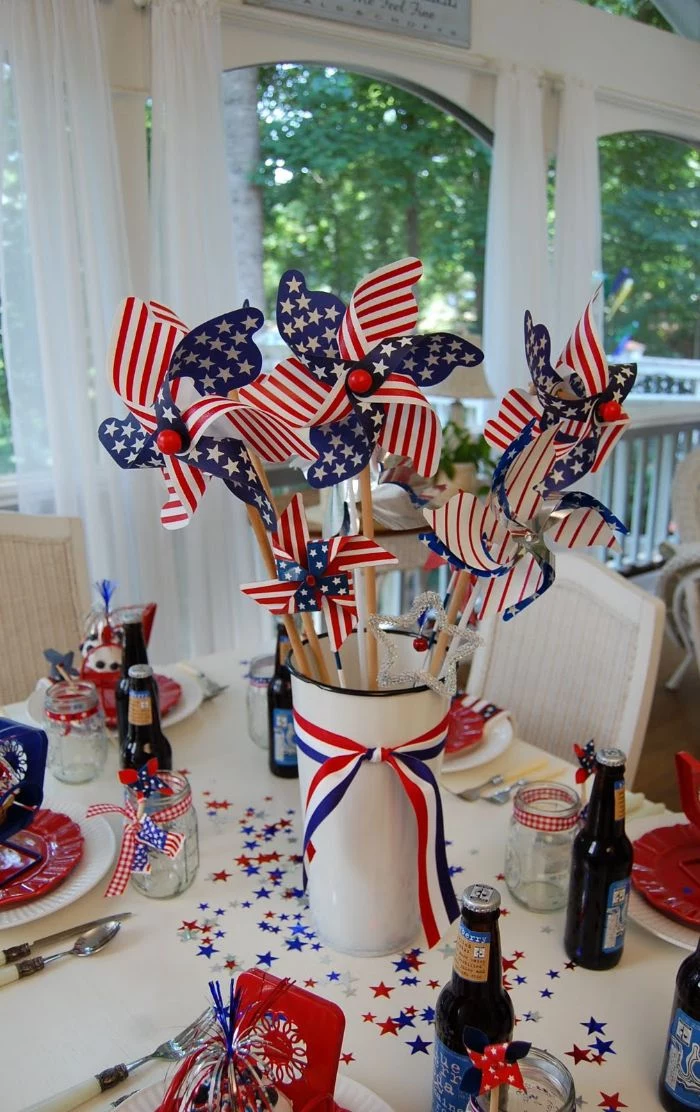
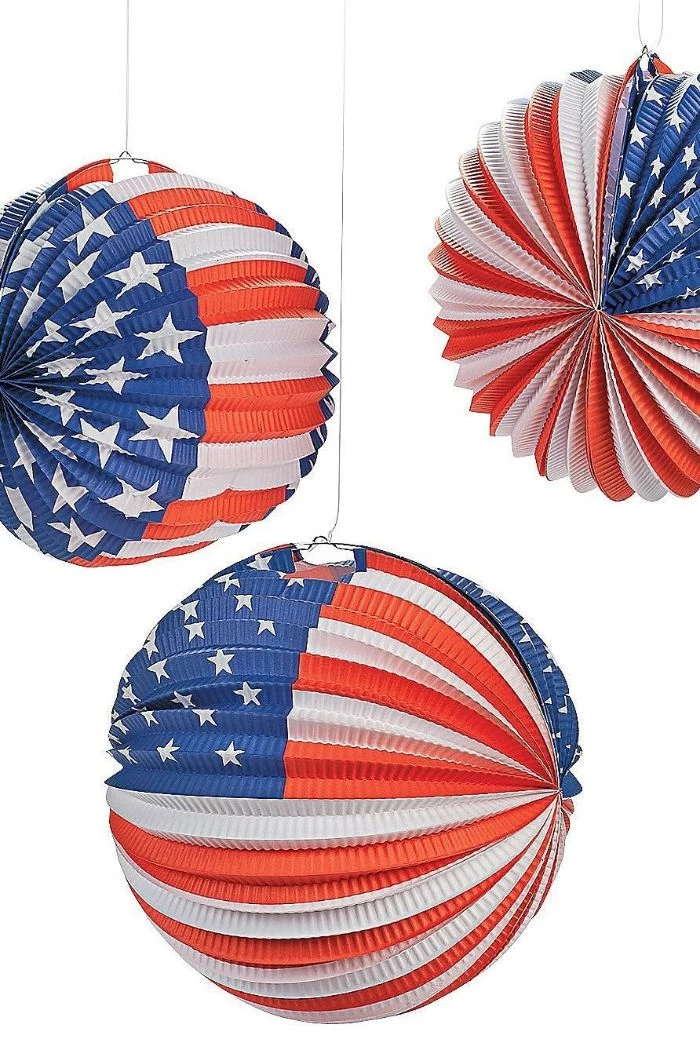
When planning your decor, think in threes. A cluster of three painted Mason jars, a trio of small flags in a planter, or three hanging paper lanterns creates a more visually appealing and balanced arrangement than a single object or an even-numbered group. It’s a fundamental rule of design that works wonders for holiday decorating.
Looking for the perfect fabric for outdoor banners or pillows?
Head to the fabric store and look for Sunbrella brand fabric. It’s a solution-dyed acrylic originally designed for marine and awning use, meaning it’s inherently water-resistant, mold-resistant, and engineered to resist fading from harsh UV exposure. It’s a significant step up from cotton for projects that need to endure the elements all summer long.
Fact: A standard U.S. flag’s canton (the blue field) should technically extend down to the lower edge of the seventh red stripe.
While you’re not making an official flag, keeping these proportions in mind for projects like a pallet flag can make your creation look more authentic and intentional. A quick search for ‘official US flag proportions’ will give you a simple guide to follow.
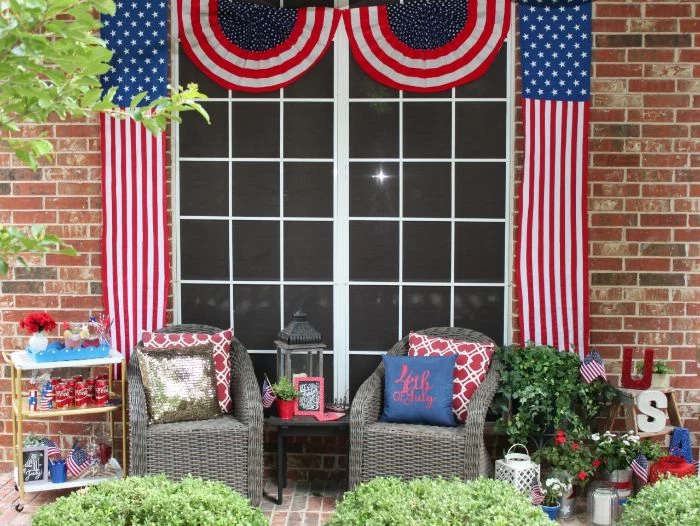
A common pitfall: Making everything red, white, and blue. This can quickly overwhelm a space. The key is to use a neutral base. Let the natural wood of your deck, the green of your lawn, and the color of your house be the main backdrop. Then, add your patriotic pieces as thoughtful accents. This allows your handcrafted items to truly shine without creating visual chaos.
Instead of a traditional wreath, consider a door hanging with a more linear shape. Take three or four lengths of reclaimed wood lath or yardsticks. Paint them in your muted red, cream, and navy palette. Once dry, drill small holes in each end and connect them vertically with rustic jute twine, leaving a few inches between each plank. It’s a modern, minimalist take on patriotic door decor that is simple to make and store.
John combines 12 years of experience in event planning, interior styling, and lifestyle curation. With a degree in Visual Arts from California Institute of the Arts and certifications in event design, he has styled luxury weddings, corporate events, and celebrity celebrations. John believes in creating memorable experiences through innovative design and attention to detail.
To provide the best experiences, we use technologies like cookies to store and/or access device information. Consenting to these technologies will allow us to process data such as browsing behavior or unique IDs on this site. Not consenting or withdrawing consent, may adversely affect certain features and functions.
Functional
Always active
The technical storage or access is strictly necessary for the legitimate purpose of enabling the use of a specific service explicitly requested by the subscriber or user, or for the sole purpose of carrying out the transmission of a communication over an electronic communications network.
Preferences
The technical storage or access is necessary for the legitimate purpose of storing preferences that are not requested by the subscriber or user.
Statistics
The technical storage or access that is used exclusively for statistical purposes.The technical storage or access that is used exclusively for anonymous statistical purposes. Without a subpoena, voluntary compliance on the part of your Internet Service Provider, or additional records from a third party, information stored or retrieved for this purpose alone cannot usually be used to identify you.
Marketing
The technical storage or access is required to create user profiles to send advertising, or to track the user on a website or across several websites for similar marketing purposes.