DIY Holiday Magic: Your Guide to Crafting with a 3D Pen
I’ve spent countless hours with all sorts of digital fabrication tools, from giant 3D printers to high-powered laser cutters. And yet, I always find myself coming back to the humble 3D pen. There’s something so direct and honest about it—a straight line from your hand to a physical object. The first time I used one, I thought it was just a gimmick. It wasn’t until I started using it for quick repairs and model mockups that I truly grasped its power. Now, I love helping other crafters get past those initial shaky scribbles to create some genuinely impressive stuff.
In this article
- First Things First: Is This an Expensive Hobby?
- How Does This Thing Actually Work?
- Pro-Tips for Clean, Strong Projects
- Project 1: Delicate Snowflakes
- Project 2: Layered 3D Tree Ornament
- Before Our Last Project: How to Switch Colors
- Project 3: Stained-Glass Ornaments
- A Quick Word on Safety
- Inspirational Gallery
The holidays are, without a doubt, the perfect time to fire up a 3D pen. You can create custom decorations that have a personal story, something you’ll never find in a big-box store. This guide is built on my own journey, full of the mistakes I’ve made and the tricks I’ve picked up along the way. We’re going to go beyond the basics to really understand the tool, the materials, and the techniques that will make your projects look sharp and last for years.
First Things First: Is This an Expensive Hobby?
Let’s get this out of the way. Is a 3D pen a huge investment? Honestly, not at all! That’s the beauty of it. You can get a fantastic starter setup for less than a fancy dinner out. Here’s a realistic shopping list:
- A Good Beginner 3D Pen: Expect to pay between $40 and $70 for a reliable model. Look for ones that have adjustable temperature and speed settings.
- PLA Filament: A multi-color pack of PLA, the most common type of plastic, usually runs about $15 to $20 online. This will be enough for dozens of ornaments.
- Silicone Mat: A simple silicone baking mat from a place like Target or Walmart is perfect. It protects your table and the plastic peels right off. Maybe $10.
- Small Craft Clippers: For trimming little plastic bits. You can get a pair for about $5 at any craft store or online.
So, for around $75, you can have everything you need to get started. It’s one of the most accessible ways to get into 3D creation.
How Does This Thing Actually Work?
A 3D pen is basically the magic wand of a 3D printer. It’s not sorcery, just some clever, simple engineering. Inside the pen, a little motor grabs a long strand of plastic (called filament) and feeds it into a heating chamber. This “hot end” melts the plastic to a precise temperature. The gooey plastic is then pushed out through a tiny nozzle, where it cools and hardens almost instantly. Understanding that simple process—melt, extrude, cool—is the secret to getting the pen to do what you want.
The two buttons you’ll care about most are temperature and speed. They’re a team. If you want to draw faster, you need a higher temperature to melt the plastic quickly enough. If you’re working slowly on tiny details, you can use a lower temperature. Nailing that balance is your first big step toward making cool stuff.
Choosing Your Plastic: PLA vs. PETG
The filament is your pen’s “ink.” Most pens today use a standard 1.75mm diameter filament—using the wrong size will jam your pen, so just double-check your model’s specs before you buy. For holiday crafts, we mostly stick to two main types.
My go-to recommendation for almost any decorative project is PLA (Polylactic Acid). It’s a plant-based plastic that’s super easy to work with and very forgiving for beginners.
- Why it’s great: PLA melts at a lower temperature (around 180-220°C), which means it’s less likely to warp as it cools. This is a lifesaver for getting flat, crisp shapes. It barely has a smell, maybe a little sweet and waxy, but cracking a window is always a good idea.
- The downside: It’s strong but also a bit brittle. If you drop a delicate PLA snowflake on a tile floor, it might snap. It’s also sensitive to high heat, so don’t leave your creations in a hot car during the summer. But for Christmas decorations that live in a box most of the year? It’s perfect.
- Use it for: Detailed ornaments, snowflakes, anything with sharp corners or fine lines.
Then you have PETG (Polyethylene Terephthalate Glycol), which is like PLA’s tougher cousin. Think of it as a step up in durability.
- Why it’s great: PETG is more durable, more heat-resistant, and has a little bit of flex, making it less likely to snap. The parts you ‘weld’ together will be incredibly strong. Plus, it comes in gorgeous translucent colors that are absolutely perfect for a stained-glass effect.
- The downside: It needs higher temperatures (usually 220-245°C) and can be a little stickier or “stringier” to work with than PLA.
- Use it for: Things that might get handled a lot like gift tags, or any project where you want that see-through, jewel-toned look.
Heads up! You’ll see another plastic called ABS out there. I’d recommend avoiding it for home crafting. It’s very strong, but it needs really high heat and gives off some pretty strong fumes that you don’t want in your living room without serious ventilation. Start with PLA, then maybe grab some PETG to experiment with once you’ve got the hang of things.
Pro-Tips for Clean, Strong Projects
Going from wobbly messes to clean, sturdy objects is all about technique. I always use a silicone mat to work on. I learned this the hard way after the hot nozzle of my pen left a permanent little divot in my dining room table. The plastic just peels right off the silicone. Good lighting is also a must!
- Drawing on a Surface: This is skill number one. For smooth, clean lines, rest the pen’s nozzle lightly on your mat. Try to move with your whole arm for long lines, not just your wrist. Use a slower speed setting for more control.
- Drawing in the Air: This is what makes the pen feel so magical! To draw a line upwards, start by extruding a small anchor blob on your surface. Then, lift the pen steadily into the air. The plastic will stretch and cool as you go. Move to your second anchor point, press the nozzle down to connect it, and hold for a second. If you move too fast, the strand will be weak; too slow, and it will droop. It takes a little practice.
- Welding Parts Together: You can make complex 3D shapes by drawing flat pieces and then joining them. Just hold the two pieces together and run the hot tip of the pen along the seam. You can do this without even extruding plastic to subtly melt them together, or add a thin bead of filament for a super-strong bond.
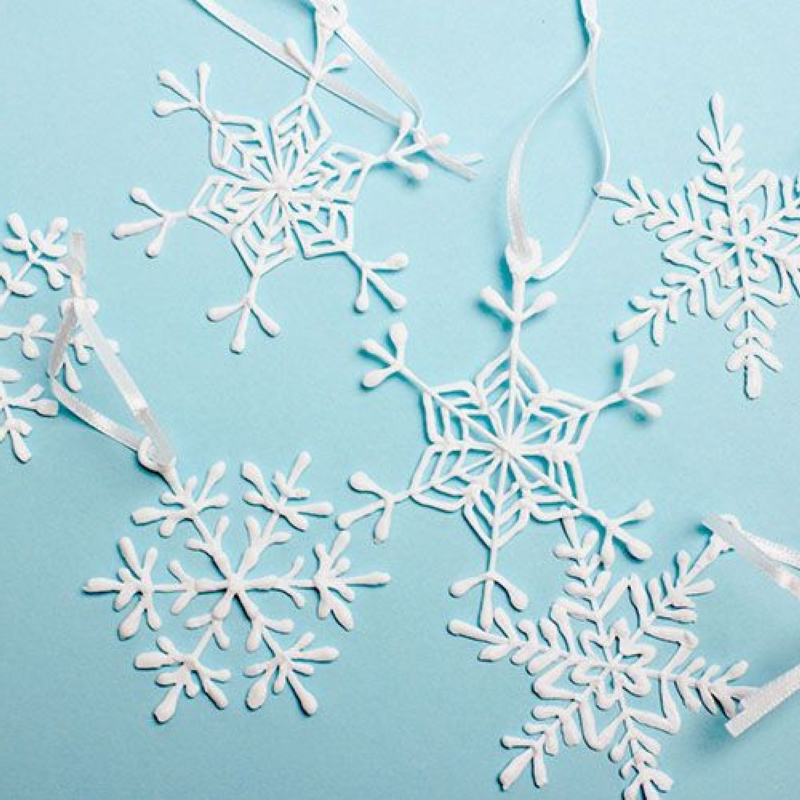
Project 1: Delicate Snowflakes
Skill Level: Beginner
Time: About 10-15 minutes per snowflake
Materials: White or light blue PLA, parchment paper
This is the best project for practicing line control because every snowflake is unique, so you can’t mess it up! Find a design you like by searching online for “simple snowflake line art printable”—you’ll get tons of free options. Place a sheet of parchment paper over your printed template and trace away. For a stronger ornament, try to draw each of the six main arms as one continuous line, from the center out and back again. At the top of one arm, draw a small, thick loop for the string. Go over that loop two or three times to make it nice and strong. Once it’s cool (which only takes a few seconds), just peel it off the paper and snip off any wispy plastic strings. That’s it!
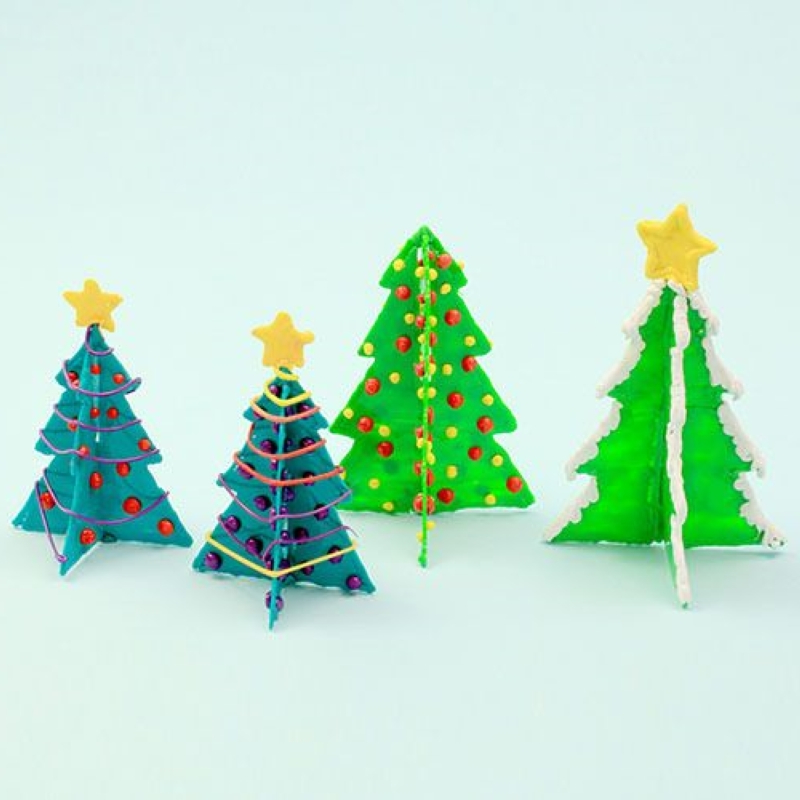
Project 2: Layered 3D Tree Ornament
Skill Level: Intermediate
Time: About 30-45 minutes
Materials: Green PLA, plus another color like yellow for a star (optional)
Here, we’ll make a 3D object by connecting two flat pieces. First, draw two identical, simple Christmas tree shapes on your parchment paper. A height of 3-4 inches is a good size. Fill them in solidly with a zigzag pattern. Now for the clever part. On one tree, you’ll create a slit from the center of the base up to the halfway point. On the second tree, you’ll make a slit from the very top down to the middle. The slit needs to be just a bit wider than your plastic is thick.
A little pro-tip: Don’t try to draw the slit. Instead, draw a solid tree piece. After it cools, use the hot nozzle of the pen (with the plastic flow turned off) to carefully melt a clean line. For a perfectly straight cut, you can even lay a metal ruler down and run the hot tip along its edge as a guide. Once you have your two pieces, just slide them together. They should interlock to form a freestanding tree. You can then weld a little star to the top and add a hanging loop.
Before Our Last Project: How to Switch Colors
Heads up! The next project uses multiple colors, so you need to know how to switch filaments cleanly. It’s easy. First, set your pen to the correct temperature. Then, use the “unload” or “reverse” button to back the old filament out. Once it’s completely out, take your new color and feed it into the pen until the motor grabs it. Let the pen extrude the new color onto your scrap mat until it runs pure and you don’t see any of the old color. Now you’re ready to go!
Project 3: Stained-Glass Ornaments
Skill Level: Advanced
Time: Patience required! Plan for at least an hour.
Materials: Black PLA for the frame, various translucent PETG colors for the ‘glass’
This one is a showstopper. On your silicone mat, use black PLA to draw the frame of your design—a star, a bell, whatever you like. Make these frame lines thick and strong by going over them a few times. Let it cool completely. Now, switch to your translucent PETG. This is where you need good temperature control. You want it just hot enough to flow smoothly but not so hot that it melts your black frame. I usually drop the temperature by about 5-10 degrees for this part. Slowly fill in each section of your frame with color, working in a tight back-and-forth motion to create a solid, glassy pane. The key is to let each colored section cool before you start the one next to it. It takes practice, but when you hang these in front of a Christmas light, the effect is absolutely magical.
A Quick Word on Safety
As much fun as this is, a 3D pen is a tool, not a toy. The nozzle gets extremely hot—hot enough to cause a very serious burn in an instant. I have a small scar on my knuckle from one careless moment, and it taught me to always be mindful of where that tip is. Always supervise kids, and never, ever touch the nozzle.
Also, even with safe plastics like PLA, it’s just smart to work in a well-ventilated area. Open a window or have a small fan going. And when you’re done for the day, unplug the pen and let it cool down on a heat-proof surface before you put it away.
Small plastic pieces can be a choking hazard for little kids and pets, so please make sure your beautiful creations are displayed safely and out of reach.
Alright, now it’s your turn! Start with the snowflake, see how it feels, and don’t be afraid to experiment. Every ‘mistake’ is just a lesson. I’d love to see what you make—try sharing a picture of your first creation online. Happy crafting!
Inspirational Gallery
PLA Filament: The go-to for beginners. It’s plant-based, smells faintly sweet when melted, and is ideal for rigid decorations like ornaments and stars. It offers a glossy finish and a huge color range, including glitter and glow-in-the-dark varieties.
PETG Filament: A fantastic alternative if you need more durability. It’s slightly more flexible than PLA, making it perfect for items that might get handled a lot, like custom gift tags or clasps for wreaths. It requires a slightly higher temperature, so check if your pen, like the MYNT3D Super 3D Pen, supports it.
Nearly 60% of consumers say they prefer receiving a personalized or unique gift over a conventional one during the holidays.
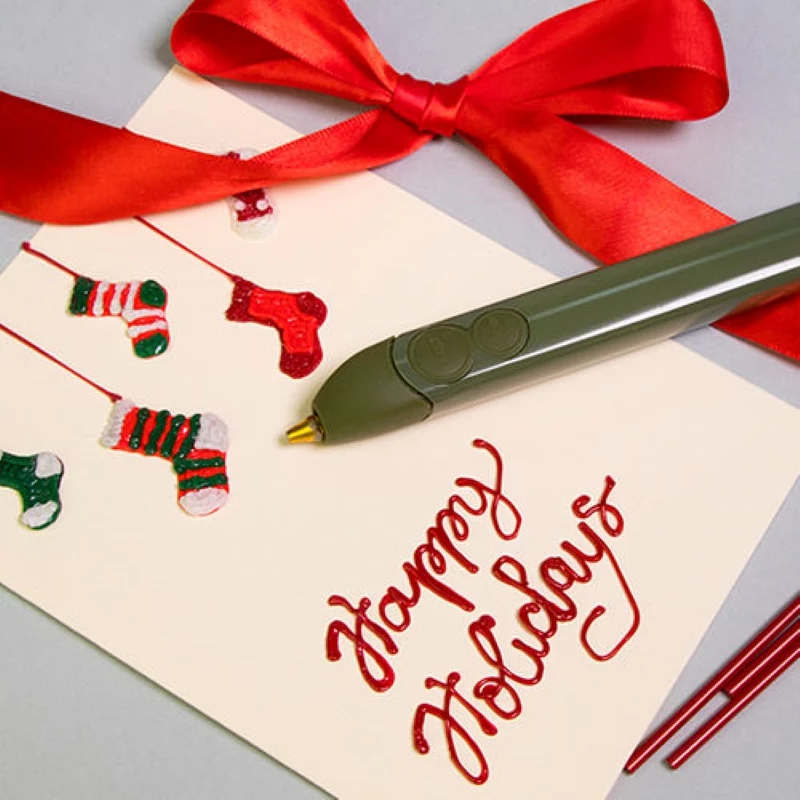
Your 3D pen is a direct route to creating those one-of-a-kind presents. Think beyond ornaments: craft a personalized bookmark for the bookworm in your family, or a unique keychain featuring their initial. These small, thoughtful items often carry the most sentimental weight.
Running into trouble? Don’t get frustrated! Most issues have a simple fix. Before you start a big project, check for these common culprits:
- Inconsistent flow: Your temperature might be too low, or the nozzle could have a minor clog. Try increasing the heat slightly or using a cleaning rod.
- Wobbly lines: Slow down your hand movement. A slower drawing speed gives the plastic more time to set and creates a sturdier, cleaner line.
- Filament won’t stick: Make sure your silicone mat is perfectly clean and free of dust. For the first layer, press the pen tip lightly onto the surface to ensure a good anchor point.
Want to create that magical, translucent
- Create decorations with a delicate, snowy texture.
- Add a frosted finish to your plastic snowflakes.
- Give your creations a shimmering, sugar-spun look.
The trick? Use a white or translucent glitter filament and draw in quick, slightly overlapping circular motions. This technique avoids flat, solid fills and instead builds up a light, airy texture that catches the light beautifully, mimicking the look of fresh frost.
A 3D pen works by heating plastic filament to its melting point, which for common PLA is around 180-220°C (356-428°F).
The beauty of a 3D pen lies in its imperfections. Unlike a mass-produced ornament, each piece you create tells a story of its own making. That slight wobble in a line or the unique blend of colors becomes part of its charm. These aren’t just decorations; they are future heirlooms, imbued with the memory of a cozy afternoon spent creating something by hand.
A touch of sparkle: Adding glitter to your 3D pen creations can feel messy. For a clean, high-impact finish, try this: draw your shape with any color filament. While the plastic is still warm and tacky, gently press it into a small pile of fine craft glitter. The glitter will adhere directly to the surface. A light coat of clear spray sealant will lock it in place permanently.
For a touch of rustic, Scandinavian-inspired charm, move beyond the bright reds and greens. Try crafting your holiday decorations using a specific, limited color palette.
- Wood-Fill Filament: Brands like AMOLEN offer filaments containing real wood fibers. They look and even smell like wood, perfect for creating reindeer or log cabin ornaments.
- Monochromatic Whites: Use various shades of white and clear filaments to create a whole set of minimalist snowflakes, stars, and icicles.
- A Single Accent: Create all your pieces in a neutral tone like wood or white, and add just one pop of color—a single red berry on a white wreath, for instance.
Some of the most popular 3D pens, like the 3Doodler Create+, are known for their reliability and wide range of specialty filaments. They offer unique plastics like ‘flexy’ for bendable creations or even ‘wood’ for a rustic finish. Investing in a pen with a strong ecosystem of materials opens up a whole new world of holiday crafting possibilities beyond simple ornaments.


