How to Sew a Face Covering That Actually Works: A Complete Guide
Over my years working with textiles, I’ve come to believe that every fabric has a purpose. A heavy canvas is meant for hauling, a light cotton for breathing. It’s all about form meeting function. So when people started looking for ways to make their own face coverings, I saw it through that same lens. This isn’t just about throwing a piece of cloth over your face; it’s about using the right materials and techniques to create something that’s genuinely effective.
In this article
Honestly, this is about function, not fashion. I’ve put in thousands of hours at the sewing machine, and I want to pass on the little details that make a huge difference. We’re going to dig into what really matters: fabric choice, a truly snug fit, and construction that lasts. A well-made covering is more comfortable, more durable, and ultimately, does its job better.
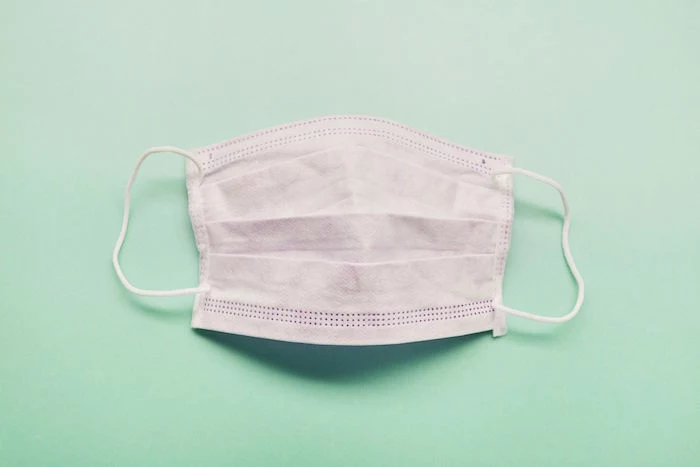
But first, a quick reality check. A homemade cloth face covering is absolutely not a medical device. It’s not an N95 respirator or a surgical mask, which are critical tools for healthcare professionals. Our goal here is simpler: to create a solid physical barrier that helps reduce the spread of our own respiratory droplets. Think of it as a community-care tool. It’s one piece of the puzzle, working alongside good hand hygiene and keeping a safe distance. Okay, with that clear, let’s get started.
The ‘Why’ Behind a Good Mask
To make something that works, you have to understand the problem you’re trying to solve. For a face covering, it’s a constant balancing act between two key factors: filtration and breathability. You need fabric that can trap particles, but you also have to be able to, you know, breathe through it. If it’s not breathable, you’ll just end up pulling it away from your face, which defeats the whole purpose.
Think of fabric as a tangled web. A tighter weave means smaller gaps in that web, making it better at filtering. But, that same tight weave can make it tough for air to get through. On the other hand, a super loose fabric (like a cheap, stretchy t-shirt) is a breeze to breathe through, but it barely filters anything. The sweet spot is right in the middle.
That’s why health experts strongly recommend using multiple layers. It’s a brilliant, low-tech solution. Layering dramatically increases the filtration power without making it impossible to breathe. A three-layer design using the right fabrics is a fantastic, reliable choice for everyday use.
It’s All About the Fit (No, Really)
I can’t stress this enough: a mask’s effectiveness is destroyed by a poor fit. If you see big gaps on the sides of someone’s face or around their nose, that mask isn’t doing much. Air is lazy; it always takes the path of least resistance. Those gaps are wide-open highways for air to bypass the filter entirely.
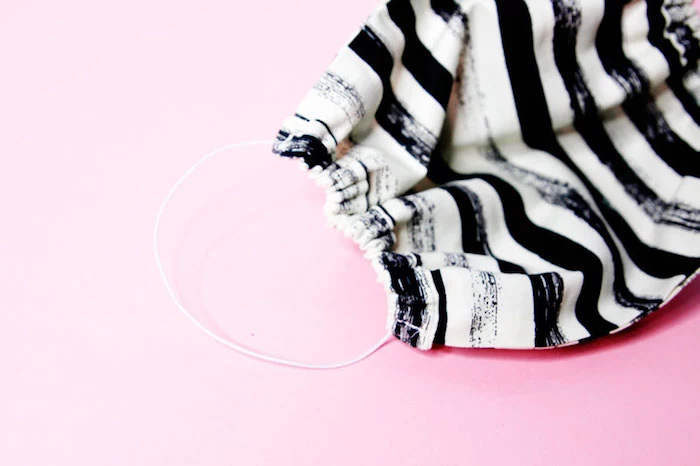
A good covering needs to create a seal. It should fit snugly against your face—over the bridge of your nose, flush along your cheeks, and tucked securely under your chin. This is why a nose wire isn’t just a nice-to-have feature; it’s essential. It lets you mold the top edge to the unique shape of your face, which is a game-changer for preventing your breath from escaping upwards.
Quick tip for glasses-wearers: If your glasses are constantly fogging up, that’s a dead giveaway that you have a poor seal at the top of your mask. A good nose wire, bent into a sharp ‘M’ shape over the bridge of your nose (not just a soft curve), can almost eliminate this problem.
How Do You Know It Fits Right? The Fit Check
Once you’ve made your mask, put it on and do a quick test:
- The Candle Test: Stand about a foot away from a lit candle and try to blow it out. With a well-fitting, multi-layer mask, you shouldn’t be able to. If the flame flickers wildly or goes out, you likely have leaks.
- The Mirror Check: Look in the mirror. Do you see any obvious gaps along the sides of your face or nose? When you breathe in, the mask should pull slightly inward.
- The Puffy Cheek Test: Try to puff out your cheeks. You should feel the air trying to push the mask material out, not just escaping from the sides.
Choosing Your Materials Like a Pro
The stuff you choose to build with will make or break your project. Trust me, I’ve experimented with more fabric combos than I can count, and they are not all created equal.

The Shopping List: What to Buy and What to Expect
Here’s a quick rundown of what you’ll need and a ballpark on cost. You can get most of this from a local fabric shop like Jo-Ann, or find it all online.
- The Best Fabric: Your go-to should be high-quality, 100% cotton with a tight weave. My absolute favorite is quilter’s cotton. It’s designed to be durable, has a dense weave, and actually gets softer with each wash. A quarter-yard, which is enough for a couple of masks, will run you about $3-$5. High thread-count bed sheets (think 400-600 thread count) are another excellent option. A good way to test fabric is to hold it up to a light. You shouldn’t be able to see distinct points of light through it; it should be more of a diffuse glow.
- The Middle Layer (Optional but Recommended): For a three-layer mask, the pros often recommend a non-woven polypropylene fabric for the middle layer. At the fabric store, this is usually sold as “sew-in interfacing.” Just check the package to make sure it’s the non-fusible (not iron-on), washable kind. It adds an electrostatic filtering quality. If you’re unsure, just using a third layer of your main cotton fabric is a perfectly solid and safe alternative.
- Ties or Elastic: This is a personal call, but here’s the breakdown. Elastic is fast, but it can make your ears sore after a few hours and breaks down over time in hot washes. If you go with elastic, get a soft, 1/4-inch braided type—it’s much comfier. Fabric ties, on the other hand, offer a perfectly adjustable fit and are incredibly durable. They take a bit longer to tie, but for all-day wear, they’re often more comfortable. You can buy a yard of elastic for about $2, or just use scraps of your main fabric to make ties for free.
- Nose Wire: You can buy flat aluminum nose strips specifically for this, and they work great. A pack of 50 might cost around $8-$10 online. In a pinch, 18-gauge plastic-coated floral wire from a craft store works, too. Just be sure to fold or curl the ends with pliers so they don’t poke through the fabric.

What to Absolutely Avoid
Please steer clear of knit fabrics like t-shirt jersey. They stretch when you breathe, which opens up the weave and tanks their filtration ability. Also, avoid anything super thin like gauze or voile. On the flip side, don’t use anything waterproof or plastic-coated, like old raincoat material. It’s not breathable and can be genuinely dangerous. Safety first, always.
What If You Don’t Have a Sewing Machine?
No machine? No problem! You can absolutely sew a durable and effective mask by hand. It will take a bit more time, but the result can be just as strong.
The key is using the right stitch. You’ll want to use a backstitch for all the main construction seams. A backstitch creates a solid, locked line of stitching that looks almost identical to a machine stitch on the top side. It’s much stronger than a simple running stitch. Just look up a quick video on how to do a backstitch—it’s easy to learn and is one of the most useful hand stitches you can know.
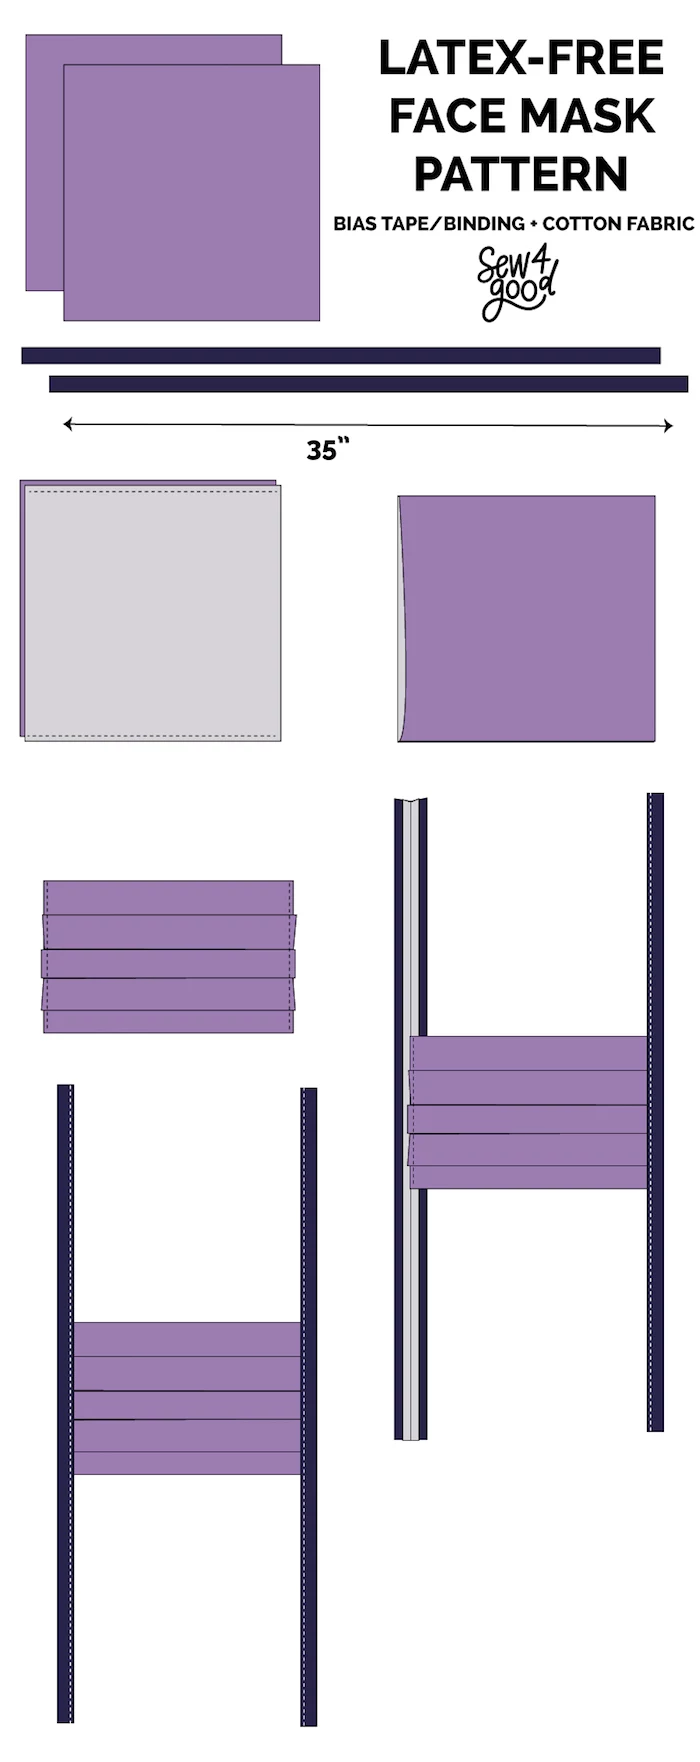
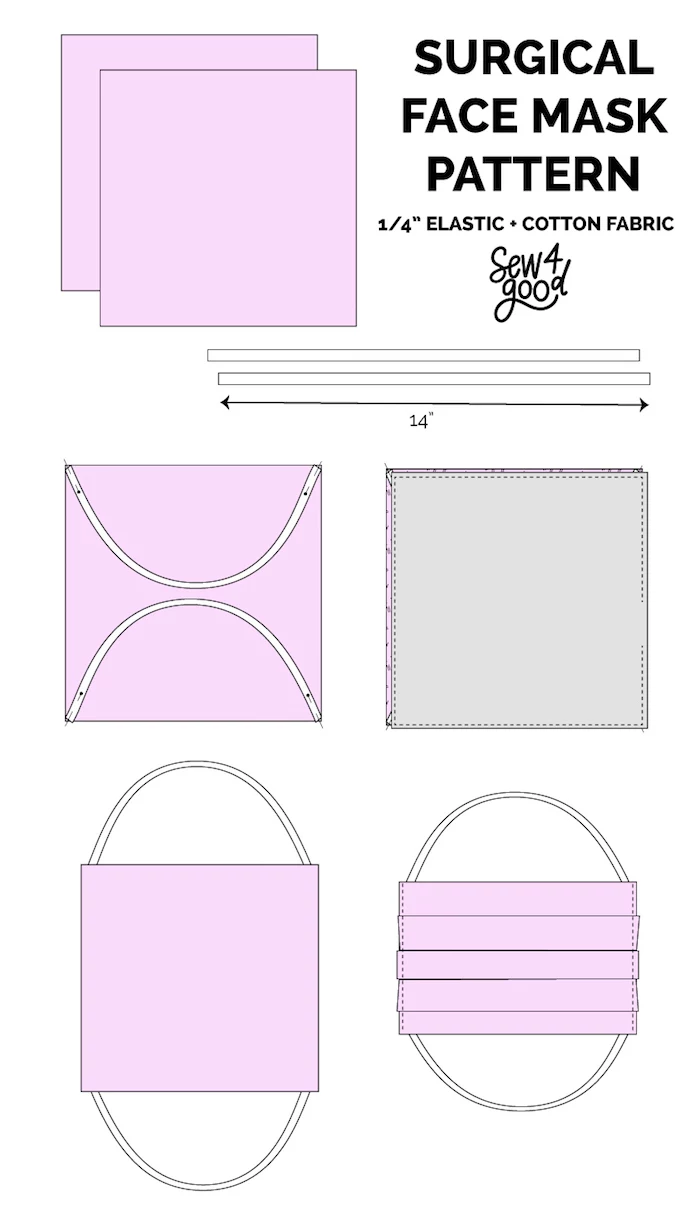
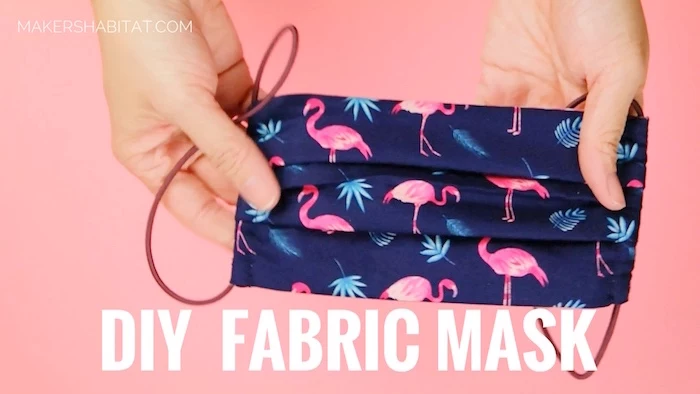
Project 1: The Classic Pleated Mask
This is the workhorse design. It’s straightforward, fits a lot of different faces, and is great for batch-sewing. Expect your first one to take about 45-60 minutes. Once you get the hang of it, you can probably make one in under 30 minutes.
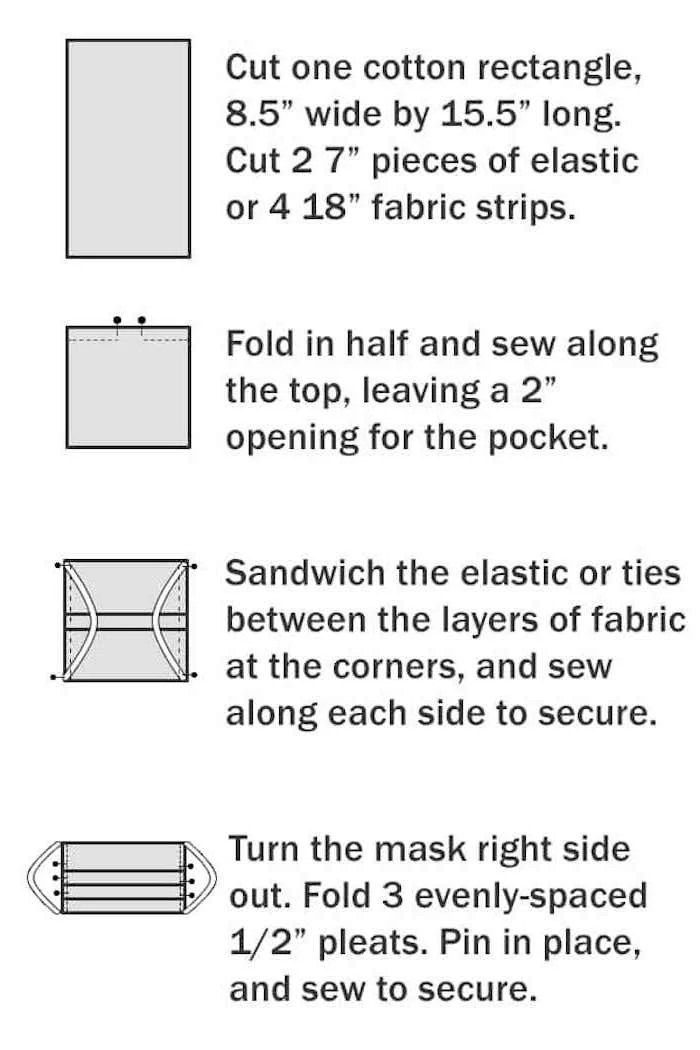
Step 1: Prep & Cut: Always pre-wash, dry, and iron your fabric to shrink it. For an adult three-layer mask, cut one main rectangle 9 inches wide by 15 inches long. For the middle filter layer, cut a smaller rectangle 9 inches wide by 7.5 inches long.
Step 2: Assemble the Body: Lay your big rectangle right-side down. Fold it in half so the short ends meet, and press that fold. Open it back up. Place your smaller middle layer on one half, aligning it with the center fold. Now, fold the other half back over it, sandwiching the filter layer inside. Pin the three open sides.

Step 3: Sew the Tube: Sew along the top 9-inch edge with a 3/8-inch seam allowance. Now you have a tube. Turn it right-side out and press it flat, making sure the seam is crisp.
Step 4: Create the Pleats: You’ll now make three evenly spaced, 1/2-inch pleats. A pro tip: fold them all downwards, like shingles on a roof. This helps prevent particles from settling inside the folds. Pin them, then press them firmly with a hot iron. The final height should be about 3.5 inches.
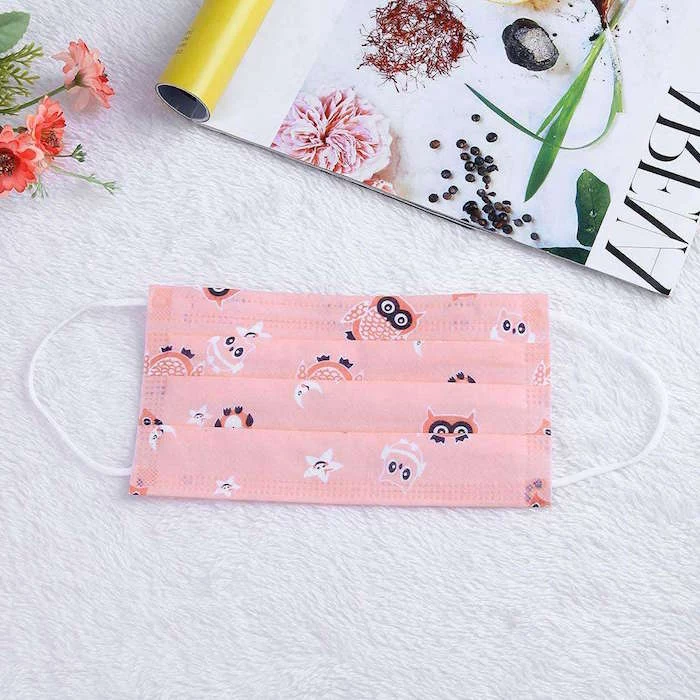
Step 5: Attach Ties or Elastic: Cut four fabric strips, each about 18 inches long and 1.5 inches wide. To make a tie, press the strip in half lengthwise. Open it, then fold the raw edges into that center crease. Fold it in half again along the original crease and stitch it closed. It’s a simple process that creates a super durable tie. Securely stitch one tie to each of the four corners. If using elastic, cut two 7-inch pieces and stitch them securely to the sides, forming ear loops.

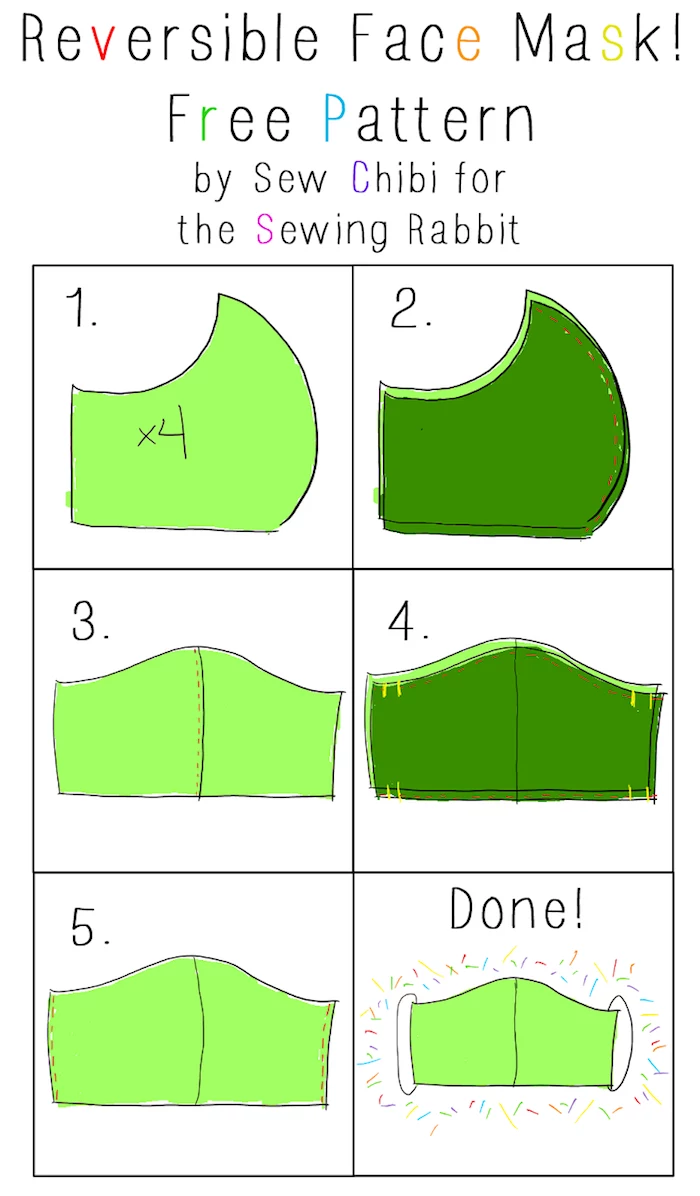
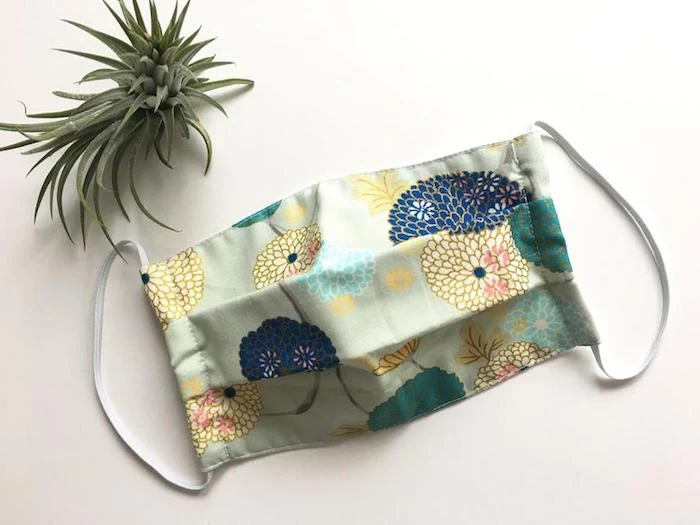
Project 2: The Fitted Contoured Mask
This design offers a closer, more sculpted fit and is my personal favorite for daily wear, especially since I wear glasses. It requires a pattern, but it’s well worth the effort. This one might take a little over an hour for your first try.
Step 1: The Pattern & Cutting: You can find tons of great contoured mask patterns with a quick search for “fitted face mask pattern PDF.” Look for one from a university health resource or a major sewing blog. You’ll need to cut three pairs (a left and a right half) of the pattern piece: one pair for the outer layer, one for the lining, and one for the middle filter layer.
Step 2: Sew the Center Seams: Place the two outer pieces right-sides together and sew the main curved seam. Repeat this for the lining pieces and the filter pieces. You’ll now have three bowl-shaped parts. To help that curve lay flat, you MUST clip it. Make small snips into the seam allowance every half-inch or so, being careful not to cut your stitches. Press the seams open.
Step 3: Assemble the Mask: Lay your outer piece right-side up. Place the filter layer on top, then place the lining piece on top of that, right-side down. Pin everything together along the top and bottom, making sure the center seams line up perfectly. Sew along the top and bottom edges, leaving the sides open for turning.
Step 4: Turn and Topstitch: Clip the top and bottom curves just like you did the center seam. Turn the mask right-side out through one of the side openings. Gently poke out the seams with a chopstick or a similar blunt tool. Press it flat. Now, topstitch about 1/8-inch from the edge all along the top and bottom. This gives it a clean, professional look and stops the layers from shifting.
Step 5: Finish It Up: You can create a small channel for the nose wire on the inside lining. Then, finish the raw side edges by folding them in twice to create a channel for your ties or elastic. Insert your nose wire, feed your ties or elastic through, stitch everything securely, and you’re done!
A Quick Word on Common Pitfalls
Getting stuck? It happens. Here are a couple of frequent issues:
- Needle Breaking? You’re likely hitting a very thick seam, especially on the pleated mask. Switch to a stronger needle, like a 90/14 Jeans or Denim needle, and go very slowly over the bulky parts.
- Thread Bunching Up Underneath? Stop! Don’t power through it. This is almost always a threading issue. The best fix is to take the top thread and bobbin thread completely out and re-thread your machine from scratch. 9 times out of 10, that solves it.
Care, Safety, and Final Thoughts
Your job isn’t done once the last stitch is in. A mask needs to be cared for. It should be washed after every single day of use, or sooner if it gets damp. The best method is in a washing machine with regular detergent and hot water, followed by a hot dryer. Store your clean masks in a clean, dry spot—a paper bag is great.
And I have to say it one more time: public health guidelines state that cloth coverings shouldn’t be used for children under two, or for anyone who has trouble breathing or can’t remove a mask on their own. This is a critical safety rule.
Learning to make a proper face covering is a genuinely useful skill. By focusing on the details—good fabric, multiple layers, and a snug fit—you can create something that is leagues better than a simple single-layer cloth. Take your time, be proud of your work, and know that your effort is a real act of community care.
Inspirational Gallery

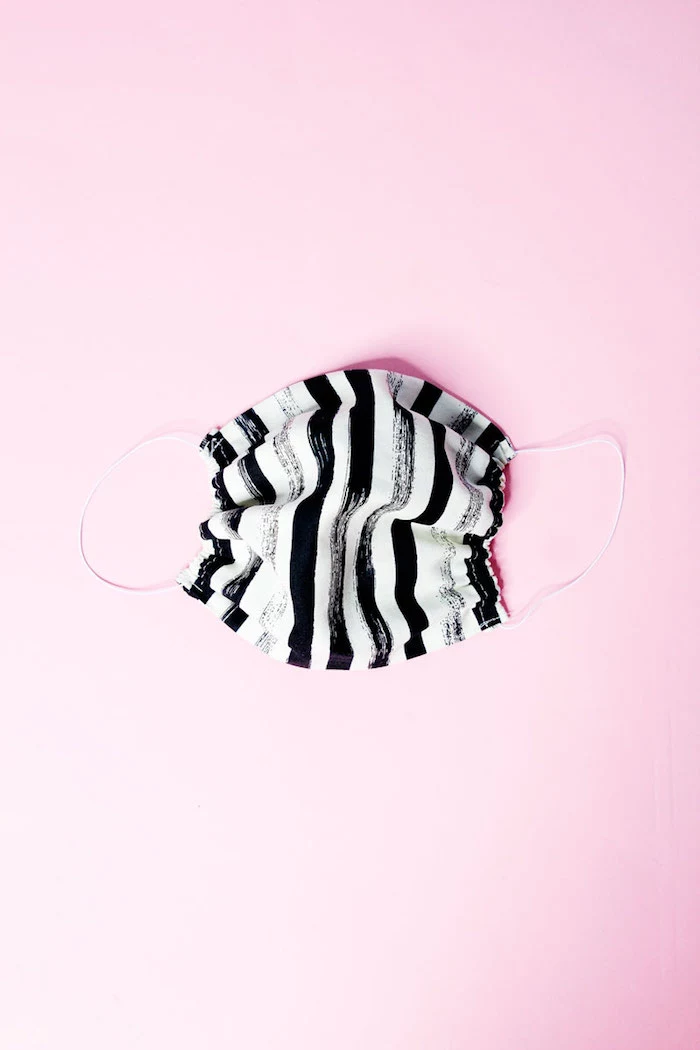
The Nose Wire: Your Secret Weapon for a Perfect Fit. The single biggest upgrade you can make to a homemade mask is adding a mouldable nose piece. It drastically reduces air leaks from the top (a major issue for glasses-wearers) and helps secure the mask to your face. You don’t need fancy materials: a simple pipe cleaner folded in half, a sturdy paperclip straightened and bent, or specific flat aluminum nose strips available from craft suppliers all work wonders when sewn into a small channel along the top edge of your mask.
- Lessens painful ear fatigue from tight loops.
- Creates a more secure, gap-free seal around the entire face.
- Stays in place better when you’re talking or moving.
The secret? Ditch the ear loops for ties or a head strap. Use four long fabric ties, two on each side, that you can knot behind your head. Or, create a single, adjustable elastic strap that goes around the back of the head. It transforms the comfort for all-day wear.
A 2020 study in the journal ACS Nano found that a combination of one layer of high-thread-count cotton with two layers of silk or chiffon could filter upwards of 80-99% of aerosol particles.
This highlights the power of combining different types of fabric. The cotton provides a good mechanical barrier, while materials like silk or chiffon can add an electrostatic barrier, which helps trap smaller particles. Layering isn’t just about adding thickness; it’s about creating a more complex and effective filtration system.

What’s the best fabric to use for a mask?
For the layers closest to your skin, nothing beats high-quality, 100% quilting cotton. Look for tightly woven fabrics with a high thread count (often sold as ‘batik’ or premium quilting cotton from brands like Kona® Cotton or Art Gallery Fabrics). It’s breathable, soft, and filters effectively. For a middle layer or filter, consider adding a non-woven material. A square of spunbond polypropylene (the kind found in some reusable shopping bags) or a piece of flannel can significantly boost filtration without compromising breathability too much.
Cotton Thread: The classic choice. It sews beautifully with cotton fabric and has minimal stretch, which helps maintain the mask’s shape. It’s strong enough for this purpose and widely available.
All-Purpose Polyester Thread: Slightly stronger and more durable than cotton, with a bit of give. It’s an excellent, robust choice that holds up well to frequent, high-heat washing. Brands like Gutermann Sew-All are a reliable standard.
For mask making, either works well, but polyester often has the edge for longevity.
Once you’ve mastered the basic construction, a few simple stitches can make your mask uniquely yours. A small, embroidered initial in a contrasting color, a few hand-stitched stars along the cheek, or even a simple running stitch along the seams adds a touch of personality. It’s a quiet way to reclaim a bit of individuality while still prioritizing function.

Proper care is essential for both hygiene and the longevity of your mask. Follow these steps to keep it in top shape:
- Wash after every single use. Treat it like underwear.
- Use a gentle, fragrance-free detergent, especially if you have sensitive skin.
- Washing in hot water is effective. Tumble drying on high heat will also help sanitize the mask and maintain its shape.
- Consider using a small mesh laundry bag to prevent ties from tangling or elastics from getting stretched or snagged.

The ‘Candle Test’: If you can easily blow out a candle while wearing your mask, it’s likely not providing an adequate barrier.
It’s tempting to grab that old, soft, stretchy t-shirt for a mask, but single-layer knit fabrics are one of the least effective materials. The weave is very loose and porous, offering minimal filtration of respiratory droplets. Furthermore, the stretchiness of the fabric tends to pull and create gaps around the nose and cheeks. For effective protection, always stick to multiple layers of non-stretch, tightly woven fabric.
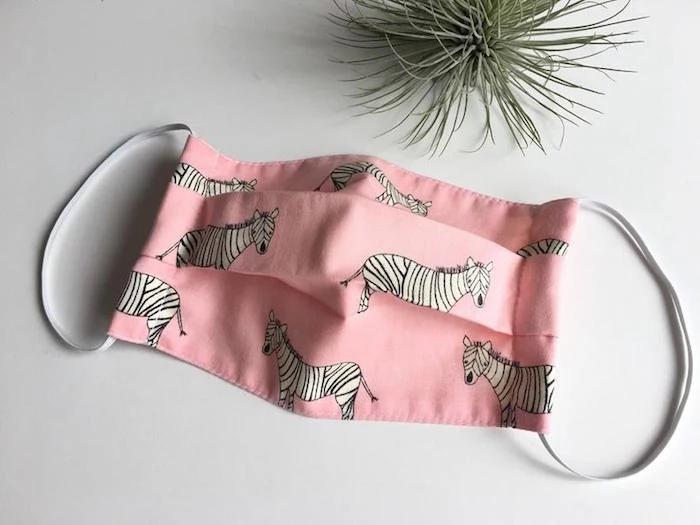
Feeling claustrophobic or finding it hard to talk in your mask?
Look into the ‘3D’ or ‘origami’ mask pattern. This design uses clever folds to create a structured pocket of air in front of your mouth and nose. It sits away from your lips, making it much easier to breathe and speak clearly without the fabric muffling your voice or getting damp. While it requires more precise sewing, the payoff in comfort is immense.

- Ensure the nose wire is bent firmly over the bridge of your nose before putting on your glasses.
- Pull the mask up high on your nose, so the weight of your glasses helps to seal the top edge.
- Try washing your lenses with soapy water and letting them air dry. This leaves a thin surfactant film that can help prevent fogging.
Important point: Pre-wash your fabric! All cotton fabrics will shrink when washed and dried, especially in hot water. If you sew your mask and then wash it, it could shrink to an unwearable size or warp out of shape. Always run your fabric through a full wash and dry cycle *before* you even cut out your pattern pieces. This ensures your finished mask will remain the correct size and fit for its entire lifespan.


