Your First Folded Book: A Beginner’s Guide to Turning Old Books into Art
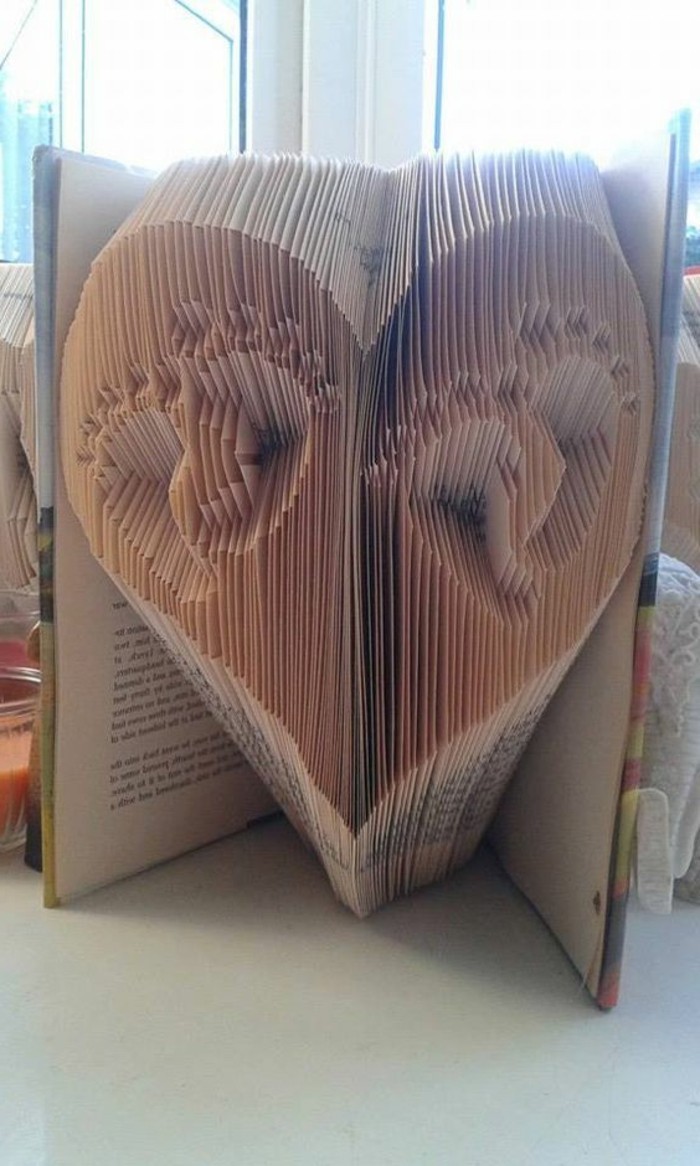
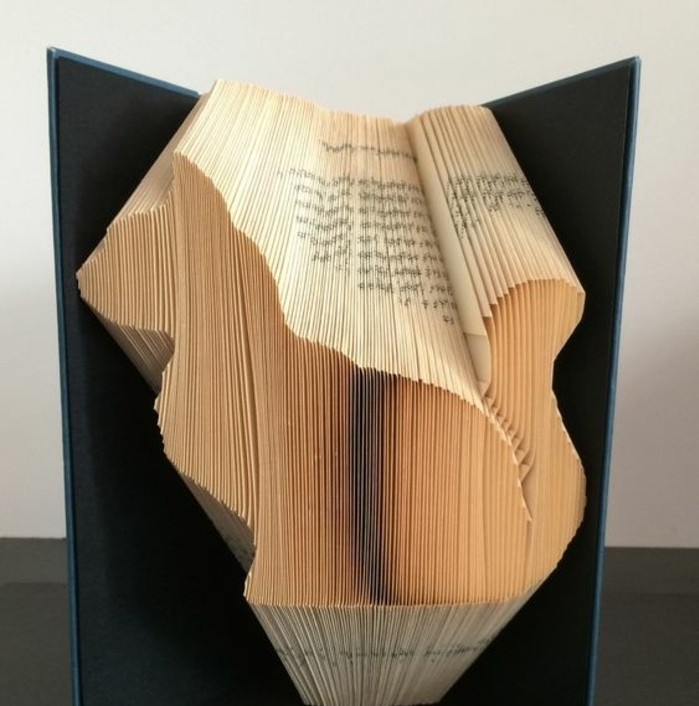
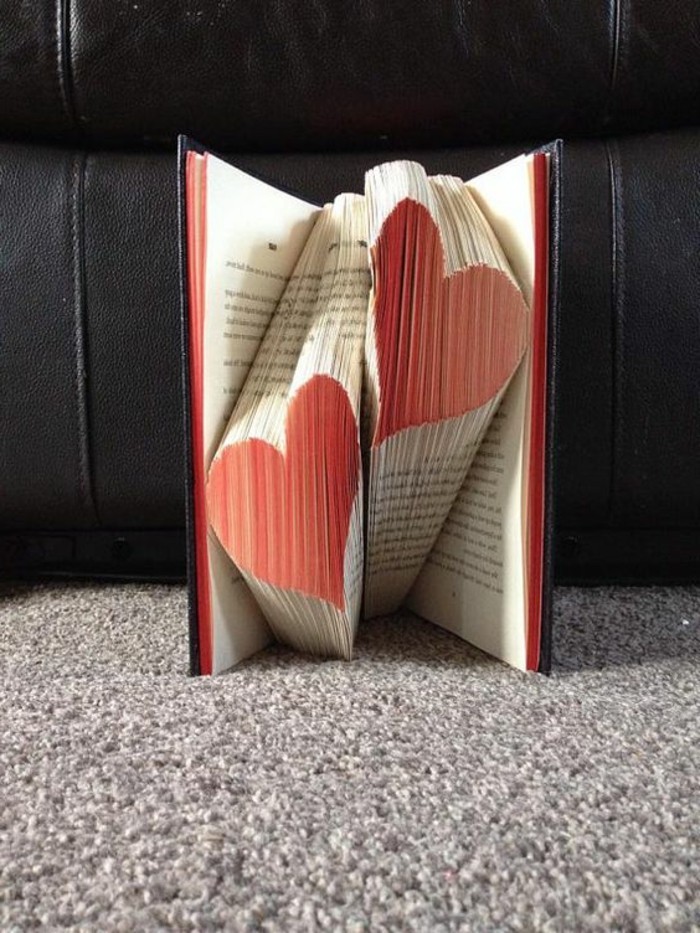
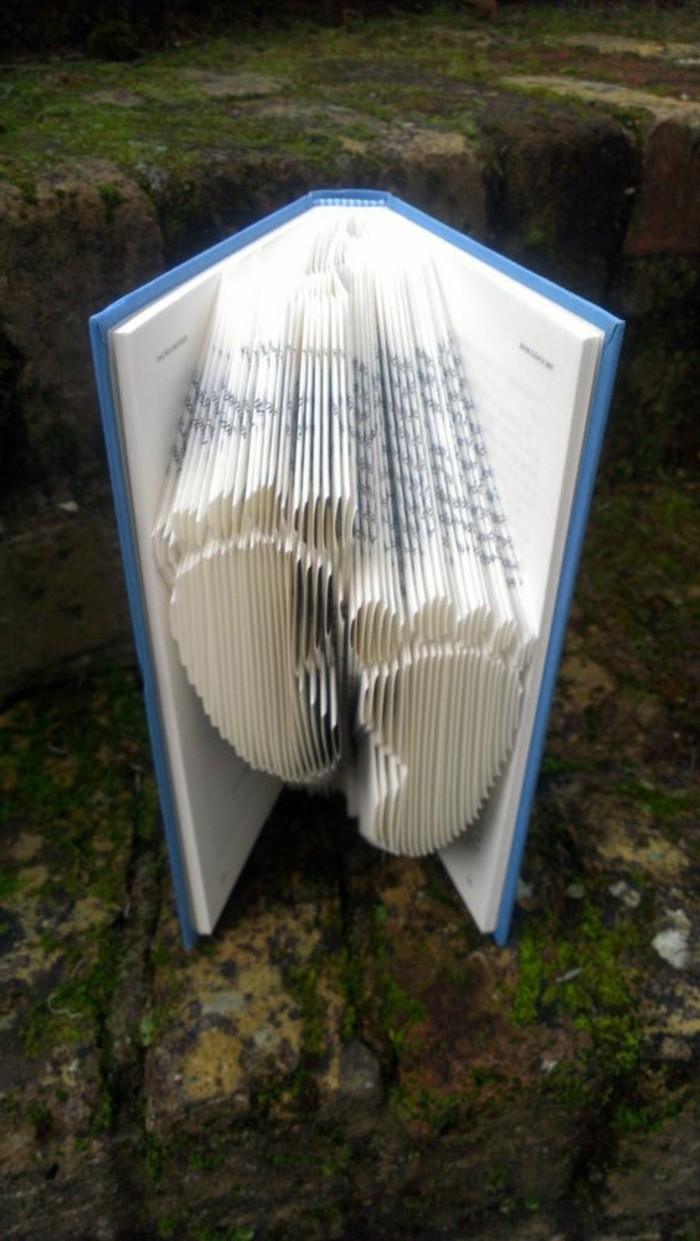
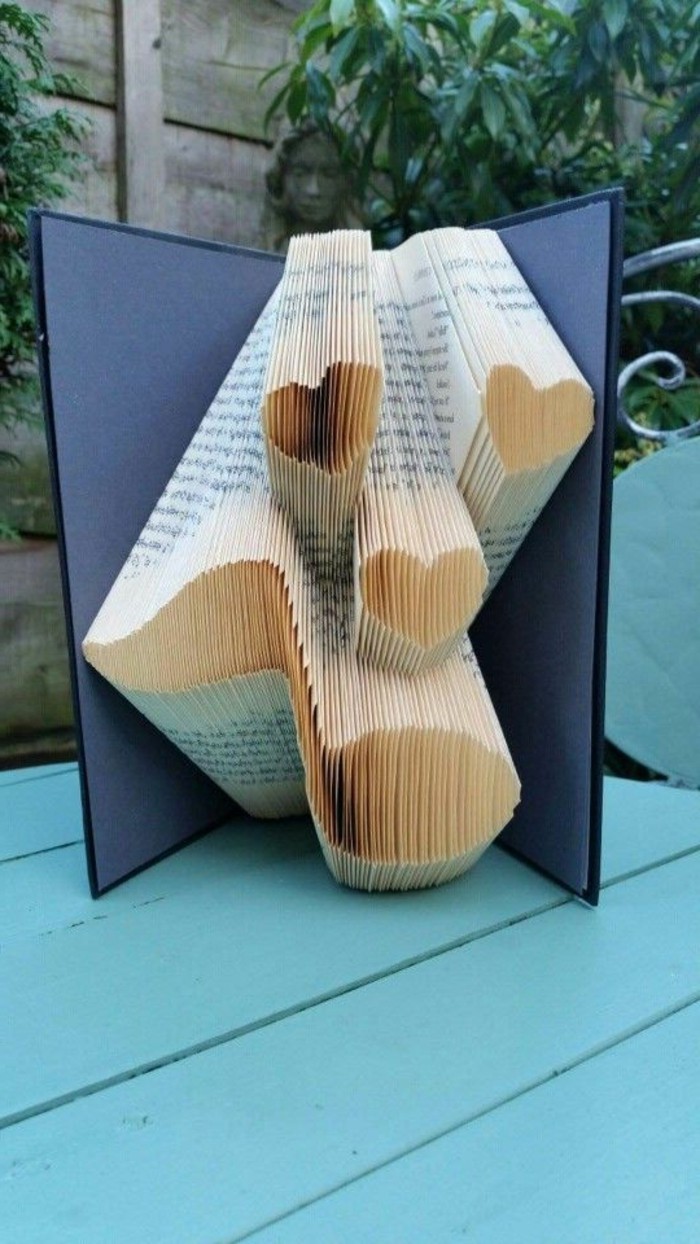
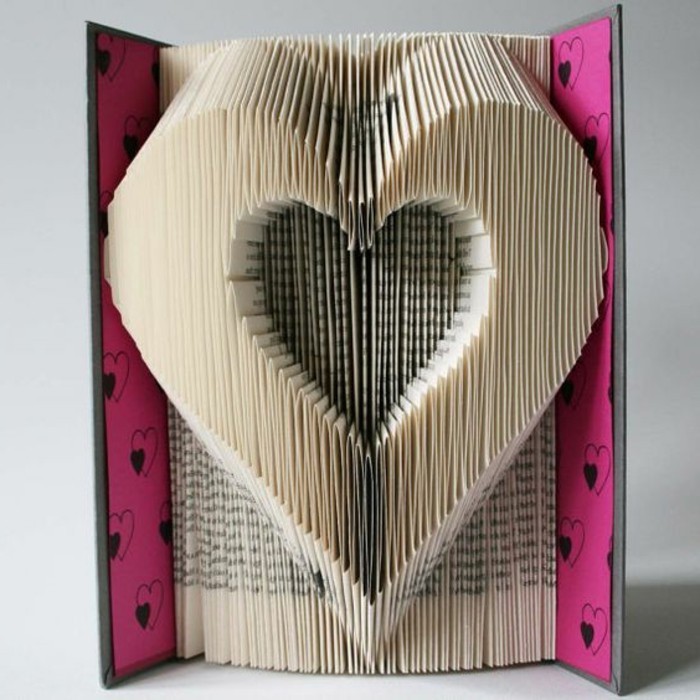
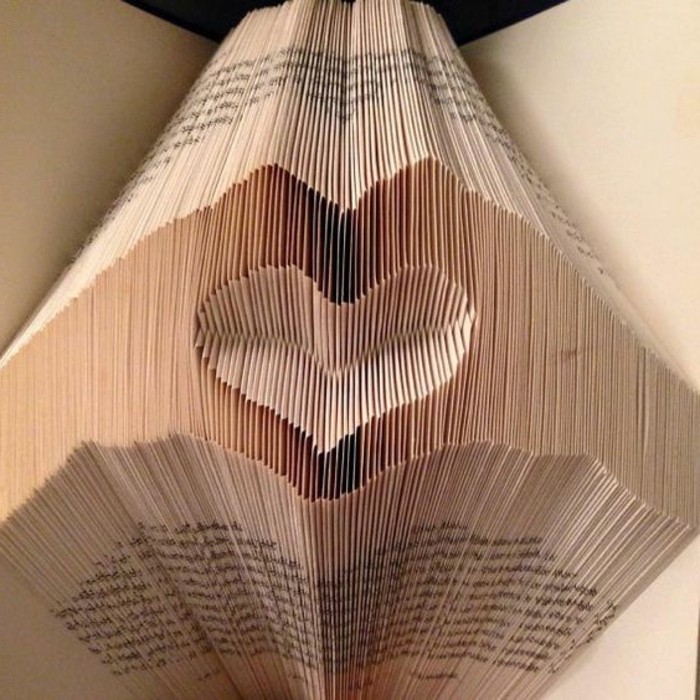
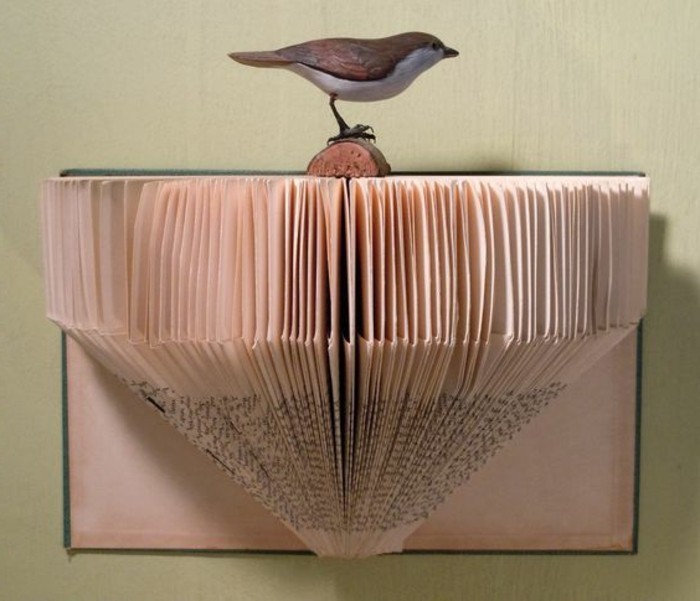
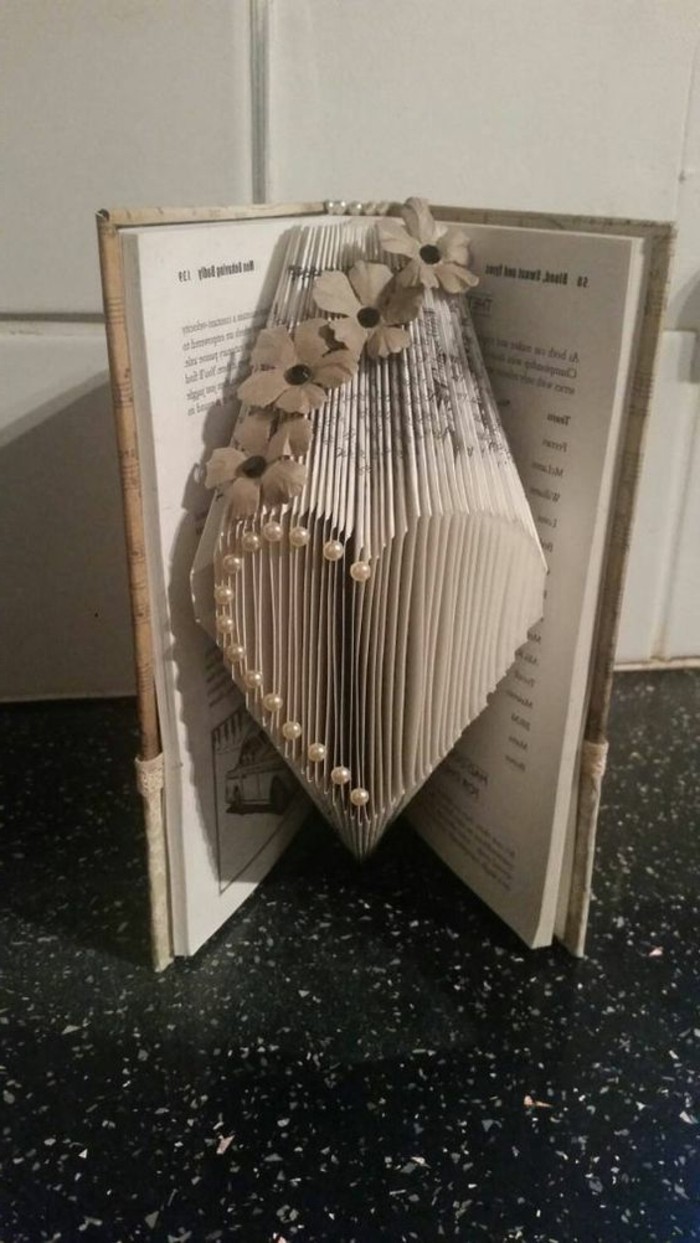
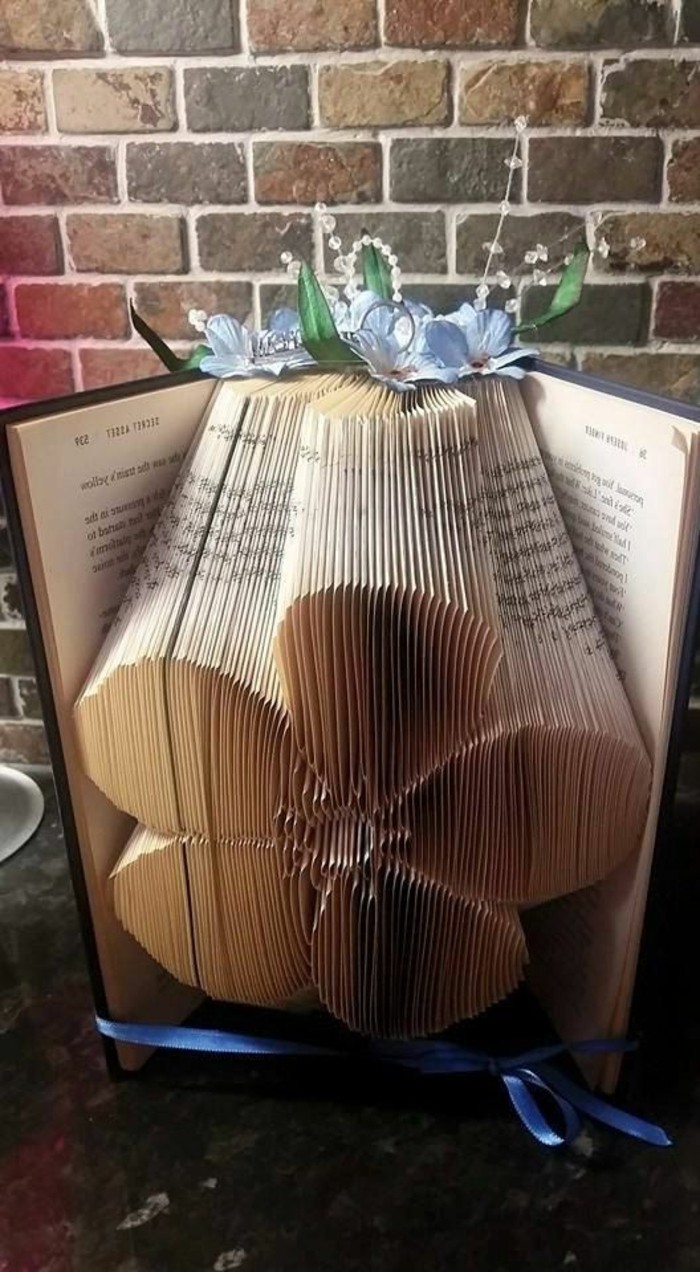
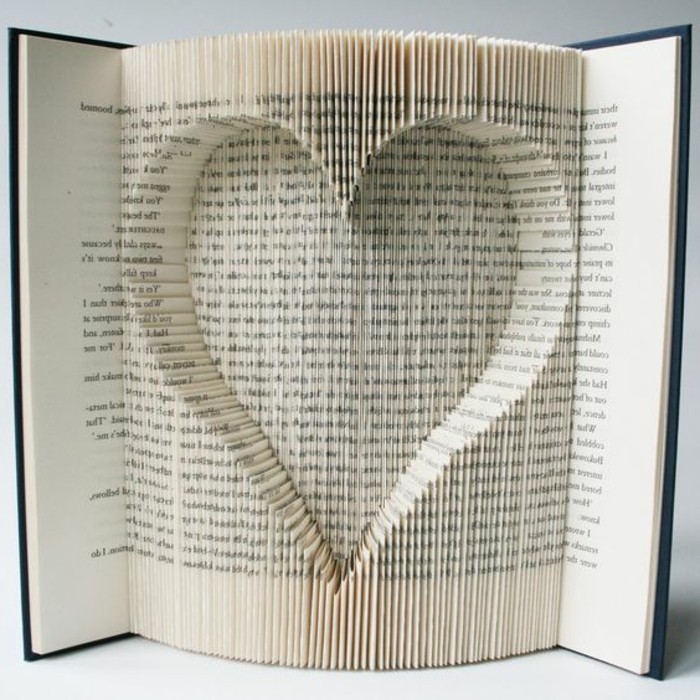
I still remember the first book I ever folded. It was this thick, forgotten dictionary with a faded blue cover, one I’d rescued from a box headed for the recycling bin. The pages were soft and had that lovely, slightly yellowed look. Over a few quiet evenings, armed with just a simple ruler and a pencil, I slowly turned it into a heart. Honestly, it wasn’t perfect. The folds were a little uneven, and I remember tearing one page just slightly. But the process felt like this quiet conversation with an old object, giving it a whole new purpose.
In this article
A lot of people ask if this craft destroys books, and it’s a totally fair question. As a book lover myself, the idea of hurting a valuable text is the last thing I want to do. So, my rule is simple: I only work with books that have reached the end of their reading life. We’re talking mass-market paperbacks with broken spines, outdated textbooks nobody wants, or the stacks of duplicates you see at library sales. To me, book folding isn’t destruction. It’s a transformation. You’re honoring the book’s physical form and giving it a second life as a piece of art.
This is a craft of patience. You don’t need some incredible artistic talent, but you do need focus and a bit of precision. In this guide, I’m going to walk you through the whole process, just like I would in a workshop. We’ll cover picking the right book, the simple tools you’ll need (and what to use if you’re on a budget), and the core techniques to get you started.
First Things First: Finding Your Perfect Book
Before you even think about folding, you have to understand the book itself. This is where so many beginners trip up—they just grab any old book off the shelf and then get frustrated when things don’t work out. A little knowledge here saves a ton of headaches later.
The success of your project really comes down to two things: the paper and the binding. Old books often have this wonderful, high-quality, acid-free paper that’s just a dream to work with. It’s soft and holds a crease beautifully. On the other hand, you want to be careful with some vintage paperbacks, as their pages can get super brittle and just crumble. A quick test: if a page feels fragile or cracks when you gently fold a corner, it’s best to find another book. I learned this the hard way on a 500-page project where the paper started splitting by the end. Not fun.
The Book-Hunter’s Checklist
So, when you’re at the thrift store or a library book sale, here’s what to look for versus what to avoid. You can find amazing hardcovers for a dollar or two, so don’t feel like you need to spend a lot.
- What to Look For: A hardcover is an absolute must, as it gives the sculpture the stability it needs to stand up. Look for books with a sewn binding—if you peek into the center, you can see the threads holding little groups of pages together. These books lay flat and are much easier to work with. Aim for a book that’s about 8 to 9.5 inches tall (that’s around 20-24 cm), as most patterns are designed for this size.
- What to Avoid: Steer clear of paperbacks; they just don’t have the structural support. I also skip books with very glossy, coated pages, like you find in some art books or magazines, because the coating can crack and flake off when you fold it. Also, books with a lot of full-page photos will interrupt the visual flow of your final piece.
A little insider tip? Those old Reader’s Digest condensed books are absolutely fantastic for beginners. They are everywhere, they’re cheap, they have sturdy bindings, and the paper quality is usually just right. They’re my go-to for introductory workshops.
Your Simple Toolkit (and Budget-Friendly Hacks)
One of the best things about book folding is how little you need to get started. You’re not investing in a ton of expensive gear. Using the right tools, however, will make your work much cleaner and way more enjoyable.
- A Ruler: I’d recommend a metal ruler that’s at least 12 inches long. The ones with a cork back are great because they don’t slip on the page. A decent one will only set you back about $5-$8 at any office supply store.
- A Pencil: A simple mechanical pencil is perfect. The fine point makes sharp, consistent marks that are easy to see but won’t smudge all over your project.
- A Bone Folder: This is a simple, flat tool used to press sharp, crisp creases into the paper. A real one costs between $5 and $10 online or at a craft store and gives a professional finish. Budget-friendly tip: If you’re not ready to buy one, the smooth, rounded handle of a metal spoon or even the edge of a sturdy gift card works in a pinch!
- A Pattern: To start, you can easily find free patterns online. Just search for something like “free simple heart book folding pattern PDF.” These patterns are basically just a list of measurements to guide your folds.
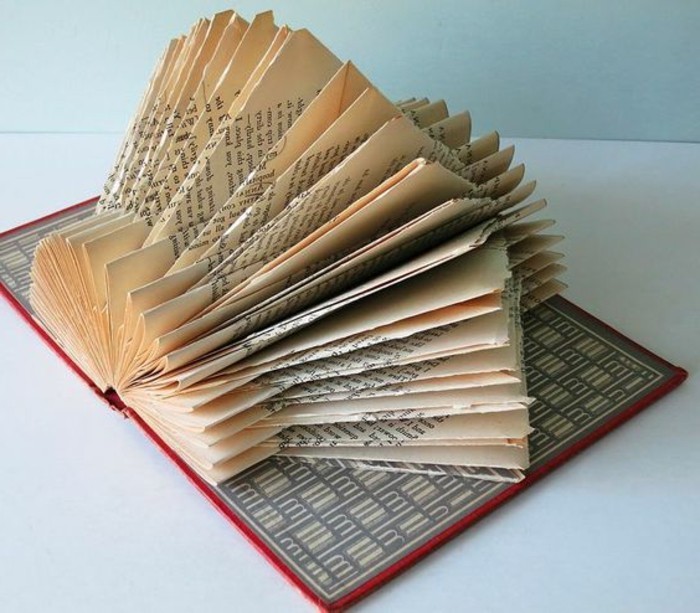
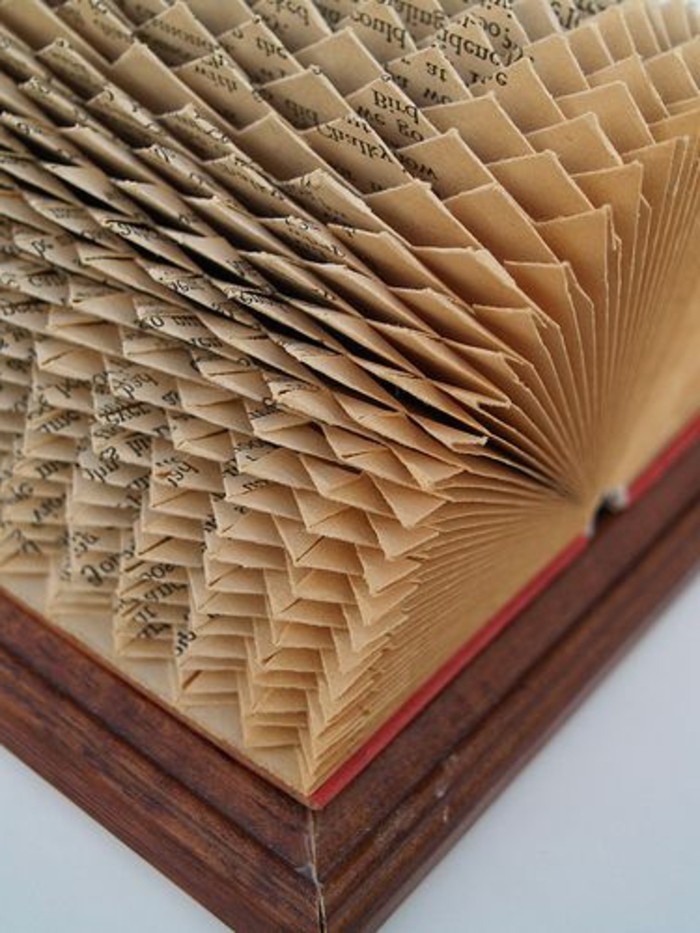
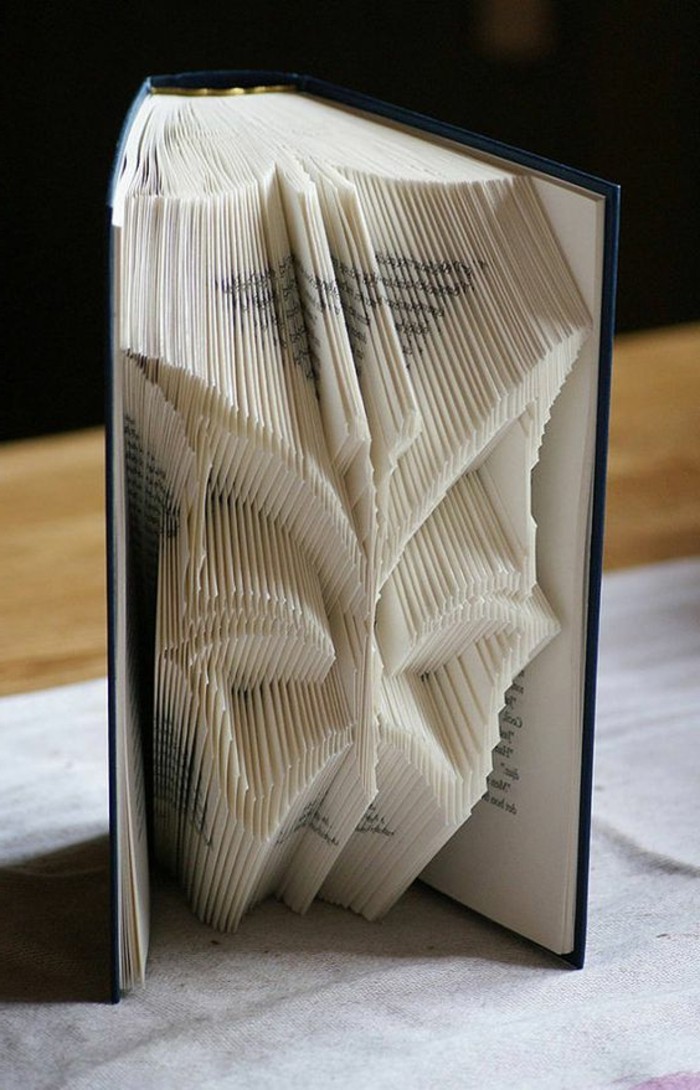
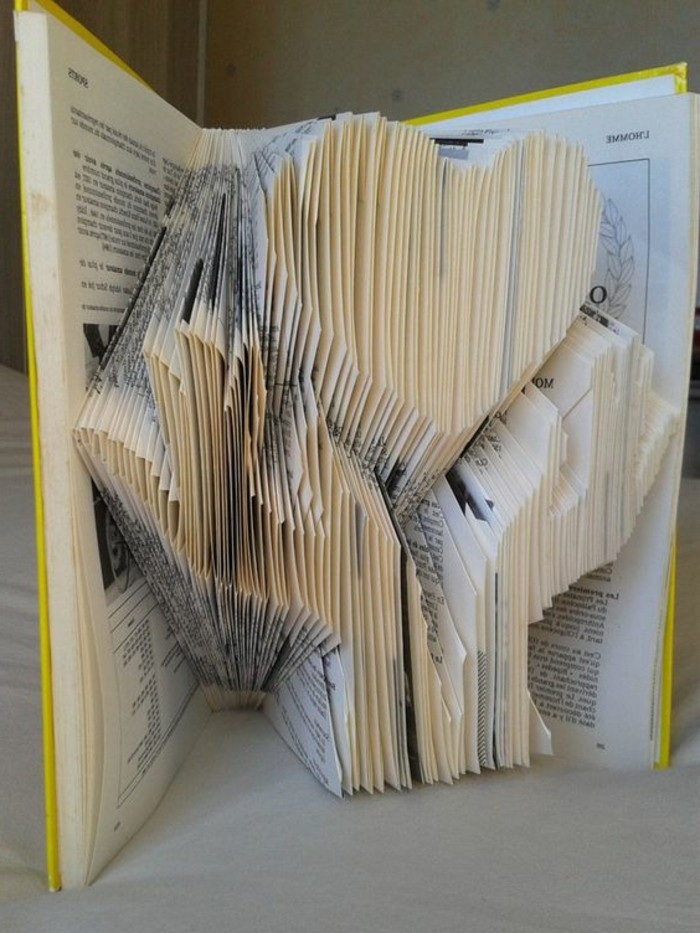
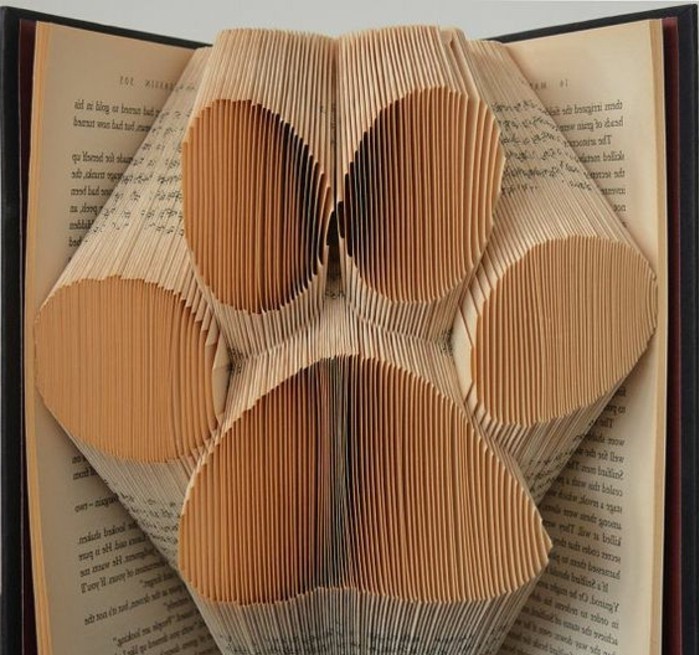
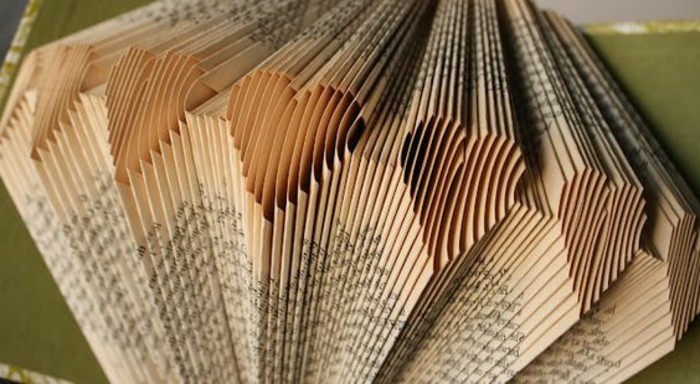
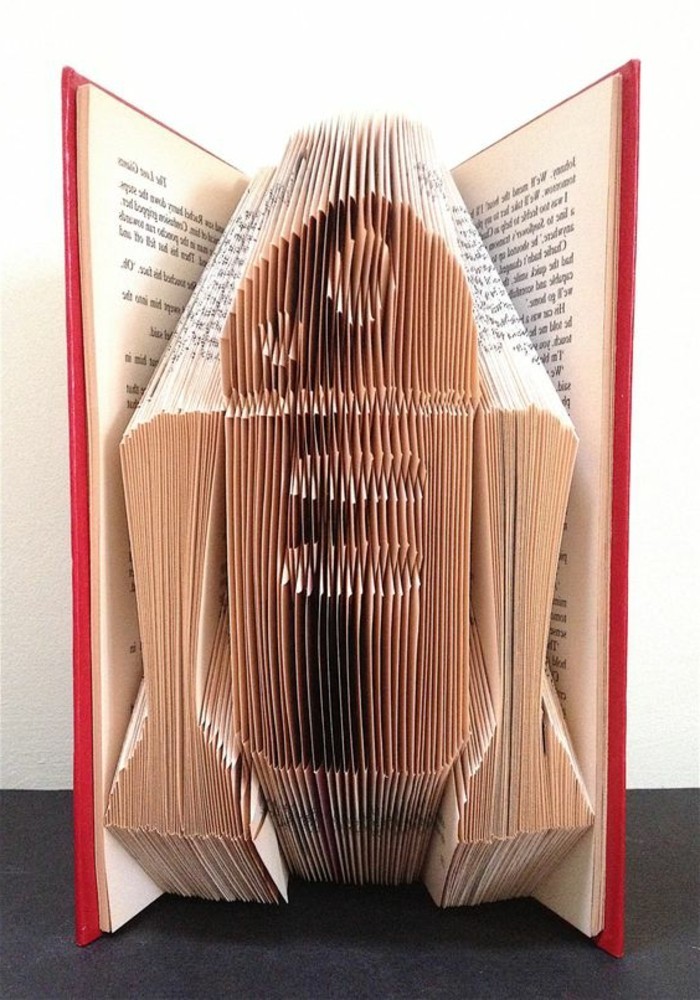
The Core Technique: Measure, Mark, and Fold
This is the most common method, and it’s super reliable. A typical pattern will have columns of numbers. For a simple design, you’ll usually see one column for the page number and two columns for your measurements (Mark 1 and Mark 2). All measurements are taken from the top edge of the page.
Here’s the step-by-step breakdown:
- Prep Your Book: Your pattern will tell you how many pages it requires. Always pick a book with more pages than you need. A common question is where to start. Easy! If your pattern needs 300 pages and your book has 400, just skip the first 50 pages. Start your pattern on the 51st sheet of paper to center the design perfectly.
- Mark the Page: Open to your first working page. Let’s say the pattern says Mark 1 is 8.2 cm and Mark 2 is 12.5 cm. Place your ruler at the very top of the page and make a small, light pencil mark at 8.2 cm, then another at 12.5 cm.
- Make Your Folds: Take the top right corner of the page and fold it inward so the top edge of the paper lines up with your first mark (8.2 cm). Now, take the bottom right corner and fold it upward to line up with your second mark (12.5 cm).
- Crease and Secure: Use your bone folder (or spoon handle!) to press these two folds into sharp, clean creases. Gently tuck the folded page back toward the spine. It should be snug, but not so tight that it strains the paper.
- Repeat, Repeat, Repeat: Turn to the next sheet of paper and do it all over again with the next set of measurements from your pattern. Heads up! Remember that patterns refer to one fold per sheet of paper (a leaf), which technically has two page numbers (front and back). Don’t let the printed numbers confuse you; just focus on folding one sheet at a time.
Honestly, this process is super methodical. Put on some music or a podcast and just find a comfortable rhythm. Consistency is key.
Quick Win Challenge: Wanna try this right now without a pattern? Grab any hardcover book. Turn to a random page, say page 50. Fold the top corner down to the 6cm mark and the bottom corner up to the 15cm mark. Do that for the next 10 pages. See? You’re already doing it! You’re getting a feel for the rhythm.
Common Mistakes and Super Easy Fixes
Your first project is all about learning. You’re going to make mistakes, and that’s completely okay. Here are a few common slip-ups and how to recover without stressing.
- “I tore the page!” It happens to everyone. For a small tear, you can usually fix it with a tiny, discreet piece of clear tape placed on the inside of the fold where it won’t be seen. No one will ever know.
- “My folds look messy and uneven.” This usually happens when you rush. If a fold looks off, gently unfold it right away, flatten the page with your bone folder to erase the crease as much as possible, and try again. The paper has some memory, but one correction is usually fine.
- “I marked the wrong spot!” This is the easiest fix of all. A good eraser will lift the pencil mark right off. Just be gentle so you don’t smudge the page.
A little time-saving hack: Once you get comfortable, you can speed things up by marking the measurements for 10-20 pages all at once. Then, go back and do all the folding for that section. It gets you into a nice groove.
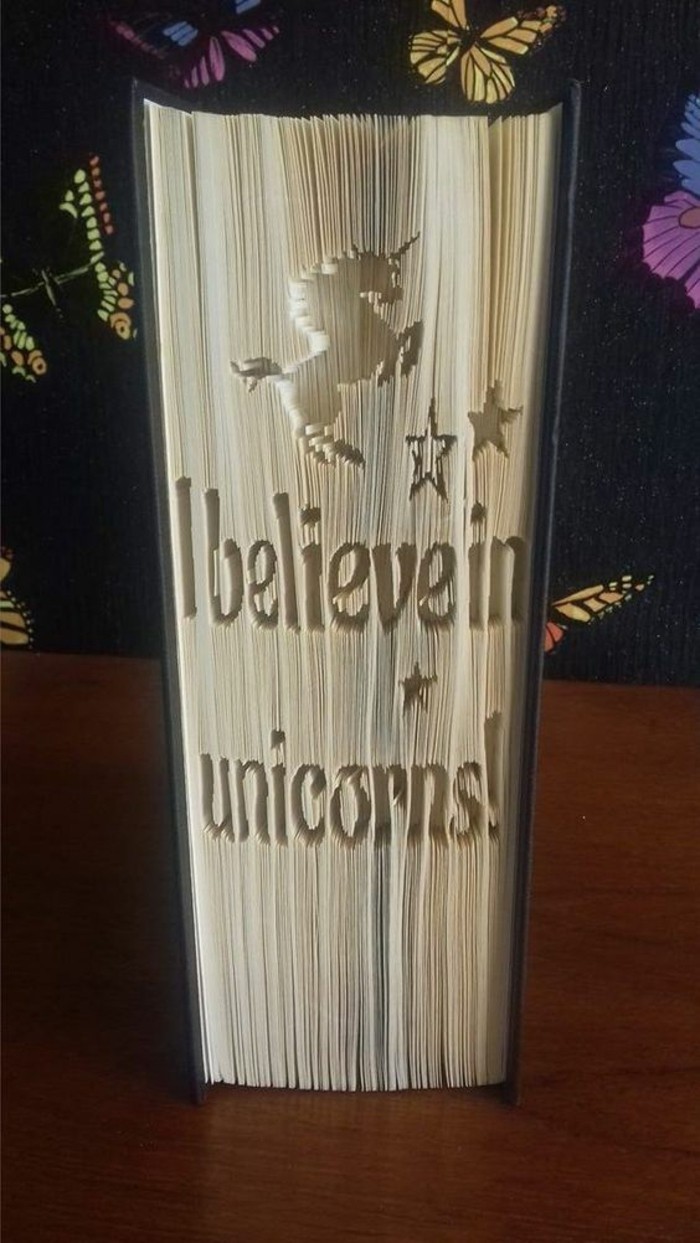
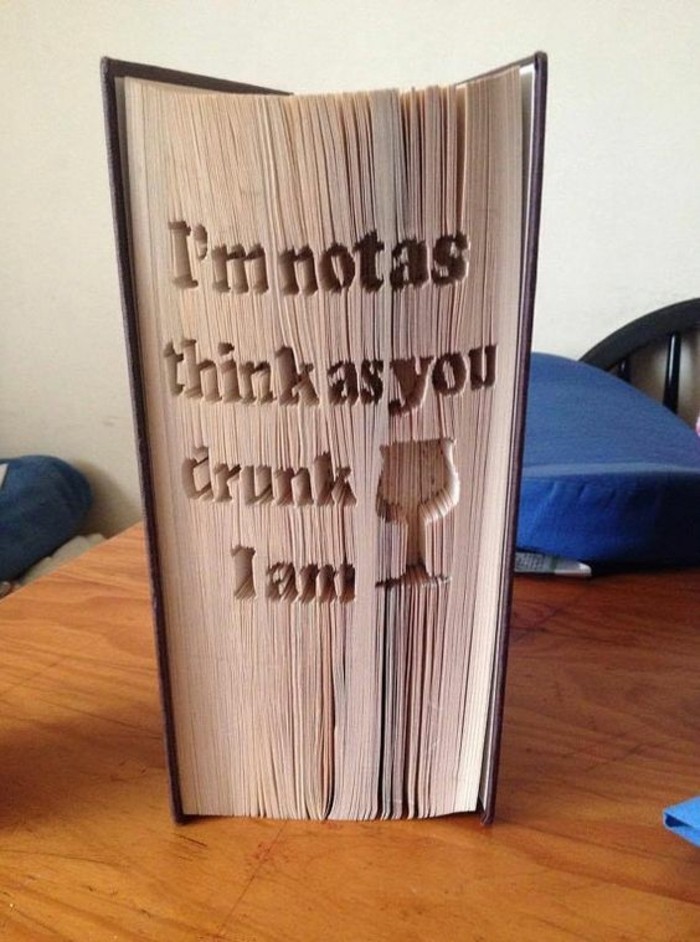
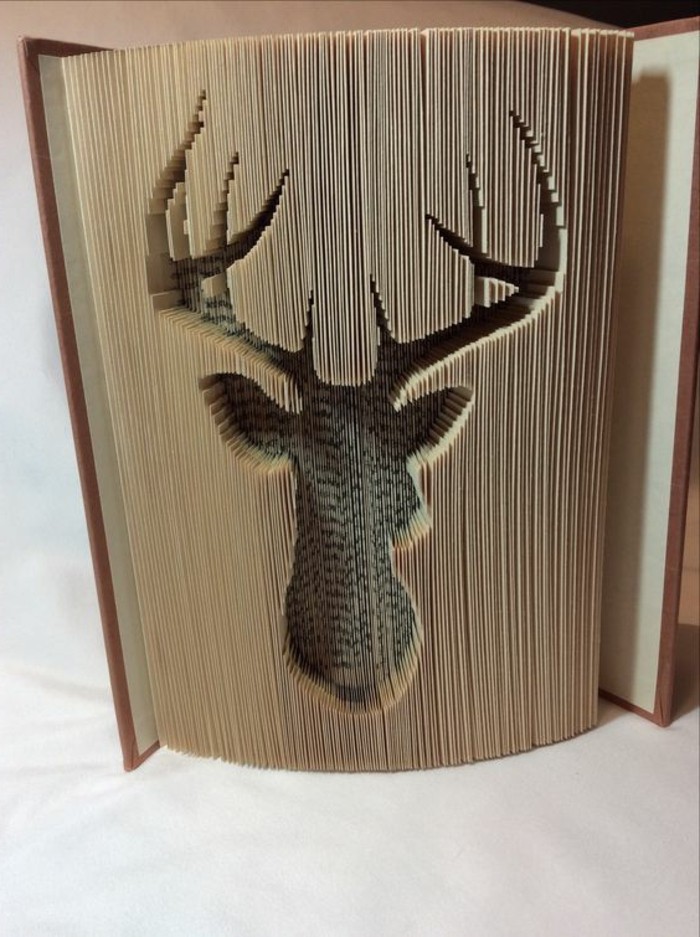
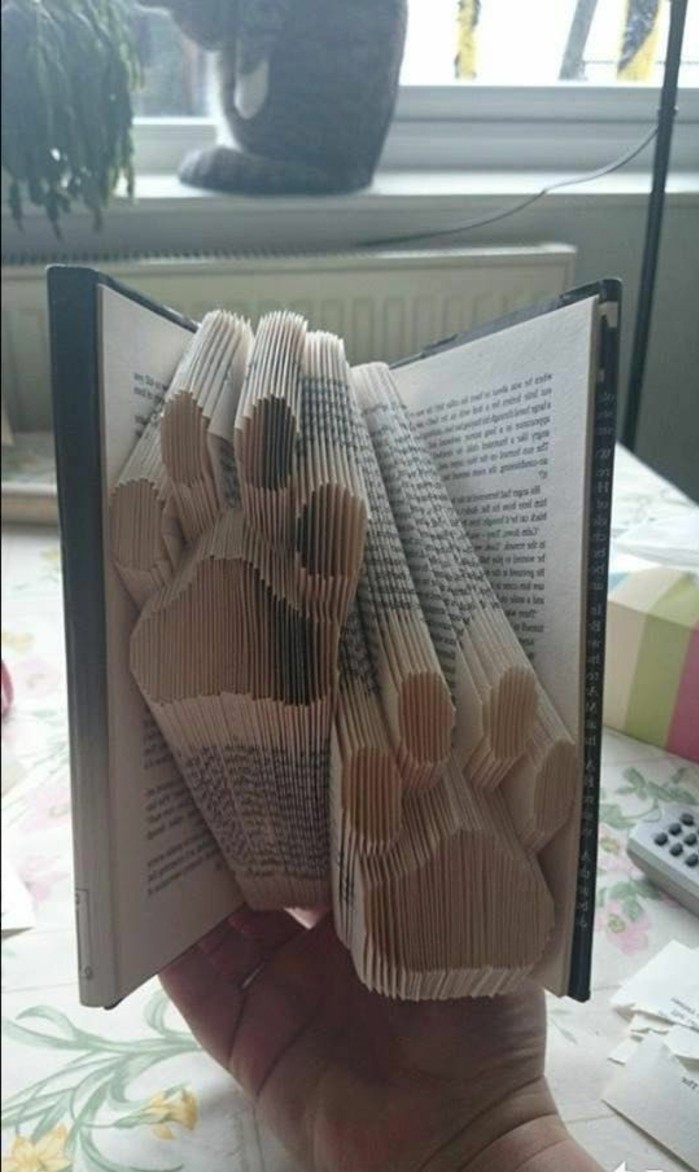
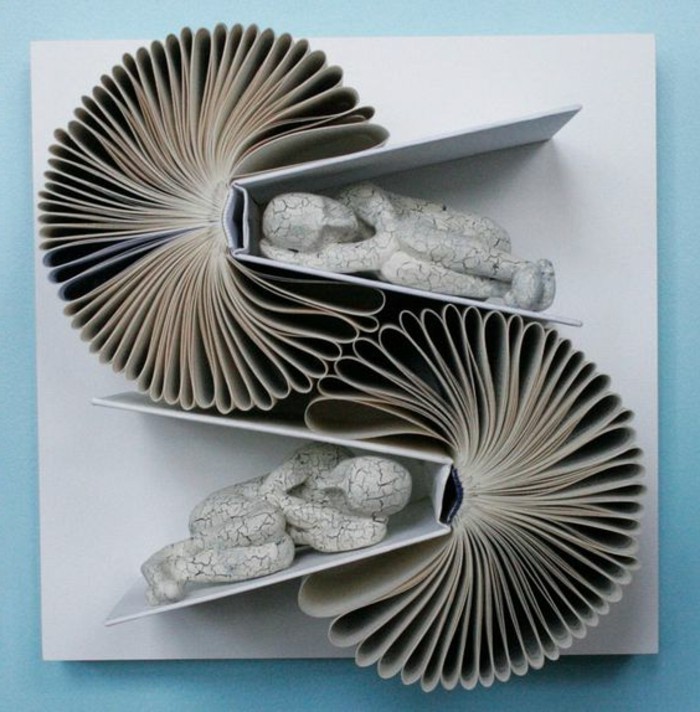
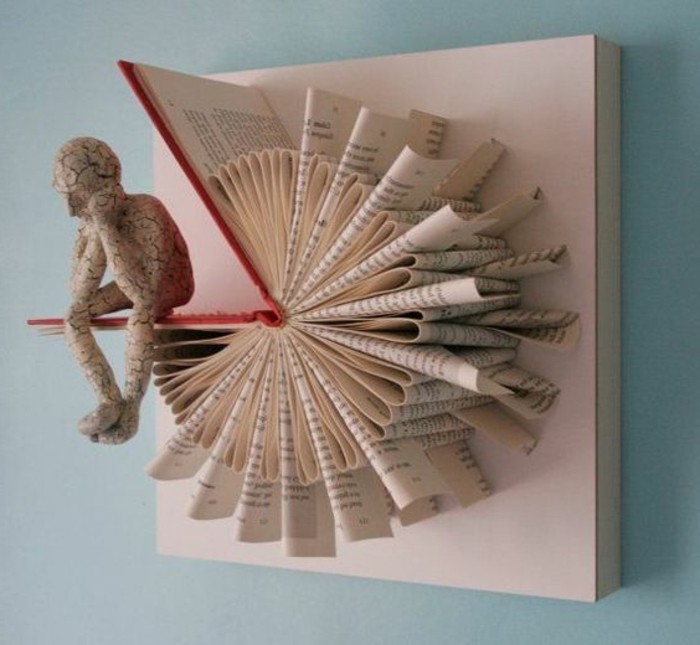
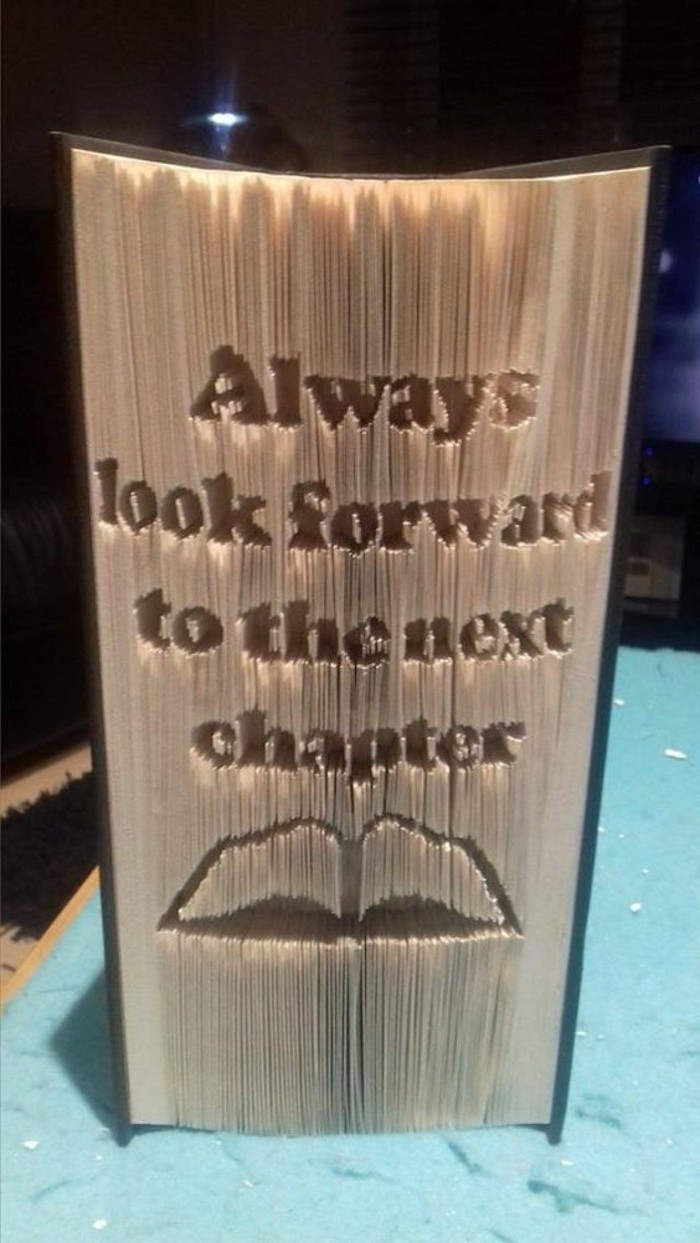
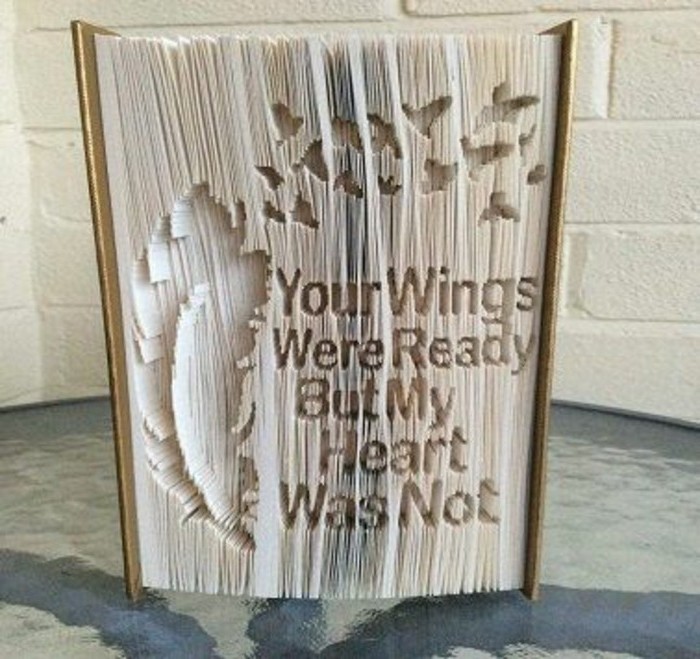
Leveling Up: The Cut-and-Fold Technique
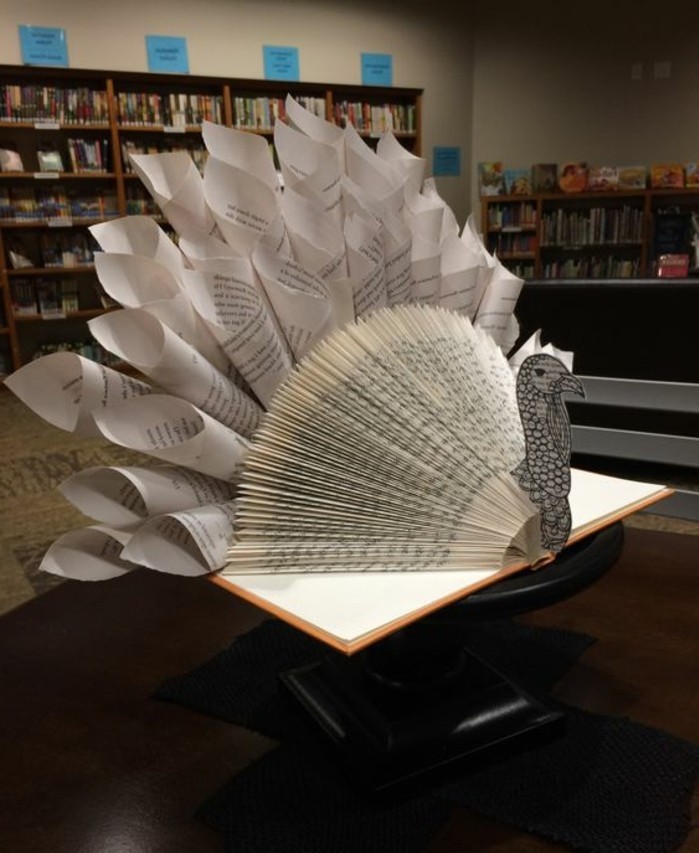
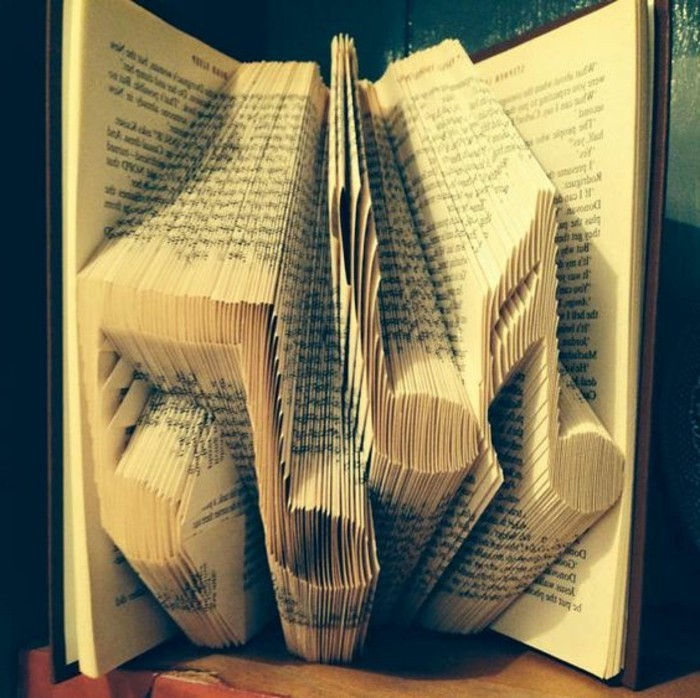
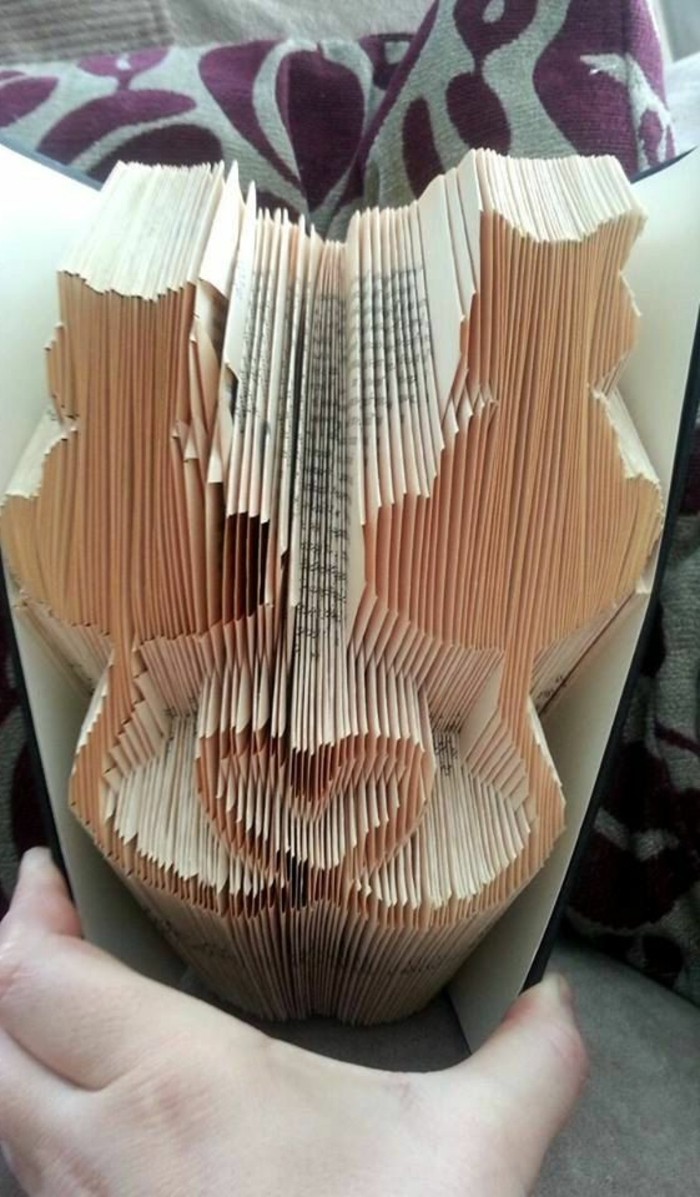
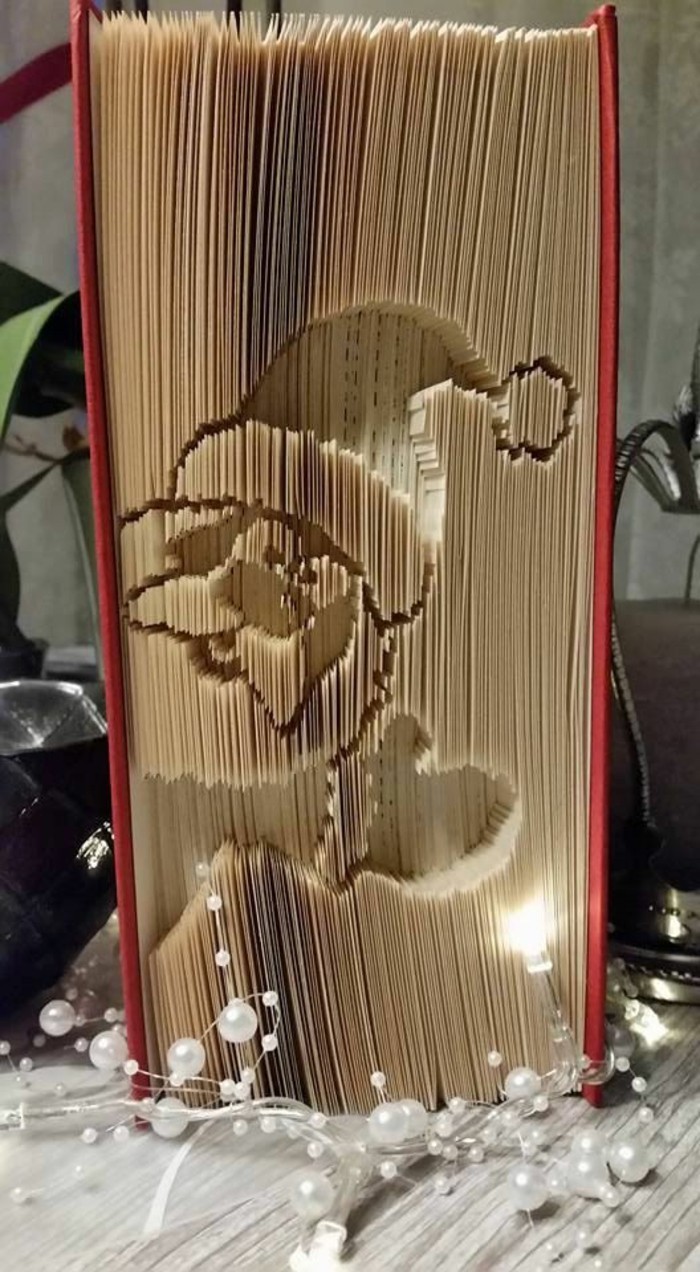
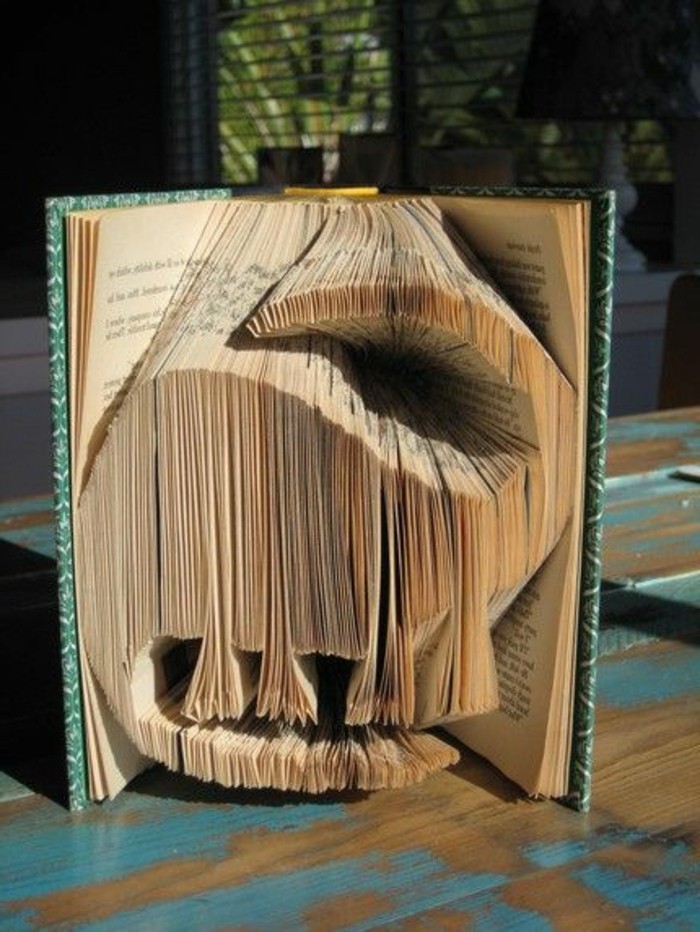
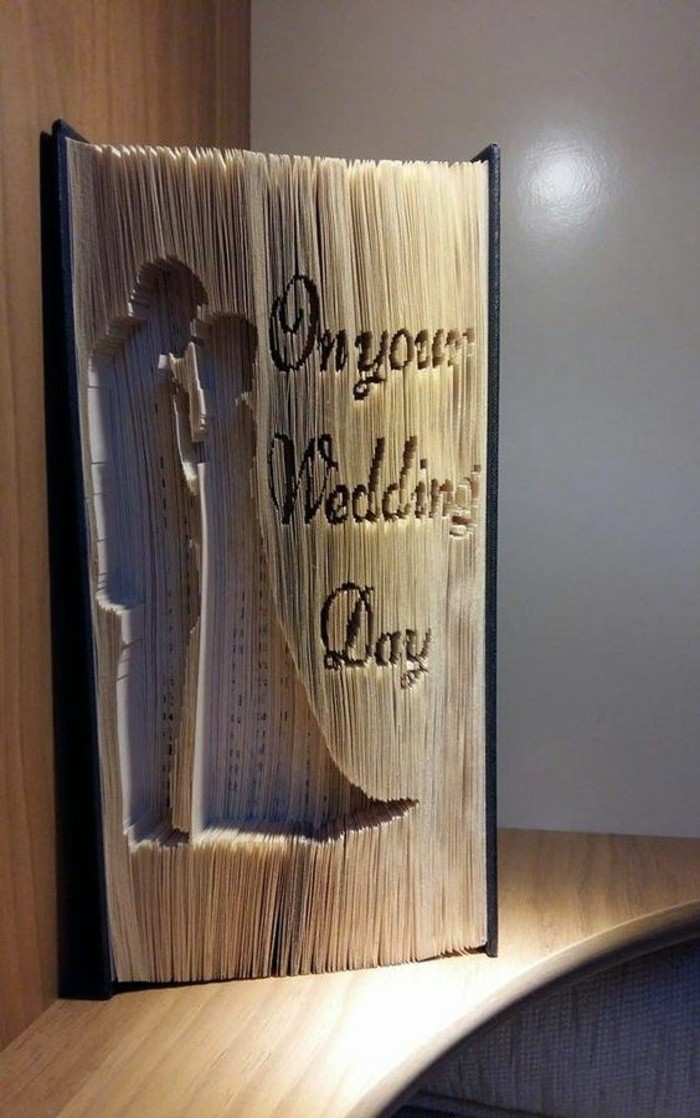
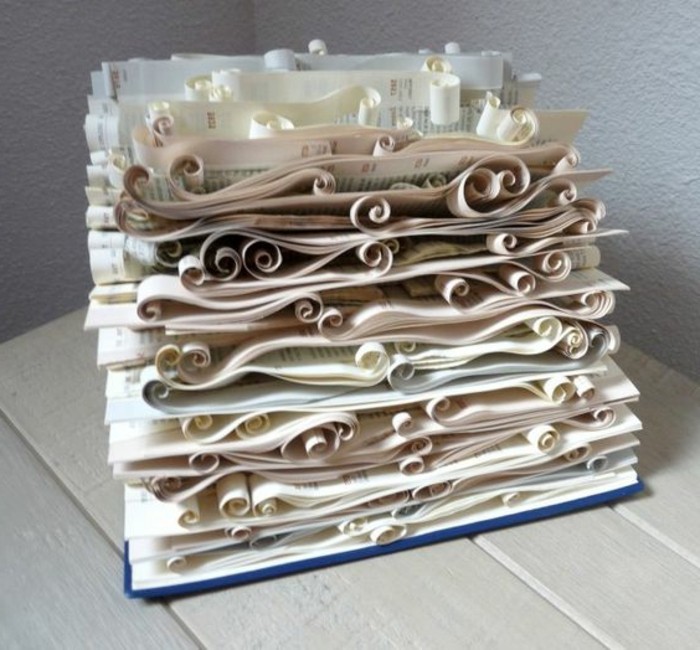
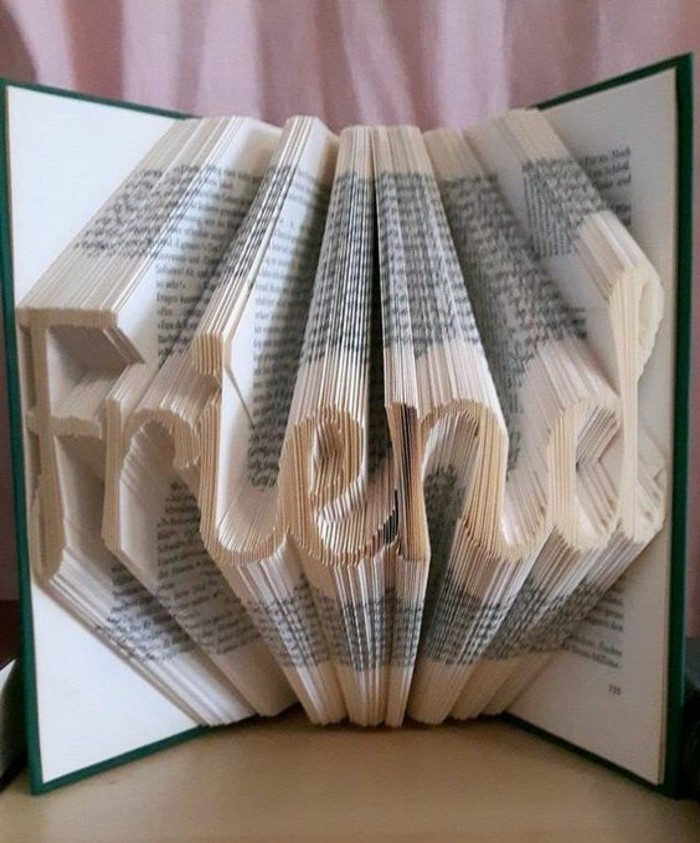
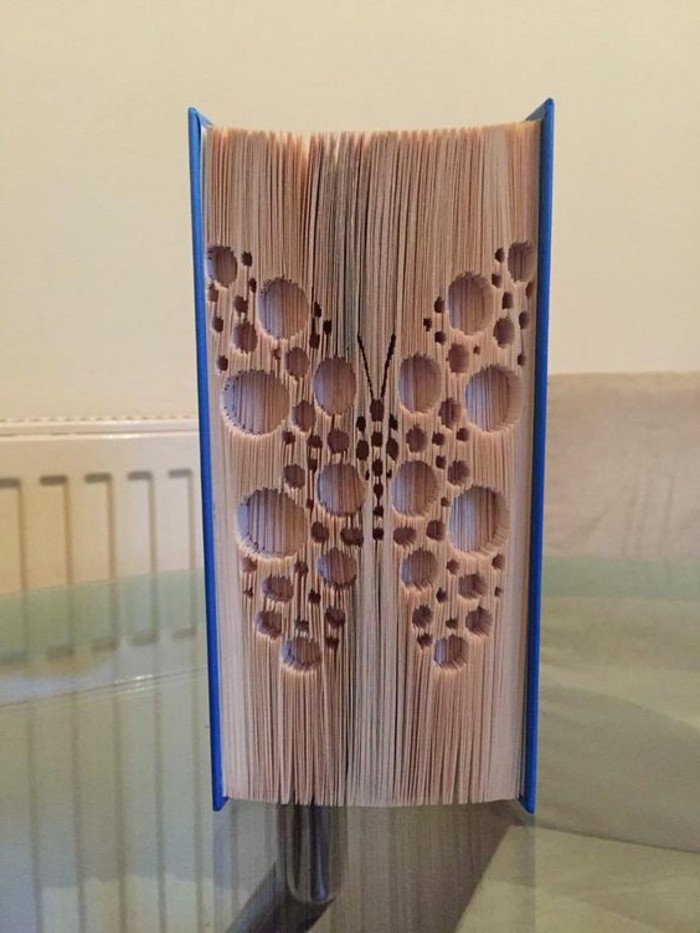
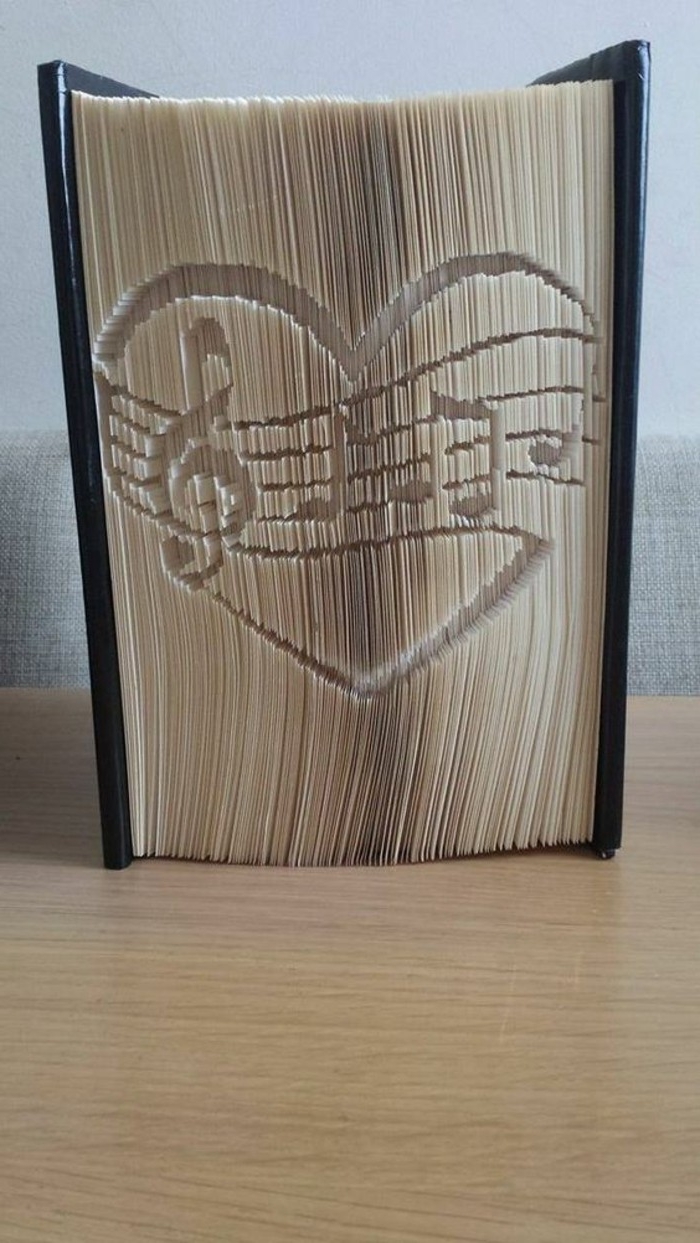
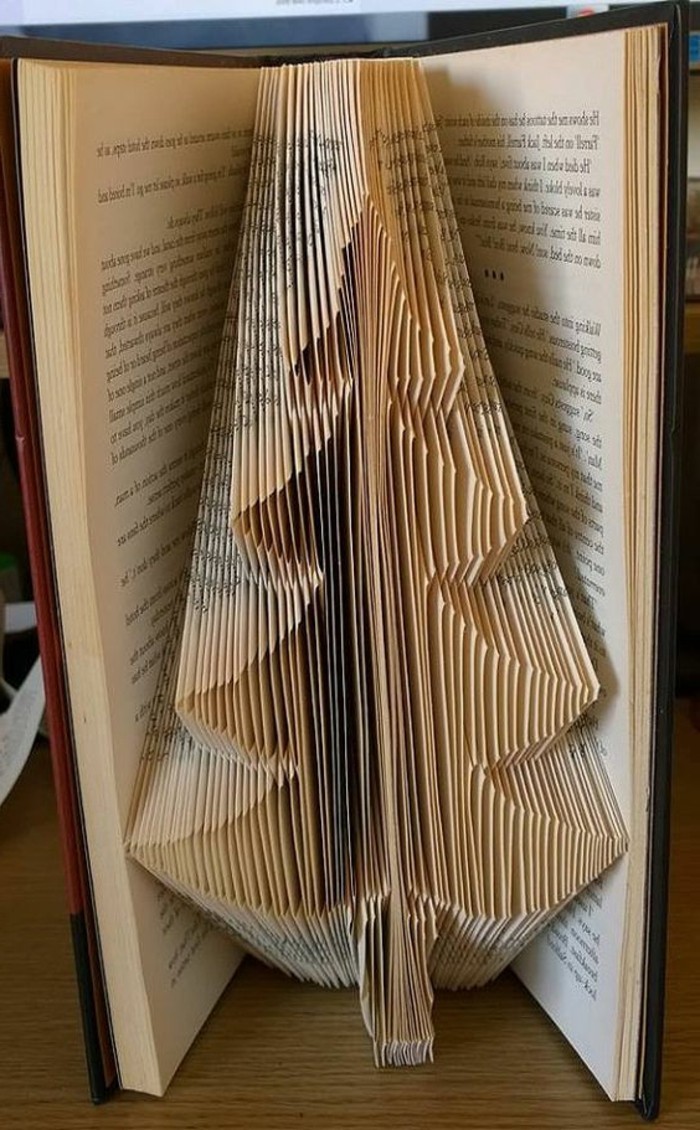
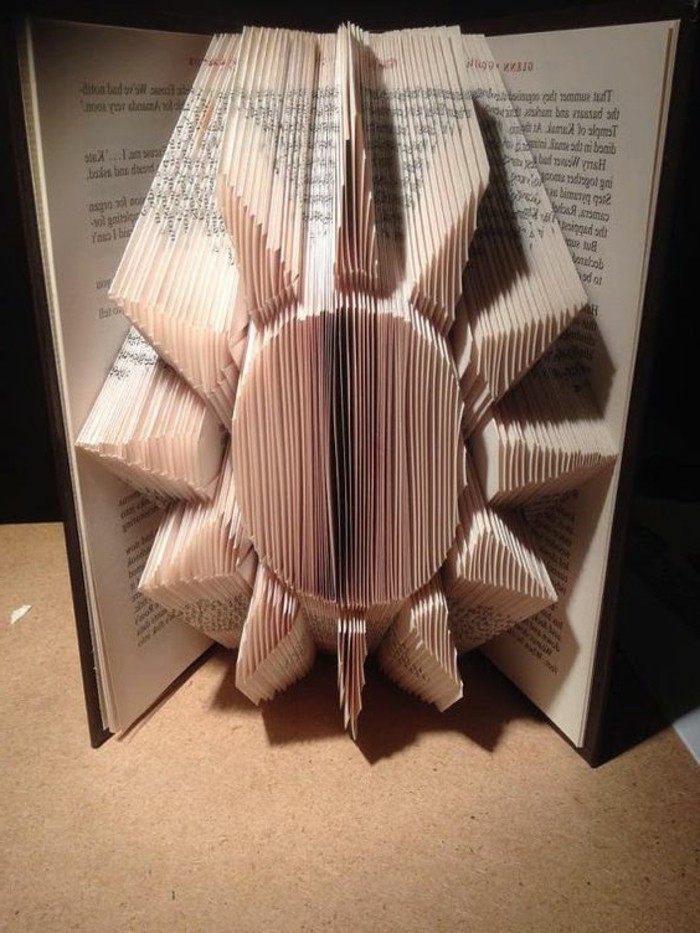
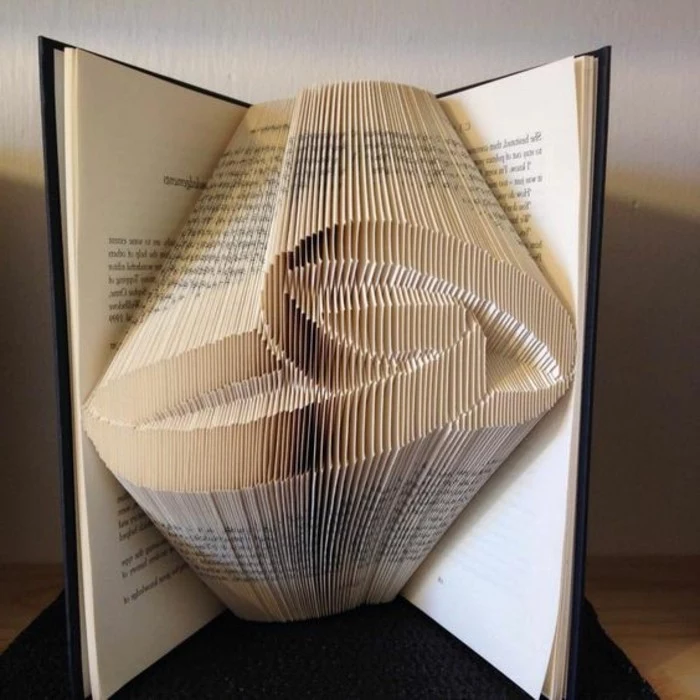
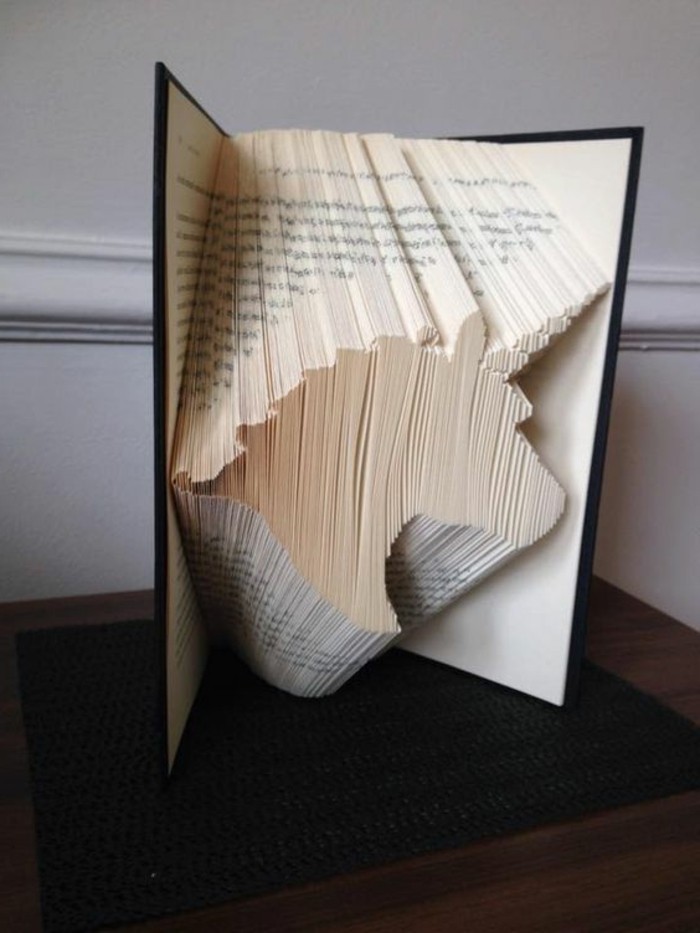
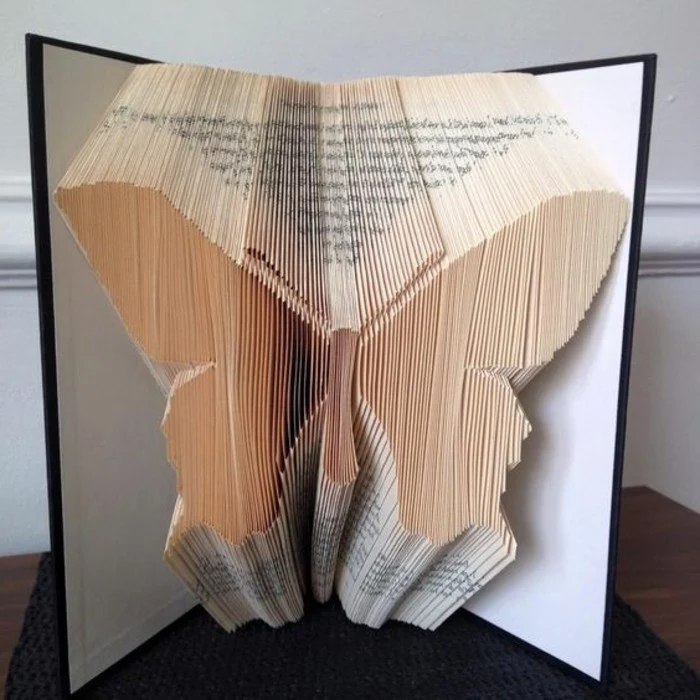
Once you’ve got a few basic projects done, you might feel the urge to try something more advanced. The cut-and-fold method creates incredible designs that seem to float inside the book, allowing for detailed silhouettes and words.
But a serious safety warning first: This technique requires a very sharp craft knife (like an X-Acto knife), and you need to be careful. I’ve seen some nasty cuts from careless handling. Always, and I mean ALWAYS, use a cutting mat underneath your page to protect the book and your table. Always cut away from your body, and always use a fresh, sharp blade. A dull blade is dangerous because it requires more pressure, which is when slips happen. If you’re not comfortable with a craft knife, just stick with the fold-only method. It’s just as beautiful.
Caring for Your Art (And Yourself)
When you’re done, you’ve got a beautiful paper sculpture! To keep it looking great, you’ll want to protect it from dust and sunlight. The best way to dust it is with a can of compressed air (the kind for keyboards) or a very soft, clean paintbrush. And try to keep it out of direct sunlight, which can fade the cover and make the pages brittle over time.
By the way, take care of yourself, too. You’ll be sitting and focusing for long periods. Work in a well-lit area, sit in a comfy chair, and make it a rule to stand up and stretch every 30-45 minutes. This is a marathon, not a sprint!
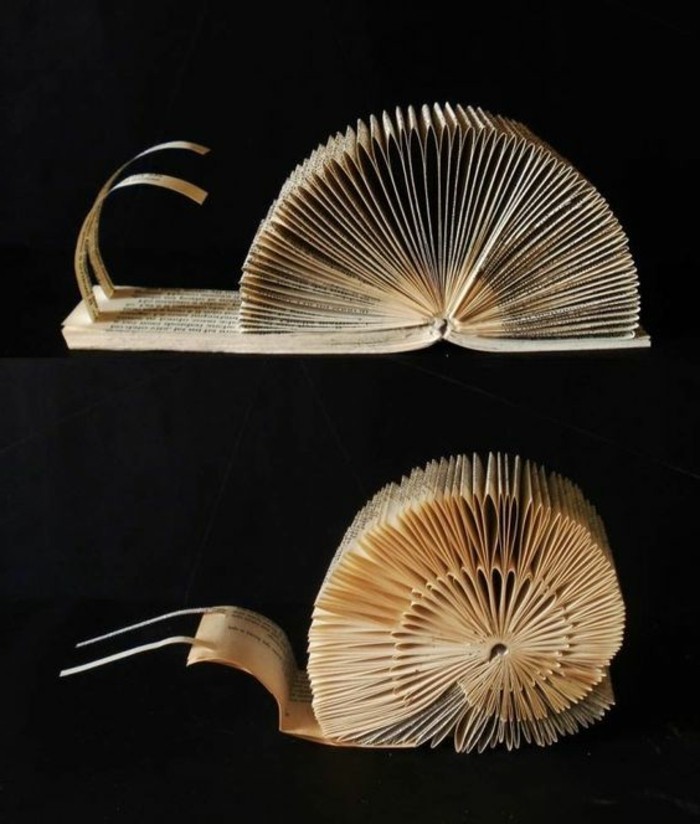
The real joy of this craft is in the slow, deliberate process. You take something common, something often overlooked, and with your own time and attention, you reveal a hidden beauty inside. I hope this guide gives you the confidence to pick up a book and create something amazing. Happy folding!
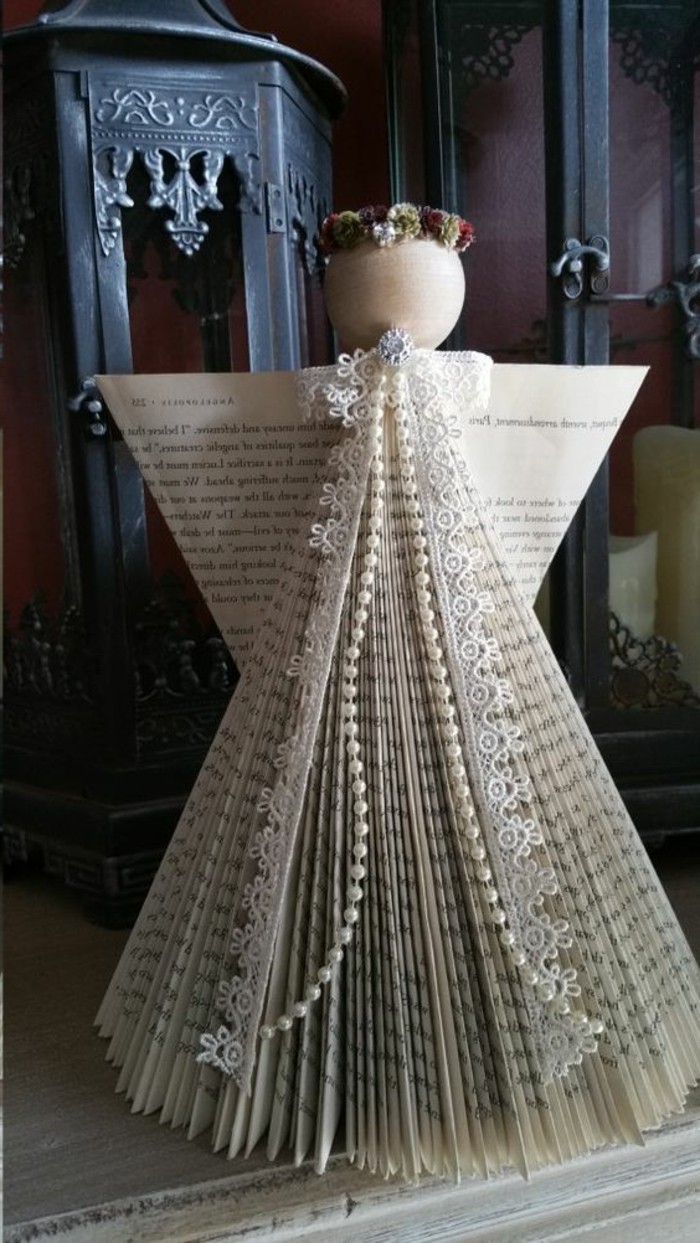
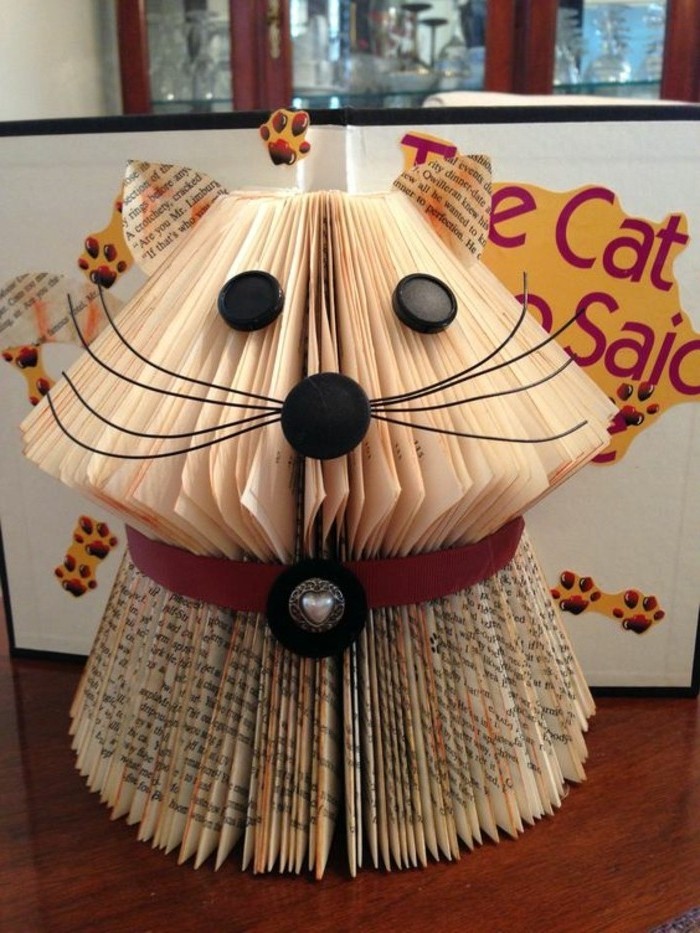
Inspiration Gallery
Ready to upgrade your toolkit? While a pencil and ruler are enough to start, a few key items elevate the craft:
- A Bone Folder: This is the game-changer. A genuine bone or Teflon folder from a brand like Cricut creates incredibly sharp, professional-looking creases without damaging the paper.
- A Mechanical Pencil: For consistent, fine lines when marking your pages. Much more precise than a standard pencil.
- A Self-Healing Cutting Mat: If you venture into


Option A (Hardcover): Offers a stable, self-standing base for your finished art. The covers act as a natural frame, perfect for display on shelves or mantels.
Option B (Paperback): Can be easier to handle and fold, especially for beginners. The final piece is lighter but may need support to stand upright.
For your very first project, a sturdy mass-market paperback is often more forgiving.


There are more than 170 million books in the Library of Congress. Imagine the millions more sitting unread in homes and shops!
By giving a used book a new purpose, you’re participating in a beautiful form of upcycling, celebrating the object itself long after its story has been read and extending its life as a piece of art.


What if I tear a page or make a wrong fold?
Don’t panic! It happens to everyone. For a small tear, a tiny dab of clear-drying glue like Aleene’s Tacky Glue applied with a toothpick can make it nearly invisible. If you’ve folded a page incorrectly, gently unfold it and use a bone folder to firmly press the old crease out before making the new one.

There’s a meditative quality to the repetition of folding. Page after page, the simple, focused movements can quiet a busy mind. Many crafters find they enter a ‘flow state,’ losing track of time as the pattern slowly emerges from the pages. It’s as much about the calming process as it is about the beautiful result.


- Your folds will be noticeably sharper and more defined.
- You’ll avoid the shiny marks that fingernails can leave on paper.
- It reduces hand strain on larger projects with hundreds of pages.
The secret to that professional finish? A simple and inexpensive tool called a bone folder.


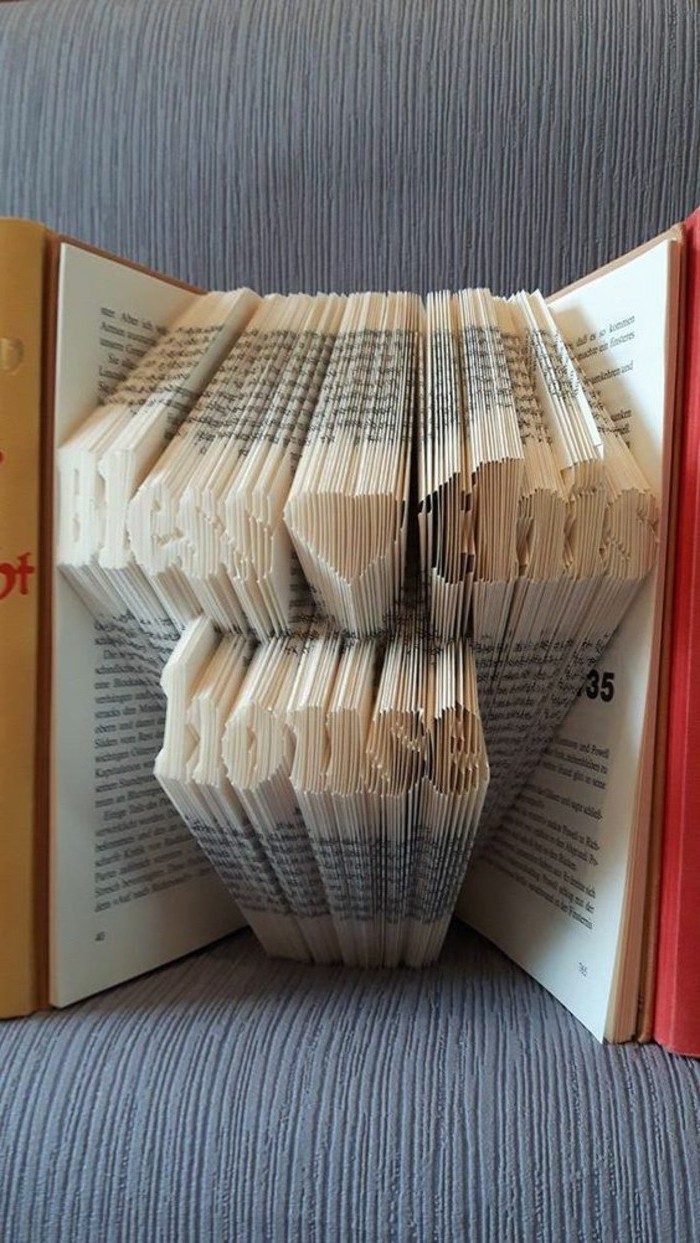
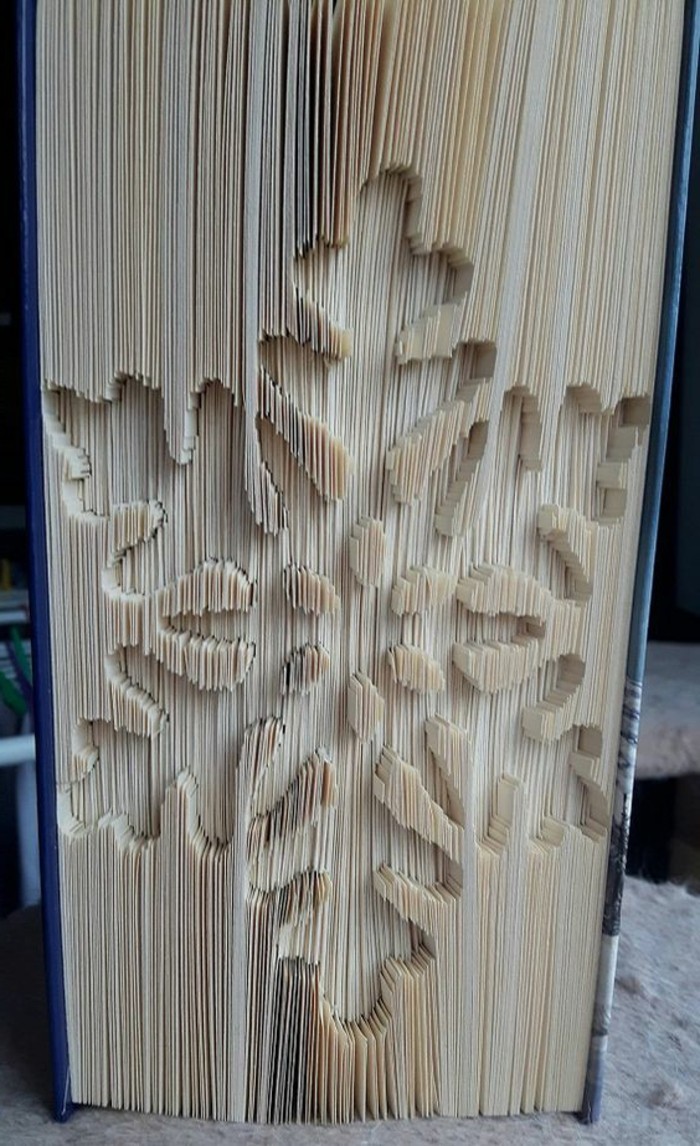
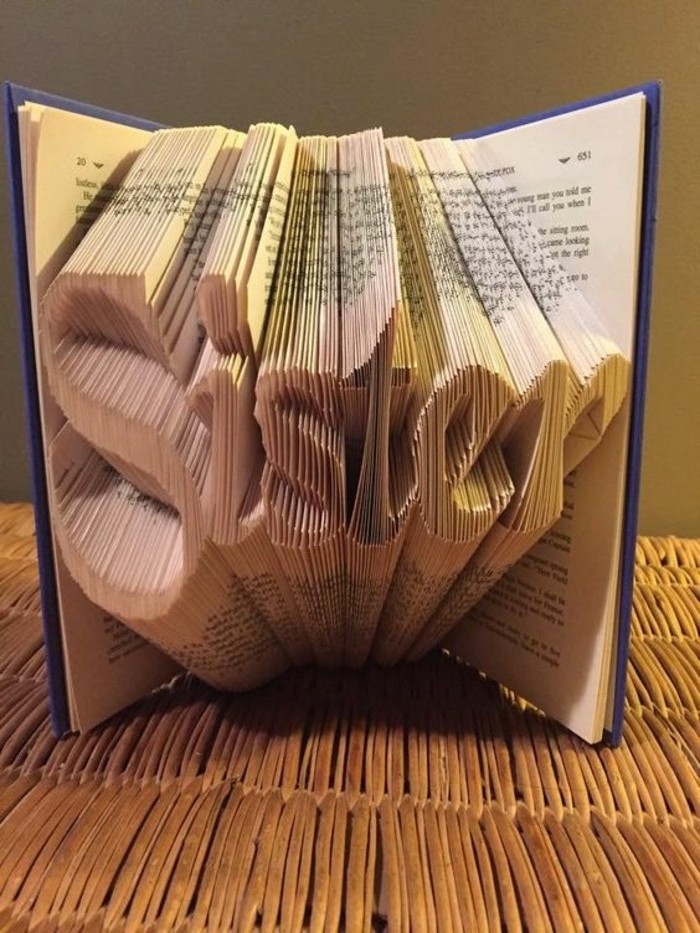
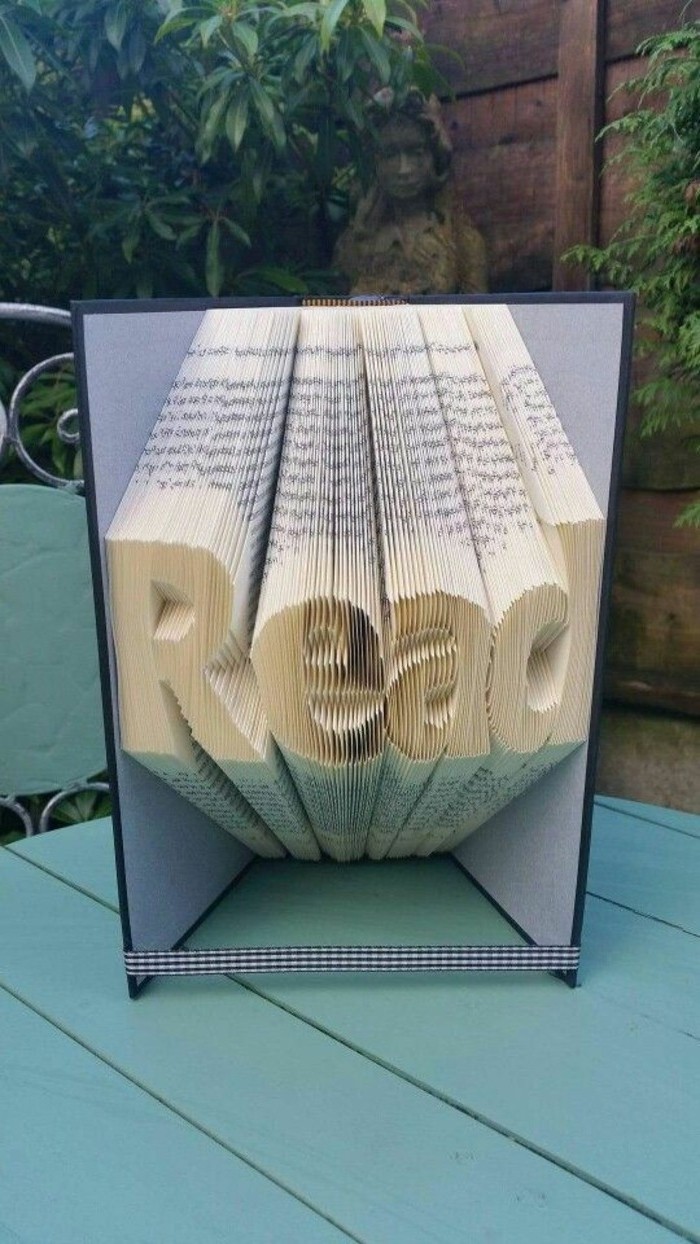
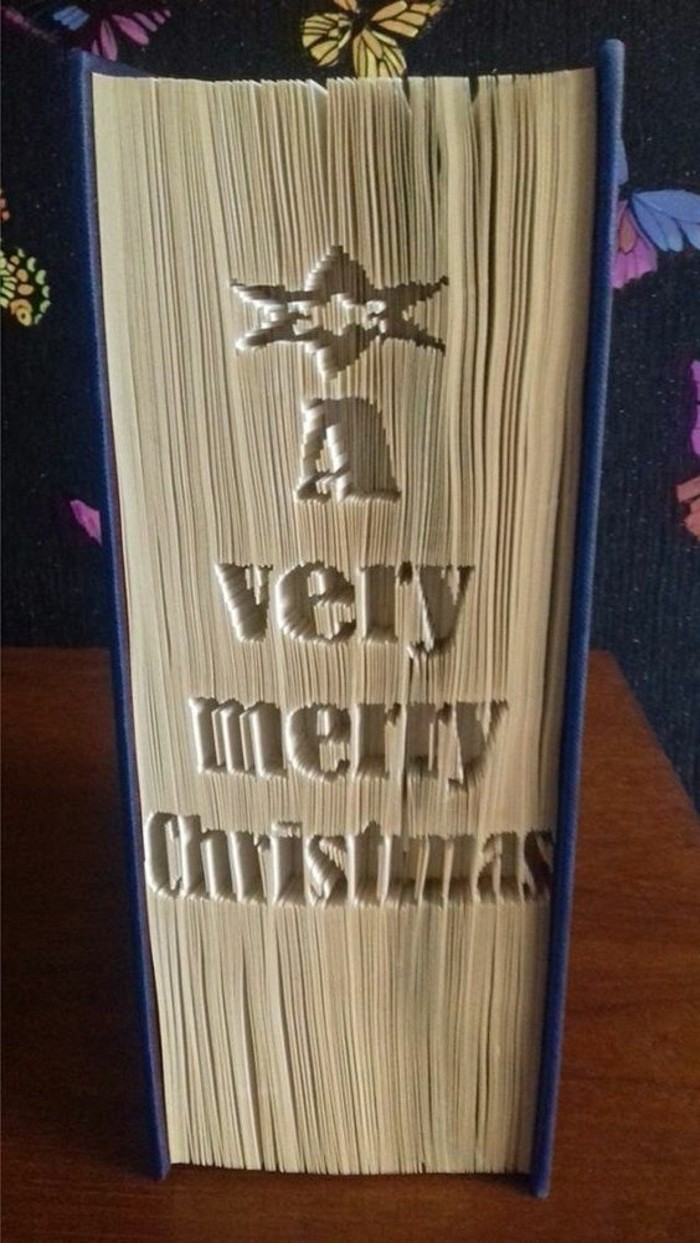
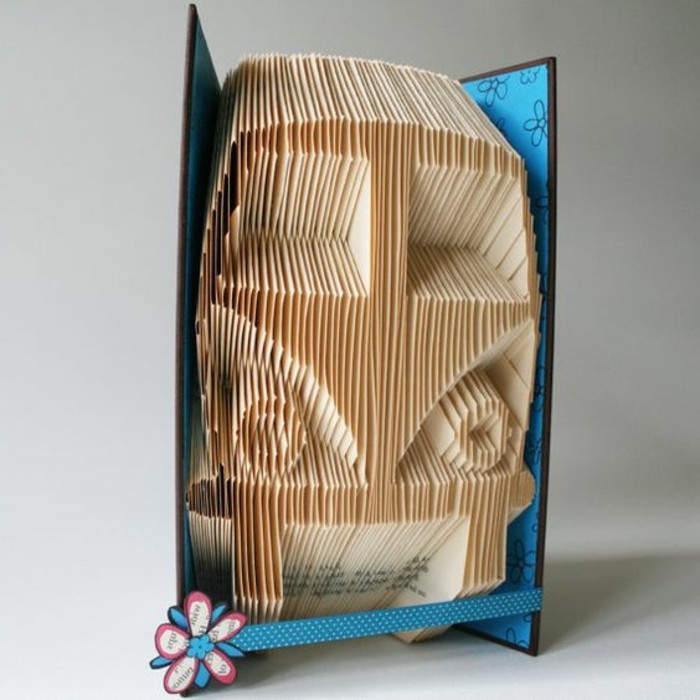
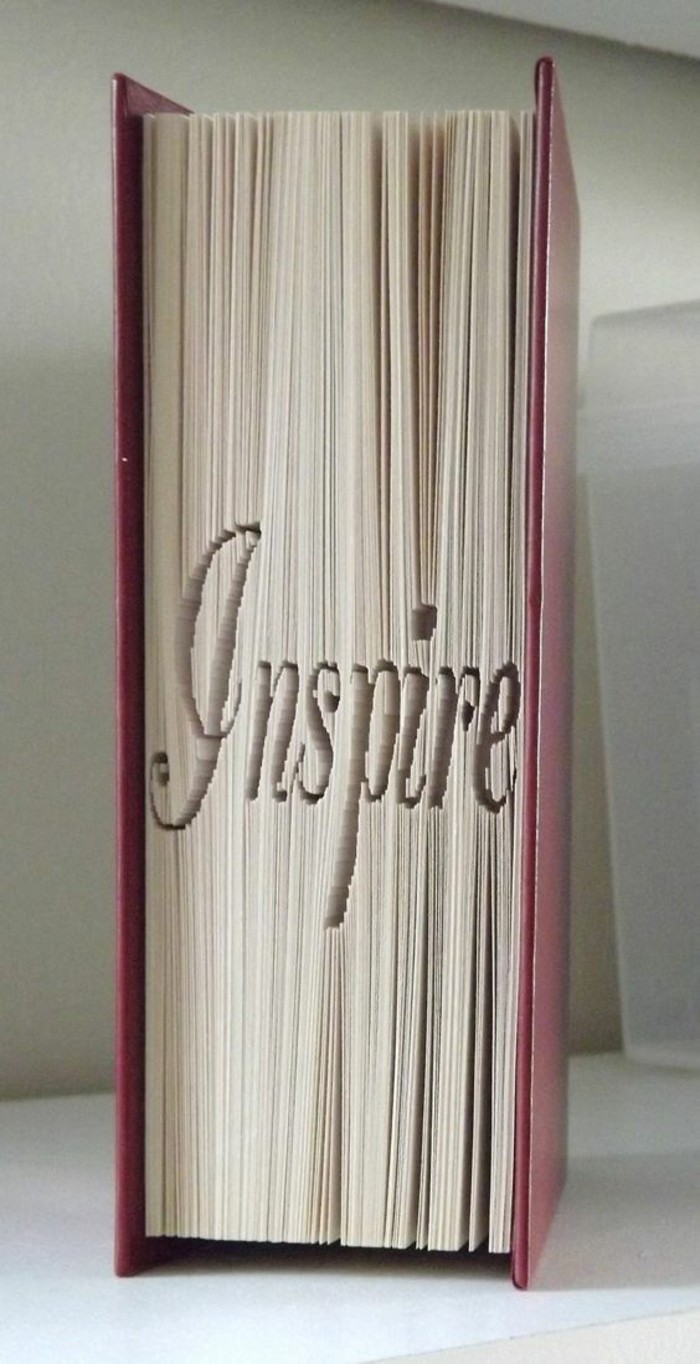
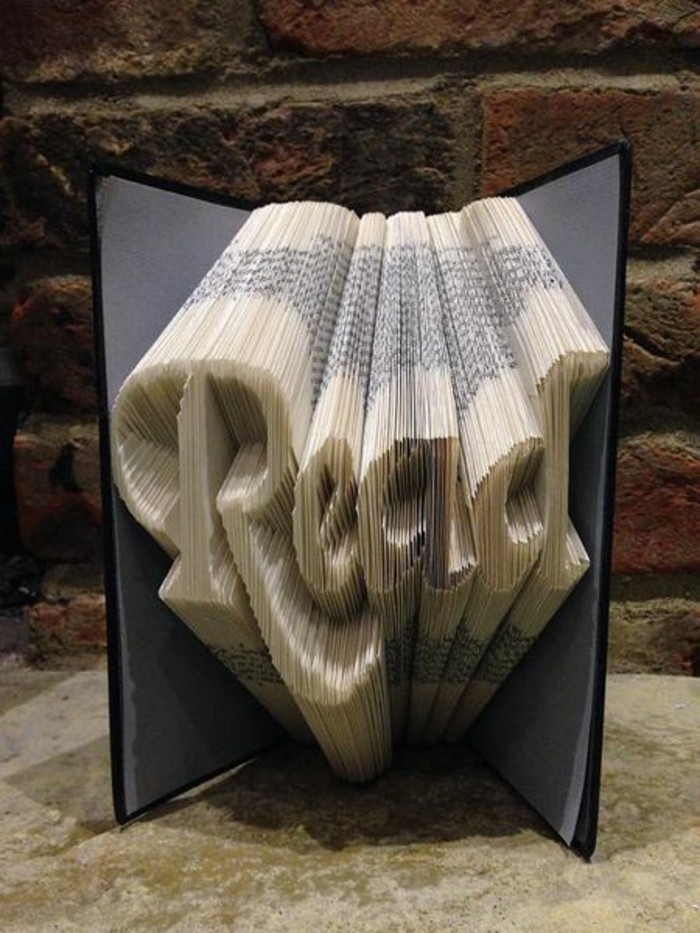
Don’t forget page count: A common beginner mistake is choosing a book that’s too thin for the desired pattern. Most intricate patterns, like words or detailed images, require at least 400-500 pages to create enough folds for the design to be clear and legible. Always check the pattern’s recommendation first!
For a surprising pop of color, try coloring the edges of the book’s pages *before* you start folding. Clamp the book tightly shut and use a sponge applicator to lightly dab a metallic ink pad (like those from Tsukineko) along the fore-edge. Let it dry completely, and as you fold, flashes of color will appear within your design.
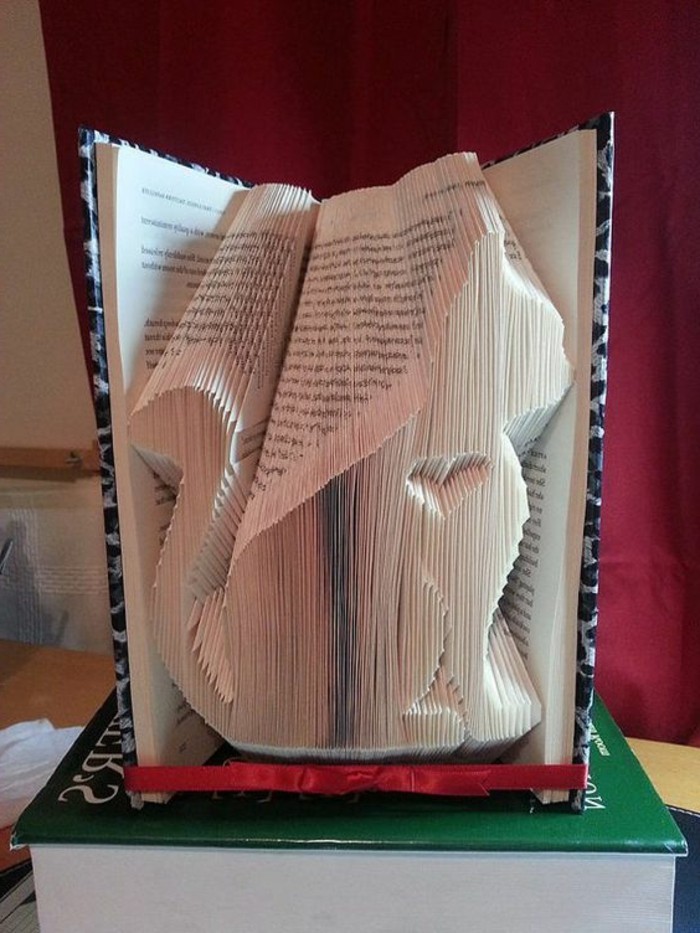
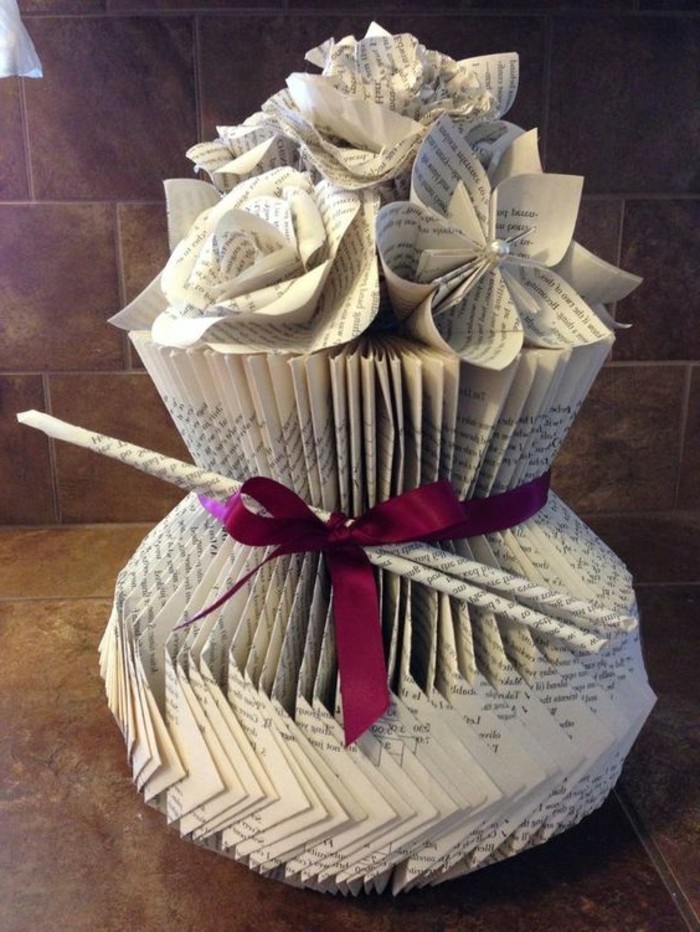
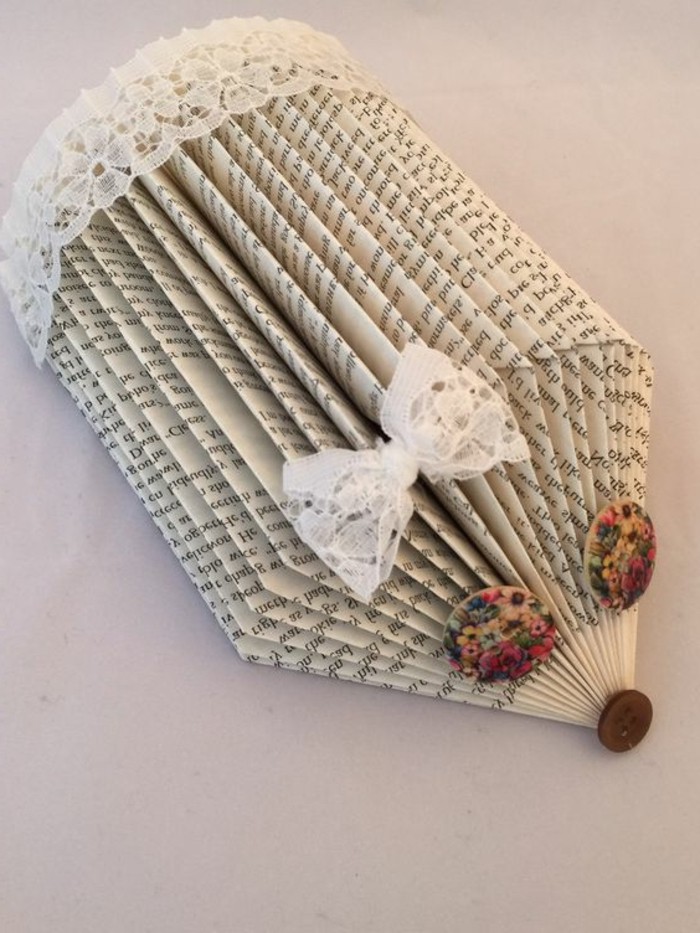
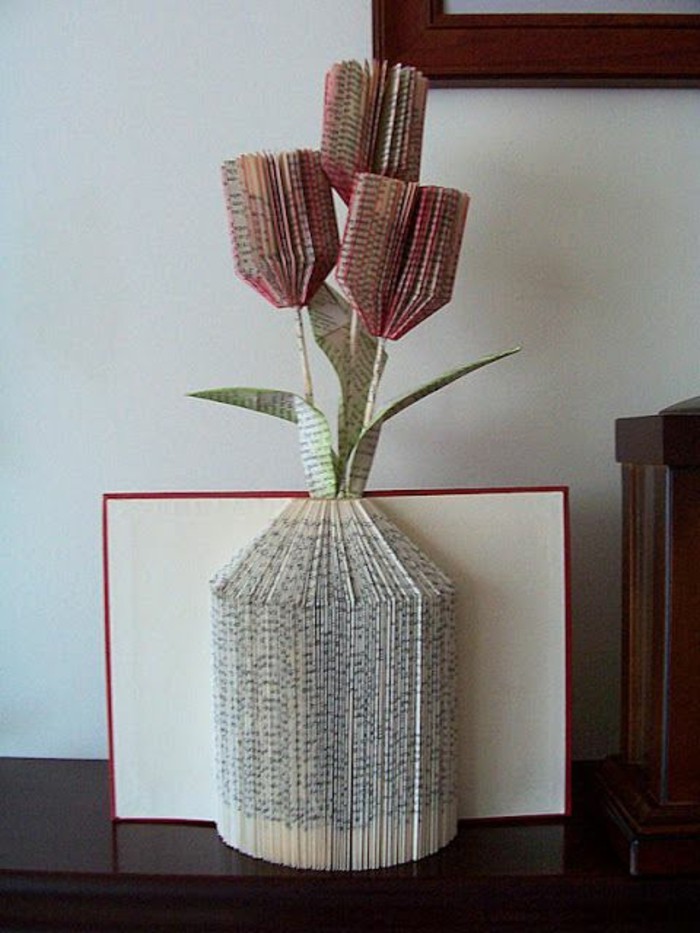
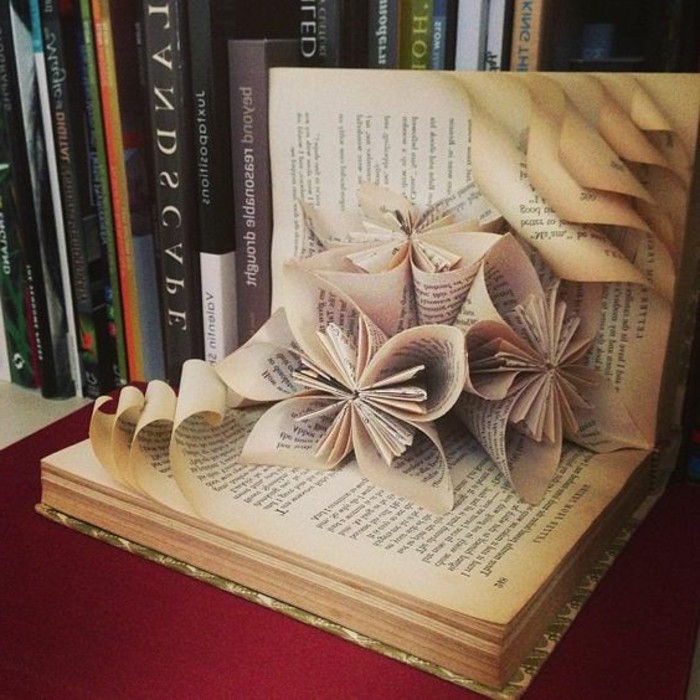
Once your masterpiece is complete, how you display it is key. Think about complementing its new life as a sculpture:
- Place it on a mantle, flanked by smaller, simpler objects so it remains the star.
- Use a small, adjustable easel to display it on a side table.
- For a touch of magic, entwine a delicate strand of copper-wire fairy lights through the folds.


Building your book stash doesn’t have to be expensive. Your best bets are library book sales, where you can often get a whole bag for a few dollars. Also, keep an eye on local thrift stores and the growing number of ‘Little Free Library’ boxes in neighborhoods—they’re treasure troves of unwanted books perfect for folding.


The book is a physical object. It’s a sculpture. It’s a vessel of ideas. – Anselm Kiefer


A hidden pitfall: The book’s ‘gutter’—the inside margin where the pages are glued to the spine. If you fold too tightly into the gutter, you risk cracking the spine or tearing the pages. Always leave a small, consistent gap between your fold’s deepest point and the binding itself. This ensures the book opens comfortably and the spine stays intact.

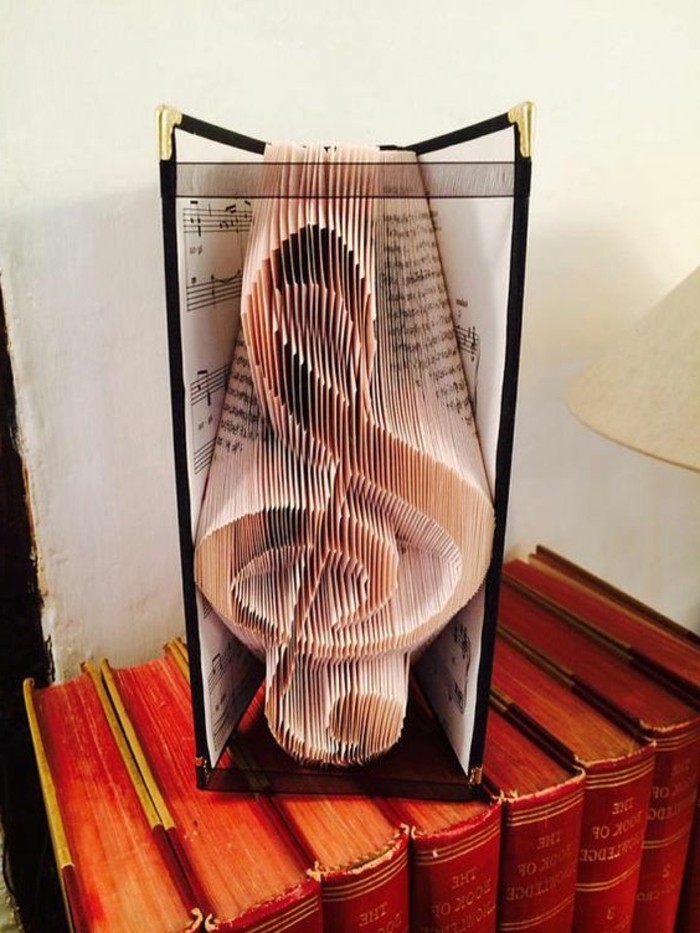
Need a dose of inspiration? Look up the work of Isaac Salazar, often considered a pioneer of modern book art. He transformed the craft from simple shapes into intricate words and logos, showing the world that a book’s pages could become a canvas for highly detailed sculptures.

Ever wonder why so many book folders seek out old Reader’s Digest Condensed Books? It’s the perfect storm of features: they’re hardcover and self-standing, they have a high page count (usually over 500), and the paper is often high-quality, non-glossy, and ages to a lovely cream color. Plus, they are widely available in second-hand shops.


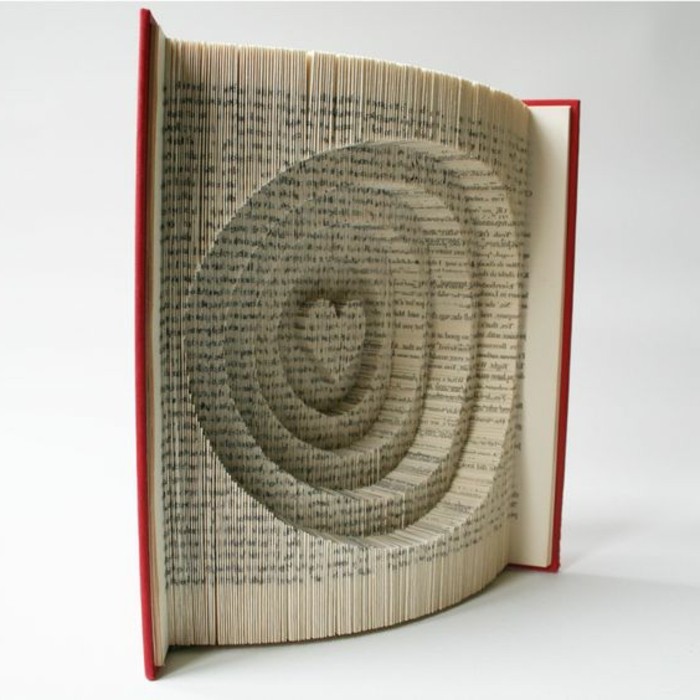
Measure & Mark: This classic technique involves using a ruler to mark specific points on each page from a list of measurements. It’s precise and great for geometric or text-based patterns.
Graphic Pattern: This newer method uses a template that you place directly behind the page you’re folding. You simply fold the page corners to meet the edges of the printed design. It’s more intuitive and often faster.
Many Etsy pattern sellers now offer both formats, so you can choose what works for you.


Working with a book that has glossy, coated pages? Be gentle. They crease differently and can be prone to cracking. Use a Teflon bone folder to avoid shiny marks and apply firm, even pressure rather than a quick, sharp fold.


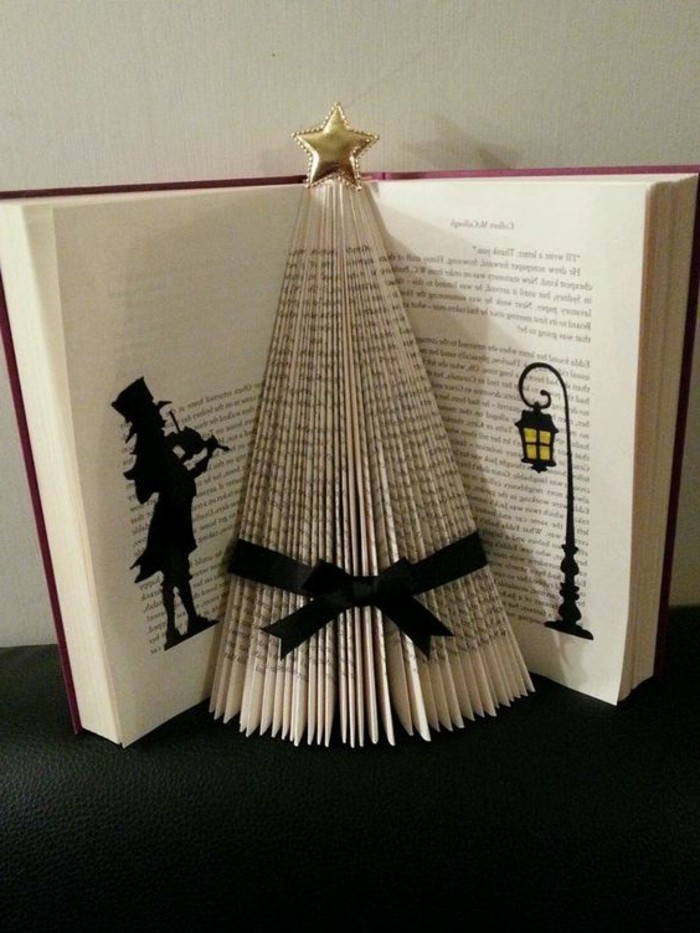
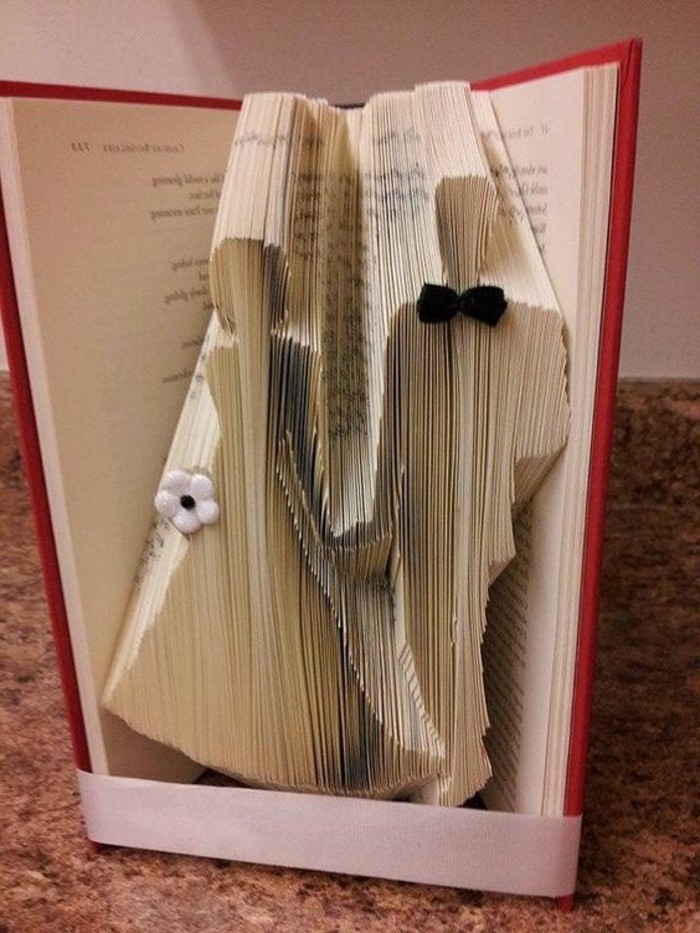
A folded book makes an incredibly personal gift. Consider these ideas:
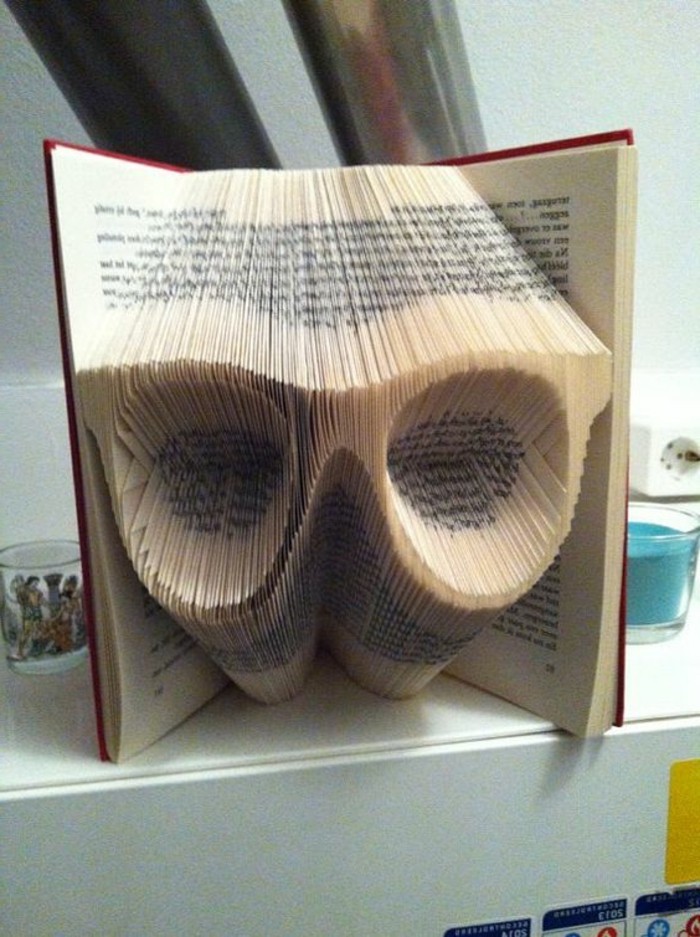
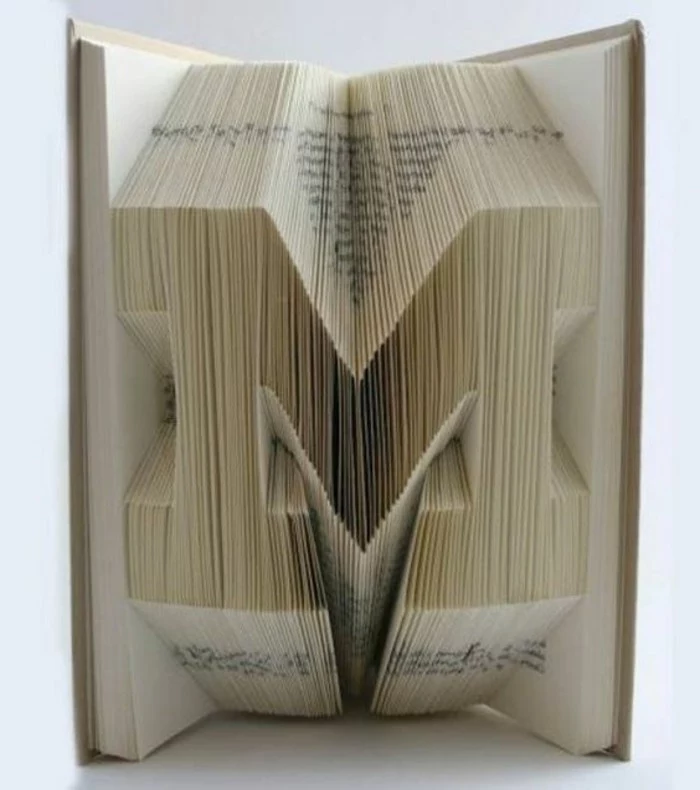
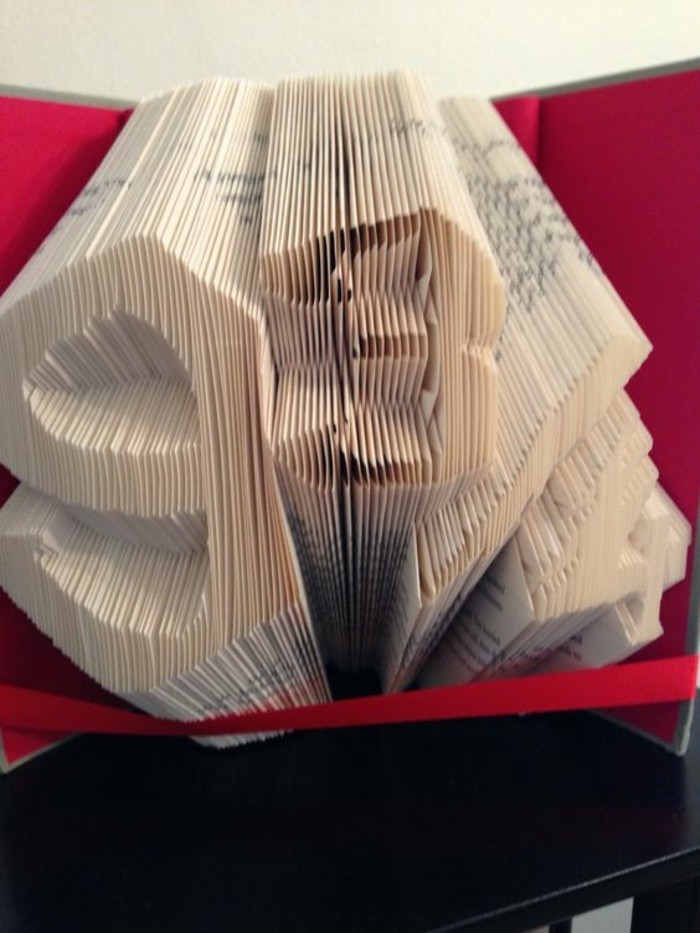
- For a wedding or anniversary, fold the couple’s initials or wedding date into a beautiful vintage book.
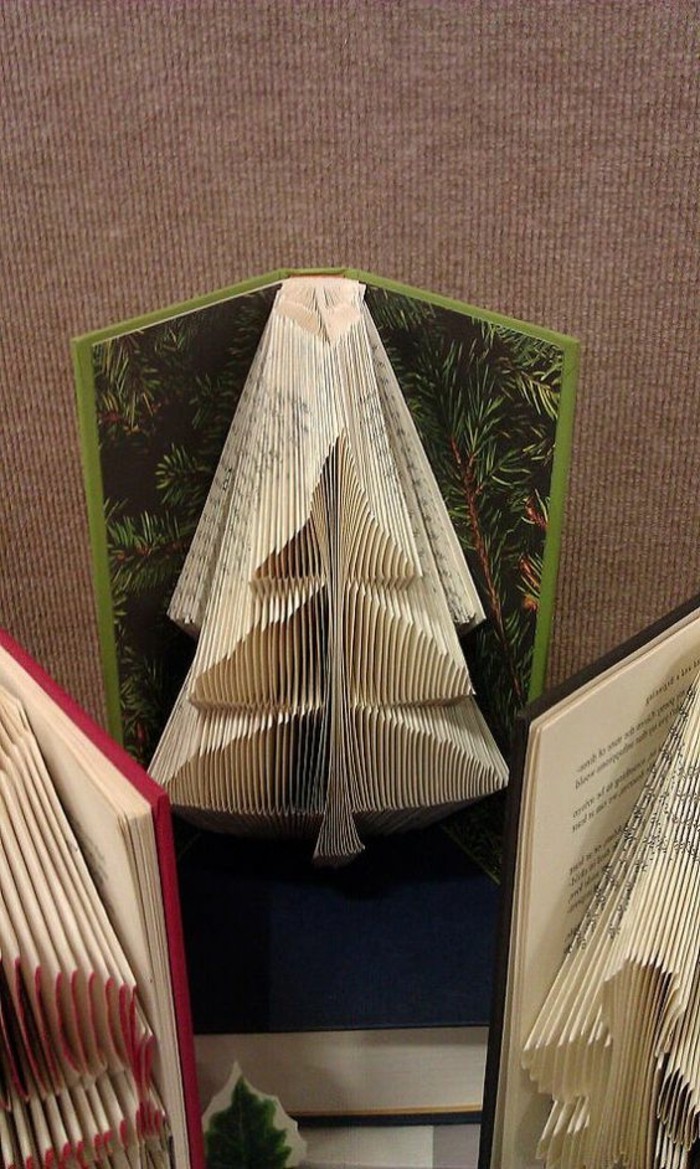
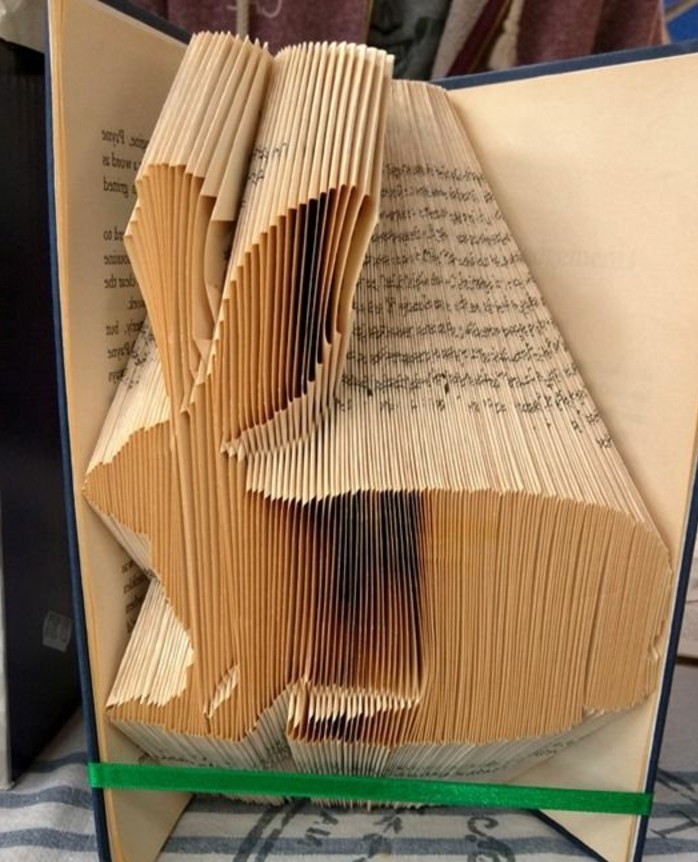
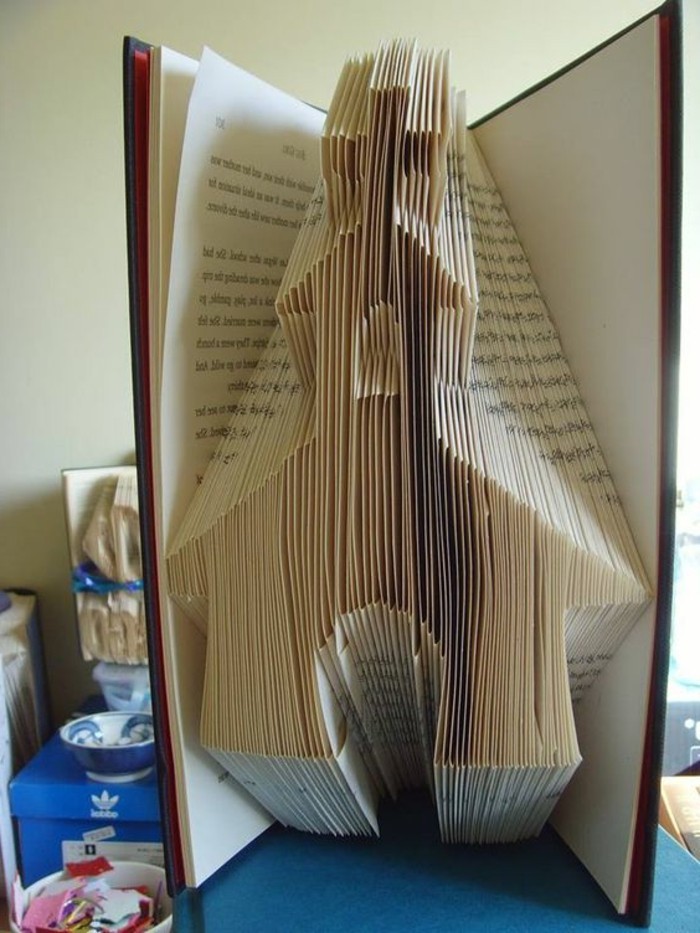
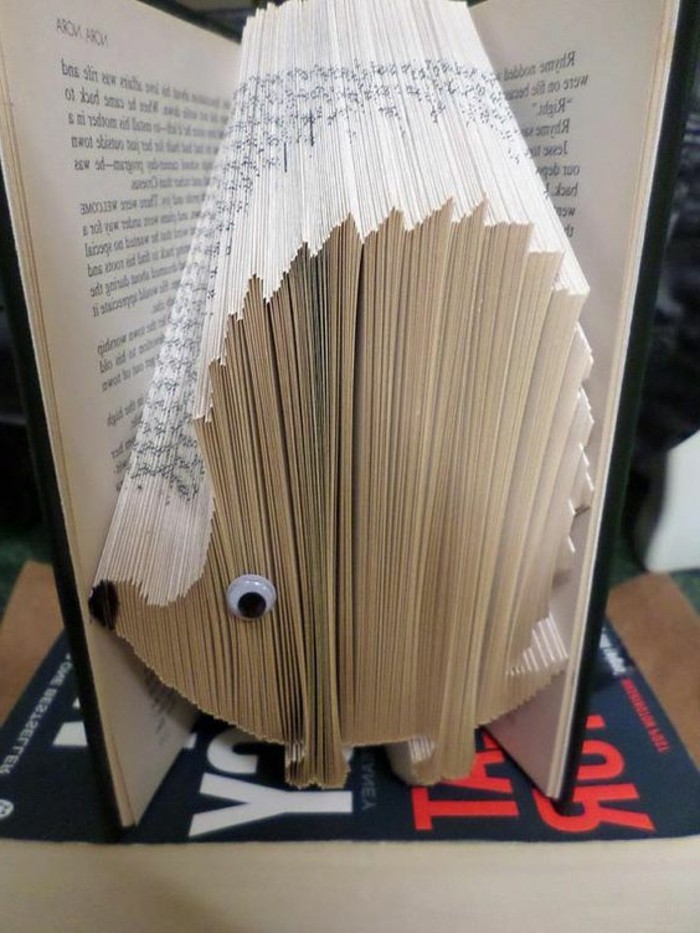
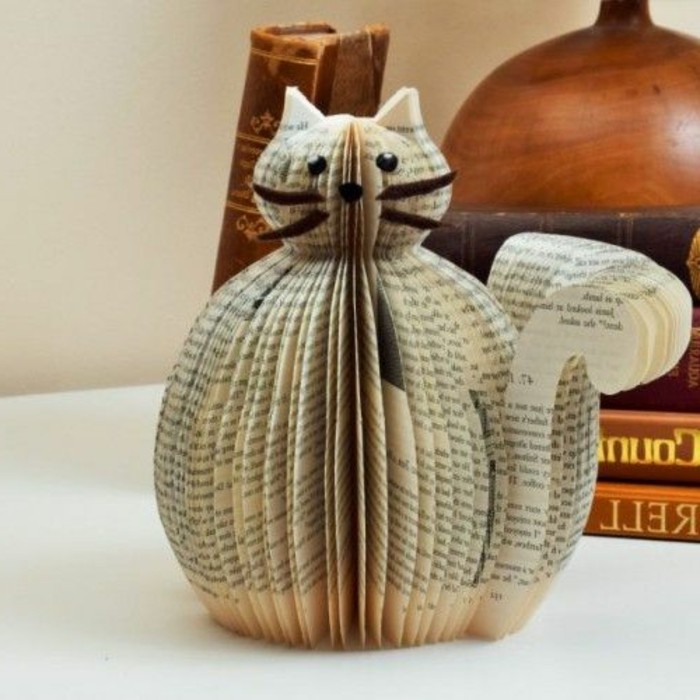
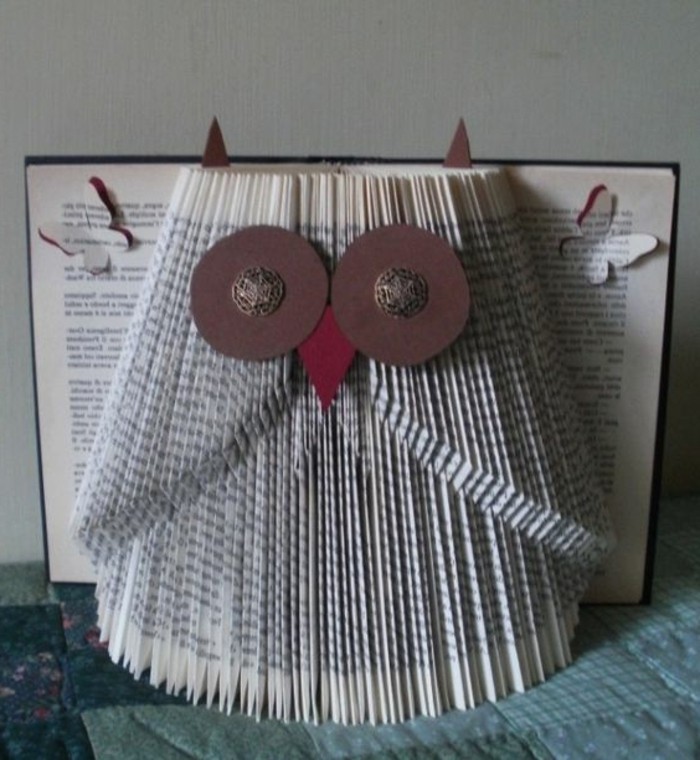
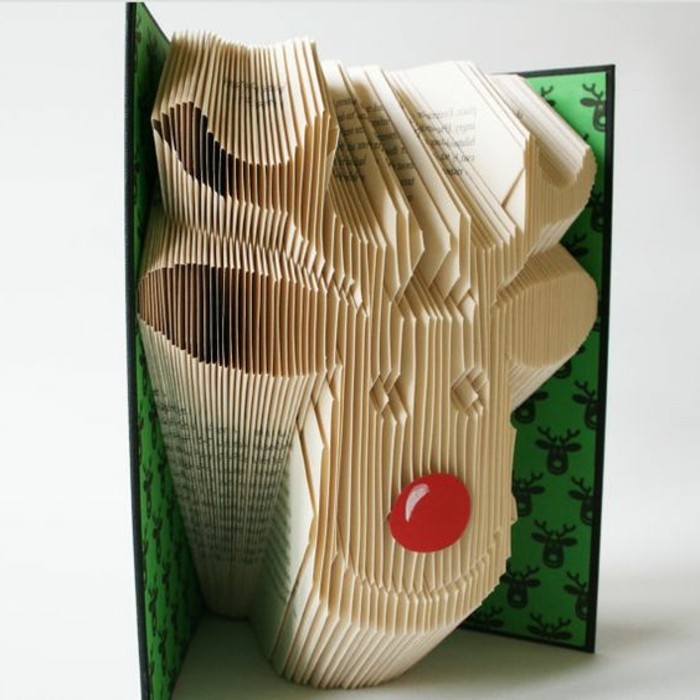
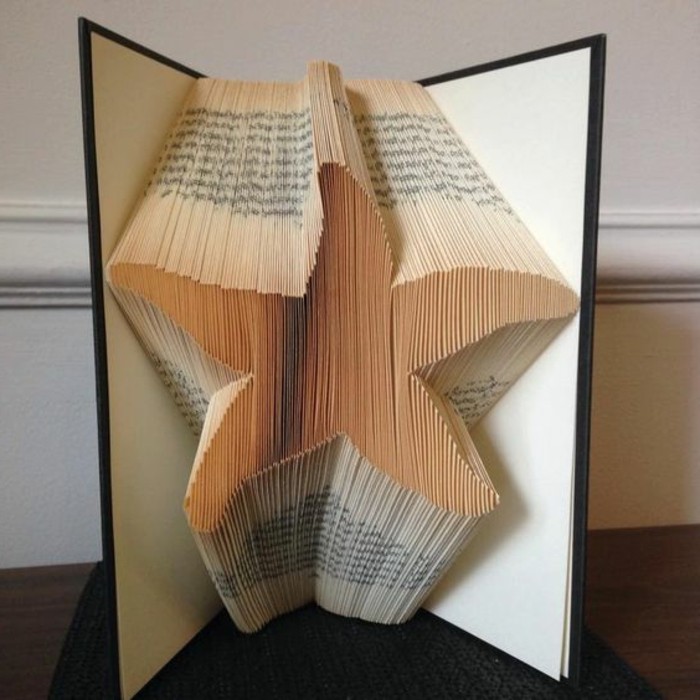
- For a new baby, create a sculpture of a duck, a star, or another simple nursery shape.
- For a graduate, fold the word


- Use a can of compressed air (like that used for keyboards) to gently blow dust out from between the folds.
- A soft, clean makeup brush is perfect for delicately sweeping away dust from the page edges.
- Keep the sculpture out of direct sunlight to prevent the paper from yellowing or becoming brittle.


Can I fold a book that has lots of pictures?
Absolutely, but be mindful of where they fall! A large, colorful illustration landing in the middle of your design can be a wonderful, serendipitous surprise. However, if the images are on thick, glossy paper different from the rest of the book, it can disrupt the tension and uniformity of your folds. It’s best for beginners to stick to books with text-only pages.
The art of paper folding, Origami, originated in 17th century Japan.
While book folding is a more recent craft, it shares the same core principle: creating beauty through precise folds. Think of your book as a single, bound stack of paper, ready to be sculpted. The same principles of tension and crisp creases are your best friends here.

- It helps ‘train’ the paper, making the final fold easier.
- It significantly reduces the risk of the page tearing near the spine.
- It results in a much neater, more uniform final appearance.
The pro technique? Before making your main folds, gently run your bone folder along the lines you plan to fold. This is called ‘scoring’ or ‘pre-creasing’.

Design Tip: The Rule of Three. When displaying your folded book art, grouping items in threes creates visual harmony. Try pairing your main book sculpture with two smaller, complementary objects—perhaps a small potted succulent and a vintage brass key. This creates a balanced and intentional-looking vignette.

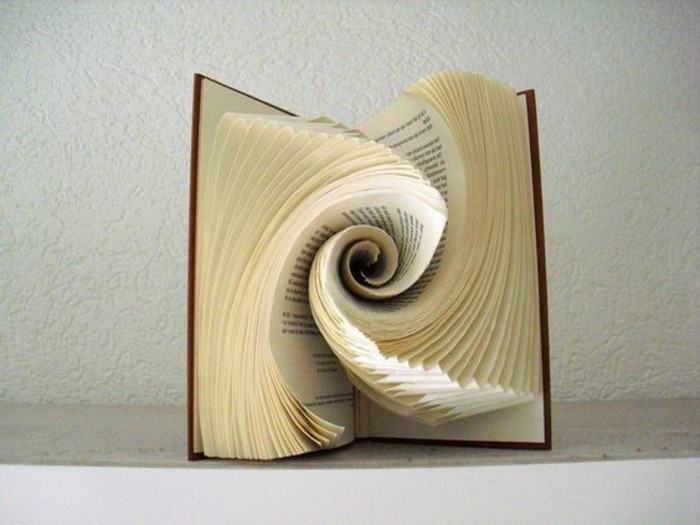
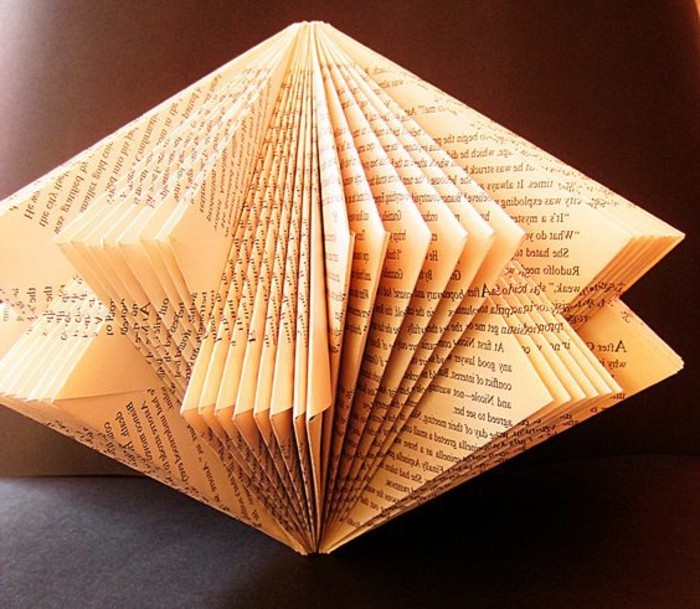
Don’t just think of hearts and letters. Look to architecture and geometric tilework for inspiration. The repeating patterns of Art Deco buildings or the clean lines of a geodesic dome can be translated into stunning, abstract book sculptures.
Globally, the paper and pulp industry is the fourth largest industrial energy consumer.
While recycling is crucial, upcycling a book into art is even better. It requires no water, no industrial processing, and no transport other than from the thrift store to your home. It’s a beautiful way to give an object a new, long-lasting life on your shelf.