I learned a lesson I’ll never forget during my first year in a busy model-making shop. My mentor, a seasoned pro with hands as steady as a surgeon’s, saw me wrestling with a piece of mat board. I was trying to cut a tiny window opening with a dull blade, pushing so hard my knuckles were white. Suddenly, the blade skipped, tearing across the pristine surface and heading straight for my other hand.
His hand shot out and stopped my wrist. He wasn’t angry. He just looked at me and said, “The tool isn’t the problem. Your respect for it is.”
He then spent the next hour teaching me about the simple craft knife—not as a cheap, disposable toy, but as a genuine precision instrument. He showed me how to feel the subtle drag of a blade losing its edge, how to hold the handle for total control, and how to safely ditch a used blade. That single hour of instruction was foundational. A craft knife is often the first truly sharp tool a creative person masters, and understanding it is everything. This isn’t just about cutting paper; it’s about control, precision, and respecting the tools of your trade.
Getting to Know Your Tool: What Makes a Good Craft Knife?
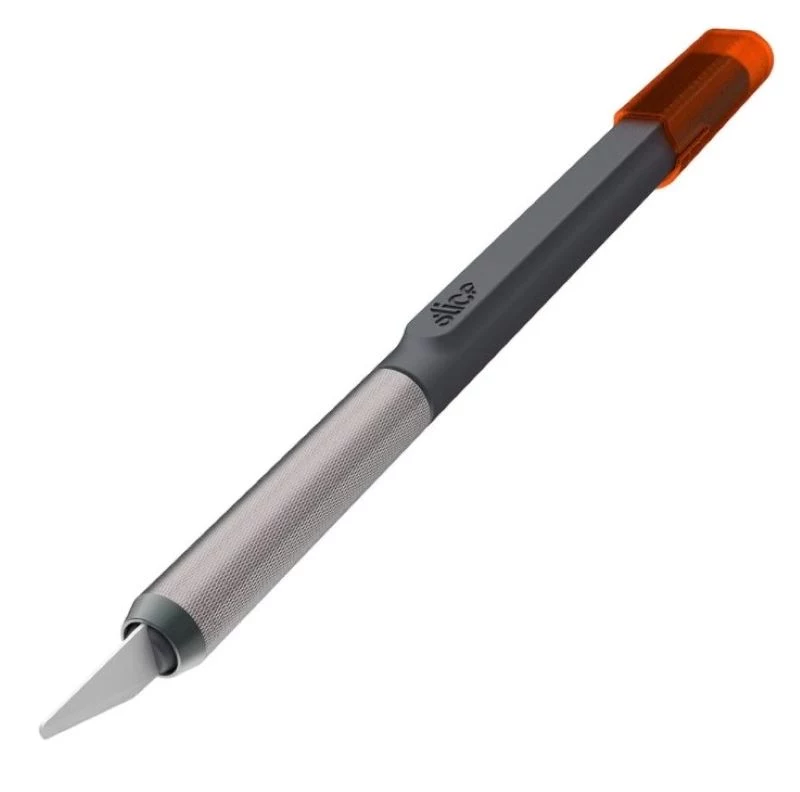
A precision knife looks simple, but every single part is designed with a purpose. When you know the ‘why’ behind its construction, you instantly become a better, and safer, user. In the workshop, we call them precision knives, not hobby knives. It’s a small change, but it reminds us they’re built for accuracy that scissors can never match.
The Handle: Your Control Center
The handle is so much more than just something to hold onto. Its weight, material, and shape directly impact your control over the cut. The most common handles, like the classic X-Acto
1, are made from lightweight aluminum. This is fantastic for agility and detailed cuts on paper or cardstock, letting you work for hours without hand fatigue.
But you’ll also find handles made from plastic, often with a soft, rubberized grip. These are incredibly comfortable and give you a more secure hold, which is a huge plus if your hands tend to get a little sweaty. The rubber helps ensure your fingers don’t slip down toward the business end. For heavier work, some pros (myself included) prefer a solid steel or brass handle. That extra weight adds a feeling of stability, making the knife feel planted and giving you confidence when scoring thicker materials like plastic sheets or thin plywood.
Heads up! One feature you should never overlook is an anti-roll design. Many handles have a hexagonal grip or a flattened shape for a reason. I’ve seen some nasty accidents happen when a perfectly round knife rolled right off a workbench and onto a foot. It’s a critical safety feature.
The Collet: The Unsung Hero of Safety
The collet is that small, slotted metal bit at the tip that grips the blade, tightened by a knurled collar. To be frank, this is the single most important part for both performance and safety. A well-made collet, usually brass or aluminum, will grip the blade tightly and evenly. No wobbles. Period.
On cheap knives, this is where manufacturers cut corners. A poorly machined collet might grip the blade on only one side or fail to tighten properly. I once had a blade pull clean out of a cheap handle mid-cut. A wobbly blade makes precision impossible and is just plain dangerous. When you buy a knife, pop a blade in and tighten it down. Gently try to wiggle it with pliers (never your fingers!). If there’s any play, return it. It’s not worth the risk.
The Blades: A Quick Guide to the Different Types
This is where things get interesting. The blade’s material dictates its sharpness, durability, and how it behaves under pressure. Knowing the difference helps you pick the right tool for the job.
It really boils down to two main camps: steel and ceramic. Let’s break them down.
High-Carbon Steel: This is the pro’s choice for a reason. The high carbon content allows for an incredibly hard and wickedly sharp edge—the sharpest you can get, really. It’s perfect for those final, high-precision cuts where the cleanest possible edge is non-negotiable. The downside? It’s brittle. If you apply too much sideways pressure, it can snap. It also rusts easily, so you can’t leave it in a damp garage.
Stainless Steel: This is your trusty all-rounder and what most general-purpose blades are made of. The addition of chromium makes it rust-resistant, which is a huge plus for general crafting or for anyone working in a humid environment. The trade-off is that stainless steel doesn’t hold an edge quite as well as its high-carbon cousin. For most people just starting, it’s the perfect balance of performance and low maintenance.
Zirconium Oxide (Ceramic): These modern blades are often misunderstood. They are NOT touch-safe like a butter knife. They are sharpened at an angle that makes it harder to get cut by an accidental, light brush. But trust me, if you apply direct pressure, a ceramic blade will cut you deep. Their superpower is edge retention—they can stay sharp up to ten times longer than steel. They also never rust. The major weakness? They are extremely brittle. Drop one or twist it in a cut, and it will shatter. They’re a specialized tool, not an everyday replacement for steel.
By the way, the most common blade shape you’ll see is the classic
11 blade. Its sharp point is perfect for piercing and detailed work, while the long, straight edge is great for slicing. We buy them by the 100-pack in the shop.
Pro Techniques for Clean, Safe Cuts
Using a knife effectively is a physical skill. Over the years, I’ve developed a few non-negotiable rules. These aren’t just suggestions; they’re hard-won lessons from experience (and a few minor nicks).
Always Cut Away From Your Body. This is the golden rule. No exceptions. Your other hand, your torso, and your legs should never, ever be in the path of the blade. Brace your material with your non-cutting hand, but keep those fingers far away from the cutting line.
A Sharp Blade is a Safe Blade. This sounds backward to beginners, but it’s true. A dull blade requires you to use more muscle, which means you have less control. A slip is practically guaranteed. A sharp blade, on the other hand, glides through material with minimal pressure. My personal rule: I start every new, significant project with a fresh blade. If I’m doing a ton of cutting on cardstock, I’ll swap it out after about 30 minutes of steady work. A 100-pack of blades costs around $10-$15 for a reason—use them freely!
Know What’s Underneath. Always cut on a proper surface, ideally a self-healing cutting mat. These mats are made of a special vinyl that allows the blade to sink in slightly without being damaged, and the cut magically closes up afterward. Cutting on cardboard will give you a fuzzy cut and dull your blade fast. Cutting on a hard surface like wood or glass will destroy your edge in a single pass.
Use a Metal Ruler. Please, never use a plastic or wood ruler as a cutting guide. A sharp blade will shave the edge, ruining your line and potentially jumping the ruler toward your holding fingers. A steel ruler with a cork back is the gold standard; the cork keeps it from slipping.
Make Multiple, Light Passes. This is the secret to getting those professional-looking cuts in thick material. Instead of trying to Hulk-smash the blade through in one go, use three or four light passes. The first pass just scores the surface and creates a perfect track for the blade to follow. The next few passes deepen the cut until you’re through.
Try This Right Now: Grab a piece of thick junk mail, like a postcard. Try to cut a square out of it with one hard press. See how the edges are crushed and a bit fuzzy? Now, try another square with 3 gentle passes. The first just scratches the surface, the second goes deeper, and the third finishes it. Look at that crisp, clean edge! That’s the magic right there.
Changing a Blade Without Losing a Finger
Changing the blade is where a lot of accidents happen. Never, ever use your bare fingers to grip the old blade.
Here’s the process:
Loosen the collar of the knife just enough to free the blade.
Use a small pair of needle-nose pliers to grip the dull blade by its spine (the non-sharp side).
Carefully pull the blade out and away.
My favorite hack: I keep a small, cheap magnet stuck to my workbench. I just touch it to the spine of the old blade to pull it out. No fumbling with pliers, and my fingers are never near the edge.
Dispose of the blade immediately in a designated container. An old pill bottle or small tin marked “Used Blades” is perfect. When it’s full, tape it shut securely.
Holding the new blade with the pliers or magnet, insert it all the way into the collet and hand-tighten the collar until it’s snug.
Your First-Timer’s Shopping List
If you’re just starting and mainly cutting paper, vinyl, or cardstock, you don’t need to get too fancy. Honestly, a simple and affordable kit will handle 90% of all crafting tasks.
Your First $40 Kit:
A classic knife: Look for a standard
1 handle knife from a reputable brand like X-Acto, Olfa, or Excel. This should run you about $5 to $8.
A cutting mat: A small 9×12-inch self-healing mat is a great start. It’ll cost between $10 and $15.
A good ruler: Grab a 12-inch or 18-inch cork-backed steel ruler. This is a must for safety and will cost about $5 to $10.
Blades, and lots of them: Get a 100-pack of
11 stainless steel blades. This will set you back $10 to $15 but will last you a very long time.
You can find all of this at any art supply store like Michael’s, a big box store like Home Depot, or easily online.
Troubleshooting Common Cutting Problems
Even with the right gear, you might hit a snag. Here are a few common issues and how to fix them.
Problem: The edges of my cuts are fuzzy or torn. Solution: 99% of the time, this means your blade is dull. Change it. The cut line should look like a clean canyon wall, not hairy with little paper fibers sticking up.
Problem: The tip of my blade keeps snapping off. Solution: You’re likely putting too much pressure directly on the point or twisting the blade in a cut. Let the long, sharp edge do the work. When cutting curves, try rotating the material with your other hand while keeping the knife moving forward.
Problem: My straight lines aren’t actually straight. Solution: Your ruler is probably slipping. Use a cork-backed one and apply firm, even pressure. Also, check your posture! Look directly down over the cutting line to avoid parallax error, which can trick your eyes.
Final Thoughts: It’s a Tool That Teaches You
I’ve used laser cutters and CNC machines that deliver flawless precision at the push of a button. And yet, I always come back to the humble craft knife. It connects your hand and eye directly to your work in a way that no automated machine can. It teaches patience through the quiet rhythm of making multiple passes. It teaches respect through the constant, honest awareness of its sharp edge.
So take your time, stay safe, and learn to appreciate its simple, sharp honesty. The results will show in every clean line you cut.
John combines 12 years of experience in event planning, interior styling, and lifestyle curation. With a degree in Visual Arts from California Institute of the Arts and certifications in event design, he has styled luxury weddings, corporate events, and celebrity celebrations. John believes in creating memorable experiences through innovative design and attention to detail.
To provide the best experiences, we use technologies like cookies to store and/or access device information. Consenting to these technologies will allow us to process data such as browsing behavior or unique IDs on this site. Not consenting or withdrawing consent, may adversely affect certain features and functions.
Functional
Always active
The technical storage or access is strictly necessary for the legitimate purpose of enabling the use of a specific service explicitly requested by the subscriber or user, or for the sole purpose of carrying out the transmission of a communication over an electronic communications network.
Preferences
The technical storage or access is necessary for the legitimate purpose of storing preferences that are not requested by the subscriber or user.
Statistics
The technical storage or access that is used exclusively for statistical purposes.The technical storage or access that is used exclusively for anonymous statistical purposes. Without a subpoena, voluntary compliance on the part of your Internet Service Provider, or additional records from a third party, information stored or retrieved for this purpose alone cannot usually be used to identify you.
Marketing
The technical storage or access is required to create user profiles to send advertising, or to track the user on a website or across several websites for similar marketing purposes.